How did Image Engine get involved on this show?
Early last year (February I believe) the Executive Producer on ZERO DARK THIRTY (ZDT), Colin Wilson got in touch with us about the show. We sent them some of the vehicle and environment work we had done on THE THING. That lead to me heading over to meet with Colin, Kathryn Bigelow and Mark Boal on location in India during the first week of shooting… we were on the show a week later.
How was the collaboration with director Kathryn Bigelow?
Let me start off with saying it was a true honor to work with her, she is an amazing filmmaker and it was pretty awesome to get a look into how she approaches her movies. Second I must stress how much of an appropriate word “collaboration” was. She let you do your job trusting you to do it and to become part of the overall creative process. If she ever calls on me again to help with one of her films I wouldn’t have to think about it for a second, not just because of who she is in the industry but because I had a great time on it and really enjoyed working with her.
What was her approach to visual effects?
Words she would use when describing what she wanted were “authentic”, “gritty”, and “honest”. And I will say that she has a much better eye towards visual effects than she gives herself credit for.
What have you done on this movie?
I was the production Visual Effects Supervisor and Image Engine the primary visual effects facility. We were involved heavily during production, supervising, designing and shooting for visual effects. And during post, handled a large variety of work from matte paintings to augmenting a number of different environments from military bases, to the Bin Laden Compound, to the CIA headquarters, wire and rig removal from complicated physical effects set-ups, augmentation of practical effects, explosions, lots of crowd/environmental clean-up in order to make things as authentic and true to the locations they were intended to portray, gore enhancement… and of course the numerous Stealth Helicopter shots. There was also a lot of plate grading and sky replacements to help set a tone and consistency for the raid.
The movie took place on an impressive number of locations. How did you recreate these places?
Kathryn is a big fan of not using VFX unless absolutely necessary. So as much as possible these various locations were for the most part practically shot. Between the locations they found in India and Jordan and with the great work of Jeremy Hindle (Production Designer) and his team they were able to pull off some amazingly realistic location shoots. Of course there were limitations… and that’s where we came into the picture. There were numerous smaller shots where we relied on comp clean-up, adjusting things like signage, wardrobe, etc.
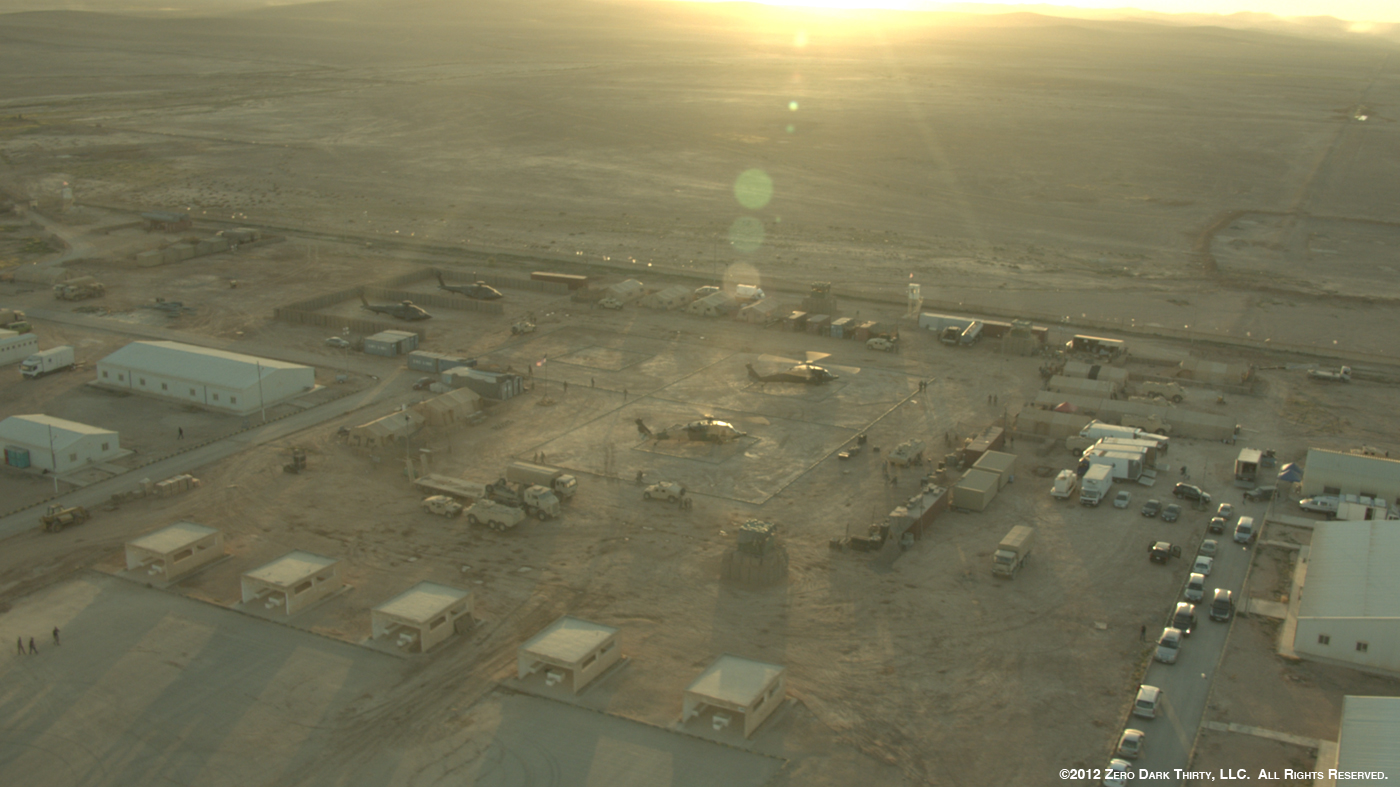
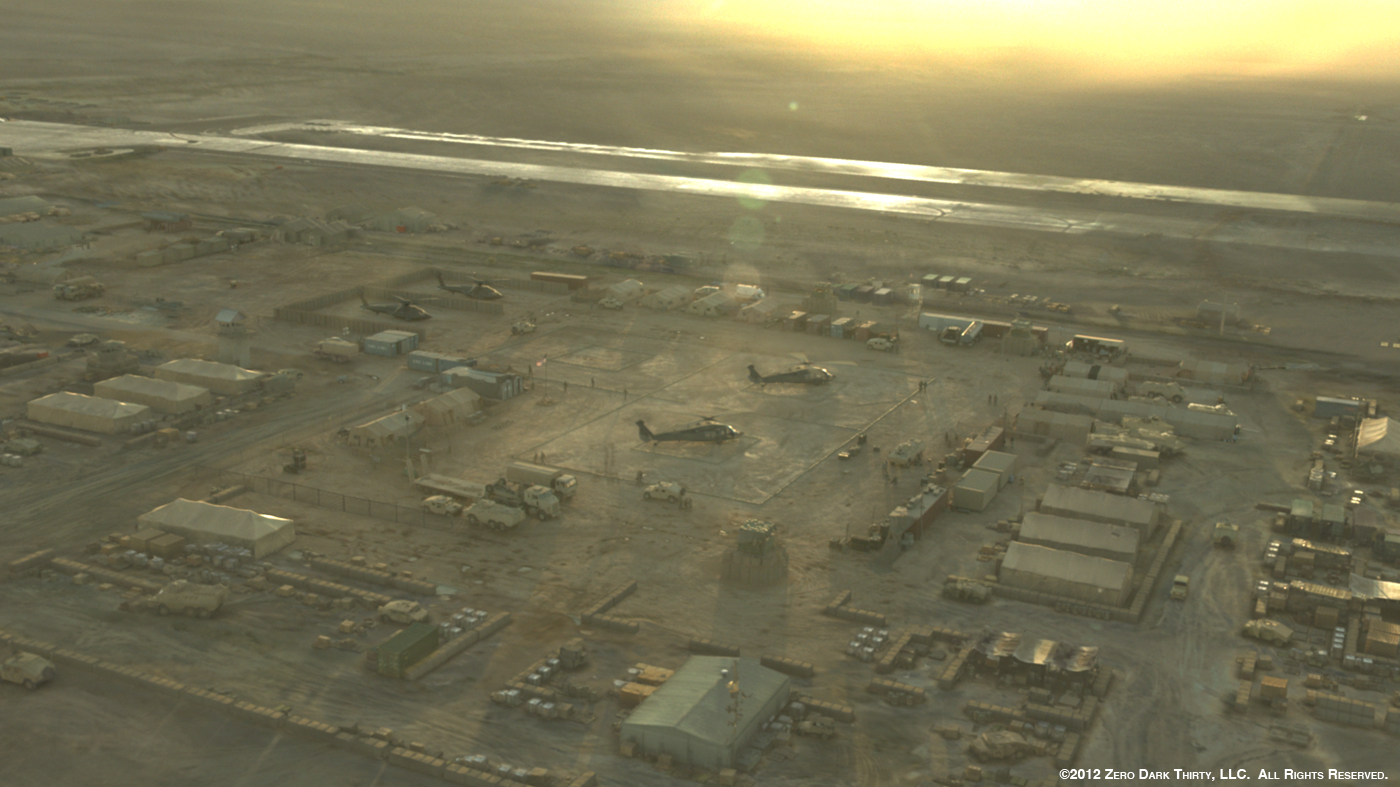
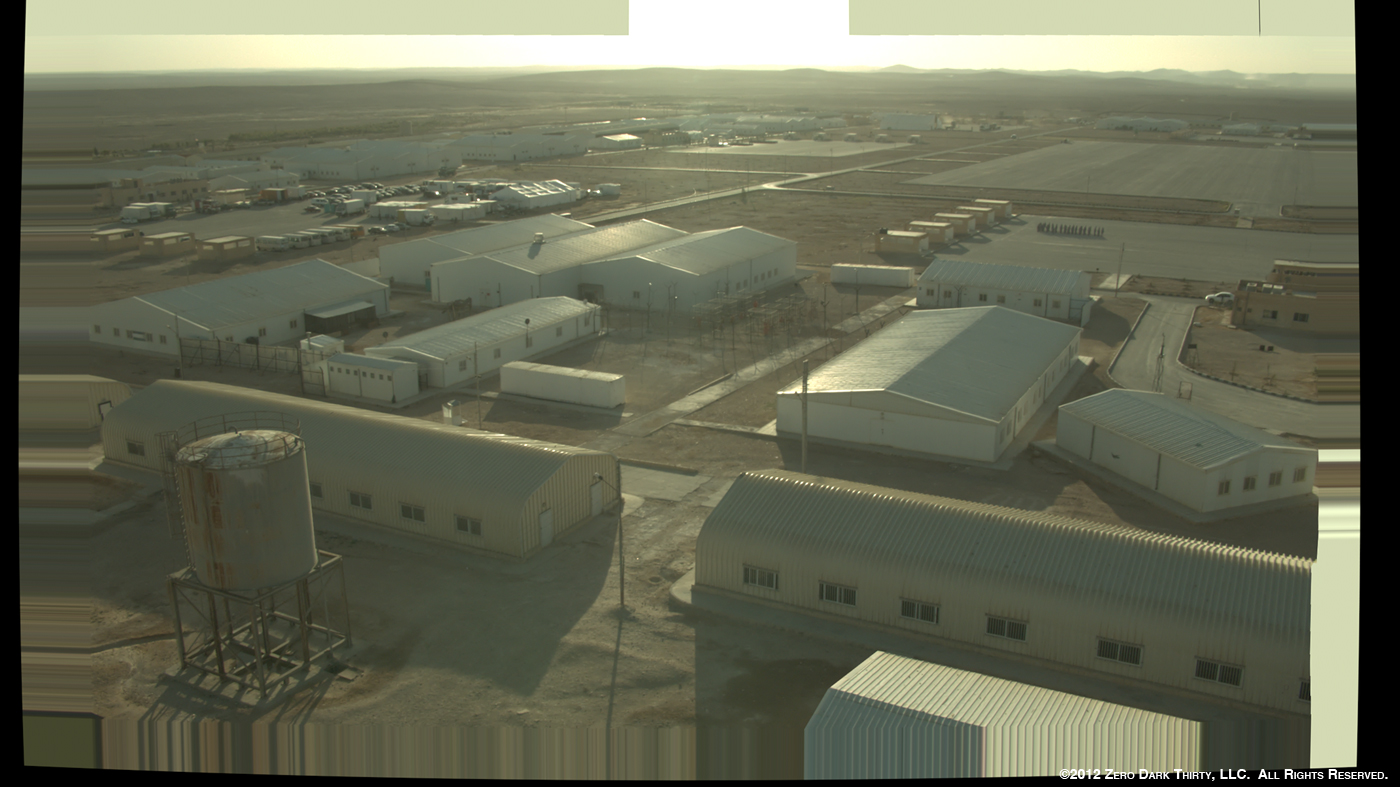
And then there were the big wides; things that we pretty much had to recreate from scratch… these primarily were focused around bustling military camps, Area 51, the US embassy, Bagram, Camp Chapman and the Forward Operating Base. And for this we relied primarily on our matte painting team. Some of the shots were your more typical/straightforward set-extension type shots… but the big aerials were certainly more challenging.
It was interesting that a single military academy in Jordan actually served as the location for all of the 3 major military locations (Bagram, Chapman, FOB) … different corners being dressed separately for each one. Typically we would start with a helicopter shot of the academy, then we would go in and create a rough layout using simple geometry with a fast paintover so that it had a better representation of the direction we planned to take the shot in. Using these paintovers we were able to quickly get to the place where Kathryn and Mark were happy. From there the real work would begin. That layout would get cleaned up and put through our asset system receiving simply lookdev and rendering for handoff to the matte painters. They would then start the laborious job of recreating these extensive environments each with its own signature look. Simultaneously animation would get the same layout file and start populating the (upwards of 400) digital soldiers/base personnel and extensive arrays of military vehicles, doing everything from simple errands, maintenance, drills, emergency response in the case of Chapman bombing… but essentially filling the camps with bustling activity and life. All of that then got passed through to FX for dust simulation since all of our locations were pretty dirty and dusty. Of course it wouldn’t come together without the talented compositors assembling all of these elements and putting the finishing touches to them. This was never truer than in the case of the Bagram shot where because of the significant stabilization needed and the extreme lens contamination from shooting towards the light we essentially had to completely rebuild the plate from the ground up, the guys did a phenomenal job!
What did you receive as references and indications from the production for the locations?
As I mentioned we were on the show pretty early and we were part of many of the location scouts, I was on site during some of the building of the compound and I spent a lot of time with Jeremy Hindle the production designer who had gathered a huge amount of reference for all of the location work he was going to have to do. In the truly collaborative nature of this film he made all of this research available to us, which was great. In addition to that, Kathryn and Mark had their own sets of reference imagery that they had gathered. Between all of that, the footage that was actually shot, we had a pretty good idea of what we were going to need. We also had production send a photographer to the actual locations, places we couldn’t film like Abbottabad to shoot reams of still photography for us for both reference and use as elements.
How did you create the various screens’ content?
The actual graphics were created by another company that Colin (Wilson) had dealt with in the past. We shot a bunch of reference of real Blackhawk internals flying at night and sent that off to them. They then sent back individual screen graphics. We took that, treated it and comped it into the helicopters.
There is a big explosion on a US base. How did you create the explosion?
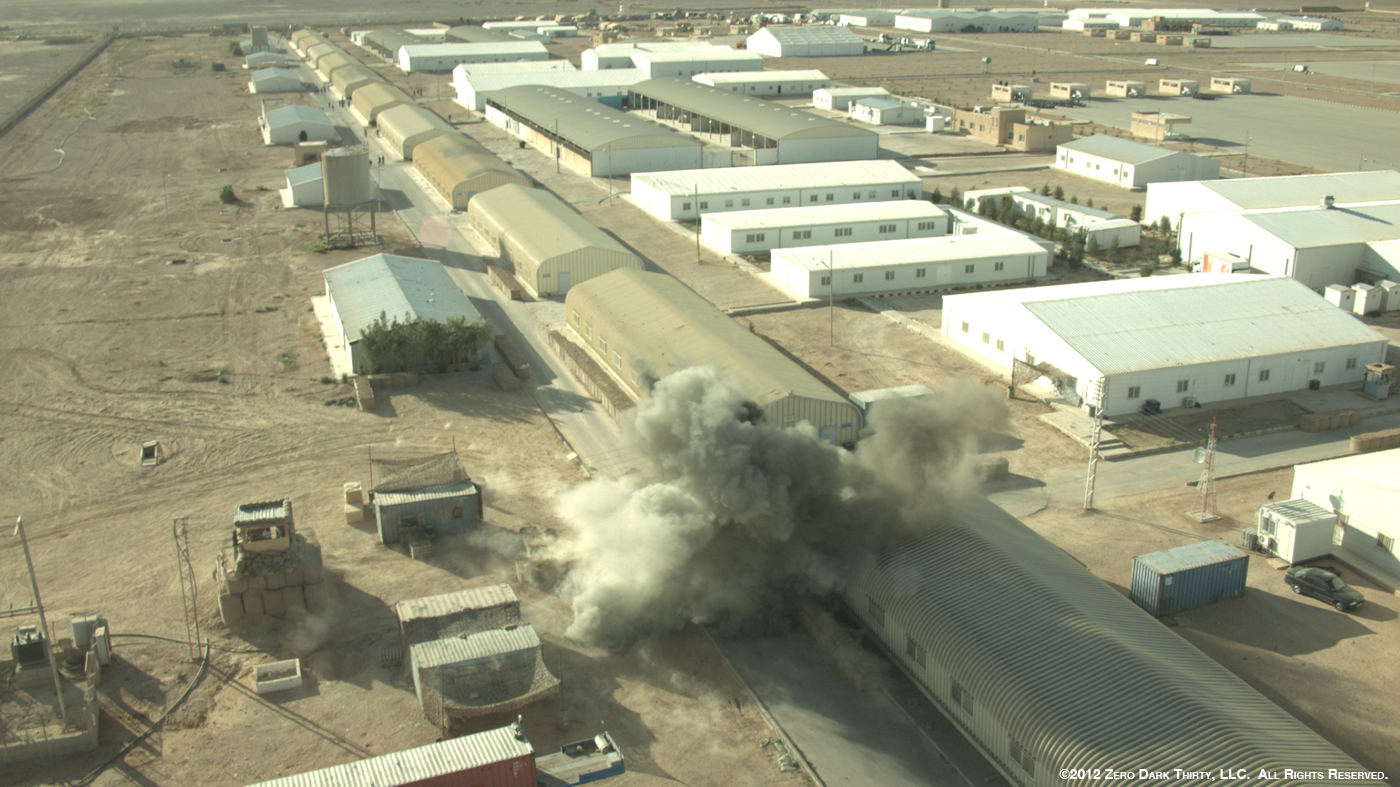
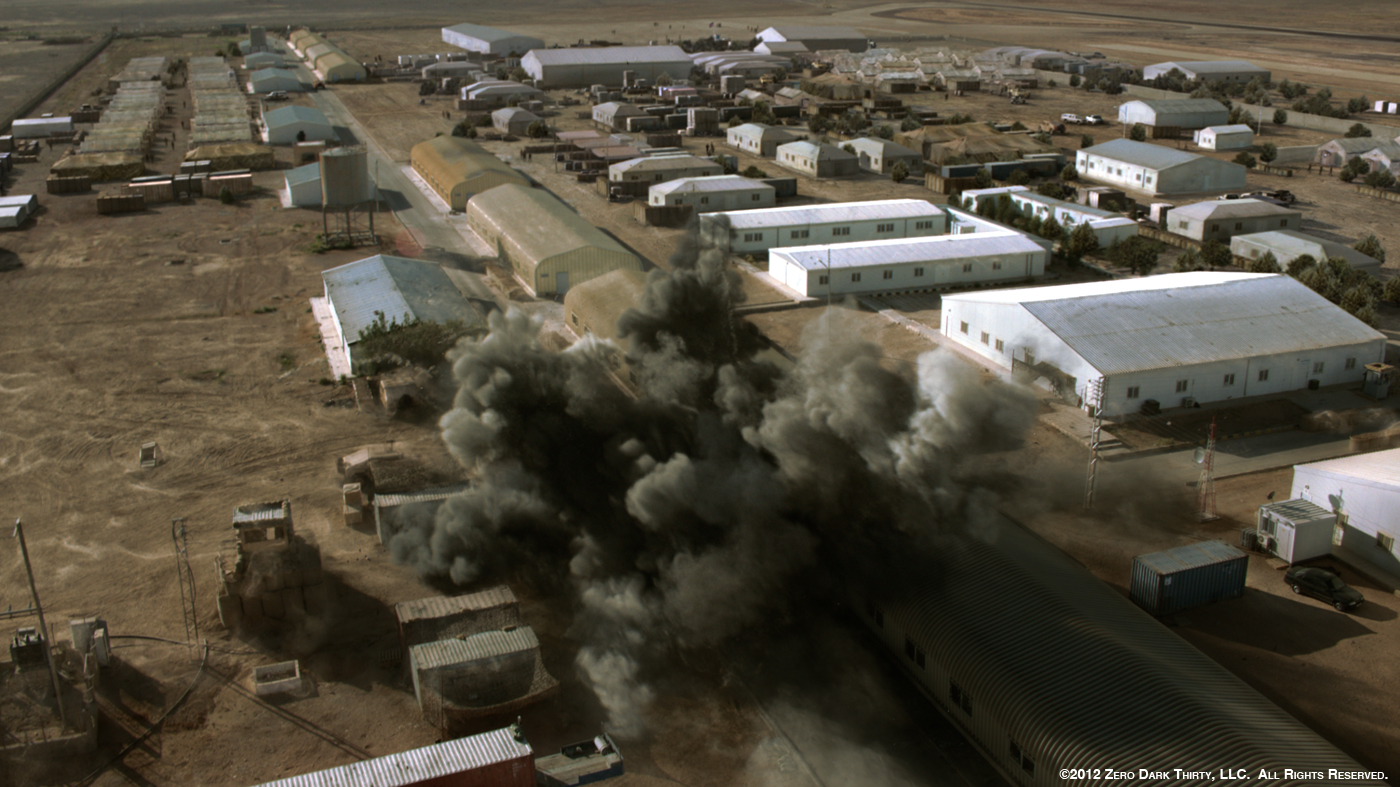
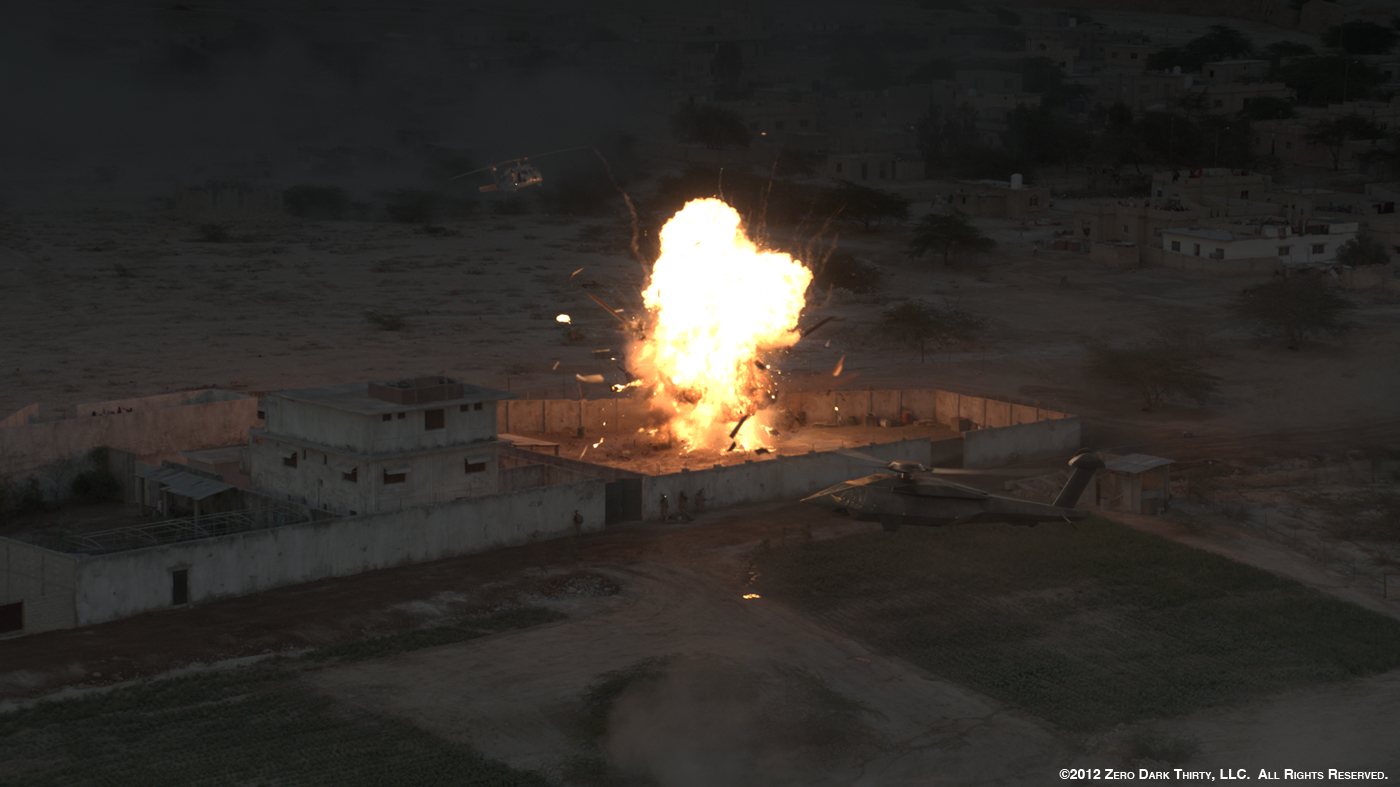
The explosion itself was handled in a couple of ways. Initially it was planned to be primarily a physical effect, shot in a number of passes. Richard Stutsman, the Special Effects Supervisor on the film and his crew created an impressive practical explosion. Working together with them we decided to split the various passes into a clean plate with the actual car (no people), people reaction pass with air cannons (no car), dust cannon pass (no people, or car), and finally the actual explosion with the rigged car. All of these various takes were covered I believe by 8 cameras including a Phantom and a few extra Canon 5Ds and 7Ds. Once editorial had settled on their camera angles we took the various passes and stitched them all together so it looked like it all happened at the same time instead of spread out across multiple takes across multiple days.
This approach worked great for the low angle shot, however for the high angle shot Kathryn decided she wanted something even bigger… something really devastating. So for that shot we only used the practical explosion for the first 1 or 2 frames… and the rest of the explosion was created digitally, complete with shockwaves, shattering glass, vehicle and building impacts/damage and countless simulations and passes from the FX team. And while in the end only 2 angles were used from the many cameras that rolled it provided great reference for the digital shots, and in fact we even cut bits of different explosions from various angles and used them throughout the movie to augment various shots.
The movie features stealth helicopters. Can you tell us more about their creation?
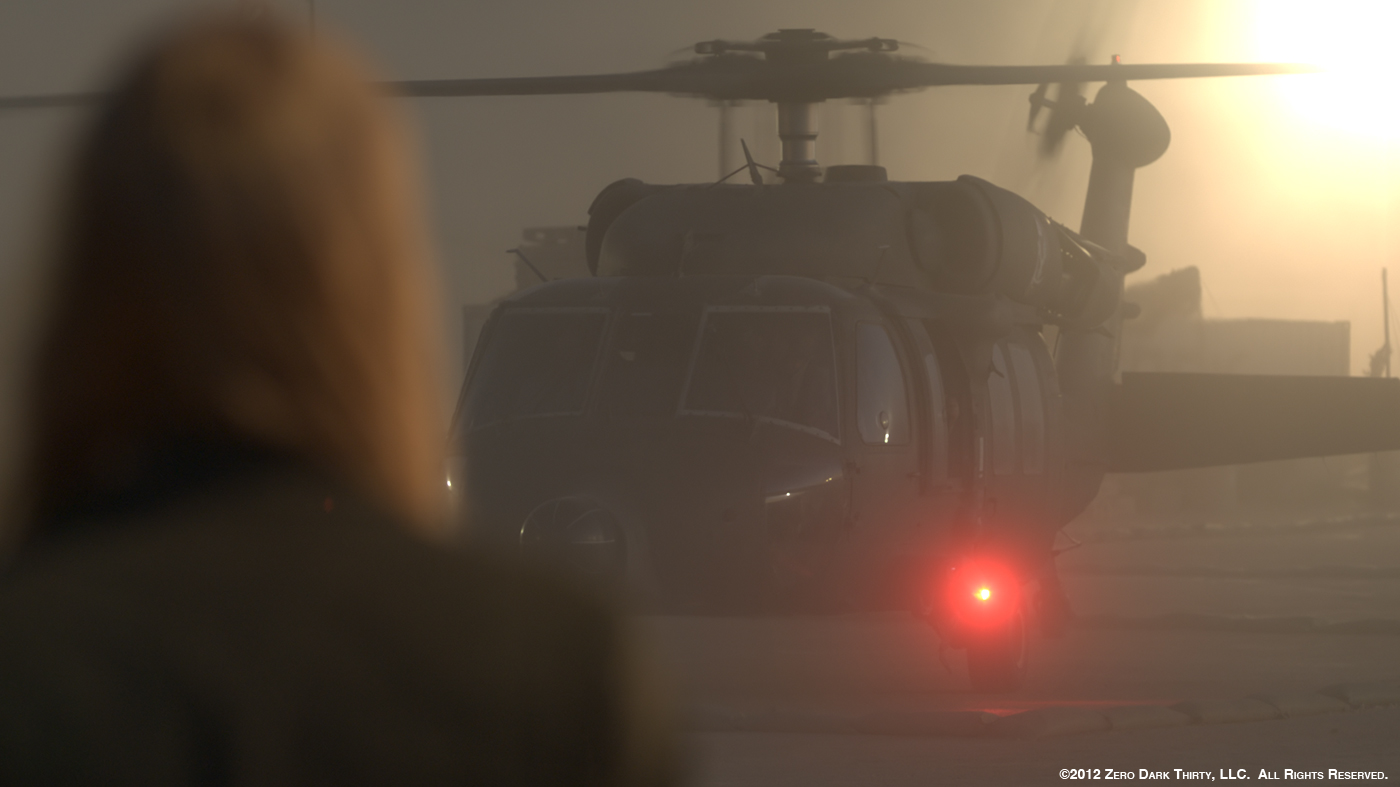
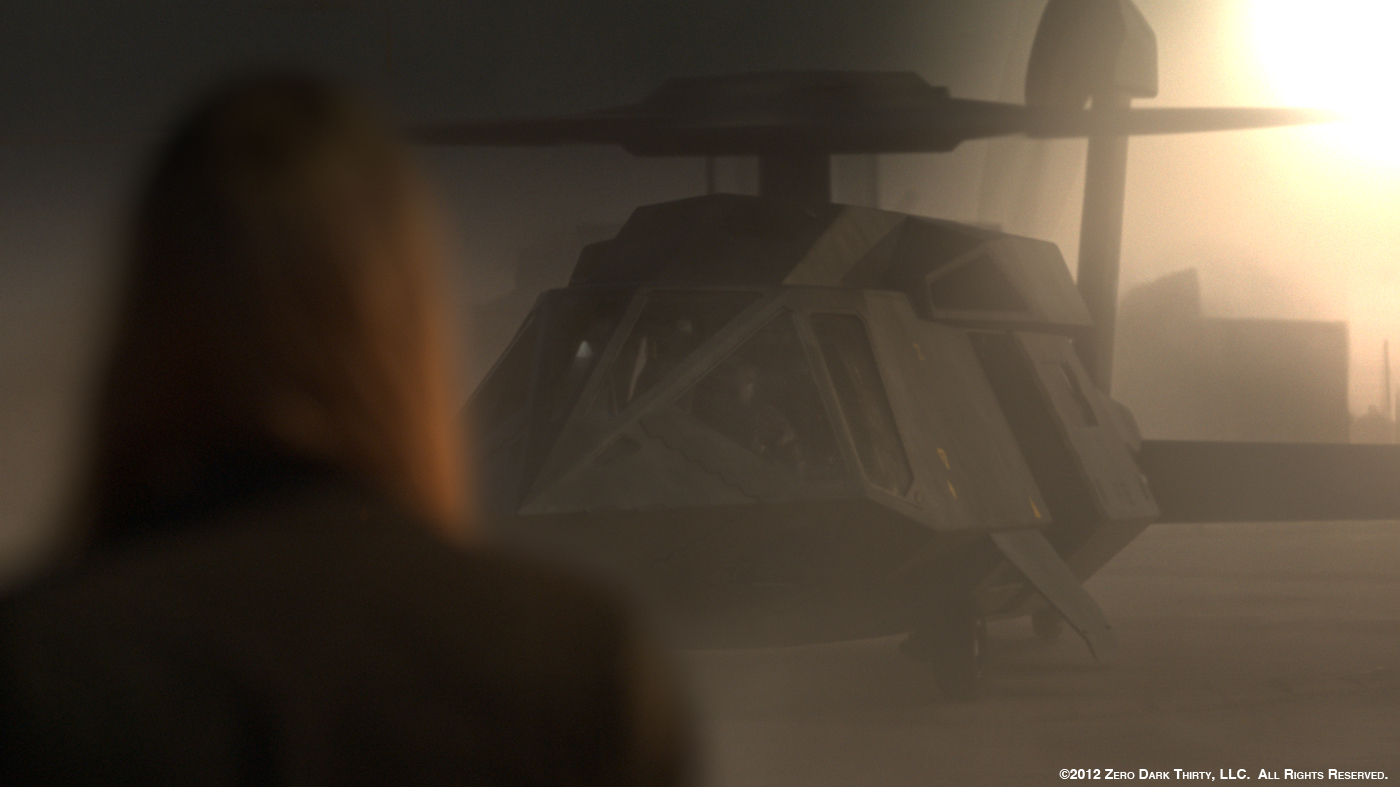
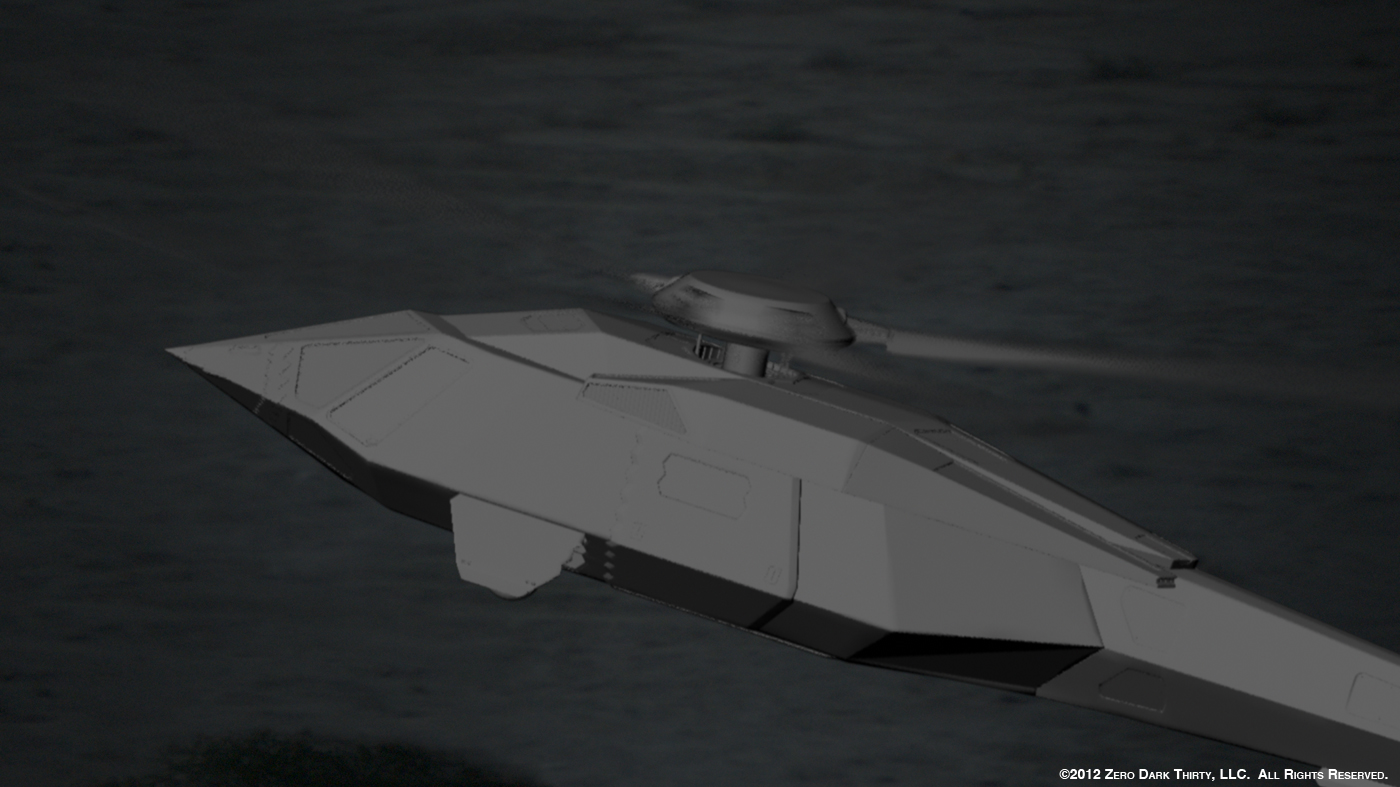
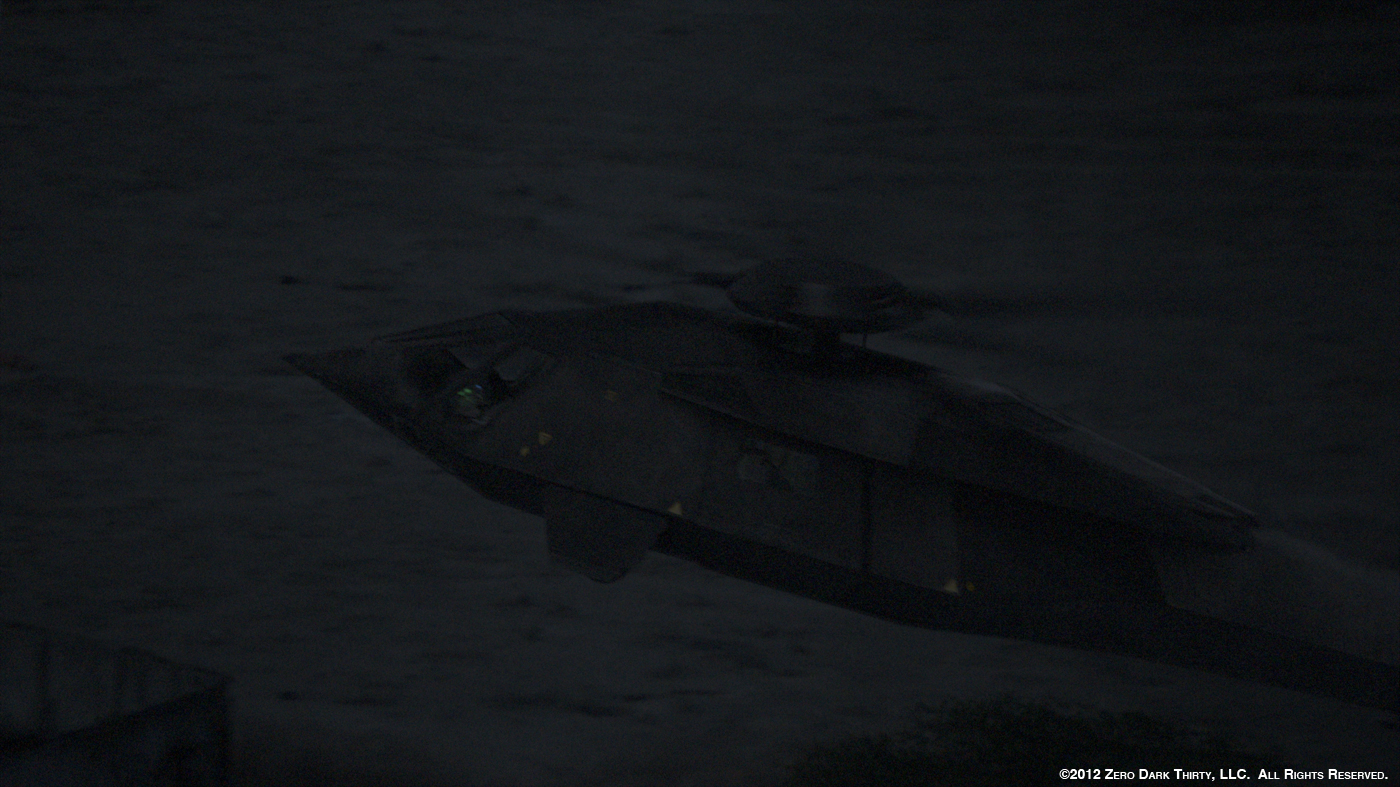
Sure, the Stealth helicopters (Stealth Hawks) were one of the biggest contributions to the film in terms of visual effects. People might not realize it, but I would say roughly 90% of the shots where you see an exterior view of the Stealth Hawk its entirely digital, and another 5% have digital rotors and dust added. That includes close-ups of wheels, doors, nose etc., not just the flying shots. Now that being said, there were a couple of pretty awesome full size helicopters built in London and shipped to Jordan to shoot with. These worked great for all of the interior shooting and it was planned to use them for much of the exterior work during the crash as well (hanging them from a 200 foot crane)… but in the end most of those shots were replaced digitally due to primation performance issues.
They also provided a “grounding” for the digital build. We were given the CAD data used in producing them and from there our asset team cleaned them up and started adding endless details so that they would hold up to the scrutiny we knew they would come under. While conceptually a very simple geometric design the Stealth Hawks actually presented a very difficult challenge. They were essentially a few flat polygons, relatively matte black, and primarily seen in almost complete darkness… and while what we were after was raw and gritty, it’s still a film and needs to have a certain aesthetic quality to it. In terms of the lighting and look dev its worth quoting Mathias Lautour who headed up the look development and was the lighting lead on the show: “The helicopter had to stand out and shape nicely, but we kept all the diffuse and reflection values very low, with our highest value on the Helicopter generally below 0.05. Having a fully black helicopter at night meant that the lighting had to be done mostly with reflections. This particular light component is delicate to tune and can quickly look very fake if the reflection shader/textures are not tuned properly, so we had to work hard to ‘sell’ the helicopter.”
In addition to the challenges of the actual build and lighting of these helicopters I wanted to make sure their performance was believable. We strongly recommended shooting with real Blackhawks and I am very happy that production decided to go with that. Having worked on shows with helicopters before I knew how surprisingly difficult it can be to nail the motion. But capturing real Blackhawks in camera allowed us to simply matchmove their motion and translate that directly to our digital helicopters… we got all the subtleties, those shakes, pauses, and weight essentially for free without a guessing game. Of course there were times when the final performance captured with the actual Blackhawks wasn’t what we wanted and in those cases it was a traditional keyframe approach, but we had lots of actual reference to help guide that. In addition to the benefit of motion, the DP was able to compose his shots with a real helicopter in frame, and we got real environment interaction.
Speaking of the environmental interaction that was the last piece of the puzzle. While we got a whole lot of dust blowing around in our shots we still needed to create a helicopter dust rig to help embed our digital helicopters into the shots, as well and enhance what was shot. Our team of FX artists did a great job matching the plate in terms of not only the look of the dust but also the vortices and motion within it.
How did you create the huge mountain environments?
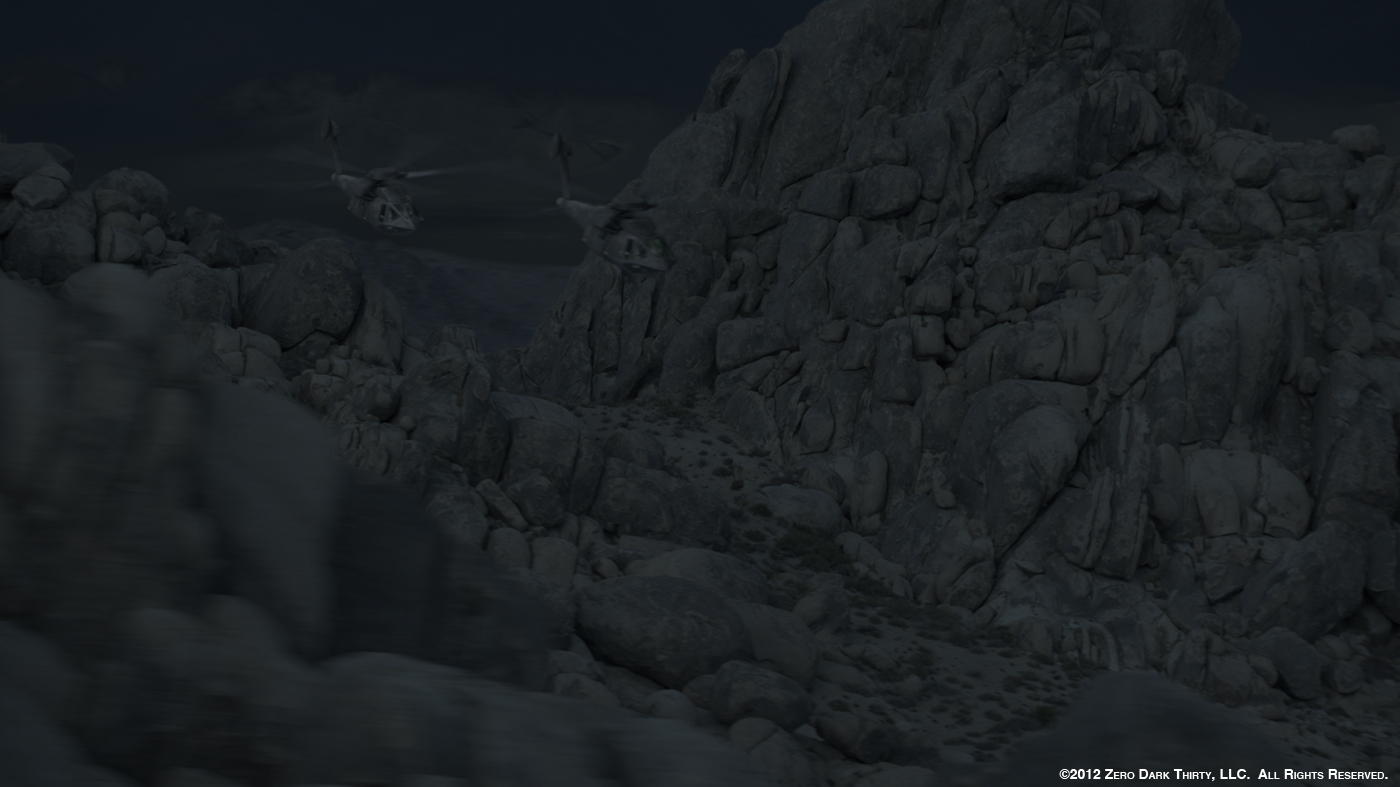
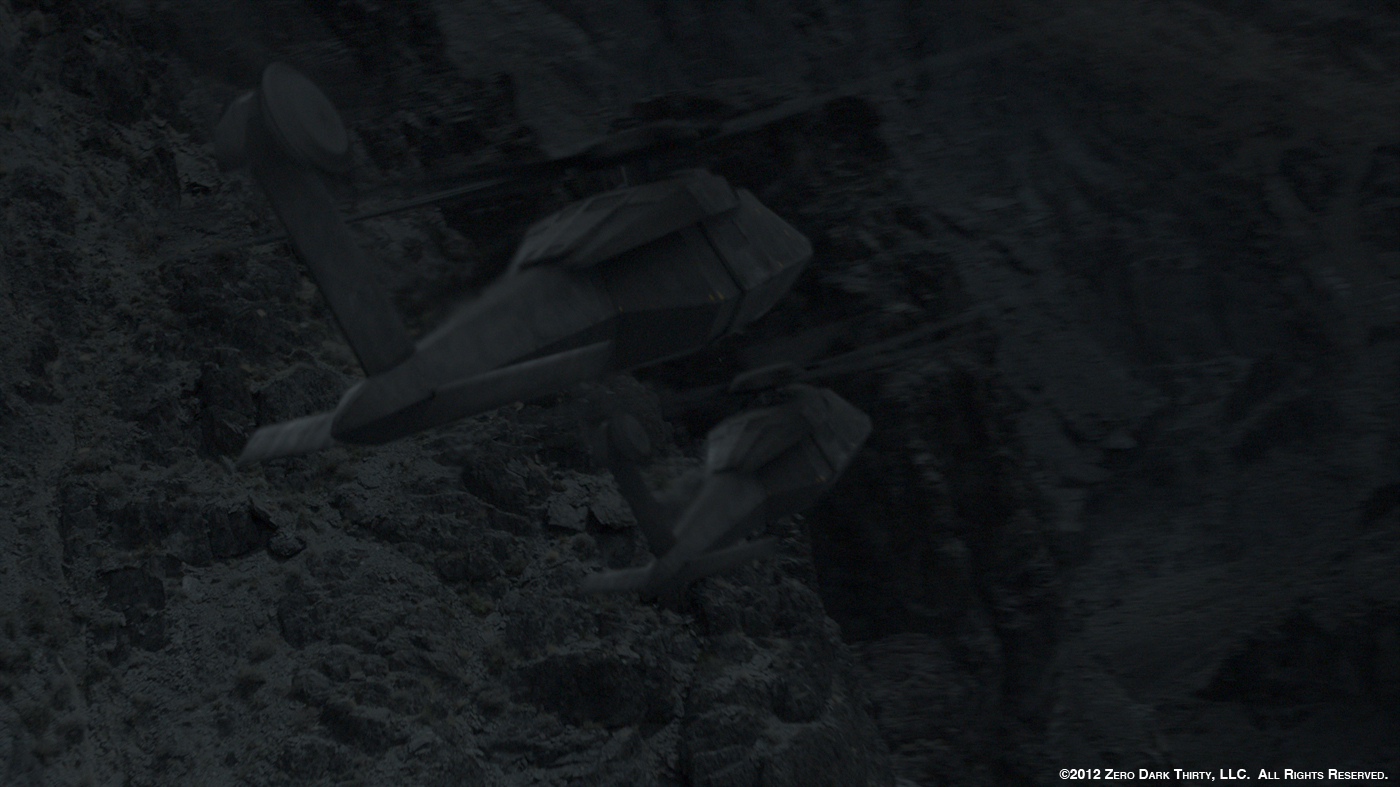
In short, we shot them. This section of the film was actually a big hole for quite some time. There were a bunch of interior shots (with nothing to put out the windows) and no exteriors for the actual journey. There was some brief discussion about going digital with this but most of us all felt the same way… shooting real helicopters in a real environment will inevitably produce something far more believable and authentic. So it was actually quite late in the production, September (about 6-8 weeks out from final delivery) that I lead a small team down to Lone Pines California to shoot both clean plates for our interior window composites and helicopter aerial footage for the exterior views. The shoot lasted a few days and it was pretty awesome flying around some spectacularly varied terrain with some amazing pilots lead by Kevin LaRosa.
Once Kathryn and Billy (Editor William Goldenberg) had selected the takes they wanted to use in editorial, it came back to us to do day for night grading and insert the Stealth Hawks. The approach required for these was a bit different from our other helicopter shots. Like all the footage of the Blackhawks these were shot during the day (ranging from about noon to 4pm) so they all needed to be heavily graded and tweaked in comp. But unlike the footage shot in Jordan we did not shoot actual Blackhawks at Lone Pines. Instead they were a much smaller Euro chopper and a Twin Star. So this required a slightly different technique in remapping the helicopter performance where we had to dampen all of the animation curves and slightly retime things in order to get the correct weight on our Stealth Hawks.
Can you tell us in detail about your work on the final assault?
The work on the raid was a bit of a mish-mash of things. Of course it involved a bunch of day for night exterior shots with digital helicopters, the big crash and eventual explosive destruction of one of the Stealth Hawks. But there were also a variety of rig removals, digital gore, distant environment augmentation, and some sky replacements with other miscellaneous comp work thrown in.
How did you create the helicopter crash?
The helicopter crash was a big focus for us. In fact the choreography of the event changed significantly after shooting had wrapped. This lead to us doing a bit of a scramble of post-viz and redesigning of the action beats and shots in early September. Because of the changes, we couldn’t use the initially planned on shots. Instead we relied on scouring through the hours of footage looking for interesting angles that might have nothing to do with actual helicopter plates at all. Some chosen backplates were from the raid and had to have all the SEALs removed from them, others needed to have the entire practical Helicopter and its 200 foot crane removed, and in a few cases we simply had to recreate the whole plate digitally, compound and all. But once we had the new plates, new choreography and animation worked out we leaned heavily on the FX team for getting the visceral, in your face feeling Kathryn wanted.
We were simulating dust, gravel, paper scraps, bottles, cans, garbage, hanging laundry, crumbling concrete walls and barbwire. FX TD Sam Hancock spearheaded this work: “For the debris we had a lot of variation in the types of objects that were getting thrown around the compound. We developed a tool that enabled us to adjust the material properties of each object separately and simulate them all together. We used Houdini’s cloth solver for the deforming objects and the bullet solver for the rigid objects such as bottles and cans. These two solvers were used in the same simulation so that the rigid and soft objects could interact with each other. The dust simulation was used to drive the motion of the debris using a SOP Solver that we developed to apply forces from the dust simulation.”
In the end, all the last minute scrambling aside with the redesign, I am very happy with the results and think it turned out much better in the end than if we hadn’t gone through the process we did.
Have you enhanced some gore makeup and gunfights?
Not a whole lot but there were a spattering of shots where we had to add digital gore, wounds, muzzle flashes, laser sights, and night vision goggle glow.
What was the biggest challenge on this project and how did you achieve it?
The biggest challenge without a doubt on this show was the light level. Working with such incredibly thin margins of light was very difficult for everyone on the show. I wouldn’t second-guess Kathryn’s and DP Greig Fraser’s decision on this because it helped to create a very unique and powerfully gripping moment in the film, in a way both isolating and enveloping for the viewer. But man was it hard! The editors could hardly see what they were cutting when they got our shots (quicktime compression at that level results in pretty much a mush of 10 colors)… so we would grade things up for the Avid (which isn’t ideal either because it would bump in the edit). There was a phenomenal amount of back and forth with the DI colorist Stephen Nakamura. I have never spent so much time in the DI suite but it was paramount, Stephen, Greig and I spent a lot of time tuning the look and making sure what we delivered would stand up to the process, finding a very fine line to balance on.
And internally our lighters and compositors not only had to deal with the final dark targeted look but they had the challenge of trying to actually get there from footage that was shot in many different lighting situations… resulting in a lot of day-for-night, dusk-for-night, dawn-for-night, and everything in between. In the words of our compositing supervisor Jesus Lavin: “Each shot needed a specific colour correction treatment so we couldn’t take advantage of the use of any sort of template to speed up the process. Some of them had a pretty hard keylight, while some others had a very diffuse one. Our goal was on the one hand to match the plates to the existing (VFX or non-VFX) night shots in the movie, and on the other hand, find a balance between all our colour-corrected plates. At the same time we would try to keep (or create, if there wasn’t any) some sort of light direction for the lighters to be able to play with. Sometimes the night grade would work right away, sometimes it would be a back and forth dialogue between comp and lighting.”
Are there any other invisible effects you want to reveal to us?
I briefly mentioned this earlier but I think it’s worth mentioning again because it speaks to Kathryn’s attention to detail and I think why there is a certain authenticity to her work. On more than just a few shots we would go in and be tweaking things like turban shapes, wardrobe colors, arm patches, breaking wine glasses and wine bottles… basically anything that might catch someone’s eye as being out of place.
Was there a shot or a sequence that prevented you from sleep?
Not really any one sequence or shot… there are always a couple of shots that show up or hang on right until the very end… the London bus was one, but those never really keep me from sleep. On this show the biggest thing was the light levels I mentioned before. That, and the time compression of the post schedule in general meant that everything was moving in tandem all at the same time with constant course corrections and changes from every department working on the film (not just VFX).
What do you keep from this experience?
I guess a lot of things really. As always there were some great friendships made both here at the facility but also with many of the production crew. I am also very proud of the work we did on this film, and it’s not often you get to be part of a film that is in many ways more than “just” a film… it’s a bit of history. But most of all, and I think one should always aim for this, is this film was definitely a great learning experience. Working closely with people like Kathryn, Billy, and Jeremy was a pretty great opportunity, and one not to be wasted.
How long have you worked on this film?
Like I mentioned we joined production on set around March, which rolled through to June. Then we transitioned into an early look development phase while Kathryn started to sort out the edit. And finally the actual postproduction and shot work really mainly happened in September and October (with reshoots and the journey stuff happening in the mix of that).
How many shots have you done?
Roughly 300 and change on this one.
What was the size of your team?
At peak size we got to around 40 artists…. and as is often the case some of them did not end up in the credits at the end of the film…so to all the crew at Image Engine, THANK YOU FOR YOUR AMAZING WORK! Also want to give a big shout out to Jeremy Hattingh for all his work and days spent on-set for us… thanks man!
What is your next project?
The crew has split onto a number of different shows going on at Image Engine currently, ELYSIUM, R.I.P.D., THE FAST AND THE FURIOUS 6 and LONE SURVIVOR.
A big thanks for your time.
// WANT TO KNOW MORE?
– Image Engine: Dedicated page about ZERO DARK THIRTY on Image Engine website.
© Vincent Frei – The Art of VFX – 2013


