The team of Weta Digital (composed of VFX Supervisors Ken McGaugh, Kevin Smith, Luke Millar and Animation Supervisor Dennis Yoo) talk in detail about their work and the challenges on MORTAL ENGINES.
// Ken McGaugh – VFX Supervisor
How did you get involved on this show?
I was offered the opportunity to work with Christian and Peter on MORTAL ENGINES in October 2016, at which time pre-production was beginning to ramp up.
How was the collaboration with director Christian Rivers?
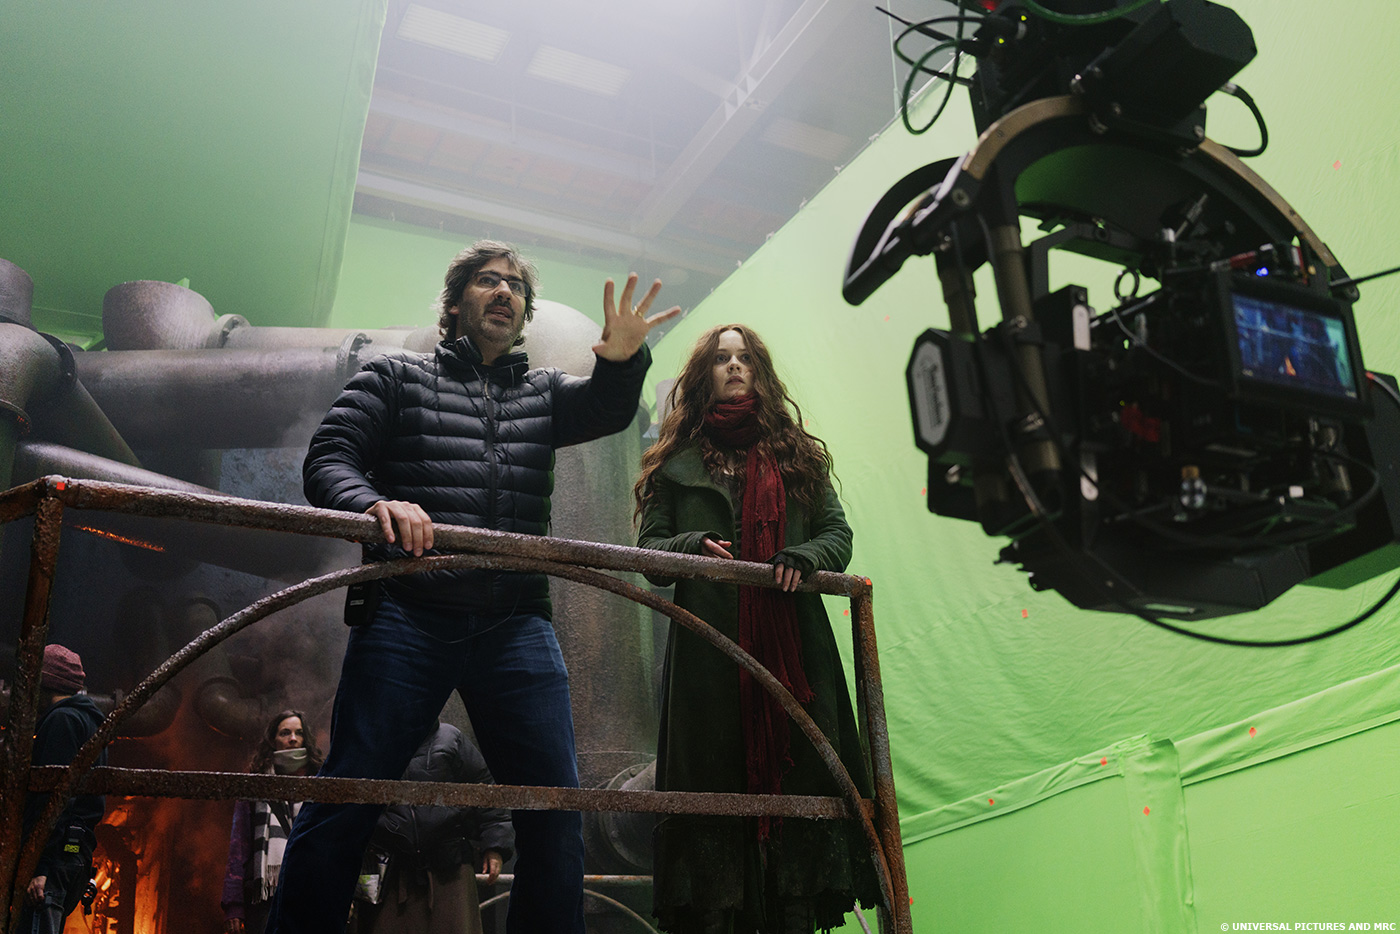
Working with Christian was very collaborative, not only because he is a very talented filmmaker, but also because of his extensive experience working in VFX at Weta. We didn’t have to go through the usual confidence building exercise we do with most directors, and because we speak the same VFX language it greatly streamlined the whole VFX process.
That’s his first feature film. How did you help him with such a big VFX show?
Christian’s experience at Weta meant that he knew what we were capable of delivering and how we would go about it, so the biggest help we were able to provide him was allowing him to focus on the other parts of filmmaking and not worry so much about the VFX.
How did you split the work amongst you and your VFX Producer?
VFX supervisors are generally responsible for managing the creative side of delivering VFX and liaise primarily with the director. VFX producers are responsible for managing the financial and logistical side of delivering VFX and liaise primarily with the client producers.
The Mortal Engines universe is rich and new. How did you work with the art department?
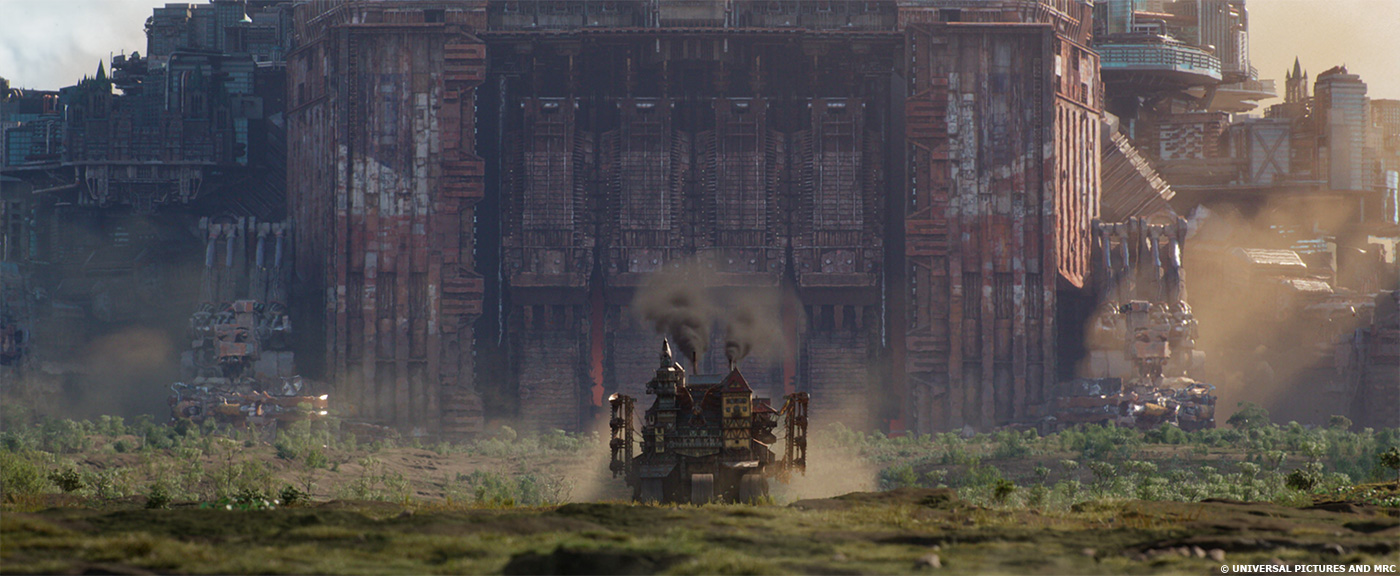
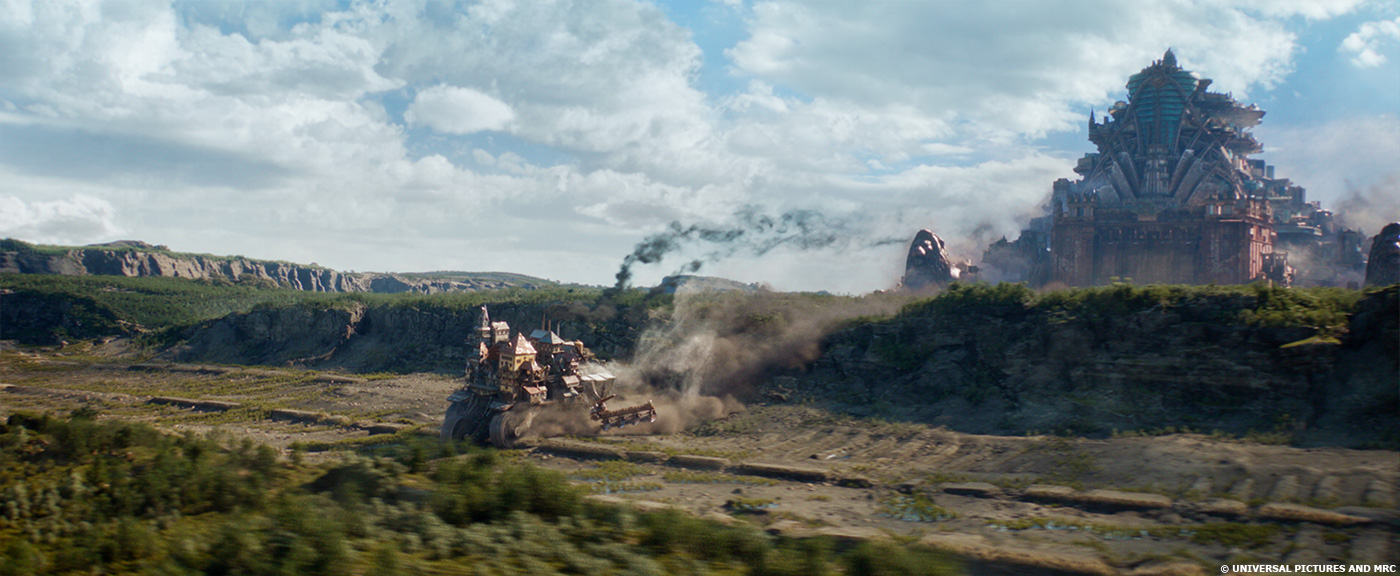
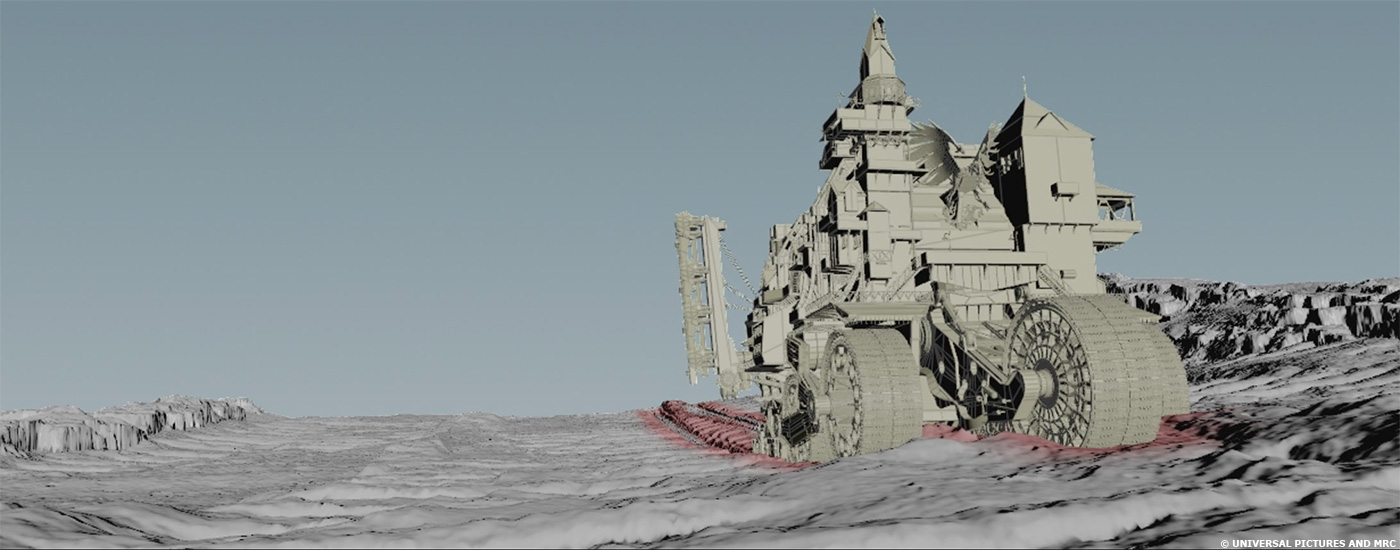
During pre-production, we frequently collaborated with the art department to assist them with deciding where and how to handle the takeover from their practical sets into our digital set extensions. Regarding the building of digital traction cities or airships, we usually started from art department concept art and then refined the design throughout the 3D build process. These refinements were often necessary once we started figuring out how the proportions look from different angles and how the assets needed to move.
Can you explain in detail about the design and creation of London?
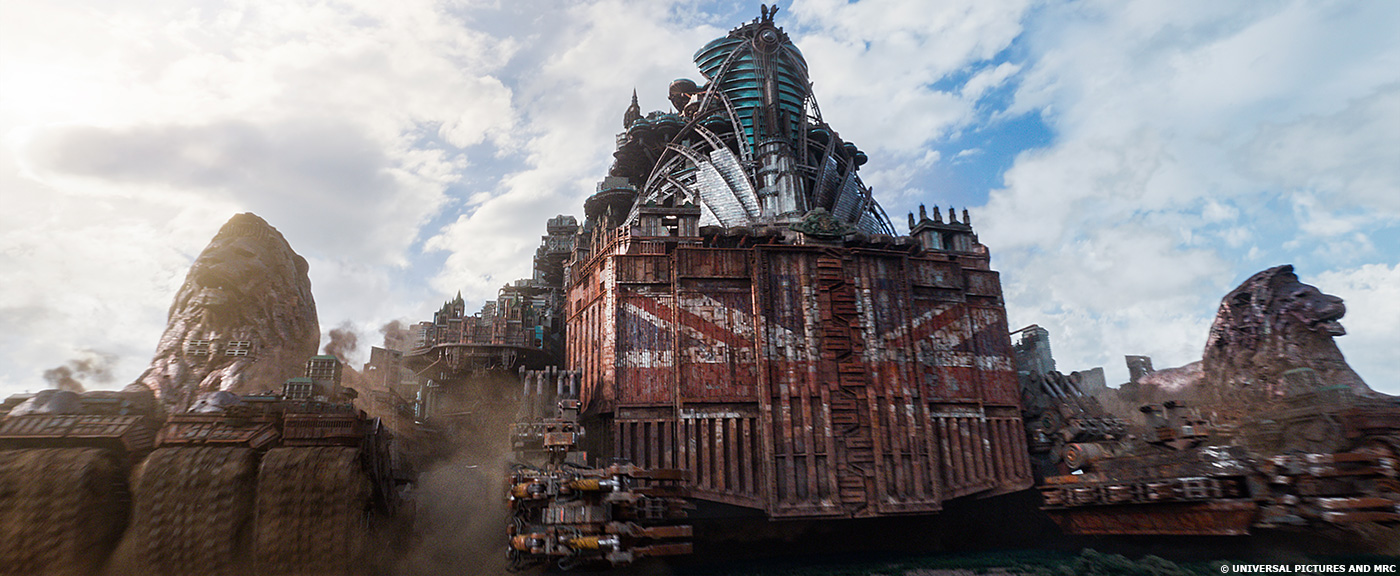
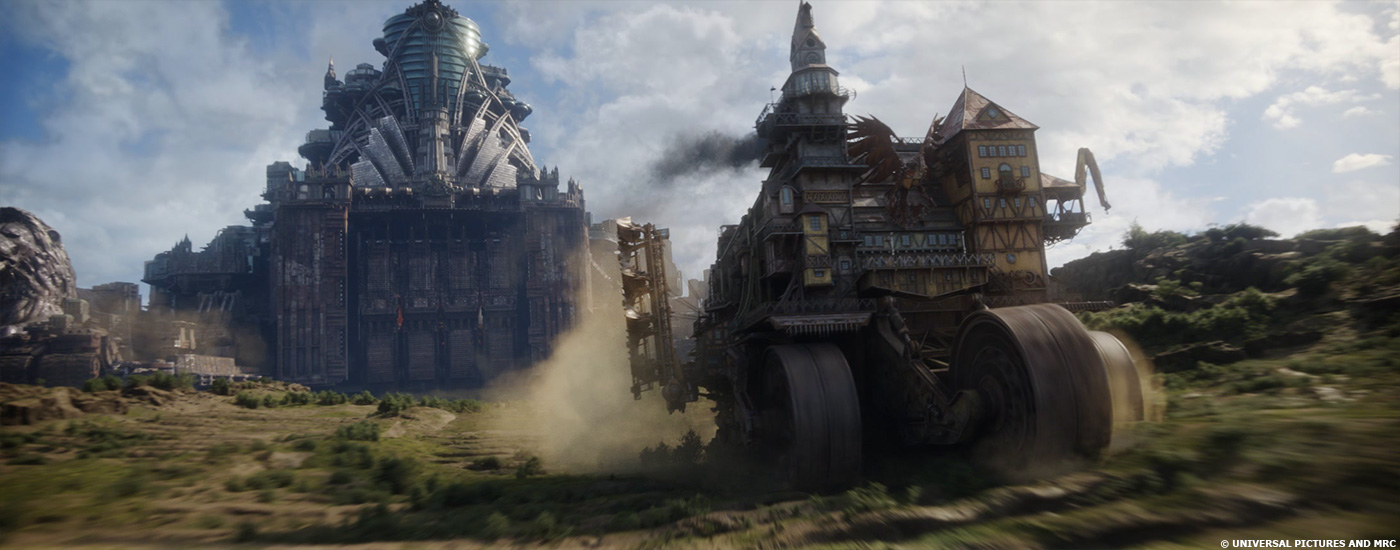
London’s design needed to sell both its immense size as well as maintain believability once put into motion. Both requirements were met by designing London’s superstructure with a vertical core off which lily pad-like platforms were supported by large suspension systems. Each lily pad represented an entire neighbourhood, complete with residences, parks, gardens, and shopping districts. The lily pads were distributed into layered tiers, where each tier needed to distinctly reflect the stratified social structure of London. The upper tiers were cleaner and more affluent, while the lower tiers were dirtier and poorer.
We also borrowed from the real-world London its characteristically diverse architectural styles. Structures reminiscent of London Bridge or the Houses of Parliament were juxtaposed with steel and glass buildings from the financial hub. This was carried through the design London’s front façade so that this unique characteristic of London was evident both from near and afar.
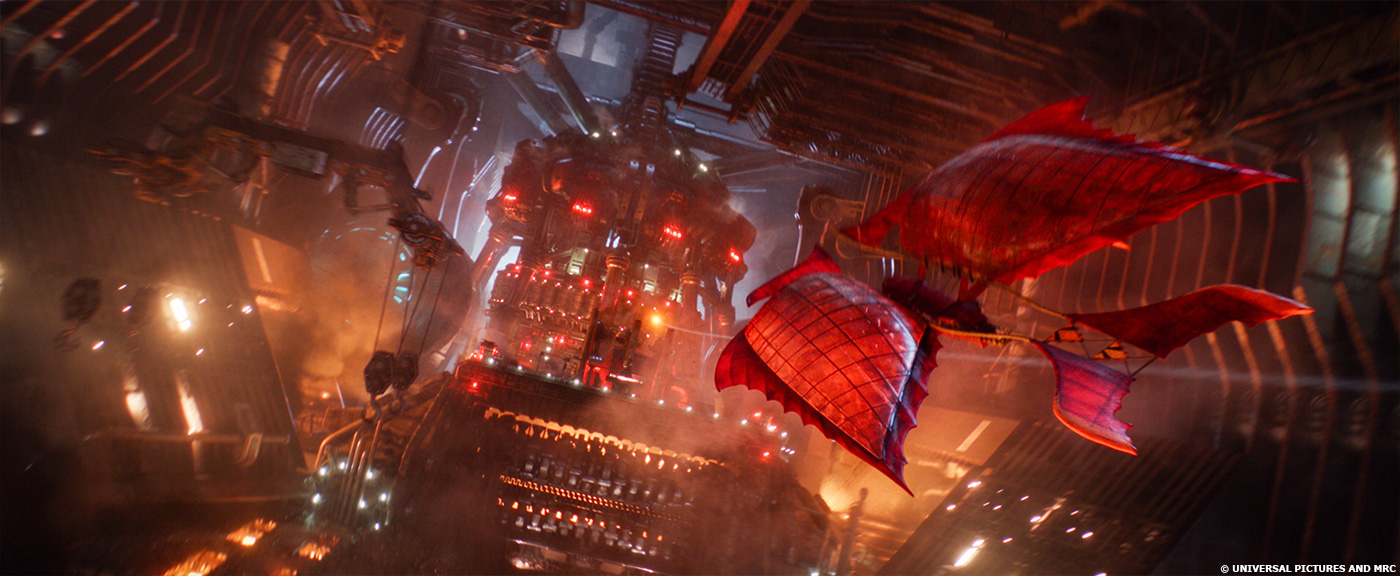
All of this was built on top of London’s gut, where the captured city of Salzhaken was ingested. The design of the gut was inspired by large scale foundries, where industrial machinery and atmospherics were lit from warm furnace glows. At the rear of the gut were the engines and generator that powered the entire city.
London is seen in various lighting conditions. How did you handle the aspect?
Because of London’s size and the composition of most of the shots, we lit London primarily with a single key light representing either the sun or the moon. London was also always back-lit to keep consistent with the cinematographer’s lighting direction during principle photography. We frequently had to test many lighting angles however since all the sharp edges on London made it tricky to find just the right one.
Can you tell us more about the other various little cities?
We built 16 additional smaller traction towns in addition to London. During the years of development, dozens of concepts had been created for various types of traction towns. Selects were made from them and modifications were made to suit the requirements of the scenes in which they play.
London is destroying the little cities. How did you manage so many simulations?
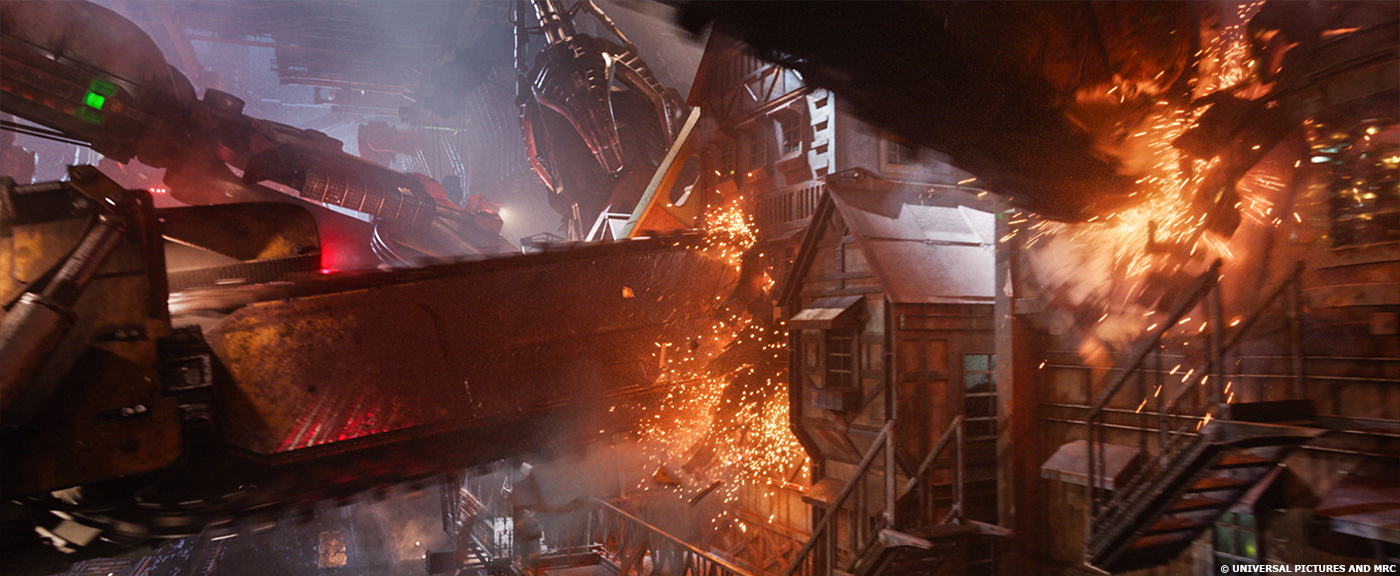
During the scene where Tom chases Hester through Salzhaken as it is being destroyed, we staged the two primary destruction moments as single large simulations instead of shot specific simulations. The shot cameras were then dressed into these simulations, which made continuity much more manageable. Additionally, we constructed the buildings completely with destruction ready material properties prior to designing the shots themselves. This gave a lot of freedom to the animators when choreographing the shots in the scene.
The heroes are escaping in the middle of those destructions. Can you tell us more about the light interactions?
The lighting theme was composed of cool fill lighting accented with warm furnace glows and sparks. To keep it interesting we also dressed in more neutral spot lights sweeping across the environment and red emergency strobes. All light sources were kept off screen, except for sparks. This helped to sell the danger of being trapped on these structures while they were being destroyed.
What’s the VFX shots count?
Weta delivered 1682 VFX shots, 378 of which were full CG shots. Some additional greenscreen comps were delivered by Park Road Post’s internal VFX division.
What was the size of your team?
Close to 900 artists worked on MORTAL ENGINES at Weta Digital.
What was the main challenge on the show and how did you achieve it?
My main challenge was creating London and keeping it both big and believable. Please see above for how we achieved it.
// Luke Millar – VFX Supervisor
What was the real sizes of the sets?
The sets varied in size from 15-20 metres for the smaller interior shots like the airship cockpits, London’s bridge etc, to full stage 100+ metre builds for Airhaven and the London track sets. Airhaven was probably the most complex with a huge network of gantries, gondolas which were suspended from above by a multitude of cables. However, these ended up only forming a very small section of the final environment seen on screen so we under took digital extensions in almost every direction!
Later we discover many aircrafts and an air station. Can you explain in detail about their creation?
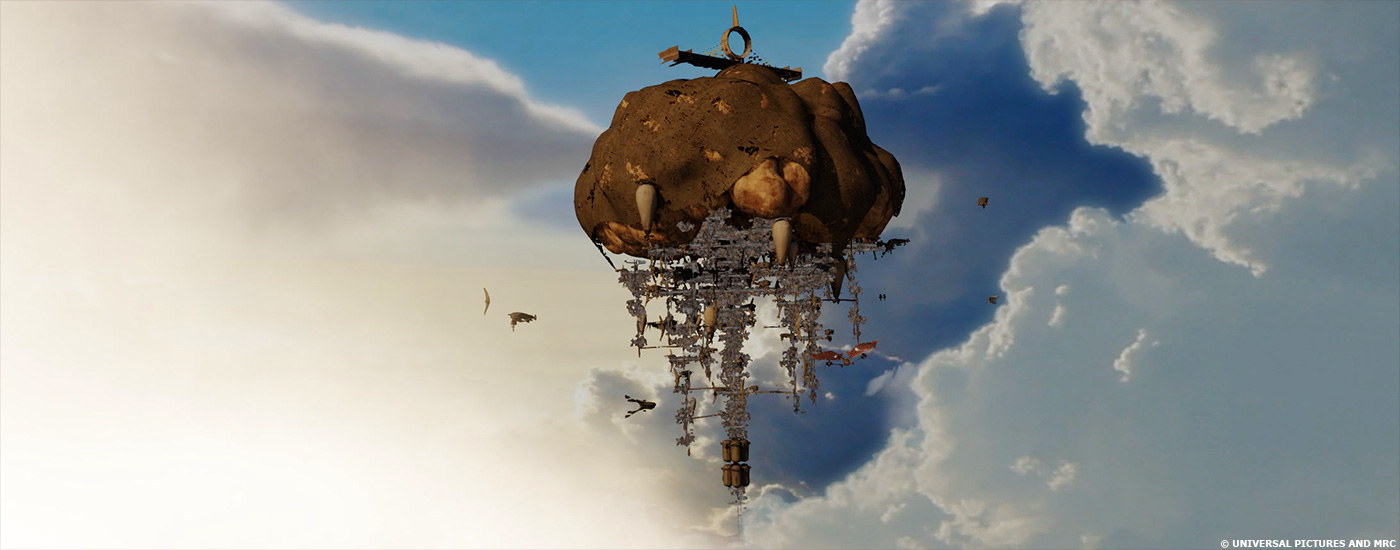
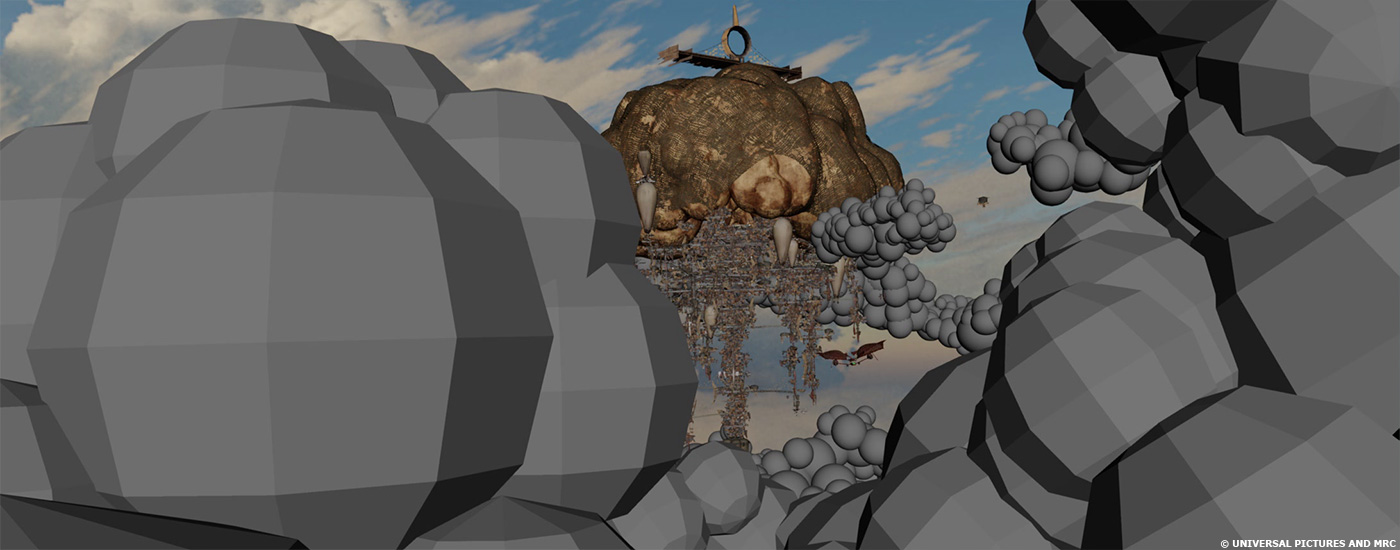
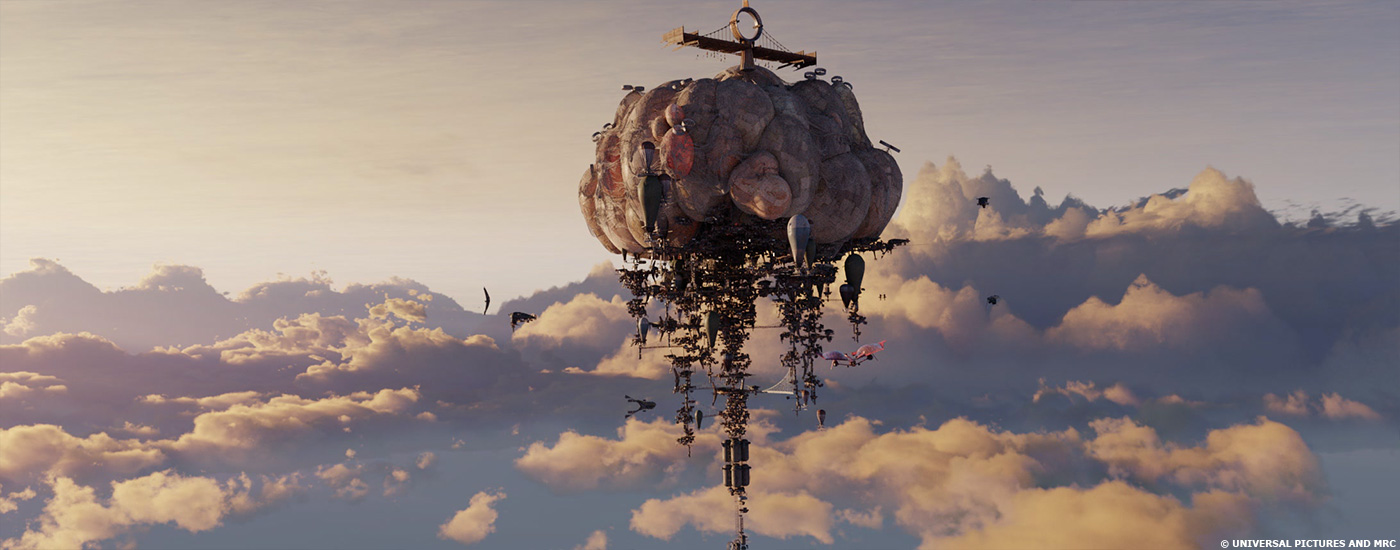
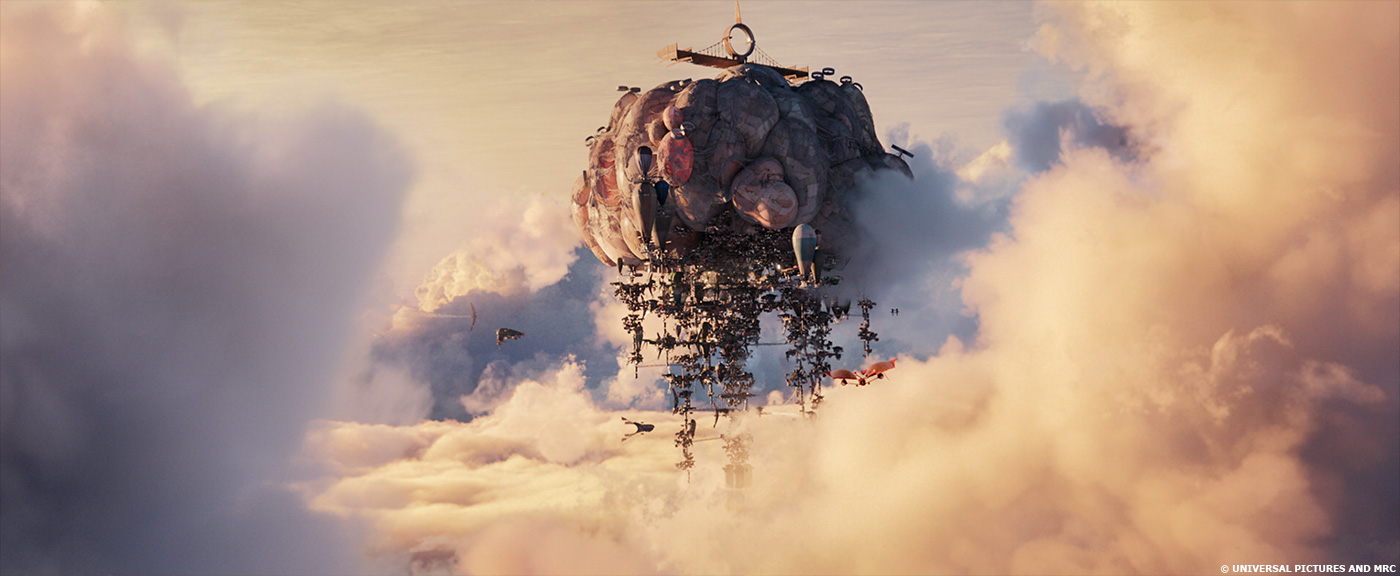
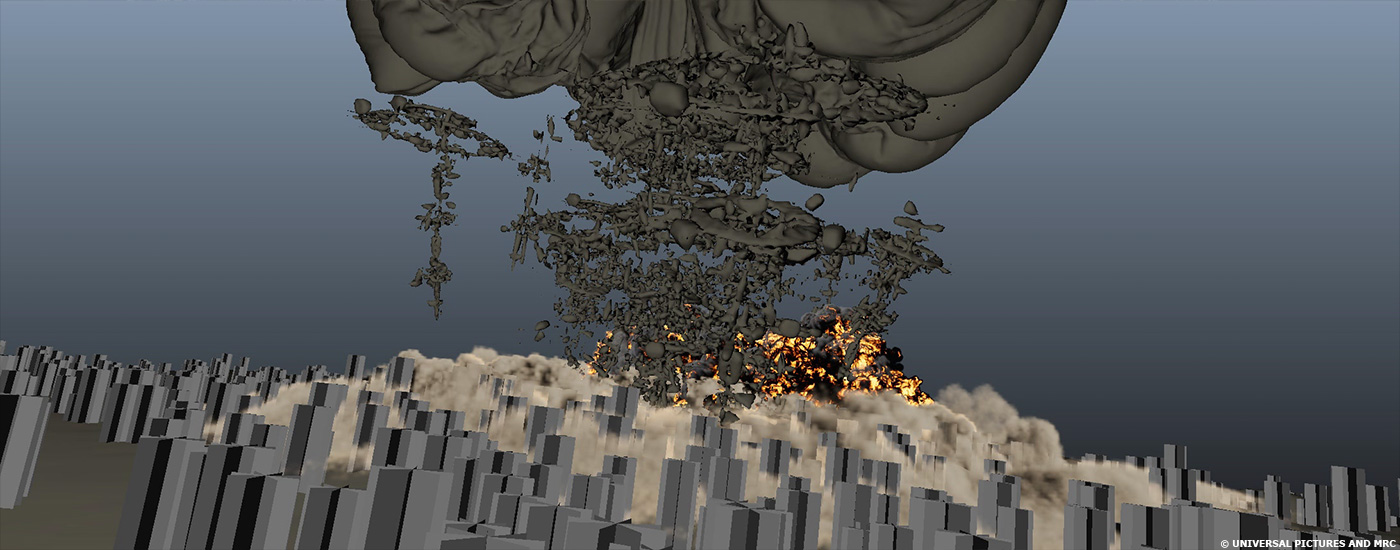
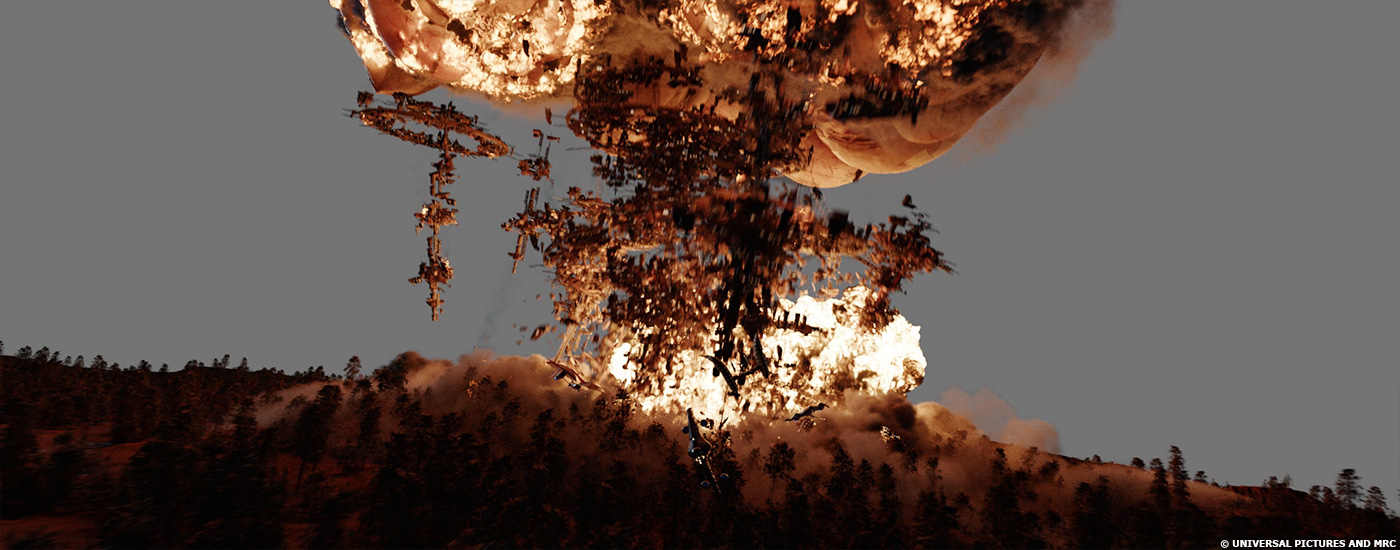
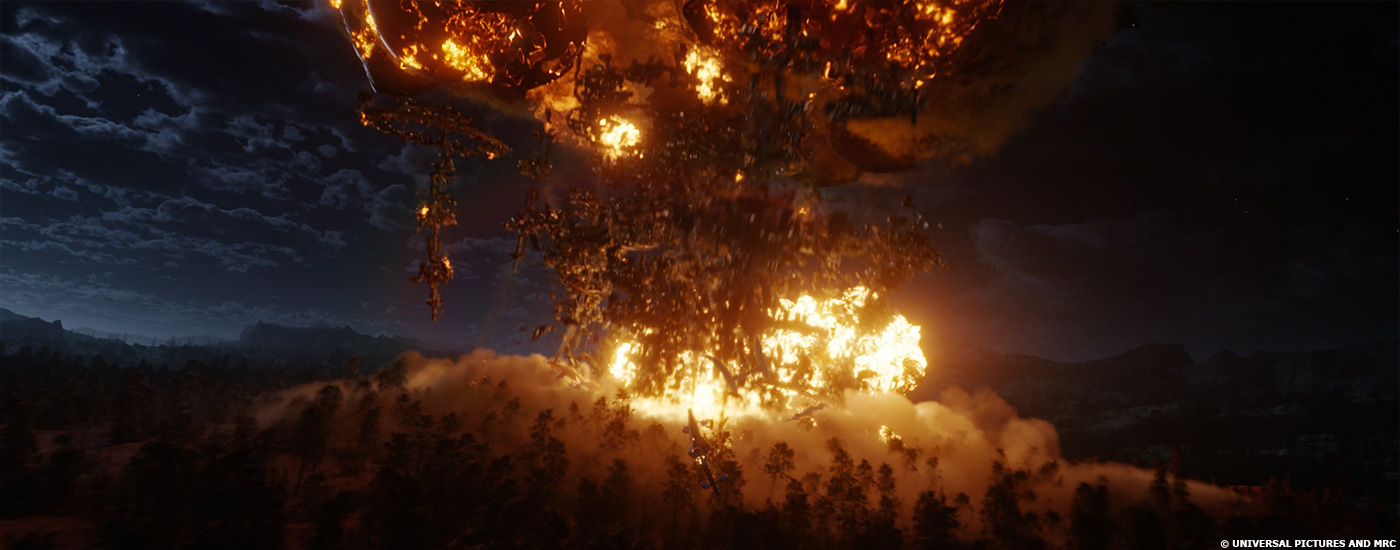
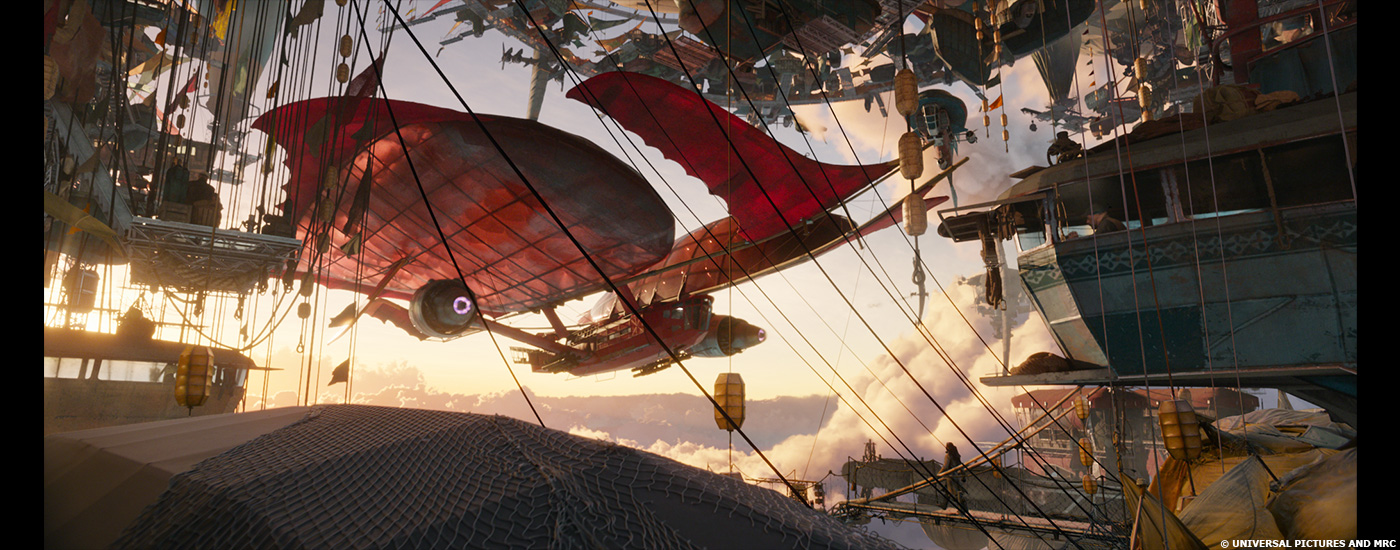
In contrast to the mobilised cities, the anti-tractionists favour lighter-than-air airships and visit a floating city called Airhaven. Airhaven is built up of a huge number of old airship gondolas, interconnected by a series of walkways and bridges with the entire city suspended from above via a huge gasbag. To build the city, we started off at the component level and modelled a series of kit parts that we could lay out to form small dwellings. We could then use the small dwellings to make larger rings and then the rings became the tiers that hung from the gasbag. Working from the component level up gave us 2 main advantages: it meant that we were always honouring the true scale of the place and it also made it much it easier to break it apart when it crashes in the ground later in the movie! We also modelled digital clouds and shaded them using MIE scattering techniques which we then nestled amongst the city.
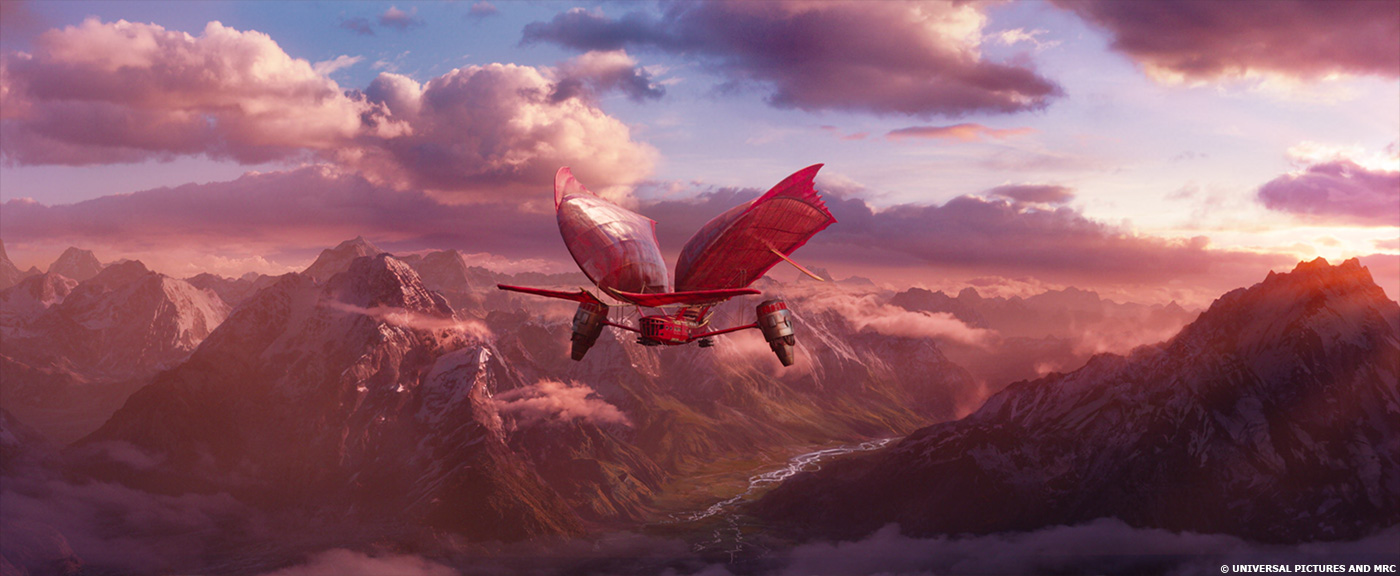
The airships were all designed to be able to float unassisted but were refined so that they could have the manoeuvrability of a fighter jet. Attention was paid to material types to always reinforce these ideas. We referenced current day airships and materials as well as modern composite construction techniques when building these aircraft. All the airships were built with jet engines and we rigged moving cables, flex and cloth interaction that would adjust as the airships went from cruising speed to full attack mode.
How did you handle the cloth simulations for the wings and balloons?
With the size and complexity of Airhaven, it was impossible to simulate all the flags, sails and balloons that made up the entire structure. There were literally 10,000+ pieces of fabric! We set up a selection of over-length cloth simulations and then extracted the motion in vector displacement maps. These were then fed into the palette with various time offsets so that we could get cloth motion at render time. If we wanted stronger wind or a different performance i.e. when the city was falling, then we could simply switch out the maps. We expanded this technique when setting it on fire and the cloth burns away. However, when the main gasbag catches fire, we had to run multiple high-resolution bespoke cloth, fire and smoke simulations to achieve both the scale and detail required for when the city crashes into the ground.
A mechanical man is chasing the heroes called Shrike. Can you explain in detail about his design and creation?
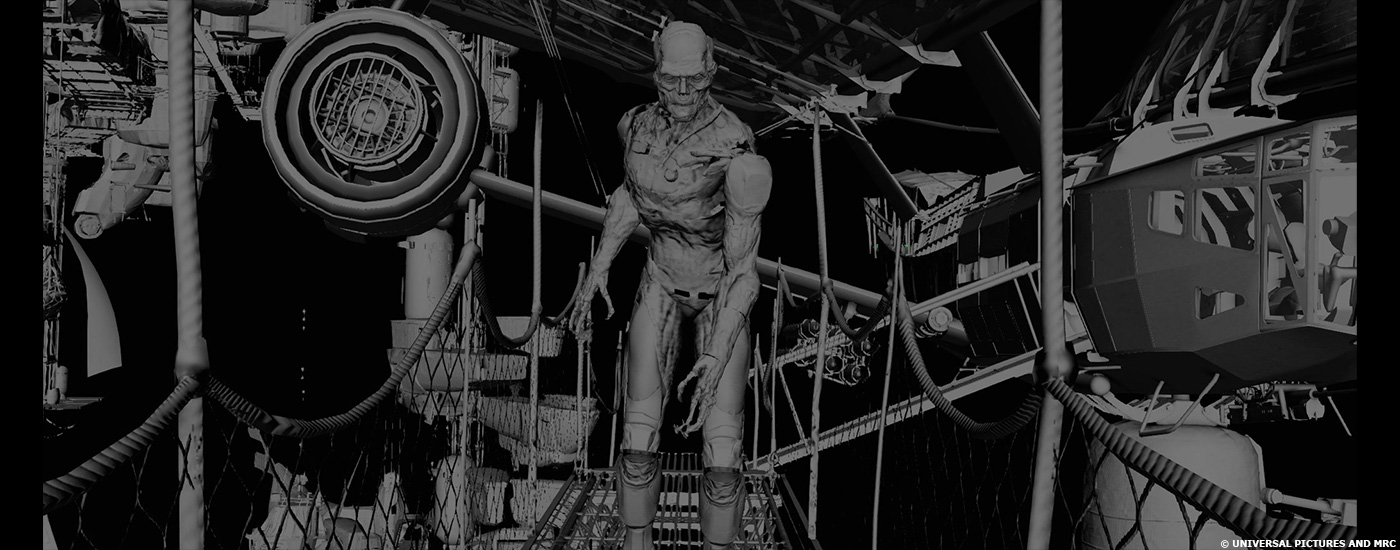
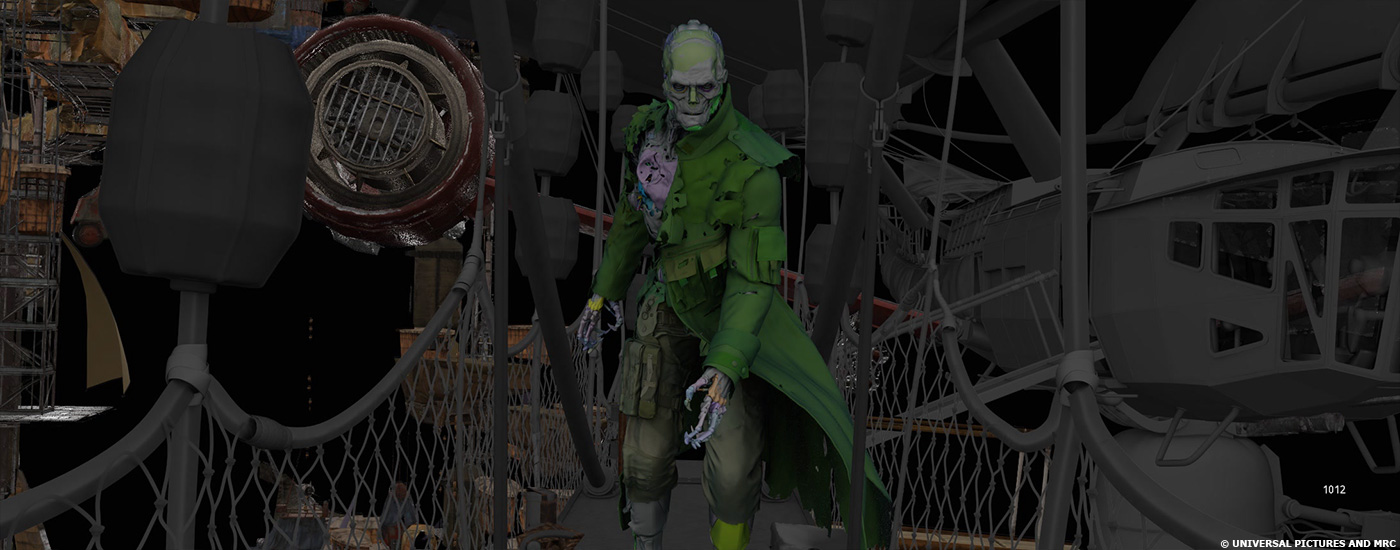
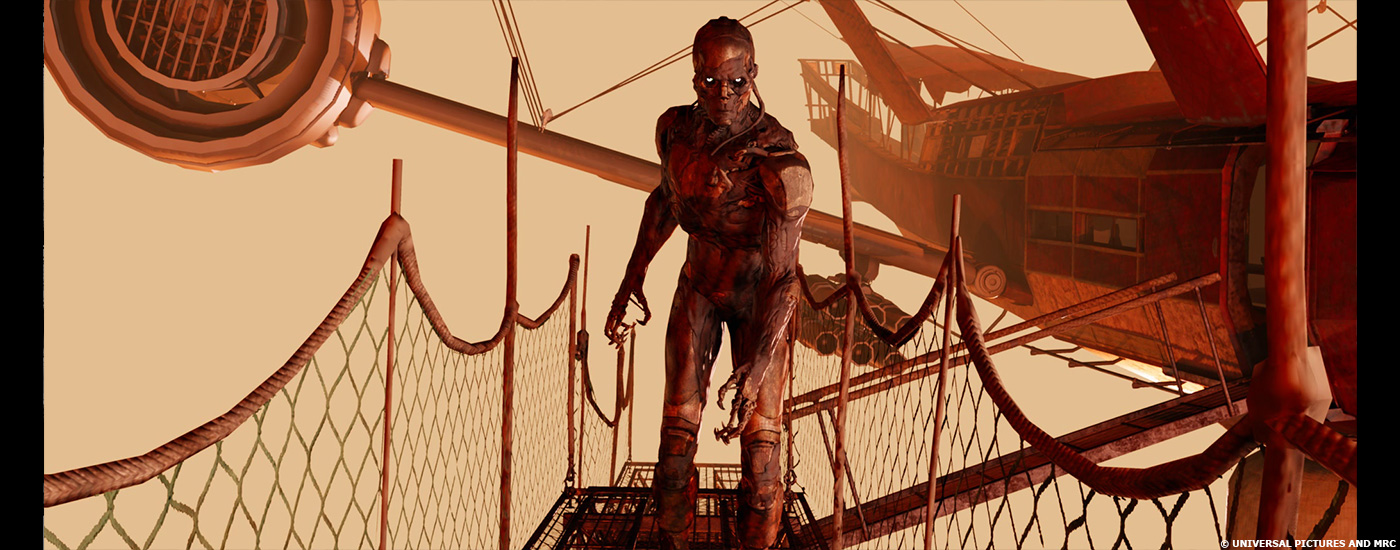
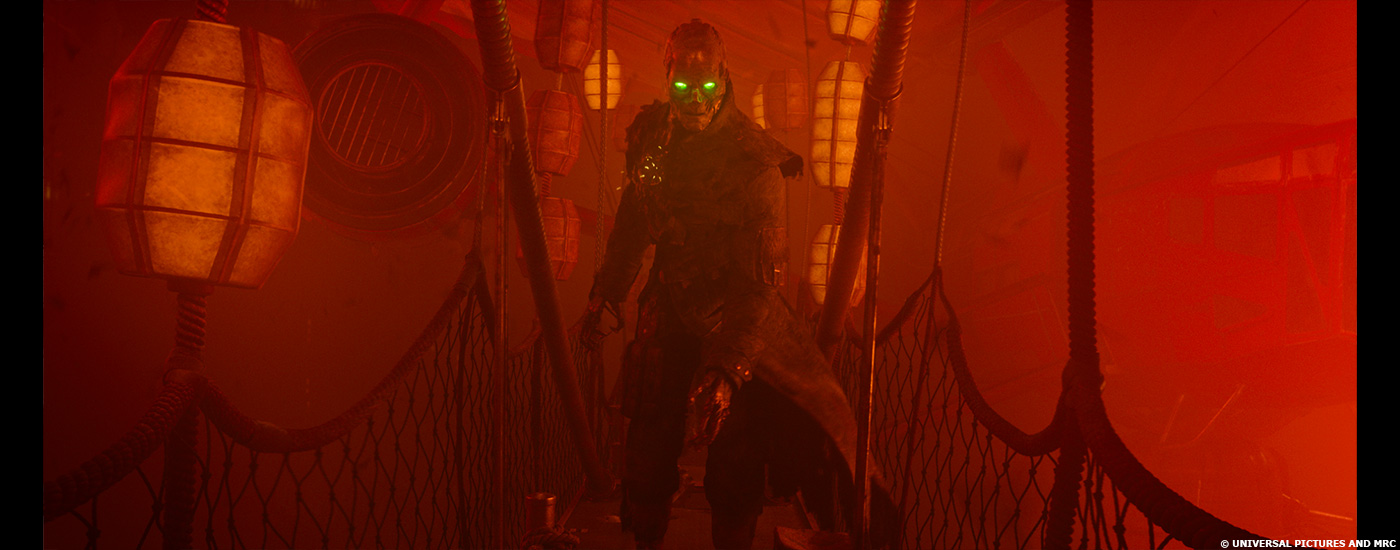
Shrike is a stalker which means he started life as a human and had metal components attached to him when he was re-animated after death. We were provided detailed concept art for the design of Shrike but had to solve several challenges when realising him as a fully realistic creature. We developed the look of the skin/metal combination through a complex model and layered shading techniques to define which areas would be skin, metal and the transition areas between. In a standard human, you don’t see the end skeleton and the skin at the same time, so we had to work out ways to attach skin to rigid pieces and allow it to stretch and flex in a realistic manner. It was also important to add flesh to any area that required specific motion (notably the face) as the base metal pieces wouldn’t carry the performance required.
How did you manage Shrike’s internal lighting?
One of the iconic images from the book is a stalker’s green eyes. We did a lot of work developing the look of the glowing eyes so that he could be menacing when in full stalker mode but also be able to take it right back so that you could empathise with the character during his final scenes. We experimented with redesigning the human eyeball so that we could fit lights behind the eye and then dialled in various levels of illumination to the sclera, iris and pupil to fit with the varying emotional beats. As we follow Shrike through the movie, he acquires more and more damage and so to represent that internal injury, we setup an array of internal lights that could be adjusted and timed to spark elements as the electricity arced. These lights reflected off the metal parts and scattered through the skin shading model to further reinforce his material make up.
// Dennis Yoo – Animation Supervisor
Did you use procedural animations for the various moving part of the cities?
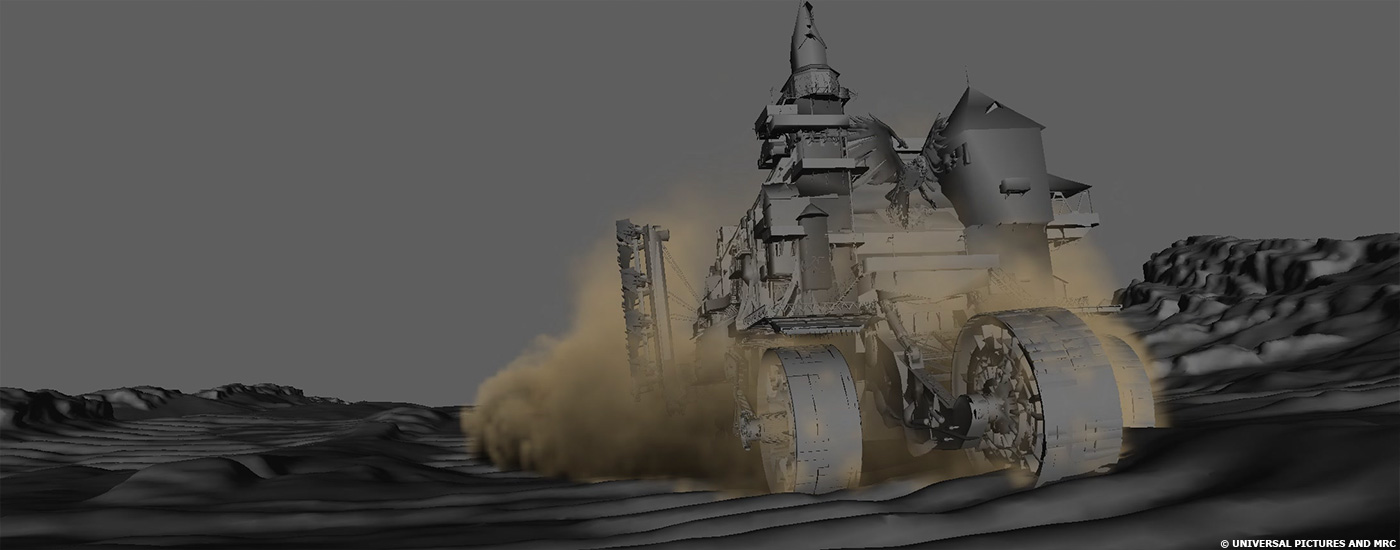
The main aspects of animation were keyframed-animated, but we were aware that keyframe animating the many parts of the cities would be a very labour-intensive task for the animators. So, to alleviate some of the work load, we devised a procedural workflow. The procedural animation could be broken up into 3 parts – the wheels of the towns, the secondary buildings on the towns, and the animation FX smoke.
For the wheels of our cities, we ran an initial contact pass where all the wheels react to an undulating ground terrain using a proprietary software that we call “Gumby”.
From there, we would ray cast a contact geo from the main layout, then use that geo to dynamically drive the contact of the wheels via “Gumby.” We had settings on each wheel for height depth and amplitude of reaction. All this could be baked down to where an animator could use keyframes to adjust motion. Jonathan Dysart our Creature Lead had a huge hand in getting this workflow implemented for use on our cities.
For the buildings on the cities, we developed a dynamic caching system where an animator could view the secondary motion of the buildings in real-time as they animated the main controls of the city. This motion could then be baked onto the buildings as keyframes and adjusted using keyframing animation techniques for a final animation pass. We were initially struggling with using dynamics in our animation as the nature of dynamics is that you are not able to scrub them in a timeline. Software Engineer, Jamie McCarter was the brainchild behind this idea and implemented it into our cities.
A FX smoke rig was attached to the city puppet, so an animator could actively turn the visibility on for presentation submissions. This allowed the filmmakers to view a version that was close to what the final render would look like as well for the overall composition of the shot.
All in all, we could not have had this procedural workflow working so well on our cities without the help of our Animation Lead Morgan Loomis and motion R&D developer Thomas Stevenson.
Can you tell about the airship’s animation and especially during the final battle?
The airships were a little tricky to figure out initially as they needed to be lighter than air and buoyant like a balloon but still able to move at incredible speeds like jet planes. The key was to differentiate the movements as they were almost different types of crafts depending on their speeds. Buoyant, bobbing slightly when at lower speeds and slick, stiffer movement when at high speeds.
The final air battle was so epic and the difficulty animating airships shooting at a city moving at 300kph was daunting on so many levels.
First off, I’d like to highlight the previs that was created for the sequence which captured the heart of the action. Many of the previs cameras could easily be imported straight into the animation scenes which helped post animation keep the initial feel and action of the sequence. We can attribute this fast- paced, seamless action to Christian Rivers who worked extremely closely with our Previs Supervisor Marco Spitoni and their brilliant collaborative relationship.
In post-production we split this sequence between Animation Sequence Supervisor Mark Smith and myself. This was probably the only sequence where we needed to do this. We worked together on solving many of the technical issues and refining the flow of the animation. We had the entire animation team working on the sequence at one point, up to 40+ animators. Continuity was a big concern and our Layout team did an excellent job at mapping out the initial structure of the sequence, but the complexity meant we needed to figure out scene continuity on the fly. The animation FX in the sequence such as tracer fire, artillery flak, animation driven destruction, was a hard, tedious process but the end results made it all worthwhile.
Which aircraft is your favourite?
The Jenny Haniver was definitely my favourite. She, being the main protagonists ship, warranted the most time put into design and puppet rigging. She had the most animation controls out of the airships and animating her could be intricate and complex but because of that, the results on her animation spoke volumes. Most of the animation controls and the flexibility of workflow within the rig can be attributed to our Animation Lead Sathyan Panneerselvam who’s passion for this particular airship was an extension of his passion for iconic movie vehicles.
Can you tell us more about Shrike’s facial animation?
Shrike’s facial animation was an on-going evolution as the film evolved. Stephen Lang’s onset performance was amazing in itself, but Shrike’s facial design changed dramatically after principal photography wrapped. Working closely with Christian Rivers, we developed Shrike’s look and expressions closely and found less was more, especially for the stoic and emotive aspects of his character. A lot of the development in finding Shrike’s facial performance was due to the very laborious yet creative work from our Animation Lead John Sore and our sole animator from the facial team, Chris Moss.
Shrike is a really heavy character. How does that affect your animation work?
The virtual weight of Shrike being heavy is difficult to portray as he is still proportionately human-sized, albeit a foot taller than average. But the extent of his weight meant we needed to exaggerate the timing of his limbs and base without pulling him out of real-world physics. Keyframe animation gave us the freedom to find his mechanical weight while still being believable.
// Kevin Smith – VFX Supervisor
How did you work with the SFX and stunts teams?
It’s on onset relationship. We collaborate with those departments early on to help them not do anything that makes it harder for us in post and to be there for them in case there’s anything we can do later to make it easier for them on the day.
During the movie, we discover many locations and environments. How did you create so many various places?
Just like you put your pants on in the morning, really. One leg at a time. In all seriousness, it comes down to an incredible group of artists doing the work and an incredible production crew making sure that it stays on track and finishes on time. We were lucky that we had a good idea what filmmakers wanted so we had the luxury of starting a lot of assets and environment builds before the sequences were turned over and then it was just keep putting one proverbial foot in front of the other.
Which one was the most complicated to create?
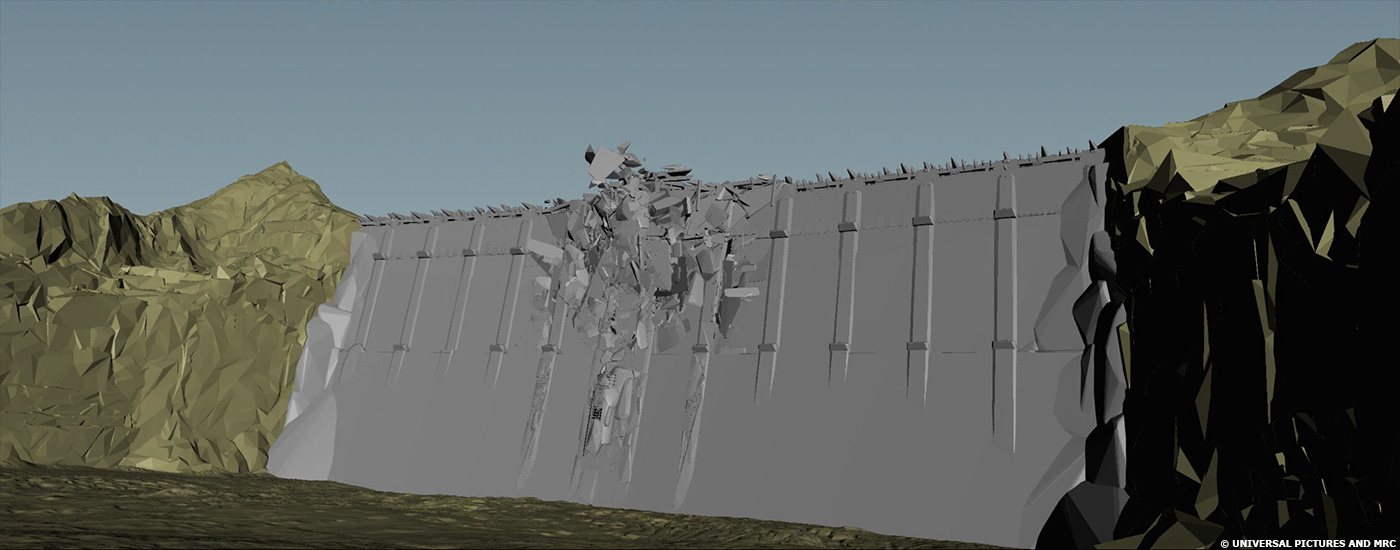
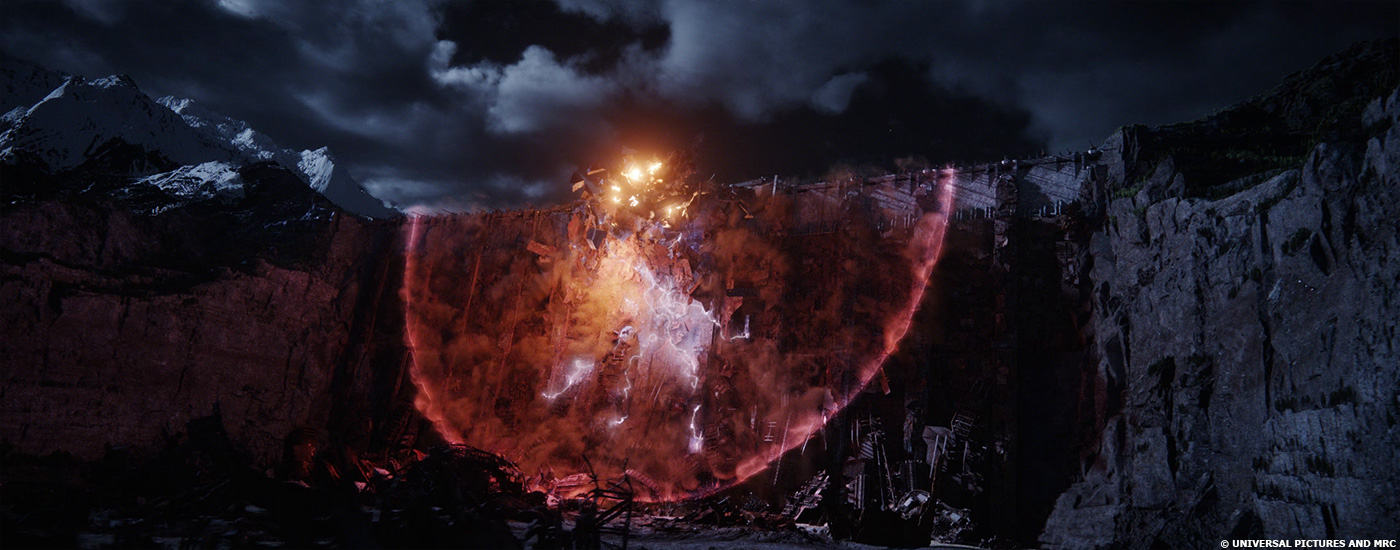
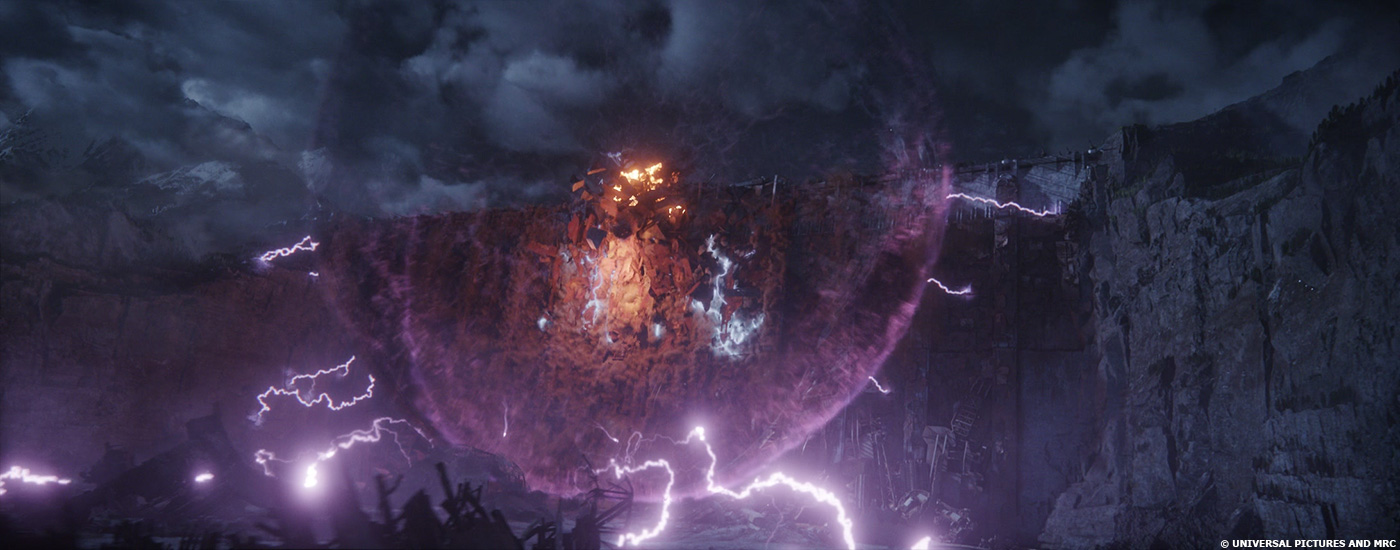
The most complicated thing was the Shan Guo build. We ended up creating about 5000 square kilometres of valley, mountains, shield wall and city in the build. Because of the aggressive schedule not only did we build procedurally at every step and at every scale. There were so many different things going on, procedural cities, matte paintings, 3D clouds, nuke projections, Houdini modelling, animation, hundreds of millions of trees, and plates that needed to fit into that world; we emptied our bag of tricks for this one and then I think someone must’ve found a couple more under the cushions of a couch or in a closet somewhere. And even though the action was split into several different “sequences”, most of the third act is really just one long sequence that happens in the Shan Guo environment, so we had the complications of worrying about continuity for the execution of 400+ shots over 16 weeks. It wasn’t like finalling one sequence and moving on to the next. Everything had to work together because there wouldn’t be any time to go all the way back to the beginning and change or fix anything and any change meant you had to update everything.
London has a massive weapon called The Medusa. Can you explain in detail about its design and creation?
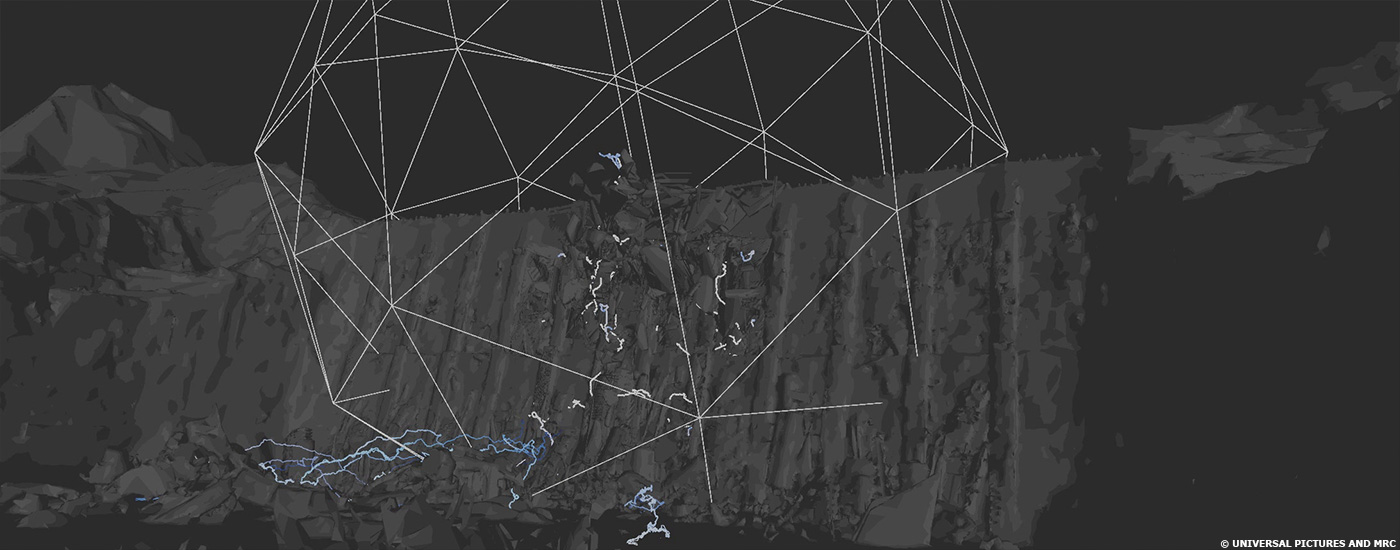
My team worked on the beam and the blast, the actual firing of the Medusa weapon. The general design of the blast was, for the most part, worked out in post-vis by the filmmakers and it was up to us to take it from there into something appropriate for the film.
What kind of references did you received for the explosion caused by The Medusa?
For the fantastical parts of Medusa, we had really good reference from the filmmakers, so we just picked up where the post-vis left of and kept refining those ideas, adding detail and layers for realism. For the practical looking parts of the destruction we just made sure to not cheat any of the physics. Audiences have a pretty good idea of what that kind of thing is supposed to look like, so we looked at lots of large-scale destruction. High explosive quarrying, building demolition, volcanoes, lightning storms, that kind of thing.
How did you simulate and animate this FX?
It was too big of a job to be handled by one person, so it was broken up into more manageable parts and assigned to individual effects artists who were free to use whatever tools they felt most comfortable with to create that part of the effect. So, there was a lot of Houdini and a lot of Synapse used. There was also quite a lot of compositing involved to combine all the effects passes with additional elements being generated directly in Nuke.
Which sequence or shot was the most complicated to create and why?
Our most complicated shot was probably Shrike walking out of the ocean at the end of the Sharkmoor sequence. What started out as plate photography eventually became and all digital shot, so it had a little bit of everything. Digital environment, character animation, water and spray simulations and interaction between them all and on top of that the shot is 700 frames long.
A big thanks for your time.
WANT TO KNOW MORE?
Weta Digital: Dedicated page about MORTAL ENGINES on Weta Digital website.
© Vincent Frei – The Art of VFX – 2018


