Update to the interview of MPC for PRINCE OF PERSIA

[lang_fr]Un nouveau lien a été ajouté à l’interview de Stéphane Ceretti pour PRINCE OF PERSIA:

MPC Breakdown: Breakdown VFX pour PRINCE OF PERSIA.[/lang_fr][lang_en]A new link was added to the interview of Stephane Ceretti for PRINCE OF PERSIA:

MPC Breakdown: VFX Breakdown for PRINCE OF PERSIA.[/lang_fr]

TOY STORY 3: Simon Christen – 3D Animator – Pixar

[lang_fr]Quel est ton parcours ?
J’ai grandi à Berne, en Suisse. Au cours dans mes années du lycée, j’ai décidé de poursuivre mon intérêt pour l’infographie et d’essayer d’en faire une carrière professionnelle. J’ai eu la chance d’être de pouvoir m’inscrire à l’Academy of Art University de San Francisco et de commencer ma formation d’animateur 3D. Après 4 ans d’études, j’ai obtenu mon diplôme et j’ai été accepté comme stagiaire à l’animation chez Pixar. Après le stage, j’ai travaillé comme fix animateur sur RATATOUILLE. Je n’aurais pas pu demander une meilleure introduction pour travailler dans l’industrie. Cependant, mon contrat se terminait après ce projet, donc ma femme et moi nous avons déménagé à Los Angeles, où j’ai commencé à travailler comme animateur pour Disney sur BOLT. C’était génial de passer une année et demie en Californie du Sud et d’apprendre une nouvelle expérience d’un autre studio et dans une autre ville. Pendant ce temps, je suis resté en contact avec les gens de chez Pixar et lorsque l’occasion de retravailler chez Pixar s’est présentée, je l’ai saisie. Je suis retourné chez Pixar au milieu de la production de UP. Depuis lors, j’ai travaillé sur TOY STORY 3 et je travaille maintenant sur leurs prochains projets.

Comment t’es-tu retrouvé sur Toy Story 3 ?
Après avoir terminé mon travail sur UP, j’ai travaillé la promotion des ressorties de TOY STORY et TOY STORY 2. C’était génial de travailler sur certains de ces personnages classiques. Une fois que TOY STORY 3 fut prêt pour la production, j’ai rejoint leur équipe d’animation et nous y avons travaillé pendant un peu plus d’un an.

Quels personnages as-tu animés ?
Comme la plupart des animateurs de Pixar, je n’ai pas animé juste un ou deux personnages. J’ai été capable d’animer de nombreux personnages, certains plus que d’autres. C’était un véritable plaisir d’avoir l’occasion de travailler sur des personnages aussi définis. Je pense que mon personnage favori à animer était Lotso. Ce fut est un tel plaisir de l’animer. J’ai animé ses derniers moments dans le film, où il essaie de s’échapper, mais il est ramassé et attaché au camion. Ce fut une série vraiment amusante de plans.

Avez-vous des contraintes pour le style d’animation pour faire correspondre ce troisième film avec les deux autres TOY STORY ?
Les rigs des personnages ont tellement changés depuis les deux premiers films que c’était un défi d’essayer de correspondre au même style d’animation. Woody, Buzz et toute la bande ont de telles caractéristiques et des comportements si spécifiques, que nous devions essayer de les imiter afin que l’on sente qu’il s’agissait des mêmes personnages. Avec n’importe quelle suite, vous avez la chance d’avoir beaucoup de référence pour obtenir de l’inspiration, mais aussi les limites afin de ne pas aller trop loin.

Peux-tu nous expliquer comment étaient les rigs ?
Les rigs que nous utilisons chez Pixar sont très bien développés et c’est un plaisir à les utiliser et animer. En fait, je n’en sais pas trop sur l’aspect technique des rigs car les riggers ont tendance à cacher leur structure sous-jacente. Quand nous recevons les personnages définitifs, ils sont composés de milliers de contrôles à animer.

Comment se passait la collaboration entre les animateurs et les riggers ?
Je n’étais pas vraiment impliqué dans ce processus, ce sont les leads animateurs qui s’occupent de préparer les rigs avec les riggers au moment de la préproduction. Une fois que tous les animateurs ont rejoint le projet, les rigs sont solides et prêts pour être animés.

Avez-vous utilisé les vidéos des acteurs quand ils étaient l’enregistrement de la voix de leur personnage ?
Non, pas sur ce film.

Peux-tu nous dire combien de secondes vous animez en une semaine ?
Cela varie, bien sûr, en fonction de la prise de vue, mais en moyenne je dirais que nous faisions autour de 80 à 90 images, donc un peu moins de 4 secondes. Si vous obtenez un paquet de plans, parfois, je préfère tous les bloquer à la fois. Dans une semaine comme cela, je n’anime pas dans le détail. Une fois que le blocage est approuvé, vous pouvez affiner et finir un couple de plans assez rapidement. Cela dépend aussi du nombre de personnages présent dans le plan. Quelques plans dans TOY STORY 3 avaient jusqu’à 200 personnages. Avec autant de personnages, cela diminue forcément le nombre d’images animées à la fin de la semaine.

As-tu rencontré des difficultés ou des problèmes inattendus ?
Chaque film a ses propres défis. Et celui-ci n’était pas différent. Un grand défi était de rester fidèle aux personnages et d’essayer de prolonger le travail qui avait été fait par les animateurs sur les films précédents.

Quel était le personnage le plus complexe à animer ?
Je ne dirais pas qu’il y avait un personnage qui était plus compliqué que les autres. Cependant, il y a eu un plan qui a été vraiment difficile pour moi, j’animais le plan au début du film où la mère filme le jeune Andy en train de jouer avec Wooy et Mr Patate. Puis vient Molly qui détruit un pont et quelques jouets. C’était un sacré défi, car le plan est réellement long avec de multiples personnages, et il implique des déplacements de physique avec des animations crédibles d’enfants. En fin de compte, c’était vraiment un plan amusant à faire et je suis content de la façon dont Molly fait tout tomber.

Comment étiez-vous d’animateurs à travailler sur ce film ?
Nous étions environ 80 personnes dans le département d’animation, y compris les animateurs, les leads, les fixers et tout le support technique.

Que gardes-tu de cette expérience ?
Cela a été un privilège incroyable d’être capable d’animer tant de personnages iconiques. J’ai beaucoup appris des vétérans de l’animation, certains d’entre eux ayant déjà animé sur TOY STORY et TOY STORY 2. Cela a également été très agréable de travailler avec le réalisateur, Lee Unkrich. La plupart des réalisateurs chez Pixar sont soit des scénaristes soit des animateurs. Lee a cependant un passé de monteur et nous, en tant qu’animateur, nous avions l’aperçu dans un tout nouveau monde quand il faisait la critique de nos plans.

Quel est ton prochain projet ?
Je crois que je vais travailler sur CARS 2. J’espère que je pourrais aussi un peu animer sur BRAVE.

Quels sont les quatre films qui t’ont donné une passion pour l’animation et du cinéma ?
Pour être honnête, je ne suis pas sûr que ce soit mon intérêt pour les films qui m’ait conduit dans cette industrie. Je pense que c’était pour moi plus la fascination des images générées par ordinateur. J’étais vraiment intéressé les images 3D et je jouais pas mal avec 3D Studio Max. Et éventuellement, je pensais à devenir un artiste 3D. Ce ne fut que j’étais inscrit à l’université que j’ai découvert que j’aimais l’animation comme une vraie passion.
Cependant, j’ai vraiment aimé LE LIVRE DE LA JUNGLE, MONSTERS INC. et THE INCREDIBLES alors que j’étais à l’école.

Un grand merci pour ton temps.

// EN SAVOIR PLUS ?
Pixar: Page spéciale TOY STORY 3 sur le site de Pixar.[/lang_fr][lang_en]What is your background?
I grew up in Bern, Switzerland. During high school I decided to pursue my interest in computer graphics and try to make a professional career out of it. I was fortunate enough to be able to enroll at the Academy of Art University in San Francisco and start my education as a 3D animator. After 4 years of studying I graduated and was accepted as an animation intern at Pixar. After the internship I worked as a Fix Animator on RATATOUILLE. I couldn’t have asked for a better introduction to working in the industry. However, my contract was up after the show, so my wife and I relocated to Los Angeles where I started working as an Animator for Disney on BOLT. It was great spending 1.5 years in Southern California and getting to experience a different studio and city. During that time I stayed in contact with people at Pixar and once the chance presented itself to go back, I took it. I returned to Pixar during the middle of production on UP. Since then I worked on TOY STORY 3 and I am now working on upcoming projects.

How did you get involved on Toy Story 3?
After wrapping up work on UP I worked on some promotional work for the re-release of TOY STORY and TOY STORY 2. It was awesome to work with some of the classic characters. Once TOY STORY 3 was ready for production, I joined their animation team and we worked on it for a little over a year.

Which characters did you animate?
Like most animators at Pixar, I didn’t animate just one or two characters. I was able to animate many of the characters, some more than others. It was a lot of fun having the opportunity to work with such established characters. I think my favorite was to animate Lotso. He’s such a fun character to work with. I animated his last moments in the movie; where he tries to sneak away, gets picked up and tied to the truck. That was a really fun series of shots…

Do you have any constraints for the animation style to match the third film with the two other Toy Story movies?
The character rigs have changed so much since the first two movies, it was a bit of a challenge to try and match the same animation style. Woody, Buzz and the whole gang have such established characteristics and specific behaviors; we had try and match them so they really feel the same. With any sequel you have the blessing of having a lot of reference to get inspiration but also the limitations of branching out too far.

Can you explain how were the rigs?
The rigs we use at Pixar are very well developed and a pleasure to work with. I actually don’t know too much about the technical aspect of the rigs as the riggers tend to “hide” the underlying structure. We just get the finished characters with sometimes thousands of controls to animate.

How was the collaboration between the animators and the riggers?
I wasn’t really involved in this process as the lead animators usually figure out the rigs along with the riggers in pre-production. Once the full force of animators joins the show, the rigs are solid and ready to be animated.

Did you use the videos of actors when they were recording the character’s voices?
No, not on this show.

Can you tell us how many seconds do you animate on a week?
It varies depending on the shot of course, but on average I would guess around 80 to 90 frames; so a little less then 4 seconds. If you get a chunk of shots, sometimes I like to block them out all at once. In a week like this I won’t hand in any animation. Once the blocking is approved you can then polish and finish a couple shots fairly quickly. It also depends on how many characters are in a shot. Some shots in TOY STORY 3 had up to 200 characters. The frame amount obviously drops with that many models.

Did you encounter some difficulties or unexpected problems?
Every show has its challenges. And this one was no different. One big challenge was to stay true to the characters and try and live up to the great animation people have done on the previous movies.

What was the most complicated character to animate?
I wouldn’t say there was one character, which was more complicated than the others. However, there was one shot that was really tricky for me; I animated the shot in the beginning of the movie where the mom is filming young Andy playing with Woody and Mr. Potatohead. Then Molly comes stumbling in, knocking over a bridge and some toys. It was a challenging shot as it was really long, with multiple characters, involving some difficult physical moves, with toddler and children acting. In the end it was a very fun shot to work on and I am happy with how Molly stumble turned out.

How many animators worked on it?
We were around 80 people in the animation department including animators, leads, fixers, techs and support staff.

What do you keep from this experience?
It was an incredible privilege to be able to animate with such iconic characters. I learned a lot from the veteran animators, some of them having already animated on TOY STORY and TOY STROY 2. It was also great getting to work with the director, Lee Unkrich. Most directors at Pixar are either Story guys or animators. Lee however comes from an editing background and so we as animators got a glimpse into a whole new world when he was critiquing our shots.

What is your next project?
I believe I’m moving onto CARS 2. Hopefully I will also get to animate on BRAVE as well.

What are the four films that gave you a passion for animation and cinema?
To be honest, I’m not sure if it was the interest in moving pictures that really got me into this industry. I think for me it was more the fascination for computer graphics in general. I was really interested in 3D graphics and played around in 3D Studio Max. Eventually I wanted to become a “3D guy”. It wasn’t until I was enrolled at University that I discovered that I like animation as a specific major the best.
However, I really love THE JUNGLE BOOK, MONSTERS INC. and THE INCREDIBLES while I was in school.

A big thanks for your time.

// WANT TO KNOW MORE?
Pixar: Dedicated TOY STORY 3 page on Pixar website.[/lang_en]

© Vincent Frei – The Art of VFX – 2010

INCEPTION: Paul Franklin – VFX Supervisor – Double Negative

After beginning his career at Digital Film and MPC, Paul Franklin helps to the creation of the studio Double Negative in 1998. Since then he has supervised projects such as THE LEAGUE OF EXTRAORDINARY GENTLEMEN and HARRY POTTER AND THE ORDER OF THE PHOENIX and has supervised all the movies of Christopher Nolan since BATMAN BEGINS. In the following interview, he talks to us about his work on INCEPTION.

What is your background?
I originally studied sculpture at university in the 80s which is where I first started experimenting with computer graphics. I combined this with the student theatre and magazine work that I was doing at the time which then lead me into film making and animation. I worked in video games for a while as an animator/designer and then moved into film and television in the early 90s. In 1998 I helped to set up Double Negative VFX.

How was your collaboration with Christopher Nolan with which you have already worked on BATMAN BEGINS and THE DARK KNIGHT?
Chris is a fantastic director to work with – he is very demanding, always pushing you to raise the bar in every area, but he also gives you a lot of feedback and involves you in the creative discussion which makes you feel a part of the whole movie making process. Chris told me at the beginning of INCEPTION that it would be an all-consuming experience, and he was right!

Can you explain how you created the sequence in which Paris is folded over itself?
Returning to the Paris environment, Ariadne, played by Ellen Page, demonstrates her new-found ability to control the dreamworld by folding the streets in on themselves to form a giant « cube city ».

The Dneg vfx team spent a week documenting the Paris location where main unit was scheduled to shoot. Seattle-based Lidar VFX Services did a great job scanning all the buildings and then delivering highly detailed data from which Double Negative built a series of Parisian apartment blocks. It wasn’t possible to get above the buildings so the Dneg VFX modellers sourced photographs of typical Paris rooftops to fill in the missing areas. We implemented the new pertex texture mapping techniques in Renderman to allow the CG team to avoid the laborious UV coordinate mapping that is usually associated with models of this type. The final folded streets featured fully animated cars and people – anything that’s not on the flat in the final images is CG.

How did you created the impressive scene of the cafe in Paris?
Early on in INCEPTION, Ariadne is taken into a dreamworld version of Paris by Cobb, played by Leonardo DiCaprio. When Ariadne realises that she is actually dreaming she panics and the fabric of the dream starts to unravel, disintegrating violently and flying apart in all directions.

Special Effects Supervisor Chris Corbould created a series of in-camera explosions using air mortars to blast light weight debris into the Paris street location. Whilst giving an extremely dynamic and violent effect on film, the system was safe enough that Leo and Ellen were able to actually sit in the middle of the blasts as the cameras rolled. Director of Photography Wally Pfister used a combination of high speed film and digital cameras to capture the blasts at anything up to 1000 frames a second which had the effect of making the turbulent debris look like it was suspended in zero gravity, giving the impression that the very physics of the dreamworld were failing.
Starting with a rough cut of the live action, the Double Negative VFX animation team used the in-house Dynamite dynamics toolset to extend the destruction to encompass the whole street. The compositors retimed the high-speed photography to create speed ramps so that all explosive events started in real-time before ramping down to slow motion which further extended the idea of abnormal physics. As the destruction becomes more widespread the team added secondary interaction within the dense clouds of debris to sell the idea of everything being suspended in a strange weightless fluid medium.

What did you do in the scene in which Ellen Paige turns large mirrors on a bridge in Paris?
Ariadne continues her exploration of the limits of the dreamworld by creating a bridge out of the echoing reflections between two huge mirrors.

We had scouted a bridge over the River Seine in Paris (Bir-Hakeim bridge which had been previously featured in LAST TANGO IN PARIS) which had a really interesting structure: a Metro rail deck overhead with a pedestrian walkway underneath framed by a series of cast-iron arches. Chris wanted this bridge to reveal in an interesting way as part of Ariadne’s playful exploration of her new-found ability to control the dreamworld. During preproduction we worked up various concept animations of the bridge assembling itself in a blur of stop-frame construction, but it always ended up looking slightly twee and overly-magical – Chris was interested in something elegant that, whilst simple in concept, would defy easy analysis by the viewer. In an early discussion I mentioned that from certain angles the arches resembled the infinite reflections generated by two opposed mirrors – Chris thought that this was an interesting idea and eventually asked the question « what could you do on set with a really big mirror? ». I got together with Special Effects Supervisor Chris Corbould who got his team to build an eight foot by sixteen foot mirror that could be swung shut on a hinge, effectively forming a huge reflecting door. Dneg then got to work on a series of animations that explored the range of what we might be able to get in camera with this rig and we arrived at a series of camera setups which then formed the basis for Chris and Wally’s shooting plan. This gave a great start for us in VFX, but as big as the mirrored door was (it’s size being limited mainly by weight as it was already up to 800 Lbs) we still needed to do a lot of work. The compositing team set about removing the support rig and crew reflections and then adding in the infinite secondary reflections as well as the surrounding environment. The result is a series of shots so subtle in their execution that you’re not really aware of any digital intervention until the very last moments of the sequence. In fact most of what you’re looking at is digital with only the actors being real – even their reflections are digital doubles in many cases.

Were you involved on the extreme slow motion and what did you do on them?
We shot slow motion using both the Photosonics 4ER (which uses standard 35mm film) and the Phantom digital camera. Slow motion photography involves a trade off between speed and quality – the faster the camera runs (and thus the slower the resulting image) the lower the quality of the picture. We came up with a solution to this by shooting at as high a frame rate as possible whilst still maintaining the quality and then slowing the footage down even more in post using various respeed tools inside Dneg’s in-house version of Shake. Some things were impossible to shoot slow motion, such as the falling rain in the wide shots of the van coming off the bridge, so instead we created all of the falling rain as VFX animation.

Can you explain to us the shooting of the train that attacks the heroes? What have you done on this sequence?
The train is pretty much all in camera, in other words we really had a full size train on the street crashing through the cars. Special effects and art department built the shell of the train on a truck body – Double Negative then removed the truck’s wheels and added metal train wheels. The fractured road surface was created in CG and additional work was done in compositing to add shadows to the building facades, increasing the overcast rainy-day look.

How was the shooting of the amazing corridor fight and how did you create this sequence?
The « spinning corridor and hotel room » sequence was all in-camera. Chris Corbould’s special effects team built a huge rotating set to create the effect of Arthur (Joseph Gordon-Levitt) and the sub-security guards running over the walls and ceilings. The same principle applied for the scene inside the spinning hotel room. The only VFX work was a simple removal of a camera rig from the background of the final shot in the sequence.

How did you created the zero gravity effect?
The zero-g look was achieved through the use of cleverly designed stunt and special effects rigs which were then removed digitally by Double Negative in post. For the zero-g fight, where Arthur grapples with the security agent a vertical version of the hotel corridor set was built and the performers were dropped into it on wires with the camera filming them from the bottom end of the set. For the most part the actors hid their own wires, but when they became visible they were painted out with CG set extensions being used to fill any gaps that were left in. Much of the rest of the zero-g sequences, such as in the elevator shaft, was achieved on a horizontal set with Joseph Gordon-Levitt being held in a special « see-saw » rig or suspended from a small crane. Once again, Dneg removed all the rigs and repaired the backgrounds where necessary.

Did you created digital doubles for the corridor and zero gravity sequences?
The only digital double work in the zero-g sequences is a brief moment when Arthur is tying up the sleeping dreamers where we replaced the heads of two of the stunt actors with CG heads of Cillian Murphy (Fischer) and Ken Watanabe (Saito). Everything else is done with real people!

During the sequence in the mountain. Was the landscape real or is it all CG?
The landscapes are all real save for a small bit of terrain at the base of the Fortress when seen in the wide shots. The location of the snow scenes (Kananaskis County in Alberta, Canada) was absolutely spectacular – the only thing we had to do was add the digital Fortress in the wide shots and paint out the odd building in the background.

How did you created the avalanche?
The avalanche is for real. The special effects team collaborated with the local mountain patrol to trigger avalanches with strategically dynamite charges. We added the Fortress in the background and the little falling figures on the cliff face, but otherwise it’s all the real deal.

How was the collaboration with New Deal Studios?
New Deal are a great bunch of guys. I’ve worked with them directly before on LEAGUE OF EXTRAORDINARY GENTLEMEN and of course on THE DARK KNIGHT and Double Negative’s relationship with New Deal goes right back to PITCH BLACK, our first movie in 1998. Ian Hunter, New Deal’s VFX supervisor, did a fantastic job with his team, creating a sixth scale version of the central section of the Fortress and then rigging it for a dynamic collapse and pyrotechnic destruction.

Can you tell us about the sequence at the edge of the ocean. How did you created this city that is falling apart?
The Limbo City shoreline is, perhaps, the scene that has the most obvious symbolism of any of the dream environments. The sea represents Cobb’s subconcious mind and the city is the mental construct that he built within it – having once been beautiful and pristine, the city is now mutating and crumbling back into the subconcious sea, symbolising Cobb’s state of mental collapse. Chris wanted the city to take on the aspect of a glacier, slowly sliding out into the sea with giant architectural « icebergs » splitting off and drifting away in the water.

During pre-production both Art Dept. and VFX worked on concept designs for Limbo City devoting particular attention to the decaying shoreline. However, even after several weeks’ work we weren’t getting anything that Chris felt happy about – everything was just a little bit too literal. We discussed the idea of Limbo having started out as an idealistic modernist city that has started to collapse back into the sea of Cobb’s subconsciousness. We started with the basic concepts: a city of modern buildings and a glacier. We took a simple polygonal model of the glacier, built from photographic reference, and developed a Maya-based space-filling routine that populated the interior with basic architectural blocks with the height of each block being determined by the elevation of the glacier at that point. We then began to develop a series of increasingly complex rules that added street divisions or varied the scale of the buildings or added damage, all determined by samples taken from the glacial model. After each new rule was added we reviewed the resulting structure and then refined the process.

Once we had reached a certain level of complexity our VFX art director developed a series of paintings from the CG renders provided by the procedural system and these then fed back into the development of the rules. In this way we arrived at a city layout that had familiar features such as squares, streets and intersections, but which had a totally unique structure that felt more like a natural landform – a cliff being washed into the waves with architectural « icebergs » floating out to sea. The VFX animation team then used Houdini to create the collapsing architecture which was primarily referenced from natural history footage of glaciers rather than from building demolitions, adding giant splashes with Dneg’s proprietary Squirt fluids system. The hero shot from the sequence, featured in many of the online trailers, was developed from a helicopter plate that we shot with the INCEPTION aerial unit in Morocco – that’s actually Leo and Ellen walking through the waves. The final look of the city shoreline was created by using lots of reference of derelict housing developments as well as bomb damaged buildings in Iraq and other war zones.

Can you explain the final sequence and its gigantic city that mixed old house and skyscrapers? Was it all shot in front of a greenscreen?
We shot inside the actual house (an early 20th century « craftsman house » in the San Gabriel valley in Pasadena California) and used the location for both the scenes in Cobb’s memory and Limbo. For the Limbo shots we built a large greenscreen, supported on a platform, outside of the windows. The cityscape was created from the same CG setup used for the scenes of Cobb and Ariadne walking through the deserted city. Great attention was paid to the compositing with a lot of time spent on getting the depth of field and exposure right.

How was shot the top? Was it CG or real?
The top was shot for real, there was no CG for it.

How long did you work on that show?
I first read the script in February 2009 and then started on the show properly in April of that year. Our final delivery was at the end of May 2010 – so, in all about 13 or 14 months.

How many shots have you done and what was the size of your team?
We worked on 560 shots of which 500 are in the final film. In total we had about 230 people working on the visual effects over the duration of the show.

What is your next project?
Right now I’m taking a bit of a break – we’ll see what comes later this year!

What are the four films that would have given the passion of cinema?
My favourite films are not necessarily visual effects films, but they all feature visual innovation and take a rigorous approach to story telling. I love David Lynch’s films, in particular THE STRAIGHT STORY which I think is a powerfully emotional film about a very singular man’s journey across rural America. My favourite film is Alexander Korda’s 1940 version of THE THIEF OF BAGDAD, which features some of the earliest use of bluescreen – I love its totally consistent sense of fantasy and powerful drama and it also looks absolutely incredible. That film, perhaps more than any other, is what got me interested in making films and visual effects myself.

A big thanks for your time.

// WANT TO KNOW MORE?
Meet the Filmmakers: Podcast of Paul Franklin at the Apple Store in London.
Double Negative: Dedicated INCEPTION’s page on Double Negative website.
fxguide: Paul Franklin’s podcast and New Deal Studios work on fxguide website.

© Vincent Frei – The Art of VFX – 2010

JONAH HEX: Ara Khanikian – Lead Compositing – Rodeo FX

Ara Khanikian evolves in the midst of visual effects of Montreal since nearly 10 years, he has gone through many studios like Buzz Image, Hybride or Rodeo FX. He has worked on projects such as THE FOUNTAIN, 300, THE X-FILES, TERMINATOR SALVATION or TWILIGHT: ECLIPSE.

What is your background?
I studied 2d/3d animation in 1999, worked freelance for a couple of years, then joined the team at Buzz for about 5 years, did 2 years at Hybride, and then joined the team at Rodeo FX around 2 years ago.

How was the collaboration with the director and production VFX supervisor?
We had a very good relationship with the director and vfx supervisor. We would touch base very regularly using video-conferencing and cinesync sessions to discuss the progress of the shots.

What did Rodeo on this show?
Our workload changed a lot over the period of time that we worked on this project. We, initially, were awarded around 20 shots, and it obviously included a fair amount of matte paintings composited with greenscreen footage. We had some shots where we had to create CG crows. Some hero ones that occupied a large portion of the screen and also large flocks, We also did a lot of tests and r&d for cg fire and smoke that would be used to enhance live action elements. Unfortunately, for story-telling purposes, these shots never made it in the final cut of the film. We ended up delivering 5 shots. They’re the shots where Jonah Hex arrives at Independance Harbour, Virginia. We created 2 matte paintings and CG crows for these shots.

Can you explain to us the creation of a matte-painting shot from scratch to final image?
We always start with research, we like getting a lot of photographs. We’ll go out and take photographs of anything and everything that could help us, we’ll get visual references from movies and paintings. We usually even shoot practical elements like smoke and fire, crowd elements, flags, etc etc.. anything that will help us take a shot to the next level. Then we do some concept work and try to nail the overall mood, the basic layout of the matte painting and, of course, the lighting and composition. We present it to the director and when he’s happy with the result, we start with the actual matte painting work. In our pipeline, the matte painters will usually work in Photoshop while the matte painting TDs start prepping a 3d scene with the correct camera infos and start the modeling that will be used for the camera projections. Once that’s approved, it gets rendered and handed off in a couple of hi-rez layers to the compositor where it gets composited with all the other elements for the shot, which usually involves practical elements (like smoke, fog, and anything that would give more life to the shot). In one of our shot, we even had crowd and people walking around, shot on greenscreen that would be used to populate the streets of the matte painting.

What are the references that gave you the director?
For this project, we looked a lot at old photographs of New-Orleans. The style and architecture of that city was a great match to what the director wanted to see. We also photographed some of the older buildings in Old Montreal that looked great because of the moody dimmed lighting that’s present there.

Have you done CG crows?
Yes, we did. All the crows in our shots are CG. They were all done in XSI and rendered with Mental Ray in openEXR. We worked with another Montreal based facility for the crows. We had 2 hero shots of crows where we would see them « up close and personal ». These 2 crows were hand-animated and they look and feel really awesome. We also used a more procedural approach for the flock of flying crows that we added in another shot.

Did you used lots of 3D projection for your mattes?
It depends. If the shot is static or has very slight camera movements, we usually don’t need to do any 3d projections, the matte painting is simply exported to the compositor who will take care of the tracking. For some other shots, we will need to match-move (usually in 3d-equalizer), create a 3d scene, and then use camera projections.

What was your margin of creativity on this project?
We actually had a lot of creative input on our shots and the director was very open to our suggestions.

How long have you worked on this movie and what was the size of your team?
We worked for about 3 months, and our team varied between 5 and 10 artists.

What was the challenge on this film and how did you overcome it?
One of the biggest challenges we had was a technical one. This film was entirely shot with an anamorphic lens and one of the shots that we worked on had a very wide angle lens that created a huge amount of lens distortion. The shot had a fairly complex and long camera move (I believe it was a 21 seconds shot) that showed Jonah Hex on his horse arriving on a bridge and the camera would gradually pull out and reveal the city of Independance Harbour, Virginia. Only part of this bridge was built on set and was filmed in front of a greenscreen. We created a CG extension to this bridge, the matte painting of the city and a flock of CG crows. Dealing with this much lens distortion in a big establishing shot with a lot of perspective and parallax change had its share of technical challenges. The matchmove and tracking were fairly complex because of this. In the end, it worked out beautifully.
We had also done a lot of r&d and tests on a sequence where Jonah Hex would get his face burned with a branding iron by his nemesis, Quentin Turnbull. We had to create a very hot looking branding iron, and fumes and smoke effects coming out of the tip and especially find a convincing look of Jonah’s skin melting as soon as the brand would touch his skin. It was very gory! His skin was melting and burning, smoke was coming out of everywhere! The director decided to go with a much more graphic look that looked a lot like the comic book for that whole scene.

What are your softwares?
For compositing, we used Flame and Nuke. The matte painting department mostly used Photoshop and Softimage|XSI.

What did you keep from this project?
It was a very interesting and fun project! It allowed me to discover the dark and mysterious universe of Jonah Hex which I really didn’t know.

What are your next projects?
We just finished our work on RESIDENT EVIL: AFTERLIFE, and are starting SOURCE CODE and THE IMMORTALS.

What are the four films that gave you a passion for cinema?
I guess I’m part of a whole generation that really got inspired by classics such as STAR WARS, E.T., CLOSE ENCOUNTERS OF THE THIRD KIND, INDIANA JONES and BACK TO THE FUTURE trilogies.

A big thanks for your time.

// WANT TO KNOW MORE?
Rodeo FX: Official website of Rodeo FX.

////

Rodeo FX – credits list

Visual Effects Supervisor
Sébastien Moreau

Visual Effects Producers
Nina Fallon
Benoit Touchette

Visual Effects Coordinator
Josiane O’Rourke

Compositors
Ara Khanikian
Laurent Spillemaecker
Vincent Poitras
Simon Devault
Christophe Chabot-Blanchet

Art Director, Matte Paintings
Mathieu Raynault

Matte Painters
Frédéric St-Arnaud
Sithiriscient Khay

3D Artists
Jeremy Boissinot
Moïka Sabourin
Marilyne Fleury
Daniel Rhein

Camera Matchmove
Jean-François Morissette

System Administrator
Curtis Linstead

© Vincent Frei – The Art of VFX – 2010

THE A-TEAM: Bill Westenhofer – VFX Supervisor – Rhythm & Hues

AtRhythm & Hues for nearly 15 years, Bill Westenhofer has overseen many projects such as BABE, STUART LITTLE, CATS & DOGS, MEN IN BLACK 2 or THE CHRONICLES OF NARNIA. In 2008, he received an Academy Award ® for Achievement in Visual Effects for his work on THE GOLDEN COMPASS.

What is your background?
I’ve been working in the visual effects industry for over 15 years. I have a master’s degree in computer science from The George Washington University in Washington DC, specializing in graphics algorithms. My formal training is technical, but I’ve been drawing, painting, and animating on my own since I was very young. My current role as Visual Effects Supervisor combines both disciplines. I have to creatively direct the team of artists while helping to develop the technical approaches to achieve the looks we need.

How was your collaboration with director Joe Carnahan and production visual effects supervisor James Price?
From the start, Joe and Jamie emphasized the « fun » factor of THE A-TEAM. They wanted high energy, dynamic action which meant a lot of objects close to the lens and fast moving cameras. I thought our collaboration worked very well. We were able to bring a lot of ideas to the table and they likewise were great in crafting fun sequences and in helping us whenever an action or ‘gag’ wasn’t working.

What sequences have been made by Rhythm & Hues?
We worked on two sequences in the film: « The Tank Drop » and « Long Beach Harbor ».

Can you tell us about the design and the creation of the crazy freefall tank sequence??
This sequence was both the most fun and the one that caused the most « sweat » at the studio. The challenge was the sheer insanity of a tank falling through the sky and redirecting itself with its main gun. Whenever you push the believability of physics you run the risk of the whole thing falling apart. I really think we were able to walk the fine line in telling the story of what the tank was doing and yet maintaining just enough weight that it worked with a degree of plausibility.

The sequence was prevized before was came on board. The previs established most of the cuts that you see in the final product and nailed down the details of the action. R&H created several shots for a very early teaser trailer and based it very closely on this initial previs. Once those were out the door, we reconsidered the action with the ‘believability’ in mind and made the adjustments that finally made it into the film. It was interesting to see how your perception of whether something was working or not changed as the rendering of the clouds and the tank became more realistic. A lot of the early previs animation proved to be too ‘light’ with the tank responding too heavily to its main gun, for example.

How did you create so realistic clouds??
The clouds were, by far the most challenging part of the sequence for our R&D folks. We didn’t have any aerial photography and we knew we would be flying right up to and sometimes through the clouds. This meant we would have to create fully rendered volumetric clouds. The clouds were also going to be very important in the shots compositionally, and to provide a sense of speed, so we needed an efficient ways to visualize how they would work in the animation stage. The technique we settled on was to make a library of predefined cloud ‘caches’. Analogous to the pre-light stage in a regular 3D object (like the plane or tank), we setup turntables so we could adjust characteristics of each cloud – the amount of ‘wispiness’, design areas with smooth detail next to clumpy cumulus puffs, etc. This was designed in Side Effect’s Houdini. We then took these caches and made lo-res iso surfaces which were handed to layout artists who composed the ‘cloud landscape’. The iso-surfaces were lo enough to be interactive during the animation stage, and the animators, in fact, had the ability to add of move them to help the sense of speed, etc.

Once they got to the render stage, Cloud lighters placed scene lights to represent the sun, simulate bounce lighting from cloud to cloud and also simulate some of the complicated internal light scattering in the cloud. We did try to simulate that within the volume renderer, but it proved to be very expensive. To make up for that, one of our TDs, Hideki Okano, developed a tool to place internal lights where there would be the most internal scattering in a full simulation. He also developed a feature we called ‘crease lighting’ which mimics a phenomenon in cumulus clouds where the ‘creases’ between lumps are actually brighter than the lump because of an increase in water vapor density as you move in from the edges.

For the actual render, Houdini’s MANTRA delt with the actual cloud visibility calculations and was the framework for a ‘ray-march’ render. At each ‘march-step’, however, a custom volumetric calculator called « FELT » (Field Expression Language Toolkit) written by Jerry Tessendorf was used which had the ability to add additional multi-scattering terms. After initial renders, we had the ability to add more detail by ‘advecting’ the volume caches – increasing the ‘wispy’ quality. We also added realism by mixing clouds with different levels of ‘sharpness’ together, often within the same 3D space.

As a final touch, in a few specific shots where a plane passes through a cloud, we added the ability to animate the clouds from the plane’s airflow. This achieved the wing ‘vortex’ effects you see as it emerges from the cloud.

This sequence presents major challenges especially with particles and parachutes. How did you achieved them?
We used Houdini extensively for all sorts of explosions, missile trails, burning engines, etc. For the most detailed explosions we used Houdini’s fluid simulation with thermal heat propagation combined with traditional particle effects and a few flame cards. One relatively simple effect that was harder than it looked were the tracers. In animation, they simply used straight ribbons to suggest where the bullets should go from a story point. Once we had to realized them with more realistic ‘ballistic’ flight, our effects animators had to actually « aim the guns », leading the targets etc to achieve a similar effect. While a little bit of cheating was possible (bending their flight-paths for example), you could only push this so far before it looked wrong. The effects animators ended up with their own mini ‘shooting gallery’.

As for the parachutes, one of the effects I’m most happy with is a shot where you see the canopies being straffed by the aforementioned tracers. The effects artist worked with his « aim » until we were happy with the amount of impacts and the choreography of the bullet paths. He then created geometry markers that noted where each bullet entered and exited the canopy. This was handed back to modeling who punched varying sized tears in the right places. Finally, a « technical animator » went?back and animated impact waves to the surface that corresponded to the hits. It was a lot of hand work, but I thought it worked beautifully in the end.

The sequence of the dock in Long Beach is another crazy sequence. Can you talk to us about the shooting of this sequence. Was it shoot entirely on a bluescreen or some part where shoot on the real dock?
Much of it was shot for real at a dock in Vancouver, Canada. For the most part, during the first half of the sequence you are seeing a real dock and a CG ship with containers. A few shots were added later and evolved as the edit came together and these were blue-screen set pieces with CG backgrounds created with photo-mapped geometry. One interesting bit involves the first two establishing shots of the ship on the water. Live plates were photographed (over the ocean and at the dock), but the task of perfectly matchmoving ship wakes and reflections proved so difficult that we ended up replacing the water completely. The digital water ended up being such a good match that it worked perfectly. Once the ship starts to explode, a lot of the shots were blue screen pieces with digital backgrounds.

The sequence turns to the massive destruction of the dock. How did you handle all these elements collide and destroy themselves?
Again we used Houdini for a rigid body simulation of the ship and containers. Once the rigid body sim was run, a damage pass was run to add gross deformations to the containers based on where they impacted with other objects. A fully detailed simulation of the damage proved cost prohibitive, so for the most part, wherever more specific detail was needed (or when the containers were close to camera), animators went back with deformation tools and blend shapes to hand craft the damage. Another detail was added when container doors opened and contents started to spill on the dock. This was also done with a combination of rigid body simulation and hand animation.

Weta Digital has also participated in this sequence. How was the collaboration?
In the original sequence, the ship is hit by the missile, lists, and the containers spill onto the dock. We then went back to have the initial missile hit trigger a series of secondary explosions that ultimately split the ship in half. Unfortunately for us (R&H) we didn’t have the capacity to take on the additional shots and effects work that it would require, so Fox asked Weta to step in and tackle those. We gave them all of our assets – ship, containers, dock gantries, etc and they created several new shots to depict the additional explosions. Once the ship starts to list, we had a few shots (even before the cut change) that were blue screen?shots of the actors, on the ground or hanging from partial set pieces.?For these we used our CG simulations, and photomapped environment. In a few cases, the new continuity required us to abandon aerial plates and make fully synthetic shots for some of the wides. Weta handled the majority of these, but in the few cases where we had done significant?work and the continuity impacts were manageable, we finished them.

How long have you worked on this project?
I actually came on the project in January, taking over for another supervisor who had to leave for personal reasons.

Was there something that prevented you from sleeping on this show?
Fortunately, the futon couch in my office allowed me to sleep well – hehe.
Actually, the hardest part was just working with the complex material in the ever shortening timeline of post productions. Studios want to see finished renders much earlier in the process than?ever before.

What was the size of your team??
We had about 120 artists on the show.?

What is your software pipeline?
We used Houdini and Mantra for much of the effects work. We also use Maya for modeling. The rest of the work was done in our?in house proprietary tools including our renderer ‘wren’ and compositing?software ‘icy’.

What did you keep about this experience?
This project pushed our pipeline which had been tailored for 3D character films. It showed where we needed?improvements – many of which are being implemented as we speak. The same goes for my career. This was a welcome change from digital lions and creatures and was a lot of fun. I’m very happy with the clouds and tank sequence in general, and many of the ship shots in the Long Beach sequence – especially the ones where the ship takes up part of the background looked absolutely convincing. There are of course the obvious effects work once the ship starts to explode, but I think people might be surprised there was work done in many of the ‘in-between » shots.

What is your next project?
Will let you know once I do (laughs).

What are the four films that gave you the passion for cinema?
STAR WARS and RAIDERS OF THE LOST ARK as a kid…
JURASSIC PARK was the one that made me rush out to California…
THE GODFATHER though is still one of my favorite films.

A big thanks for your time.

// WANT TO KNOW MORE?
Rhythm & Hues: Official website of Rhythm & Hues.
fxguide: Complete article about THE A-TEAM on fxguide.

© Vincent Frei – The Art of VFX – 2010

PRINCE OF PERSIA: Ben Morris – VFX Supervisor – Framestore

After working several years at MillFilm on films such as BABE 2, GLADIATOR or LARA CROFT, Ben Morris joined Framestore in 2000 and participate on projects such as TROY, CHARLIE AND THE CHOCOLATE FACTORY and as visual effects supervisor on THE GOLDEN COMPASS and PRINCE OF PERSIA.

What is your background?
I studied at Art College and then did a Mechanical Engineering degree. Having left university, I joined Jim Henson’s Creature Shop designing and developing computer based Performance Animation Control Systems. I moved into CG during post-production on BABE 2 at MillFilm and moved to Framestore in 2000, where I have worked to the present day.

How was the collaboration with Mike Newell and the production VFX supervisor Tom Wood?
I really enjoyed working with both of them. Tom, in particular, was a very creative and inspiring VFX Supervisor to work with. He comes from a facility background and has a invaluable practical knowledge of how shots are put together.  He also has an great sense of design and visual style, which shows through in all the work he supervised on PRINCE OF PERSIA.

What are the sequences made by Framestore?
The Hassansin Vipers and the Sandroom at the end of the film.

Were there real snakes on the set or are they all in CG?
There is one brief shot of a real python at the beginning of the Hassansin’s Den sequence – all the Vipers are CG.

How did you create the CG sand?
(Answer by Alex Rothwell, Lead FX artist)
Before starting the work, we first need to be clear in our minds about how we thought that much sand would move. There was no reference for a moving body of sand the size of a football field so we had to imagine what we thought it would look like with the help of our concept artists and try and realize that. Fast moving sand exhibits some fluid like properties but there are also key aspects of the movement that are un-fluid like. We contemplated doing a lot of fluid simulation work to model the movement of the sand, but large simulations are extremely time consuming and are not as directable as other solutions. Above everything we wanted a system that could be exactly controlled by an artist reacting to the director’s or supervisor’s comments.

The whole sequence was blocked out by the animators using geometric surfaces to represent the sand’s surface, we were able to get most of the key movement of the sand signed off in this way before an fx artist became involved. Once the layout of the shot had been finalized we had a custom plugin in Maya that took the animated geometric surfaces representing the sand and were able to produce a flow of particles that replaced the geometric surface in the final render. The plugin was able to create particle movement that appear fluid like and was dictated by the gradient of the under lying surface. Any additional flow detail could be controlled via maps, allowing the artist to quickly and visually paint the sand flow direction, including any turbulence and spay. The number of the semi-simulated particles was increased at render time via a custom particle management system dubbed pCache. This system allowed us to generate the number of particles need to produce a convincing render without the overhead of the extra processing and storage. The sand artists were able to write shader like scripts that gave complete control over the up scaling process and could also be used to produce addition surface detailing and displacement. In some of the wide shots over a billion points are being rendered.

Can you tell us about the shooting of the final scene in which the sand flows into the void?
Dastan is a mixture of real Jake Gyllenhaal and the odd digi-double. Jake really threw himself into the challenge and worked very hard to do most of the stunts himself. It really paid off in post, as we only had to do one face replacement in the entire sequence.

Can you tell us about your collaboration with Double Negative for the Oasis sequence?
The collaboration worked very well. For a few shots we needed to animate and render Vipers which were caught in the time-freezing effect created by Dastan releasing the dagger’s sand. Both companies worked on the same backplates, some of which had ‘virtual’ camera moves created by DNeg. Once we got approval for element in the shot we would package up a bundle of data for Dneg (reference animated geometry, 3D render elements and the approved comp).

What was the biggest challenge on this show?
Creating the epic scale of the environment and destruction required in the Sandroom. We always referenced back to the early concept work created by our VFX Art Director Kevin Jenkins perfectly captured the ‘look and feel’ of the sequence before we started working on it.

How many shots have you done and what was the size of your team?
We worked on approx. 220 shots and completed 125 for the film. We had 60 crew working on the project over a period of 2 years.

Was there some shots that prevent you from sleeping?
We had a couple of trailer shots involving complex sand simulation and rendering which delivered pretty close to the wire, but that’s the great thing about trailers – they flush out all the bugs before final delivery.

What did you keep about this experience?
Working with Tom Wood was an absolute pleasure and our relatively small crew created some really outstanding visuals from concept design through to final delivery. So I guess we’ll all keep some beautiful pictures …

What is your next project?
I have started working on a great project with a very good director, but sadly I can’t talk about it right now.

What are the four films that gave you the passion for cinema?
STAR WARS, BLADE RUNNER, DUNE and DARK CRYSTAL.

A big thanks for your time.

// WANT TO KNOW MORE?
Framestore: PRINCE OF PERSIA dedicated page on Framestore website.

© Vincent Frei – The Art of VFX – 2010

PRINCE OF PERSIA: Stephane Ceretti – VFX Supervisor – MPC

Stephane Ceretti worked for nearly 12 years at BUF in Paris on films such as ALEXANDER, MATRIX 2 and 3, HARRY POTTER 4 or BATMAN BEGINS. Then he moved to MPC in London as VFX supervisor on PRINCE OF PERSIA. Since this film, he joined Method Studios still in London, where he oversaw THE SORCERER’S APPRENTICE.

What is your background?
First of all I am french. I spent the first 12 years of my career at Buf Compagnie in Paris, where I had the chance to work as VFX supervisor on films such as ALEXANDER, MATRIX 2 and 3, HARRY POTTER 4, BATMAN BEGINS, THE PRESTIGE, SILENT HILL and BABYLON AD. I joined MPC in 2008 as VFX supervisor on PRINCE OF PERSIA.

How was the collaboration with Mike Newell and the production VFX supervisor Tom Wood?
Very good ! On this kind of production we usually spend most of our time with the VFX supervisor. Tom Wood used to work at MPC, that helped breaking the ice very quickly. I ended up going to Morrocco and in Pinewood studios where we shot most of the battle sequence happening at the beginning of the film. That period of time spent on the shoot is essential to understanding what the director is after as well as getting a visual sense of the universe that the production designer and Tom Wood wanted to depict in the movie.

What did MPC on this show?
MPC was in charge of developping the look of the City of Alamut and its surroundings. We also had to create a CG persian army for the opening battle sequence. Our work covered simple set extension to complement the sets built in Morroco to views of a Full CG representation of the city of Alamut for wide opening shots. Our biggest task was to create the enviroment and armies that are attacking the Eastern Gate of Alamut. Considering this was mostly shot in Pinewood studios we had a big task in front of us to make it look like it was shot in location and give the scope that this sequence needed.

What references did you have for the city of Alamut?
The production designer did a layout and design of the city : the walls, the inner city with, the various palaces and gardens, the big white and gold temple at the base of the super high tower in the middle of the city. We then had to extrapolate from that and create the entire city. We did a lot of research and based on stills that Wolf Krueger gave us from Rajasthan in India we ended up creating a map of indian locations we would have to visit to create a library of buildings, trees,villages and cities. We then sent our digital photographer James Kelly there for 3 weeks to shoot as much textures and references as he could. James also came to Morroco to shoot stills of the sets, as we would have to extend these and mix and match them with india locations. We also took stills of morrocan locations for the surroundings of the City, as well as India locations and as I was away in Corsica for a break I took some other stills of corsican mountains which ended up being the perfect match for what we wanted. Again, we ended up using a mix of all these sources to create the city surroundings.

In terms of the look of the city, and the light ambience, we spent a lot of time looking at references stills in books and on the net, but Tom showed us painting from the Orientalist painters. These were stunning and gave us a good sense of the style of light and levels of haze and myst and dust we
would have to put in the city.

Were you in contact with Jordan Mechner and Ubisoft?
Not really, no.

Can you explain to us how you recreate the city in CG?
It was a big undertaking. Based on the thousands of stills that James took back from India and Morroco we created a library of buildings sorted by styles and sizes. We then took the layout from the Art department and created some layout tools based on alice, our crowd system that we customized to accomodate for buildings and city props, to design the city space. This first interactive pass allowed us to do quick modifications that we could show to Tom to get approval. Once the main squares/gardens/streets and palace and markets had been layed out from key views of the city, we could get into the minutia of customising some pieces of the city by hand to match specific shot needs. We had to create management tools to allow us to decide what kind of props would be used, where to put the trees (we created a huge library of trees, with particles leaves that we could render and keep the memory usage manageable) …
The city was a huge asset to work with but Renderman handled the renders pretty well.

During shooting scenes in the city of Alamut, can you tell us the size of the real set?
The sets built in Morocco were huge, but it was never big enough ! so we ended up having to extend quite a lot of them. But the East Gate set that was built inside the 007 stage in Pinewood studios was really huge, it took most of the space in the studio and we were really close to the ceiling, making it difficult to light and operate. Blue screen coverage was also difficult. It was one of the biggest interior sets I’d ever seen.

What was the proportion of extras and digital doubles made with ALICE during the attack of the Persian army?
It depends on the shots, but sometimes we had about 50 to 100 extras and ended up making it 20 to 50 times bigger. I think we had a total of 300 to 400 extras on big wide shots but again we ended up having many many more in CG. PRINCE OF PERSIA was not a huge crowd show for us on that sense, all the crowd shots we had ended up being fairly simple.

After ROBIN HOOD, this new project is an opportunity to admire ALICE work on an army. How do you ensure that the rendering of these shots do not take years?
Compared to the city shots, the army shots were a real piece of cake I can tell you !

About the beautiful shot that rotates 360 degrees around the Prince Dastan before his jump. How did you make it?
We shot Jake in front of a green screen on a set in Pinewood, with the wooden beam on which he stands … and all the rest is CG. The East Gate on which he is standing is a CG representation of the set in Pinewood, the close surroundings is a 3D reconstruction of the Moroccan sets with extra top ups and then in the back you can see our 3D city and the surrounding CG mountains based on stills from Corsica. So it’s a big collage of many techniques and locations and CG. We also have CG armies and city crowd into the shots. It was one of the most complex shot to get right as we do a lot
of work with atmospherics, the light coming from the sun…

Can you tell us about the shots for the giant sandstorm that destroyed Alamut?
We did Alamut in these shots, but we did not do the sandstorm and the destruction. These were shared with another facility.

What was the biggest challenge on this project?
Getting the city to render, and the Golden Palace extensions to look real !

How many plans have you done and what was the size of your team?
around 300 shots in the end, and maybe around 80 to 100 people worked on it, but not all at the same time.

Is there a shot or a sequence that makes you lose hair?
They all do !

What did you keep about this experience?
It was great working with MPC for the first time, as well as working with Tom and Mike. Also, being on a Bruckheimer production is really demanding but extremely rewarding and quite fun, they are really passionate about the work and always push for more, which is cool from an artist’s point of view.

What is your next project?
Well, I just finished working on another Bruckheimer Production called « THE SORCERER’S APPRENTICE » for Method Studios in London. And I am starting onto another project from Marvel shooting in the UK.

What are the four films that gave you the passion for cinema?
I can’t choose, they all give me a passion for Cinema, even the ones that don’t have visual effects in them ! I am quite eclectic in my tastes, so I can enjoy a movie like PRINCE OF PERSIA or STAR WARS or a Chris Nolan movie or a french movie but not for the same reasons. I could not really choose just 4 movies …

A big thanks for your time.

// WANT TO KNOW MORE?
MPC Breakdown: VFX Breakdown for PRINCE OF PERSIA.
The Moving Picture Company: PRINCE OF PERSIA dedicated page on MPC website.

© Vincent Frei – The Art of VFX – 2010

PRINCE OF PERSIA: Sue Rowe – VFX Supervisor – Cinesite

Sue Rowe is one of the few female VFX supervisors in the business. She works at Cinesite for over 10 years and oversaw movies such as TROY, CHARLIE AND THE CHOCOLATE FACTORY, X-MEN 3 or THE GOLDEN COMPASS. She just finished the visual effects of PRINCE OF PERSIA.

What is your background?
I have a degree in tradition animation and worked as a commercials animator for few couple of years, before retraining in computer animation and taking an MA at Bournemouth University.

How was the collaboration with Mike Newell and the production VFX supervisor Tom Wood?
Mike was very enthusiastic on set and we worked closely with Tom Wood, who we had worked with previously. Tom comes from a facility background (Note: MPC and Cinesite), so he understands the technology involved and the dynamic worked well.

What sequences did Cinesite contribute to in the film?
We created over 280 shots and the key sequences we worked on were the Avrat parkour jump sequence, establishing the views of the city of Nasaf, the prince’s home town.
The most exciting sequence for us was the Hassassins’ attack, where we created five separate weapons which were hand animated in an exciting, fast moving battle using whips, blades and fire. We also created the ‘youthening’ of the king Sharaman (Ron Pickup) and his brother (Sir Ben Kingsley), the death of king and the lion hunt sequence.

What references did you have for the town of Nasaf and how did you recreate it?
We had a good start using the location in Morocco, it was a real privilege to visit these historic sites and simply augment them. We also visited an exhibition on Ancient Persia at The Tate gallery in London, called « lure of the East » on British Orientalists paintings, and carried out internet and photographic research for generic Arabic art, clothing, tiles and architecture.

As I was on set for the duration of the shoot in Morocco, I was able to bring home high resolution stills which captured the real lighting conditions, in addition to the usual camera data information we were supplied topographical scans called Lidars of the environments.

Can you tell us a typical day on the shooting in Morocco?
We would usually start at 5.30am when the sun came up and drive to the various desert locations. Filming was in general 12 hours per day. Whilst we were filming it was Ramadan, which when combined with the daily temperature of over 40 degrees centigrade, proved to be a challenging environment to work in.

During the shoot we took high dynamic range photography, which would provide us with a lighting environment, to which we would match our computer generated cities.

What was the size of the real set?
There were several full-sized elaborate sets, which were initially filmed in Morocco, then recreated at Pinewood. The backgrounds were shot with blue screens, so that we could replace the set environments with sky domes taken in Morocco. This allowed for wire removal on parkour jumping sequences, in particular for some of the more difficult stunt work.

What did you do on the chase scene in the Avrat market?
We created 3D set extensions as the real locations were just not big enough for the scope of the film. We also created 3D and 2D arrows for the action sequences. In some cases we did wire and rig removals to the stunt doubles to make it more dramatic we added a digital face replacement over Jake’s stunt double. We also added general atmosphere to shots using 2D smoke and dust elements augmented and composited into shots to convey a city environment. Additionally, we composited digital matte paintings into the background and added sky replacements for look consistency throughout the sequence.

Can you tell us about Hassassin weapons? How did you create and animate them?
The Hassassins sequence was great fun to work on. We choreographed the sequence with CG Supervisor Artemis Oikonomopoulou and our Animation Director Quentin Miles. Although we shot references for the whips on set, the stunt team only had a handle in their hands so we had some freedom regarding where the whip would fall. Add to that a few swings and dust hits and it’s a pretty dynamic sequence. Tom shot the stunt guys on set practicing with a real whip and we researched the way the whip recoils in some detail. When the whip cracks it’s because the move is faster than the speed of sound and creates a sonic boom.

The Hassasin are always surrounded by a mysterious looking cloud. Again this ended up as a visual effect as it’s impossible to control smoke on an exterior set. As the shots developed, the cloud became more ominous. Both the cloud and the sand trails were done in Houdini. We used Autodesk Maya to create and animate the weapons.

How did you make Sir Ben Kingsley younger?
The director, Mike Newel, didn’t want to cast another younger actor to play the king and his brother in the flash-backs. What we did was show him a test which made him look 20 years younger. Mike really like it as it meant he could get the performances of the real actors, which is what he wanted.

However, there are conditions to this approach. As it’s a 2D effect but it relies on good data being gathered during the shoot. We cast two youth doubles who stood in straight after the take with the original actors so we could take high res digital stills in the same lighting conditions. This needed to be timed well as no one likes holding up a film set but the end result was worth it. Tom Wood comes from a facility background so he knew that 10 minutes extra on set can save months of work later down the line in post.

What we did was to take photos of a younger person’s skin textures like the pores and skin surface glow. We added darkened eye lashes and thickened hair, and removed wrinkles and age spots. These were then tracked onto the actors’ skin using our in-house software Motion Analyser, which basically sticks the new skin on top of the old skin – like a digital skin graft.

Can you explain how you created the lioness?
Using Autodesk Maya, the lioness was generated to reflect a creature that looked starved and malnourished. We really wanted to present a lioness which was bordering on emaciated, to emphasise her need to hunt. To achieve this look we graded the lioness to have washed-out fur and deeply emphasised her bone structure around the rib cage and hips. As the hunt scene progresses the lioness is speared through the mouth by a CGI spear, which was also created using Maya.

What was the biggest challenge on this project?
Just the pure variety of Visual effects needed for the show. We had many little sequences that each needed to be designed and look development signed off. Working on a Bruckheimer film means everything needs to be bigger and better than the usual so we used to say “what would JB do?” and make ourselves give it that extra 100%!

What is your pipeline at Cinesite?
For the cities, firstly, after concept work we built a number of buildings in 3D that could be placed to recreate a town layout. These were all unique and could be manipulated individually. The basic town layout was left to a dedicated “town planner”, who would get the buildings in roughly the right position, then render them. These would all be tweaked on a shot by shot basis for general aesthetics, but adhered to the basic town structure.
These layouts would be passed to a lighter, who controlled displacements, ageing of the buildings as well as lighting situations. They then passed from lighter to compositor, where additional layering techniques were used, such as adding smoke, 2D props, to give the city an animated, “lived in” feel.

For the whips, we would initially try to use the hand gestures and moves from the plate as a starting point for animation. Often, we would need to warp or varispeed the plates to add dynamism to the shots. Once we had whip animation signed off, these would go through lighting to compositing, where “depthing”, glints, collision impacts would all be added to give a heightened sense of danger.

The smoke, which was used in the Death of Sharaman sequence, had its own effects pipeline. We had to body track the dying king and use his skin as a smoke emitter, as well as the cloak that was killing him. This smoke followed Sharaman around and appeared to be emanating from him.

How many shots have you done and what was the size of your team?
285 of our shots made the final film, but we produced 320 in total. The team size was 60 artists.

Is there a shot or a sequence that prevented you from sleeping?
The lion hunt weighed heavily on my shoulders as I had convinced Tom we could do a better job doing a CG lion than the real lioness. She was a fat and contented animal who really didn’t want to roar so we replaced all the real footage with a more hungry wilder animal to give the sequence the edge it needed.

What did you keep about this experience?
That lighting a scene is the key, adding real atmospherics over the top make it photo real.

What is your next project?
I am currently supervising Cinesite’s work on JOHN CARTER OF MARS, for Disney, which is due out at the cinema in 2012.

What are the four films that gave you the passion for cinema?
ERASERHEAD, David Lynch
LUXO JR, John Lasseter
DIMENSIONS OF DIALOGUE, Jan Svankmajer
BLADE RUNNER, Ridley Scott

A big thanks for your time.

// WANT TO KNOW MORE?
Cinesite: PRINCE OF PERSIA dedicated page on Cinesite website.

© Vincent Frei – The Art of VFX – 2010

PRINCE OF PERSIA: Michael Bruce Ellis – VFX Supervisor – Double Negative

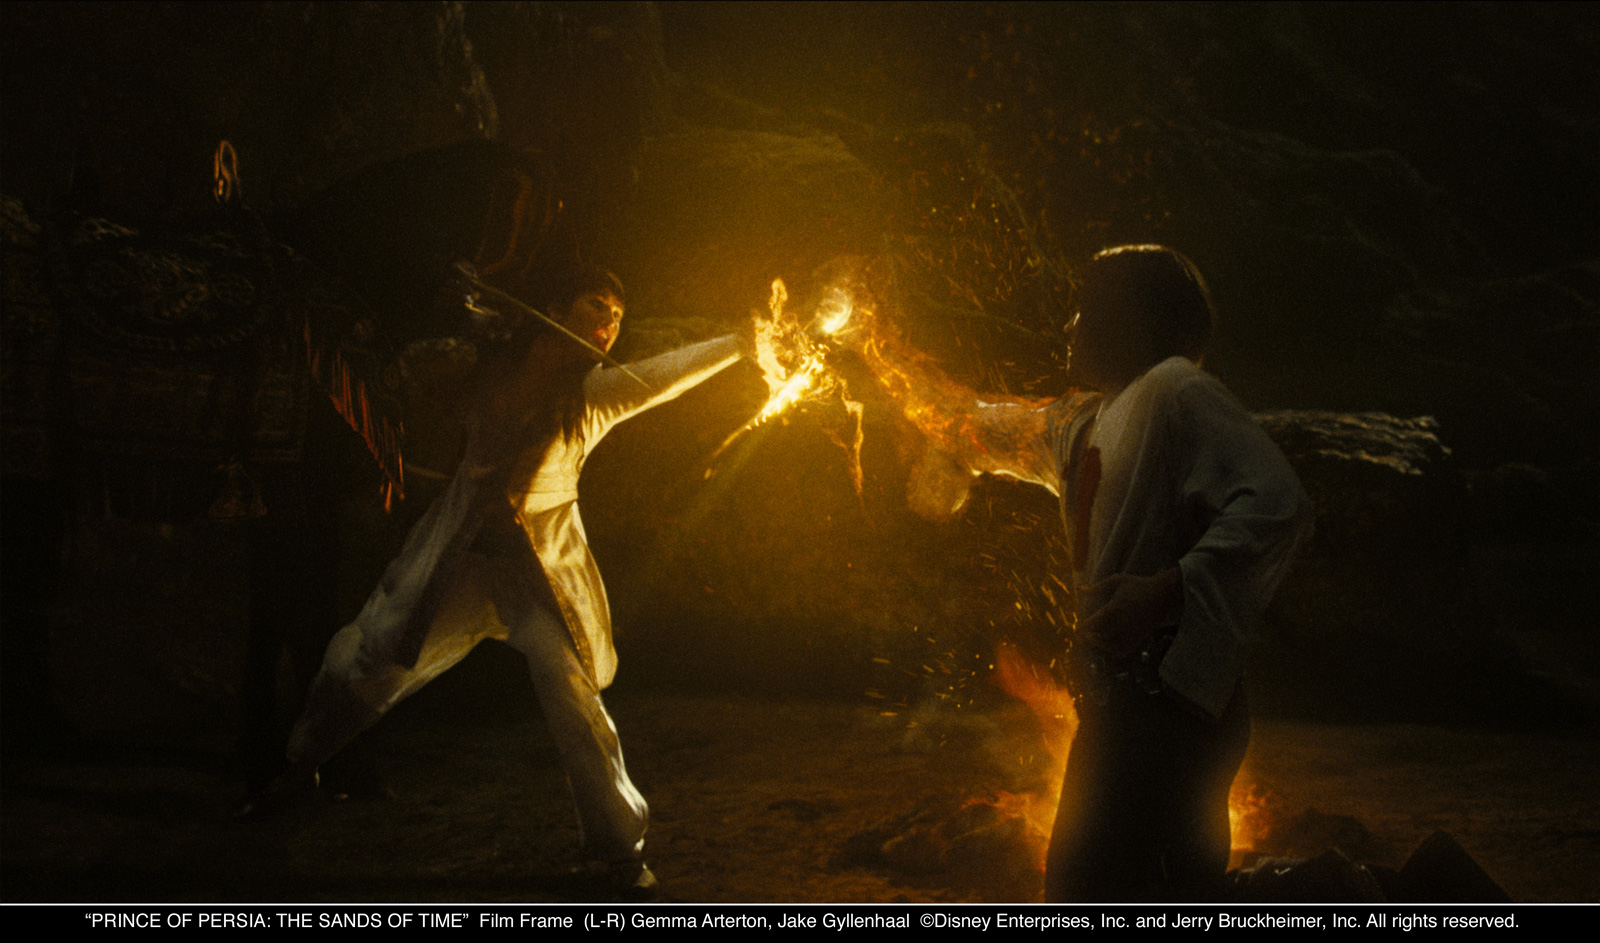
Michael Bruce Ellis worked for over 10 years at Double Negative, he begins at the roto department of the studio and then quickly rise and is visual effects supervisor on movies such as WORLD TRADE CENTER or CLOVERFIELD. He recently completed the visual effects of PRINCE OF PERSIA.

What is your background?
I began my career as a graphic designer in TV, working on Channel Identities, Promos and Title Sequences. I switched career in 1999 to join Double Negative’s 2D department as a Roto Artist. Apart from a short stint at Mill Film to work on one of the HARRY POTTER movies, I’ve been at Dneg ever since.

How was the collaboration with Mike Newell and the production VFX supervisor Tom Wood?
Mike Newell is a great Director who is very focused on storytelling and the actor’s performances, he’s not so concerned with the minutiae of visual effects. Tom Wood had a great deal of input in coming up with creative solutions, we had a lot of scope to try out ideas and concepts although rule number one was always that the storytelling is crucial and cannot be obscured by the images, however beautiful!

What did Double Negative made on this show?
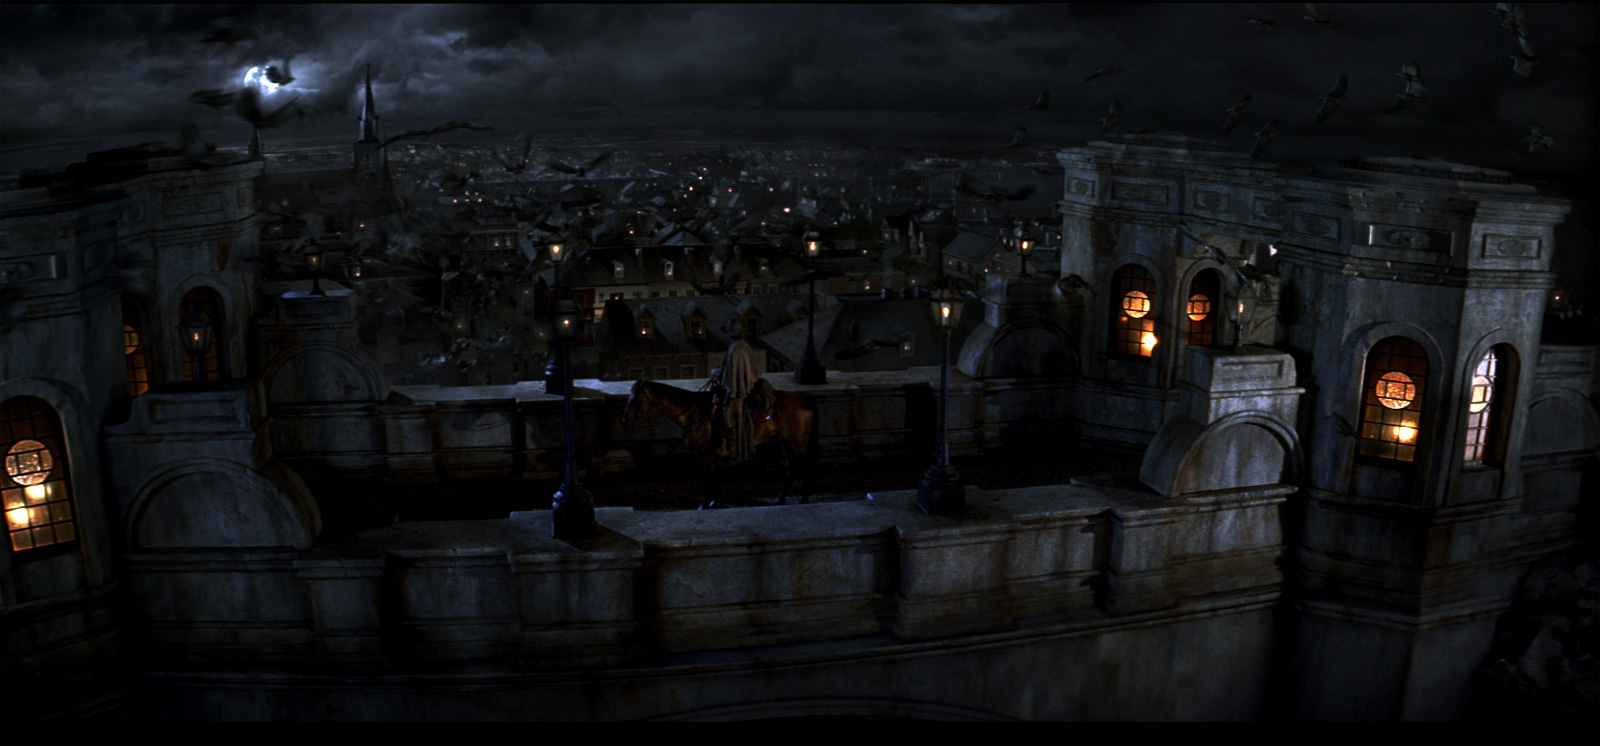
Dneg were asked to work on 4 main scenes in the movie, which involve the « magical » aspects of the story. The three rewinding scenes when the dagger of time is activated and the climactic Sandglass end sequence.

We had around 200 shots, which took us 18 months to complete.

Can you tell us about the visual design of the slow motion effect?
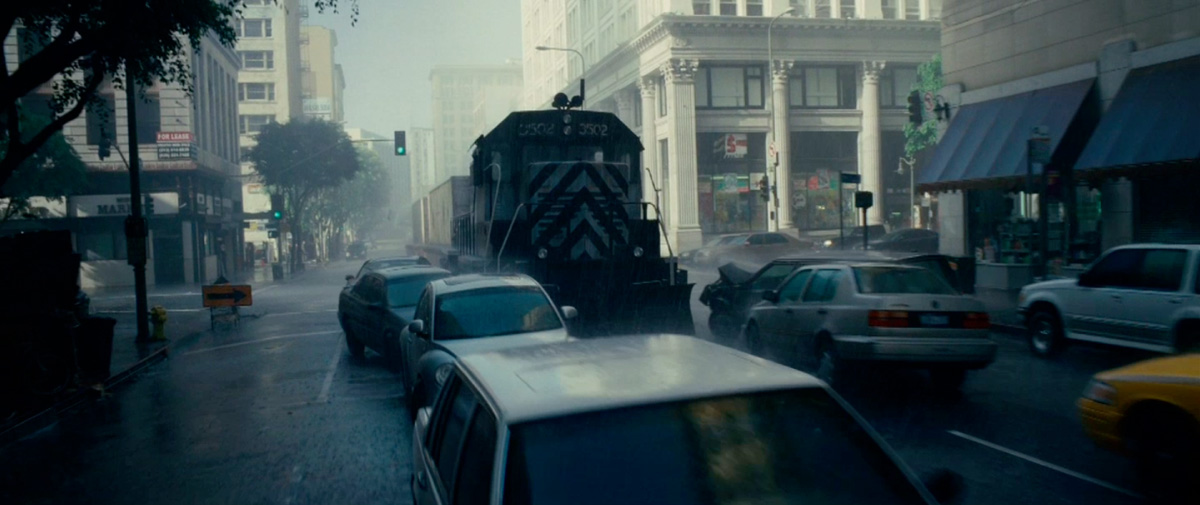
Early on in the project we’d discussed creating a very photographic open shutter look for the “rewind” effect. Tom Wood had given us reference on long exposure photography in which a moving subject creates a long smear effect as it moves through frame. This had been done before with static objects frozen in time using an array of several stills cameras with long exposures, which we’re then cut together to make a consecutive sequence. But this gives the appearance of a camera moving around a frozen object, we wanted the camera moving around a moving human form that had a frozen long exposure. This, as far as we knew, had not been done before so we needed a new technique in order to achieve it. Lead TD Chris Lawrence began exploring a technique called Event Capture to see if it could help us achieve the look we wanted.

Can you explain to us what it is and what it can do?
We’d done some work previously on “Event Capture”. The QUANTUM OF SOLACE freefall sequence used the technique, then we developed it further for PRINCE OF PERSIA, it allowed us to achieve something that couldn’t be done any other way.

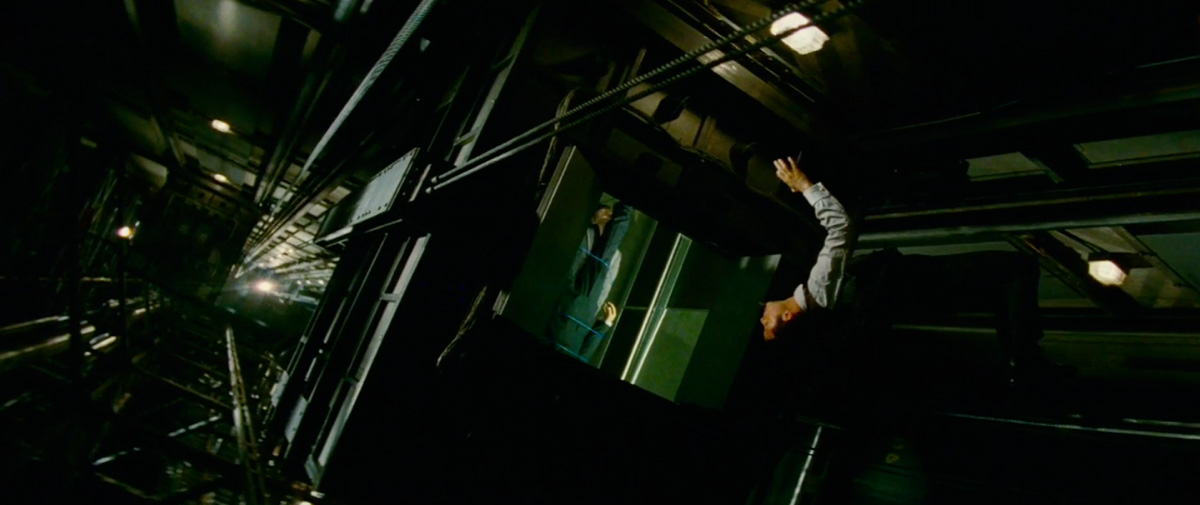
This is a technique which records a live scene using multiple cameras, then reconstructs the entire scene in 3D, allowing us to create new camera moves, slip timing of the actors, change lighting, reconstruct the environment and pretty much mess around with whatever we wanted.

The technique works by shooting the action with an array of locked cameras set in roughly the path that you plan your final camera to move along. We ultimately used a maximum of 9 cameras at a time. Precise calibration of camera positions, lens data and set details allows us to combine all 9 cameras to reconstruct a 3D scene which has original moving photographic textures.

As our new 3D camera moved around the scene we transition between each of our 9 cameras to give the most appropriate texture. One problem we found with this technique is that as our photographic textures are derived from locked camera positions, specular highlights tend to jump over an image rather than smoothly roll over a surface as they do in real photography. He had to correct this by manually painting out such problems.

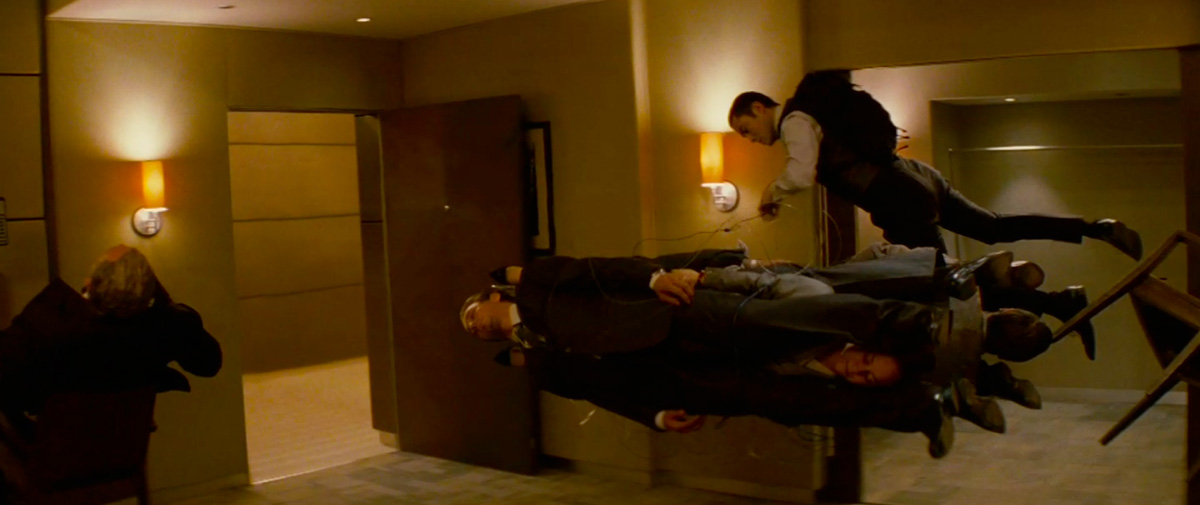
The great advantage of this technique was that it answered all of our technical requirements while giving us great creative freedom. With some restrictions based on texture coverage, we could essentially redesign live action shots after they’d been shot. The camera is independent from the action. A camera move can be created after the shot has been filmed, actors’ timing can be slipped and they can be manipulated to break them apart or change them as if they were conventional 3D.

Can you explain us how was the shooting for the slow motion sequences?
Each rewind scene is constructed so that we see a regular piece of action leading up to the dagger being pressed, the action then rewinds to a earlier part of the scene then the action plays forward again with an alternative outcome.

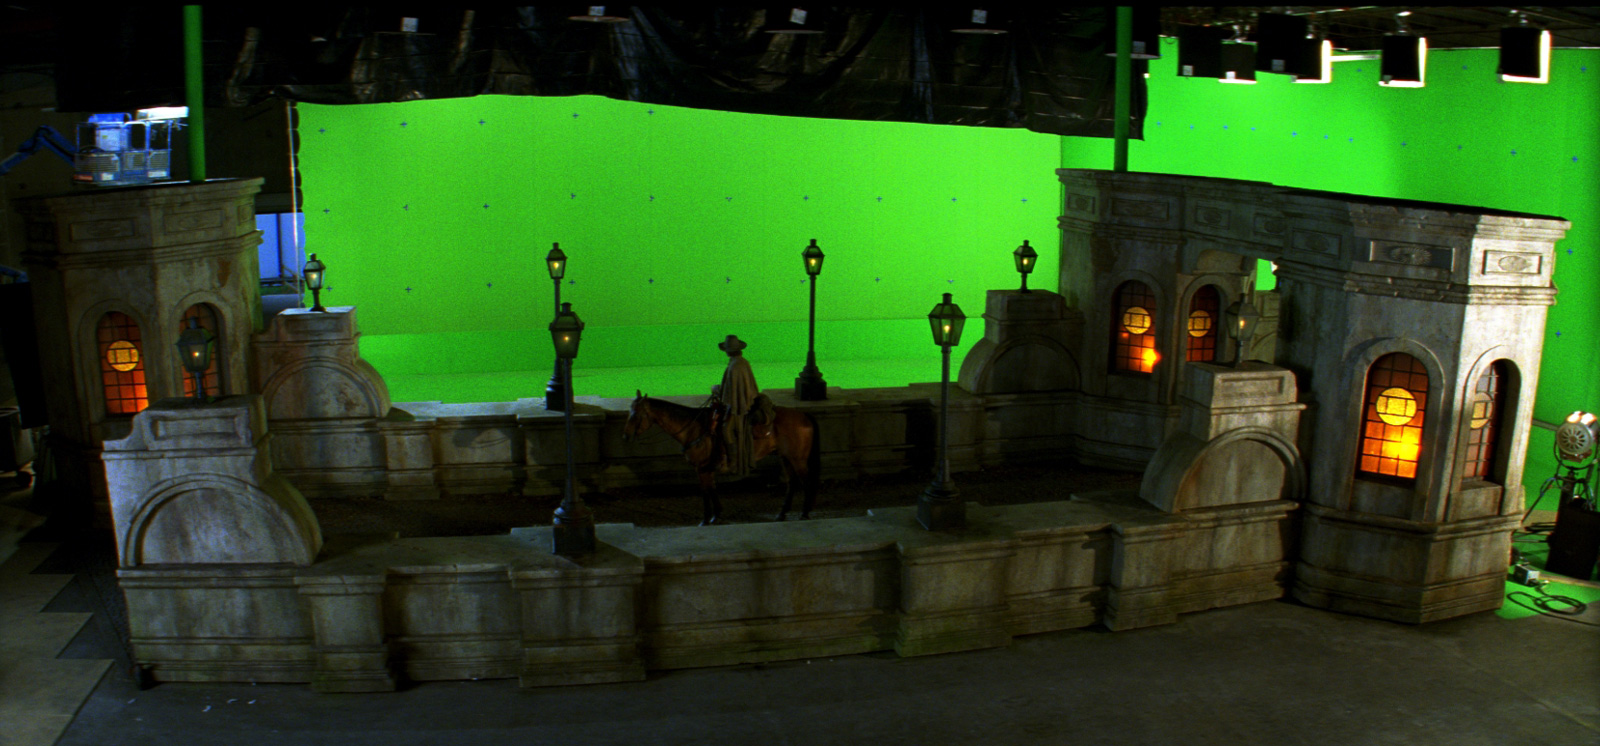
The rewind effects work had to fit seamlessly into a regular forward action scene and we’d need the actors to repeat everything as closely as possible. It seemed like the most logical thing to do was to shoot the rewinds straight after the forward action as it appears in the movie. The actors still had the moves and performances fresh in their minds and we could shoot with the same sets and keep the lighting set-ups as similar as possible.

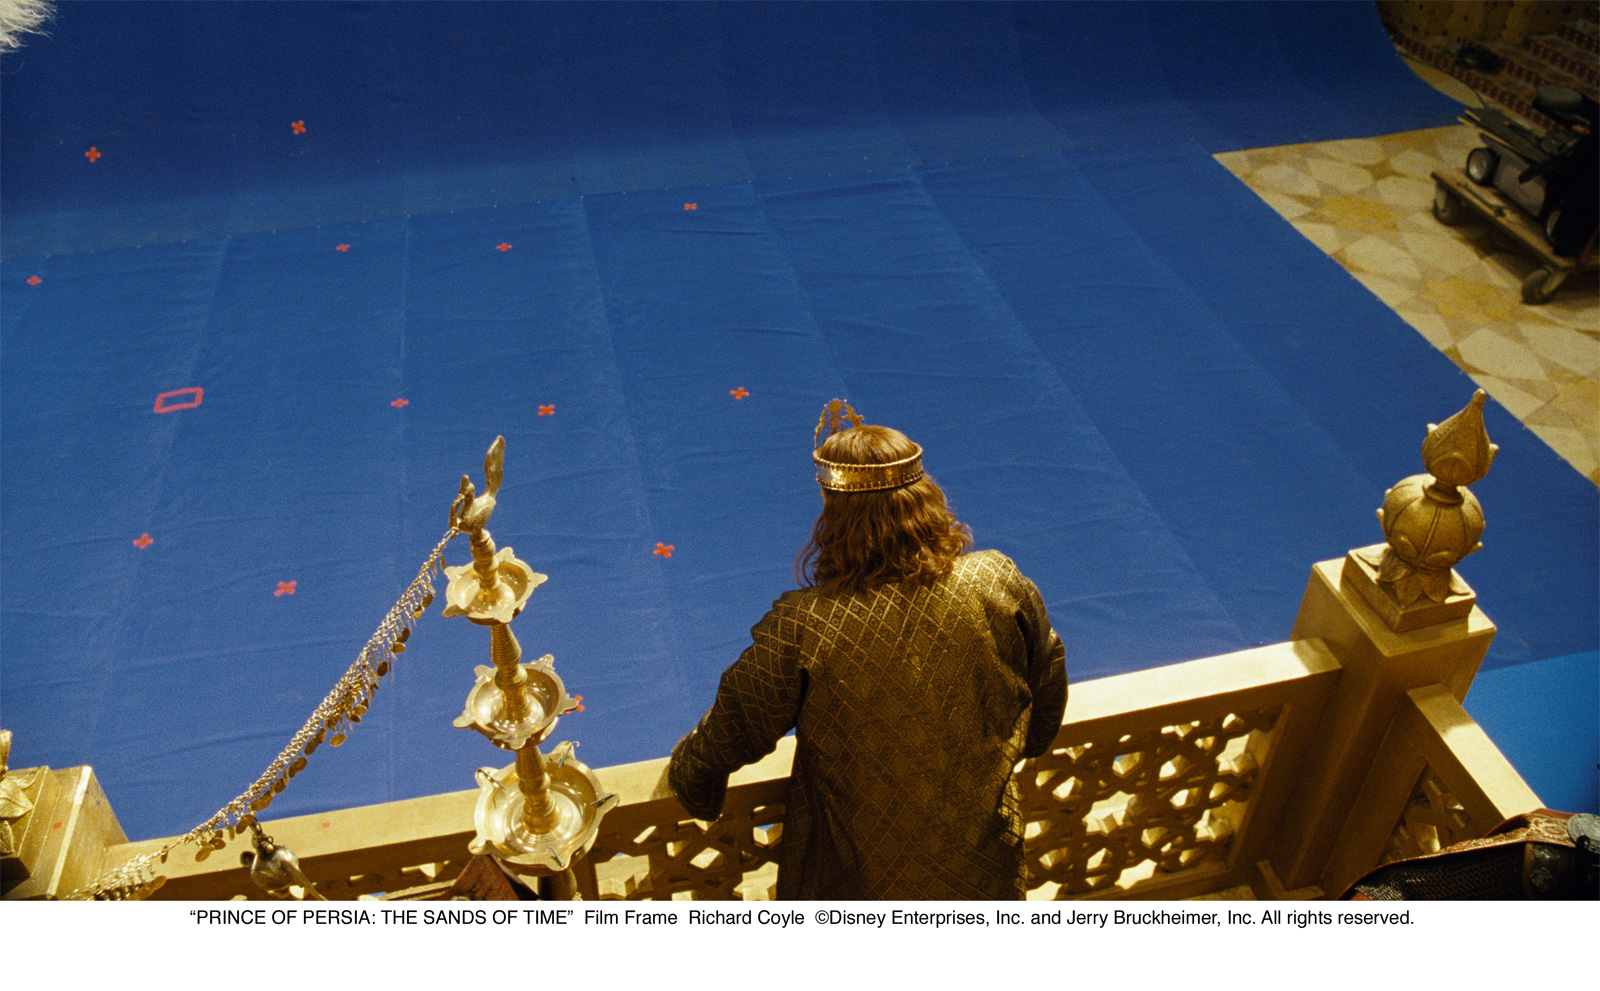
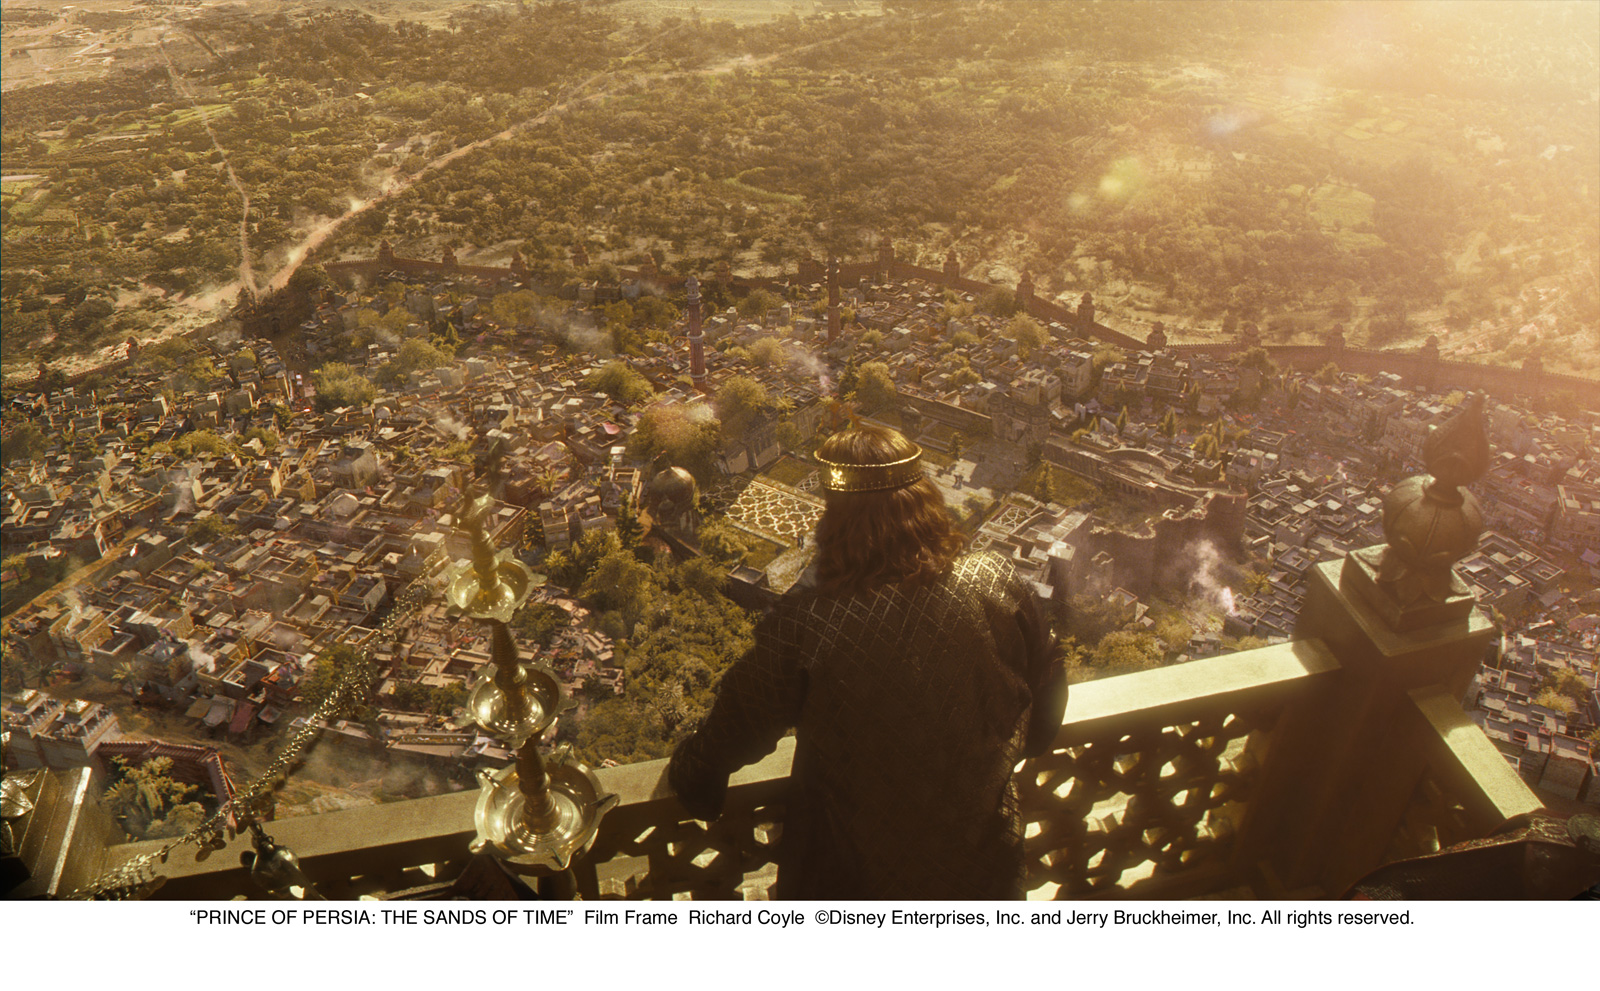
The technique we were employing required clean, crisp photography with a minimum of motion blur but a maximum depth of field. This gave us a better result when projecting our 9 cameras onto 3D geometry and was valuable in creating convincing new camera moves as it meant that we could apply our own motion blur and depth of field.

This was a problem because we’d need a lot of light hitting our subjects and all of our rewind scenes occurred at night or indoors. John Seale and our VFX DoP Peter Talbot came up with a way of boosting the scene lighting universally by 2 to 4 stops. It meant that the rewinds could keep the same lighting feel with shadows and highlights matching the forward action but give us the best possible images to work with.

So it was really the transition in the shoot schedule from Forward action to Rewind Action that took the longest time to set up because we had to accommodate this boost to the lighting. As soon as we had the first rewind set-up in the can, the others followed much more quickly. We’d carefully planned the position of each camera and marked up the set accordingly so we were quickly able to set-up our cameras for each shot.

Did you create digital doubles for these sequences?
Yes but not in the conventional sense. Event capture gave us a digital human form for each of the actors. But the process is not perfect and we still had to do a lot of body tracking. We ended up with grayscale Digi-doubles onto which we projected moving textures from our 9 cameras, giving us real photographic textures on very accurate 3D human forms.

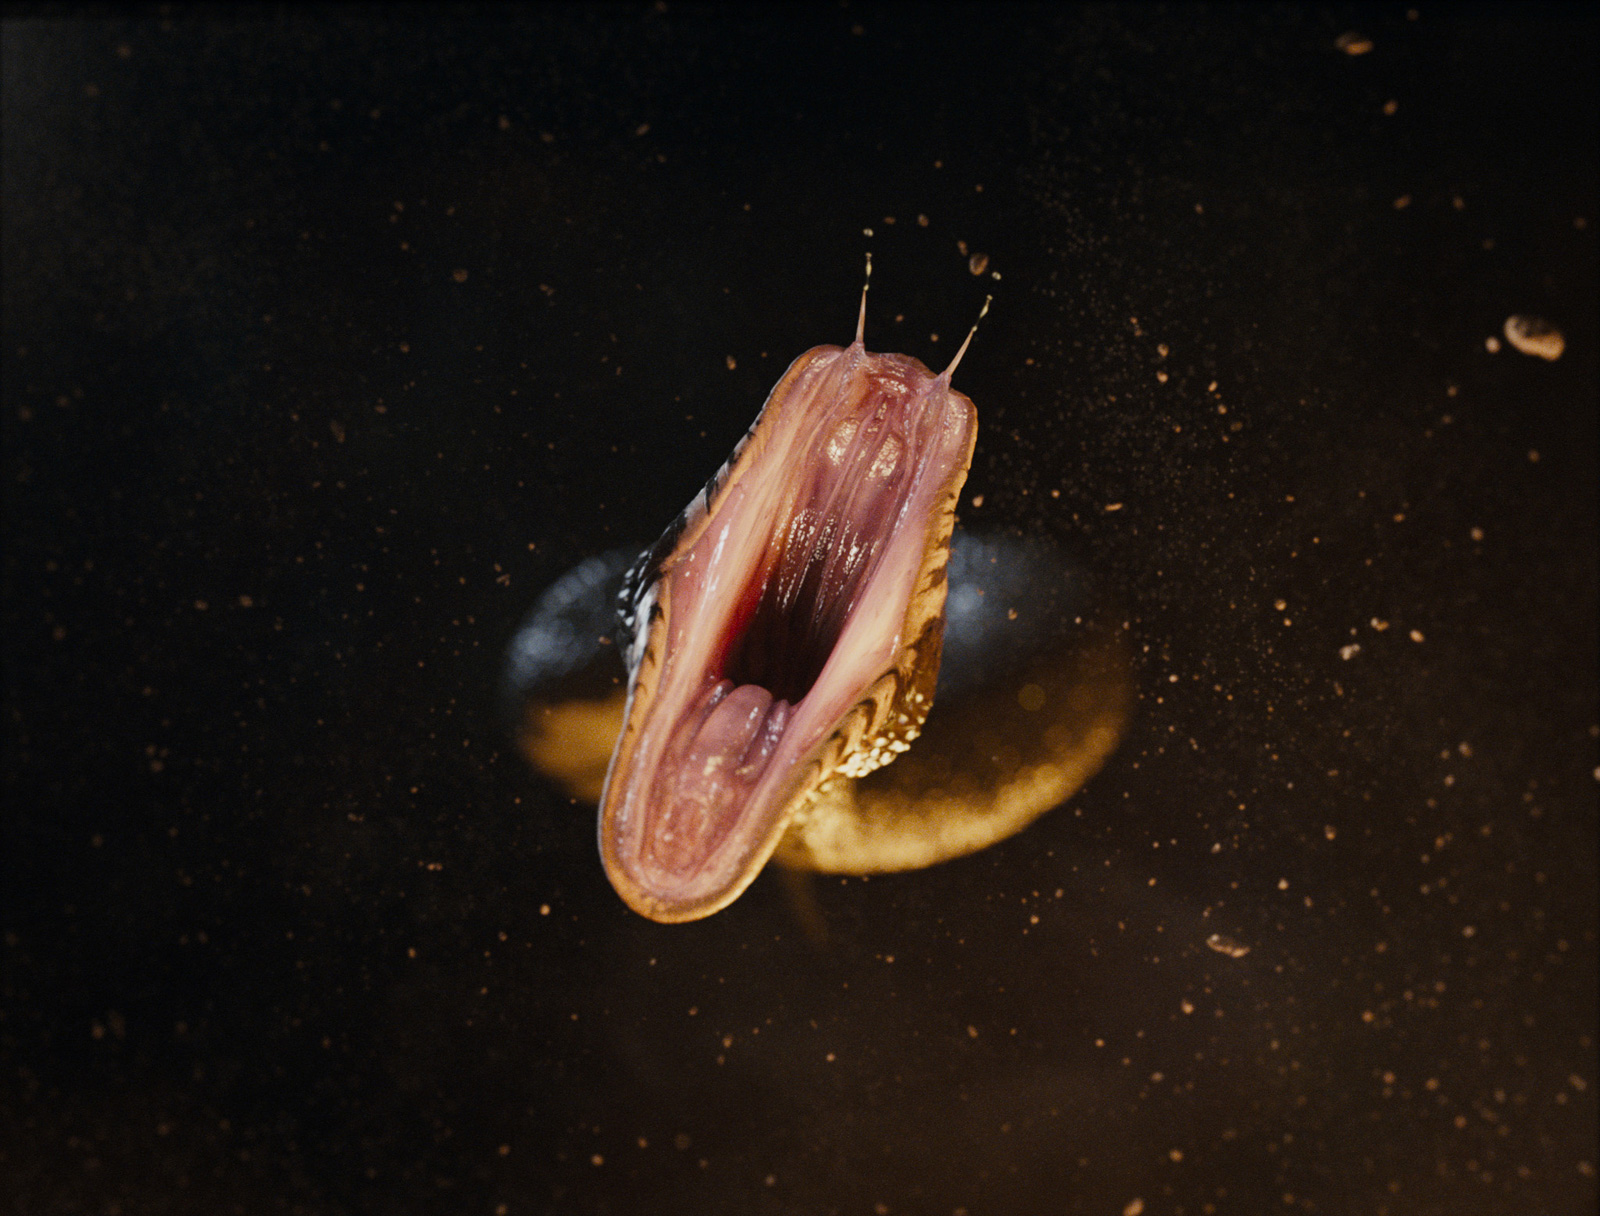
Can you tell us how you create those beautiful particles?
Our effects 3D supervisor Justin Martin and 3D leads Eugenie Von Tunzelmann, Adrian Thompson and Christoph Ammann developed a look and technical approach for the particles. All of our sequences revolved around the magic sand and we wanted the viewer to feel that they were seeing the same substance in the intimate rewind shots as in the wide sandglass chamber shots. When we’d created a 3D figure with full photographic textures and a new camera move, we were free to try numerous creative ideas for both the rewind trail effect and the ghost particle effect. We did some work in streamlining our particle set-up, we did tests to push up the amount of particles we could render to a billion. In the end we found that we didn’t need that many with about 30 million particles on the ghost body and 200 million airborn particles. We found that we could create very organic magical particles using Squirt (our own fluid sim) and Houdini.

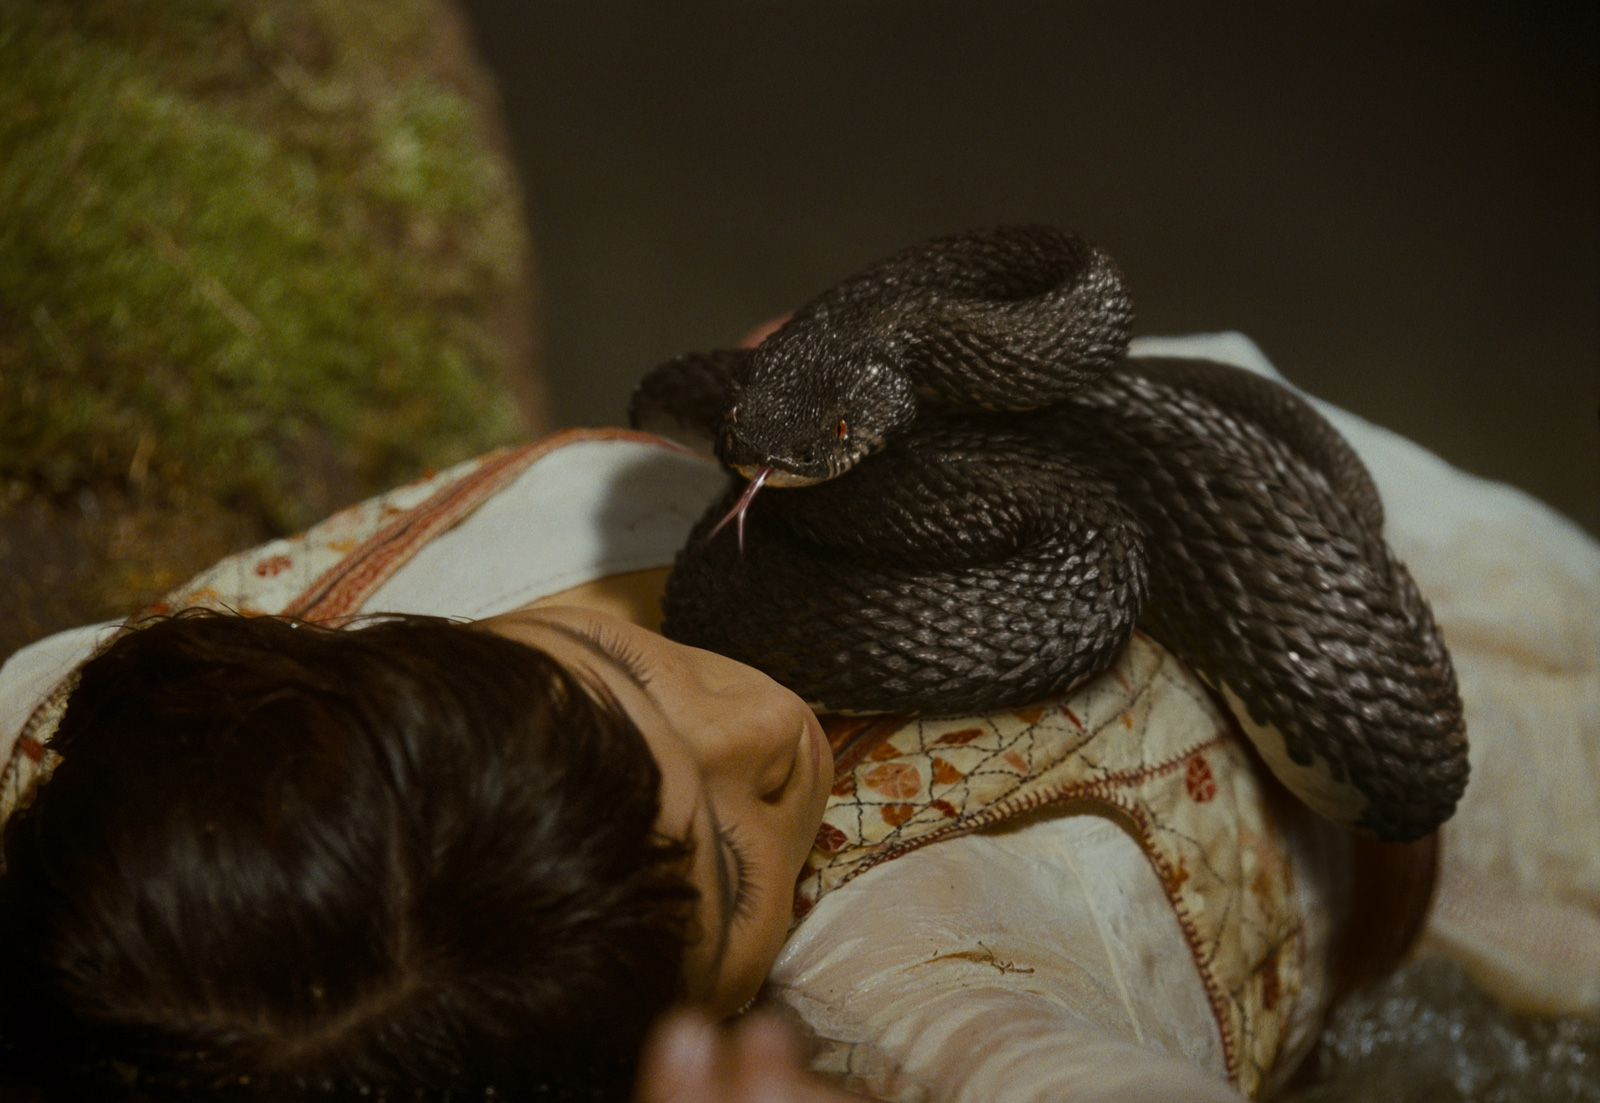
How did you work with Framestore (which made the snakes) for the Oasis sequence?
Maya scene files and rendered elements were passed backwards and forwards between the facilities. In some of the shared shots it proved more efficient for dneg to take the shot to Final, in others it was Framestore. We just kept an open dialogue between facilities to keep work on shared shots flowing as smoothly as possible. For the rewind shots it made sense for dneg to create a camera move then pass that over to framestore to render a snake which we’d then get back both comped and as an element, in order to create rewind trails.

The final scene is really very complex. How did you achieved it?
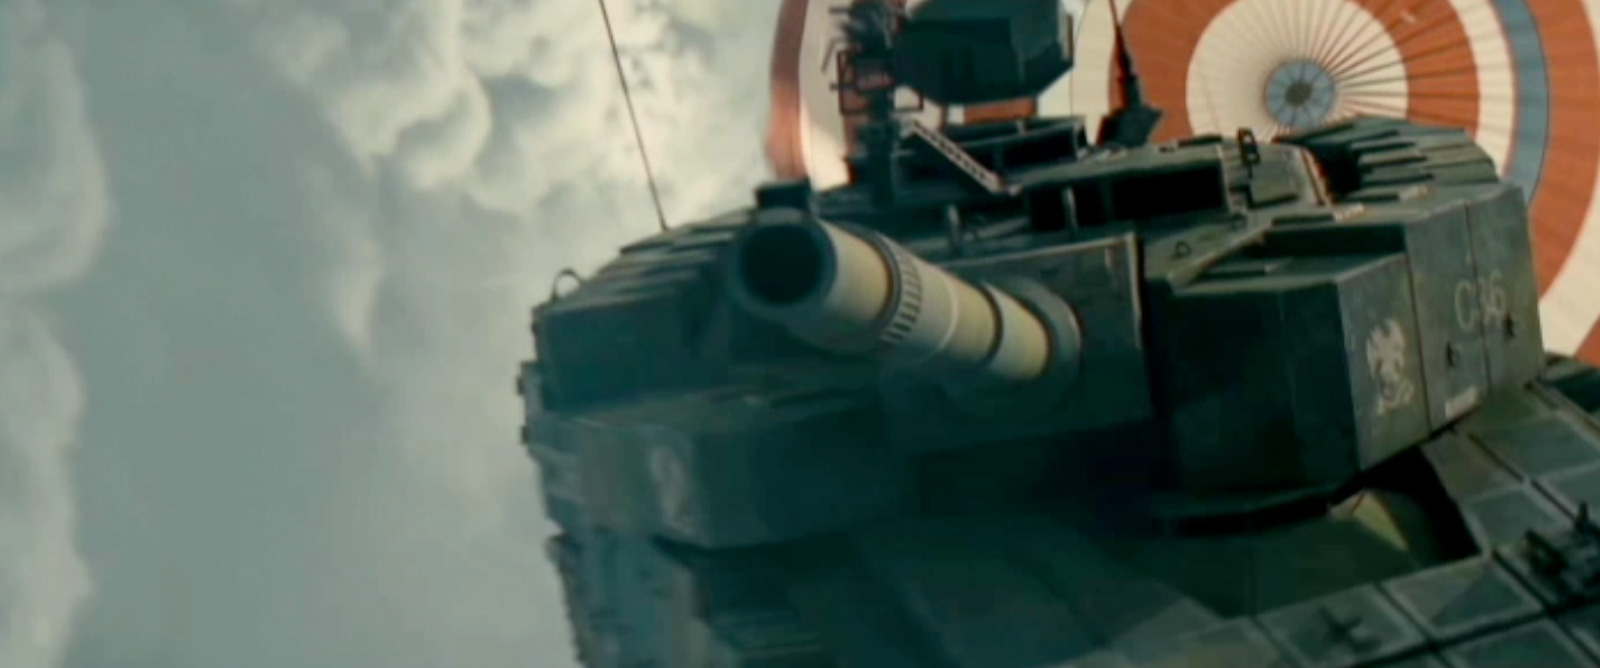
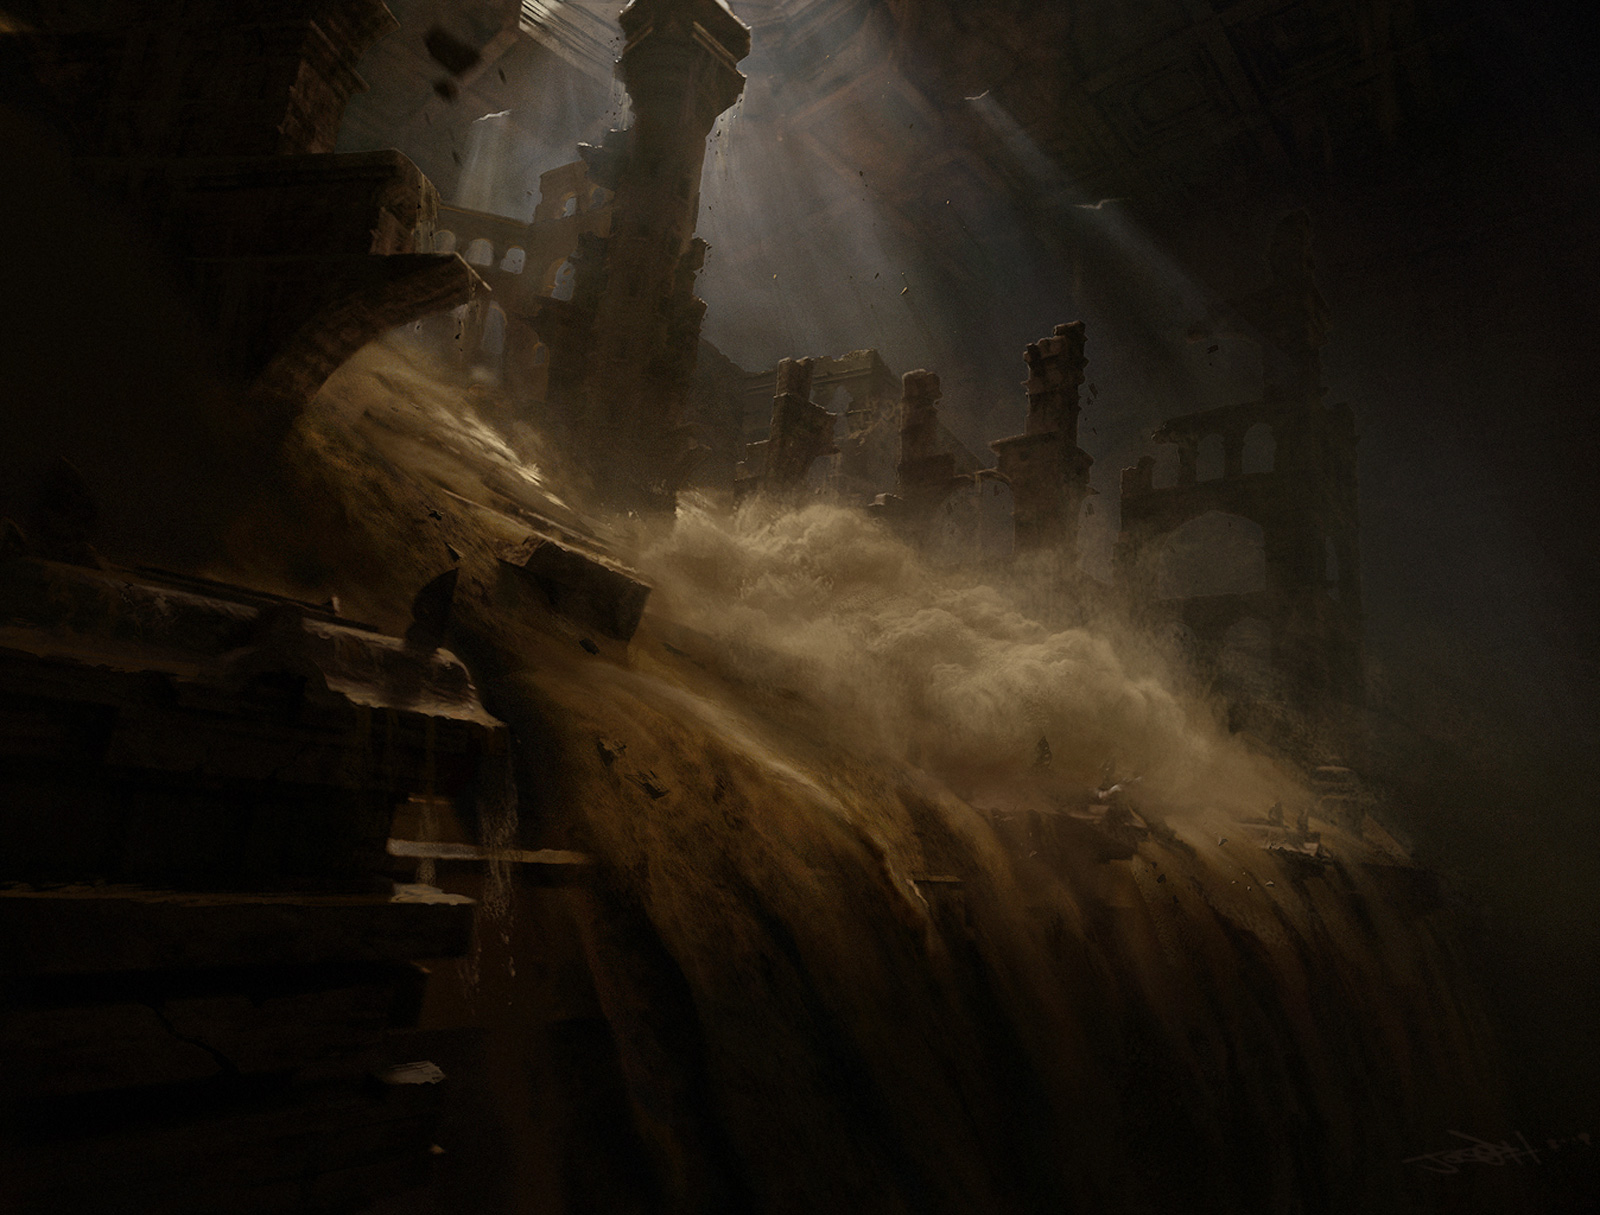
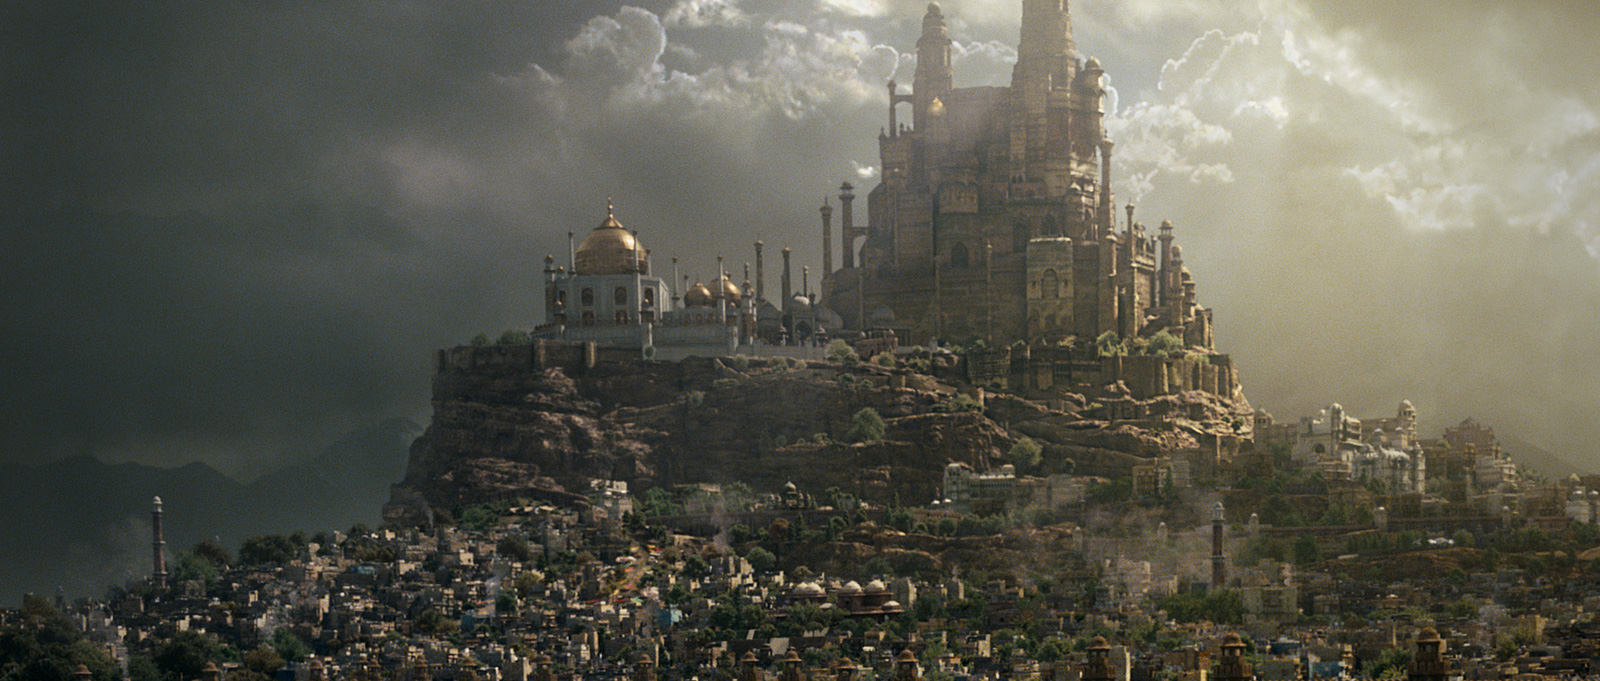
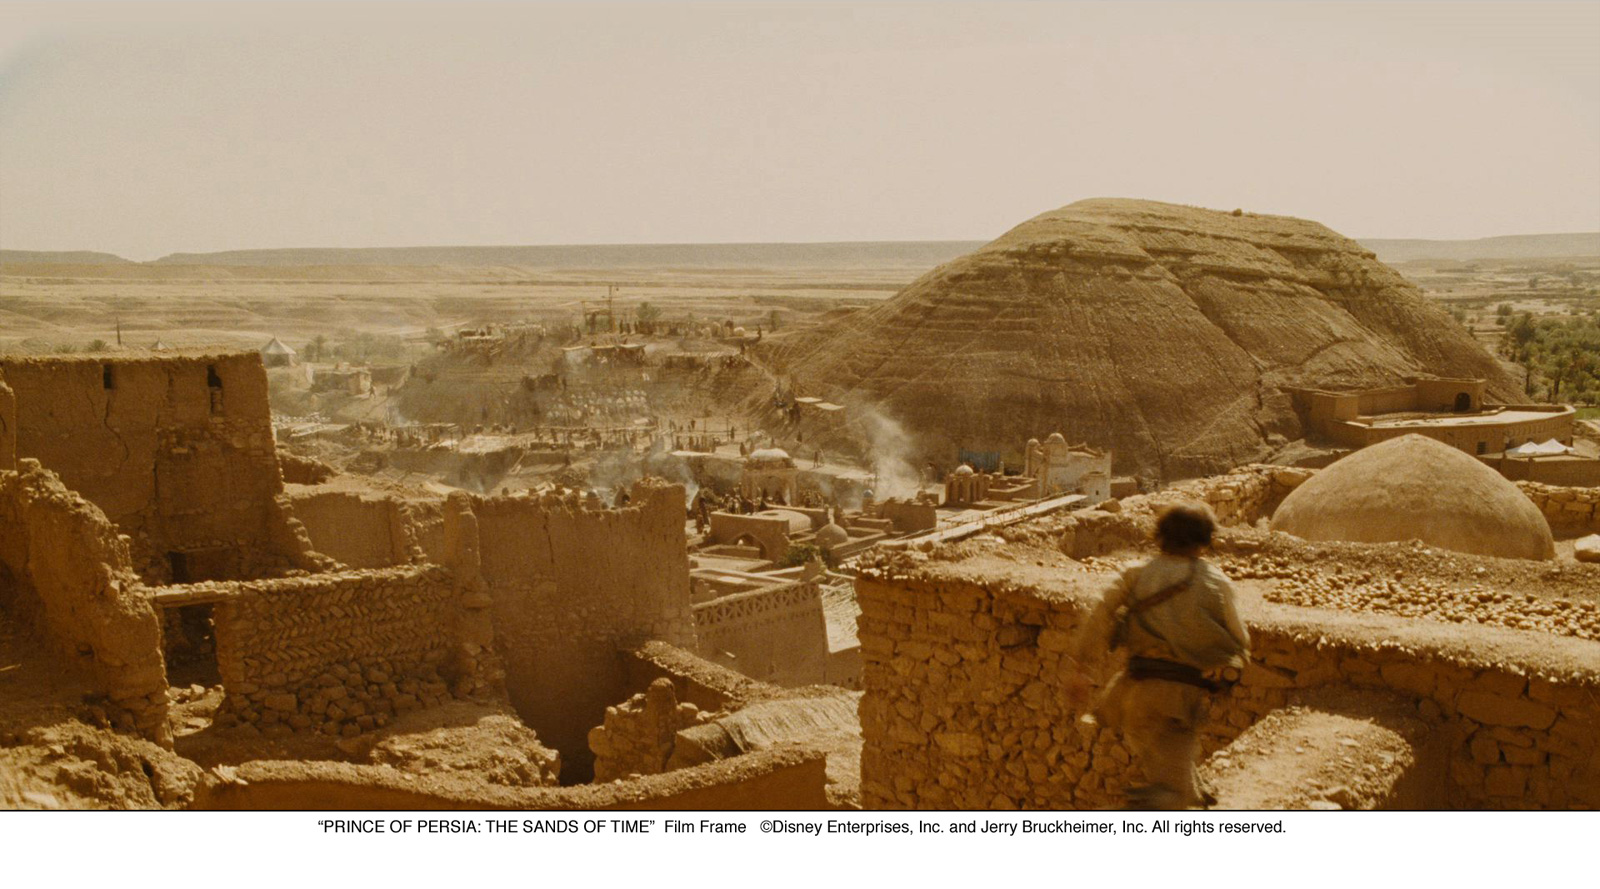
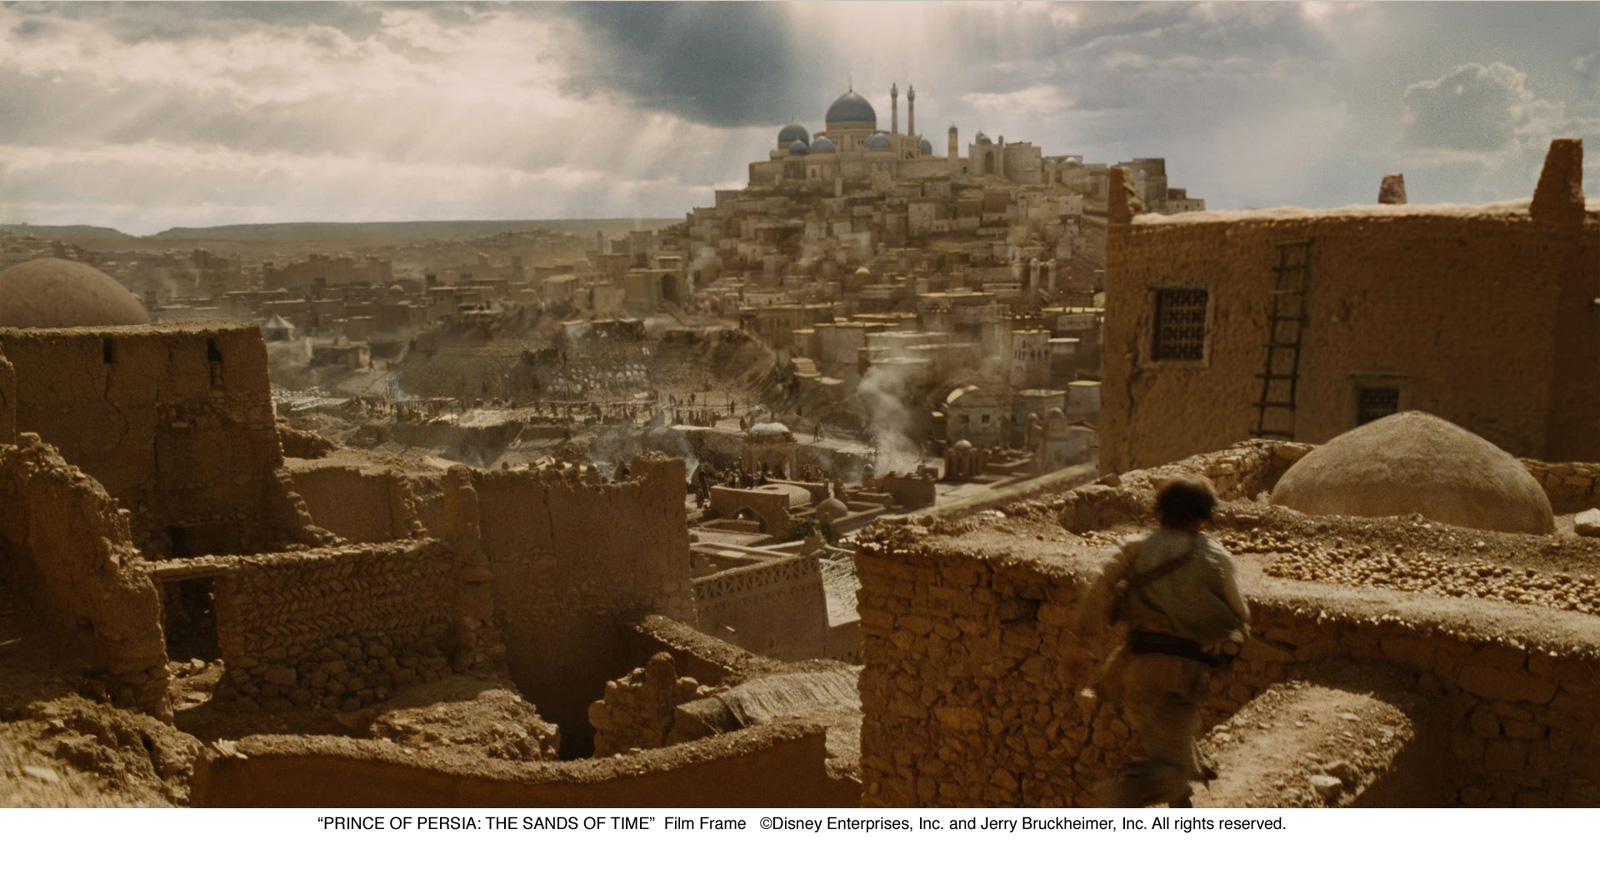
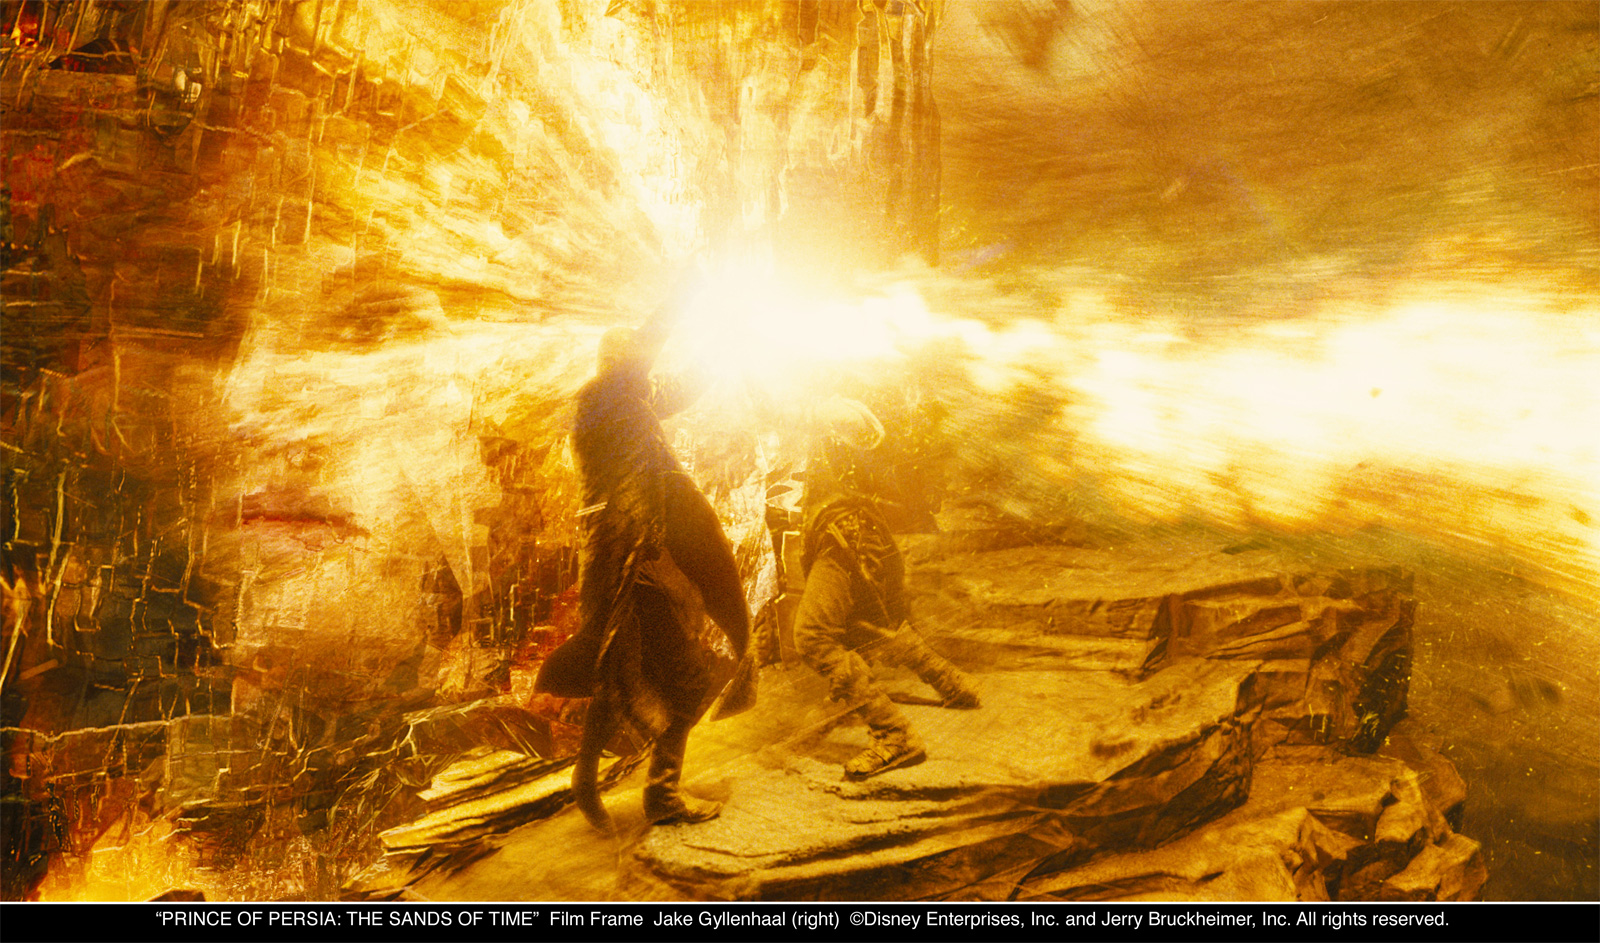
The brief for the sandglass scene at the end of the movie was to create a digital environment that felt 100% real yet had an enormous light emitting crystal tower in the centre filled with moving twisting sand. The sand at times needed to present images from the past inside the crystal. And the chamber has to be collapsing all around the actors. Also if that wasn’t enough the sand inside the crystal had to escape and start destroying everything, barreling into walls and knocking down stalactites.

We knew we could create the underground rock cavern but the crystal was a bigger challenge.
What does a 300 foot crystal filled with light emitting sand look like?
We looked for reference but there really isn’t anything, it wasn’t ice. The closest thing we found was some giant underground crystals but they just looked like a photoshoped images.

In the end we went out and bought a load of crystals from a local New Age store, we shone lasers through them, lit them with different lights and played around with them copying what it was that made them feel like crystal, the refraction, the flaws etc. Peter Bebb, Maxx Leong and Becky Graham used this and built an enormous version of it.

The biggest challenge of this sequence was achieving the scale, the crystal is such a crazy object. We went to a quarry in the UK and took lots of photos. We reconstructed the rock surface in 3D and projected textures onto the geometry, so that it became a very real rock surface built to a real scale.

Another thing that helped us with scale was adding all the falling material. Christoph Ammann and Mark Hodgkins spent a lot of time working on the way that rocks would fall from the roof and break up and how they would drag dust and debris with them. Getting the speed of falling material right really helped with our scale, adding atmosphere also helped, we added floating dust particles which are barely readable but which kind of subconsciously add a feeling of space and distance.

What was the biggest challenge on this show?
Our most challenging role on PRINCE OF PERSIA was to create the Dagger Rewind effect.

Our brief for the Dagger effect consisted of three main requirements, which were needed to tell this complex story point.

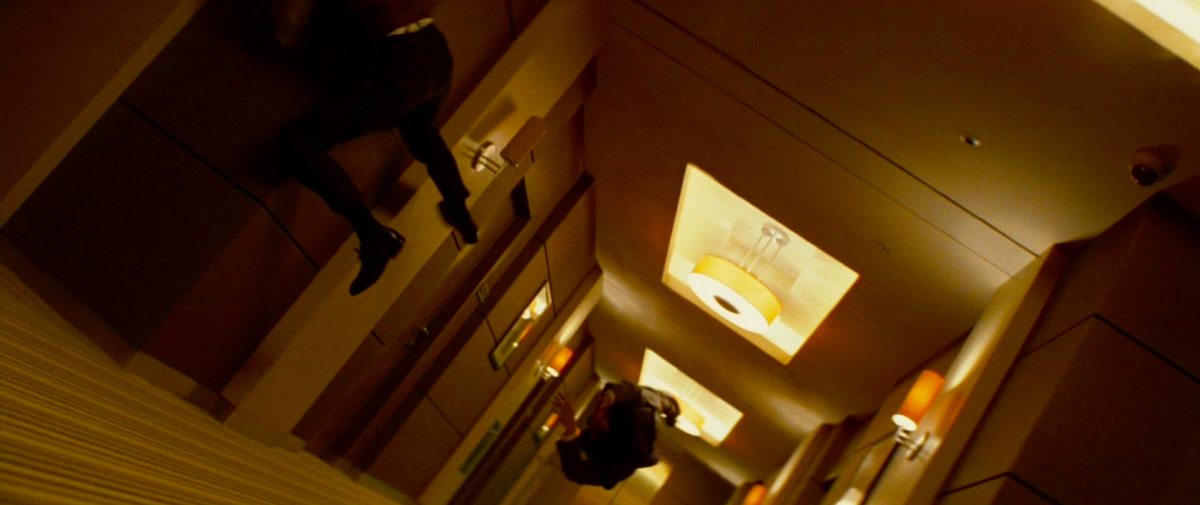
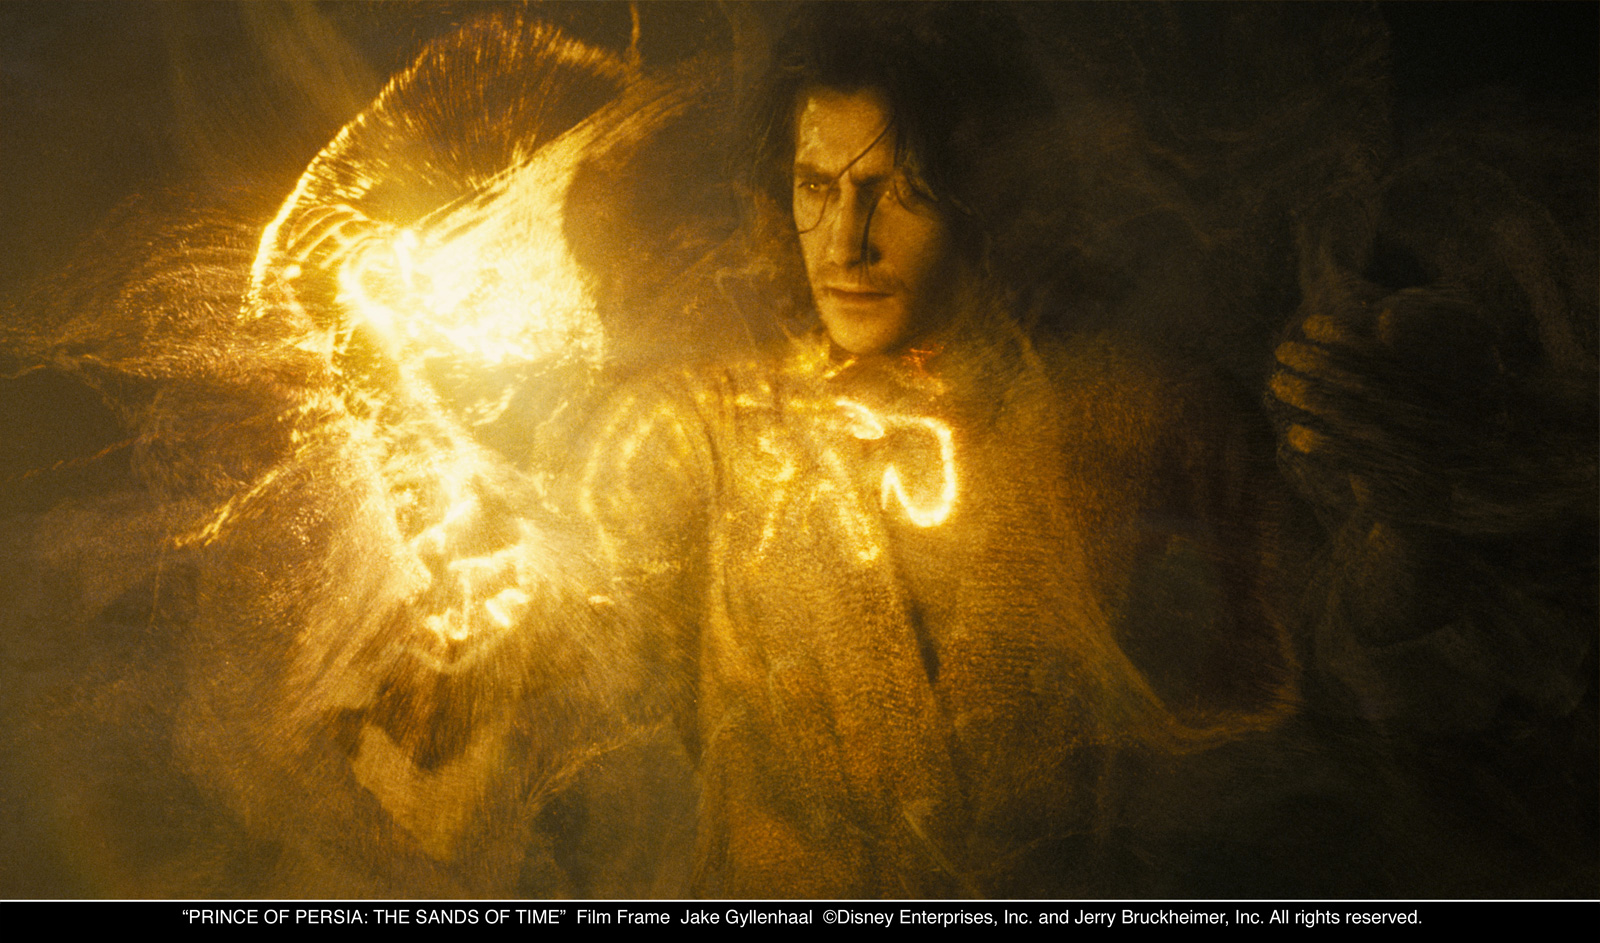
The person who activated the dagger needed to detach from the world so that they could view themselves and everything around them rewinding. We as the viewers needed to detach with them so that we could see the rewind too. We needed a way of treating the detached figure to tell the viewer that he is no longer part of our world. We called this the “ghost” effect.

The world that the ghost sees rewinding needed to have a signifying effect which would show us that it was the magical dagger that was rewinding time. When the dagger is activated we needed to see people moving in reverse in a magical way. We called this the “rewind” effect.

The dagger needed to change the whole environment in some way when time is rewinding so that we could clearly tell the difference between rewinding shots and regular forward action shots.

So we needed an approach to the Dagger Rewind effect which could achieve all of these things. The same actor would need to appear twice in many shots moving both forward and in reverse simultaneously with 2 distinctly different looks, the “ghost” and the “rewind” effects. We’d need to freeze and rewind some aspects of the same shots. We’d need to relight scenes.

On top of all of this, we knew that we’d need an approach that was very flexible. We knew that the choreography of each shot was going to be very complicated with inevitable changes to actors positions or camera moves needed to help convey the story as clearly as possible. Who was standing where, which direction are they moving in, are they in regular time, frozen or in reverse were all questions that could be answered at the previs stage but we knew that with the addition of the “looks and effects” that we wanted, this choreography would probably need to change a little after shooting.

How many shots have you done and what was the size of your team?
200 shots with a small team, which ramped up to around 100 artists at our busiest time

Was there anything in particular that prevented you from sleeping?
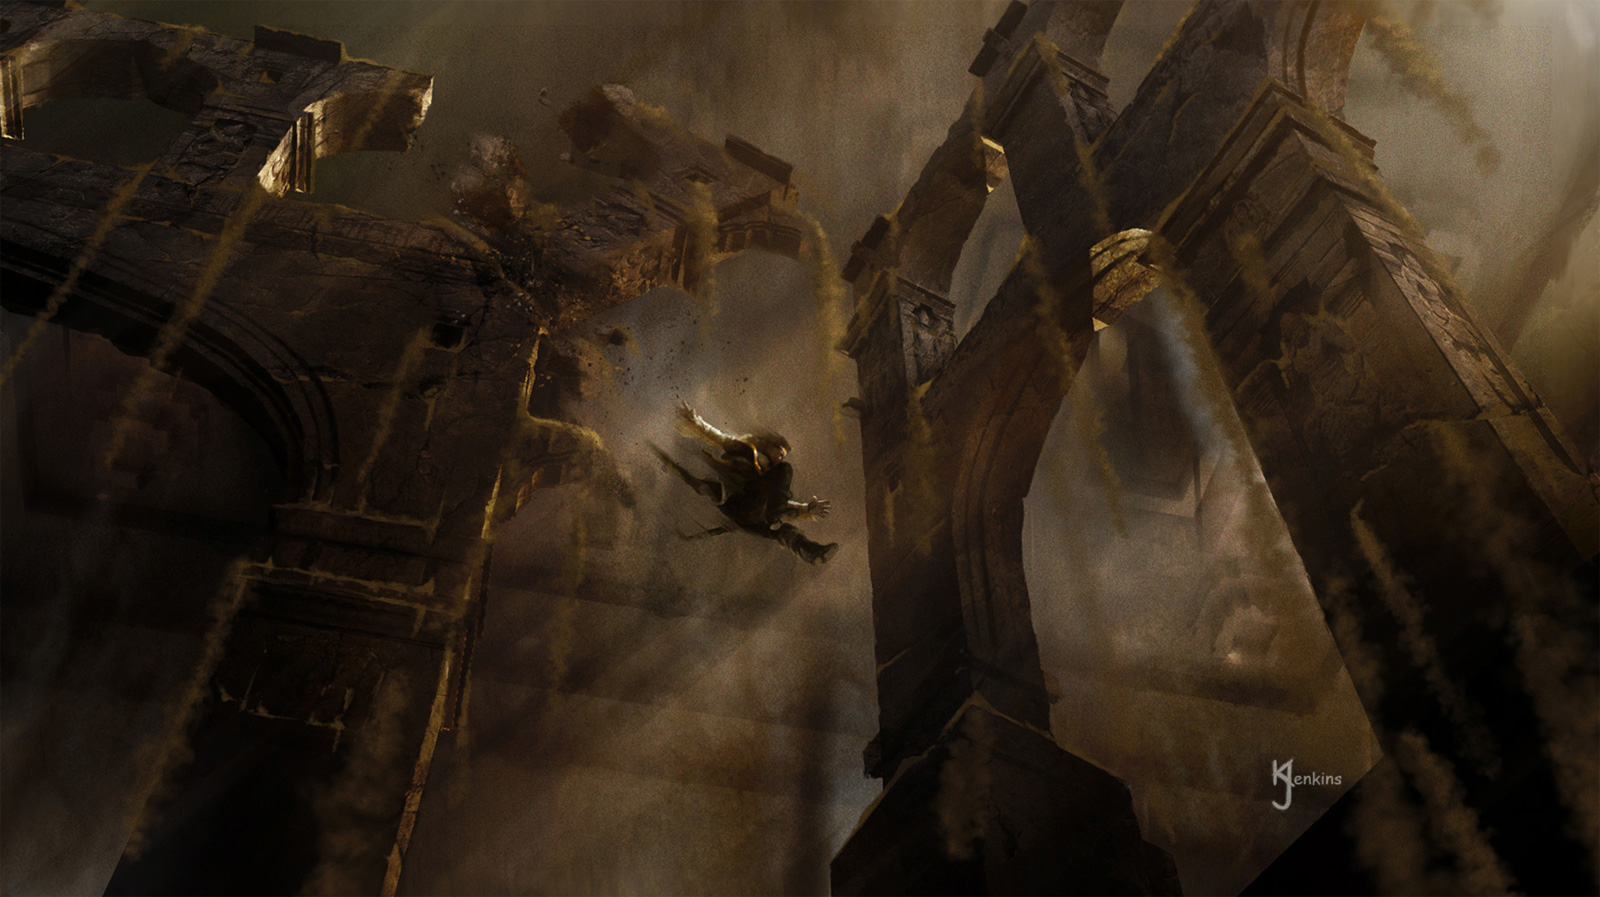
The most difficult shot occurs when Dastan activates the dagger for the first time, bursting out of his body as a particle ghost and watching himself rewind in time. The shot travels from a mid shot to extreme close up then back out to a wide. We had to design everything about the shot. Its fully CG and we get very close to Dastan’s face who had to be completely recognizable. It’s also absolutely covered in particles, which the camera passes through. Editorially we had to tell a crucially important story point, creatively it had to look magnificent and it was a huge technical challenge. Yep…a little lost sleep on that one!

What are the four films that gave you the passion for cinema?
JAWS – I love everything about it…particularly the rubber shark.
ALIEN – Giger and Scott made this movie feel like it came from another planet!
BLUE VELEVT – Lynch really gets under the skin
THREE COLORS trilogy – beautiful movies
SOME LIKE IT HOT – can’t stop at 4

A big thanks for your time.

// WANT TO KNOW MORE?
Double Negative: PRINCE OF PERSIA dedicated page on Double Negative website.

© Vincent Frei – The Art of VFX – 2010

THE CRAZIES: Josh Comen and Tim Carras – VFX producer and VFX supervisor – Comen VFX

Founded in 2006 by Josh Comen, Comen VFX has participated in many projects including TV series like THE SOPRANOS or WEEDS and on movies such as A PERFECT GETAWAY, NEXT, RISE or THE SPY NEXT DOOR.

In the following interview, they talk about their work on THE CRAZIES.

JC= Josh Comen, VFX Producer // TC= Tim Carras, VFX Supervisor

What is your background?
JC: For the past eights years I have worked as a visual effects producer on feature films, television, music videos, and commercials. Comen VFX was founded in 2006. It is part of Picture Lock Media, parent company to Comen VFX and Picture Lock Post.

TC: I first became involved in visual effects at the University of Southern California, where a group of us organized a student-run VFX studio. I subsequently worked as a freelance compositor, designer and effects supervisor before joining Comen VFX as visual effect supervisor in 2007.

Can you explain to us the creation of Comen VFX?
JC: I created Comen VFX for the sole purpose of having a company that could quickly adapt to the needs of both the director and the production. Visual Effects and the methods to complete them on budget and on time are always changing. I thrive on navigating those waves, and charting our course!

What kind of effects have you made on this movie?
TC: We did a range of shots on THE CRAZIES, including compositing, set extensions, bullet hits, and paint work. In addition, we designed and composited a graphical user interface for the Sheriff’s computer.

What were the challenges on this show?
TC: Designing the computer user interface was the biggest creative challenge we faced on THE CRAZIES. It had to be visually simple, but efficient at conveying specific information to the audience at a glance. It had to feel organic, but we couldn’t borrow any design elements from familiar Mac or PC systems. It’s amazing how much of the visual language of computing comes from the two main operating systems in use today, and how much R&D is required to generate original artwork that feels natural. And of course, we had to create all that on a tight schedule and with finite resources.

How was your collaboration with the director?
JC: We would receive feedback from the director directly and via editorial.

TC: Breck Eisner has a keen sense of what he wants in his movie, but he also understands the utility of visual reference material. Even for shots that might be taken for granted in another context, Breck was always in interested in seeing sample images we’d prepare to help communicate the look of the shot, or sending samples of his own. Having pictures to look at allowed us to communicate in a much more visual way than words alone.

What is your software pipeline?
TC: This show occurred while we were in the middle of transitioning from Shake to Nuke, so the compositing was split about half and half between those platforms. We also used Photoshop for computer UI design, and Motion for particle systems.

What did you keep from this experience?
TC: Good communication is everything. When everyone involved is working toward the same goal, things tend to fall into place organically.

What is your next project?
We are currently working on THE FIGHTER, HOLLYWOOD DON’T SURF and YOUNG AMERICANS.

What are the 4 movies that gave you the passion for cinema?

JC: There are certainly many movies that have given me a passion for cinema. At the top of that list for me would be RISKY BUSINESS because I am all for the messages it gives: Life is about taking risks, you gotta risk big to win big. I thrive on taking risks!

TC: I think THE MATRIX and DARK CITY were the first films in the digital age that really got me thinking about visual effects as a tool that could really change the way we tell stories. Peter Jackson’s LORD OF THE RINGS trilogy extended that concept into bigger and brighter environments and characters. But setting VFX aside, what grabs my attention is films like THE SHAWSHANK REDEMPTION, where a fascinating story is told in a way that is unique to cinema.

Thanks for your time.

// WANT TO KNOW MORE?
Comen VFX: Official website of Comen VFX.

© Vincent Frei – The Art of VFX – 2010

0SuiveursSuivre