Simon Hughes began his career in visual effects in 1997 at Cinesite. For over 10 years, he worked in various studios like Double Negative, Rainmaker UK or Clear and on movies like KINGDOM OF HEAVEN, UNITED 93 or SLUMDOG MILLIONAIRE. In 2009, he joined the teams of Image Engine to work on DISTRICT 9. He subsequently oversaw the effects of film LAW ABIDING CITIZEN, THE LOSERS or THE FACTORY. In the following interview, he talks (with Gustavo Yamin, Jordan Benwick and Janeen Elliott) of his work on IMMORTALS.
What is your background?
My background was in fine art, and audiovisual technology, but I began working in the industry in London at Cinesite in 1997. I started as a runner, to editorial back in the days when we still cut film, projection and database management for vfx, to scanning and recording where I became the S&R supervisor.
I made a jump to the side after a few years. I had been thoroughly trained in shake during my time in S&R, so I moved over to compositing as I really got the taste for my creative urges again! After just over 6 years I left Cinesite to take a job at Clear Film, which soon became a part of Prime Focus. Myself, and a small team were in charge of setting up the film department and had some great experiences such as working directly with Danny Boyle, and high end productions such as KINGDOM OF HEAVEN.
Again after a few years I moved on to Double Negative working on films like UNITED 93, HARRY POTTER and THE REAPING. After this I moved on to Rainmaker UK, where I was again involved in the early days of a startup vfx company and also transitioned into comp supervision.
As I am a Canadian citizen I have always had my eye on the industry in Canada, and after a couple of years at Rainmaker I took a job at Image Engine for two reasons, they had made the complete transition to Nuke and they were due start on District 9 which was just an incredible sounding project. Once I finished on DISTRICT 9, I received a VES award for compositing and moved into VFX supervision more or less straight after. Working on LAW ABIDING CITIZEN, THE FACTORY, THE LOSERS, IMMORTALS and most recently SAFE HOUSE (2012) where I have been the supervisor for the show working directly with Universal.
How did Image Engine get involved on this show?
Image Engine had worked on a number of shows with Raymond Geiringer. I had worked with him on LAW ABIDING CITIZEN with Visual Effects Executive Producer Shawn Walsh, and we had developed a good working relationship, which lead Raymond to contact us. Tarsem was also a big fan of DISTRICT 9.
How long have you worked on this film?
We worked on this for around a year. Work began in 2010 when I went on set in Montréal.
How many shots have you done?
There were around 130 shots in total.
How was the collaboration with director Tarsem?
Working with Tarsem was a fantastic experience; his artistic sensibilities are what drive his films to become the grand spectacles that they are. So it was a real challenge to try to live up to those standards.
What was his approach to VFX?
Tarsem seemed to encourage creative freedom, we were expected to drive the imagery forward ourselves to a point where the film could be viewed holistically, and this is then where he really got involved. This was great, as he understood that the process takes time – allowing us to develop our ideas and techniques first so that he could then direct them further.
How was the collaboration with Production VFX Supervisor Raymond Gieringer?
Working with Raymond has always been a good experience, he is incredibly calm, and focused, and as an ex-facility supervisor he thoroughly understands the challenges that VFX facilities have to overcome to complete high end vfx.
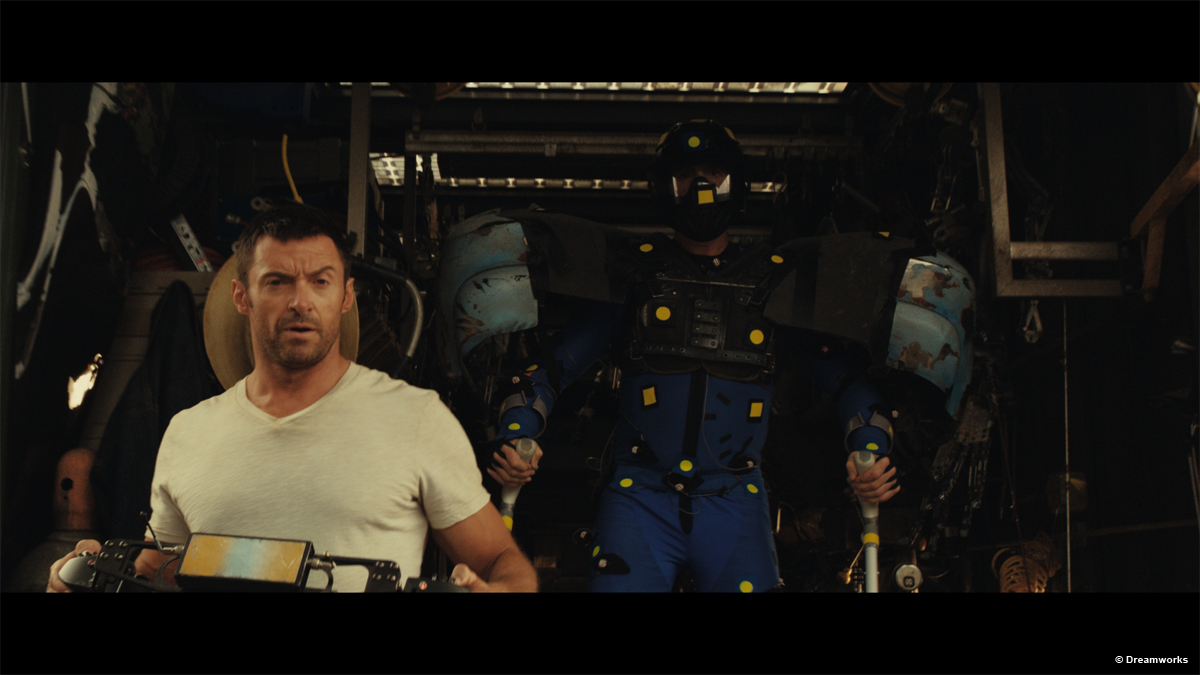
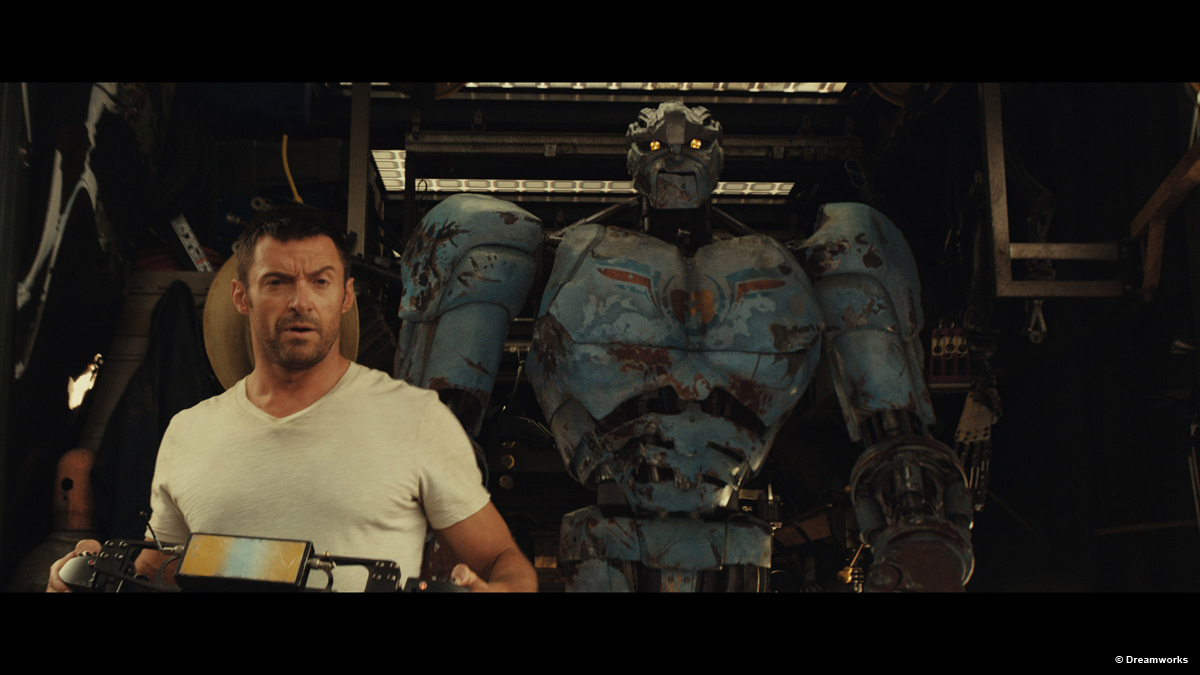
What have you done on this show?
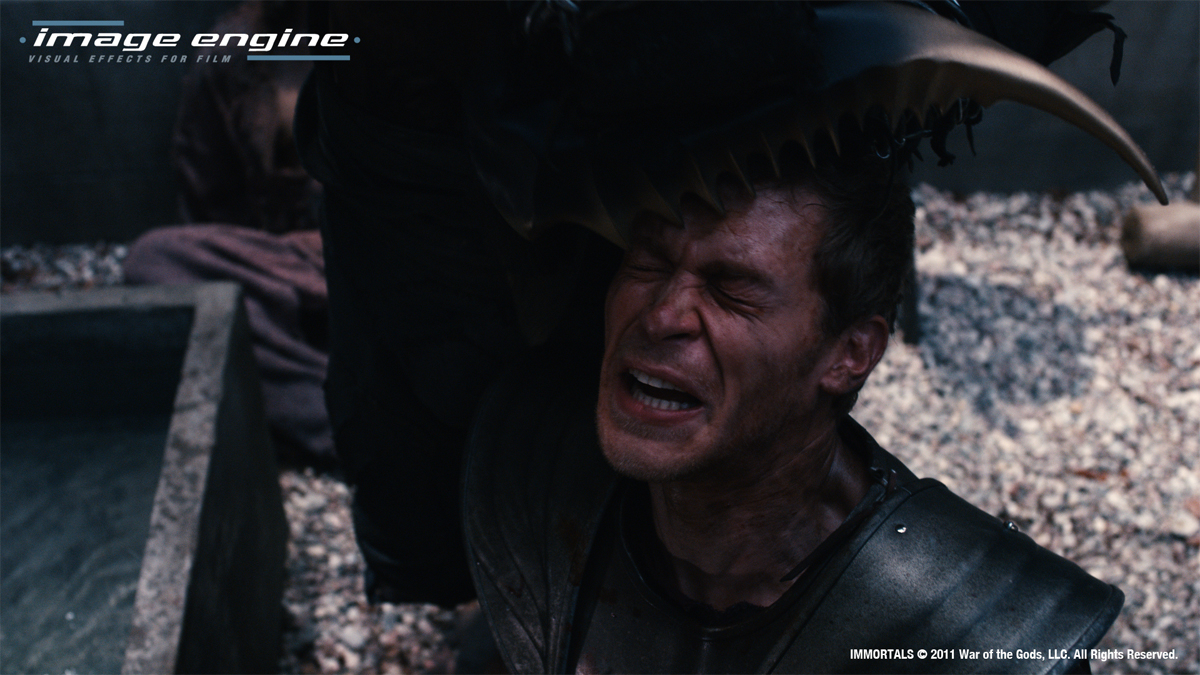
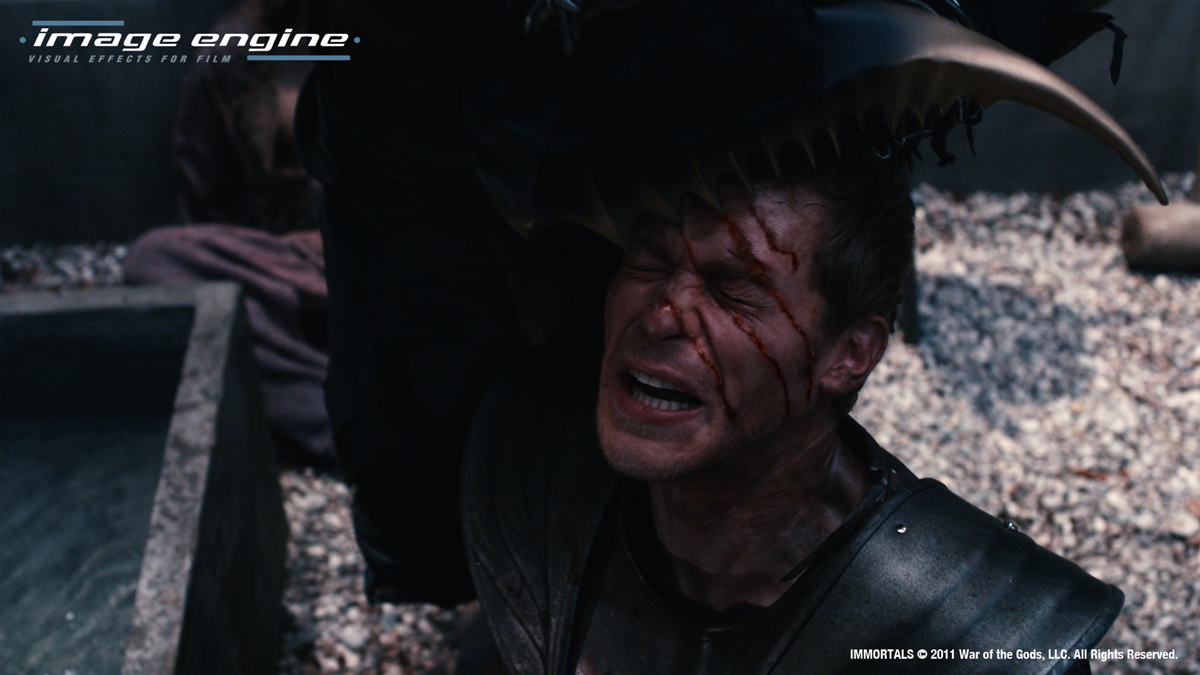
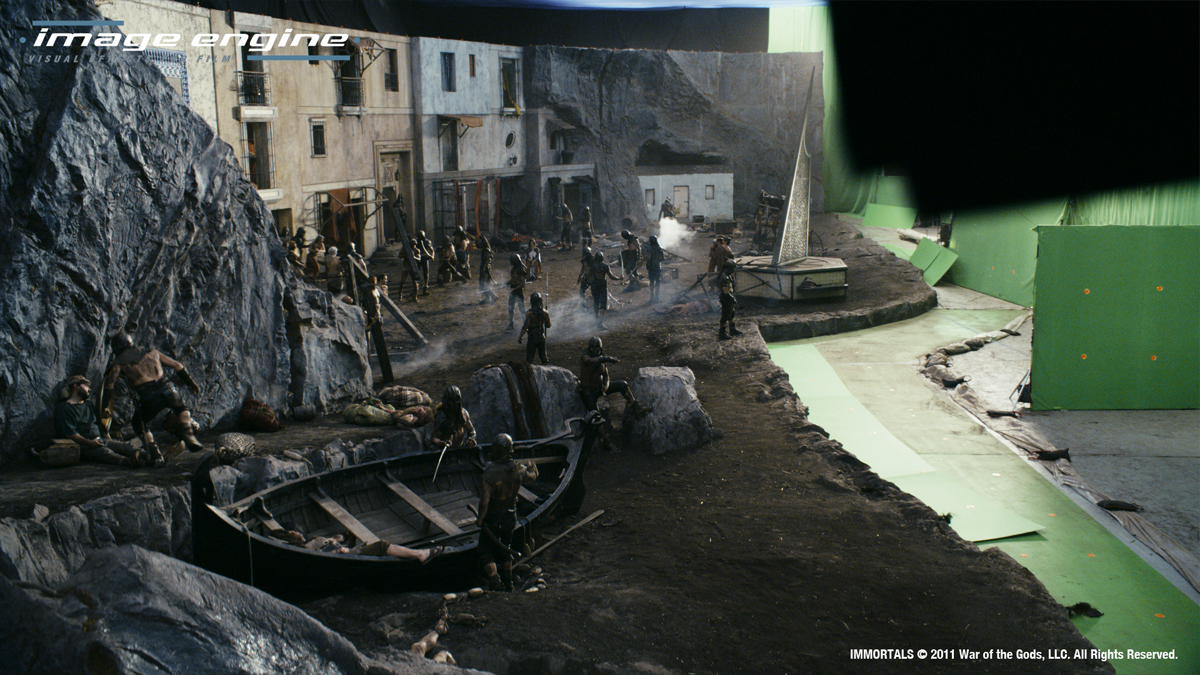
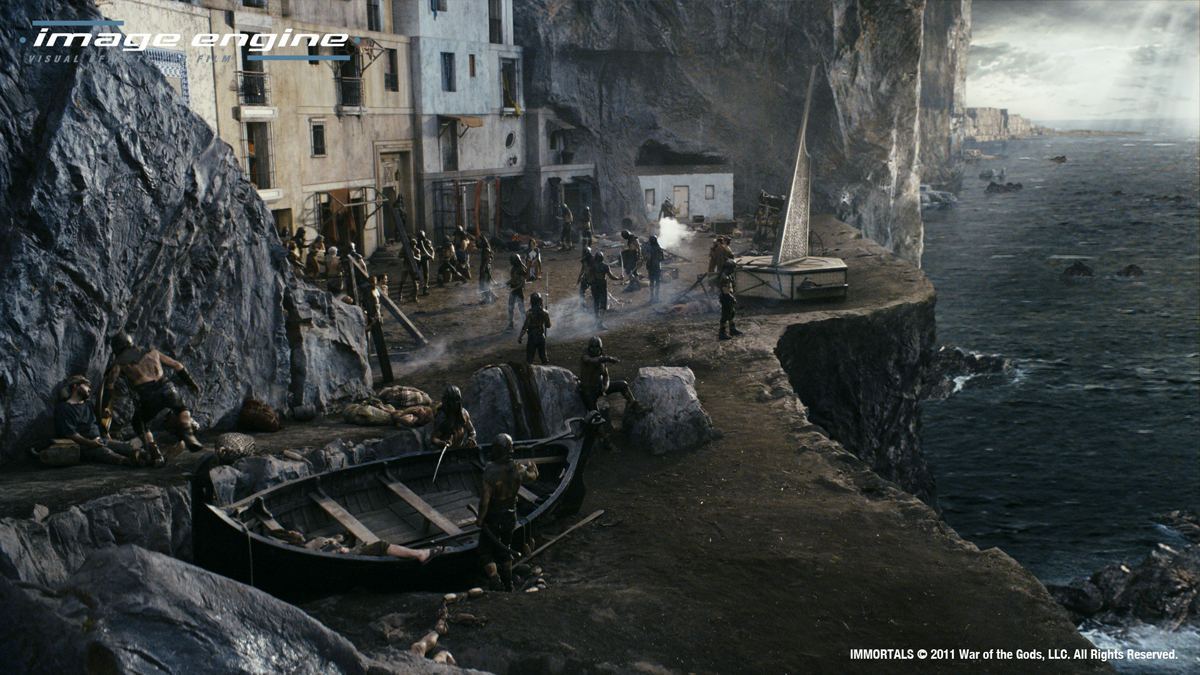
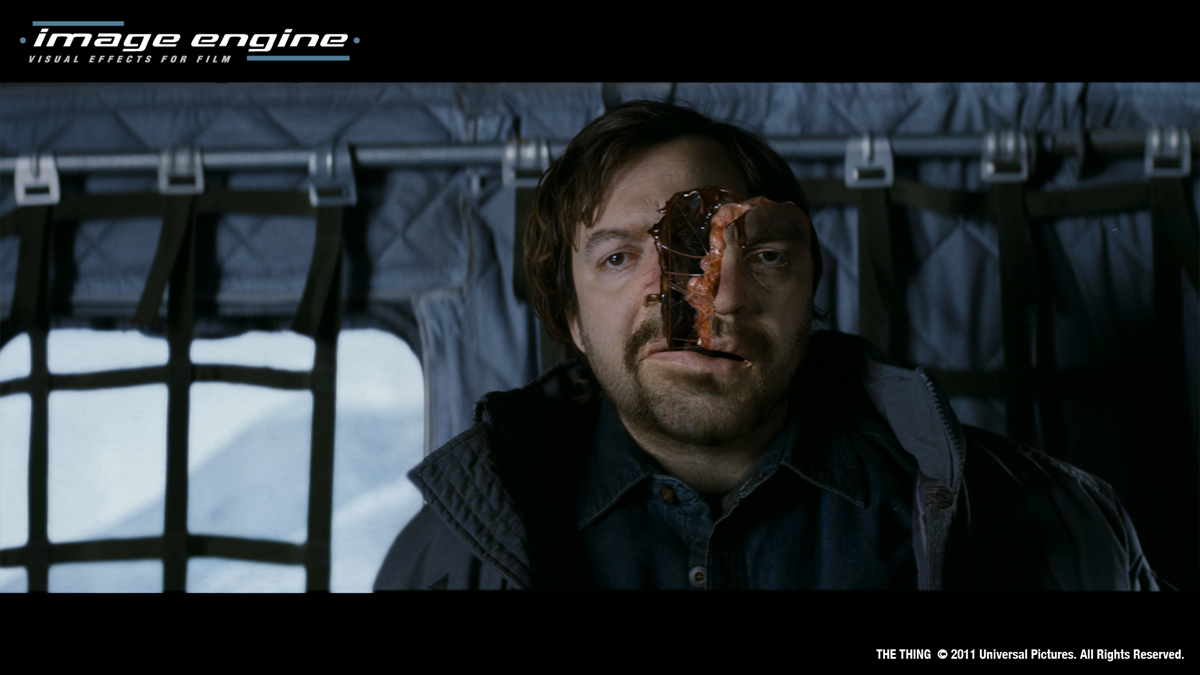
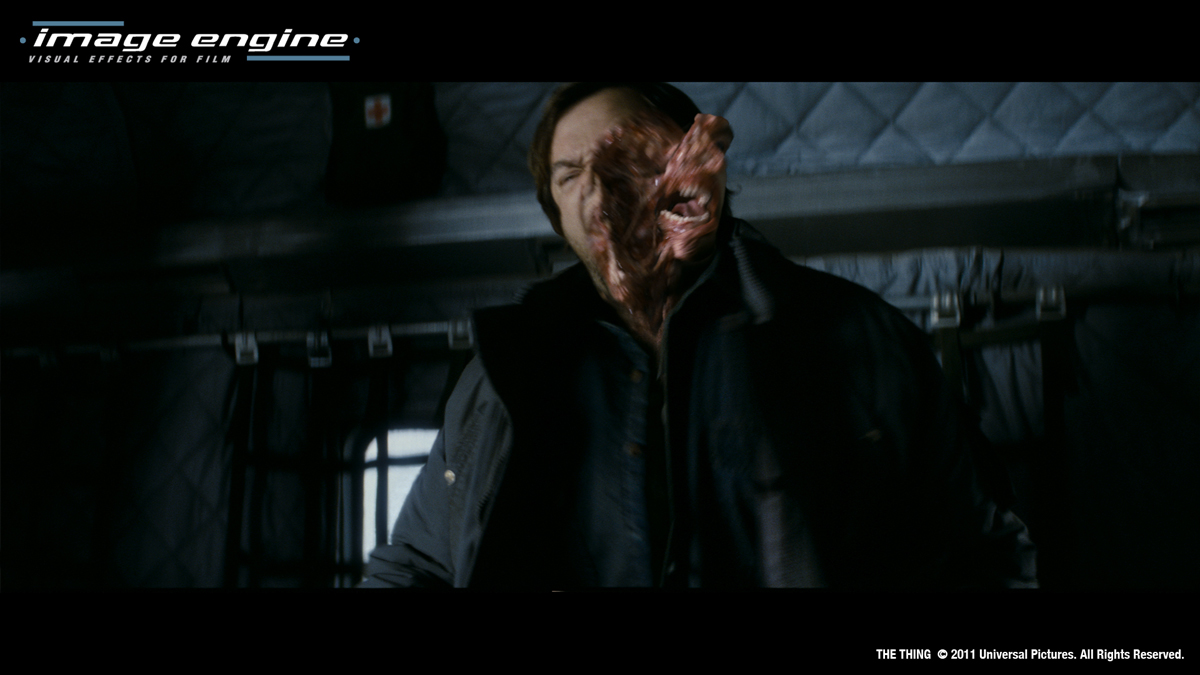
Image Engine provided the full range of visual effects work on IMMORTALS, from computer generated characters, character transitions and heavily stylized digital blood and gore, but the main challenge for the company was definitely the digital environment work.
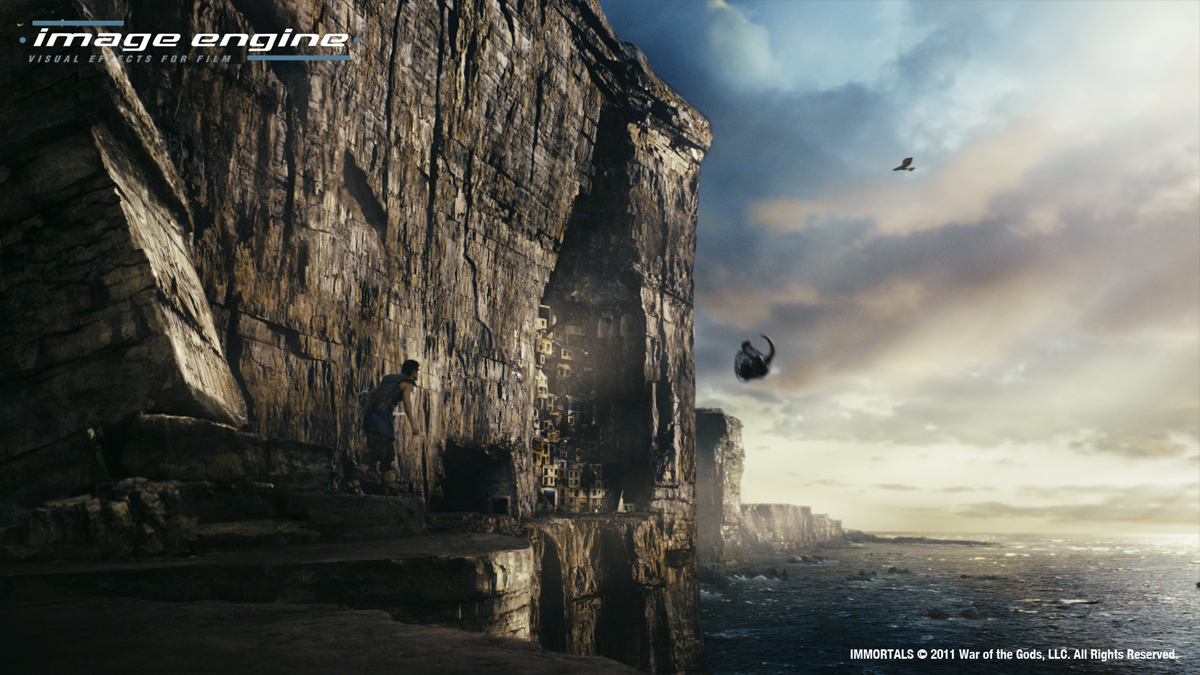
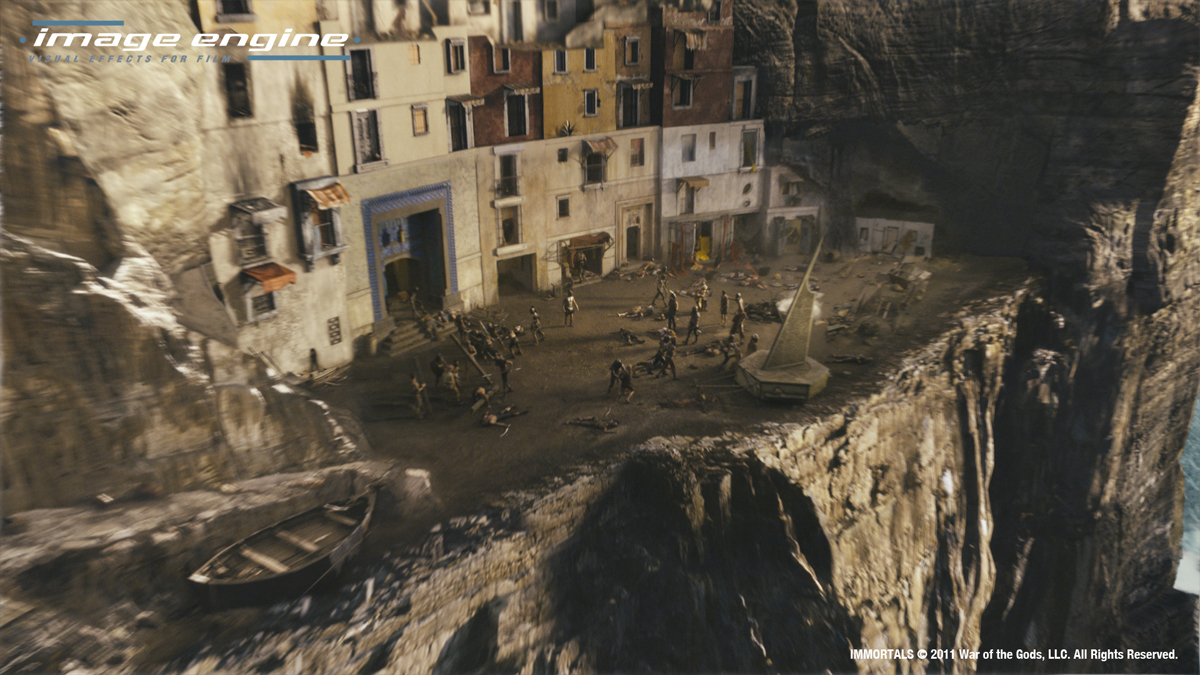
The main environment was the cliff, which stretches for roughly half a kilometer and houses three of the key sets: the village, the tree-bluff and the checkpoint, which are all carved into the rock.
Can you tell us more about the village and the cliff?
Essentially at the start we did a lot of concept art ourselves; working out how the cliff should look and how the village could conceivably extend from the original 3 stories.
The concepts only got us so far, so essentially became more of a case of pushing it forward and trying to visualize it in broad strokes as we were going along, so we could see it in context. The cliff was a design challenge, as it is such a vast and simplified structure. It was all about rock, and the details within the rock surface, which is a bigger challenge than it may sound.
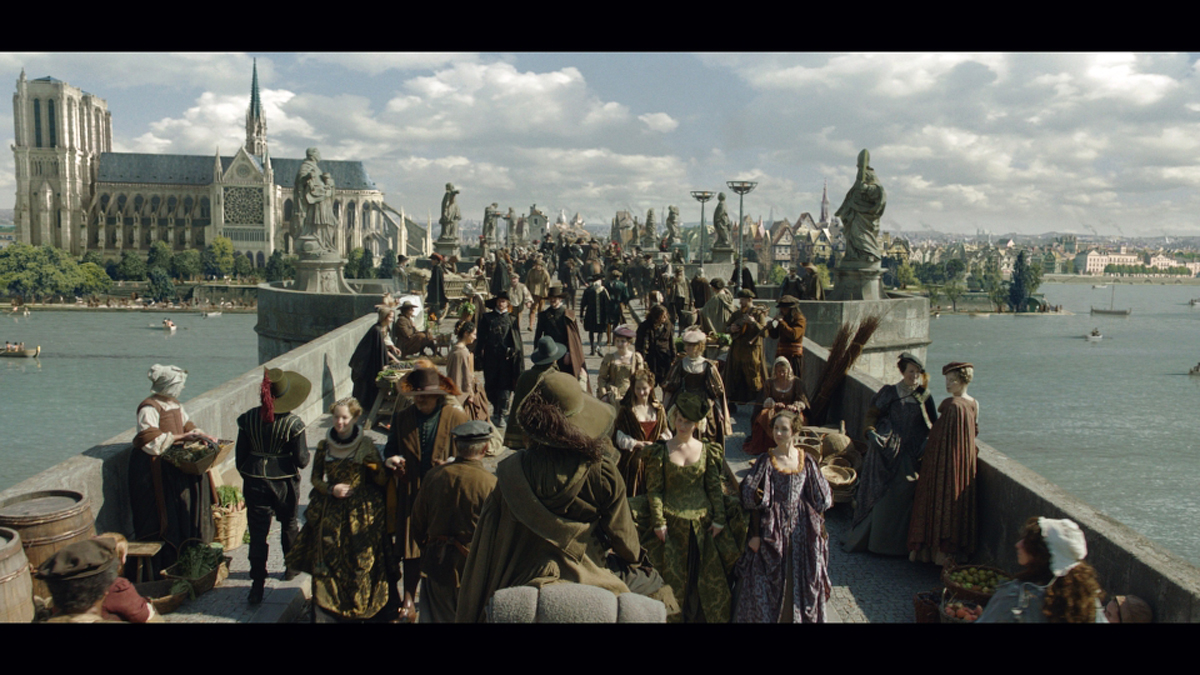
The village extension was also a very creative challenge. We had to find a way to demonstrate depth and scale, and find a way for people to be able to travel between the levels. We also wanted to create a sense of life and organic growth that you see in medieval towns and cities throughout history, where the structures grow around each other over time.
The trick was scale, how to make these things seem vast.
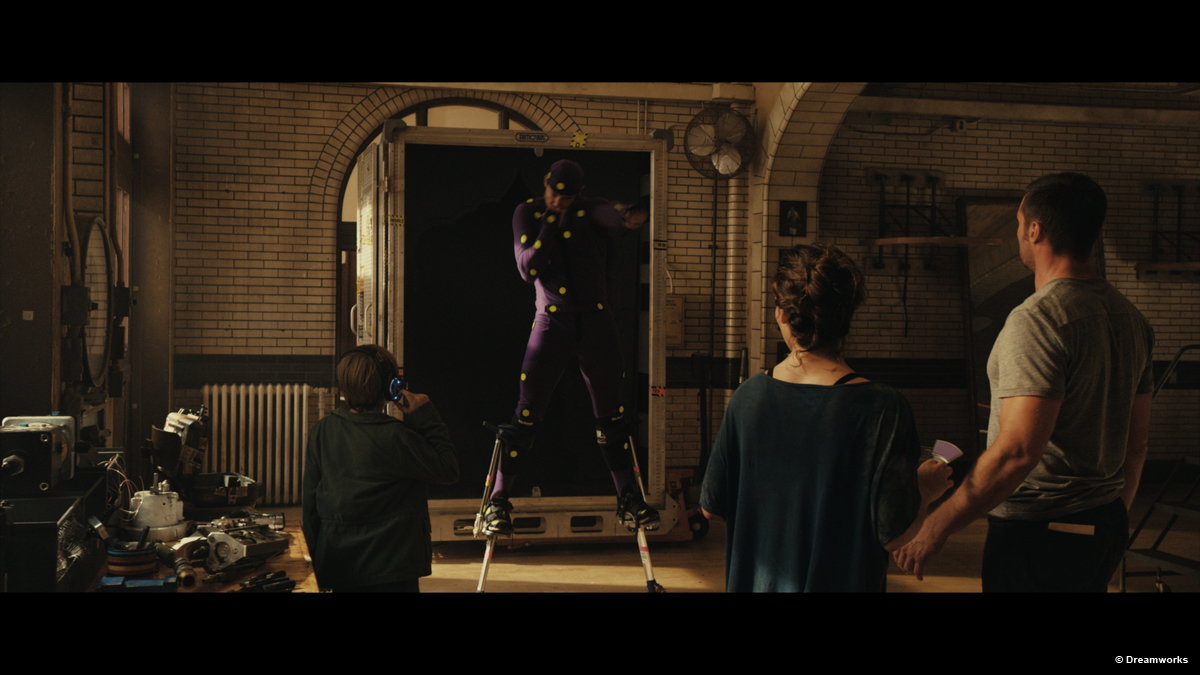
How did you create the first reveal of Athena?
To start with we created a basic human form in Maya that was used to body track Athena, mainly focused on the head and neck. From this we projected a painted version of her head onto the geo, and also created a selection of ink blot styles images that were also used as a basic texture on the geo. From this we were able to supply comp with a CG head and a selection of alpha channels that they could use to drive the effect.
The lower half of the body was taken from footage of the painted Athena and warped to match the practical in Nuke. The reveal were a combination of displaced roto shapes and the ink blot textures, that gradually reveal the unpainted plate version, the goal was to try to create a fluid transform that looked like it was seeping into her body.
How did you design and create the magical arrows?
The arrows started as a CG asset, that was essentially silver with little chips and dents along the body, and a sharp well defined head, and feathers on the tail. Using 3delight to render we were able to give comp a solid arrow as a base and then a selection of aov’s that were used to drive the effect, namely pref, position, spec, reflection and z depth.
The glisten was created from making the spec sharper and crisper and by adjusting contrast taking it just down to small finer details, which is one of the reasons why we made lots of dents and details in the body of the arrow in the first place. This gave us a basic sparkle, that we treated heavily both through combinations of the chromatic aberration, noise patterns, and convolving with glitter imagery.
The transition was driven in part by mapping noise patterns to the arrow using pref, and transition from tail and tip down to the middle using the depth pass and manipulating it values over time. Essentially we created a method that could be applied to multiple shots.
How did you create the Hawk?
This started as a much simpler build as we were only originally expecting to see it far from camera, so over time this was brought closer and closer until it became a hero character. The build was in maya, textures in photoshop and some sculpting in Z brush. The animation was in maya.
Can you tell us more about your work on gore shots?
The gore work went from the simpler adding of practical gore from an element shoot, to creating CG limbs and arms and chopping them off. In addition to this there was a collection of weapons created which ranged from daggers, to swords, to spears, and in one instance one spear is snapped into three different sections and used to brutally maim soldiers as Theseus rampages through the tunnel.
The gore work was a lot of fun; really it was a case of more more more!!
Was there a shot or a sequence that prevented you from sleep?
The environment was a challenge, so as a whole this is the part of the show that left it’s mark on me, and taught me a lot more about how to do this kind of work. I think it kept us all awake at night dreaming about rock surfaces!
What do you keep from this experience?
How to create something of such a huge scale, but at the same time keep it flexible enough to handle the creative process. We work in an industry that calls more and more for well defined procedural approaches, that don’t always lend themselves well to creativity, so it is a difficult balancing act, and IMMORTALS taught me a lot about this.
// SPECIFIC SHOTS IN FOCUS BY IMAGE ENGINE ARTISTS
// Gustavo Yamin, Senior Digital Artist
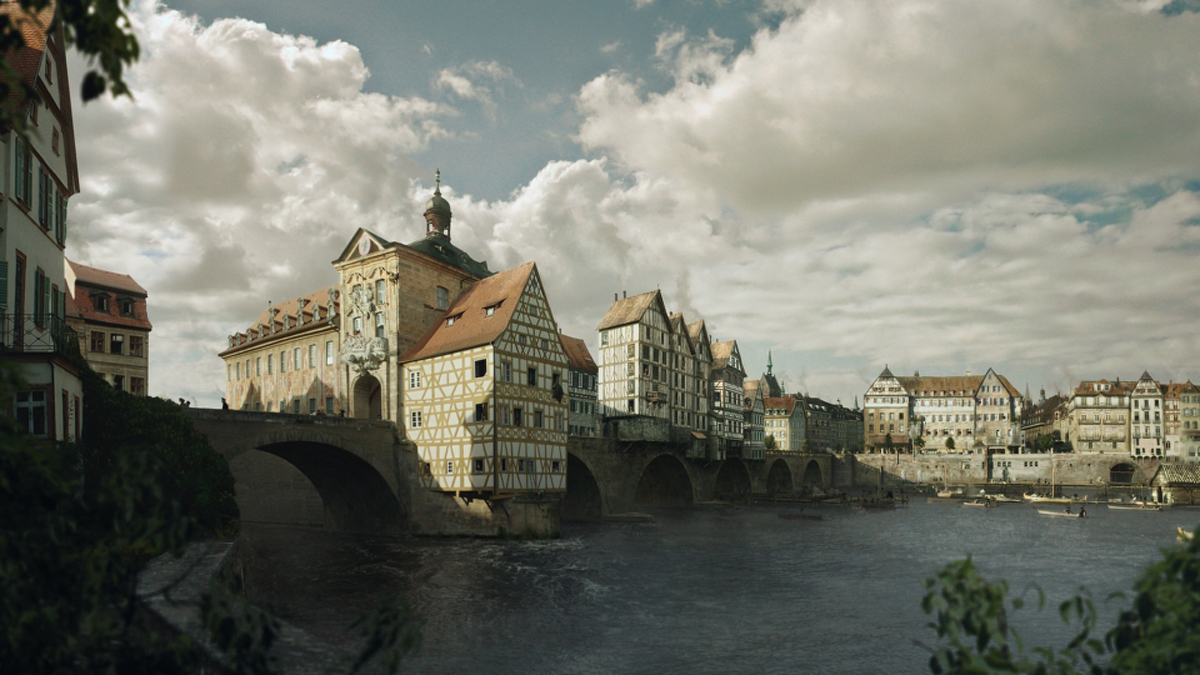
Can you tell us how you designed and built the cliff?
The task of creating this massive set extension was a multi-faceted challenge that consumed over 6 months of planning, setup, sculpting, rendering, matte painting and compositing.
The production sketch we received from the client provided a rough guideline to the overall « look », and it was clear right from the start that Tarsem wanted stone formations that looked realistic but definitely epic in shape and scale.
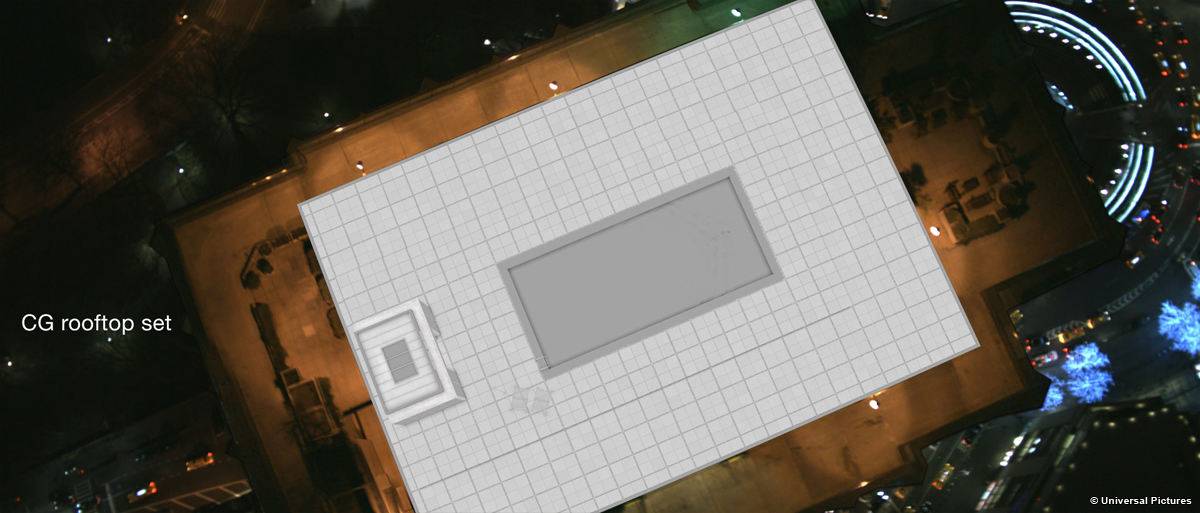
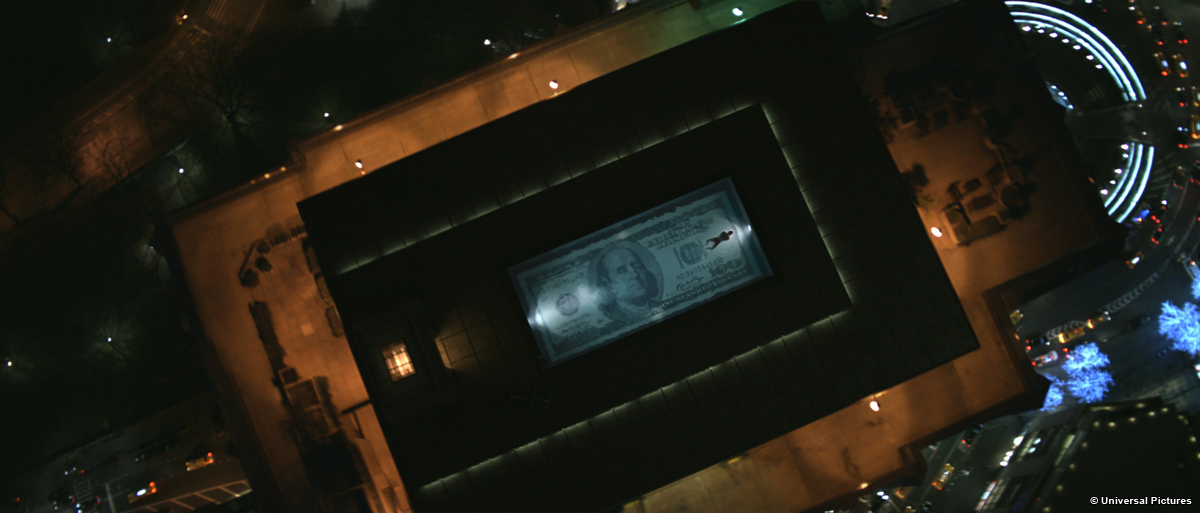
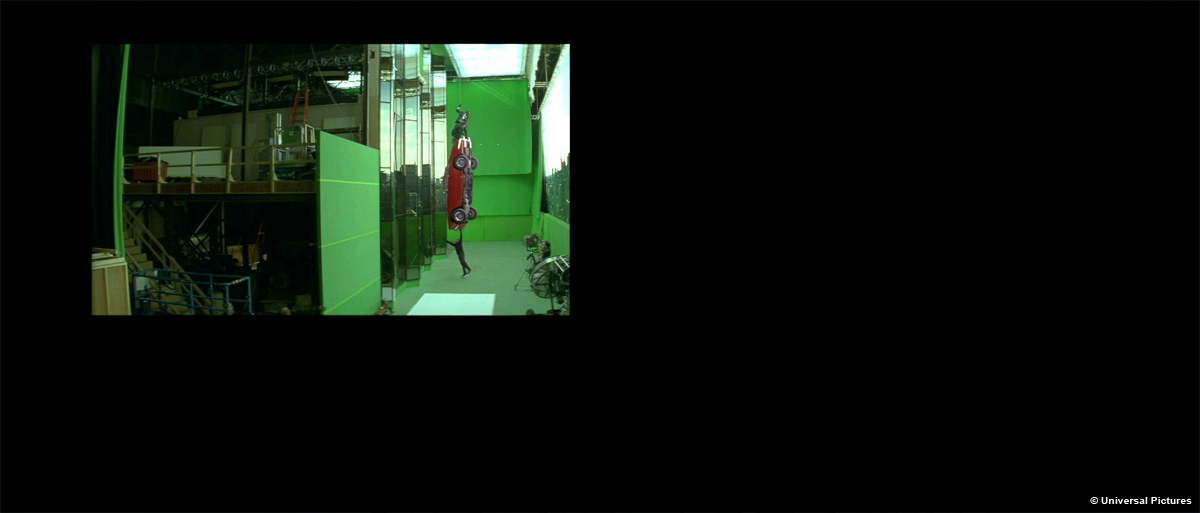
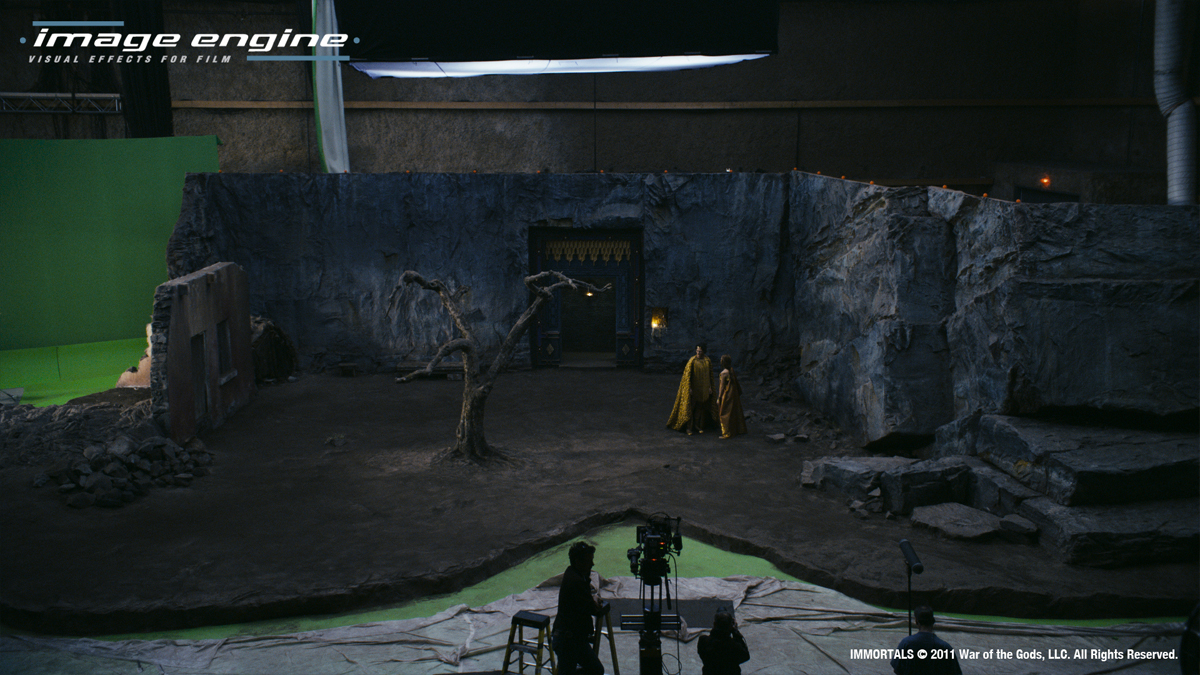
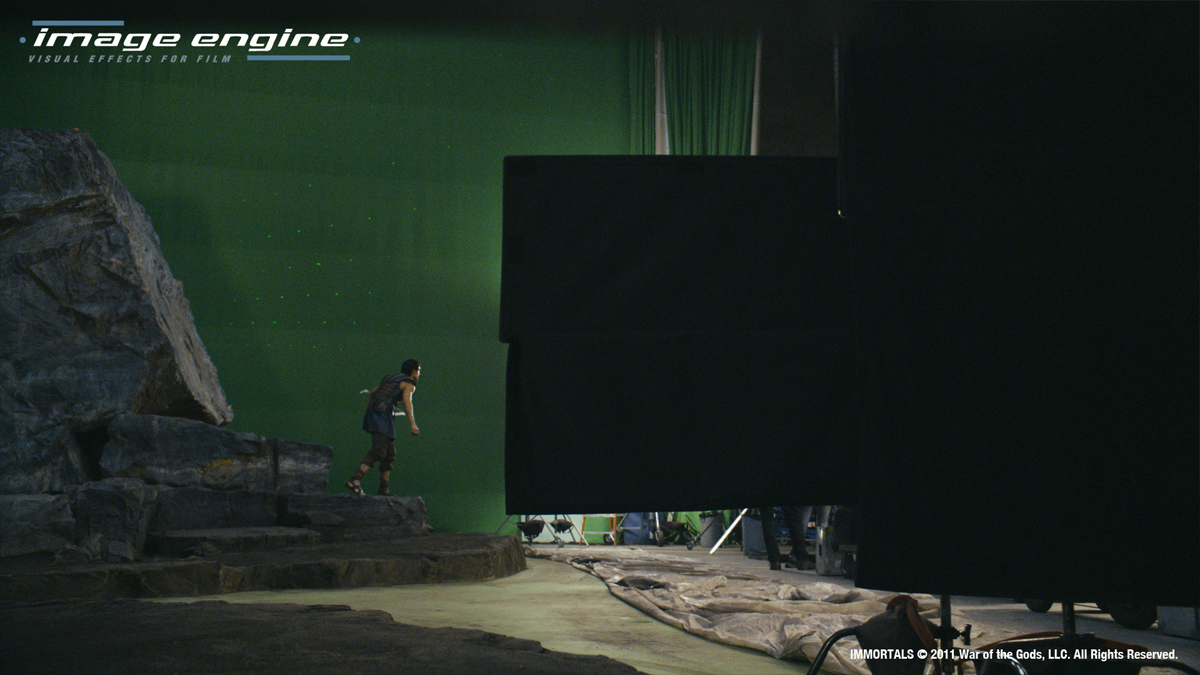
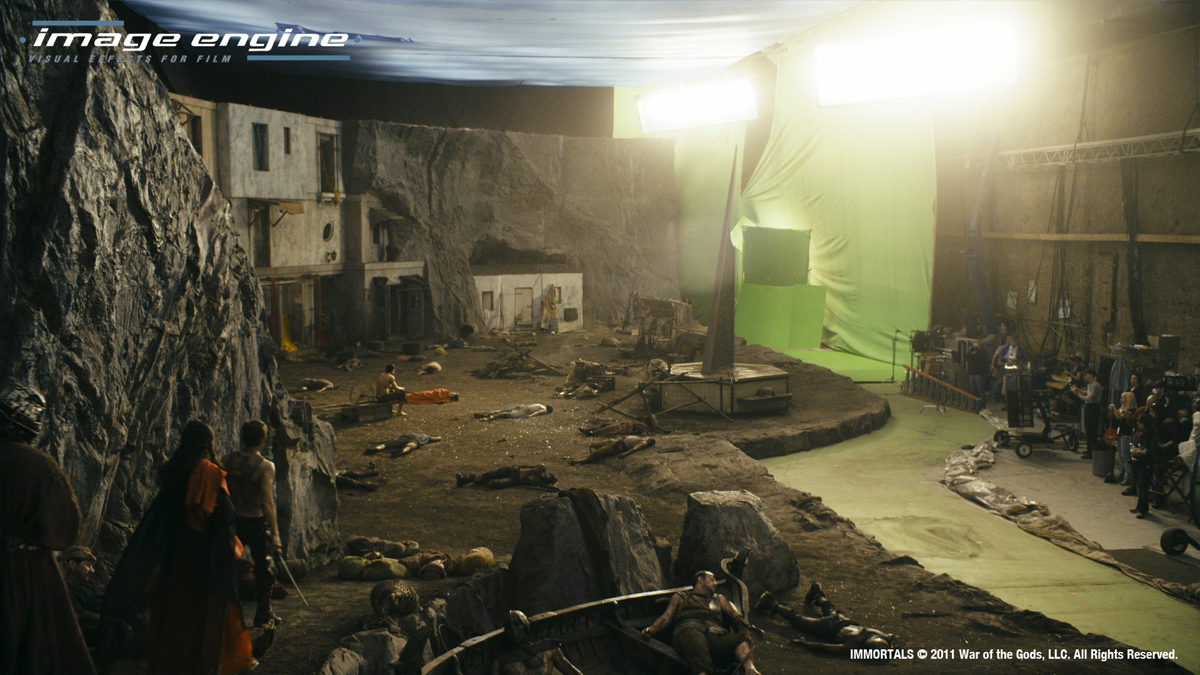
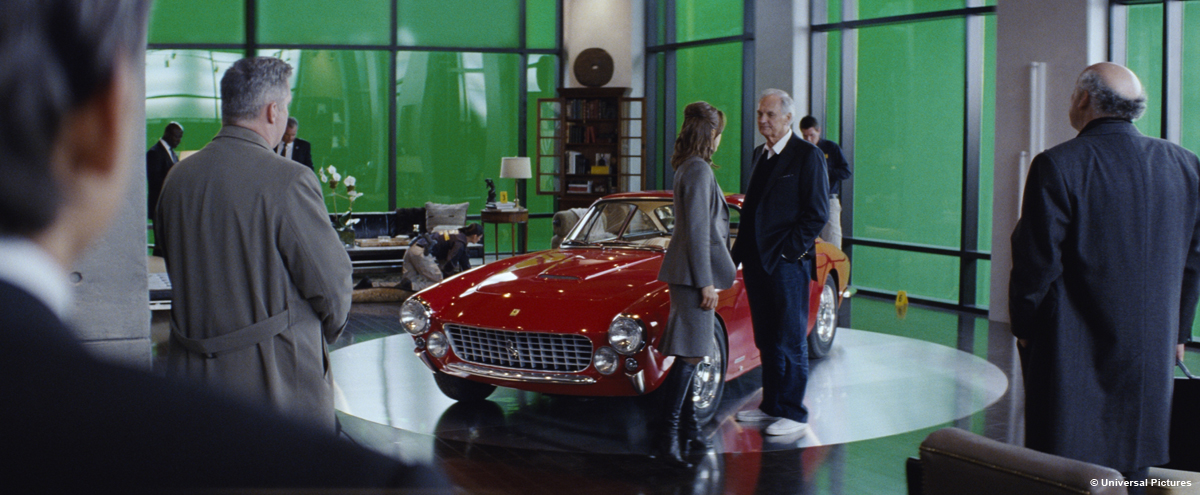
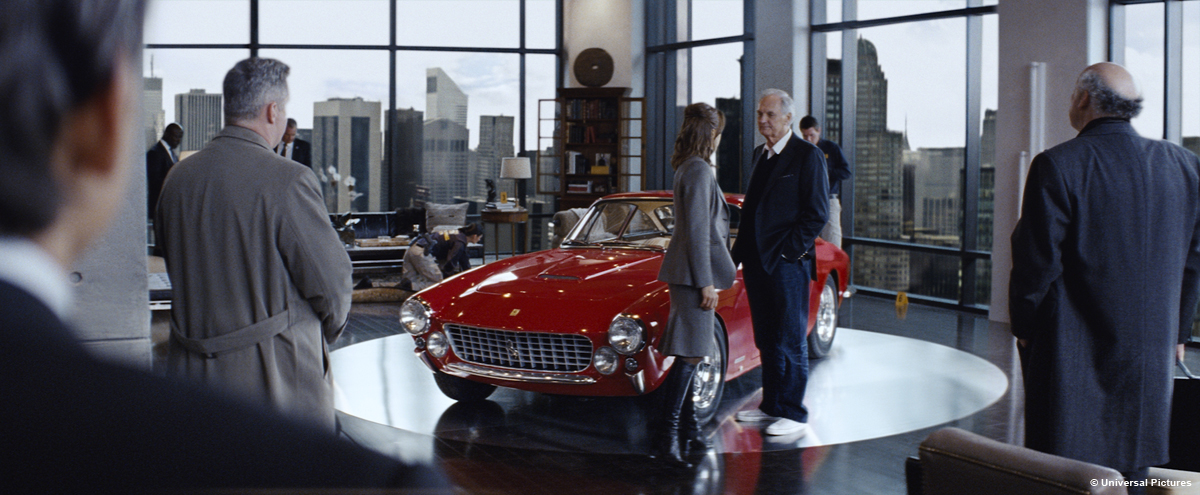
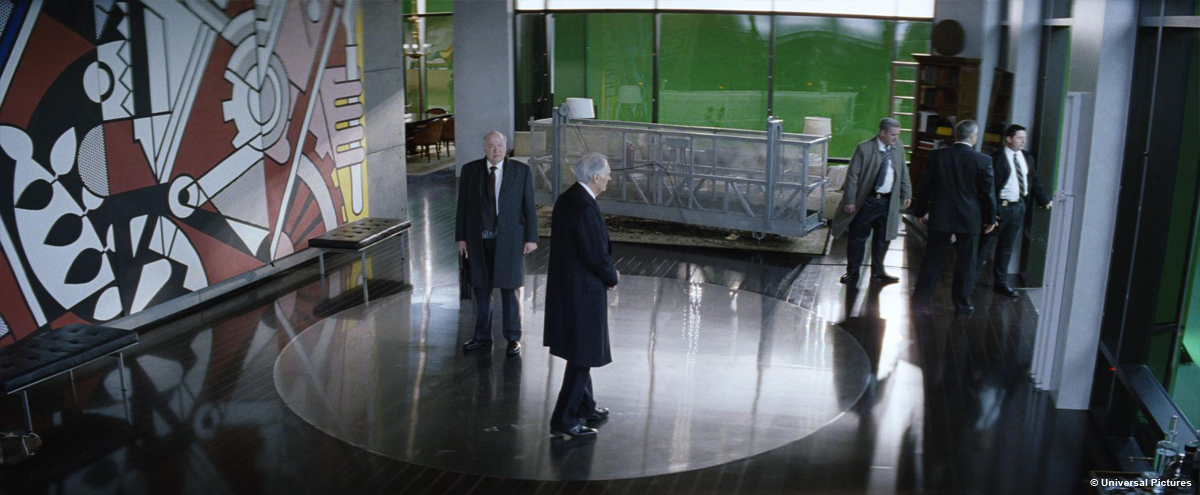
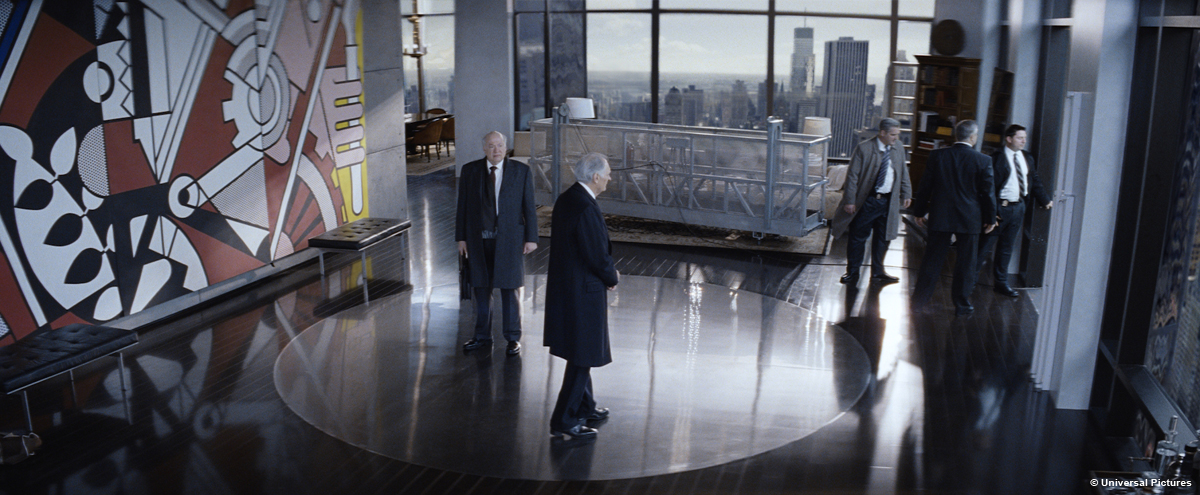
Production used a special setup that would allow the director to shoot these sets against green screens and immediately comp the image over a 3D model of the cliff, placing the real set in proper visual context on the face of the virtual cliff. In this way, Tarsem could choose angles that would frame the real set and the rest of the cliff as it should be seen from each of the three key locations. This 3D model was sent to Image Engine as the basis for the cliff structure we should build [envisioned by Tarsem Singh], along with photos of the rock structures built on-set.
I proceeded to building a more detailed « blocked » version of the same volume in Maya and tagged parts of it with real images of rock features that I thought would fit specific parts of the cliff – broader areas and also the ones closer to the actual sets. The initial blocking of the cliff in Maya was done by simply scaling and piling dozens of polygon cubes together. These served as a « volume guide » for the formations that would bridge each set area and matched the 3D model of the cliff used by Tarsem in his shots. The model ended up spanning roughly half a kilometer within Maya, and it was obvious we would need to segment it to be able to manage the high-resolution version. The cliff face alone was broken-up into 20 parts.
Once we decided how the whole cliff should be segmented, I built cages (simple low-resolution geometry) in Maya that surrounded the cubes that formed each cliff chunk and sent both cage parts and blocks to Zbrush. I shrink-wrapped the cages onto the grouped cubes creating a single mesh that matched the intended volume and could be refined further. For each block, I pushed the subdivisions up to anywhere between 2 and 3 million polygons for initial sculpting. For parts that required the highest amount of detail, I would sculpt further using the HD Geometry feature in Zbrush. I would then export 4K 32-bit displacements of each block and reassemble the whole cliff in Maya to be rendered in 3Delight.
One interesting challenge we had not anticipated, came with the realization that the model used on set as in-camera reference for Tarsem had been deformed and re-arranged almost on a per-shot basis to fit his framing and composition requests. So, our cliff model did not match, initially, any of the reference plates we received from production – even though it had been built based on that same 3D model they used on set! In the end, we had to rig all the 20 cliff parts individually and as a whole to be able to re-shape the entire thing to match the per-shot distortions.
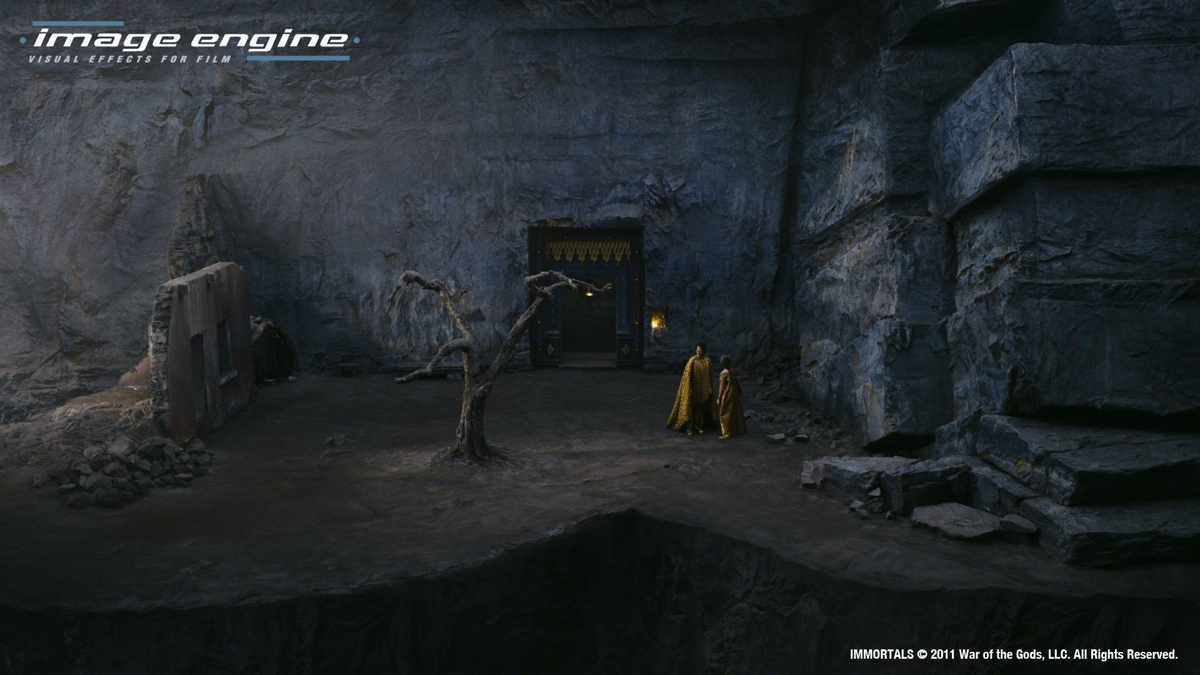
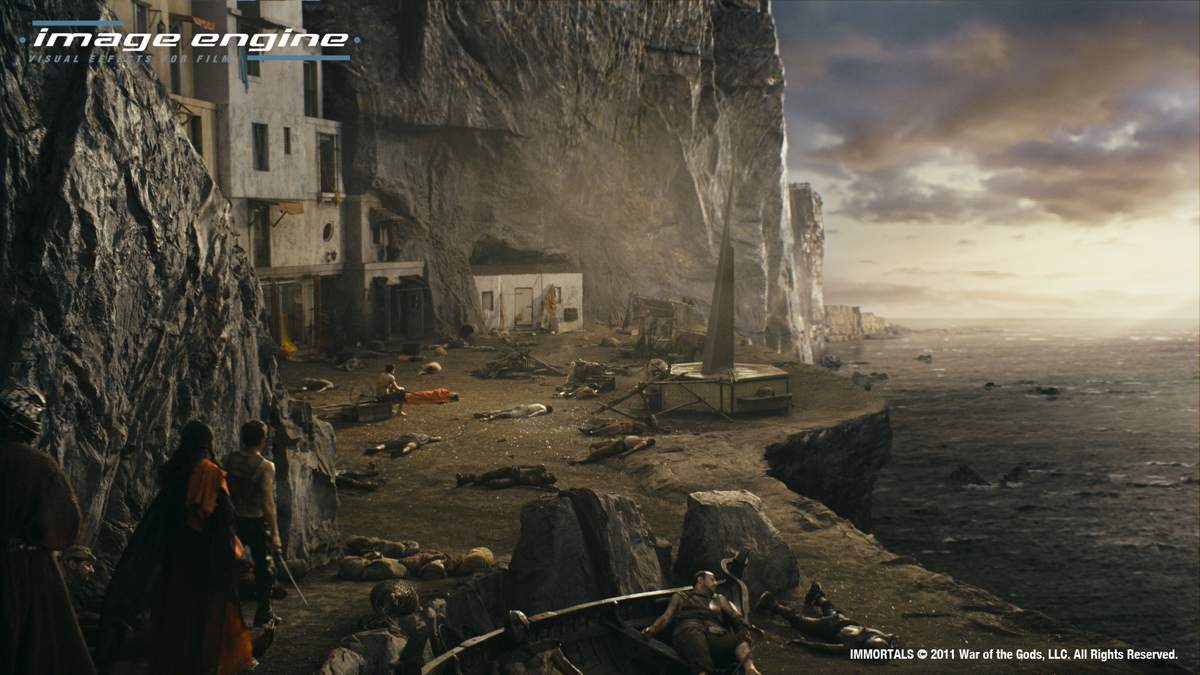
The end result was a clever mix of 3D and matte painting – to tackle the intractable close-ups that were just too extreme for the 3D build to handle (without further cliff segmentation and sculpting); and to handle tweaks and last-minute structural changes requested by the client fast enough to meet the deadlines. »
// Jordan Benwick: Lead Compositor
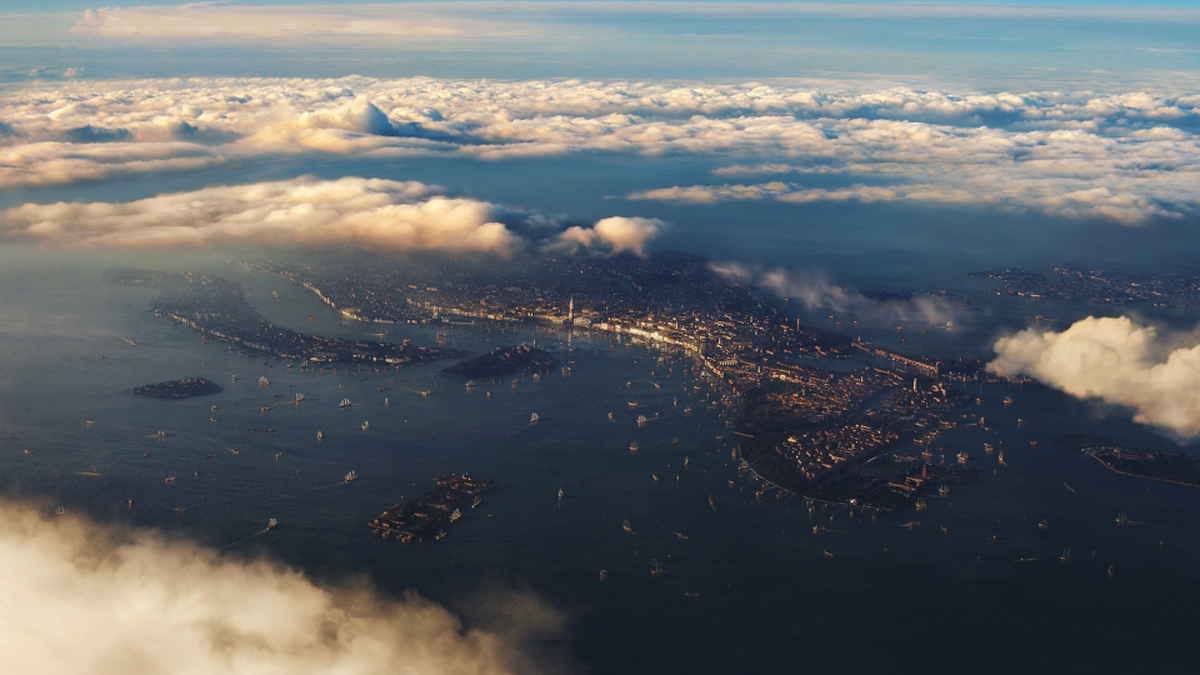
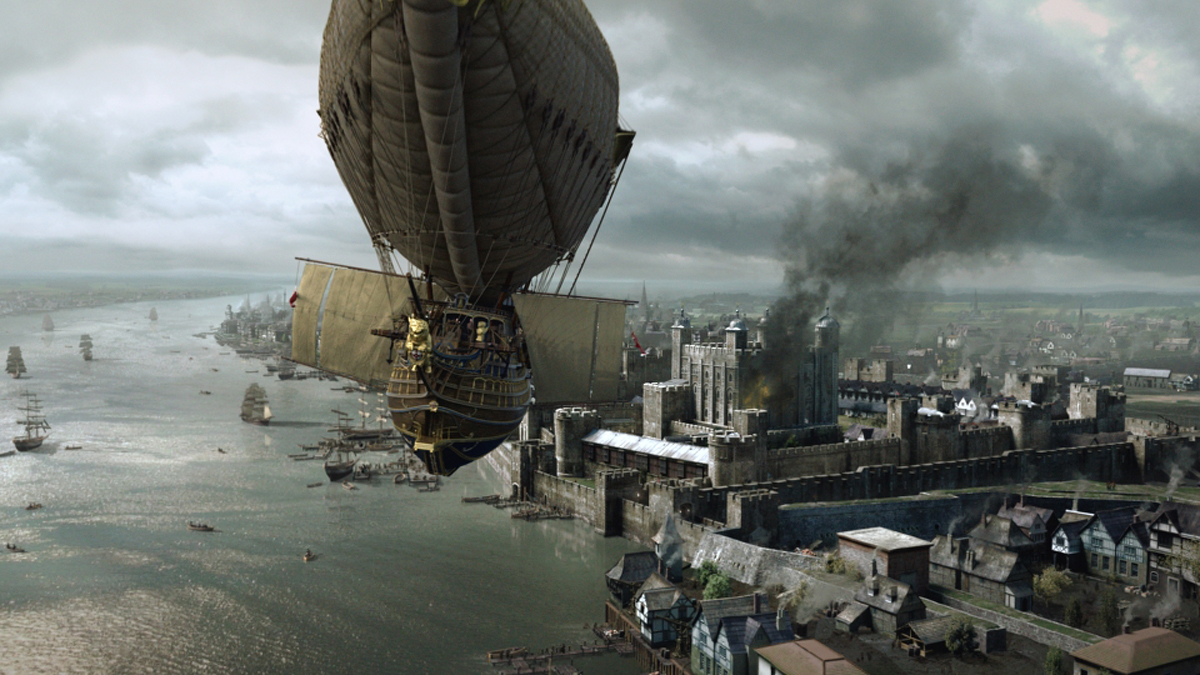
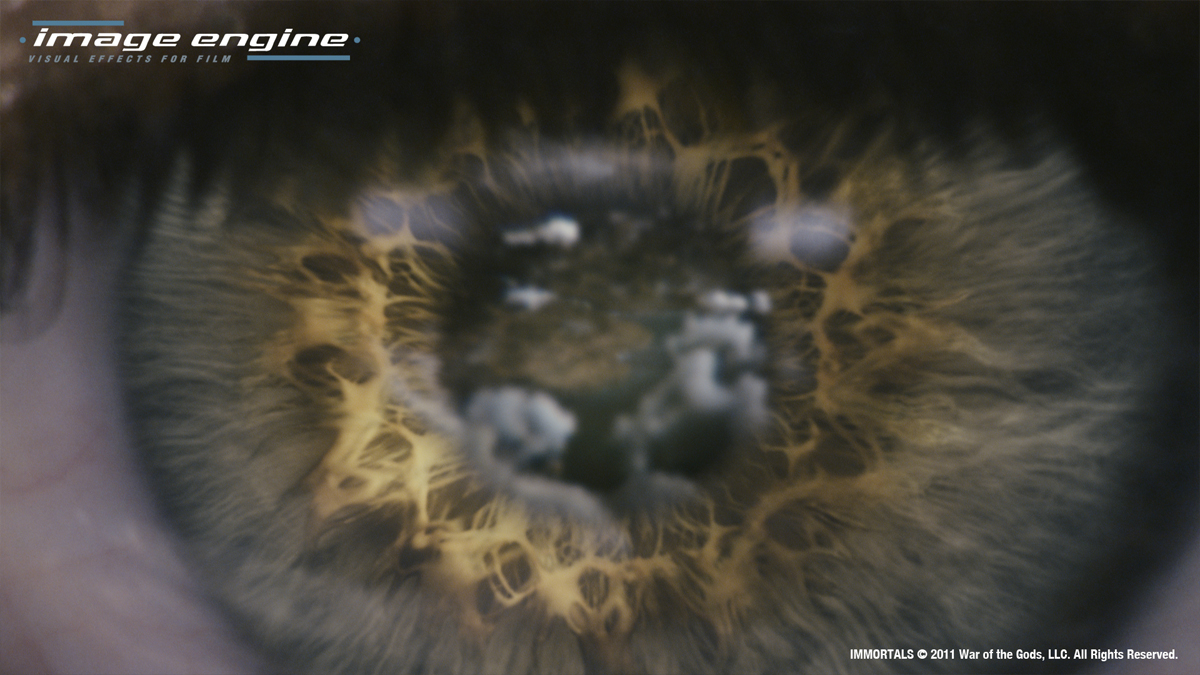
Can you tell us more about the big impressive pull out shot that start at the village and finish in Athena’s eye?
We knew the shot was going to be massive in scope right from the start of the project. We didn’t know just how much of the vista we were going to see, how much would be covered by cloud, etc. We did a lot of concepts and back and forth with the clients. In the end not very much stayed the same as the look of the cliff and terrain was still being worked out.
While that was going on we started on the transitions & plate work. The 1st plate of the village set was shot on a zoom lens, pulling out from long to ~18mm. We had to transition from the zoom out to a dolly out which would fly us up into the heavens, with all the parallax that implies. So in Nuke I projected the plate on the village/cliff geo, but had to get roto of all the soldiers to stand them up on little cards all around the set, and a clean plate underneath them.
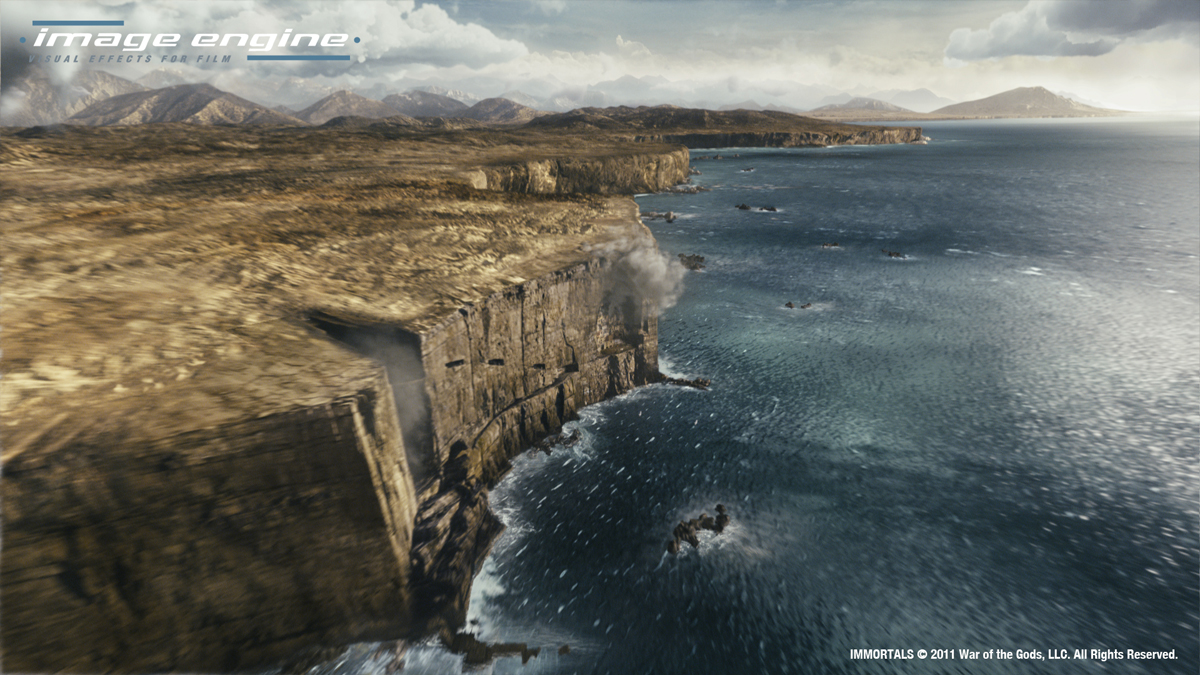
We did a lot of rounds of cliff shape and look, so there was a full 3D render of the cliff, but in the end the closer parts of the cliff were largely augmented by matte paintings projected onto the geo. Because we started so close and ended seeing the whole near cliff, there were four matte paintings at 4-6k each inset within the next. A matte painting was also needed for the terrain on top of the cliff.
The base for the ocean was a wave pattern displaced 3D plane, which we re-lit in Nuke based on a sky dome. To that was added a lot of 2d elements, many layers of crashing waves, whitecaps, rocky formations, and more paintings (did you see a trend here?), to really amp up the interest and break up the clean cg feeling. Janeen Elliott did a lot in comp to bring everything up a few levels.
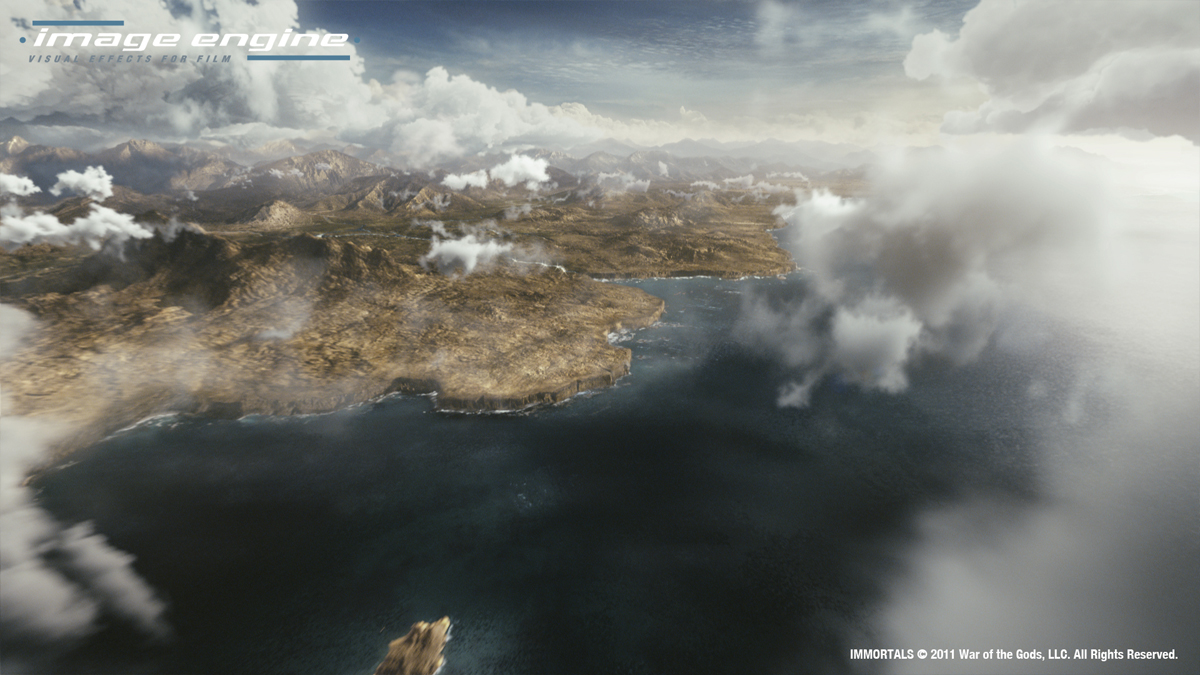
As we were developing the shot, it was clear we would see the same clouds from below as above, which would clearly never work just using photographed clouds on cards. It would also be difficult to find enough aerial views of clouds with the correct lighting and type of cloud. I came up with a method to create clouds using noise patterns and faked lighting, so the shape and lighting could be controlled, and then put them on a stack of cards for each cloud to get a cheap volumetric effect, and even shadows onto the terrain. It was a real hack, and kinda worked! They were limited in that they could only be used for cumulus clouds and not-so-close up.
By far the best clouds were cooked up by Greg Massie in the fx dept, using Houdini. Those are the giant hero thunderhead clouds. The final shot included some of each kind of cloud.
The last piece is the eye transition, which was done in nuke using the plate and, yep, another matte painting. The iris was broken out into several layers and placed in several depths for a bit of parallax to get a sense of overlapping fibers of muscle.
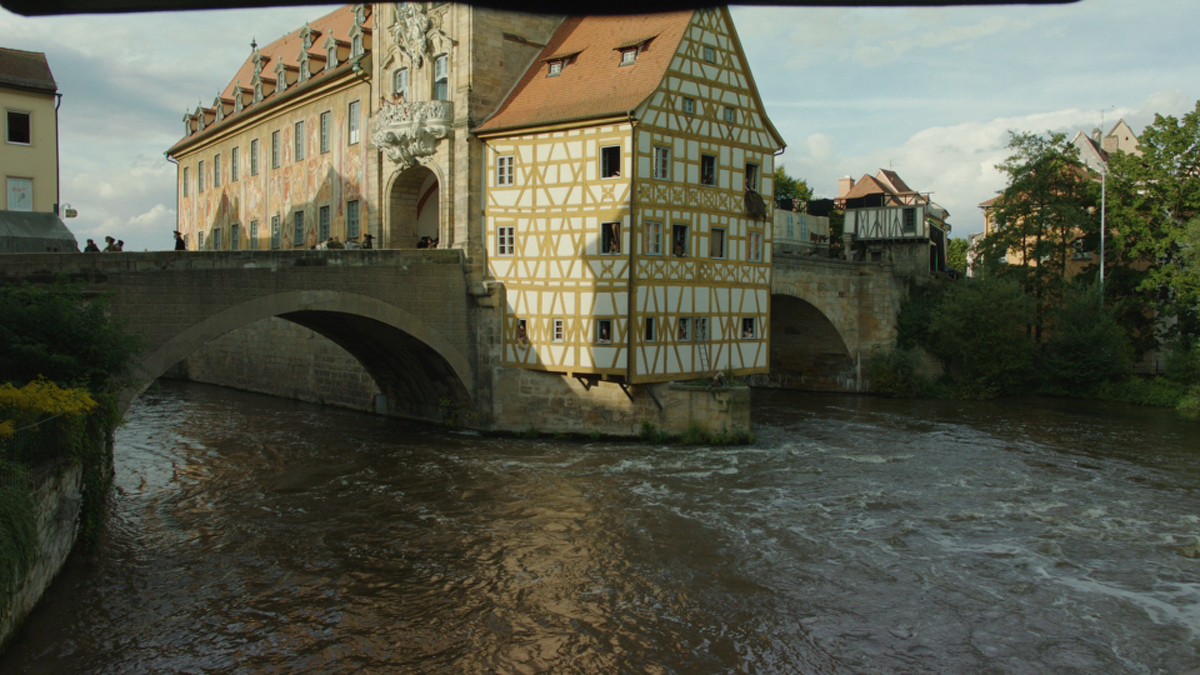
How did you create the set extensions for the tunnel and the monastery?
The monastery shots came to us very late in the production, so we decided we had to be efficient as possible. We came up with a hybrid 3D/matte painting/comp technique, which worked out very well, as we were able to turn around changes quickly, with only 2 artists.
Our 3D artist, Ben Stern, textured and lit the scene as usual, but only rendered 2-5 key frames for each shot that showed the extremes of the camera moves.
In Nuke, I then re-projected the key renders, using the cameras they were rendered through, onto the geo of the monastery. The projections covered all of the monastery that could be seen through the shot camera, so the full frame range could be rendered out of Nuke. It also meant that we could paint and re-texture the monastery in comp. The candelabra flames were 2D elements I shot in the back room of the studio, with some comp tricks to create the light interaction with the candelabras themselves.
// Janeen Elliott: Senior Compositor
Can you tell us in detail the creation of the great shot in which we follow 4 arrows in the air?
I began working on the fly-by shot (where we follow the four flying arrows to the village along the cliff) after it had been initially setup by another artist.
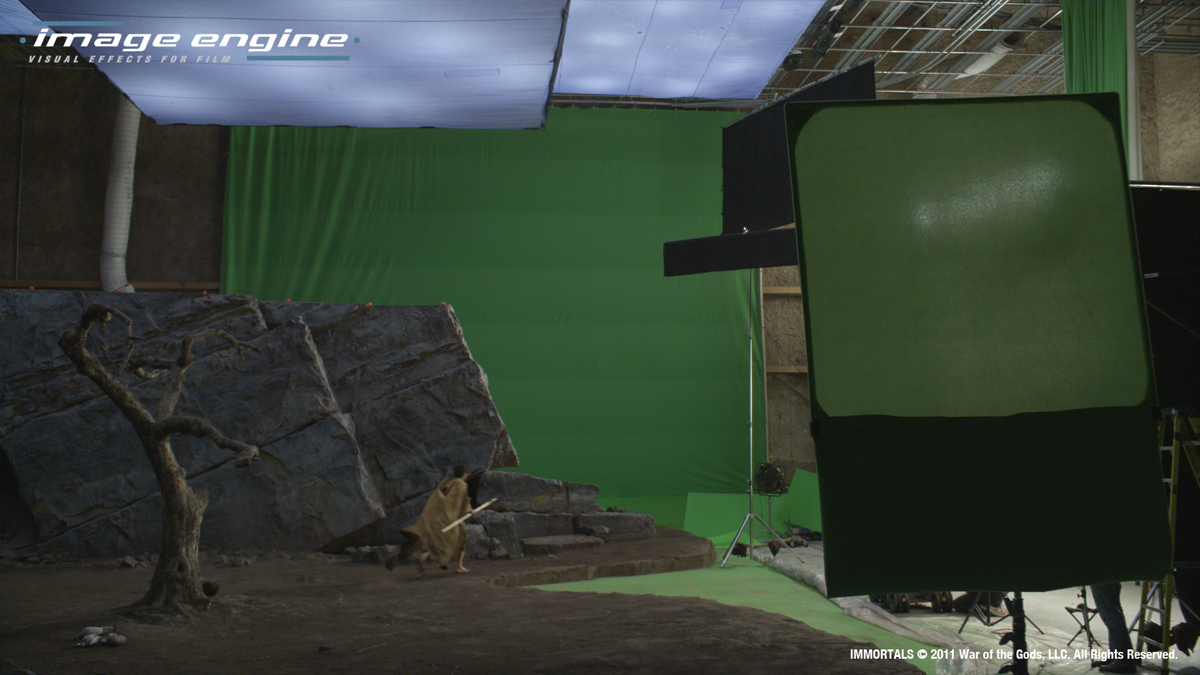
One of the first things I had to do was to tweak the original foreground plate of the hero shooting the final arrow from the bow. The camera move was baked into the plate, and we needed the actor (Henry Cavill) to release the arrow sooner than he was in the plate, so the hand needed to be adjusted. We also needed to lower his arm since the trajectory of the arrow needed to be lower than he was aiming in the plate. Once that was accomplished, the majority of the work I focused on was the cliff face.
We were working with a mix of some CG areas along the cliff face, and some matte painting patches and photographic patches which were projected on to 3D geometry in Nuke. This was a bit of a tricky process in that the geometry onto which we projected our textures needed to simulate the cliff face geometry as best as possible in order to avoid pinching and stretching as the camera went past. We found that we couldn’t use the full CG geo that 3D had used as it was simply too heavy in Nuke.
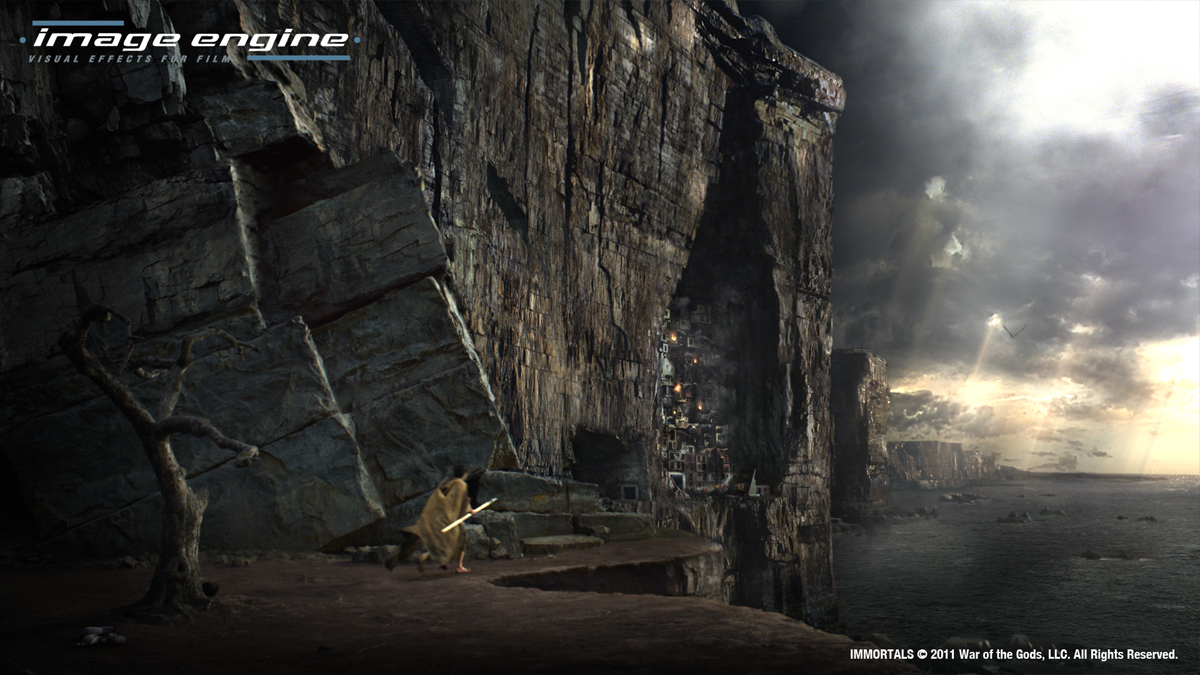
Instead, it was more efficient to use cards in areas that we were updating. Also, we had to use higher resolution matte paintings and photographs the closer the camera got to the cliff face, so there were quite a few cards used along the fly-by. Projections in Nuke also helped us where we had notes to adjust the look of the village. Certain buildings needed to be changed for color, or to add fire scorch marks, and we were able to use Nuke’s projections with rotoshapes to easily track the rotoshapes to the desired building to make the change quickly.
Also of course, this helped in blending in the CG buildings with the live action ones of the plate where the actors where shot. Projections were used again in the water area as well. We used them to project clips of live action waves crashing along the cliff face, and the rocky outcroppings.
I also applied the established magic arrow look to the four flying arrows as well as created the look for the impact that those arrows would have upon their targets. Of course there was quite a bit of overall adjustment to color to all aspects of the shot, and the final god rays were also applied as a final touch.
A big thanks for your time.
// WANT TO KNOW MORE?
– Image Engine: Official website of Image Engine.
© Vincent Frei – The Art of VFX – 2011