ROBIN HOOD: Richard Stammers – VFX Supervisor – The Moving Picture Company

After starting his career in 1992 at Animal Logic, Richard Stammers joined MPC in 1995. He participates in many projects of the studio and work as vfx supervisor on such movies as WIMBLEDON, THE DA VINCI CODE and its sequel ANGELS & DEMONS or ELIZABETH: THE GOLDEN AGE.

What is your background?
I trained as a graphic designer in 1991, but my final year at university was spent predominantly doing traditional animation. My first job in the industry was at Animal Logic in 1992 where I was employed as a junior designer creating televising graphics and animation. Whilst I was able to learn the vfx tools of the trade in Australia i kept my design roots and upon returning to London I split my time between vfx compositing and designing/directing TV graphics and commercials. I joined MPC in 1995 to focus entirely on creating visual effects initially in commercials and later making the transition to features in 2002.

What did MPC do on this movie?
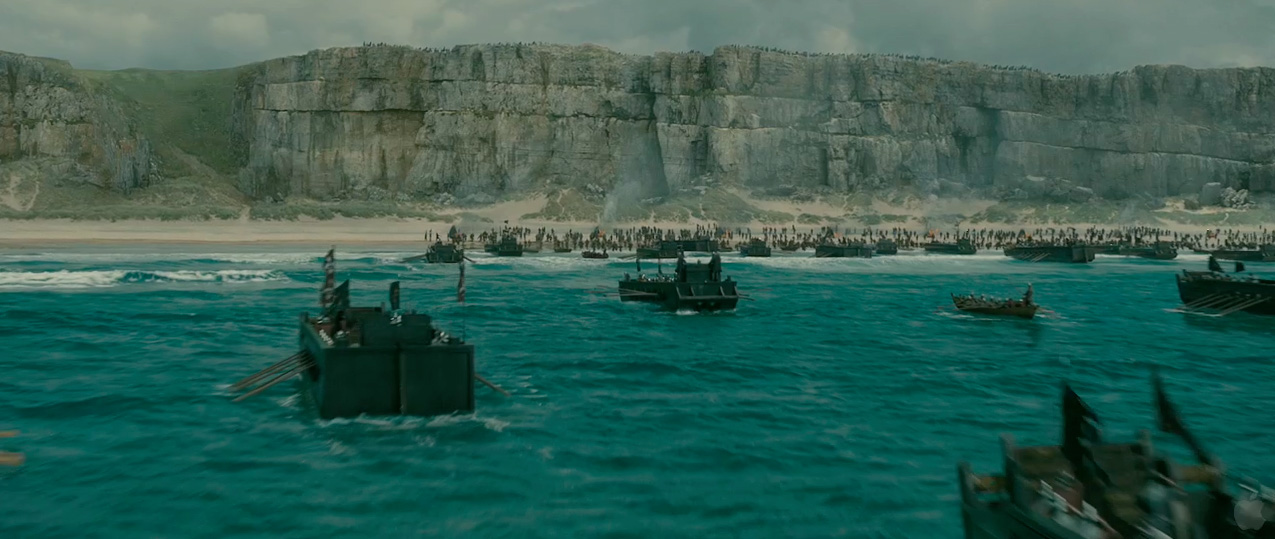
One of MPC’s main challenges was to create the invading French Armada and the ensuing battle with the English army. A CG fleet of 200 ships and 6000 soldiers were added to the 8 practical boats and 500 extras used in principal photography.  MPC used Alice, its proprietary crowd generation software to simulate the rowing and disembarkation of French soldiers and horses, with all water interactions being generated using Flowline software.  The defending English archers and cavalry where also replicated with CG Alice generated clips and animated digital doubles. MPC relied predominately on its existing Motion Capture library for much of Robin Hood, but a special mo-cap shoot was organised to gather additional motion clips of rowing and disembarking troops and horses.

MPC’s digital environment work was centred on two main locations; London and the beach setting for the French invasion and final battle.  A combination of matte painting and CG projections were used to recreate the medieval city, which featured the Tower of London and included the original St. Paul’s Cathedral and old London Bridge under construction, in the city beyond.  The production’s football field sized set provided the starting point for MPC to extend vertically and laterally, and in post production alternate digital extensions were also created to reuse the set three times as different castle locations.  Each extension was a montage of existing castles chosen by Ridley Scott and production designer Arthur Max.  For the beach environment, MPC had to create cliffs that surround the location, and were added to 75 shots.  Once approved in concept, the cliff geometry was modelled using Maya and interchangeable cliff textures were projected depending on the lighting conditions.

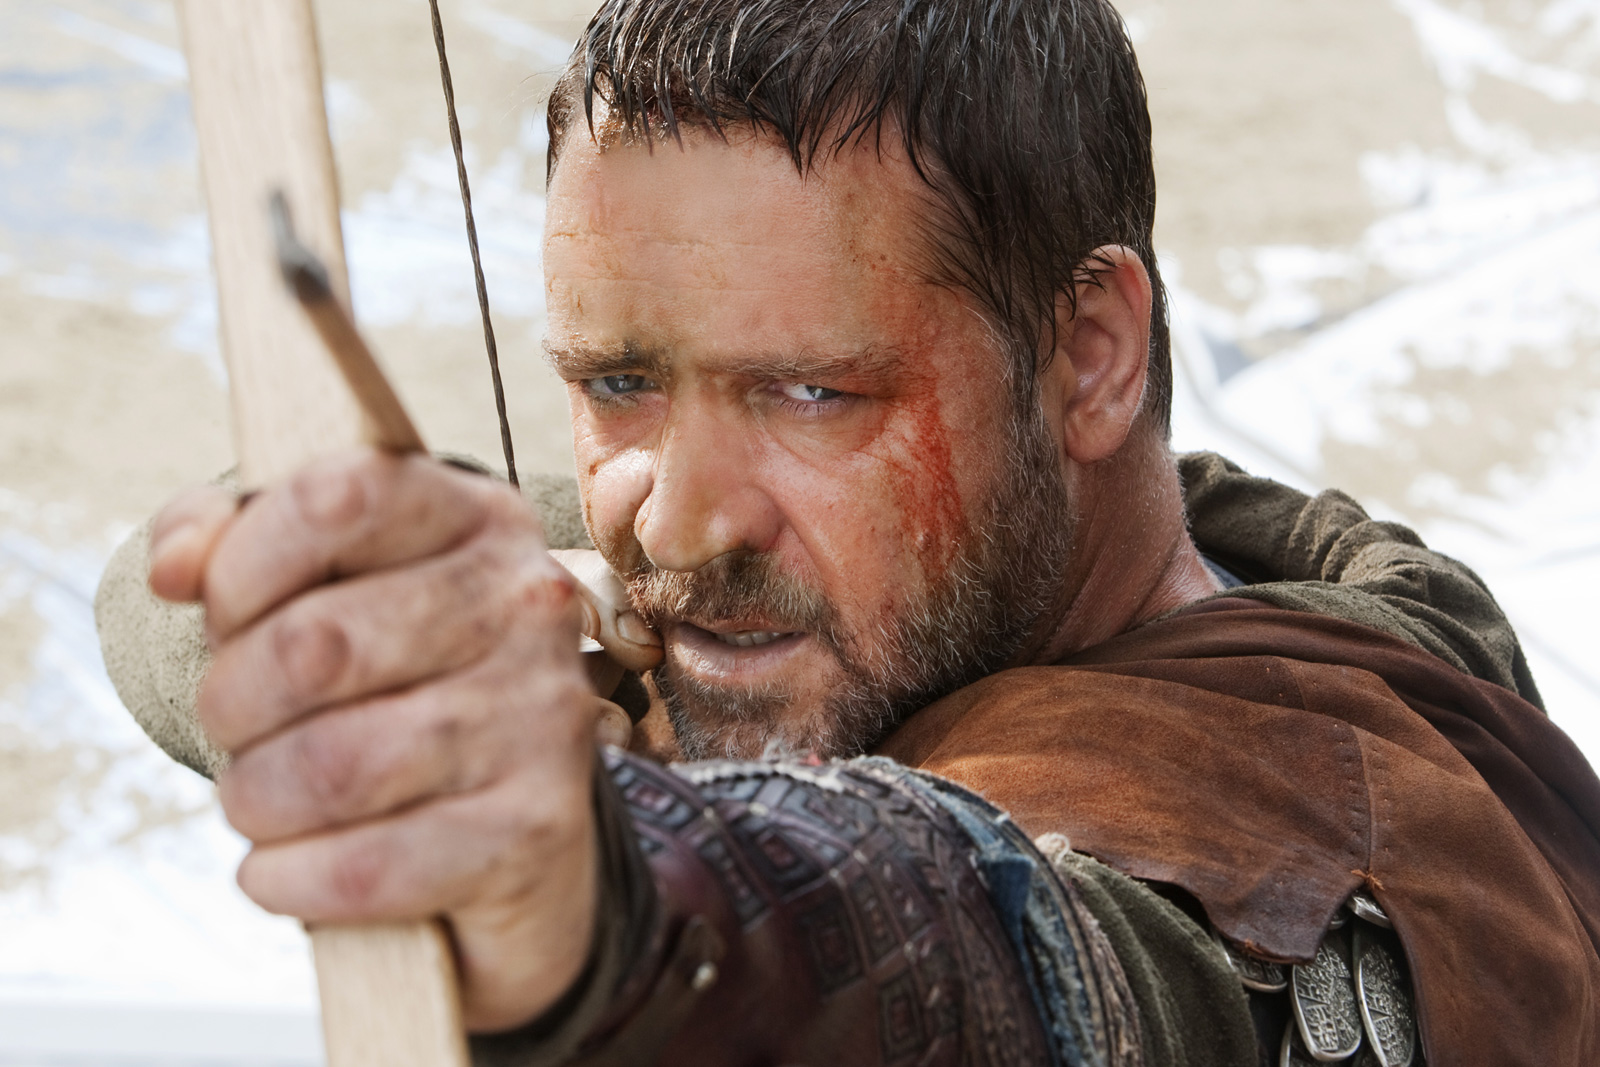
MPC was also responsible for creating the arrows for various sequences on the film.  Practical blunt arrows were used in production where ever possible, but most shots presented safety issues so digital arrows were animated instead.  Arrows were added to over 200 shots, with 90% of these being handled by the compositing team using Shake and Nuke.  MPC developed proprietary 2D and 3D arrow animation tools to assist with the volume of arrows required, which included automatically generating the correct trajectory and speed, and controls for oscillation on impact.

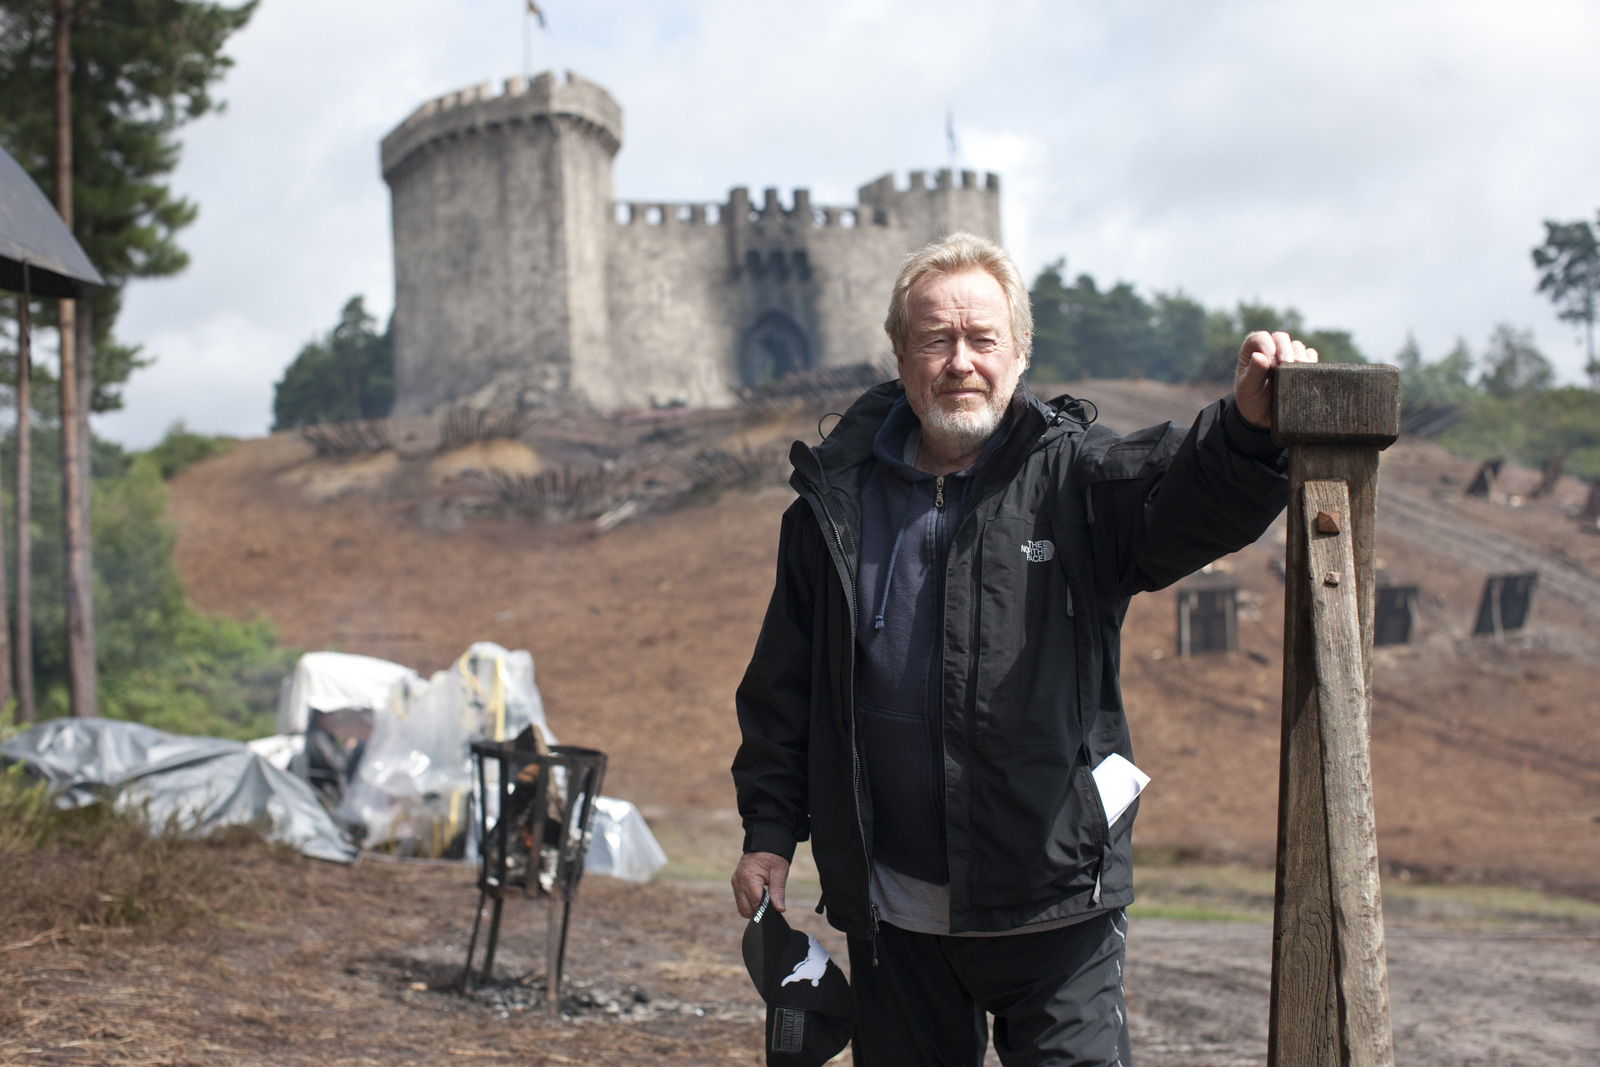
How was your collaboration with Ridley Scott?
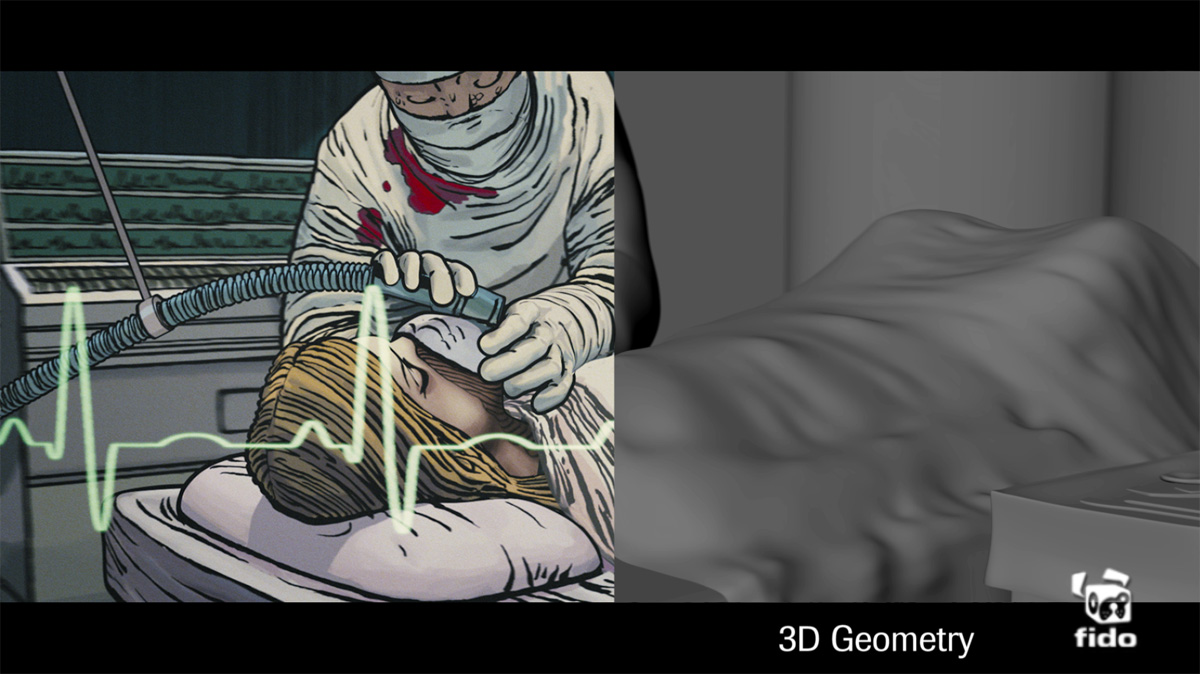
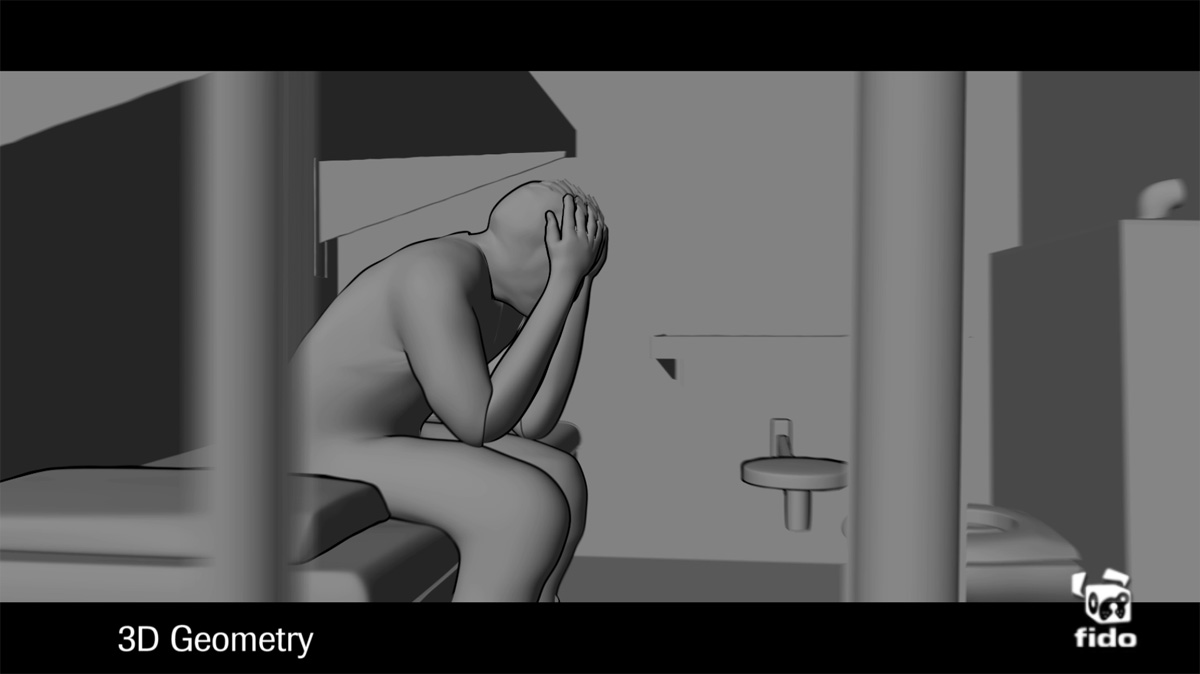
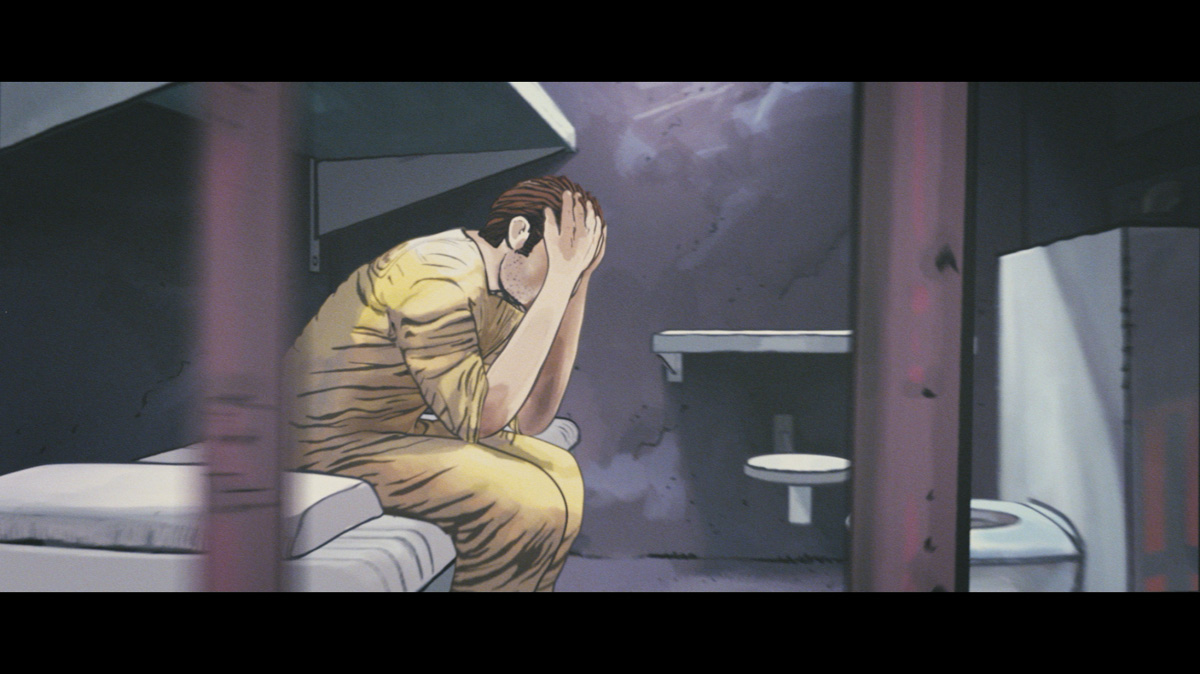
Very good. He’s always very clear and concise about what he wants and also takes an interest in the financial implications of his requirements, and will spend the vfx budget where he feels it’s most suited. He usually would brief me with a quick sketch and would often follow up with a more detail by drawing over a print out of a shot. I’d get my team at MPC to interpret this into the 3d realm as simple un-textured Maya geometry over the plate, and re-present this to Ridley for approval. Where there was any ambiguity over a shots requirements I’d present a few options to choose from, so we had a clear brief before starting any detailed work on a vfx shot.

Can you explain to us the shooting of the French Armada and it’s landing?
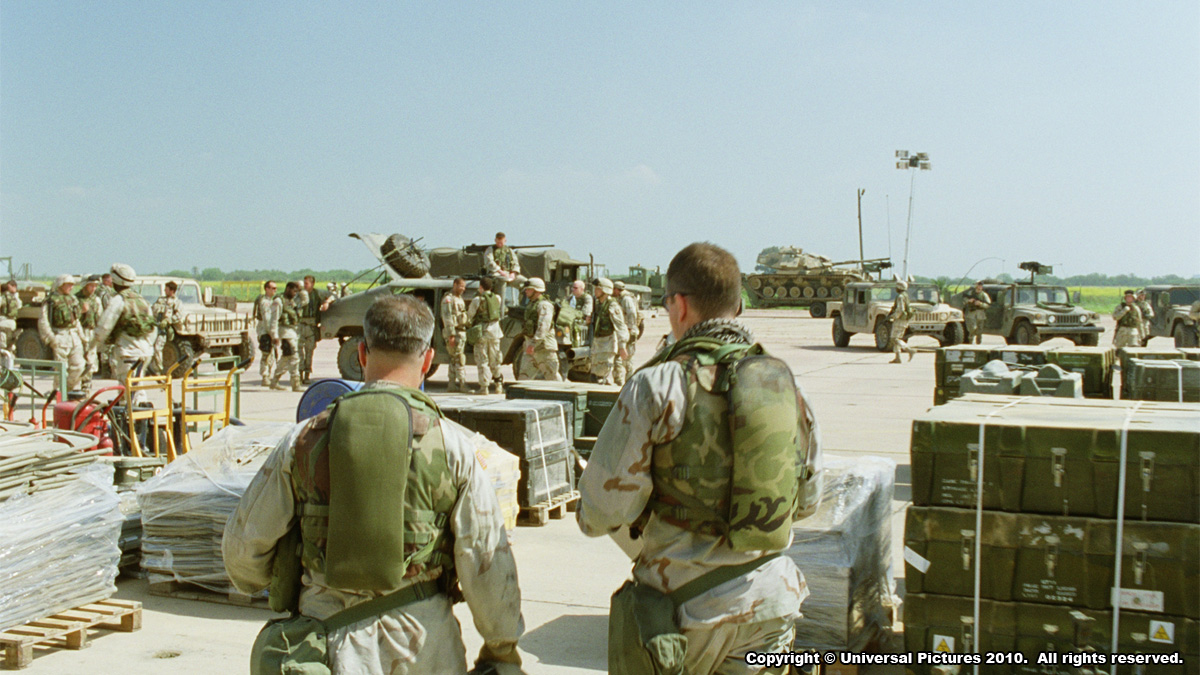
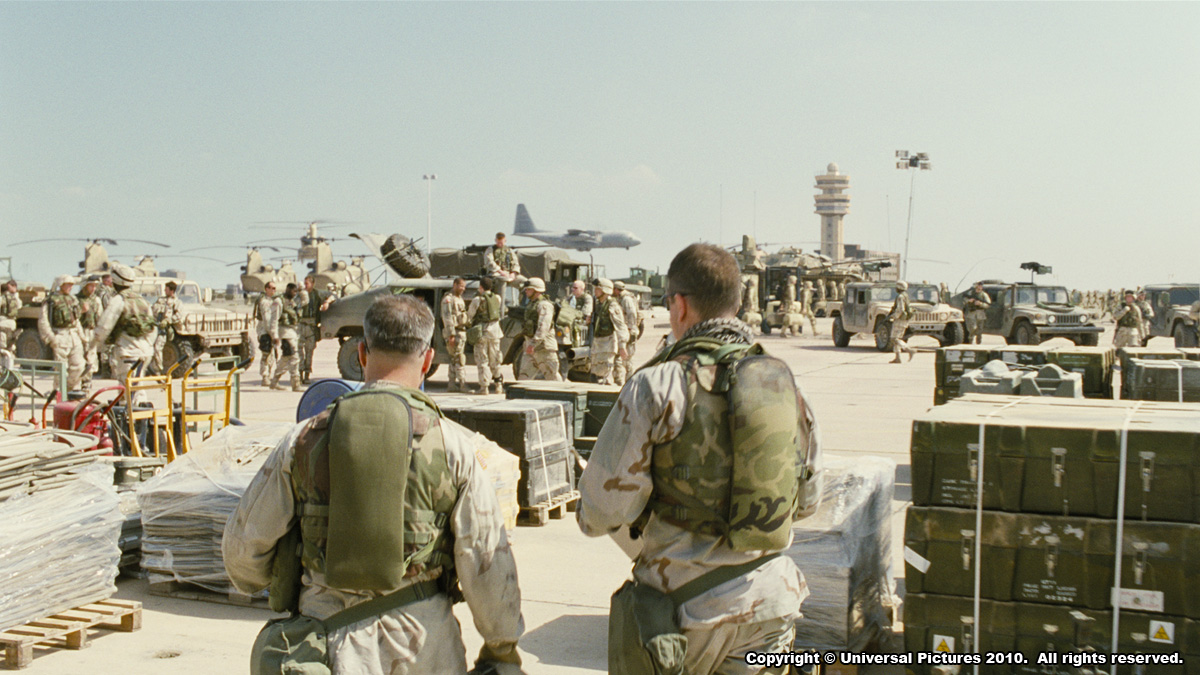
The location for this shoot was at a beach called Freshwater West in Pembrokeshire, Wales. The crew of up to 1000 people were there filming for 3 weeks, in order to capture enough footage for the 20 minute screen time the battle was edited to. Further time was scheduled at Pinewood studio’s Paddock Tank and Underwater Stage to complete some of the shots that were considered impractical or too dangerous to achieve on location. The production where able to create 4 real working landing craft and 4 rowboats to represent the armada, and as many as 500 extras on some days. Ridley’s shooting style for this battle involved staging large scale performances each lasting 4-5 minutes and get as many cameras covering the shots he needs. This would take some time to set up and rehearse, and then it would be frenetic for a few minutes whilst they shot. He’d do several takes then move on to the next key stage of the battle.

The shooting conditions were extremely difficult and varied which caused great continuity problems. Changing light and weather created the usual inconsistencies, but the changing tide moved at 1 meter per minute so the size of the beach constantly was fluctuating, and the shooting crew had to be equally mobile, with all equipment on 4×4’s or trailers. For the vfx crew this meant the 10 cameras Ridley was using were moving constantly, so wrangling all the camera data and tracking markers, essential for our mactchmove department, was a huge task. We overcame much of this by capturing all camera locations with Lieca Total Station surveying equipment, and later incorporated the data in to a Maya scene with a LIDAR scan of the beach location. All cameras were armed with zoom lenses to deal with Ridley’s constant request to reframe for particular compositions he wanted, and often we’d find takes that had been shot half a dozen different focal lengths. Despite me reminding Ridley that we needed to avoid zooming during takes (because of the added complexity of the matchmove process) inevitably some of the shots later turned over to MPC were incredible difficult to work with.

How did you create those shots and what was the part of CG in the plates?
During the end battle most of MPC’s work was supporting what was already present in the plates, in some cases the number of extras was sufficient, and we’d be only adding a few boats into the background. But with 10 cameras filming and only 8 practical boats, most shots needed MPC’s digital armada, CG soldiers or environment work to augment the background. There were also a handful of wider shots that where MPC created the entire invasion or battle and much of the background landscape too. Each CG shot went through the same basic pipeline: first the film scans would go to the matchmove department for camera tracking and to the comp department for colour balancing to create a ‘neutral’ grade for consistent CG lighting.

The prep team would also handle any clean up such as marker removal or camera crew removal at this stage. Once a Maya camera was available the environment department would handle creating the cliff and the layout team would place the armada, which started from a master boat formation, and animation cycles which could be scaled or offset to suit the conditions of the sea. We usually go through a couple of versions of refinement to make it work compositionally and in context to the cut. Once I had approved the boat layout the crowd and layout teams set to work with our ALICE software to place all the soldiers in the boats and the beach with the appropriate animation. At this stage we’d send a temp version to the editorial team to cut in so Ridley and Pietro Scalia, the editor, had a chance to comment. At this stage we’d know the CG content of each shot and could accurately identify the rotoscoping requirements to create all the mattes necessary to place the cg behind the foreground live action. Whilst we waited for feedback on our layouts we continued into lighting and rendering and got the effects team working on the water interactions for the boats and crowds. Once we’d established a few key shots this process worked well. There was generally little or no feedback from Ridley so we could progress into comp quickly and get the shots looking more final.

Can we explain the creation of a crowd shot with your software Alice?
The first stage of preparing for a large crowd show like Robin Hood is to identify the motions that are going to be required. ALICE has a very sophisticated underlying motion syntheses engine that can take multiple inputs from any combination of motion capture clips, keyframe animation cycles & physics simulations which it can manipulate to give us the resulting simulations we see on screen, this gives us a great deal of freedom when deciding how to tackle a show.

For Robin Hood we relied predominately on MPC’s existing mo-cap library but extended it with new mo-cap data captured over a 2-day shoot, specifically targeted towards the disembarkation of soldiers & mounted cavalry, along with the rowing motions for the boat crews in each of the different boats. Once all the new motions arrived at MPC they were processed into the existing library through our motion capture pipeline, where our crowd team started to the create the motion clip setups and motion trees which would drive the agents for the whole show.

With ALICE being fully proprietary it allows us to quickly write anything from a new behaviour, such as inheriting motion from the boat the crowd agent is occupying, to simple tools that automate and simplify tasks for other departments. For the first time ALICE was used by our Layout department who took on the challenge of populating the whole Armada.

The crowd team produced a large number of different caches for each of the different rowing motions and disembarkations required for the various different boats. We then wrote a simple interface, which the Layout team could then use to rapidly set-up, randomize, change, and offset the caches to populate all of the boats in a few simple steps.

Once the first pass had gone through layout, the crowd team would take over any of the shots, which required more complex simulations to top up the action. This generally involved tweaking/adding to the disembarking to make it feel more chaotic, ranging from people being dynamically hit with arrows to stumbling through the water whilst providing the data required for the FX team to add in the interactions.

Once I was happy with the combined work of crowd and layout the next stage was to do the cloth simulations for all of the agents. Most agents only required the looser cloth of the lower body and any flags that were being carried to be simulated and this was handled by ALICE’s inbuilt cloth solver, before the resulting caches automatically flowed into FX and lighting departments.

There are a very large number of arrows that are drawn in this movie. How did you manage this?
Knowing that we have a large number of arrows shots on the show, meant we needed an efficient process to deal with them. I’d had great success on a past show Wimbledon (2004) animating tennis balls to mimed rallies, much of which was achieved as a 2d only compositing solution in shake. I felt that we could do the same on Robin Hood, as the trajectories were similar, but even simpler. One of the shows compositing leads, Axel Bonami took the process further by developing a series of shake macros, which only required the artists to place the start or end position of an arrow. The macro would use a still of a real arrow at the most appropriate perspective to work for the shot and then automated the animation process. He added further controls for impact oscillation to so the artists if necessary could dial this in. Arrows were added to over 200 shots, with 90% of these being handled by the compositing team using Shake and Nuke. MPC also developed proprietary 3d arrow animation tools to assist with large volumes of arrows where the 2d solution was unproductive. This was essentially a Maya particle system but could be tied into to the ALICE pipeline to allow crowd agents to fire arrows or be killed by them.

How long have you been working on this project?
I started in March 2009, and we delivered our final shot on 12th April 2010, so around 13 months in all, which seems to be about the minimum these days for VFX supervising a show right the way through.

What was the biggest challenge?
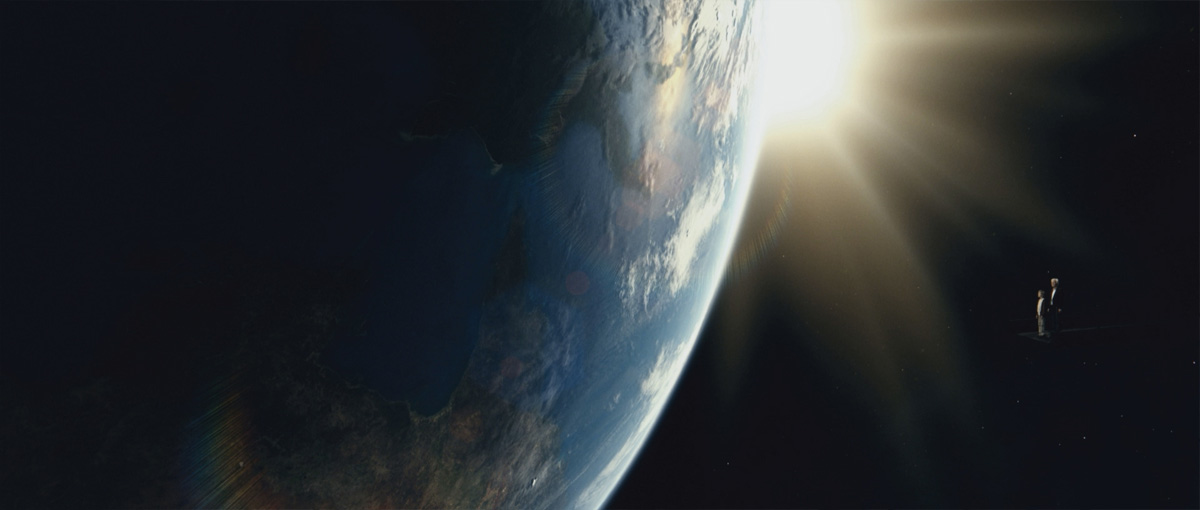
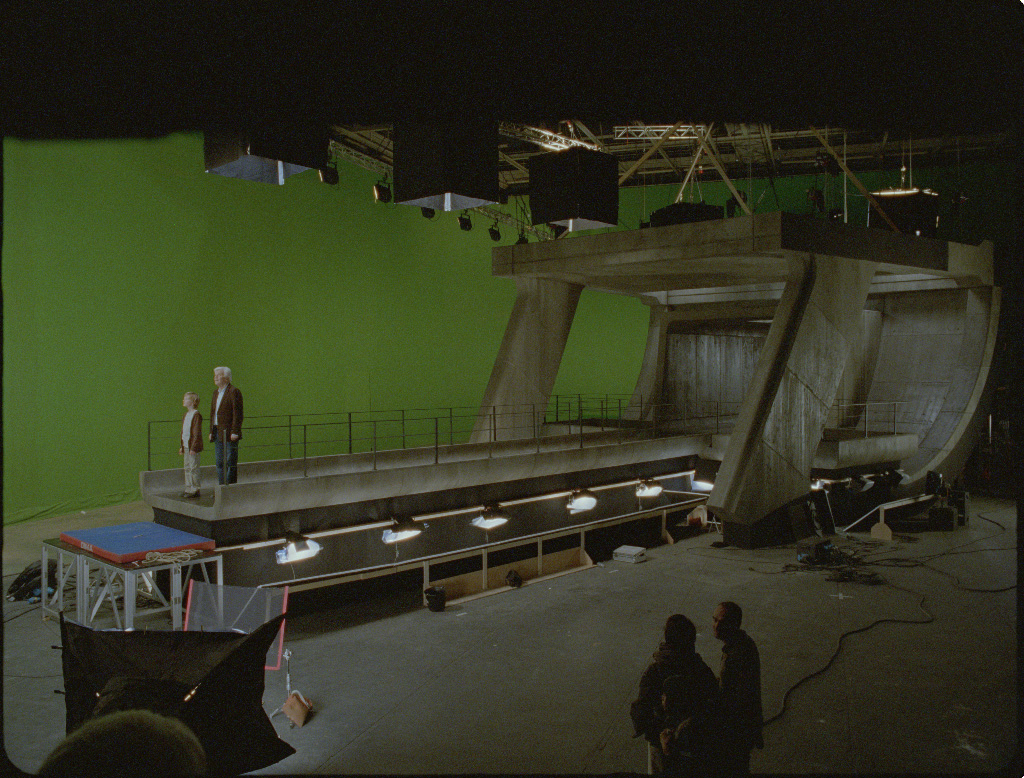
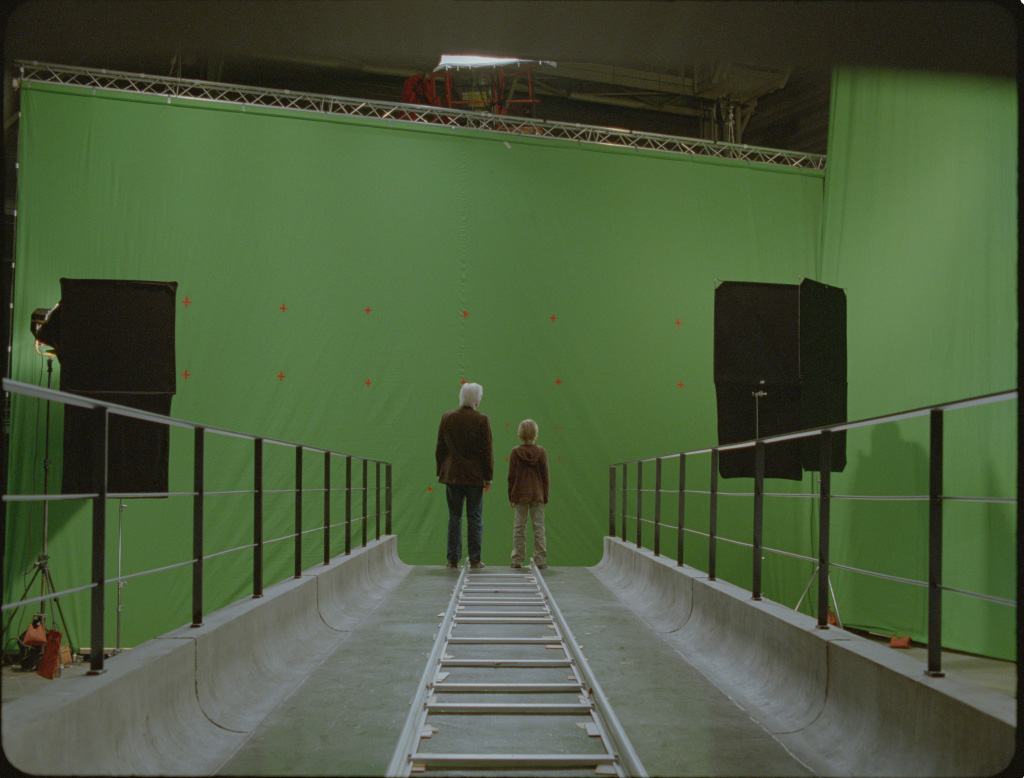
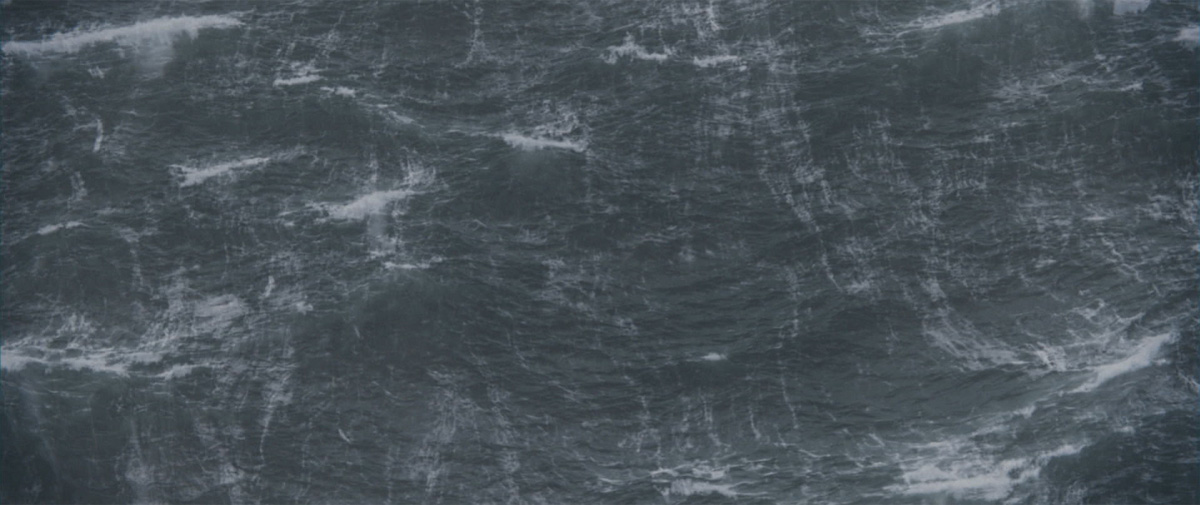
There’s a sequence of shots where the merry men return to England in King Richard’s ship. The production weren’t able to shoot this boat at sea, and Ridley wanted it to be windy and rough so the chances of shooting the right kind of sea plate were slim. It was storyboarded as one wide shot only so we looked into stock footage to use, but Ridley wasn’t happy with any of the options. Instead he turned to a previous film of his, ‘White Squall’, and cut in a sequence of shots from there, which featured a modern sailing ship and included insert shot of the sails. The 5 shots we created involved replacing this ship with a medieval CG replacement. There were no similarities between the 2 styles of boat, and further more it was so close to camera we had to completely rebuild our asset to a higher level of detail, and populate the deck with CG sailors, horses and windy canopies. We had no camera information for the plate and they were ‘scope anamorphic’ so the machmoves were tricky too. The finals were beautiful – a real testament to the teams that made it all work – a great example of just dealing with whatever gets thrown our way!

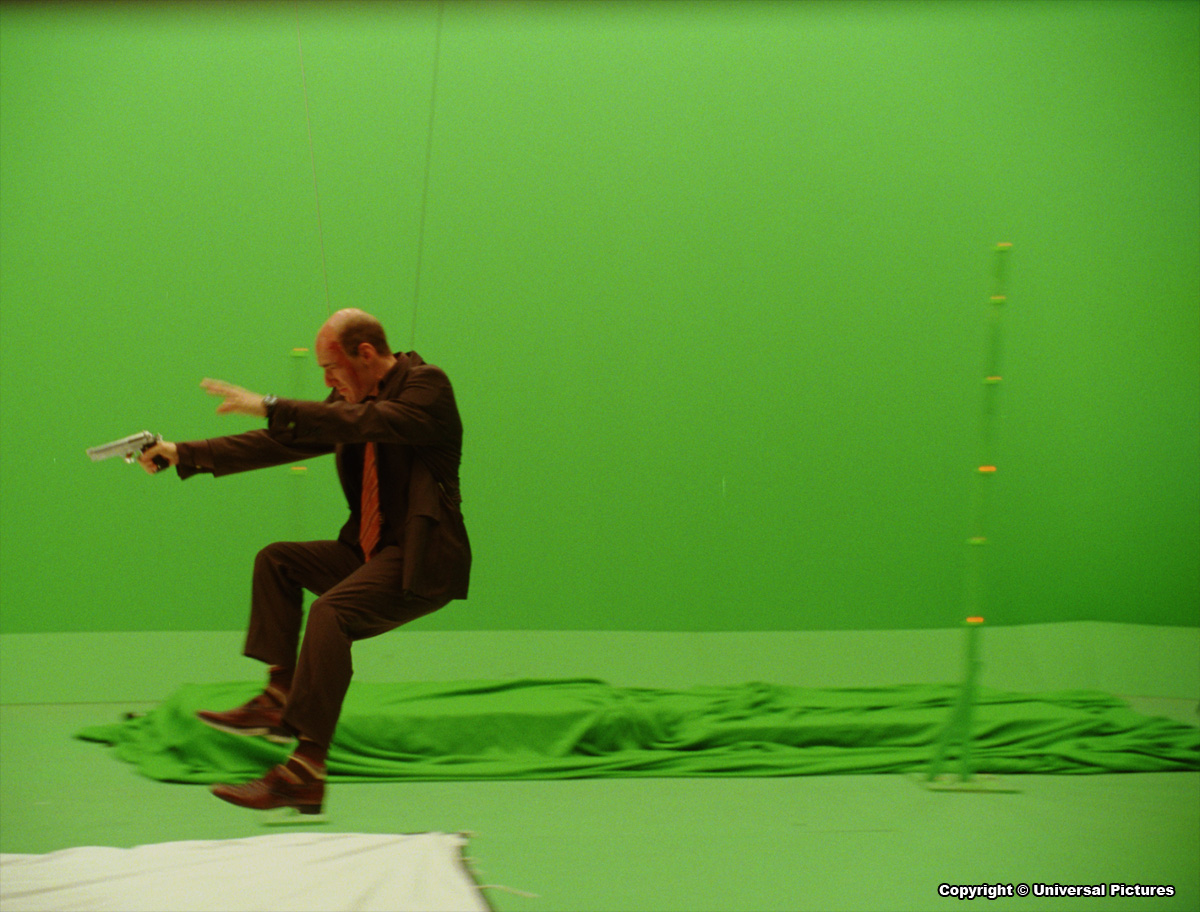
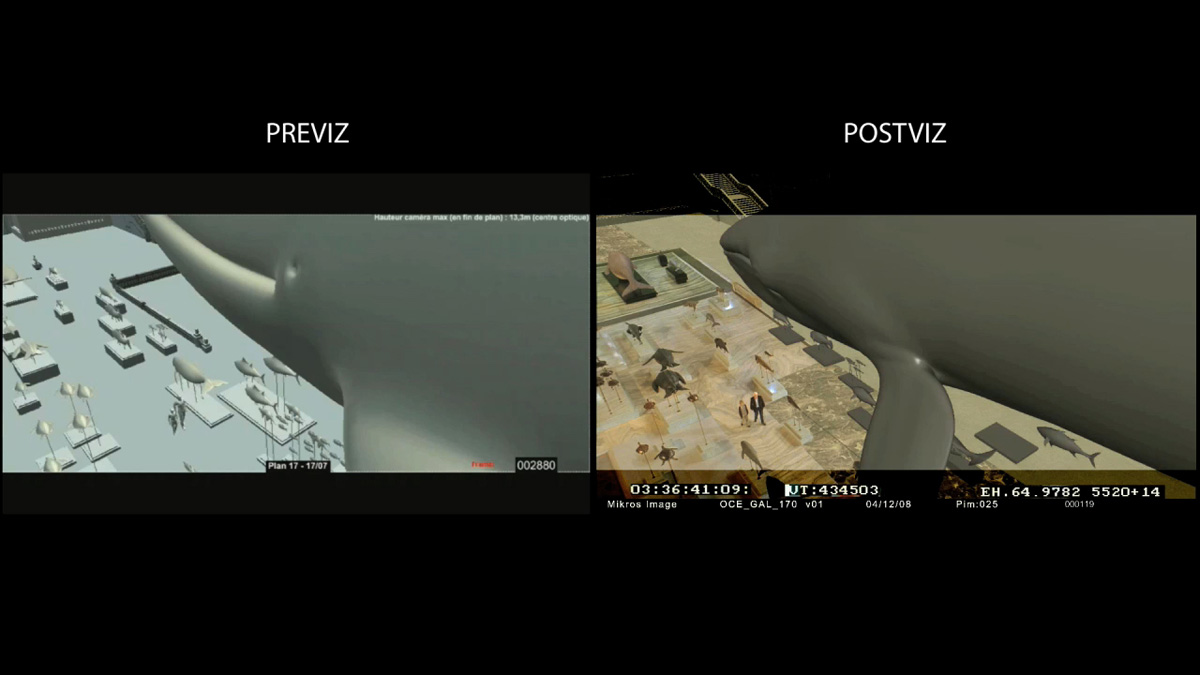
Was there shots that made you lose your hair?
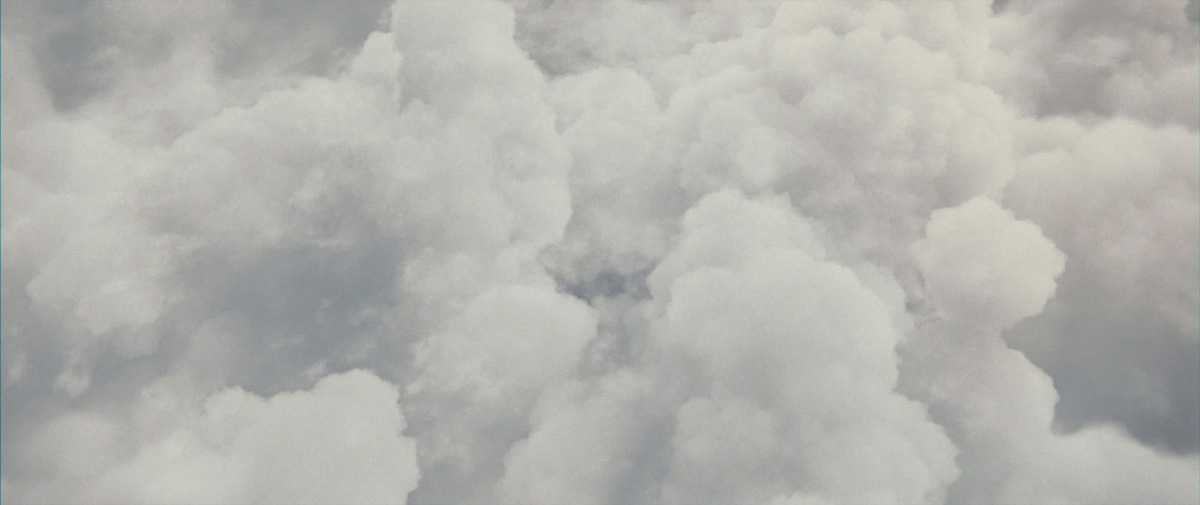
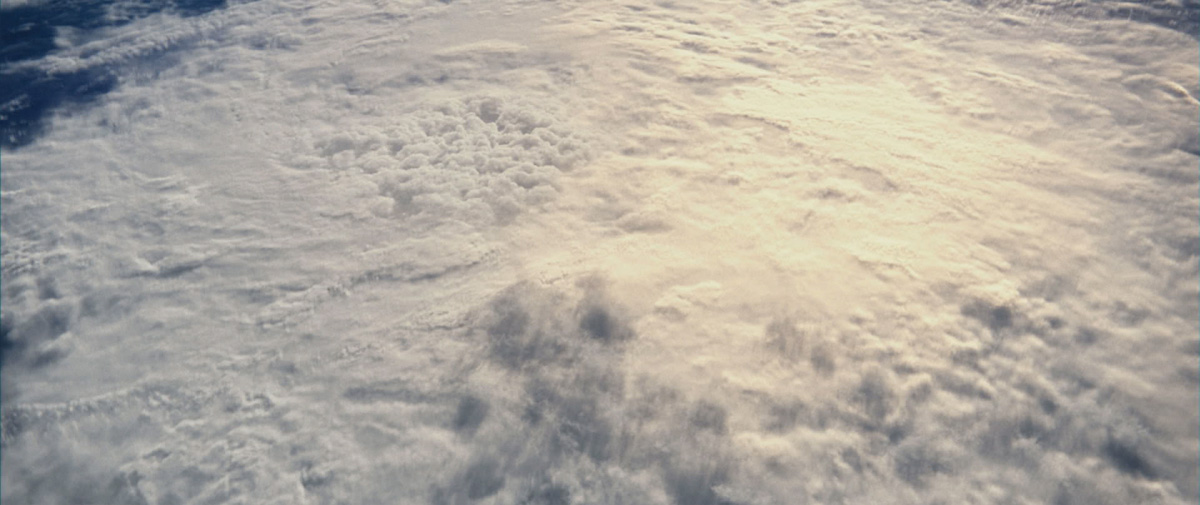
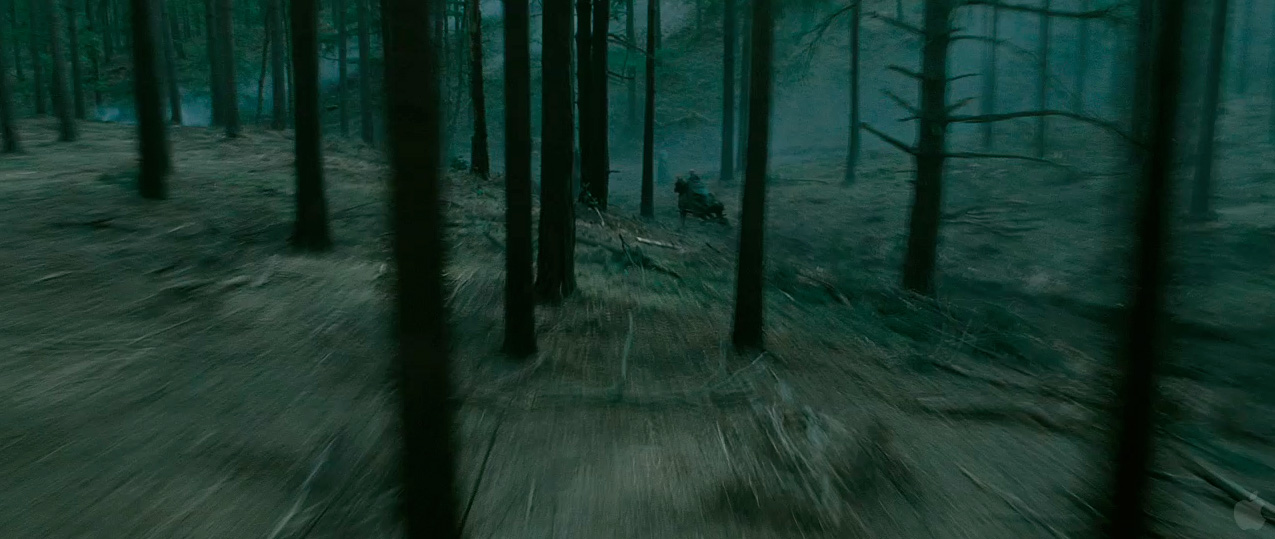
Well things never got that bad, but there were a few shots that I did worry over. One was an arrow POV shot that represents the moment at the end of the film when Robin Hood fires a deadly blow at Godfrey, Mark Strong’s character, as escape the battle on horseback. Pietro felt that this was an important moment in the film that mirrored a similar moment nearer the beginning of the film when Robin wounds Godfrey in a similar attempt to kill him. There were many discussions on how we could shoot it but no clear solution that worked with the limitations of the beach location. MPC created a previs of the shot, as it was important to visualise the key elements required and how we could break the down into achievable chunks. The first half of the shot sees mostly sky and digital environments that we were already creating, but the second half flies right into the back of Godfrey’s neck whilst he galloped along the shoreline. As the shot took place in the shallow waters of the beach, this was something I did not want to attempt as a full CG shot, because of the complexity of recreating the sea. I opted to shoot a moving plate of the beach and sea to match the previs as best as possible, and separately shoot Mark Strong’s stunt double as a bluescreen element, so we could manipulate it to work for the shot.

The practical and cost effective solutions were to shoot the background plate with a miniature helicopter and the foreground stunt man riding a partial mechanical horse, with MPC creating a full replacement CG horse. 20 MPH winds hampered the plate shoot and left us with only a few usable takes requiring significant stabilisation, and the cameras proximity to Godfrey’s neck required a slow Super Technocrane move to avoid injuring him. As we had to speed ramp the shot much faster in post we compensated with the stunt man performing his riding actions in slow motion. It was an uncomfortable set of elements to work with, and required a lot of manipulation to piece together. The final solution involved creating a BG almost entirely in CG but retaining the live action sea, which was camera projected back through our previs camera. Godfrey’s element was successfully pinned to a hero cg galloping horse and we started getting something that was working. But the nature of a smooth arrow trajectory made the shot look so clean and out of context to the surrounding shots, and this is where most of my concern lied. It was always going to be delivered late in the schedule, the last week in fact, and there would be no time to re-conceive the shot in another way if Ridley didn’t like it. So we set about adding as many of the attributes of the surrounding shots as we could. We changed the sky to something less pretty, added camera shake, layers of smoke to pass through, we dirtied up the beach by matte painting extra detail like clumps of seaweed, and added more depth hazing overall. And with the shot carefully graded to match the shot it cut to we had success. It took it far enough away from the feel of the previs, and worked really well in the cut – it’s a great moment in the film.

What did you remember about this experience?
The shot exceeded my expectations, which is always great. As a VFX supervisor you have to be a jack-of-all-trades, but you work with teams of artists who are masters at their disciplines, so you take for granted high expectations – exceeding them is always a bonus.

What is your next project?
Well, nothing confirmed. I’m busy at MPC pitching on possible news shows, but nothing I can talk about yet.

What are the four films that have given you the passion for cinema?
As a student, sequences created by Ray Harryhausen and Terry Gilliam are what inspired me to take up animation. TERMINATOR 2 and JURASSIC PARK both had jaw-dropping moments, which to me pushed the boundaries of VFX at a time when I was quite junior to the industry. They inspired me to do better. I always loved David Lynch’s DUNE and Ridley’s ALIEN, I’m happy to watch these again and again – few films have that effect on me these days.

Thanks so much for your time.

DETAILED SHOT BREAKDOWN

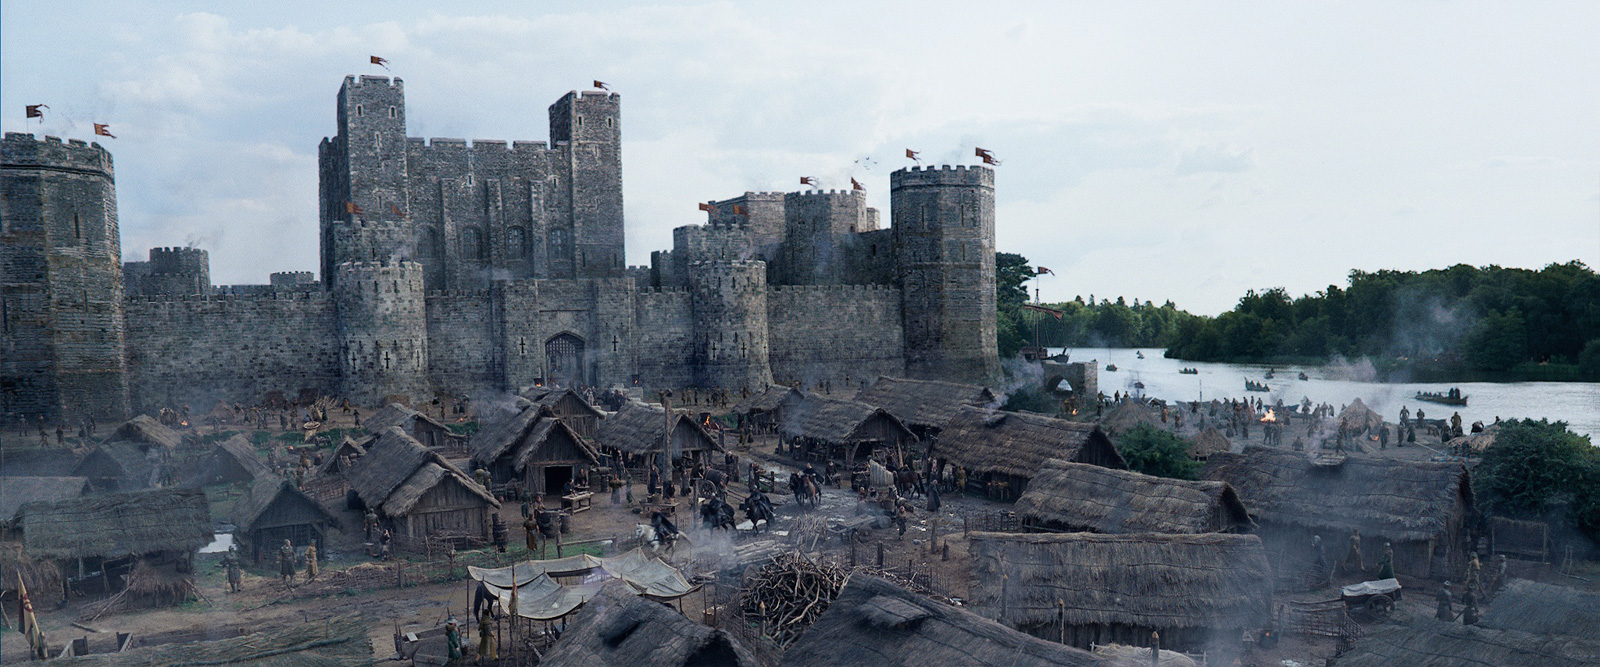
Robin and Merry men leaving the Tower of London.
The foreground live action plate was shot on the backlot of Shepperton Studios. MPC created a digital matte painting of the castle walls, Tower and the river. The element used for the river was taken from a plate shot at Virginia Water, Surrey. Ridley wanted the town of London to be full of life and make the river bank busy like a market, so MPC bolstered the limited number of extras with around 200 CG people in the town, CG guards on the castle and cloned live action boats on the river.  In the foreground additional huts were created to increase the housing density, and multiple layers of smoke were added. When reviewing the final version of this shot at MPC, Ridley said he liked this it so much so he wanted to live there! This is 1 of 14 other London environment shots that MPC created for Robin Hood.

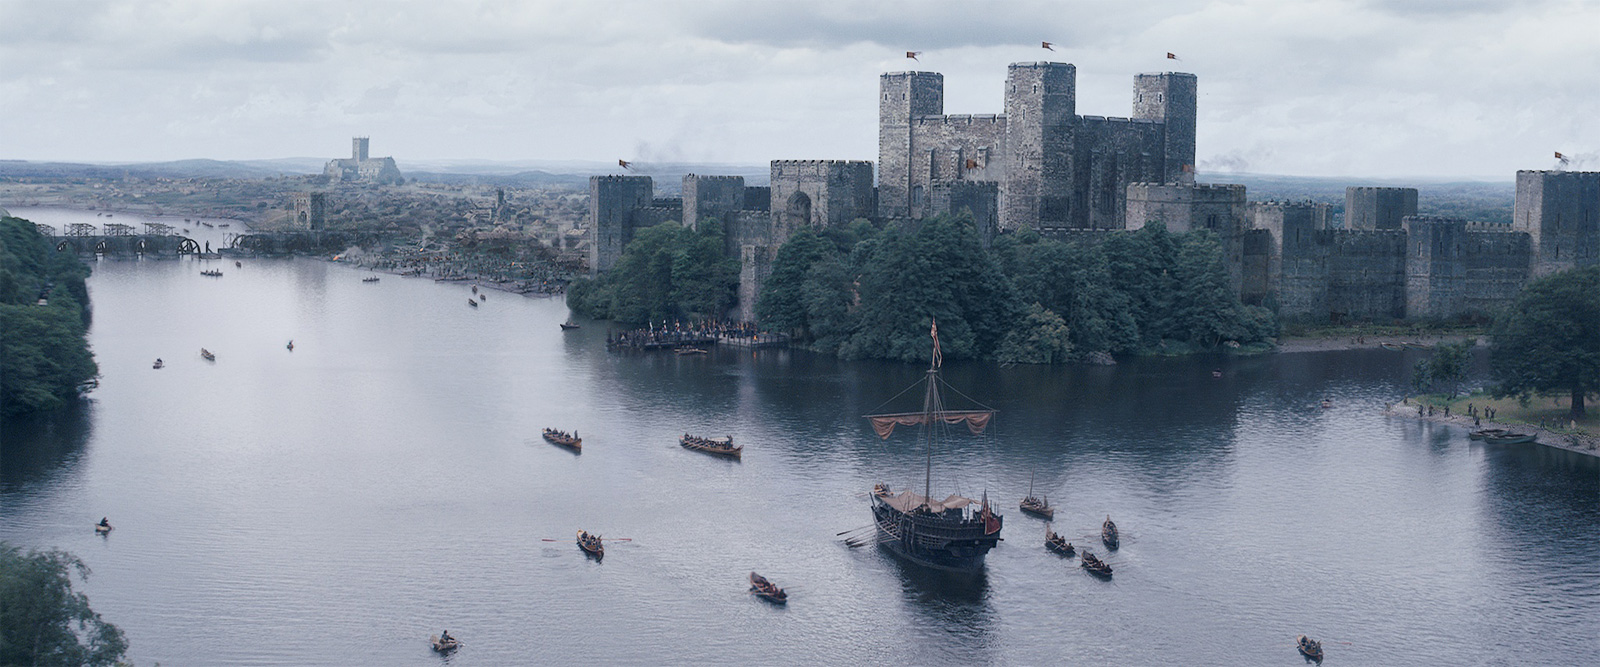
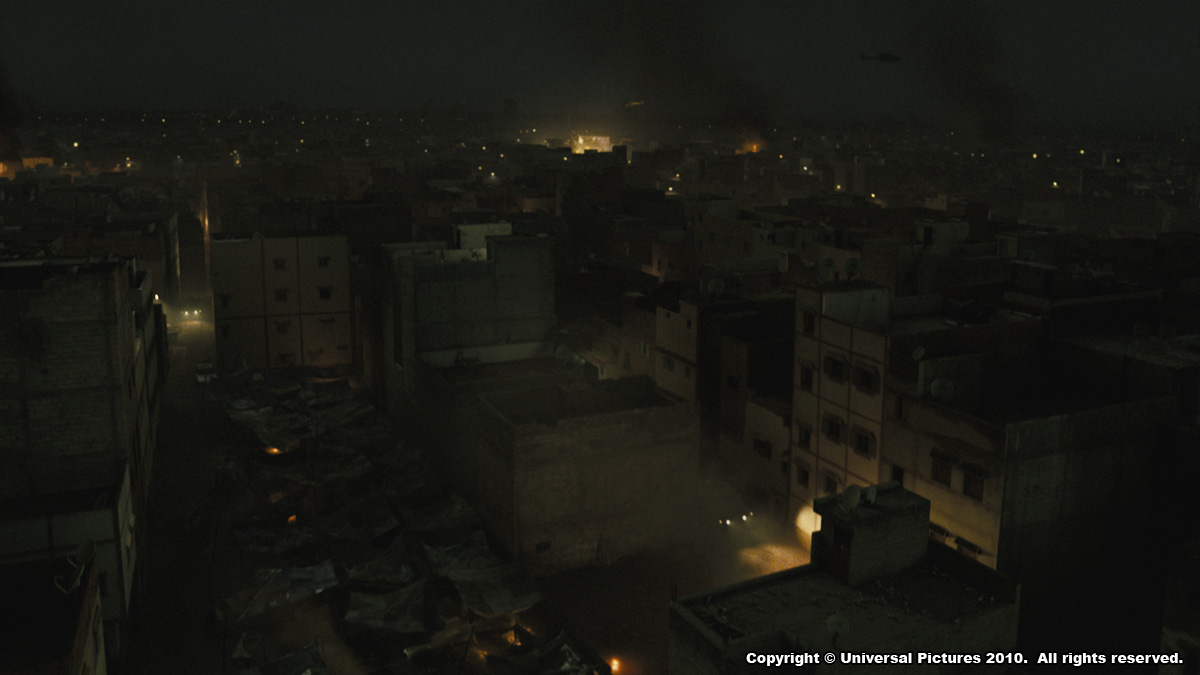
Robin and Merry arriving at the Tower of London in King Richard’s ship.
The live action helicopter plate was shot on location at a lake in Virginia Water, Surrey. The aerial unit used a Panavision Genesis camera for their photography. MPC created a CG environment where much of the original backplate was replaced with the Tower, the surrounding city of London and landscapes beyond.  The design of the Tower and it immediate surroundings were a collaboration between the Visual Effects and Art Departments, with the final layout and orientation coming from meetings with Ridley Scott, production designer Arthur Max and visual effects supervisor Richard Stammers. Whilst quite a substantial set was constructed as a river-side entrance to the Tower, the jetty, wall and archways occupied such a small part of the plate in this case, but provided MPC with the ‘anchor point’ to add their digital extensions. Environment lead Vlad Holst built the city in Maya with basic geometry to represent all the key features. This was presented to Ridley for comments and some adjustments were made before all the matte painted projections were started. The final DMP’s created by matte painter Olivier Pron extended the city to the horizon and incorporated the original stone London Bridge under construction, and old St Paul’s Cathedral in the distance. The lake was extended to become a river as a rendered CG element, in order to incorporate all the reflections of the new digital environment. The banks were populated with CG boats and CG crowds gathered to witness what they believe to be King Richard’s return from the crusades. King Richard’s ship and some of the foreground rowboats were in the original plate, but these were added to with 2d replications, and the motor wake of Richard’s ship was removed.

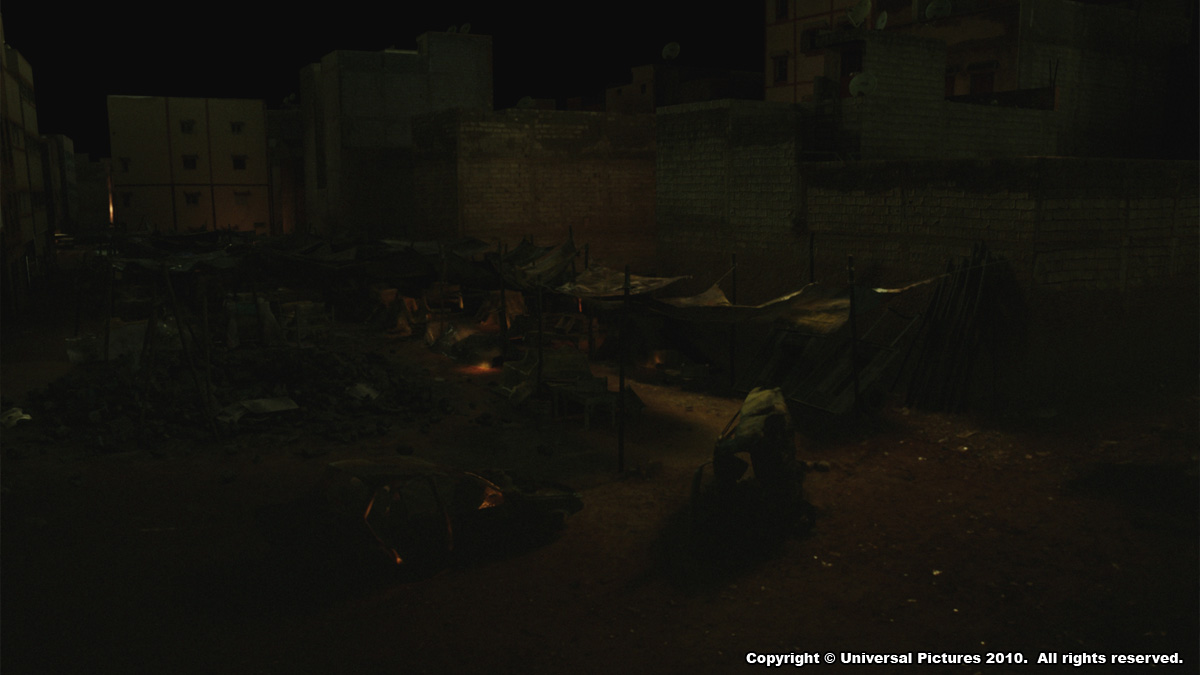
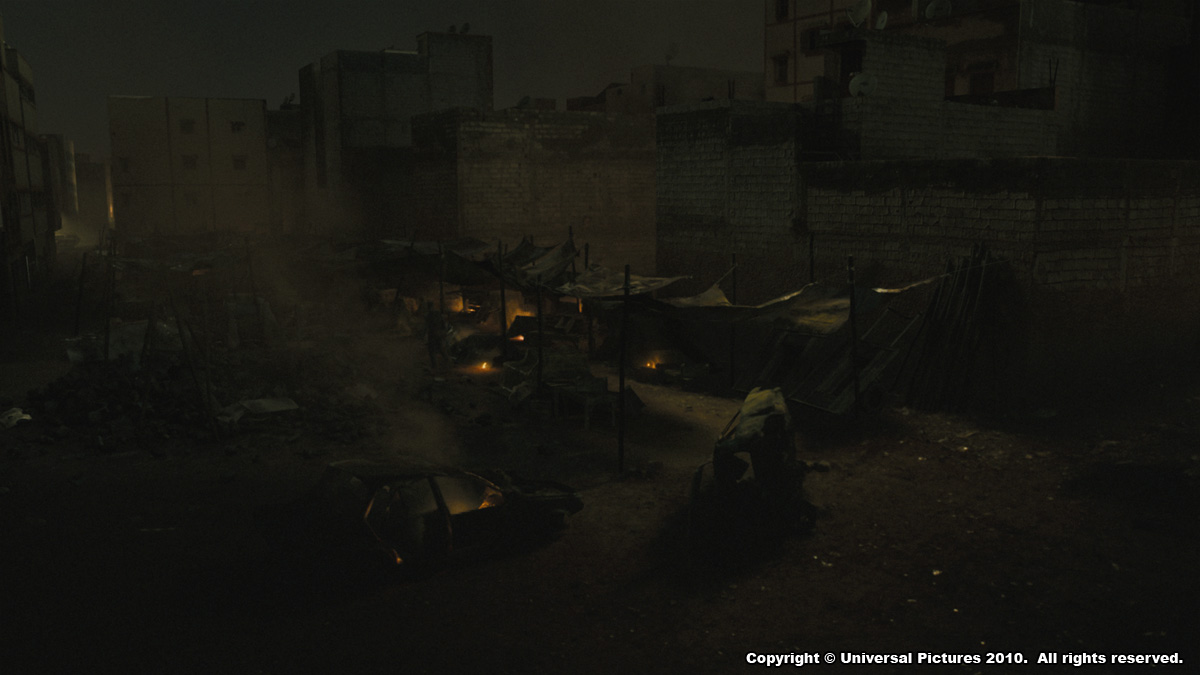
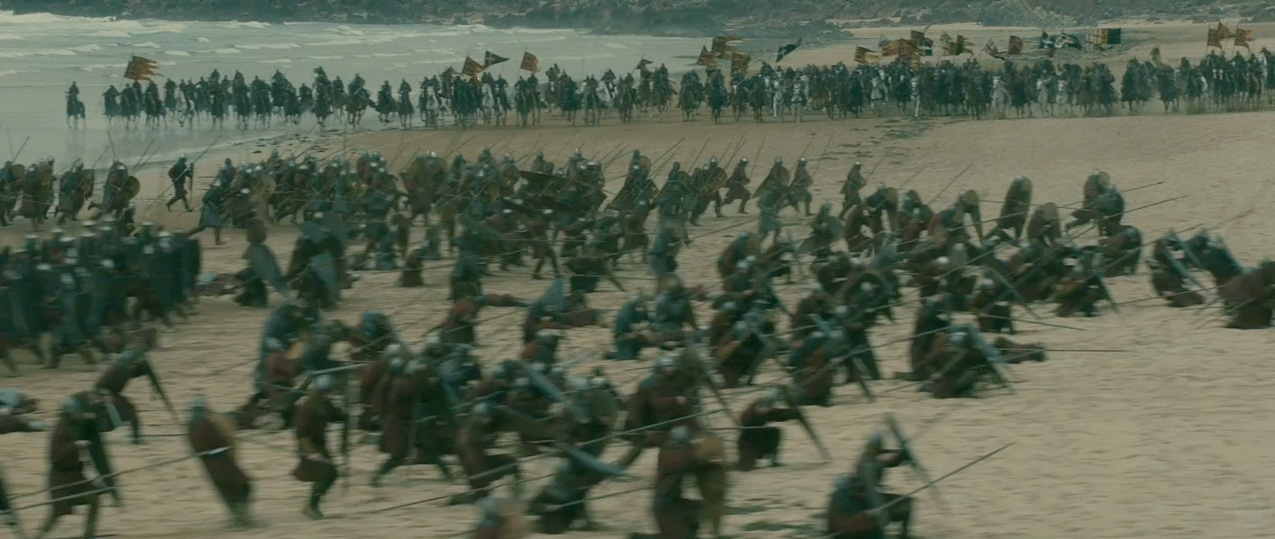
The combined armies of King Phillip and the Northern Barons approach the beach where the French Armada have begun landing.
The live action helicopter plate was shot on location at Freshwater West, Pembrokeshire in Wales and was captured using a Panavision Genesis camera.

This shot was turned over to MPC early on in the schedule and became key development shot, to test the look our CG assets. It was used to conceptualise the digital environment work, which required the creation of cliffs that surrounded this location – a necessary story point to create a tactical advantage for the English archers. Also the shot was used to determine the layout and number of boats in the French Armada and the numbers of soldiers on the beach. It paved the way for over a 150 other shots that required views of the cliffs or the French Armada.

For the design of the cliffs, MPC’s environment lead Vlad Holst created some Photoshop concepts for Ridley. Initially these were based on the white chalk cliffs of Dover, as this was the scripted location of the French invasion. The final design however, was based on the practical necessity to have a real cliff location to shoot non- VFX shots, which was in close proximity to the main beach location in Wales. These cliffs, whilst quite different from the concepts were a good geological match to the beach, and ultimately provided a better blend to the sand dunes behind the beach. Textures of the cliffs captured by the aerial unit were tiled, graded and projected onto simple Maya geometry that blended to a Lidar scan of the beach location. The cliff geometry went through a number of shape variations for Ridley’s comments with the approved version including a wide access path to the beach for the bulk of the cavalry and a narrow gorge from which Marion could join the battle later.

Ridley wanted to feel that the end battle involved around 2000 soldiers on each side. The French Armada was made up of 200 CG boats, and this shot featured about half the visible fleet and 1500 disembarked French soldiers. The practical photography provided a good guide for scale and lighting, with 4 landing craft, 4 rowboats, over a hundred extras on the beach and 25 cavalry in the foreground. Ultimately much of this was replaced with CG when the beach was widened in order to maintain continuity of the tide position throughout the sequence. Boat layout and animation was handled in two stages, divided by a period where matchmove artists would roto-animate the waves in the backplate. This allowed for detailed animation and interaction with the ocean surface to be achieved.

MPC’s crowd simulation software ’Alice’ provided digital artists with the tools to handle the number of CG soldiers required. Alice utilised MPC’s motion capture library for most of the animations but with specific actions like rowing, disembarking soldiers and horses being realised through a specific mo-cap shoot. Digital effects elements such as wakes and splashes were created for the boats and CG soldiers in the water, using pre-cached Flowline simulations, which were automatically placed with each Alice crowd agent at render time.

The small numbers foreground cavalry were multiplied with the addition of full CG riders. Safety regulations prevented the helicopter’s camera from being close enough to the live action cavalry, so Ridley requested that MPC add the additional CG characters right into the foreground and under the camera. For this task, ‘Alice’ crowd agents, which are inherently suited to being smaller in frame, were promoted to having a high level of detail. Additional modelling, texturing, animation, cloth and fur simulations were required to provide the extra details and nuances to what became almost full frame CG renders. The effects team again provided interaction elements for the horses’ hooves, in the form of mud clumps, grass and dust, augmented further in the final composite with additional live action dust elements.

// WANT TO KNOW MORE?
The Moving Picture Company: Dedicated page to ROBIN HOOD on MPC website.

© Vincent Frei – The Art of VFX – 2010

IRON MAN 2: Ged Wright – VFX Supervisor – Double Negative

After working at Mill Film for HARRY POTTER AND THE CHAMBER OF SECRETS, Ged Wright joined Double Negative in 2002 and works on HARRY POTTER AND THE GOBLET OF FIRE, HARRY POTTER AND THE ORDER OF THE PHENIX or 10,000 BC. He has just finished overseeing IRON MAN 2.

What is your background?
I worked in Australia doing commercial work for a number of years before relocating to the U.K. In 2001. I joinedMill Film for HARRY POTTER AND THE CHAMBER OF SECRETS and then moved to Double Negative in 2002 and have been here ever since.

How was your collaboration with director Jon Favreau and production visual effects supervisor Janek Sirrs?
We worked closely with Janek throughout the project making sure we gathered enough reference information and data whilst in Monaco and Downey in L.A.
The process was more involved and had much more involvement from Jon Favreau as we moved into the animation and postviz stage of the project and got into the beats and details of how to tell the Monaco fight sequence.

What are the sequences made at Double Negative?
We were responsible for the Historic Grand Prix race in Monaco which culminates with an on track battle between Whilplash and Iron Man in his suitcase suit.

Can you tell us about the shooting of the Monaco’s sequence? What was real elements and those in CG?
2nd unit photography took place in Monaco, without the actors or any of the art department cars. Initially Janek was looking to shoot at least some real race cars in Monaco however the logistics of shooting on location proved to much to overcome.
Production was able to obtain permission to shut off areas of the racetrack, which in Monaco means functioning city streets, on the lead up to the race in the early hours of the morning.
A hotted up Porsche with Vista cameras mounted at the front and rear was driven as quickly as possible through these areas and the plates served as the basis for the in car driving shots.
In addition to the work 2nd unit was doing we shot 180 panoramas from either side of the track, about every 15 feet along the track which served for reflection and plate reconstruction information.
All of the race cars are CG up until they are cut in half which was handled practically in L.A. with CG enhancements.

How did you recreate Monaco in CG?
Most of Monaco was a combination of matte painting and reprojections using the photography we had taken, we ended up with around 7 TB of photographic data.
The fight area which was built as a set in L.A. was also built digitally by us for when we could not use the photography or needed to extend it.

Can you explain us more about racing cars cut in half?
The cars were rigged by SFX to cut in certain ways and tumble down the track. We added whip contact effects with Monaco and the crowd behind them.

How did your recreate the lighting of the shooting?
Our lighting pipeline is HDR based, we shoot as much HDR information as possible onset.
This was complicated for the fight sequence as the lighting in Downey was unfortunately overcast, coming from the wrong direction and there was a very large green screen where the harbour should be. So we rebuilt the lighting environment from stills and painted out the sun and any additional lights to allow more flexibility once lighting the shots.

Have you developed specific tools (for lightning or fire) for this sequence?
We used a number of inhouse tools and relied heavily on Houdini for our FX work.

How did you collaborate with Legacy Effects for Iron Man armor and Ivan Vanko?
The whip FX were designed and implemented at dneg. The suit Ivan wears was practical and handled by Legacy.

About the mobile armor Iron Man. How have you designed and build it? Have you received elements from ILM?
The MKV armour was separate from the work ILM did and there was no overlap of the work on this project.
Legacy built a 1/3 size model which we used as a starting place which was then refined and added to through out the project, we were modelling the suit and suitcase until quite late in the project, with the MK5 being made up of over 3000 individual pieces.

Can you explain how you animate the deployment of the suitcase into the mobile armor and its choreography?
We began with a lot of concept art which resembled comic book frames, this was very useful but could only take us so far.
In 3D the first step was to take the fully formed armour and try and fit it into the suitcase, which it does….just.
Jon wanted the armour to move in a consistent and mechanically believable manner which was a challenge considering what we need the individual pieces to do.
In the end focusing on what each shot of the suit up sequence needed to most clearly communicate was the key to solving this problem.

What information Jon Favreau gave you for Iron Man’s animation?
Jon has a very clear idea of how Iron Man should move and had established a language in the first film so there was a lot of catching up for us to do. One of the key challenges for us was the interaction with Whiplash as they are connected for half the sequence and there is only so much we could do to alter the performance, transition of weight etc.

How did you achieved to render so realistic metal look for the armour?
The shaders were built with the latest version of dneg’s inhouse shader set-up which allows extensive use of co-shaders. This allowed the lookdev artists to build and experiment with shaders in a more intuitive way.

What was the biggest challenge on this film?
The suitup sequence gave us the most sleepless nights.

What was the most difficult shot to do? And how did you achieve it?
There is no stand out shot in this case, most of the shots in the sequence had a large number of disciplines working on them so in a sense one of the more difficult challenges is keeping a track of such complex work.

How many shots have you done and what was the size of your team?
We finalled 250 shots with around 200 crew touching the shots over the course of the project.

What did you keep from this experience?
I learnt a great deal and are pleased with the result and how hard everyone worked, i’m not sure you are ever completely happy with the final result which helps when embarking on the next show.

What is your next project?
I’m currently inbetween shows.

What are the four films that gave you the passion for cinema?
IN THE MOOD FOR LOVE, TERMINATOR 2, WHITNAIL AND I and HOWARD THE DUCK…

A big thanks for your time.

// WANT TO KNOW MORE?
Double Negative: Dedicated page IRON MAN 2 on Dneg’s website.

© Vincent Frei – The Art of VFX – 2010

IRON MAN 2: Danny Yount – Creative Director – Prologue Films

Danny Yount started as an self-taught designer and creates film credits in Prologue Films for projects such as IRON MAN or ROCKnROLLA.

What is your background?
I started as a self-taught designer that loved using computers during a time when the industry did not take them seriously as a graphic design tool. But in 1988 the mac was not color yet. When the color models came out in 1990 everything changed. I feel lucky – I was also there when the shift to digital video started happening as well as the beginning of web publishing. Watching the computing industry transform the arts was very inspiring – it finally seemed that anything is possible for the individual – even someone like myself who did not go through art school. I’m now a Director at Prologue Films – I create main titles and direct live action sequences for film, tv promos and commercials.

What did Prologue make on this show?
We designed the visual effects for all the holographic and computer screen interfaces and interactions that occur in Tony Stark’s lab. We also shot live action to supplement the main title edit as well as designed the animated typography for the credits.

How was your collaboration with director Jon Favreau and the production visual effects supervisor Janek Sirrs?
Great. We had worked with Jon on the first movie so it was a thrill to be asked again. It was our first time working with Janek. What was exciting is that we were called in very early to help them visualize everything before shooting principal photography. That level of collaboration is what made everything work so well – it really gave all of us the leverage to explore everything deeply. Jon and Janek had so many ideas about things that were so inspiring to think about. We came back with additional ideas and tests that really pushed us to our limit creatively. Much of it was not used but it was really a joy to explore them and push ourselves.

Can you tell us how you designed the main title?
The filmmakers wanted the opening credits to be type over picture – starting with the intro of Mickey Rourke and his father as he passed away. Rourke then begins the task of building his own RT in a makeshift lab in his apartment. Underlying this sequence is the narrative of Tony’s successes and stardom via insert shots of newspapers and magazines hung on the wall. The problem was that they had not shot enough supportive material for this so we needed to set up our own film shoot at our studio – essentially recreating the wall and workbench. We matched the film stock and camera and got to work. We also did a few macro insert shots like the RT lighting up and sparks falling to the floor, etc. I thought it would be a good way of intensifying the edit a little.

How was the shooting of the sequences with holograms?
We attended the shoot, but the director shot all material for that and we were handed the plates.

Did you create previz to help the crew and Robert Downey Jr. For the shooting?
We did a little at first, but mostly we developed the ideas with the team at Marvel and provided a few camera tests. They then hired a company who specializes in previz to work with the director in-house to nail down the many story points in development. We used that study as a basic editorial template and went from there. The scene that required previz was where Tony Stark discovers the secret of the molecule from the expo model.

Can you explain to us the creation of a shot like those in the Tony Stark’s lab from scratch to the final result?
After a long discussion with Janek Sirrs about the kinds of things he and the Director wanted for the film, we went away for a while and rallied a small group of designers to create motion tests and styleframes. We also had a few vfx-based designers working on motion tests – Adam Swaab, Troy Barsness, Sean Werhli and Jesse Jones. Most of the aesthetic was created by Ilya Abulhanov and myself, but our talented team of designers and animators inspired us to push it even further as we saw what was possible. The expo sequence lead by Paul Mitchel is a good example of that. We came up with a look that was very intricate using a combination of contour shading and particles attached to vertices.

Aside from the standard procedures of matchmoving, tracking, roto, painting and wire removal, the most challenging aspects involved the interactions with Robert Downey Jr.. We really wanted everything to flow naturally but not come across as too gimmicky or canned like many interfaces can be in movies. We are first and foremost graphic designers who pay a lot of attention to visual communication and details like that – so every motion and animation in these complex scenes has a very specific purpose and acts precisely on cue to the actor’s performance and Jarvis the computer system.

Have you received some elements from ILM or supervisor Janek Sirrs like 3D scans of the sets?
Yes, we got LIDAR scans from them that informed us of correct spatial relationships. We also shot a lot of reference photography of the set in case we needed to pull a few rabbits out of our hats. One scene in particular where this was useful was the 3d photogrammetry reconstruction of the « hall of armor » shot. It started as a locked off plate but the director wanted a more dynamic move applied to it.

The shots of the sequence with the city model hologram are rather long. Did that cause you some problems (technically and artistically)?
Paul Mitchel (the designer that lead the team on that sequence) can best describe the challenges:

« The Expo hologram sequence posed a number of issues both technically and artistically. Artistically we had to handle a lot of detailed visual information on screen at one time, so we had to find the balance between the right level of complexity verses too much confusion. We needed to make sure Tony wasn’t overwhelmed by the information presented to him. We also had to make sure we enhanced his performance with holograms matching his eye line and arms reach.

Technically the challenges were getting this long sequence to feel like one coherent piece and getting it rendered for our weekly reviews with Marvel, so it took a long time to finalize the subtleties in each shot. Getting the holographic look right and consistent was a challenge as it needed to feel like the same hologram in the wide and close up shots, each shot had it’s own issues which effected the light and transparency of the hologram. »

How did you proceed to assure the shot continuity?
That’s one of the most challenging things with so many moving parts – getting everything to synch perfectly form scene to scene. And many times scenes were shortened or lengthened editorially which provided more challenges as time went on. But once the edit was locked we were all good – it’s just a little bumpy at times before that happens. Also viewing details every step of the way is extremely important. We ran all our sequences from a FrameThrower system to a large plasma display for our internal reviews with the teams involved.

Which softwares did you use?
AfterEffects, Maya, Nuke, Shake and the Flame.

How did you design the screens content and their animations?
Ilya Abulhanov and Clarisa Valdez designed all the screens and directed a team of terrific animators and designers to excecute the many detailed and complex interactions and data. Daniel Kloehn and Takayuki Sato spent countless hours animating the insanely detailed interactive components. It was definitely a labor of love – and fear – but mostly love.

How many shots have you done and what was the size of your team?
We did around 120 shots – many of them were omitted from the final film as the run length was reduced at the request of the studio. I think in the end we ended up delivering around 90 for final. At the height of production we had over 30 people working on the film in 3 separate teams lead by Paul, Ilya and myself.

How long did you work on the show?
A little over a year.

What did you keep from this experience?
We learned more about what we are capable of as a studio. We started as a small motion studio in Kyle’s house, so to see us working on this scale was very exciting. The director called us to work on this because he liked the level of detail and aesthetic we bring to the table. And we have so many talented designers coming up with crazy next-level stuff so the energy and stamina we had as a group really showed for this one. We could have all used a little more rest in the end but an opportunity like this only comes around once in a while. We gave it everything we have and I think it shows.

What is your next project?
Right now we are working on a couple of sequences for the remake of TRON as well as the end credits. The footage I saw looked amazing and I admire the director’s perspective and design sensibilities so this should be a lot of fun. I’m also a huge fan of the original film.

What are the four films that gave you the passion for cinema?
BLADE RUNNER, STAR WARS, LOGAN’S RUN and ROLLERBALL. By today’s standard the latter 2 would be silly but as a 12 year old they melted my brain. But Joseph Kozinski is doing the remake of LOGAN in addition to TRON so maybe there’s a chance to reconcile that. I hope I can do something for that also but we’ll see.

To extend the list I would add ALIENS, ROBOCOP and T2.

Thanks a lot for your time.

// WANT TO KNOW MORE?
Prologue Films: Dedicated page IRON MAN 2 on Prologue’s website.

IRON MAN 2 – PROLOGUE FILMS – VFX BREAKDOWN

Prologue Films – credits list

Sequence Designers
Ilya Abulhanov
Paul Mitchell
Danny Yount

Executive Producer
Kyle Cooper

VFX Supervisor/Producer
Ian Dawson

VFX Associate Producer
Elizabeth Newman

VFX Coordinator
John Campuzano

Technical Directors
Jose Ortiz
Miles Lauridsen

Design
Clarisa Valdez
Chris Sanchez

Animators
Alasdair Wilson
Jorge Alameida
Troy Barsness
Kevin Clark
Morris May
Darren Sumich
Jonny Sidlo
Takayuki Sato
Kyung Park
Joey Park
Alvaro Segura
Man Louk Chin
Daniel Kloehn

Compositors
Chad Buehler
Christopher DeCristo
Sam Edwards
Christopher Moore
Brett Reyenger
Matt Trivan
Renee Tymn
Bob Wiatr

© Vincent Frei – The Art of VFX – 2010

HOW TO TRAIN YOUR DRAGON: Simon Otto – Head of character animation – Dreamworks

After banking studies in Switzerland, Simon Otto pass through Les Gobelins animation school before being hired by Dreamworks Animation. It was In 1997 and since Simon has not left Dreamworks and worked almost all projects in the studio as THE PRINCE OF EGYPT, SPIRIT, SINBAD, FLUSHED AWAY as a animator and lead animator. He recently completed HOW TO TRAIN YOUR DRAGON on which he was head of character animation.

Can you tell us about your background?
I wanted to become a cartoonist at an early age. I was completely enchanted by the old Disney movies and admired the stories Franquin, Uderzo or Herge were able to create with their incredible draftsmanship. In rural Switzerland, working in such an artistic field was as unrealistic as becoming an astronaut, so I ended up doing a banking apprenticeship in my hometown.
I knew quite quickly that being a banker was not going to make me happy, so I started pursuing my artistic career with determination. After my military service I worked as a snow sculptor for about a year and shortly thereafter managed to get into the F&F Schule fur experimentelle Gestaltung in Zurich. After a summer internship at an animation studio in Lausanne (Animagination), I found my way to Les Gobelins animation school in Paris, which is one of the most prestigious animation schools in the world.

In my year, there were about 900 applicants and after three rounds of testing, they finally accepted 20 students into the program. Lucky for me, the big Hollywood studios knew about Les Gobelins, since a lot of their talent were former students. I had a contract offer in my hands about a year later. I moved to Los Angeles right after my graduation and started working as a 2D animator on THE PRINCE OF EGYPT in the Summer of 1997. I’ve been at the studio ever since and have worked as an Animator and Supervising Animator on many of the Studio’s animated features both in 2D and in CG, including THE ROAD TO EL DORADO, SPIRIT: STALLION OF THE CIMARRON, SINBAD: LEGEND OF THE SEVEN SEAS et SHARK TALE. I have worked as a character designer on OVER THE HEDGE and before HOW TO TRAIN YOUR DRAGON I did some additional animation on THE BEE MOVIE and KUNG FU PANDA and then was one of the Supervising Animators on the Aardman co-production, FLUSHED AWAY.

How many time have you worked on HOW TO TRAIN YOUR DRAGON?
I spent three and a half years on this production. For the first two years, I oversaw the entire process of bringing Nico Marlet’s character designs into the digital world. This meant doing a lot of design work myself and working closely with the modelers, riggers and the surfacing department. During this time we also had to figure out a lot of systems for the complex dragon rigs, such as simulations, flap cycle systems and pose libraries for example. Once we achieved the desired look, I took these “digital puppets” and fleshed out their personalities along with a few of our senior animators.

Once production started, my job was to make sure the style, quality and clarity of the animation was as desired while making sure we executed efficiently. I consulted the directors on everything related to character animation and, along with our seven Supervising Animators, oversaw the entire character animation team.


What is a Animation Supervisor?
On previous CG films at DreamWorks, a Supervising Animator used to oversee the animation of an entire sequence and animate all the character animation with a team of about 5-10 animators. On HOW TO TRAIN YOUR DRAGON, I was lucky to have a team of Supervising Animators available that were incredibly experienced and a good part of them had been Supervising Animators on 2D films prior to working on DRAGON. With this kind of firepower and considering the complexity of the characters – we had realistic human characters as well as complex dragon rigs – I felt strongly about approaching the movie using a hybrid casting system where each Supervising Animator was in charge of a specific character. So, depending on which character was leading the shot, we cast the shot out to the specific character teams. The advantage was that animators became tremendous experts in their characters and we were able to track very specific performance ideas throughout the movie.


How was the collaboration with the directors?
Animation directors usually spend a great deal of time with the character animation department. Since the directors are at the studio all the time, we manage to get about 1½ hours of dailies in the morning and 1½ hours of walk- around-time in the afternoon, where the directors walk from desk to desk to spend one-on-one time with individual artists. The times increase the closer to the end of the production we get. DRAGON was a bit different, since our directors came to the production fairly late and they still had a lot of writing to do. We mostly handled all the big issues in dailies and then I did walk-arounds with the Head of Layout and each specific Supervising Animator.
The Head of Character Animation and the Supervising Animators have a lot of exposure to the directors early on in a production as they discuss characters and sequences. Once sequences get launched into animation, we get all the animators together and discuss one shot after another. Animators usually come prepared and already bring ideas to the launch.
Chris Sanders and Dean DeBlois have a lot of experience with animation. They knew what seasoned animators could bring to the characters. Throughout the production there was a tremendous sense of respect and appreciation between the animators and the directors, which created an environment of great creativity. The directors presented their vision with competence and clarity. Particularly when it came to giving feedback, they were very grateful for good ideas and respected quality work. Fear wasn’t a factor, which allowed animators to even make fools of themselves when presenting their ideas.

Were you able to purpose ideas and if yes, which ones?
Most great ideas came out of some sort of collaboration, and as a group, the animation team brought a lot of those to the film. Personally, I’m most proud of the creation of Toothless as a character that had to walk the line between a fierce creature and an adorable companion. We were looking for ways to bring the audience into the experience and have them be reminded of their own pets.
I also particularly like the decision to make the last fireball shot after the giant explosion a slow-motion shot, which I had suggested. This shot gives me chills every time I see it.

What was the main challenge on this movie?
The biggest challenge lay in the style of the animation and the creation of a believable world. You can’t make a movie about Vikings without having beards, hair and fur constantly interacting. And because of our story’s dramatic undertone, we felt it required an animation style that was fairly realistic, so a purely graphic or cartoony solution to that problem wasn’t going to cut it.
Soon enough, we also realized that we had a tremendous opportunity at hand. All movies about dragons that had been created up to this point, had either hand drawn cartoony dragons in them or featured CG creatures that had to match a live action plate. We, on the other hand, had a world of dragons to create that could seem realistic but that didn’t need to match a photorealistic image. We were able to really have fun with them, make them colorful, create different species and make them funny and dangerous at the same time.

Was were the animation references for the dragons?
We looked at what had been done before in movies, but soon realized that we needed to dig deeper. So, we looked everywhere in nature for references. For each of the characters we created a movie playlist that mixed all of the references together and we would update this list as we went through production, collecting more and more inspirational material as we went along.
The Gronckle for example is a cross-breed between a crocodile, a bumble bee and a Harley-Davidson. Toothless was inspired by the stare of a wolf, the behavior pattern and overall look of a black panther and the wing beat of a bat. For shot specific actions, we ended up studying wombats, small birds of prey and especially cats and dogs.

How was the collaboration with the others departments (concept, rigging, …)?
It starts out very linearly, where an approved design gets handed from one department to the next and the characters go through the standard approval process with directors, production designer and VFX supervisor. This usually only lasts for a short while, because the show is generally still searching for the final story and production design and things have to get adjusted and remodeled and sometimes even re-rigged. The “Terrible Terror,” the little gecko-like dragon used to be the original Toothless, for example.
We were a fairly small group of people for quite some time. Nico Marlet was the main designer and we had worked closely together before on OVER THE HEDGE. We put a lot of effort into maintaining the graphic quality of the original ideas that were on paper. There was a lot of talent and willingness coming from the modeling and rigging departments and we ended up being very satisfied with the results.

What was the most complicated character to animate?
The two-headed dragon was the most complex character to animate, but luckily we didn’t have that many shots of him. Toothless was very tricky, because he could look different quite quickly depending on the camera angle and of course because he is a quadruped with two sets of wings and a tail with a fin at the end. His rig is approximately 8 times as complex as the dragon rig in the original SHREK.

Hiccup was the hardest character to make interesting. This is a common hurdle in animation, because the hero is the character with the least amount of caricature in order to be the hero for all.

What was a typical day on DRAGON?
At the peak of production, which lasted around 8 months, I would usually get in around 7:30 am and animate on my shot until about 9:30 am. After that I would have a series of sequence meetings, scheduling meetings and other discussions before I’d do rounds with the animators around 11:00 am. After a short lunch I would try and reply to e-mails and notes and do some draw-overs for animators before I had to go to more task-specific meetings. At around 4:30 pm we usually started dailies that could last up to three hours. After a quick bite I would go back to my desk and try and animate if possible. I usually tried to finish my day before 10:00 pm.
DRAGON was a very aggressive production schedule, due to the late arrival of Chris & Dean. It was quite atypical for DreamWorks as animators usually manage to get their work done in a regular 8-10 hour day.

What is your pipeline at Dreamworks?
We use a lot of proprietary software, except for previz and layout, which are done in Maya. Our animation software is developed in house and is called Emo. We have significant development resources and are currently working very closely with Intel and HP in developing our next generation software packages.

What were the shots that prevented you from sleeping?
Fine tuning Stoick’s beard simulation was a huge undertaking and demanded several months of rigging time.
One of the biggest frustrations though, was the work we did on the flying shots. In order to create a real sense of speed, some of our shots had to travel at 700-1000 km/h. So, if there were just the slightest imperfection in the camera curve, our characters would be jumping around as if they were really badly animated. This caused some tense nerves amongst the animators.

What was your best moment on this show?
Showing the directors and producers our first pass of the sequence where Hiccup befriends Toothless. It was a truly emotional moment. We knew we had a film in our hands that was going to be special.

What is your next project?
I’m not sure yet, but due to its outstanding run at the U.S. box office so far, everything is pointing towards a sequel to HOW TO TRAIN YOUR DRAGON.

What are the four films that gave you the passion for cinema?
THE JUNGLE BOOK, THE ARISTOCATS, BACK TO THE FUTURE and INDIANA JONES – RAIDERS OF THE LOST ARK.

// EN SAVOIR PLUS ?
HOW TO TRAIN YOUR DRAGON: Official website for HOW TO TRAIN YOUR DRAGON.

© Vincent Frei – The Art of VFX – 2010

KICK ASS: Mattias Lindahl – VFX Supervisor – Double Negative

Coming from Sweden, Mattias Lindahl began his career at Lego, then he left for London where he worked at Jim Henson’s Creature Shop and at Double Negative in 2001. After nearly 10 years at Double Negative, he returned to Sweden this year and works at Fido.

What is your background?
After graduating « Computer Graphics for Media Applications » in Skellefteå, Sweden in 1997. I started my 3D career at the digital department at LEGO in Denmark. I then moved to the UK where I joined Jim Henson’s Creature Shop in 2000. I started working for Double Negative in 2001 with the submarine film, BELOW. I stayed at Double Negative for a long time, up to February 2010. I returned to Sweden this year and joined Sweden’s largest VFX firm Fido in Stockholm.

How was your collaboration with director Matthew Vaughn?
I already knew Matthew from having worked with him on STARDUST. I worked closely with him from the very beginning of previs when we began KICK ASS, back in summer 2008, all the way through shooting and to the very last day before the film was shot out in February 2010. It was a long job…!

What was the challenge on this project?
The challenge was creating nearly 850 shots for an independent film on a tight budget. We had to always come up with cost effective solutions.

Can you explain in detail the opening scene?
This was the first sequence that we prevised. It was great for me since the shots that we created in previs (compositions and actions), were pretty much what ended up on film. All the plates where shot in Toronto so a big part of the job was to make it look like New York City. Sam Schweir (Double Negative) and I spent a week on top of skyscrapers in New York taking thousands of stills (for various scenes) to be used as backgrounds and 2.5D projected matte paintings. All the stills where taken at 3 exposures, stitched together and baked in to open EXR format. The stuntman was later shot on greenscreen. For the shot where he leaps over the edge we ended up replacing the legs in CG since the real ones didn’t really work for the action. The shot where he crashes in to the car is built up out of several elements: a SFX wired car on location, greenscreen crowd, CG building and a greenscreen stuntman that we dropped in to a bunch of boxes.

Can you tell us how you have conceived and achieved the animated sequence at Fido?
A 2,5D technique was used throughout to realise the Comic Book sequence. From the very beginning the idea behind the sequence was that you where meant to be able to stop the sequence on any frame and it should look like a frame from the graphic novel. So it became apparent early on that we had to work together with John Romita Jr and his team (Tom Palmer and Dean White).

John created a set of storyboards based on the lines from the script. We then took the boards and created an animated previs. A lot of work went in to the storytelling and the use of 3 dimensional moves through the comic book world. Once the previs had been approved by Matthew I flew over to see John in New York. Final tweaks where done to the compositions of each frame in conjunction with John. Once John and his team had finished the artwork, the team at Fido built and tweaked the geometry around to fit John’s drawings. The artwork was then projected on to the 3D geometry to allow us to travel around it in 3D space.
This sequence was what first got me excited about this project. It really was great to work on this piece together with John. He is such a legend in his field and getting the opportunity to bring his iconic artwork in to a cinematic experience was a great honour.

How did you design the sequence of first person view?
The idea was to create a Doom style effect with Mindy’s POV shots. It was created and shot by 2nd unit. Tim Maurice-Jones and Peter Wignall was very much instrumental in the making of this sequence. Wyld Stallyons designed the IR goggles interface and I put the shots together at The Senate.

What were your references and influences to the building and the apartment of Frank D’Amico?
Matthew wanted Frank’s apartment to be a 1930 style high-rise. The idea was that this building would have been one of the taller buildings in Manhattan, but many much taller and more modern buildings have been built since. So whenever looking at the building it would be dwarfed by the new enormous skyscrapers. The building itself was modeled on « Commerce Court North » in Toronto, which was the first high-rise to be built in Toronto in 1930.

How did you create them?
For the exterior, plenty of reference images where taken on location in Toronto. We also carried out an extensive survey of the building, using a TPS Total Station. We actually ended up doubling the width of the building, since it became clear that the interior design of Frank’s apartment would not fit inside of the building. All the views out of the apartment where created using the photography acquired in New York. The team at Double Negative (headed up by 2D Supervisor, Peter Jopling and 3D Supervisor Stuart Farley) created the look development and Lipsync Post made the composites for the largest bulk of the shots.

What did you do on the final confrontation in the apartment?
When Mindy runs wild in the corridor, all the blood hits are shot elements composited. I headed up a 4 day elements shoot. We shot loads of blood hits, exit and entry wounds, fire, smashing glass, muzzle flashes, bullet hits, etc.  We also created a CG knife, rope, gun clips and gun.
When Dave shoots the crap out of the apartment there were greenscreen comps of the New York exterior, tracer fire from the gatling guns, CG shells from the gatling guns, CG breaking glass, jet-pack effects, set extension on Frank’s apartment and additional smoke and debris.

Can you tell us about the flight scenes of the final sequence?
It was all shot motion control. We shot helicopter plates in Toronto and New York. These plates where then tracked and previs characters where animated to get sign off on flight of the characters. This animation then formed the basis for the motion control shoot. There were some big fly-by’s in the sequence and the moves where far to big for us to be able to shoot it at 1:1 on the greenscreen stage. So we used a system called aim-cam that we have developed at Double Negative. It basically allows you to take out the z-depth out of a move. This is what we shot. We then reverse engineered the moves and put the z-depth back in the comp with 3D information passed on from Maya to Shake using a propriety tool called dnplane-it.

In some flight shots, the motion blur is sometimes very strong so we don’t see the characters. Did you have some problems with those shots?
I suppose it is just the nature of an object flying past camera at high speed shot at 24fps. If we where not to use the right amount of motion blur, we would have ended up with a strobing effect.

In the final sequence, the light passes from night to day. This has been a puzzle to connect all right?
Yep, you could say that again. It was tough, but it was a great challenge set by Ben Davis (DOP). Ben had this idea that it’s just before dawn when Mindy arrives at the apartment. When Dave turns up on his jet-pack there is a little bit of light in the sky. Magic hour arrives when Dave and Mindy enters Frank’s study and the full sunrise happens as our heroes escape on the jet-pack. Because of this elaborate change of light throughout the sequence, I had to make sure that we where covered when we did our stills shoot. This meant that each location that we went to in New York, we had to photograph in daylight, dusk or dawn and night. Because we took all the stills bracketed (3 different exposures) we then had a huge range to grade the backgrounds to fit all these subtle light changes throughout the sequence.

As a production VFX supervisor on the film, how did you chose sequences that would be made by other studios?
I had to look at the various vendors strengths and give them the work that I felt comfortable they would finish to the highest standard. As with everything in this world it’s also about the finance. So Andy Taylor (VFX Producer) had to make sure they could deliver on budget.

Can you explain to us the sequence’s distribution in the other studios?

Double Negative:
The Armenian opening sequence, all Frank’s apartment exterior shots (CG building), Atomic Comics street extension, Dave hit by car, Look Development for Rasul’s interior and rooftop, Look Development for the views out of Frank’s apartment, The warehouse set extension for New York background, Russian getting nuked in the microwave, Dave shooting up the apartment on his jet-pack, Frank shot by Bazooka, Dave and Mindy escaping on the jet-pack, Mindy’s roof top, Dneg also did all the previs.

The Senate:
Atomic Comics exterior views, Rasul’s interior and rooftop, warehouse on fire, Mindy’s POV fight in warehouse and Big Daddy on fire.

Lipsync Post:
Dexter Fletcher in car crush, Mistmobile interior driving shots, Mindy goes wild in Frank’s apartment, Exterior views out of Frank’s apartment.

Ghost:
Screen inserts, cinema sign, car crush New York extension.

Fido:
Comic Book Sequence. A 1.5 minute long full CG sequence that tells the backstory of how Damon and Mindy became Big Daddy and Hitgirl.

Wyld Stallyons:
Screen insert artwork designs for computers, mobile phones and security cameras.

How many shots were done by Double Negative?
150ish

What was the sequence that prevented you from sleeping?
The Comic Book Sequence. It was such an important sequence to get right. Both visually and from a storytelling point of view. It went through many different iterations before we got something that everyone was happy with.

What did you keep from this experience?
Never give your phone number to John Romita Jr. (laughs).

What is your next project?
Some very interesting highend projects at Fido. But it’s too early to discuss.

What are the four films that gave you the passion for cinema?
THE GRADUATE, THE BIG BLUE, THE ABYSS and NATURAL BORN KILLERS.

Thanks a lot for your time.

// WANT TO KNOW MORE?
Double Negative: Dedicated page to KICK ASS on Double Negative website.
Fido: Dedicated page to KICK ASS on Fido website.

© Vincent Frei – The Art of VFX – 2010

AVATAR: Interview Neil Huxley – Art Director – Prime Focus

Neil Huxley has worked more than 5 years at Digital Pictures Iloura as Flame operator before coming to the United States where he worked as art director on movies such as GAMER or WATCHMEN at yU+co. It’s him that create the beautiful opening title sequence of this show. In 2009, he joined Prime Focus.

Hi, can you explain your career path in VFX?
My first job after graduating was UI design in interactive media production. In 2002 I started in VFX as a Flame Op at Digital Pictures Iloura in Melbourne, and then moved more into vfx design after art directing and designing the SALEM’s LOT titles sequence for TNT. I moved to LA in 08 where I worked as an art director for yU+co. There I directed some cool broadcast projects, idents, titles sequences etc… and art directed the title sequence to Zach Snyder’s WATCHMEN. The Mark Neveldine and Brian Taylor-directed movie GAMER in 2008/09 was the first project where I really tackled interface design in a film context. That project then led me to AVATAR,

How did Prime Focus get involved on AVATAR?
I think it was Chris Bond and Mike Fink’s relationship with the VFX producer Joyce Cox and our showreel that landed us the gig. We also had experience with stereoscopic movies like JOURNEY TO THE CENTER OF THE EARTH. Originally I think we only had the Ops center at the start of production but as the project progressed we got more shots from other vendors who had too much on their plates plus James Cameron really liked what he was seeing from us.

What are the sequences made at Prime Focus?
We worked on over 200 shots which included the Ops Centre, Biolab, and Hells Gate exteriors.

What elements did you receive from the production and Weta?
Well we would receive a number of assets depending on the shot and the sequence. Everyone had a look to match to so we would share assets as much as production would allow. We were sent everything from on set photography, concept art, in progress renders from other vendors, 3D models, textures etc etc. It was very exciting for us to see what other vendors were working on.

How did you design the hologram? And the one with Home Tree in particular?
We worked with Jim on the basis that this table would display multiple satellite scans orbiting Pandora so we looked at Lidar imagery. We wanted the table projections to be particle-based to mimic LIDAR mapping so we used our in-house particle renderer Krakatoa. A lot had to be modeled in house or at least reworked since it was previz quality, motion builder files, and not high res enough. The Home Tree had to be rebuilt so we could generate Krakatoa PRT Geo Volumes, a particular grid (LevelSet) representing geometry to mimic the LIDAR-Scan look Jim wanted. Home Tree in particular was re-modeled based on productions concept art. We then added projection beams, icons, glows and dust mites for added detail.

Were you able to propose ideas or did the artistic team of James Cameron already determine everything?
Jim and the production were always open to ideas – some of the screens and animation design was nailed first time, other elements took a few variations and revisions – it was great to work with a director with such a strong creative vision, you know exactly the direction in which the captain is steering the ship so to speak.

Can you explain to us the creation of an Operations Room shot?
The Ops Center and Bio Lab scenes in AVATAR included interactive holographic displays for dozens of screens and a ‘holotable,’ each comprising up to eight layers, rendered in different passes and composited. The Ops Center itself had over 30 practical plexes alone. To enable easy replacement of revised graphics across the massive screen replacement task, we developed a custom screen art graphic script, SAGI. This enabled us to limit the need for additional personnel to manage data, deliver the most current edit consistently, reduce error by limiting manual data entry and minimize the need for artists to assemble shots.

Our pipeline department built a back-end database to associate screen art layers with shot, screen and edit information, and a front-end interface to enable users to interact with it. The UI artists could update textures in layers, adjust the timing of a layer, select shots that required rendering, manage depth layers by adding and deleting as necessary and view shot continuity — while checking the timing of screen art animation across multiple shots.

The immersive screens were treated as a special case because of the sheer size of the practical plex glass element. In the case of creating graphics for the immersive screens, there were several unique factors and challenges to consider:

–The large size and prominent placement of these screens
–Their curved, semi-circular shape that we see from both sides
–The background layer is displayed as a « window to the world », behaving like a world-space environment instead of a localized overlay

To ensure that the after effects animation graphics would appear correctly once mapped onto 3D geometry modeled to match the practical immersive screens, special UV pre-distortion algorithms were applied to the source imagery. For the background layers virtual environments, flight trajectories and icons were modeled and animated in 3d animation software then rendered with a stereo camera rig. Due to the extreme curvature of the immersive screens, special UV pre-distortion algorithms were applied to the source imagery to ensure the graphics would appear correctly once mapped onto the 3D match geometry. The resulting sequence was then processed via the SAGI/ASAR pipeline, with special attributes associated with the immersive screen type invoking a scripted UV mapping system to emulate a « virtual periscope » effect as the immersives rotated to match the action of the practical screens in the plates.
Additional passes were created by the lighting and rendering team to help better integrate the screens into the photography, such as reflections, lighting and clean plate elements.

Did the stereo cause you trouble?
The stereo pipeline was already set up from the teams work on Journey to the Center of the Earth so we were ready. We had stereo dailies at least 3 times a day which really helped in pushing these shots through. Stereo problems I’m sure were the same for anyone else doing stereo projects, LE RE discrepancies, convergence issues etc which all get ironed out as you go.

Have you worked with other studios like Hybride for the screens or Framestore for the Hell Gate exteriors?
We matched a look that was established in one of Dylan Cole’s amazing concept matte paintings for the Hells Gate exterior for a particular shot. I think Framestore did the bulk of that work so they provided us with some great reference too.

Prime Focus has many branches worldwide. Do you allocate sequences between them or all was centralized in Vancouver or Los Angeles?
Most of the work was done in LA under the guidance of Chris Bond, with some additional support from the Winnipeg studio.

How was the collaboration with James Cameron and Jon Landau?
Working with James Cameron and Jon Landau was an amazing experience for all of us. One I would repeat again without hesitation.

What did you keep from this experience?
We were a part of one of the biggest, most spectacular films of all time, and I got to live out a schoolboy dream of working with James Cameron.

What are the 4 movies that gave you the passion for cinema?
Tough question! There are so many films that have inspired me over the years. My brother and I would sit all day in front of the TV in our underpants on summer break and watch movies religiously. I think one summer we watched BIG TROUBLE IN LITTLE CHINA like 30 times! I think the movies that really affected me as a kid were BLADE RUNNER directed by Ridley Scott, THE TERMINATOR and ALIENS from James Cameron and John Carpenter’s THE THING.

Thanks for your time.

// WANT TO KNOW MORE?
Prime Focus: Dedicated page to AVATAR on Prime Focus website.

© Vincent Frei – The Art of VFX – 2010

OCEANS: Arno Fouquet – VFX Supervisor – L’E.S.T.

Arno Fouquet and Christian Guillon from L’E.S.T. were responsible for general visual effects supervision on OCEANS, the new documentary feature by Jacques Perrin. The visual effects were dispatched between BUFMikros Image and Def2Shoot.

What is your background?
After an audio-visual college at Valenciennes, I started working (as intern at the beginning) at Excalibur. It was a famous special effects company for the shooting. We used rear projection, Motion Control shooting, models, matte painting (not digital, glasses painted)… it was exciting. Then I went to my military service at the photo service in the Air Force, that’s where I discovered the « digital effects » by faking photos (Photoshop) for the internal newspaper of the base. When I left the army, Excalibur had begun to equipped with machines for digital effects. The machines were available… Me too… I start with lots of tutorials and trained myself with effects softwares.
A first movie with digital effects arrived at Excalibur, Francis Vagnon, the VFX supervisor, offered me to help make the special effects. Few years later Christian Guillon and Francis Vagnon created L’E.S.T. and asked me to be part of the adventure.

Can you tell us about L’E.S.T.?
Since L’E.S.T. creation, Christian Guillon has decided to propose a new approach to visual effects for film, based on the general idea of engineering, because it’s not possess the tools that is essential, since anyone can do it, but to design, organize and coordinate their use.
L’E. S.T. is a traditional structure, focusing on the job of visual effects supervision and limited to a narrow scope, the feature film.
This method has led us to produce in-house only a small part of the effects that we were entrusted, and to outsource a larger part in according to their nature and / or quantity, while retaining total responsibility.
What I like about this philosophy is that we no longer see the other special effects companies only as competition but as partners.

How was your collaboration with Jacques Perrin?
Only happiness, Mr Perrin is a director and producer who forces the compliance. I admit I started the project with some apprehension. Jacques Perrin is not what we call a effects filmmaker, and OCEANS is primarily a documentary film, whose shooting had started four years earlier.
It was clear that we were not going to work with Jacques Perrin in the same way as we did with Frederic Forestier director of the last ASTERIX.
With Christian Guillon, we set up various tools and steps work so that Jacques Perrin and Jacques Cluzaud (second director) have not the feeling of losing control on effects sequences. Finally our two directors were like fish in water in the middle of the VFX.

How did you decide the sequence’s attribution to the different VFX studios?

We have since the preparation separated the effects in 3 parts:
– We give to Mikros, the « gallery » sequence, in which actors were walking in the middle of a set that is 90% CG. We are working with Mikros since a very long time. We had just finished « PARIS 36 » on which Mikros did a very good job on with digital set extensions. It seemed pretty obvious that this sequence was for them.

– The second big piece was for BUF, it’s the « Planetarium » sequence, and the shot is a camera movement upward that goes from a stormy sea to a wide shot of the Earth with satellite in the front. For these two sequences, there were graphics research, but also a certain technical prowess, for he was connected with the plan a sequence sequence of sea storm really shooted. I remind you that this film called OCEANS, Jacques has been more than attentive to the connection and the veracity of the raging sea. There was a lot of R & D on this sea

– The third piece was all effects called compositing effects, like the sequence of the takeoff of the rocket. These effects have been entrusted to Def2Shoot, which the advantage, among others, to be in the same places as the film lab (Digimage). It was a very good first collaboration with them.

How was the collaboration with the different supervisors?
I must be lucky, so far I’ve always listened very closely with all the supervisors with whom I worked. On this film, we worked with Hugues Namur (Mikros), Nicolas Chevalier (BUF), Frederic Moreau and Bastien Chauvet (D2S). There has always been a true collaborative effort between us. I saw them since the preparation, we discuss possible approaches (each company has its own operation and methodologies). They are usually present on set, and obviously they are there to all stages of post-production. I was fortunate to work with very good supervisors, who have nothing to prove, and therefore have no ego problem. Our common point is that we all do this business with the same passion.

Did L’E.S.T. made only supervision or have you made some effects?
We actually made some effects on a small sequence. I knew that this sequence would require a lot of roundtrip with the editing and then with digital calibration. These trips take a long time. By mutual agreement with Christian Guillon, we decided to make this sequence internally, to avoid wasting precious time to one of our providers.

Can you explain in detail the creation of the sequences of the Aquarium, Gallery and the Planet?
Aquarium:
For this sequence, we have initially been shooted the aquarium in Atlanta. This aquarium is one of the largest in the world, with a glass 19 meters long and 9 meters high. The shot in motion was shooted with a « Revolver » head. The actors were filmed a few weeks later in the green screen studio in Paris, again using head motion-control to to reproduce the same movement of the selected take.

Gallery:
This sequence was filmed in the old ferry terminal, « The city of Sea » of Cherbourg. The sequence of the gallery is the result of a very narrow collaboration with Jean Rabasse (Head designer and art director). This sequence is a mixture of real set and digital set extension, and is also a mix of real taxidermy animals produced by the art team and full CG animals.

A first « summary » modeling of the scenery (and all animals) was made, thanks to blueprints provided by art team, in order to start working the framing of the scenes directly in this virtual setting. We have therefore made working sessions with the directors and the chief operator (Luciano Tovoli) and cameraman (Luke Drion). During these sessions, setting scenes was able to unleash his imagination and test all the movements and frames they wanted. All these shots were then taken to the edit, and considered as « classics » rushes.
We went on the set up with computer animation, and we asked Mikros to go with a workstation on which were the scene modeled in Maya. This allowed us to mix, through Cinesoft, the shots that had just been filmed with the 3D scene. The post-production has been made in 4k on Maya and composited on Nuke.

On the planet that has been done at BUF, we followed the same methodology.

What kinds of challenges presented OCEANS and how did you achieved them?
OCEANS is primarily a documentary film, with shots and images never seen before. It was not that special effects of the fiction part discredit the veracity of these incredible images. The effects had to invisible and perfect, it was out of question that we speak of OCEANS as a effects movie.

Have you encountered difficulties in particular?
For time reasons, we have started doing many effects before the filming of the documentary is completed. The film was then under construction while we were doing the effects. It was therefore be flexible and more responsive as possible to the requested changes on some big effects.

What the number of VFX shots in OCEANS?
We made 150 shots.

What was the most complex sequence to do?
I think the shot was the most complex is the satellite shot. As I said, the shot is edited directly behind a sequence of storm, we have that the full CG sea connects perfectly with the other real sea. The other difficulty involved the modeling of the satellite. Because obviously, it had to be a real satellite (OCEANS is a documentary film, it was therefore inconceivable to make a fantasy satellite). Obviously it was not easy to get blueprints on a top secret satellite that ESA’s launch few months later.

How long have you worked on this project?
More than a year.

What do you remember about this experience?
Meetings incredible peoples and collaborative work with passionate and exciting peoples.

What is your next project?
For the moment it’s a too early, I can not tell you anything yet.

What are the 4 movies that have given to you the passion for cinema?
Many films of the 80s like BLADE RUNNER, DUNE, THE COOK THE THIEF HIS WIFE & HER LOVER, PARIS TEXAS.

Thanks for your time.

// WANT TO KNOW MORE?
BUF: Dedicated page to OCEANS on BUF website’s.
Mikros Image: Dedicated page to OCEANS on Mikros website’s.

© Vincent Frei – The Art of VFX – 2010

GREEN ZONE: Charlie Noble – VFX Supervisor – Double Negative

Charlie Noble works in visual effects for over 15 years. He joined Double Negative at its beginnings in working on PITCH BLACK. He will participate by result in numerous projects from studios like ENEMY AT THE GATES, FLYBOYS or THE DARK KNIGHT. He has also supervised THE BOURNE ULTIMATUM directed by Paul Greengrass, that he meet again on GREEN ZONE.

What is your background?
2D. Film opticals, Parallax Matador, Cineon, Shake

The VFX of GREEN ZONE are almost all invisible. What have you done on this movie?
Thank you. Only « almost »? (laughs)
I think of any work that I’ve been involved with over the past 20-odd years, I am most proud of what Double Negative delivered for Greenzone. There are around 650 visual effects shots in the movie, a handful being all CG. Our task was to take the Spanish, Moroccan and UK locations and root them firmly in the Iraq of April 2003. All the damaged buildings, aircraft ( apart from one Puma ) and tanks were ours, as were a lot of the palm trees.

What references did you have to rebuild Baghdad?
We did a considerable amount of internet trawling for reference images from the first half of 2003. As quite a few of the landmark Greenzone buildings have changed since the war, it was important for us to start out from as accurate a place as possible. Using an in-house photogrammetry tool, « dnPhotofit », we could extrapolate dimensions of building using just a few images.

Most textures were hand painted, derived from web-sourced images. To better support the narrative, we subsequently increased the level of damage on a few key buildings to really underline the destruction that was wrought in the Shock and Awe bombing campaign that began in earnest on 21 March 2003.

Have you used previz on the set to help the director and his cameramen?
A few big establisher shots were previzzed but for the most part, the nature of the show didn’t really lend itself to  that level of shot planning from a vfx point of view. What we did do was to take previz quality versions of all our buildings on location with us to use as a live virtual set . Courtesy of Stein Gausereide, at any given location we would set up our camera and snap our cg model to the environment. The camera had IMU’s (accelerometers) attached to all 3 axis, with this data being fed into the maya camera. Paul and the camera operators could then pick up our camera and wave it around the location and see live what our additions were going to be, with the maya output layed over the feed from the camera.

The shooting style of Paul Greengrass is very frenetic. Your matchmove and roto artists should have lost their hairs. How did you manage these aspects?
Greenzone was our third picture with Paul Greengrass, after United 93 and The Bourne Ultimatum, so we knew what we were up against with regards matchmoving. The main thing that we have learnt over the years is to record as much camera info as physically possible when shooting. As 90% of the film was shot with zoom lenses, it was vital that we knew the focal length of each frame. To assist here we built encoders that the very helpful camera dept allowed us to mount on their matte rails. These were basically toothed wheels that locked into the focal length ring and whenever the focal length changed, the ring turns, turning our wheel which sends its data down a line to a laptop that our matchmovers carried behind the camera. After a couple of weeks the equally helpful Dragon Grips, kindly offered to carry the laptops for us ( mainly to get us out of the way ! ), before we modified the systems to operate wirelessly. Once back in the UK we shot grids for each lens moving through the zoom range. This gave us accurate focal length measurements for any given position on the ring and a corresponding distortion solve, to enable us to apply the exact lens distortion to the CG for any given focal length.

In addition to one matchmover per camera on-set, we had another matchmover with a Leica TotalStation, surveying each set and start/end camera positions for each take. Once shots come in, a focal length curve is derived from the on-set data, to produce an undistorted plate with accompanying zoom curve. The matchmovers then typically used dnPhotofit to snap the photography to our surveyed sets, to achieve the matchmove. This all makes it sound much easier than ,of course, it was given the low light conditions and extreme motion blur in some shots! Hats of to all the matchmove crew, led by Dan Baldwin. They did a terrific job.
Once over the matchmove hurdle, the next task was to split the live action up into its relevant layers to enable it to be sat into the virtual environment. One of the fairly atypical aspects of the set extension work on this show was that there is never a clear line between photography and CG, the CG often starts by camera and extends to the BG with the live action rotoed in and amongst it.
We were fortunate to have some highly talented roto artists on our crew, a number of whom have now gone on to form the core of our new office in Singapore. All rotoscoping on the show used Noodle; our in-house roto tool.
Whilst essential to the process, roto only gets you a certain part of the way and its up to the compositors to bring back all the edge detail from the original plate, using all manner of keys, filters and, sometimes, painting. There was nothing easy about any step of the process and even with the best pipelines in the world, it still comes down to some very talented artists working very hard.

How did you recreate the « Shock and Awe » sequence?
The final high wide in the Shock and Awe sequence was an extremely important shot to really demonstrate the enormous scale and unimaginable force of the missiles that rained down on Baghdad around 21 March 2003. We can all remember the footage beamed from the Palestine Hotel where most foreign journalists had been corralled.
The shot starts as Al-Rawi’s convoy of 4×4’s pull out of his gate at speed and the camera rises up from 5ft to 200ft to witness Baghdad under bombardment. We shot a plate of the cars coming out of the gate with a 50ft crane up, on location in Morocco.
This served as invaluable reference for the shot which ended up being entirely CG, due to the need to extend the camera move up and to wash the foreground with light from the mid ground CG explosions.

The huge smoke plumes that we see were created using our in house fluid solver dnSquirt and some maya fluids, rendered with our renderer; dnB. We actually sculpted all these vast plumes to match the size and shapes that we saw in the footage from the real thing. Exploding buildings were achieved with our in house rigid body solver « dynamite ». Hundreds of passes were rendered out; volumetric atmospherics, lighting passes, smoke, fog, explosions, fire, tracer, buildings, exploding buildings, trees (lots of trees, all gently animating), the Tigris river, foreground cars, exhausts, dust kicked up from the road, etcetc. There were about 150 layers each with secondary lighting passes and IDs all expertly knitted together by Sean Stranks in comp, CG by Dan Neal and FX by Mike Nixon. In addition, on this sequence, our work actually started inside the house as Al-Rawi prepares to leave. We added falling dust and damage to the walls, then when we come outside, we added tracer arcing up into the sky, illuminating CG trees which we added around the courtyard. We also added reflections into car windows of what we were about to see in the high wide. All quite subtle stuff but vital to keep up the energy of this opening scene. We used Houdini L systems for all the trees which provided a useful layout tool. The L systems trees were baked out as a series of rib archives with varying levels of dynamics to simulate anything from gentle wind to chopper wash, so that the animators and the layout artists could pick up pre-animated trees and place them into their Mata scenes using simple bounding boxes for placement. At render time the curves become trunks, fronds and leaves using custom in-house shaders which created displaced surfaces from the curves.

Can you tell us more about the airport’s sequence?
The airport scene really encapsulates our work in Greenzone. We’re taking the Moroccan location and plonking it right slap airside in front of what was Saddam International Airport in Baghdad. The arrival of Zubaidi was shot the same way Paul likes to shoot all his dialogue scenes, the action is allowed to play out for nice long takes with 2 cameras on short zooms in and amongst the action and one long lens off to one side, with cameras sometimes leap frogging – one re-loading while the other carries on. The scene was shot on an open expanse of tarmac at an airbase north of Rabat. Faced with this style of filming, multiple cameras all looking 360 degrees throughout takes, it was clearly not an option to rig a few miles of bluescreen, half a mile high round the action, so the roto and comp artists really came into their own here. Matt Smith built the airport and was the CG lead for the sequence. Again, the internet was trawled for reference images from the time and these + dnPhotofit were used as layout and modelling guides. Everything was modelled from scratch and textures hand painted. There had been a fire-fight at the airport but we added extra damage to the terminal building to support the narrative. This damage was achieved by using the last frame of a rigid body simulation. This scene features the only real chopper in the movie – the Puma that Zubaidi lands in. All other aircraft in the film are CG; Blackhawks, Chinooks, C-130s etc. The opening aerial shot is all CG and has all our CG hardware on the tarmac and unloading from C-130’s; Fork-lifts, 5-tonners, Humvees, HEMTs, Bradley tanks, Abrams M1A1 tanks, diggers, Iraqi civilain cars, US gvt SUVs and landrovers along with a few hundred soldiers.
Once on the ground, we have a shot of Zubaidi’s Puma landing, escorted by a CG Chinook in extreme foreground and another behind it.
This sequence was another matchmove challenge, with handheld zooming cameras and just tarmac and sky and 30 or so milling journalists. We had the immediate tarmac, the Puma, the Journalists, a couple of Humvees and 2 tents, everything else is CG. Comp lead was George Zwier who did a great job.

How did you create the Assassins’ Gate?
This shot was re-purposed slightly in post. We shot on a broad leaf tree lined avenue in Rabat. It was actually the road that leads up to the Royal residence. We knew where we were going to place the CG Assasin’s Gate and construction had positioned 2 containers one on top of the other either side of the road with a black drape hung between them to cast the correct shadow onto anything that was to pass underneath the Gate. We marked out the footprint of our model on the road and positioned 20ft green poles at each of the corners. We also had our virtual set mix/overlay system with us so everyone could see what we’d be adding. The Gate itself was beautifully modelled and textured by Tom Edwards from web sourced images and hand painting. Paul really wanted to underline the damage that had been inflicted on the key gvt. buildings in the Greenzone and so we stripped out the real trees, added huge damaged buildings back from the road and dressed in palm trees lining the avenue. We also added fg tanks, razor wire, Greenzone sign and Bradley tanks complete with driver – we had the frame work for the tank constructed from 4×2″ panted blue so the driver was standing at the correct height. Another lovely composite from Sean Stranks.

Can you tell us how you create shots in the Green Zone in particular
We were keen to be as accurate as possible to the geography of the GreenZone. Our CG co-supervisor, Julian Foddy, became something of our tour guide, making sure that the key buildings were layed out correctly. We started modelling key government buildings way before the shoot and because we weren’t too sure of shot design they were all modelled and textured to a high LOD.
When it came to using them we would typically take a digital wreaking ball to them to match ref photography or dress in specific art directed additional damage to better suit the composition of the shot. Theres a great Miller POV shot on the way to the Palace where we start out looking out of the side of his Humvee before panning round to look out the front. We shot on a nice open boulevard in Rabat with a road dressed with sand, but apart from the immediate fg Humvee and the road, everything outside is CG, all the damaged buildings, trees, passing Humvee on the other side of the road and the distant Palace. Here’s an explanation from Julian describing how he approached the damage: « We used custom mel scripts, coupled with a dneg proprietary boolean plug -in, that allowed us to use a geometry plane as a ‘knife’ on other geometry. Firstly the building was modelled intact. The modeller would then take a high resolution plane, and add noise and undulations to the plane, similar to the line of a crack or shatter. This plane was the positioned intersecting the wall where we wanted the damage to be, and the scripts run to slice the wall into two pieces. This process was repeated over and over, until walls had been ‘blown to pieces’. Another in house tool ‘dynamite’ was then used to dynamically scatter chunks of the wall and other associated debris onto the ground.  »

What about the shots of the Palace and the poolside?
The shots outside the front of the Republican Palace were shot in southern Spain on an airbase. Art department constructed the front door and portico in front of a large white building of approximately the same height as the real thing in Baghdad. We marked up the driveway
on the location and any other CG additions that the action would come close to (or have danger intersecting with). We also had our virtual mix/overlay system with us. This was really important as a framing guide for this sequence as for one of the angles we had the CG gardens in foreground with the live action in the mid ground and CG Palace behind. So, in addition the the Palace, we have CG grass, trees, shrubs, and fountains in foreground , layed out as per the real thing using Googlearth and the copious reference photography that exists for this location, as well as CG midground vehicles and CG soldiers.

Was the flyover shot over Baghdad and the Green Zone 100% CG?
A helicopter plate filmed in Morocco for the beginning of the shot served as the only live action element. The shots begins with a ground rush of urban Baghdad, before the camera tilts up to reveal the expanse of the Greenzone. The camera travels over the crossed swords of Qadisiya, past the UFO-like tomb of the Unknown Soldier and bomb damaged ministerial complexes before honing in on Saddam’s Republican Palace. Apart from the first 150 frames, which is mainly a retimed and re-projected version of the Moroccan plate, the shot is entirely CG. Julian Foddy lit and rendered all the CG for this shot (he modelled a lot of it too and did a fair amount of the texturing ) – pretty Herculean. Graham Page composited it. I did ask him how many layers he had to deal with and I’m told it was around a hundred but with each of those layers being made up of auto-precomped layers, its pretty hard to put a figure on it. Theres in excess of 500,000 frames of CG in the shot amounting to 5 TB of data. The vast ground expanse was textured in camers space by Tim Warnock.  Jules  used a « brick mapping » approach to overcome the challenge posed by the 38,000 trees in the shot. This meant we were rendering high detail point clouds rather than actual geometry, so we moved seamlessly through varying levels of detail as the trees grew nearer camera. Tonnes of extra detail was added with the addition of buses, people, cars, choppers, smoke from smouldering buildings and FX atmospherics passes from Federico Frassinelli.

Why and how did you recreate the Black Hawk helicopters?
We couldn’t get hold of the real thing and even if we had you can understand the authorities being reluctant to let us fly them around over their capital city but as we had shots of Special Forces teams getting in, out, taking off and landing in real helicopters we had to film with something practically. Fortunately for us, the opening on a Huey is of a similar size and the Moroccan airforce kindly made 2 available to us. Having a real helicopter was really the only way to do these shots. You have something the approximate size that kicks up all the right atmos – has the right presence and forces a level of authenticity that would otherwise been hard to achieve. They were modelled from scratch using rough dimensions gleaned from the internet and using photogrammetry coupled with loads of internet stills. We finished them to a very high level of detail as in some shots we run right up to the door – 3 ft away from camera. They were lit by Bruno Baron who is a genius. The choppers look amazing. The compositors had to work hard to integrate the CG choppers into the shots, keeping as much of the real dust/atmos as possible but also using CG FX dust from Federico and Mike Noxon to bed them into the plates. The FX work is also critical to these shots, matching their sims perfectly to the practical. The choppers also have CG pilots up front animated by Will Correia. The daytime scene when the SF team land on the dusty soccer pitch and snatch Millers prisoners was one big CG chopper moment. Another takes place at night as they race from their base, across the tarmac and into their blackhawks. For this scene we just had the one Huey, one light and our 6 foreground SF team. Everything else was CG; the base, the perimeter fence, bg vehicles, the hero blackhawk that we run up to and the 2 other blackhawks complete with digi doubles running across the tarmac. Its fair to say that these shots were testing for all departments particularly matchmove – not much to track and roto – black shapes against black.

Is the night shots like the market has been easier to create?
The crane up at the end of the market-place stand-off was modelled, lit and rendered by co-cg supervisor Dan Neal and composited by Walter Gilbert. The only real thing in the shot is the rotoed element of Miller walking away from camera. Tom Edwards surveyed the set and took a number of high res tiled panoramas of the marketplace and surrounding buildings as well as a number of HDR spherical lighting images. What you see is the result of a fairly immense job from Dan from all the market-place structure – loads of boxes, wooden posts, tarpaulins, fires, smoke and buildings to the arriving Humvees and troops that get out and run into the square, the choppers, explosions, tracer. Its another kitchen sink shot!

What was the most complex sequence?
The most complex shot has to be the flyover. As far as sequences go they were all complex.

What do you remember this movie?
A really great crew – both shooting and in post.

What is your next project?
My garden. I’m helping out round the company doing bits and pieces at present, a bit of ATTACK THE BLOCK, a bit of HARRY POTTER, some INCEPTION, some bidding.

What are the 4 movies that have given to you the passion for cinema?
Thats a tough one.
CASABLANCA, KES, MARY POPPINS, UNFORGIVEN, TOY STORY. I’ve given you one extra.

Thanks for your time.

// WANT TO KNOW MORE?
Double Negative: Dedicated page to GREEN ZONE on Double Negative website’s.

© Vincent Frei – The Art of VFX – 2010

SHERLOCK HOLMES: Jonathan Fawkner – VFX Supervisor – Framestore

Jonathan Fawkner talks with us in the following interview about his work on SHERLOCK HOLMES, he has done in parallel with AVATAR. Note that Framestore received the VES AWARD for Outstanding Supporting Visual Effects in a Feature Motion Picture for SHERLOCK HOLMES.

Hello Jonathan, you’ve had a busy year. First AVATAR and then SHERLOCK HOLMES. How did you manage those projects at the same time?
Well it was certainly an interesting time. I shared the AVATAR supervision duties with Tim Webber so that certainly helped. The key to the whole thing was a great production team that I couldn’t have done it without. The AVATAR day actually was a bit later than the SHERLOCK day and I was able to juggle the demands quite easily once we got a the days planned out and everyone knew where I would be and when. But SHERLOCK was the « day job » and it delivered first, even though it came out later.

How was your collaboration with Guy Ritchie and Chas Jarrett?
Both Chas and Guy made the whole project really enjoyable. Both had a great attitude to the vfx. Chas had a meticulous plan from the outset and I was really impressed with his execution of the shoot and attention to detail and creative method of achieving shots and elements. Guy trusted Chas on most of the vfx work and had a very instinctive reaction to most shots. His mind was made up, more often than not in the first few frames. If something did not sit right with him, he would let us know otherwise we just got on with it. They were both a lot of fun to work with.

What are the sequences made at Framestore?
Framestore took on the lion’s share of the work, including the « Wharf explosion » and « Shipyard » sequences. About 450 shots in all.

I guess you had to hide many elements of the current London?
We called it « past-ification ». It was a key strategy to most of the material as Guy wanted to shoot on location wherever possible. We approached it in a number of ways but they ranged from simply painting something away, to replacing large sections of background with matte painting, to replacing whole foreground elements in CG, particularly on the river Thames sequences.

Can you explain in detail about the sequence of the fight beside the ship?
There was actually a quarter of a ship built on a location in a real Victorian shipyard at Chatham, Kent in keeping with Guys desire to shoot as much on location as possible. Enough of the ship was built to enable the close up shots of the actors in front of the hull to be shot for real. Our work there was limited to « pastification » of areas that could not be dressed and the addition of atmosphere and any views out of the doors at either end of the slipway. This included a river Thames and 19th century river wharf beyond.

Whenever we went for a wide shot we extended the set ship with our 3D lit and textured version, including all the ropes, chains, platforms and shipbuilding paraphanalia that were needed. When the ship started to move though the whole thing was CG and all the aforementioned materials were simulated to react accordingly.

Chas shot the ship on three separate occasions. With the practical ship, without the practical ship but with the destruction detritus in place, and with a completely clean shed for background plates. In the end we ended up replacing the shed with a CG projection mapped version as so much of it was being « pastified » including the whole of the roof.
As the ship is released by the Dredger character, it rips a capstan from the ground which does a lot of damage. We used a propriotary rigid body simulator called fBounce to very efficiently simulate hundreds of destructions of platforms, slipways, barrels, ladders and everything needed to devastate the area. With the addition of multiple smoke and atmos layers and a complicated chain simulation we were able to complete the effect. The water impact was enhanced by a trip to a lifeboat station where we filmed multiple launches to gather the elements we needed to composite our much larger uncontrolled ship launch.

What did you do on the big slow motion sequence with explosions?
This was a sequence that was not originally in the script but Guy had the idea for putting his actors in very real and tangible danger. There were no digital doubles or stuntmen used in the sequence. It is all Robert, Jude and Rachel. The whole thing was shot on a location in Liverpool that could not use any pyrotechnics so we were presented with quite a clean plate. Chas had story boarded the sequence and established an order for the explosions and where they would happen. These were lit with small flambos and the actors bombarded by air mortars which added some interactive lighting and gave the actors something to react to. But all of the explosions and destruction was added by us.

Chas executed a high speed motion control green screen shoot on a one-to-one scale mockup of the location. It was an ingenious modular construction that allowed each explosion to be seated in the correct scale surroundings. We shot each ignition separately on a Frog moco rig travelling at nearly 70mph in order that we could match or exceed the shutter speed of the plate. All of the interaction with the characters and set was then achieved with pain-staking compositing and lighting bled from the explosions themselves. We added a CG brick wall collapsing and some CG fire to a mimed performance from Robert during one shot which was about 30 seconds long, and also debris, embers and smoke to each explosion. Guy wanted the characters to be bombarded wherever possible and to be fully engulfed, and yet to be sure that it was our actors who were in the shot and not stunt men. In a couple of shots we rip a hole through clothes to further emphasise their proximity.

What was the biggest challenge on this show?
I knew the wharf explosion would go to the wire and it did. Guy was very attached to the sequence and he kept adding more and more. They were some of the first shots started in earnest and the last shots finalled.

How long did the post-production?
We worked for about a year.

Did you encounter some difficulties?
Due to a very well executed shoot with a good ammeinable crew and a down to earth director, the whole show passed relatively un-troubled. We had a good time.

I read that Framestore Reykjavik worked on the show. What have they done?
They helped us out on the animation side. There was a lot of simulated animation in SHERLOCK but the ship and bouncing capstan required a more creative touch. The Iceland team were free and able to help out.

Why open a branch in Reykjavik?
We had a lot of talented Icelandic crew. They wanted to be at home and we wanted to work with them still. We have crew in New York as well. The talent is pooled, and technology means we all get to collaborate pretty seamlessly.

What is your next project?
I am now on NARNIA: THE VOYAGE OF THE DAWN TREADER.

Thanks for your time.

WANT TO KNOW MORE?
Framestore: Dedicated page to SHERLOCK HOMES on Framestore website’s.

© Vincent Frei – The Art of VFX – 2010

PERCY JACKSON AND THE OLYMPIANS: THE LIGHTNING THIEF: Guillaume Rocheron – VFX Supervisor – MPC

Guillaume Rocheron begins his career at BUF in 2000. Having worked on films such as PANIC ROOM, ALEXANDER and BATMAN BEGINS, he left to join the teams of MPC in London. He worked on SUNSHINE, 10’000 BC or HARRY POTTER AND THE HALF BLOOD . In 2009, he moved to MPC Vancouver to work on PERCY JACKSON.

What is your background?
I have worked for MPC since May 2005. Before hand, I spent 5 years at BUF Compagnie, working on a number of commercials and some film projects including ALEXANDER for Oliver Stone, BATMAN BEGINS and THE MATRIX RELOADED. I started at MPC London towards the end of production for HARRY POTTER AND THE GOBLET OF FIRE, i then moved on to lead lighting TD on X-MEN3 and ELISABETH THE GOLDEN AGE and CG Supervisor on 10.000 BC, HARRY POTTER AND THE HALF BLOOD PRINCE, GI JOE: RISE OF COBRA, SHANGHAI and NIGHT AT THE MUSEUM 2.

How did you get involved on PERCY JACKSON?
Discussions about moving to the Vancouver studio started in January 2009. At that time, the studio was still pretty small but I was interested as the visual effects market was growing very fast in Vancouver. PERCY JACKSON being awarded to MPC was the perfect opportunity for me as the type of work was right up my street. 2 months later, I was on a plane to Vancouver ; 4 days later, i was on set! In the following weeks, most of the rest of the key team members arrived from MPC London. By the end, around 85 people worked on the project in the Vancouver studio.

How was the collaboration with the director and the production supervisor Kevin Mack?
After the shoot, Chris Columbus, Kevin Mack and the movie production team were based in San Francisco and we were in Vancouver. We reviewed the work with Kevin on a daily basis via Cinesync. Kevin knew what the director was after and was giving us notes and comments to make sure what we were doing was fitting within the context of the film.

What are the sequences made at MPC?
MPC worked on 9 sequences, the main ones being the Minotaur Attack, the Hades Bonfire and the Hades Mansion where we took care of the Hellhounds and the Lost Souls.

Hades is awesome. How did you create and animate it?
Hades was by far the most difficult character for 2 reasons: Firstly, he has to perform and secondly, he is a character made entirely of charcoal and fire. When he is not transformed as a demon, Hades is played by Steve Coogan. One of our challenges was to integrate characteristics of his acting into our CG character. To achieve this; we captured dialog scenes and a library of facial expressions using the Mova Contour Capture system which allowed us to create a very high resolution animated reconstruction of Steve Coogan’s face in 3D. We then used and improved our in-house motion blending tools and facial rigs to manage and manipulate the pretty dense data. The point cloud was around 600 tracking markers per frame which meant we could capture all the subtleties of the performance, even including the small vibrations under the eyelids which are generally filtered like noise by standard motion capture solutions.

The perception of a performance can change a lot once transferred into a 12 foot character like Hades. Because of the size and camera angle difference and the fact that his face is made of charcoal and lava cracks instead of humanflesh, we had slightly tweak the performance. The challenge was to do this in a non destructive way, paying attention not to change or remove key elements that defined the original performance that Chris Columbus wanted to capture.

The second challenge was to create the fire in which Hades appears and is also emitted from his giant wings. The fire was an important component in the style and acting of the character : the flames are slow and gentle when the dialog is quiet, they get bigger and faster when he suddenly gets angry and they become really fast and explosive when he wants to show his power by throwing fireballs. They require such precise control that we quickly took the decision to use CG fire instead of elements. In general, CG fire is used for quick events like fire balls, explosions, burst of flames etc… In Hades case, the fire is always there, but sometimes its not doing anything spectacular so you have time to really look at it, analyse his movement and details. It was impossible to use the standard techniques which are generally used when creating a fairly low resolution simulation and artificially enhance the visual details by mixing it with 3D noises or fractals. These don’t contribute to the quality of the movement and the simulation. For a few years now, we have worked with Flowline, the fluid simulator from Scanline and we’ve pushed it as far as we could within the time we had for the project. Every voxel of the fluid simulation was around the size of 1 millimeter which ensured that almost every pixel of visible fire on screen was contributing to quality of the movement. This is around 50 times the resolution at which we’ve simulated fire previously. Each wing was taking around 15 hours of simulation per shot, splitting the simulation across 3 machines which seems long but is finally pretty reasonable if you take in account the resolution they’ve been done at. Fluid simulations are by nature very difficult to control. Our FX team really did a fantastic job in finding methods and rules that would allow us to control that fire according to what Hades would do in every shot, without compromising the quality of the movements and details.

Can you explain to us the conception of the Lost Souls?
For the Lost Souls, the challenge was different than it was for Hades fire. We had to create a supernatural fire inferno in which hundred of creatures are trying to escape. Kevin Mack shot movement and action references with 3 HD cameras which we used to create a library of movements for our CG creatures. We then enlarged the fireplace by destroying his edges using PAPI, MPC’s rigid bodies dynamic software, so the fire inferno could get a lot bigger and so the effect could look a lot more threatening. Using the same technology developed for Hades fire, we created different layers of simulation: a fire vortex inside the fireplace, huge flames rolling on the exterior walls as well as a fire element for each creature within the fireplace. We spent a lot of time then integrating the fire in the plate, added flying embers and fine-tuning heat distortion.

MPC creates a whole bestiary for this movie. What references did you have?
For all the characters, we started from concept artwork by Aaron Sims as approved by the Director. For Hades, the Hellhounds and the Minotaur, we spent time converting the 2D concept into a 3D sculpt in Zbrush. It was important to make a version that would work in 3D and to get it approved by the director before starting the time consuming task of making a “production ready” character. We used hyena anatomy reference for the Hellhounds and a mix of human and bull references for the Minotaur body.

How did you create these mythical creatures?
After getting our Zbrush 3D concept approved, we modelled the creatures in Maya, paying attention to muscle groups. We then layed out a skeleton and muscles using MPC’s in-house solutions. The rendering was done in PRman via Tickle, MPC’s rendering tool and ShaderBuilder, MPC’s look development tool. Fur groom and fur dynamics were done using MPC’s fur tool, Furtility.

What was the most complicated creature to do?
Without hesitation, Hades. On top of the CG fire and the facial performance, we spent time defining how we would light him, with Hades being his own light source. We wrote tools to convert our fluid caches into Renderman point clouds so the fire would illuminate Hades using the color bleeding technique.

How did you add the legs of Chiron and Grover?
We roto-animated each actor in 3D so we could have their exact position in each shot and connected the CG legs or horse body perfectly to their waistline. We then animated the CG body so it would work with the actor’s performance. The most time consuming task was in fact painting out the actor’s legs from the plates. It is a pretty straightforward task when the background is pretty empty but can be very difficult when you have a full crowd behind the actors !

How many shots did you work on?
160

Did you use specific in-house software (for hair and fire)?
MPC uses a wide range of in-house software. On top of the shot pipeline and asset management tools, Tickle is our rendering interface with PRman, ShaderBuilder is our look development tool, Alice is our crowd software ( that we are using to process motion capture clips ) and we are using Flowline by Scanline for large scale fluid simulations.

What is the shot that prevented you from sleeping?
There’s been more than one !

Have you encountered any difficulties as such as unplanned things?
The unexpected always happens as you move through production on a project, some ideas that end up working great and some others that need changes. We were asked for example to make the Lost Souls look more threatening than what was defined in the original idea; so we had to change a few things to make the fire bigger, see more of the creatures etc… At the end, I think these changes were right as they really gives a nice momentum to the sequence.

What did you keep from this experience?
Being involved on a project like PERCY JACKSON has been a great opportunity, mainly because of the range of effects we’ve had to do : 5 different creatures, couple of transformation shots, some crowd and destruction and a lot of fire !

What is your next project?
SUCKER PUNCH by Zack Snyder…

What are the 4 movies that gave you the passion for cinema?
It is hard to lock it down to 4 films only. I really love movies by Brian De Palma and David Fincher.

Thanks for your time.

WANT TO KNOW MORE?
The Moving Picture Company: Dedicated page for PERCY JACKSON on MPC’s website.

0SuiveursSuivre