ITF 2011: Masterclass Karen Goulekas – VFX Prep and Data Acquisition

Here is the Masterclass of Karen Goulekas that I interviewed here for VFX work on GREEN LANTERN.

This video was shot at IMAGING THE FUTURE conferences in July 2011 in Neuchâtel, for which I’m consultant, during the NIFFF.

A big thank you to NIFFF and ITF for this video.

SHARK NIGHT 3D: Petar Jovovic – VFX Supervisor – Crater Studio

Petar Jovovic founded with several artists and friends, Crater Studio in 2005. He has since worked on films like TEARS FOR SALE, THE READER or THE OTHER GUYS.

What is your background?
My first contact with visual effects was when I skipped my secondary school classes to see STAR WARS in the cinema. Later on I learned painting and started experimenting with 3D Studio Max, and it got me extremely interested. After mastering Max, I have decided to teaching myself Maya which enabled me to enter the world of visual effects for feature films. In 2005 together with several artists and friends I have created Crater Studio whose first feature project was TEARS FOR SALE. The things started moving faster after visiting Siggraph 2008.

Can you tell us how did Crater Studio got involved on this project?
Crater Studio has been involved on various Hollywood projects since 2008. We’ve serviced several US based production studios on various feature films. The first major involvement of Crater Studio on a feature was working with VFX Supervisor Gregor Lakner and “Evil Eye Pictures” from San Francisco on a 2010 block buster comedy THE OTHER GUYS directed by Adam McKay for Sony Pictures/Columbia Pictures. Crater Studio was given vfx tasks on the most demanding shots of the movie, especially the freeze-frame, continuous-shot bar scene in which the leading actors Will Ferrell and Mark Wahlberg are caught mid-action in a series of drunken incidents. After the success of the movie and the overall good job done on vfx tasks, Crater Studio was called in August 2010 by production vfx supervisor Gregor Lakner to work on visual effects for SHARK NIGHT 3D that was about to start filming in Luisiana at the time. The primary vendor for visual effects was Reliance Media Works from San Francisco, CA.

What have you made on this show?
Crater Studio was involved from the start of the postproduction. The first task was to work on the creation of realistic CG sharks. Crater Studio’s artists worked on modeling, displacement, texturing and rigging of six different types of sharks: Great White, Mako, Tiger, Hammerhead, Bull, and Cookiecutter shark. We’ve also worked on the look development for two types of sharks in the underwater and above/breaking water environments. Crater’s artists also created water simulations and worked on shark animation, lighting and matte paintings for the show. Compositing for over 15 shots was done in Crater Studio as well.

Can you explain us in details the creation of the different sharks?
The modeling and rigging supervisor on the show, Vladimir Mastilovic from 3lateral, holds the answer to this question. As with everything else first step was gathering a lot of references. While we were learning about sharks, we got really excited about them as creatures. Like the fact that they have no bones, their bite is quite weak (compared to other predators), they have constantly growing teeth, most of them are able to eject their jaw to grab a bigger bite, they have protective layers over eyeballs, very keen sense of smell and some surprises as well like that they have their soft side in their personalities and they’re not that keen on human flesh which makes sense in a way- who would ever be able to escape them if we were their first choice for meal?! I guess the movie gives an answer to that- just main characters!

Modeling was done in digital sculpting programs like Mudbox and Zbrush. In this stage we wouldn’t worry about topology- just the anatomy, masses, the overall look. We would have group reviews with all modelers every 2 or 3 days with sharks rendered and composited next to reference. This was a good way to keep consistency in looks and anatomy. Often, riggers were included in this process to point out specific features that needed to be pronounced in order to have a more successful creature in final shot. Each of sharks we did has a special feature- great white is massive and powerful, mako is extremely fast and vicious, cookie cutters are perfect for this sort of movies- they’re small, hungry, and they come in groups… like piranhas, only sharks! Horrifying! All of this had to be communicated across the team from the very start of the process.

How did you rig them?
Once we had models done, riggers advised on topology we had to use. The topology had to be single shell, clean, grid like structure with just few poles. Because we used cloth simulators to simulate flabby skin it was preferable to have quads of similar size and with absolutely no intersections. Final topologies were a piece of art on its own as we managed to model both shark exterior and interior in a single shell with beautifully clean loops. This made things a lot easier for riggers later on.

The base of rig was quite straight forward but things we layered on top of it made the final look. We wrote a lot of custom tools for animators that made the whole process easier. These tools included managing of multiple sharks in the scene, selecting and setting keyframes in easy manner, saving poses, procedural motion/ path following and automatic secondary motion on fins. One of the more exciting things about these rigs was muscle system and integrating of simulated skin motion in controls which animators were able to use in real time. By using cloth simulators we created forces that simulate water running through the gills and propagating wake over the whole surface of the shark. Shark biting, when viewed in slow motion, often look like a water balloon thrown in mid air. Apart from obvious benefit, this also made the sharks internal structure more visible which made a refined and organic look we were after. Rig later on allowed controlling of speed and strength of these effects. In addition to this we also had procedural noise and wave patterns that we used to further increase realism and give our shots energy they required.

What was your on-set reference for lighting?
Grey and chrome spheres were used for lighting reference, as well as rubber sharks in some cases.

How was the collaboration with the teams of Walt Conti?
One of the aspect of collaboration was to use the animatronic sharks as look and light references in several underwater shots, as well as for the animation of the CG sharks.

What were your references for sharks animation especially when they are attacking and chasing the boats?
We had a great number of video and still image references for both modeling and shark animation. We used underwater and ocean documentaries as well as educational films that show sharks swimming capabilities, anatomy and bite mechanism. Most challenging was to find the references for cookie cutter shark – there is no video recording of the cookie cutter swimming!

How did you create the splashes and water interaction?
The splashes and water interaction were all created using Naiad, that was originally supposed to be used only on two most demanding shots, but it ended up being used in all of the water shots. We also had a much needed hardware support from the 24 core 96 GByte RAM simulation machine.

How did you create the shot in which the shark is jumping out of water to catch the guy on the jetski?
This was one of the most demanding shots. It started off as semi CG shot, but ended up being a full cg treatment. What made it more challenging was the fact that it was shot with a high speed camera to create the slow motion effect. Crater Studio’s task on this shot was the complete integration of animated shark and water simulation done by other vendors. Crater managed the final assimilation of the shot, including matte painting, lighting and compositing of all the elements.

Can you tell us more about the shots in which a character uses a bang stick to kill the shark attacking the girl in the cage?
Another very demanding shot. The live shot was made using the animatronic shark and Crater studio was asked to create a massive explosion of shark’s flesh leaving a big wound and flesh chunks. Crater Studio worked on the complete treatment of the shot: from camera match move and rig removal, over modeling and animation, to lighting and stereo compositing. The greatest challenge was integrating the cg elements into the live action footage to create a believable effect.

Can you tell us more about the matte paintings and the environment you created?
The matte painting supervisor on the show was Crater Studio’s Art Director Zoran Cvetkovik. By using onset photography with computer generated elements, he and his team managed to create stunning backgrounds for several shots. Most notably the shot showing the island was completely done as a matte painting. The live action background in the shot in which the shark is jumping out of water attacking the guy on the waverunner is completely replaced by our matte painting.

Were there a lot of removal rigs and crews to do?
Yes, but these tasks were mostly done in other vendor studios. Crater Studio was working on more demanding tasks, with only a few rig removals.

How did you manage the stereo aspect of the show?
SHARK NIGHT 3D was Crater Studio’s first involvement with stereo technology. Crater’s crew managed stereo tasks with great success. The most demanding tasks were stereo camera layout and stereo compositing.

What was the biggest challenge on this project and how did you achieved it?
The greatest challenge on the project was the need to create a realistic water simulations that interacted with realistic cg sharks. In order to tackle this challenge we used Naiad software and created pipeline for it. Our Naiad team led by TD Zoran Stojanoski and lighting artist Ivan Vasiljevic managed to stay on top of all the challenges that water simulation and lighting tasks presented.

What are your software and pipeline at Crater Studio?
We mainly use Maya for 3D and animation, Pixar Renderman for lighting, Naiad for water simulations and Nuke for compositing. Arnold was also used for lighting on the show.

How long have you worked on this show?
The whole project lasted for over 11 months. Effectively it took less time to finish all we had on our plate.

What was the size of your team?
Crater Studio had over 40 artists and production staff working on the project in various stages and on various tasks. We collaborated closely with Gregor Lakner as production vfx supervisor and the crew from Reliance Media Works.

What did you keep from this experience?
This was a great opportunity for Crater Studio’s artists and production staff to get hands on experience with stereo technology and demanding water simulation tasks. We have learned so much from this experience and are using the knowledge earned on current and future projects.

What is your next project?
We are currently working on a full CG part of an episode of a popular science fiction show that is in its 5th season at the moment.

What are the 4 movies that gave you the passion of cinema?
A CLOCKWORK ORANGE, FELLINI’S AMARCORD, ONE FLEW OVER THE CUCKOO’S NEST and DEER HUNTER.

A big thanks for your time.

// WANT TO KNOW MORE?

Crater Studio: Official website of Crater Studio.

© Vincent Frei – The Art of VFX – 2011

FINAL DESTINATION 5: Chad Wiebe – VFX Supervisor – Prime Focus

Chad Wiebe began his career working on the impressive opening scene in bullet time of SWORDFISH at Frantic Films. He then worked on THE CORE, X2 or CATWOMAN. It then supervised the VFX for films like TOOTH FAIRY or DRAGONBALL EVOLUTION. In 2007, Frantic Films was acquired by Prime Focus. Chad then oversee the effects of ECLIPSE.

What is your background?
I started out in art school taking graphic design and illustration at a Winnipeg college. Then when a computer animation branch of the program was created, I opted for an additional year specializing in learning 3D modeling and animation. From there I got my start at Frantic Films where we worked on the opening bullet time sequence of SWORDFISH. This led to an opportunity to travel to Los Angeles to work on a few previz projects which eventually led us to Vancouver to work on THE CORE and X2 which were filming there at the time. We saw the potential in Vancouver for a lot of future work, so we ended up setting up a small satellite office for Frantic in Vancouver which is when I permanently relocated there to help run and grow our Vancouver division of Frantic Films. (Note: Frantic Films was acquired by Prime Focus in 2007).

How did Prime Focus got involved on this show?
Prime Focus had previously worked with Steve Quale during AVATAR, and I had also worked with Ariel Shaw as VFX supervisor for DRAGONBALL EVOLUTION; he was also working with our VFX Producer Charlene Eberle at the time. So the relationship was there and the fit seemed right. Prime Focus had also done a substantial amount of stereo work in the past, which made the fit even better since FINAL DESTINATION 5 was to be shot in stereo.

How was the collaboration with director Steven Quale?
It was great. Steve has an immense amount of experience shooting stereo which was a huge asset both during the shoot and also during post production. He was really able to push the stereo in a way that worked with the movie and made the experience for the audience that much better.

Which sequences did you made?
We created the opening premonition sequence of the movie, where the suspension bridge collapses and the main characters meet their demise.

Can you explain to us the impressive recreation of the bridge?
The bridge had actually been lidar scanned, which was a great starting point. It gave us a good representation of the layout and scale of the bridge and its components. From there we had to incorporate 3 different set pieces of sections of the bridge into the model of the full bridge, which was challenging because they were each slightly different from one another, and also slightly different than the bridge itself in terms of scale and the angle of the bridge deck. Once the model was completed, we began the texturing process using massive amounts of reference photos of the bridge and the various sets that were built. Being such a large structure, it was a painstaking task to make sure every detail was considered down to each beam, cable and rivet.

How was the shooting of this sequence? What was the real size of the set?
The shooting for the bridge sequence lasted about 2 months and they actually built 3 different set pieces, which were in 3 different locations. One was an actual paved section of recreated bridge on the side of a mountain outside of Vancouver, which overlooked the ocean. This was the largest of the sets and allowed us to populate the bridge with a number of cars and construction vehicles. Then we shot on an elevated set piece which was used to propel some cars off of as well as shooting our main actors as they dangled off a hand railing which was hanging off the bridge. Then we also used a section of bridge that was on a gimbal which allowed the bridge section to lower and tilt preceding the full collapse.

Did you create some previz for this sequence?
We spent about 8 weeks doing previz for the sequence before the shoot.

Can you tell us in details how you destroy the bridge?
After our initial RnD, we started by creating a complex rig and bridge element management system in 3ds Max, designed by our rigging technical director Eric Legare. It factored in all the different elements that made up the bridge and allowed us to approach it using a combination of keyframe animation and dynamic simulations, while also managing the sheer volume of data included in the bridge model. By using keyframe animation as a starting point, we were able to quickly block out broad stroke animation passes which we would submit for approval on different aspects such as the vertical or horizontal sway of the bridge, the frequency of the cable vibration, or the amount of torsion being applied to the concrete deck.
Once we had a general look approved as a starting point, our lead FX artist Jon Mitchell would take the animation and pipe it into Thinking Particles, which we used for all aspects of the destruction, from the cables vibrating and snapping, to the concrete crumbling and breaking away and the vehicles interacting with other elements on the bridge, including the bridge itself. This was a bit of a balancing act because each aspect of the bridge and its destruction had the potential to be art directed which isn’t always easy when working with simulations. So we would at times cache out certain elements of the bridge that Steve and Ariel seemed happy with, and then try to build additional simulations on top of that.
Once the base destruction was signed off on, we would begin adding the fine detail particles, dust and debris, using a combination of Thinking Particles and Fume FX.?On top of this we also had a talented team of animators, led by Jared Barber, who would take base bridge simulations and begin blocking out all the background character animation…..which in total amounted to about 80 different digi-doubles. While we did receive motion capture of actors running around and reacting to different events, we were only able to use this as a starting point since our bridge has a substantial amount of sway during most of the action shots. So they would have to add the characters staggering as they ran, reacting to different obstacles in the way and then ultimately fall with the bridge in interesting and different ways.

What references did you used when the bridge collapse?
The main reference that we kept coming back to was the Tacoma narrows bridge collapse footage from 1940. It provided great reference that exemplified just how much stress a seemingly solid structure can endure before finally breaking apart. Beyond that we exhaustively researched building demolition videos which provided great reference for how different elements such as concrete and steel react during controlled demolitions.?

How did you create the digi-doubles?
We started with cyberscans which were taken of each actor as well as a variety of extras for background digi-doubles. From there we had our team of modeling, texture and shading artists bring the characters to life. For digital hook ups, we would choose frames that would give us the most detail for re-projecting and re-sculpting the models to match the plate 100%, and from there we would have to rebuild any data that was missing to make the digital characters usable after the hook up point. This would also include posing hair and clothes to match the plate, but then continue to match the motion once we transitioned to hair and cloth simulations.

Did you develop specific softwares or tools like for the water?
We actually used Naiad for the water simulations where the bridge impacted the inlet below. It was the first project we had actually used the software on, and thanks to a talented team of sim artists led by Chris Pember, we were able to turn around massive fluid simulations in a short amount of time. We also had to build a Naiad to 3ds Max pipeline, for which Thinkbox Software’s Frost and Krakatoa were a big help by enabling us to convert the Naiad emp format to Krakatoa’s prt format which we would then use with Frost to generate a surface mesh. We also used Krakatoa to render all of our splash elements, surface foam and mist.

How did you recreate the whole environment?
The environment itself was actually built as a hybrid of Vancouver and a location about an hour outside of Vancouver where part of the sequence was shot. Since during the outdoor shoot the weather and lighting would change by the hour, reference photography was essential for recreating the environment and capturing the feel that Steve was looking for. Environment supervisor Romain Bayle built an elaborate 3D environment in Nuke by extracting different elements from chosen reference photos which would serve as a foundation for all shots. So you could literally point a camera in almost any direction and have a true 3D re-creation of the landscape. Of course this would also be art directed shot by shot, so once we blocked out the initial sequence, Romain would then use additional reference photography that we would shoot frequently to capture interesting cloud and lighting patterns as well as background mountains and landscapes. Being a 5 minute drive from the bridge itself was also a great help, as we were able to make frequent visits to obtain additional reference material.

How did you manage the stereo aspect?
That is always challenging due to the fact that you basically have to double up on most aspects or the work you’re creating, and this ultimately leads to an immense amount of data that has to be managed. Fortunately, since Prime Focus had recently completed TRON LEGACY, we were able to use many of the tools that were created for that show, which gave us a great starting point in dealing with the stereo aspect of the show.

What was the biggest challenge on this project and how did you achieve it?
The biggest challenge was using a new fluid software which no one in our facility had used in the past. So there was a lot of learning and trial by fire required. Fortunately, having staff who were familiar with fluids from back when Frantic Films was using Flood, the transition was fairly smooth and the artists adapted really well which made the process much less painful.

Was there a shot or a sequence that prevented you from sleep?
Well I’d say one of the trickiest shots was the shot where Sam gets sliced in half. This was originally intended to be mainly practical (and was shot that way), but then it was decided Sam would be full CG for practical reasons. So it definitely became a shot that required a lot of additional time and effort down to the last week of the show, but fortunately we had an amazing team that I knew could pull it off in a short amount of time.

Which division of Prime Focus have worked on this show?
The Vancouver studio.

What do you keep from this experience?
Every stereo show has its own unique differences and challenges. Working with Steve and the stereographers on set was a great learning experience which opened my eyes to many things I had never considered in the past in regards to shooting stereo. There are always rules and boundaries you have to try to adhere to when shooting stereo, but knowing just how far you can push something before you risk breaking it will always be something I continue to explore. Beyond that I feel fortunate to have been able to work with such an amazing team on this project including our CG supervisor Todd Perry and our VFX producer Charlene Eberle who with our team really pulled together to create some amazing work.

How long have you worked on this film?
Including previz it was 8-9 months.

How many shots have you done?
Just over 130 shots.

What was the size of your team?
About 70 artists.

What are the four movies that gave you the passion for cinema?
I think trying to narrow it down to 4 would be much too difficult. I have always been and continue to be inspired by the work coming out of the visual effects industry and my peers are the ones who drive my passion for cinema.

A big thanks for your time.

// WANT TO KNOW MORE?

Prime Focus: Dedicated page about FINAL DESTINATION 5 on Prime Focus website

© Vincent Frei – The Art of VFX – 2011

GAME OF THRONES: Kirk Shintani – CG Supervisor – a52 / Elastic

Kirk Shintani worked for many years as a freelancer before joining teams of a52/elastic. In the following interview, he talks about his work on the main title of GAME OF THRONES for which he received an Emmy Award.

What is your background?
It’s a little unusual. I graduated from UCLA with a degree in Psychology, then realized that it really wasn’t what I wanted to do the rest of my life. Woops. It wasn’t until my best friend mentioned he was interested in 3D that I really thought of this career as a possibility. So I did my research and started taking classes at Gnomon School. After I graduated from Gnomon’s Certificate Program, I freelanced, took a staff job, freelanced some more, and about 4 and a half years ago, decided to stay at a52/elastic.

How was the collaboration with the production for this title?
Everyone at HBO was really great. They let us loose on this job and were really open to anything. Dan Weiss, David Benioff, and Carolyn Strauss were very supportive and gave us a lot of encouragement. It’s rare to get a chance to work on a project that has so much creative freedom. They put a lot of trust in us to do something unique and cool and I think having that support really shows in the final product. HBO understands the process and really puts their faith in it.

Can you tell us how did a52/elastic get involved on this project?
It actually started two years ago with preliminary designs. We explored the possibility of vignettes to orient the viewer originally. But in the end it slowly evolved into a title sequence to accomplish the same goal: To introduce the viewer to this large, very unique world and give them a better understanding of the territorial boundaries of each faction.

Which indications and references did you received from the production?
Initially we received tons of imagery from production to help us define which locations were important and to give us a good indication of form and scale. We also used the production art to figure out what the best way to represent the unique locations in the language that we developed for the title sequence. As the production art was refined, we would update our models accordingly. It was pretty amazing to get a chance to see the concept art from production, because it gave us a great sense of the shows direction and mood.

What was the main concept for this opening title?
It’s Retro-Futurism, mixed with da Vinci mechanicals and a dash of ‘medieval steam punk’ for flavor. We wanted to avoid a flat 2 dimensional map at all costs, so we spent a lot of time trying to find a way to keep dimension in the map but still allow us to move from spot to spot as easily as possible. The Retro-Futuristic inverted planet gave us a great foundation to build on. It allowed us to move from location to location and gave us a much more elegant way of departing and arriving at locations. A big benefit was that we could look anywhere on the map and never have to think about a horizon line. It also allowed us to show a large portion of the map while we were traveling between cities. A flat map would have been much less elegant, requiring us to tilt up for each move to show our destination as we traveled toward it.

How did you create the beautiful Astrolabe?
It started with reference. Lots of reference. Rob Feng was always collecting imagery and thinking of new ideas. We took inspiration from automata for the astrolabe, and translated that into a rough model in Maya to work out the dimensions, number of bands etc… Henry De Leon then painted the mosaics that we see engraved in the bands.

From there we took their digital paintings and used them in zBrush to generate a highly detailed engraving as displacement and normal maps and Joe Paniagua added the wood grain textures, the cracks and the animal heads to really make it feel tangible. Maya and vRay were used to shade and light the detailed model, and Eric Demeusy took our renders and cranked it up a notch by adding all the heat haze, camera shake, light blooms, and chromatic shifts.

Can you tell us more about the design for the cities?
We spent a good portion of our time trying to define a ‘language’ we could apply to our world. We wanted to make sure that the cities felt had made, so we looked at da Vinci’s mechanical concepts and actual builds of his ideas. It’s really amazing how forward thinking he was. I think it really helped us generate boundaries for our world. His ideas were grounded in the technology of the time which was great for us, because it gave us a base to work from. We always reminded ourselves that if we couldn’t make it with a saw and wood chisel then we needed to re-think the design.

Can you explain to us in details the creation of the different cities and environment?
We wanted to make sure that we thought everything through from a style standpoint before we got too far along in 3D. Rustam Hasanov did a great job of capturing the idea and feeling in his initial concept sketches and Chris Sanchez brought those concepts to life by rendering them in Photoshop. We then took the concept sketches and renderings and the basic da Vinci conceptual framework, and applied it to the locations. We wanted the viewer to feel like the city was being driven by something larger than just the location and that it had an underlying mechanical structure. Modeling was challenging because it was so closely tied to animation. There was quite a bit of back and forth between modeling and rigging because of the nature of the locations. They all had to animate out from underneath the base land mass, and they had to be mechanically possible, so modelers had to think about how to actually build the cities practically. We built many different gear variations to try and find what worked, and how to change the direction of force depending on the needs of the structure. There’s so much detail that you don’t see in the final sequence!

We also spent the time to make sure each location was unique, but still maintained the basic look we established. For instance, Winterfell is a bit worn, The Wall is weathered, and King’s Landing is much more pristine. The world itself was a little more challenging, and we wanted to be sure it tied everything together. Things like the trees scattered over the surface were just simple shapes, and the mountains were made of flat wood panels, keeping in line with the ‘hand-built’ nature of the sequence. The larger land masses were tiered to give it a feel of layered wood panels with distressing and cracks wherever the most movement would occur. We also whitewashed the wood the further north we traveled to represent the change in climate around The Wall. The water was done with Maya nCloth to give the feeling of rolling waves, but again still feeling hand made. We embroidered the type into the cloth, and built metal plaques for locations on land.

Can you tell us more about the setup and the rigging for the animation of the cities?
John Tumlin and Dan Guttierez both did a great job working with our modelers to speed up the process on the setup and rigging side of the pipeline. There were really only a few things that were traditionally ‘skinned’. Vaes Dothrak and the tree in Winterfell’s ruins were the expections. Most everything else was dependant on group and transform setups. John spent some time setting up scripts to automate some of the more complicated gear and cog mechanicals and they both spent a lot of time making sure the rigging was flexible enough to accommodate inevitable tweaks and changes to the models.

Did you used procedural animation or rely on keyframe animation?
In the end, we used both scripted animation and keyframe animation. The gears and cogs were scripted to handle the interaction in the larger mechanical chains to make our lives easier, but we keyframed all the major elements. The great thing about the set up was that we could start with the script controlling the basic gear interaction, then go back in and add offset animation and sticky gears and shuddering as an additive pass. If we had to hand animate each gear interacting with each other, we’d still be animating today! I don’t know how many there actually were, but there were more than we’d want to animate by hand.

Can you tell us more about this great render look?
This was our test bed to switch to vRay. It was basically a trial by fire, and we only got singed a little bit. We did initial tests with a rough version of the Pentos model, and were blown away by how quickly we got the renders looking great. We were convinced that we’d be able to execute the job with a brand new renderer based on that test. A testament to Ian Ruhfass, he spent the time to test and set up vRay as well as set the lighting approach and look very quickly. There were some technical hurdles along the way during the switch, like render farm implementation and locking down a build we were happy with. But overall we were impressed with vRay. Every build seems to be getting better and better, and it’s pretty stable already. DOF and Motion blur were very fast out of the box.

What was the biggest challenge on this project and how did you achieved it?
The biggest challenge was making sure we were delivering a title sequence that showed the viewer the scope of the show in a grand and elegant way. GAME OF THRONES (GOT) covers quite a bit of ground and travels to the far corners of George R.R. Martin’s world. We needed to show that scope and detail without having the sequence revert to a fly-over on a 2D map. The inverted sphere concept allowed us to keep the world dimensional and provided us with some shortcuts from place to place.

Congratulations for your Emmy Award. What was your feeling about this?
It’s an honor just to be even considered for an Emmy. There were so many people who contributed to this project. It was a great group of guys to work with. Everyone was very enthusiastic, and put some of their own creativity into the job. The GOT team was one of the most balanced and collaborative teams I’ve had the pleasure of working with and HBO gave us so much freedom to explore different ideas. Carolyn Strauss, David Benioff and Dan Weiss we always very encouraging and supportive and we wanted to be sure that we delivered a sequence they could get excited about. Personally, I wouldn’t be doing what I love if it weren’t for 4 people. The late Nobu McCarthy inspired me to follow my heart. My parents gave me the chance to do what I love. And my fiancée Michelle is the most patient, understanding and supportive woman I have ever met.

What are your software and pipeline at a52?
Maya – vRay/Mental Ray – Rush – AE/Nuke – flame/smoke.
Dan helped us implement a practical referencing and publishing system that fit our needs and wasn’t too involved or cumbersome that it would be hard to get up and running. This allowed us to work more collectively, and gave the artists some freedom to make changes on the fly without having to worry about updating assets. vRay’s render layers made breaking out passes a breeze and allowed the CG team to give the compositors the passes they needed without much effort. We try and stay pretty nimble when it comes to software and technology. The industry changes so quickly I think it’s important to be able to adapt the pipeline according to current needs.

How long have you worked on this opening title?
Actual production was about 4 months.

What was the size of your team?
The CG team consisted of 8 people, for varying lengths of time. In all, I think there were about 24 people involved in the creation of the GOT title sequence.

What did you keep from this experience?
You never know where you might end up in the future. I never thought I’d be working on an Emmy Award winning project when I was a Psychology major in college, but things have a way of working out I guess. If you do what you enjoy, everything else if gravy and I really enjoyed working on this project. I realized after we wrapped the job, that the long hours and the pressure of delivery pale in comparison to the joy of creating something unique.

What is your next project?
GAMES OF THRONES Season 2!

What are the 4 movies that gave you the passion of cinema?
BLADE RUNNER – Cinematography at its best. Lighting was a character in the film and always active in the frame.
PIXAR SHORTS – Inspired me to simplify, and showed that you don’t need a complicated and extravagant production to tell a good story. In the end it’s about execution and not complexity.
SPACE BALLS – Comedic timing can be applied to anything. A pause is sometimes funnier than a scream, and Mel Brooks is a genius!
THE USUAL SUSPECTS – Just a great movie, period.

A big thanks for your time.

// WANT TO KNOW MORE?

Elastic: Official website of Elastic.
Art of the Title: Article about GAME OF THRONES main title on Art of the Title.

// GAMES OF THRONES – MAIN TITLE – a52 / Elastic

© Vincent Frei – The Art of VFX – 2011

COWBOYS & ALIENS: Simon Maddison – VFX Supervisor – Fuel VFX

Simon Maddison joined Fuel VFX nearly 11 years ago. He has worked on projects like FARSCAPE or RIVERWORLD. Then he will oversee the effects of CHARLOTTE’S WEB or BEDTIME STORIES.

What is your background?
I have a degree in Fine Arts that I applied to computer graphics in my final year. I then had various jobs in vfx before starting Fuel VFX 11 years ago with my fellow directors.

How did Fuel VFX got involved on this show?
ILM had been talking to us about doing some work on the show. They thought we’d be a good fit for the funeral pyre sequence and we were excited by the challenge of it.

How was the collaboration with director Jon Favreau and Production VFX supervisor Roger Guyett?
Roger is an amazing person to work with. He is incredibly involving and allows you to pour as much of your own creativity into the shot as possible. The sequence we were working on had heavy connotations to the story and it was very interesting to be involved on that level – trying to solve story using complex visual effects. Challenging, but ultimately very rewarding.

What sequences have you made on this show?
We worked on the sequence where Ella is reborn within the bonfire of a native American camp. We also worked on a sequence that had a hummingbird visit Daniel Craig’s character during a trance that he has been placed under while trying to remember what happened to him in his recent past.

What references and indications did you received for the Ella (Olivia Wilde) reborn sequence?
Not much reference as it was one of those ‘something we’ve never seen before’ type briefs. Roger shot a whole bunch of dummies on fire which was great for reference but we needed the fire to move more seductively than real fire, without making it too other-worldy. Roger and Jon wanted to ground this sequence in reality, but anything that got close to a HARRY POTTER effect was quickly steered away.

Can you explain to us in details how you create the beautiful particles for this reborn?
The fire is made up of a few things. Firstly, there is a 3d rigged Ella in the fire that is animated. She is acting as a force within Maya which pushed and pulled Maya’s fluid dynamics around to create what we referred to as the ‘base’ fire. This was heavy to simulate and heavy to render, so we needed to develop a system on top of it that allowed us to add some of the more ethereal effect within it. This was a particle system that was both driven from the ‘base’ fire and also affected by its fluid dynamics. We also rendered the digital double for the moments when we see glimpses of her. We didn’t end up using any practical fire elements at all.

Did you develop new tools for the particles?
Yes we did. The particle system that is driven by the fluid solver was created to get us around long sim times.

How was filmed the shots in which Ella is walking is the fire?
She was shot with practical lights on set and we added the flames to her body as a digital post element.

How did you create the hummingbird?
The hummingbird was modeled and rigged in Maya. The feathers were made using Shave and a Haircut and it was rendered in Renderman.

Can you explain to us how you create the bird and wings animation?
The animation for these wings was tough because of just how fast they move. We had to do a lot of testing to get the motion blur and the strobing just right. We looked at a lot of hi-speed video reference!

What was the biggest challenge with the hummingbird and how did you achieve it?
Getting the motion right as well as making sure it followed Daniel Craig’s eyeline. Luckily we had a great animator on it, Thomas Price, and Daniel’s performance on the day was spot on.

Was there a shot or a sequence that prevented you from sleep?
I lost many nights on the Funeral Pyre sequence because it consisted of big, time-consuming simulations. When the clock is ticking towards a deadline, this can become quite stressful!

What do you keep from this experience?
A fantastic setup for medium scale fire! Also, that some things can appear relatively easy on paper but can prove to be harder than anyone can imagine.

How long have you worked on this film?
I was on this film for about 8 months.

What was the size of your team?
Including production, we had about 30 people touch it some degree during that period, but at any one time it was a fairly small team of 4 or 5 people.

What is your next project?
We have a few projects currently in production, but the only one we can mention publicly at the moment is Ridley Scott’s PROMETHEUS for Fox – which of course is extremely exciting to be a part of. We also did a small amount of work on THE HUNTER starring Willem Dafoe. It recently premiered at the Toronto Film Festival and was really well received.

What are the four movies that gave you the passion for cinema?
Only 4? Tough. RAIDERS OF THE LOST ARK, ALIENS, AN AMERICAN WEREWOLF IN LONDON and more recently FIGHT CLUB.

// A big thanks for your time.

// WANT TO KNOW MORE?

Fuel VFX: Dedicated page about COWBOYS & ALIENS on Fuel VFX website.
fxguide: fxguide article about COWBOYS & ALIENS.

© Vincent Frei – The Art of VFX – 2011

CAPTAIN AMERICA – THE FIRST AVENGER: Charlie Noble – VFX Supervisor – Double Negative

After telling us about his work on GREEN ZONE, Charlie Noble returns to the Art of VFX with his team of Double Negative to explain in detail his work on CAPTAIN AMERICA.

How did you get involved on this project?
Following on from our work on IRON MAN 2 (the vintage F1 Monaco Grand Prix sequence) we were approached mid-2010 to bid on 700 or so shots for CAPTAIN AMERICA. The work was divided between London and our Singapore studio with the bulk staying in London. It was also good to work with Joe Johnston again after THE WOLFMAN last year.

How was the collaboration with director Joe Johnston and Production VFX supervisor Christopher Townsend?
We actually had relatively little direct contact with Joe. Everything came through Chris and after the UK shoot we were in constant contact via Cinesync most evenings. I can’t praise Chris enough; he was so helpful and gave great notes. He’s done an amazing job on this show. Joe did manage to pop in to Double Negative whilst in London working on the score and as someone with such a wealth of experience he clearly knows his visual effects. It’s been a pleasure working with him again.

What sequences have you made on this show?
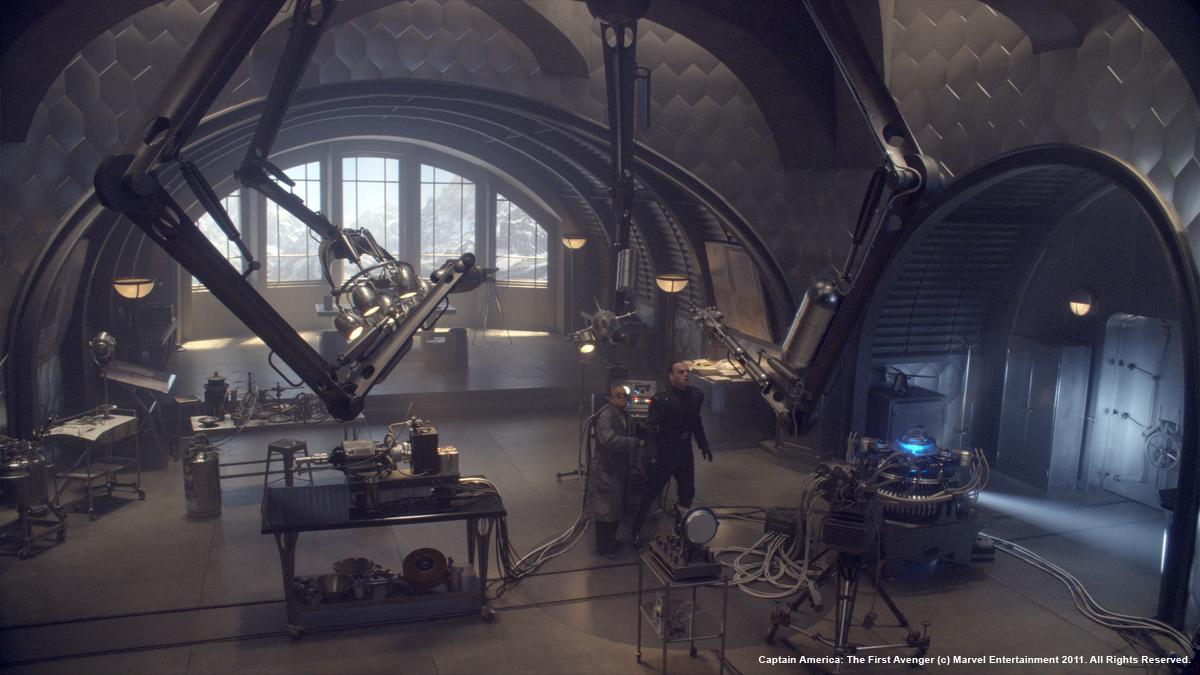
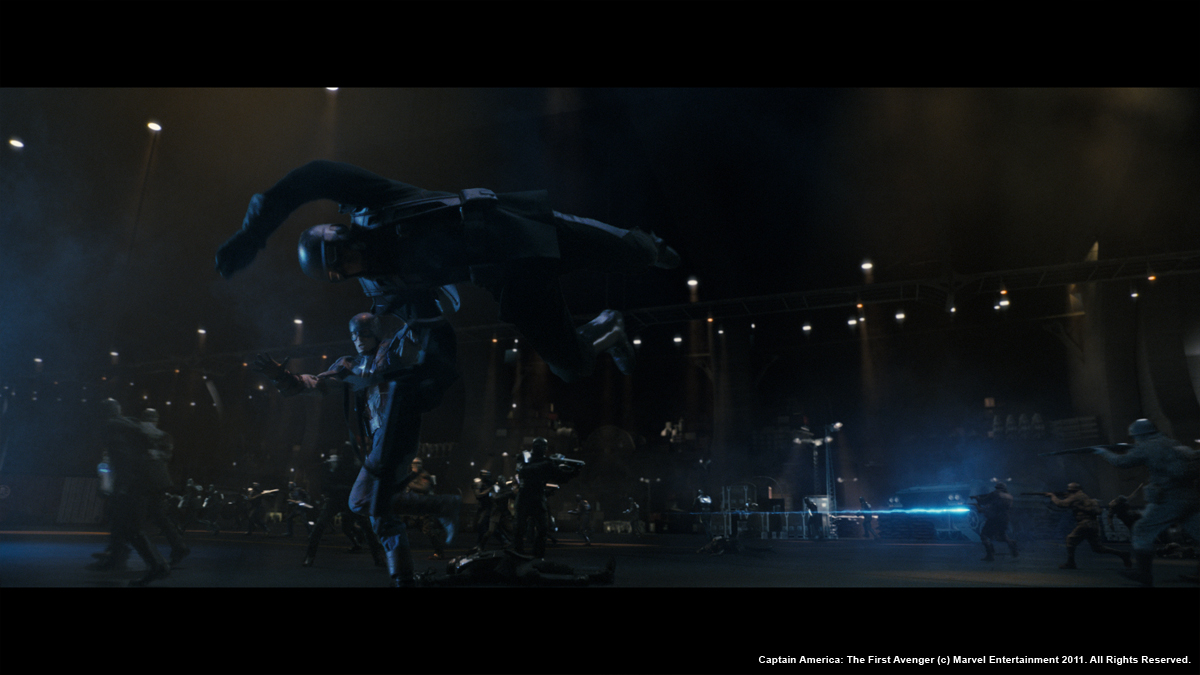
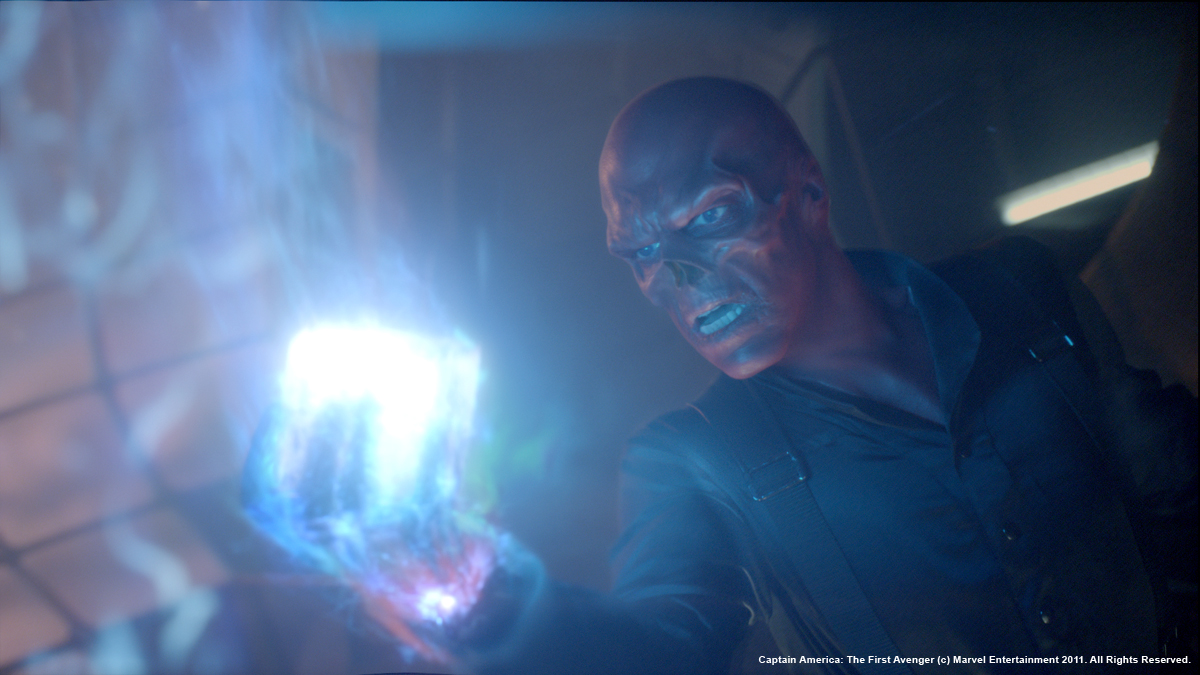
The Crypt (Schmidt finds the cube), Schmidt’s office (testing the cube, gun-firing, Nazi deaths), Hydra factory interior and exterior, the train, commandos attack Schmidt’s office, Hangar and Runway, bomber and podfighter aerials (exterior and interior), the Arctic crash and the shots where the cube goes nova.

How was the collaboration with the art department?
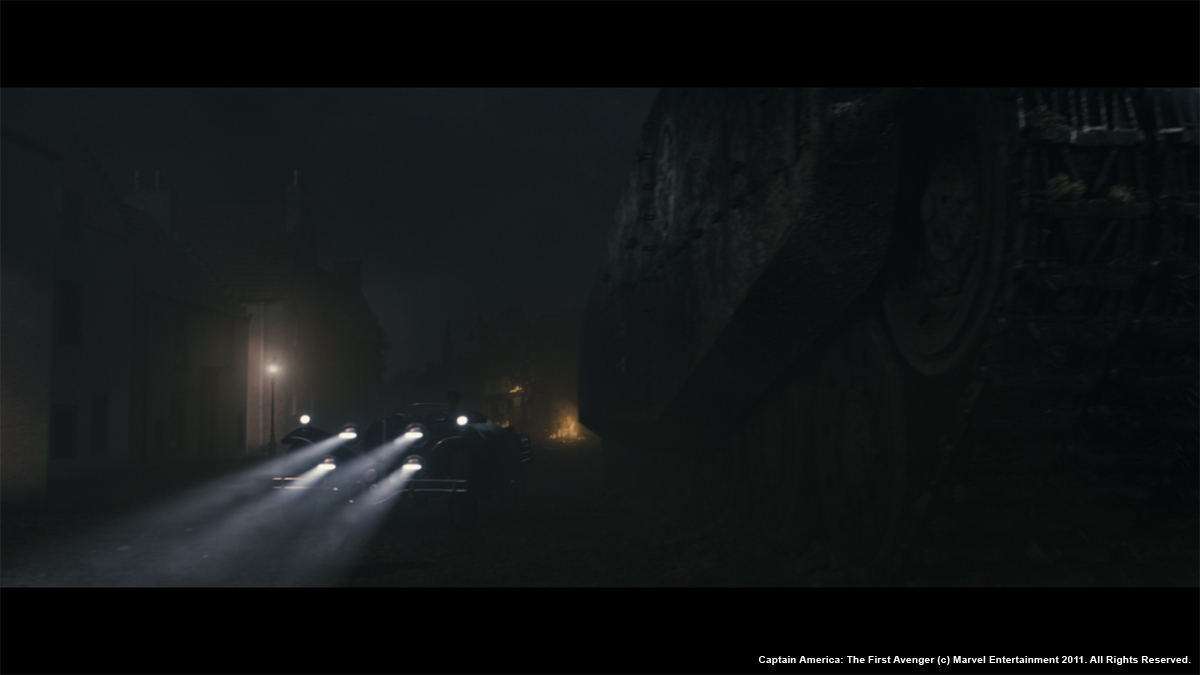
Everything was built from supplied art dept models with the exception of Schmidt’s 6 wheeled car which we lidar scanned. The bomber was modeled by James Guy and John Capleton with LookDev by the supremely talented Alexandre Millet. We visited a few aircraft museums, principally Duxford, where we took a load of reference stills for detail and texture. Whilst there we also hired a couple of tanks for the day to provide motion studies for our Landkreuser. Pete Bebb (CG Supervisor at DNeg) was up extra early that day. It’s a tough job sometimes! For the tank, CG lead Phil Johnson was faced with the same issue of scale and he spent some time modeling extra detail into the model that was supplied from Art Dept, along with some modifications to the functionality of the main turret.

Pete Bebb explains the approach:
« This vehicle is immense and the scale of the tank is at least three to four times that of the biggest tank we see these days. Standing at over 20ft high the vehicle has a massive diesel engine and 6 separate tracks. The research for this vehicle was key as we were posed with trying to sell the scale of this to the audience. The rigging and motion of this vehicle was key and we thought it best to study up close a real tank. Whilst we were at Duxford shooting the material for the bomber we had a second unit covering the material required for the tank. Luckily we were able to rent a Chieftain tank from the 1950’s – the era specific to the Hydra technology. We had a succession of planned tasks we wanted from the tanks motion and we shot these on 3 HD cameras some running at 50fps to better judge the motion of the track mechanism and weight of the tank. This was then studied and used as the main resource for the motion of our tank. We also took masses of texture reference photographs as well to assist John Seru with the texturing process and LookDev work from David Mucci.

For the car, SFX supervisor Paul Corbould had built from scratch a beautiful 6-wheeled coupe for Schmidt which we scanned and extensively photographed out at Shepperton. Whilst the real car was used predominantly, there were times when a CG version would be called for and would be seen very close up.

CG lead Maxx Leong placed the real car in a nice open area with enough room to subsequently place our CG version beside it so he could refine the shader to perfectly match the real thing as we compared the two side by side. The bodywork was very reflective with multiple layers of paint and lacquer with subtle variations in displacement between the different panels. As with all other vehicles, it was lit with an HDRI with additional reflection and bounce cards as and when required per shot.

What was the real size of the sets?
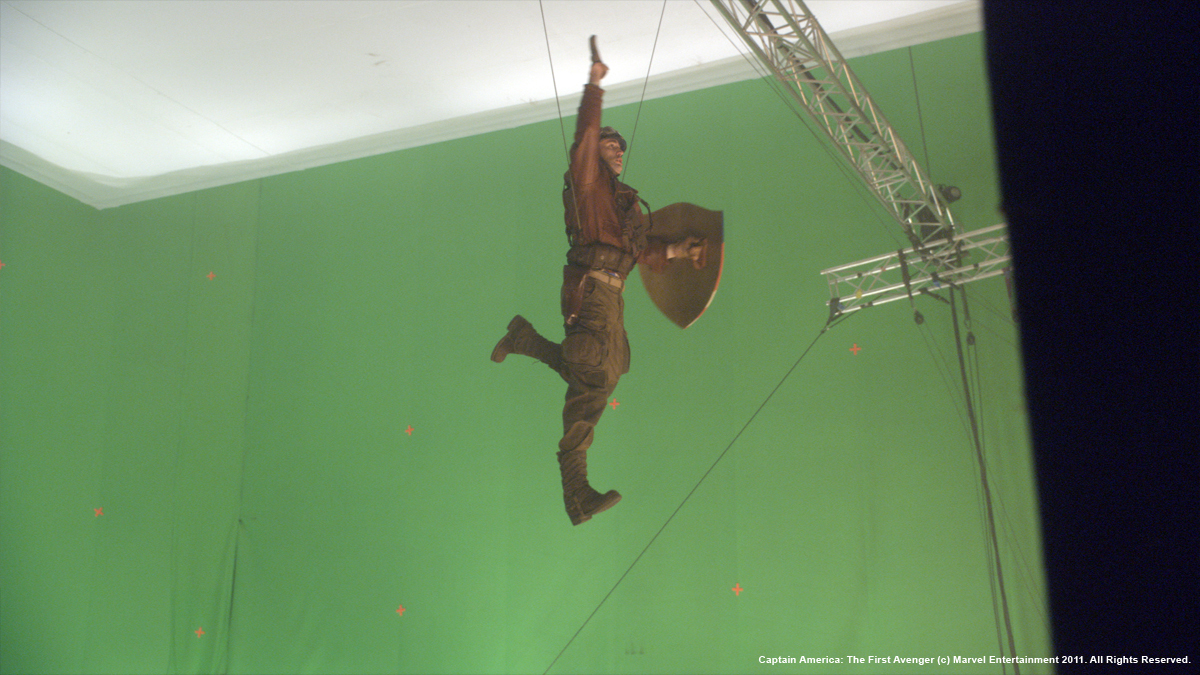
They varied from sequence to sequence. The Factory set took up the whole of Shepperton’s H-stage, the bomber cockpit interior was on a very impressive multi-axis motion base, the train sequence had just a small rocky set to start the sequence with a roof section of one train carriage for the zipliners to land on and the Hangar sequence was all greenscreen (barring the real car, landing gear and some foreground dressing for some shots).

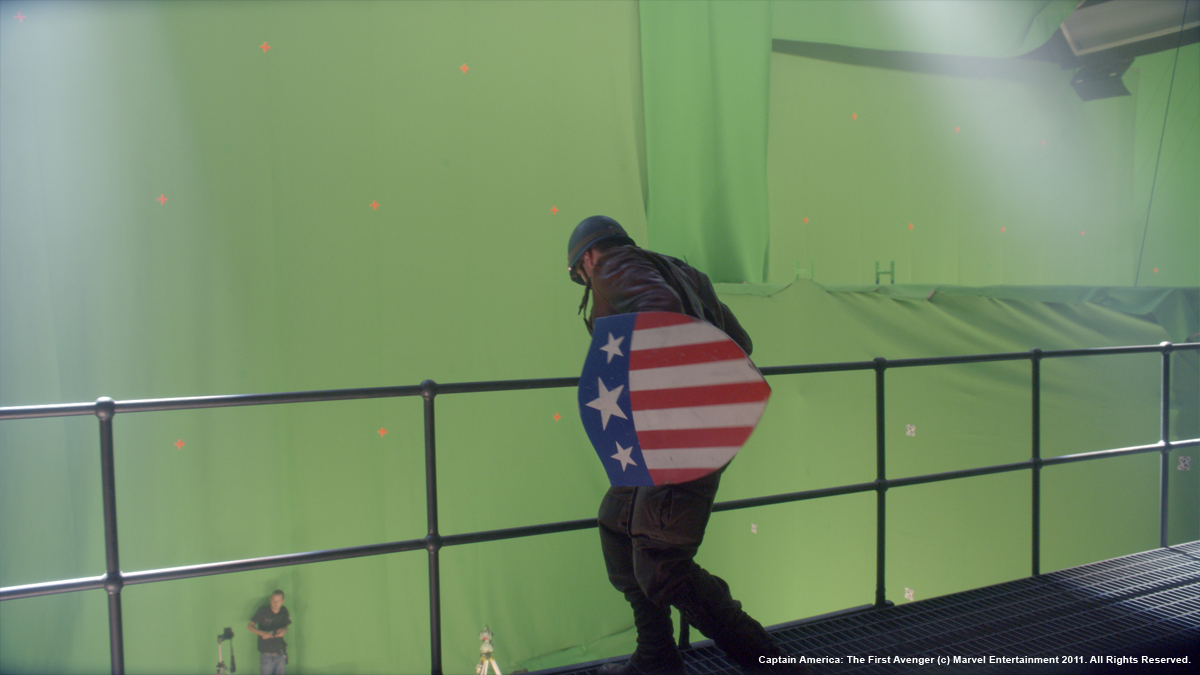
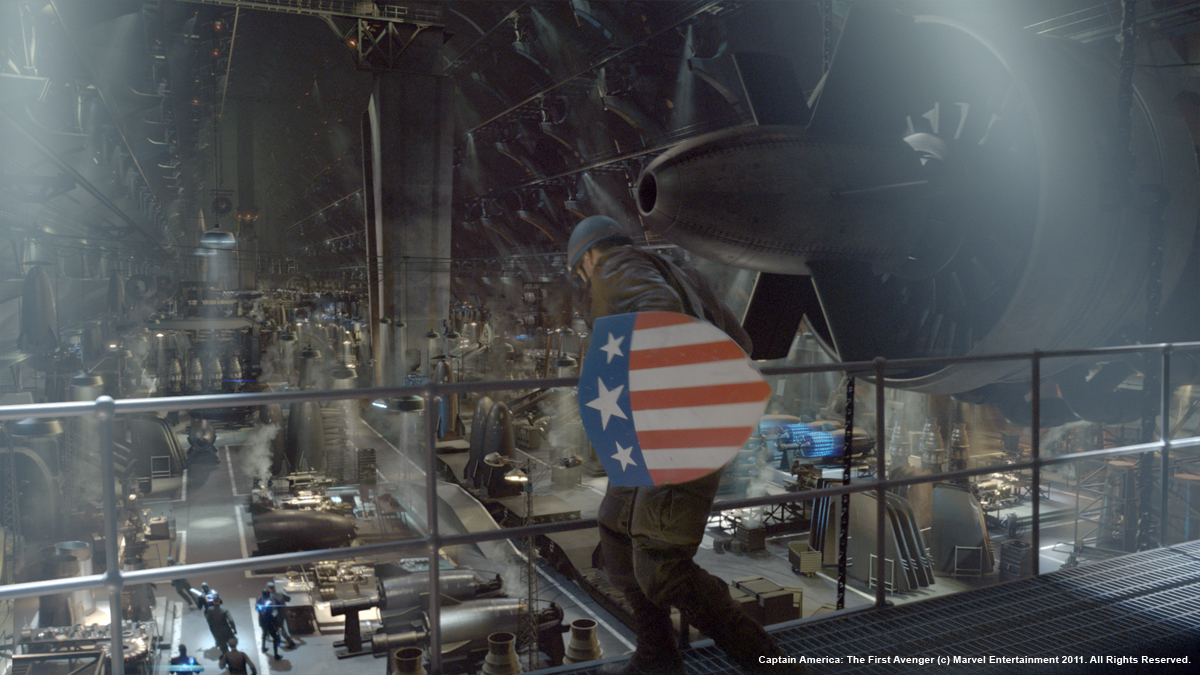
How did you create so huge environments like the Hydra factory and hangar?
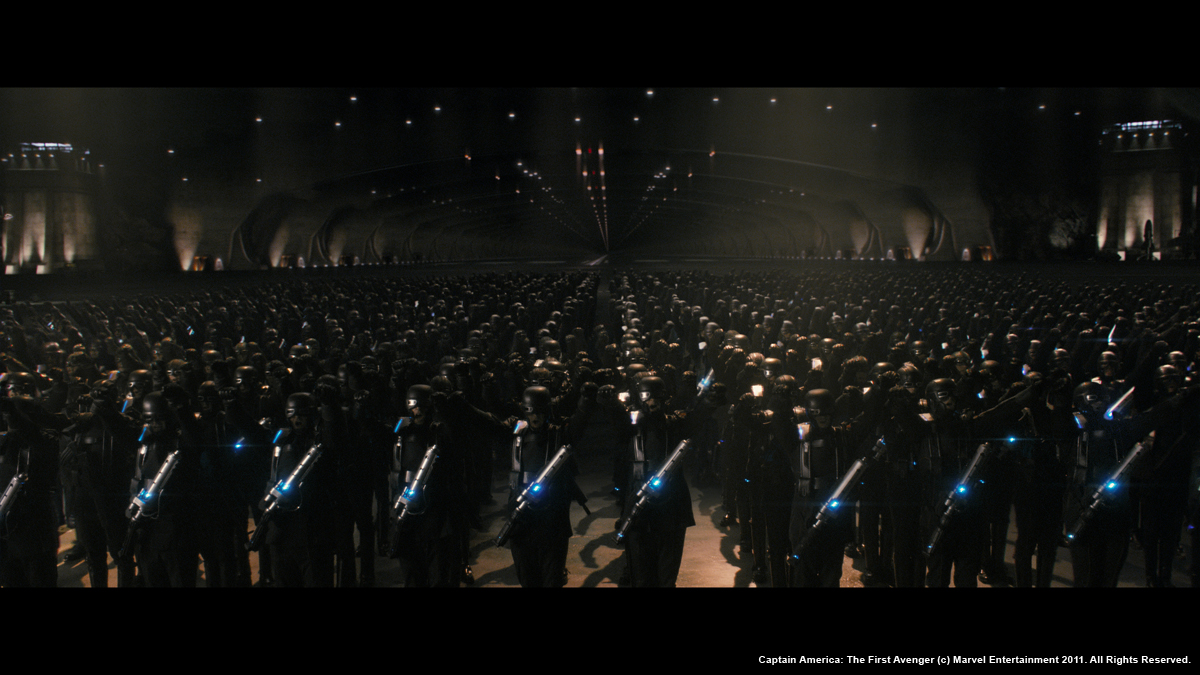
The Hangar was a pretty hefty logistical challenge comprising a 1500ft wide by 160ft high cavern 5 miles deep inside an Alpine mountain.

CG leads Alison Wortman and Jordan Kirk explain:
« Basically we modelled the hangar using proxy rock geometry to start with, while the client refined the layout of the hangar during a bit of back-and-forth between the client, Art Dept and Simon Gustafsson, our concept artist. It took some time for us to get our heads around just how enormous the space was and when the time came to upres all the rock geo, it became a huge challenge to model enough detail into the rock so that it would hold up, but without showing obvious repetition. We found that highly detailed rock aliased horribly or had a nasty aesthetic affect as you pulled the camera away, but lower res rock was shown to be nowhere near detailed enough if the camera got close – it was tough to find a balance. The process of modelling the rock was difficult and time consuming, as there was such a vast quantity to be done – we used ‘3D Coat’ for this as it made the task of sculpting a rock surface a little easier than it would have been to manipulate a poly mesh in Maya. We also used this method to generate the displacement maps, which were stored out as pointclouds and read in a render time. This helped the maya scenes hugely as none of the displacement data needed to be loaded onto the mesh, but did make it a bit harder when set dressing and texturing the concrete supports, as you could only see the point where the rock surface met the concrete by doing a render. One other side effect of this approach was that the pointclouds were reliant on the topology of the rock meshes – so once the pointclouds were generated, any tweaks to the meshes needed to be done with basic warps. Any further issues were taken care of with preprojected patches.

The concrete supports were a texture challenge due to their sheer scale – again, it was tough to get textures that were detailed enough to have adequate scale, with no repeating patterns, yet which didn’t alias or look streaky as the camera pulled away. We ended up using a few different textures, but then overlaying different texture maps to create variations, as there were far too many supports to create bespoke textures for each one.

The hangar HQ was textured as a matte paint projection to start with, but as the sequence developed and we needed additional angles on the building, we converted the projection into a UV-based texture and upres’d the details. The huge panels of windows were a challenge, the interior space was left fairly vague so we had a bit of a test-and-develop phase of looking at potential interior designs, mainly drawing on stills from Berlin’s Templehof airport. As with the rest of the hangar structure, the challenge was to be able to read enough detail to get the impression of interior structure, but to have something generic enough that the shapes could be read and understood from a distance.

Filling the hangar space with assets and vehicles was another huge challenge, because of the sheer amount of space to be filled! A lot of the assets we used (from the factory) were metallic, which meant we couldn’t bake in their lighting, so we had to come up with ways to ease the render time caused by inter-object reflection calculation. The lighting itself was also a challenge as we found the best way to achieve a sense of vast scale was to use small light sources, but with such a huge space we had hundreds and hundreds of light sources, so we had to find a way to organise these to make them manageable for the shot lighters, and to work around streamlining them for render efficiency.

The runway caused us a few headaches too. At 5 miles long, it was too long for Maya – we experienced errors with our cameras due to Maya’s precision with objects too far from the origin, so the later stages of the runway chase had to be artificially moved closer to the origin to compensate. We had problems with perspective – or rather, our perception of perspective – which meant that the runway never felt long enough due to foreshortening, despite the incredible length. The sheer scale of the bomber, and the size of the runway to accommodate it, also meant that the sense of length was compromised, because the runway was also so wide and so tall!

The perception of perspective was an issue right into shots, with several shots being ‘cheated’ to achieve a more pleasing aesthetic result as opposed to remaining true to the environment.

The scale of the environment caused problems with the perception of speed too, which was heavily dependent on camera angle. The speed of the shots varies by at least 25% in an effort to maintain the effect of consistent speed. We had to use careful pruning of elements and assets not crucial to the camera angle in order to be able to get renders through, as 5 miles is a hell of a lot to push through Alfred!

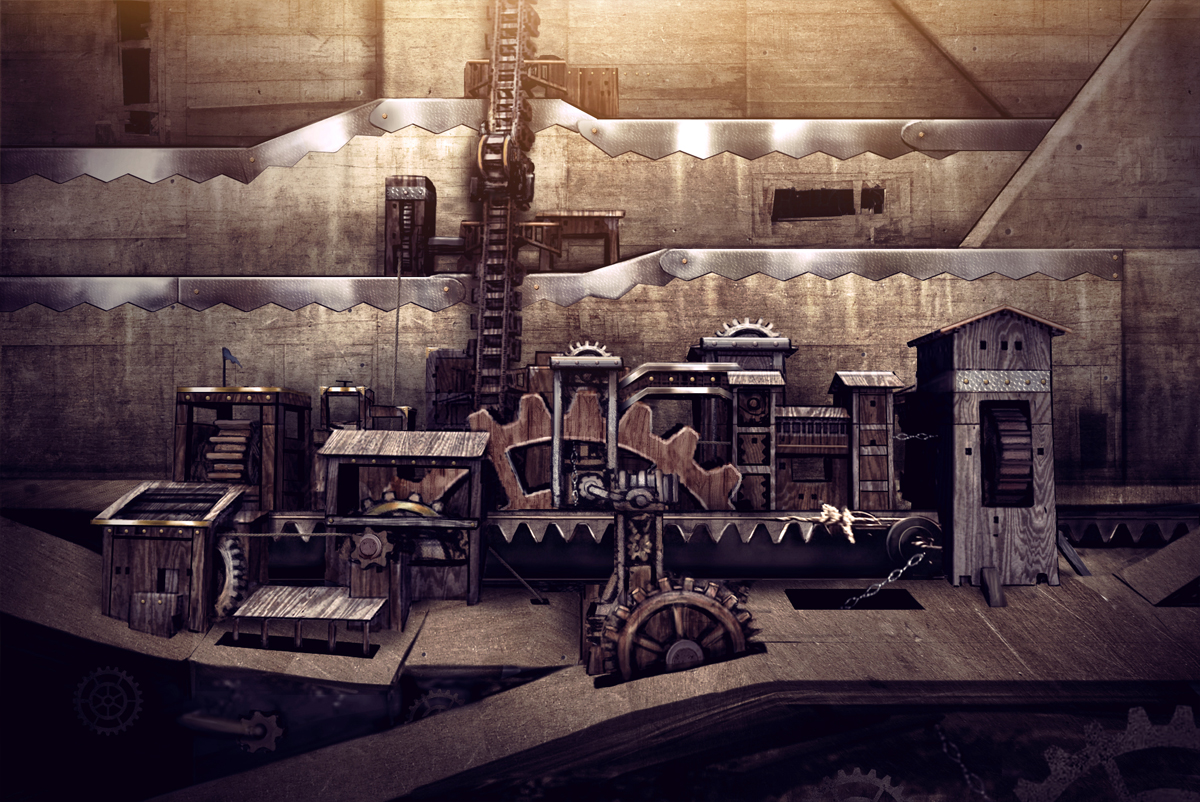
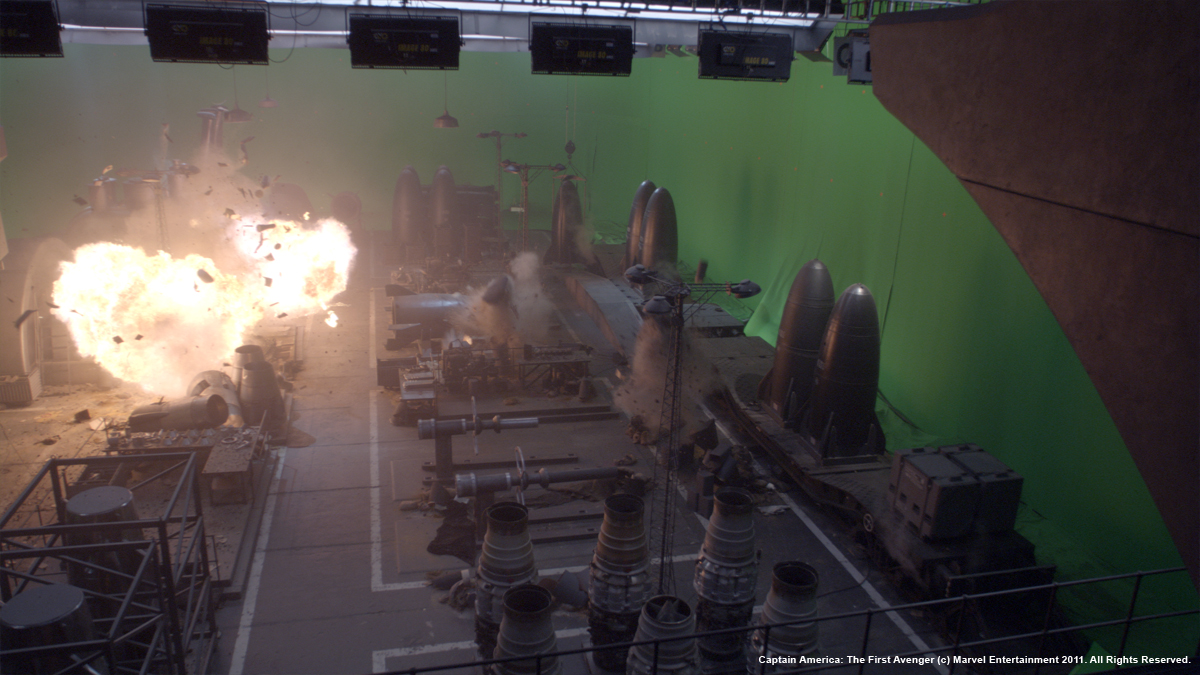
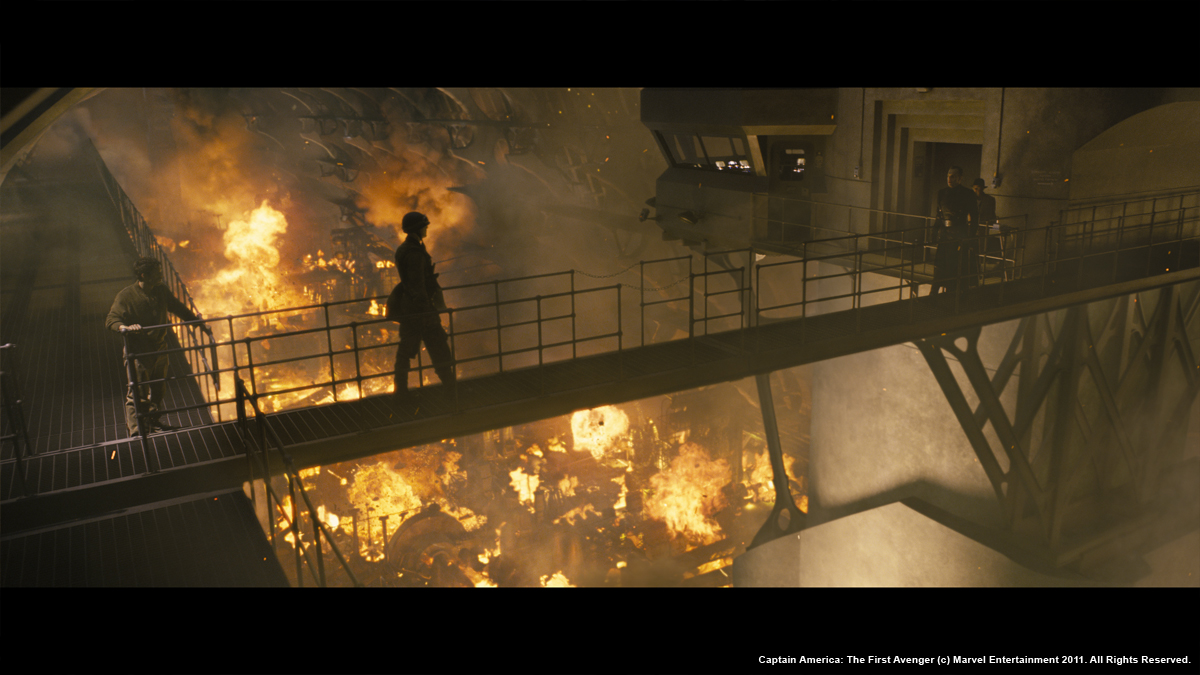
For sheer complexity, amount of geometry, number of passes both hard surface and FX, the Factory sequence tops the list, lead by Vanessa Boyce, who elaborates:
« A huge set was built on H-stage at Shepperton and it was our task to extend this out to be over 10 times larger. The Hydra Factory became 300ft x 1500ft and filled with over 1000 props (weapons, machinery, vehicle parts, etc). The main challenge became about keeping it efficient to render and easy to manage. Due to the huge amount of potential geometry, we used DNeg’s publishing tool dnAssets, where a model can be unloaded from a maya scene and still rendered through the use of a rib archive file that gets created when a model is published, to build up a relatively small library of component parts to use for the internal structure (walkways, staircases, walls, supports, etc) and we built around 40 unique props to repeat across the factory floor. We also had at least two but usually three different level of detail models for each asset which were easily swapped out when it came to shot time. The lighting approach to the factory was two-fold; we had to light a working factory and we also had to light a burning factory. The working factory had more lighting complexity because we had to consider how to light a huge environment which was filled with hundreds of strong down lights on the factory floor and architectural lighting throughout. For the initial layout stage and for big areas at shot time we used gobos attached to very large spotlights and that would give a very similar effect to having lots of spotlights but was much cheaper. When it came to shot time, we knew that this approach wouldn’t suffice for the more close-up areas of the factory so we lit it in a more traditional way (spotlights, reflection cards, etc) to get what we needed. Raytraced reflections were only used on assets that we thought needed it in order to keep render times down.

The approach we used for the exploding factory lighting setup was to provide Trevor Young (Composite Lead) and his team with enough variety in lighting passes and control over individual lights within the passes so that they could achieve the chaos and randomness that you’d expect in an exploding weapons factory. »

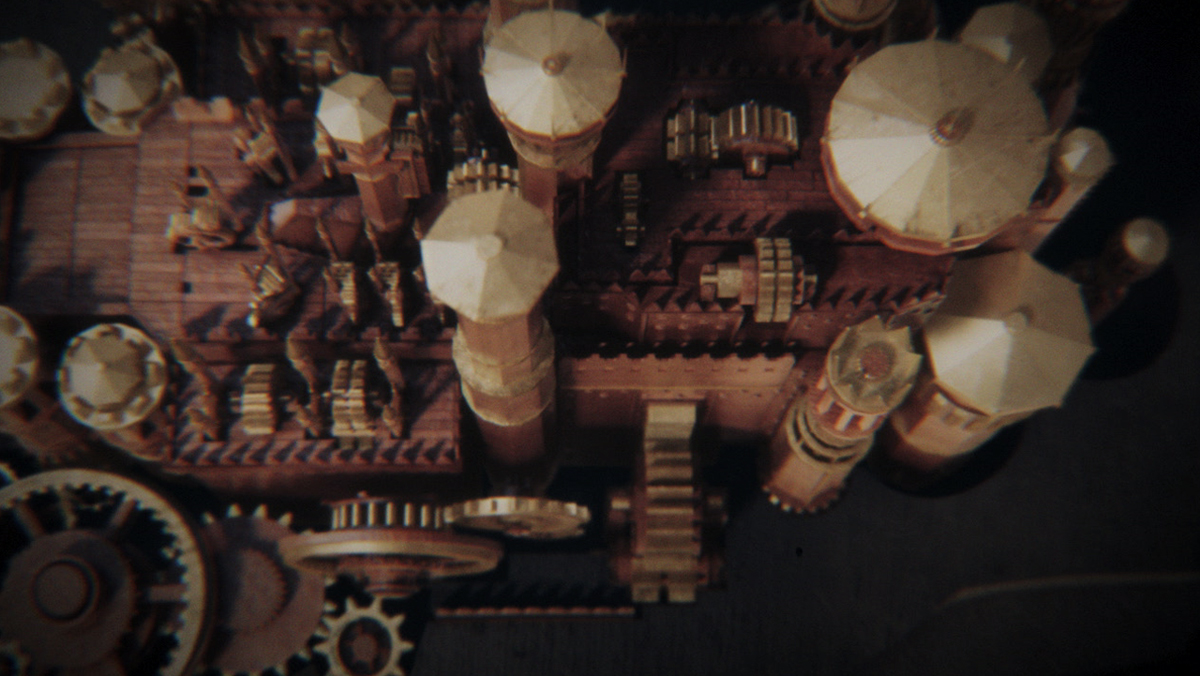
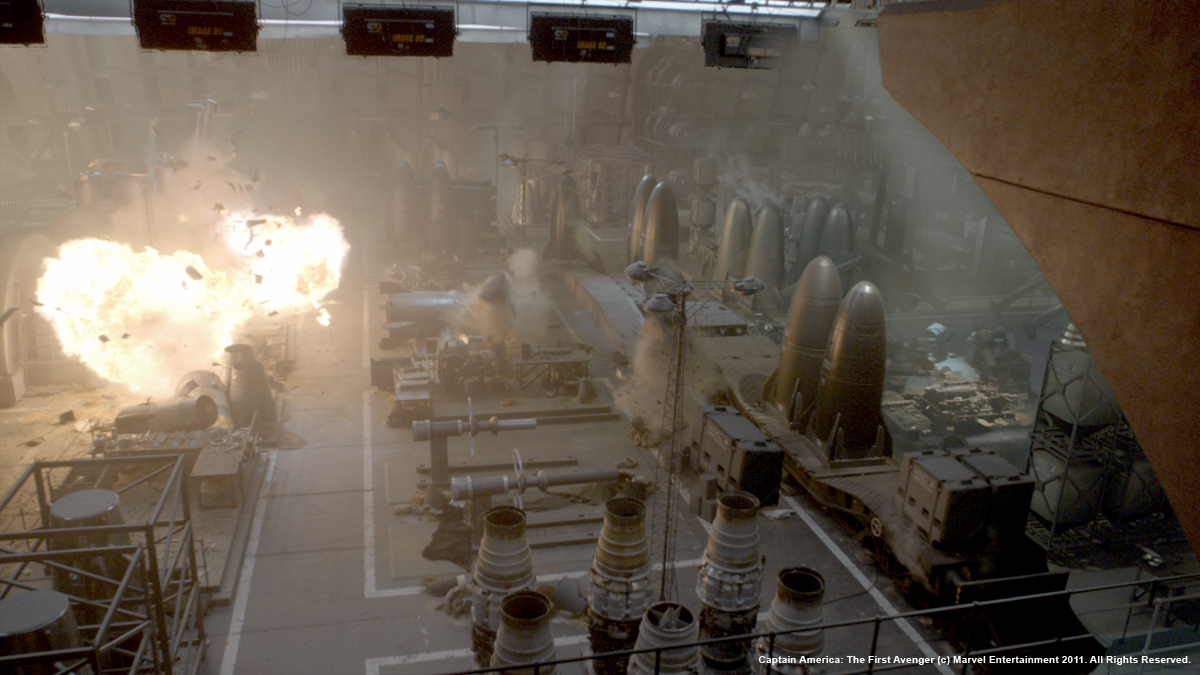
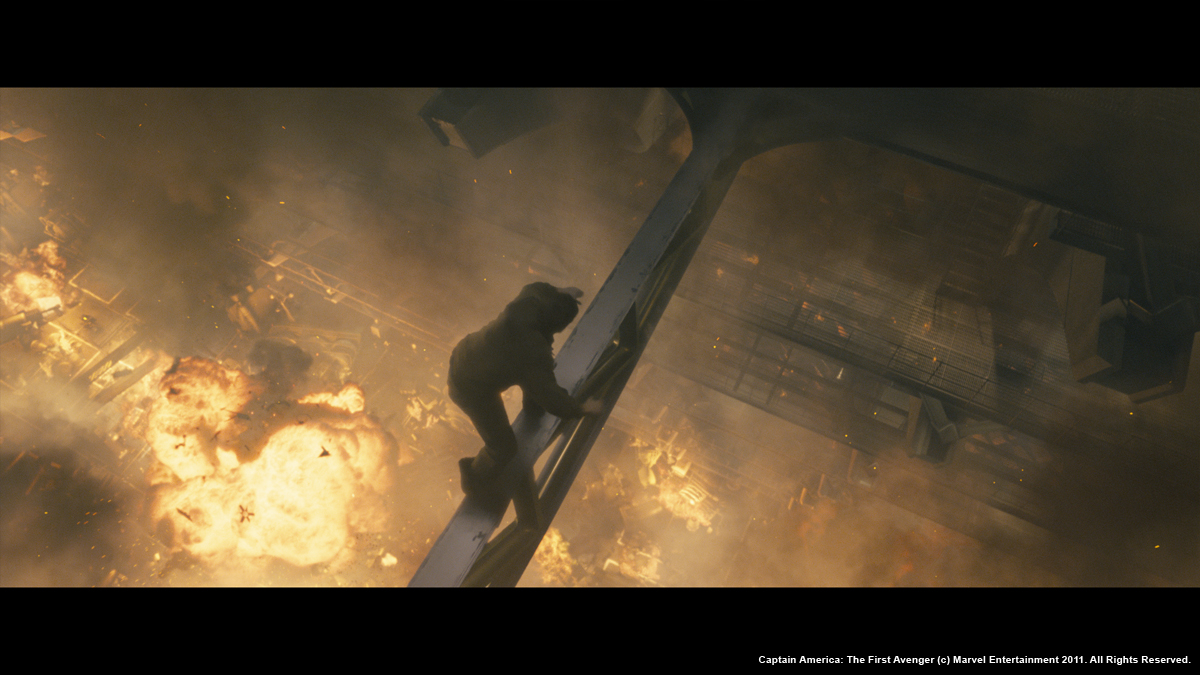
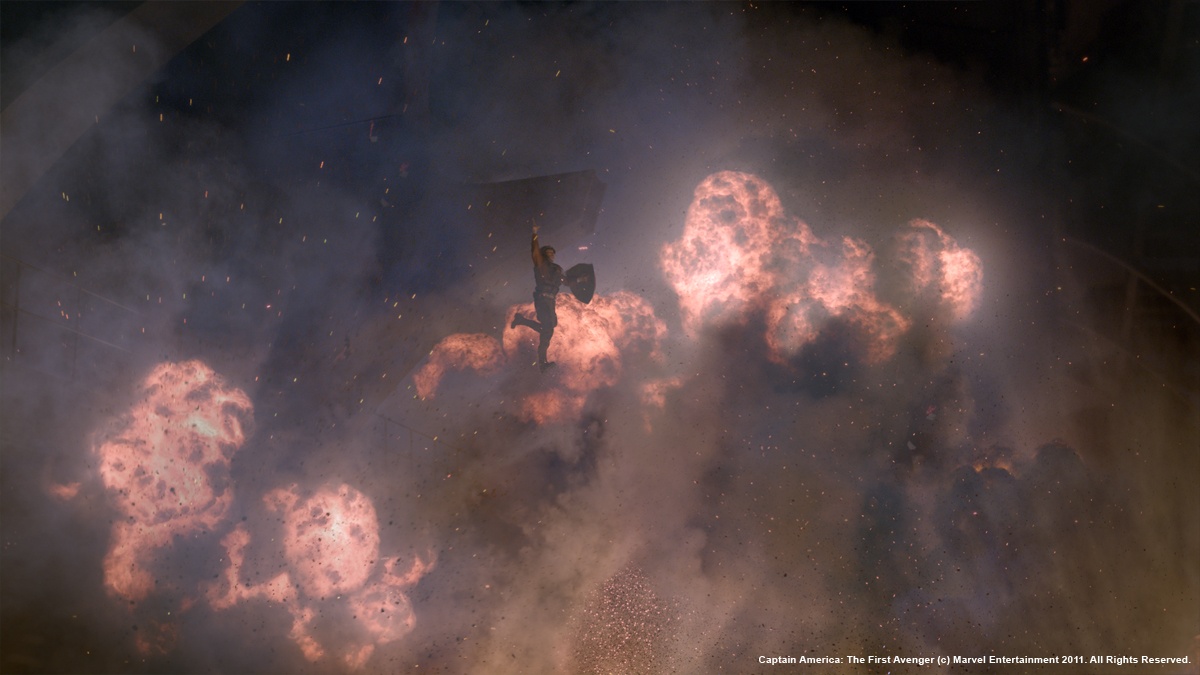
What was the challenge for a sequence like to Factory destruction?
In addition to building the entire factory and all the props, a significant proportion also had to be built for destruction as well which were then handed over to Marie Tollec and our FX team to run destruction sims on.

We had also spent a day shooting large explosions on the skid-pad at Longcross and once cleaned up these formed an invaluable library to help fill the vast space but given the magnitude of the space and the need to choreograph certain beats, the majority of the explosions and smoke were CG.

After a brief testing period of using different solvers we opted for Maya Fluids, utilising its new heat expansion features. We were able to squeeze every last drop out of Maya’s solver, getting some very large sims through, they ended up taking days to calculate. These high-resolution simulations were then rendered using our recently updated in house volume renderer Dnb. With its new feature set we were able to manage larger more complex scenes, with full 3D motion blur and advanced secondary outputs.

I can’t praise Mike Nixon, Milos Milosevic, Chris Keller and Zeljko Barcan enough for the lovely work they did on the factory destruction.

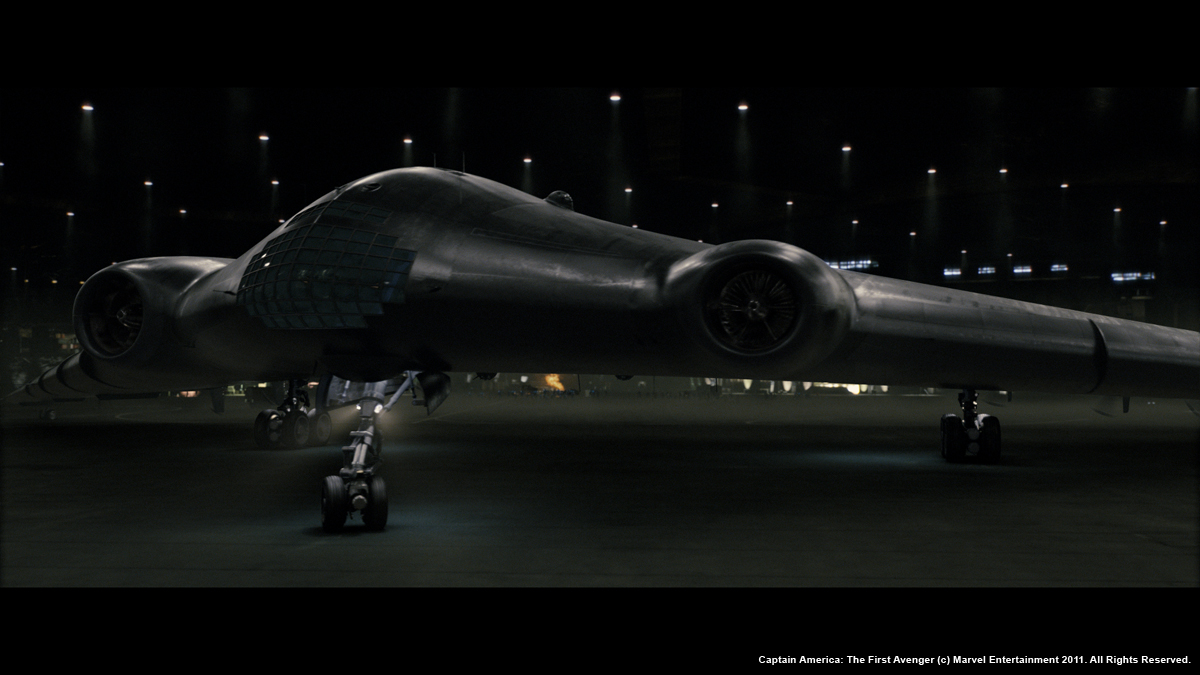
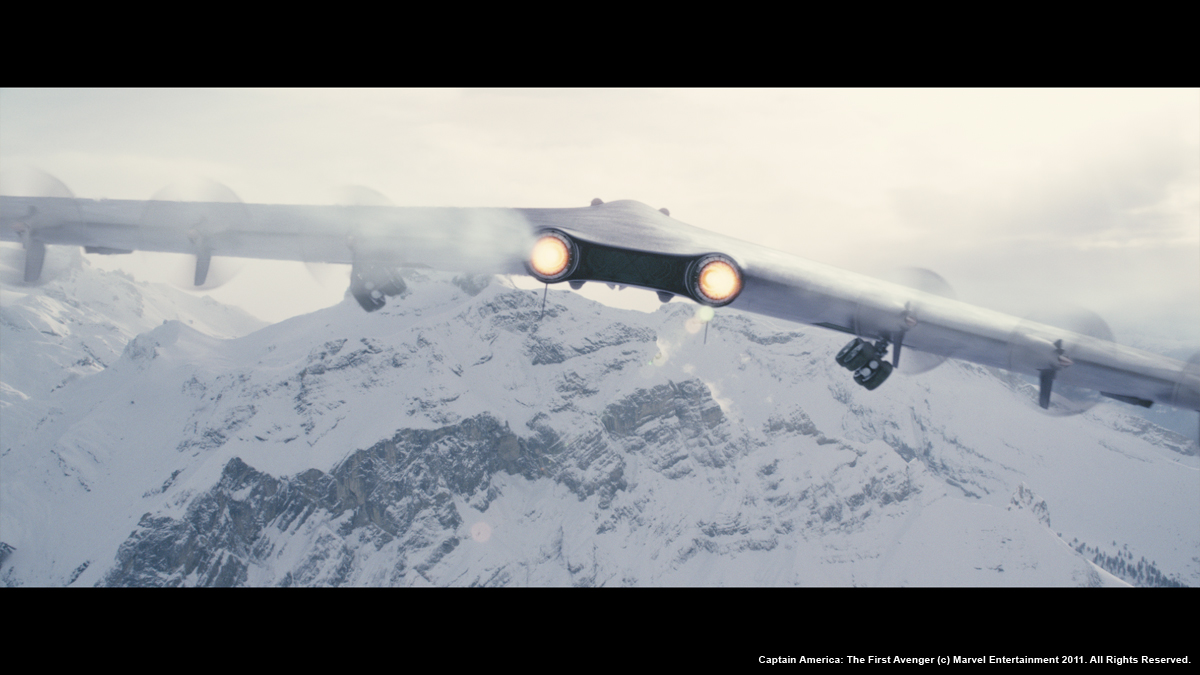
How did you create the big plane of Red Skull?
The bomber has a wingspan of 165m, over twice that of the Airbus A380, so it is vast. We started out with the Art Dept plans, then added in any of the interiors that had been built as sets (the cockpit, flight deck and area between the engines at the rear) before extending out the rest of the airframe from the section that had been built.

This then gave us sensible panel lines and displacement maps for the outer skin. Onto this we added loads of access/maintenance panels and hatches along with all the decals you’d expect on an aircraft. The brief for the Hydra technology was that it is 10-15 years ahead of the game, so for the paint we went for the stealth finish we saw on the Lockheed sr-71 at Duxford but dialling up the sheen to give it a slightly more satin look. For something that is so much larger than we’re accustomed to seeing in the air, it was important to get subtle variation in the panel textures and small-scale breakup into the spec and reflections.

We ended up with eight 8k texture maps for the skin which served for the majority of the shots with a handful of super closeups requiring bespoke additional texture paintwork.

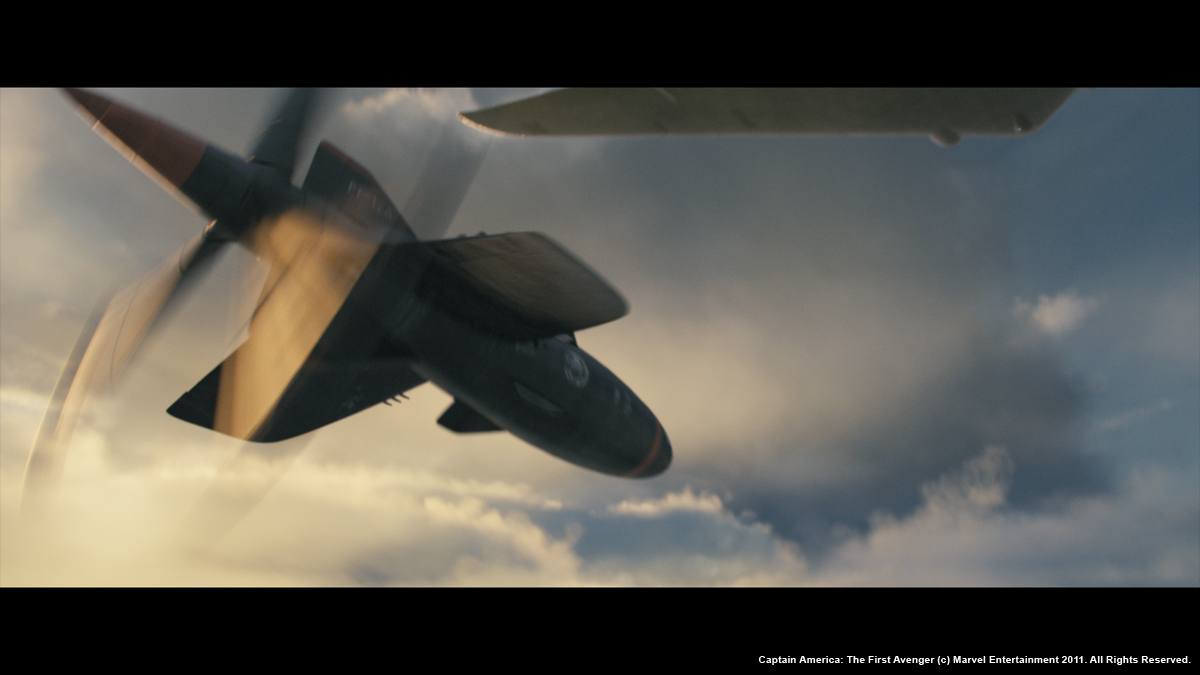
About the Pod Fighters dogfight, was there already a previs for this sequence or did you start from scratch? How did you create it?
There was no previs as such for the podfighter sequence. The podfighter action was filmed on a 6 axis motion base built by Paul Corbould and once cut together, the all cg shots were supplied as post-vis by The Third Floor which we then matched to.

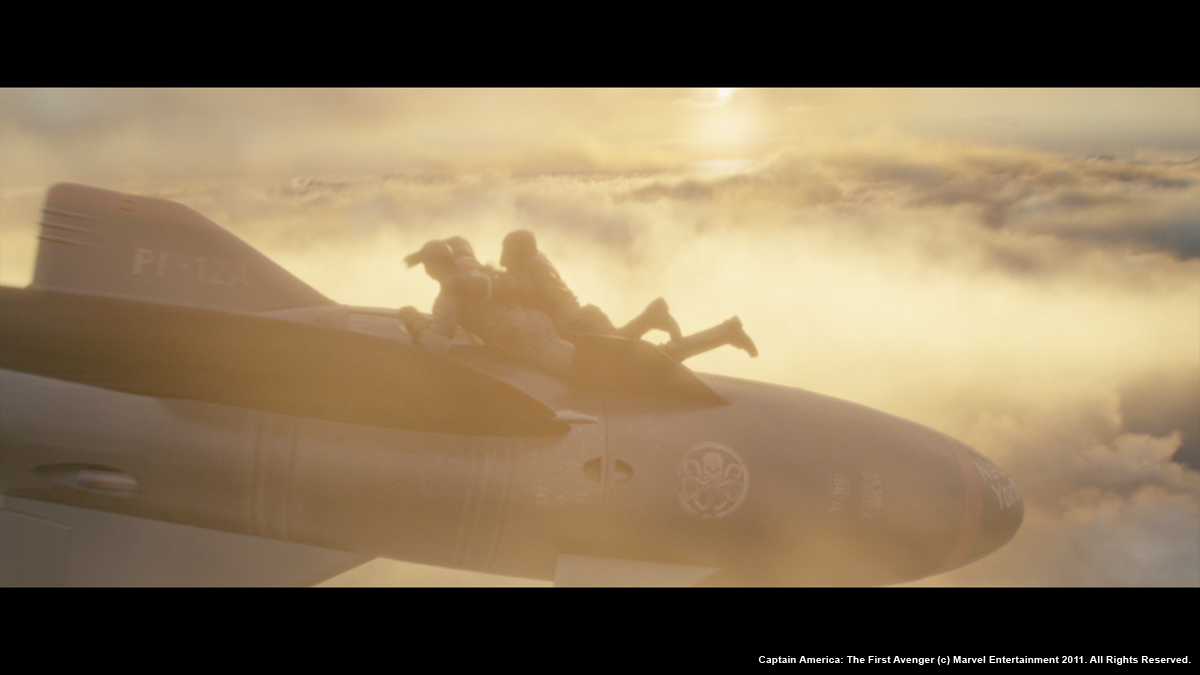
Cloud maestro Nick New supervised the creation of our aerial environments along with engine con-trails and exhaust heat distortion passes, composited by Gruff Owen and his team.

We had to create around 100 shots where we’re flying around in the clouds, with 25 of them rendered as full stereo shots. The clouds were rendered using our in-house volumetric renderer DNB, using a new node-based shader system nicknamed Meccano which allowed very flexible lighting and arbitrary output setups without the need to write code. We worked up a set of outputs to give comp full control over the look, using fake single and multiple scattering, density and shadowing.

Our base cloud layouts were done in Houdini using satellite photography to scatter points, then artists could import these point caches to Maya and adjust the layouts per shot or sequence as required. To get as much detail as possible in the clouds, we instanced fluid simulations onto these layout particles, allowing us to crank the detail even close to camera without having to rely on procedural tricks.

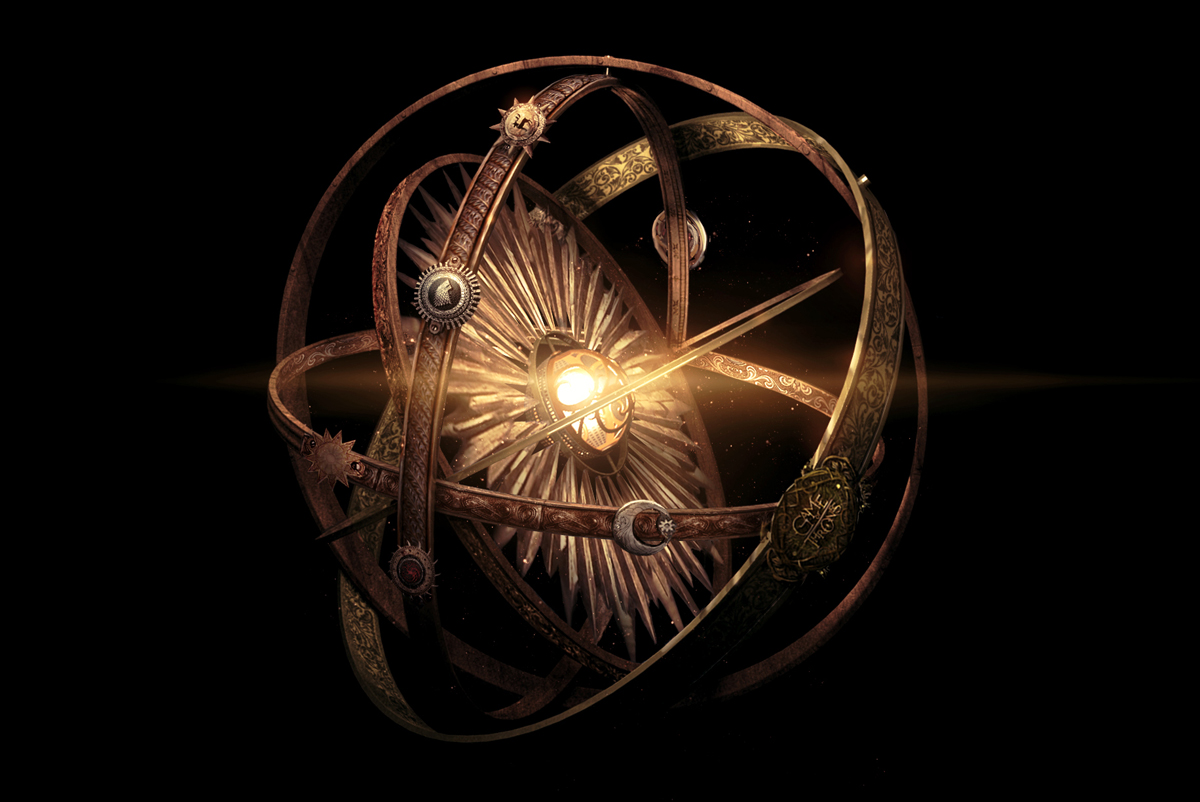
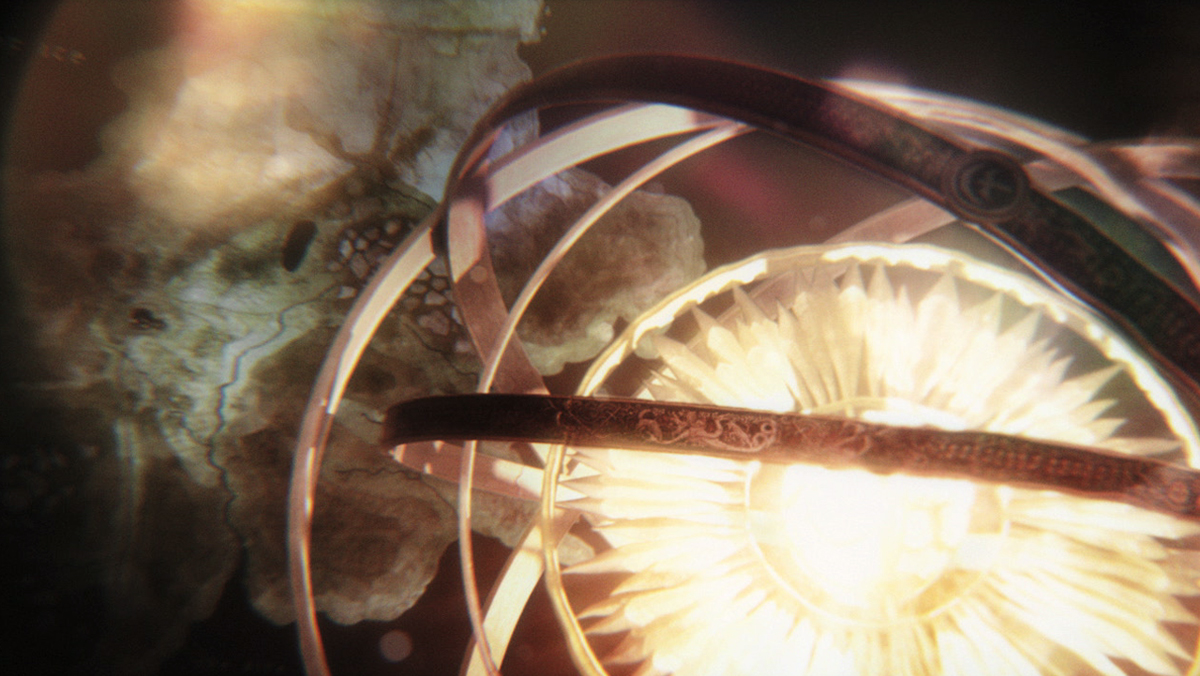
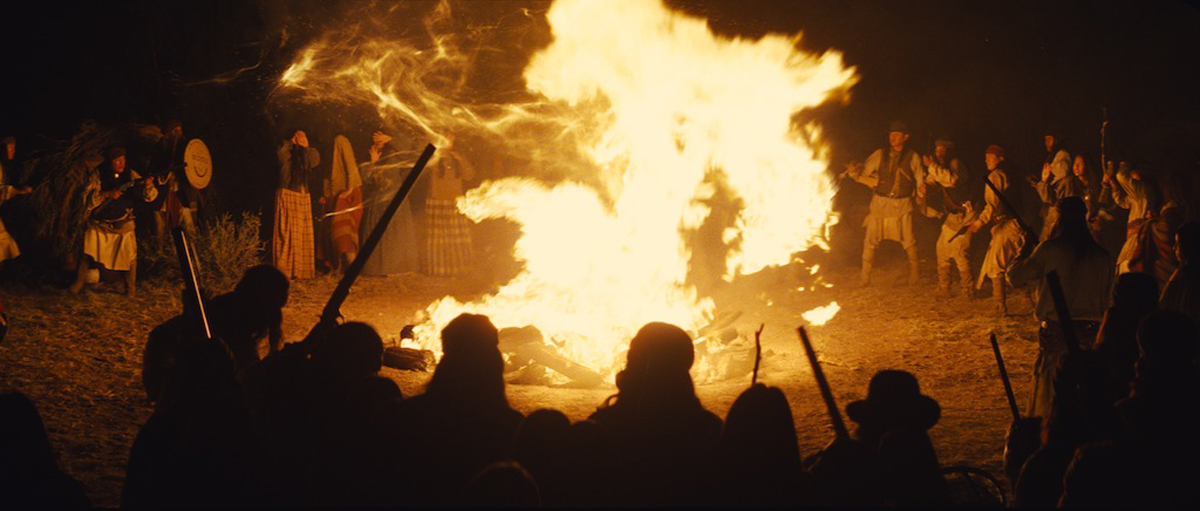
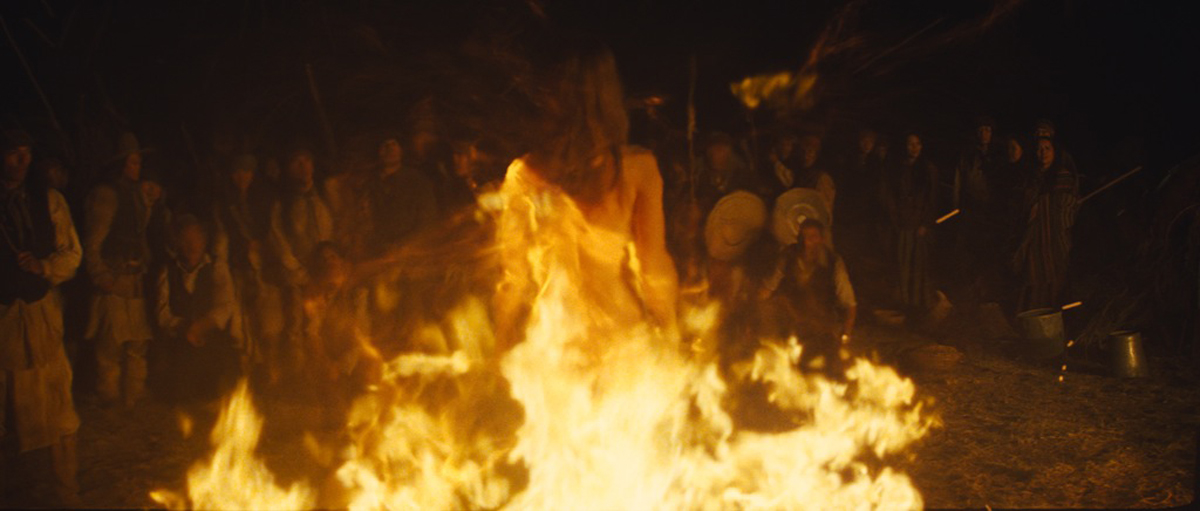
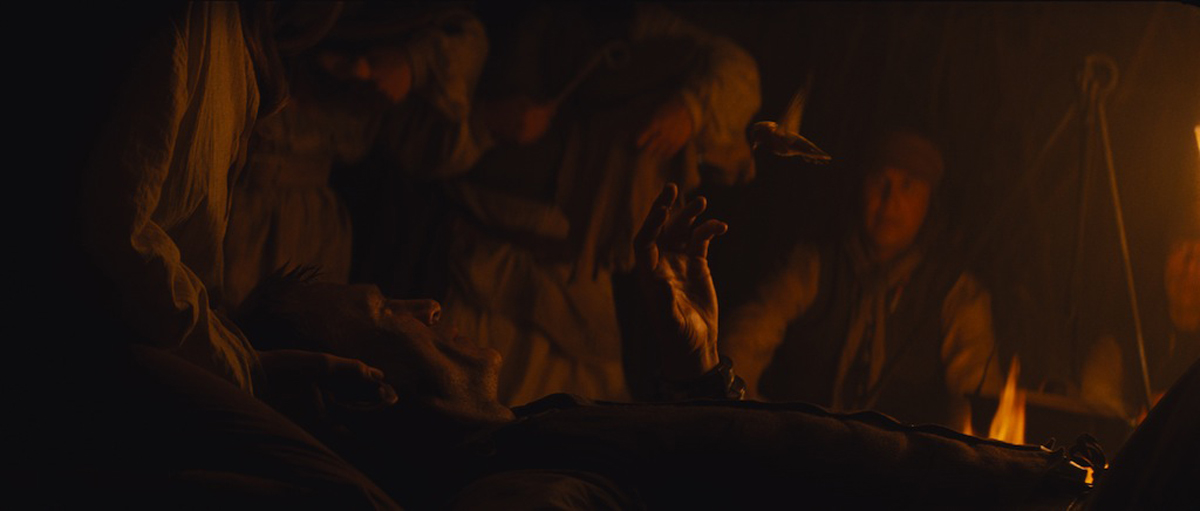
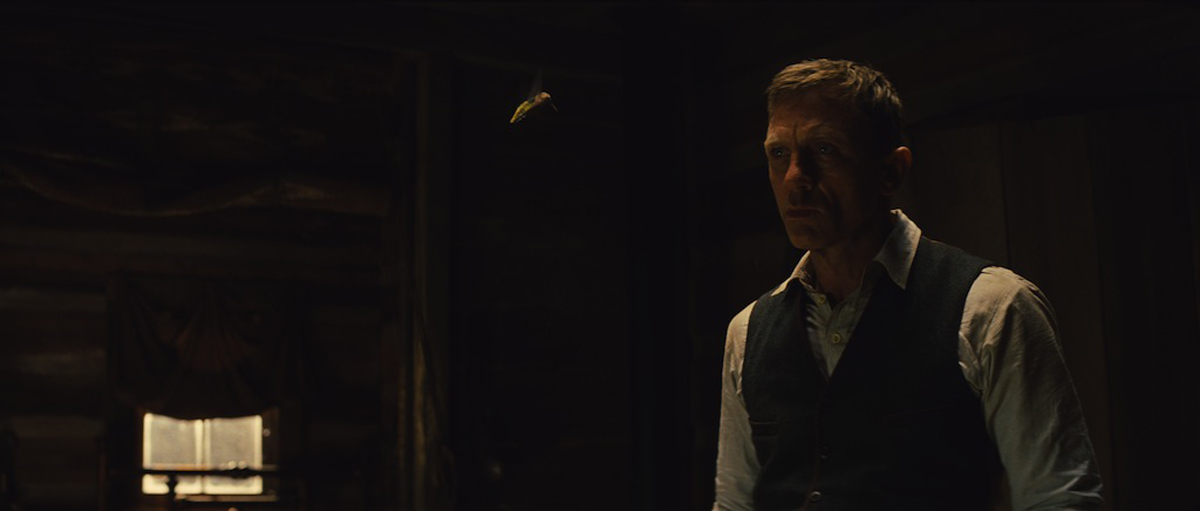
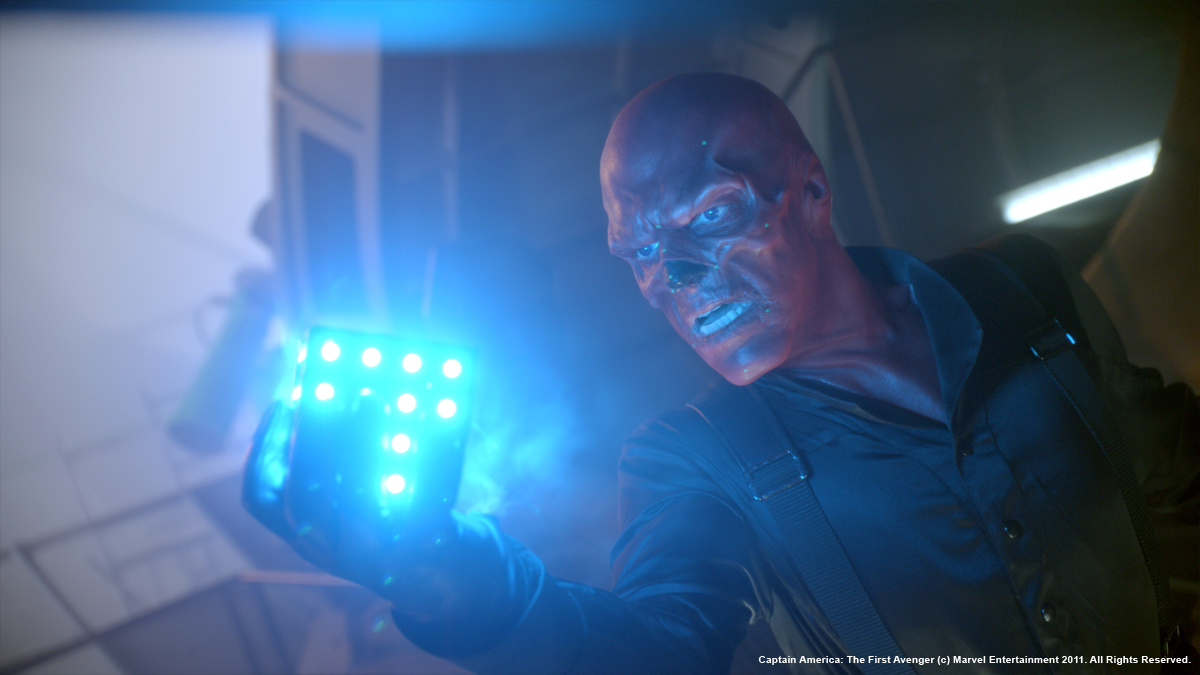
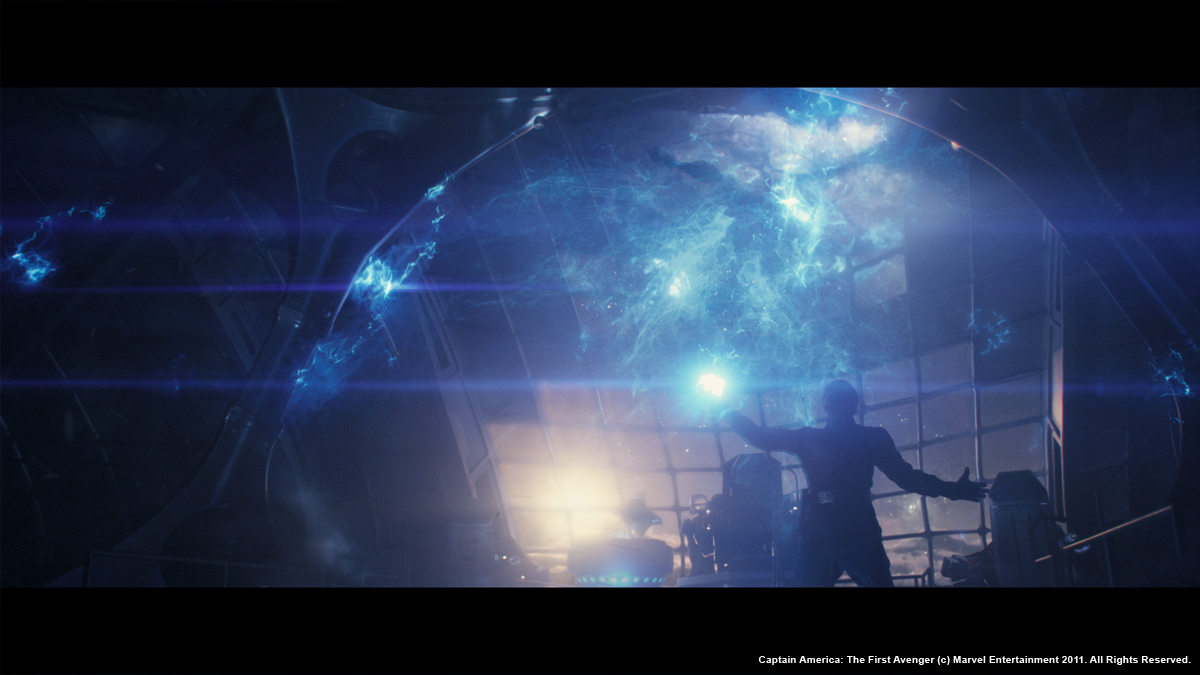
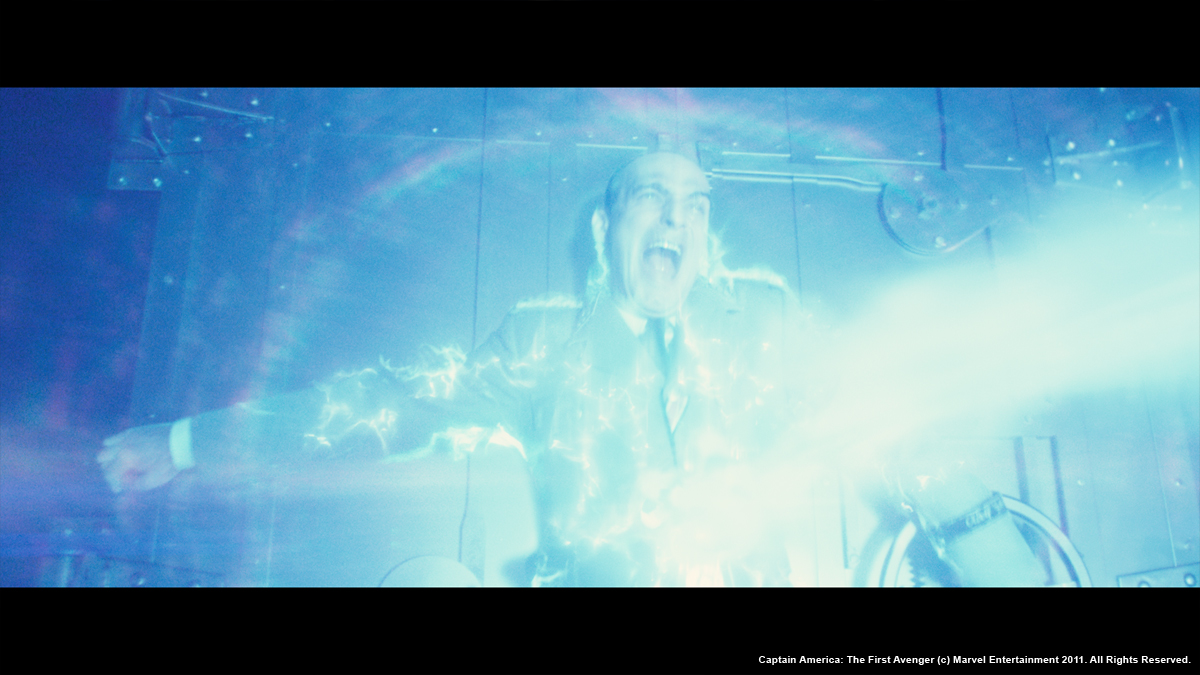
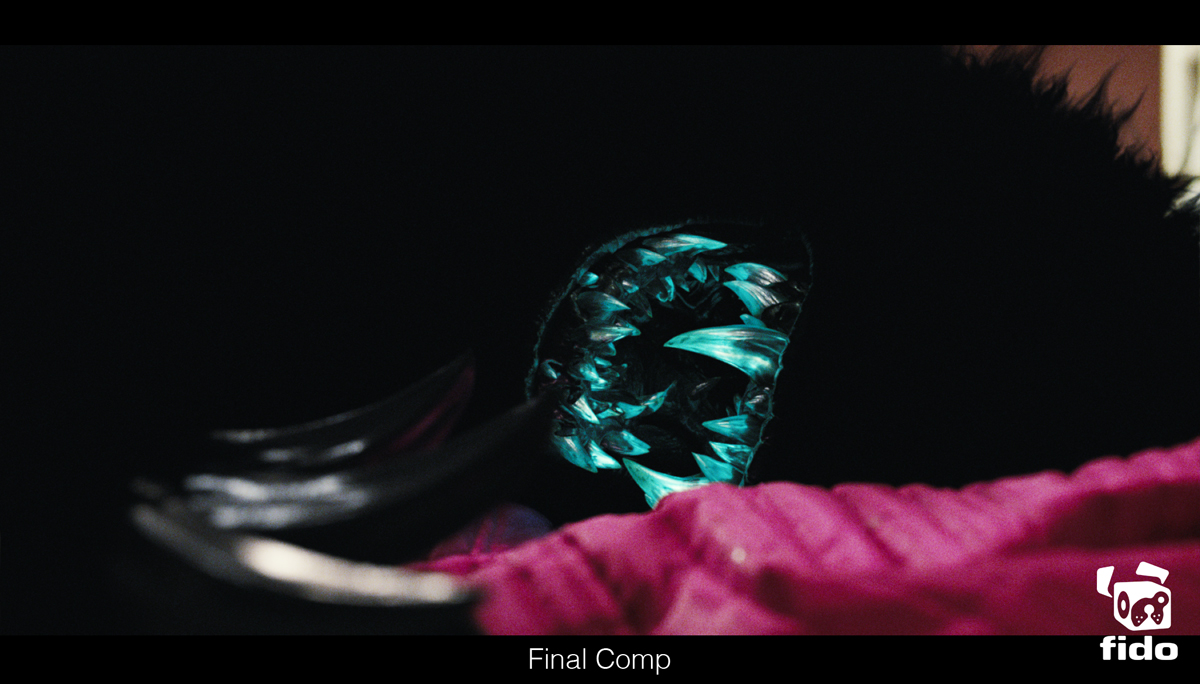
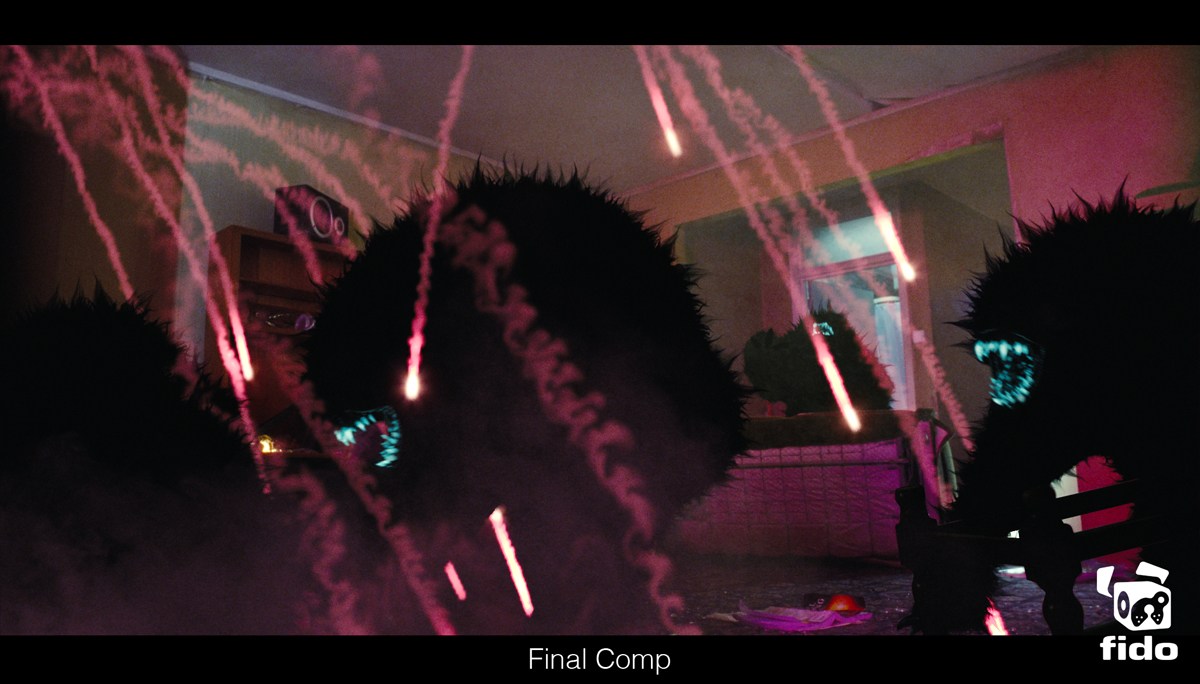
What were the references that the director gave to you for the cube universe and the death of Red Skull?
We were shown some lovely work from Buf for THOR to ensure that we remained in the Marvel universe and ours evolved from there thanks to the talents of Graham Page and Mike Ellis who lead the cube energy work with FX passes from Andrew Dickinson and Andy Feery. We initially worked on the Schmidt’s Office sequence, and created a particle based Houdini system for the energy that escapes the cube. This could produce both energy rift « crackles » and energy that wrapped around objects in the scene. These particles were also surrounded by millions of secondary particles that the crackles bled light onto, giving a very volumetric feel but with everything based off many tiny particles rather than true volumetrics. Red Skull had many extra custom particle passes that were heavily treated in the composite to build up the desired look flexibly.

How did you manage so many particles?
We tried to keep our particle simulations as small as possible for iterating the look of the crackle simulations. We then relied on a library of crackles and energy clouds, which we would layout in Maya per shot. By avoiding the need to re-simulate for every shot, and having a solid library of building blocks, we could tailor the look of the energy for each shot to the director’s specifications. Our in-house tools let us display just a small percent of the particles being referenced when inside the viewport, so we have interactive placement, but then at rendertime our particle rendering plugins can cope with the full huge cloud of them efficiently, so we’re never limited by the technology or particle count bottlenecks.

Did you develop new software for the clouds or the snow?
Our volume renderer DNB has been developed over the course of many projects to cope with the sort of scenarios like a sequence filled with fullscreen clouds. The new aspects worked on specifically developed for the show were some new single and multiple scattering techniques which enabled us to get such optical effects associated with clouds as Glories and Fogbows. This was made possible with our new node-based shader system for DNB.

Can you tell us more about the crash scene?
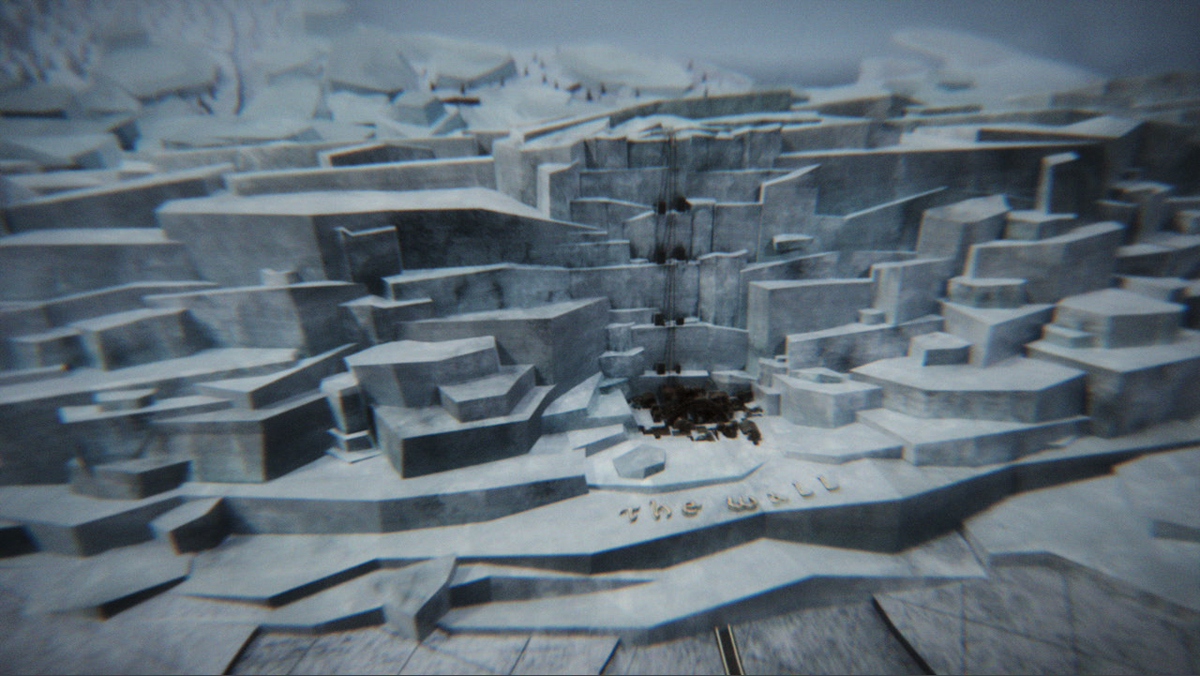
Only three shots but a fairly big challenge and one for which we knew we’d need some top notch texture reference. To that end CG supe Pete Bebb and sequence lead Maxx Leong strapped tennis racquets onto their boots and set off for Svarlbard in Norway. We hired a helicopter to shoot some HD plates and to get us to remote areas of specific interest and also spent a day on skidoos out on the ice taking thousands of stills and multiple HDRI environment domes. They returned with spectacular aerial plates of seas. fjords, icebergs and lovely stills of the ice and glaciers from the ground along with some hair-raising tales from a very harsh environment. Drifting snow and blizzard was created by David Hyde in many many layers in an echo of what we saw at the opening of the movie when the bomber is discovered.

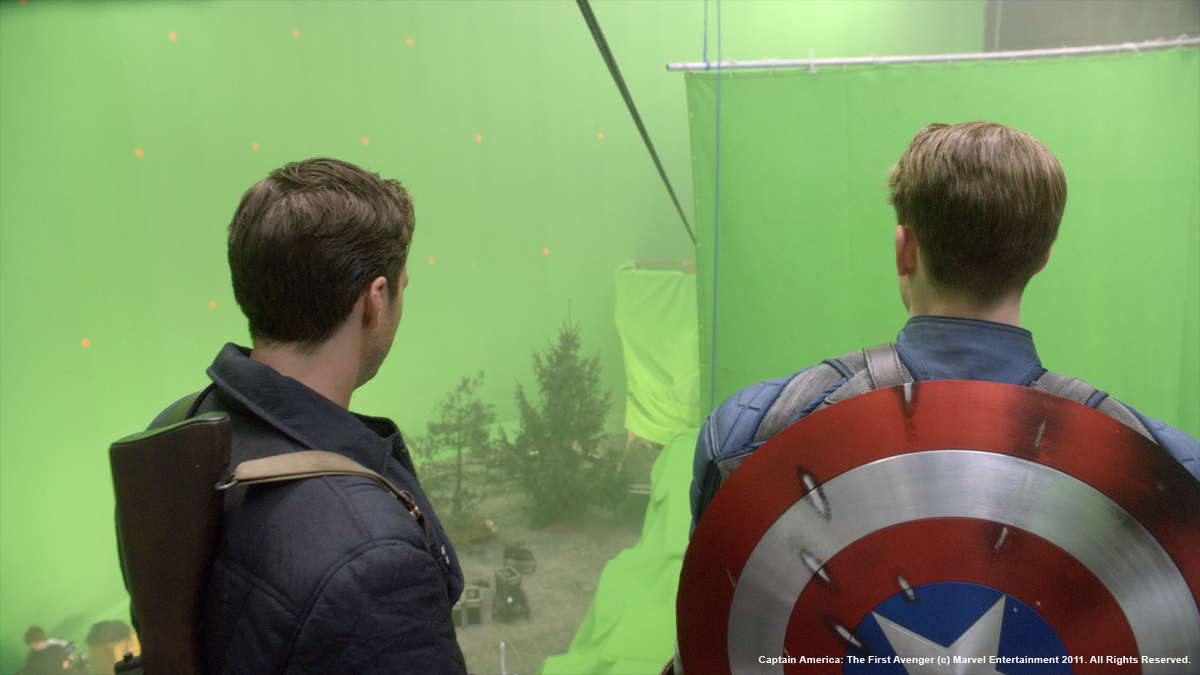
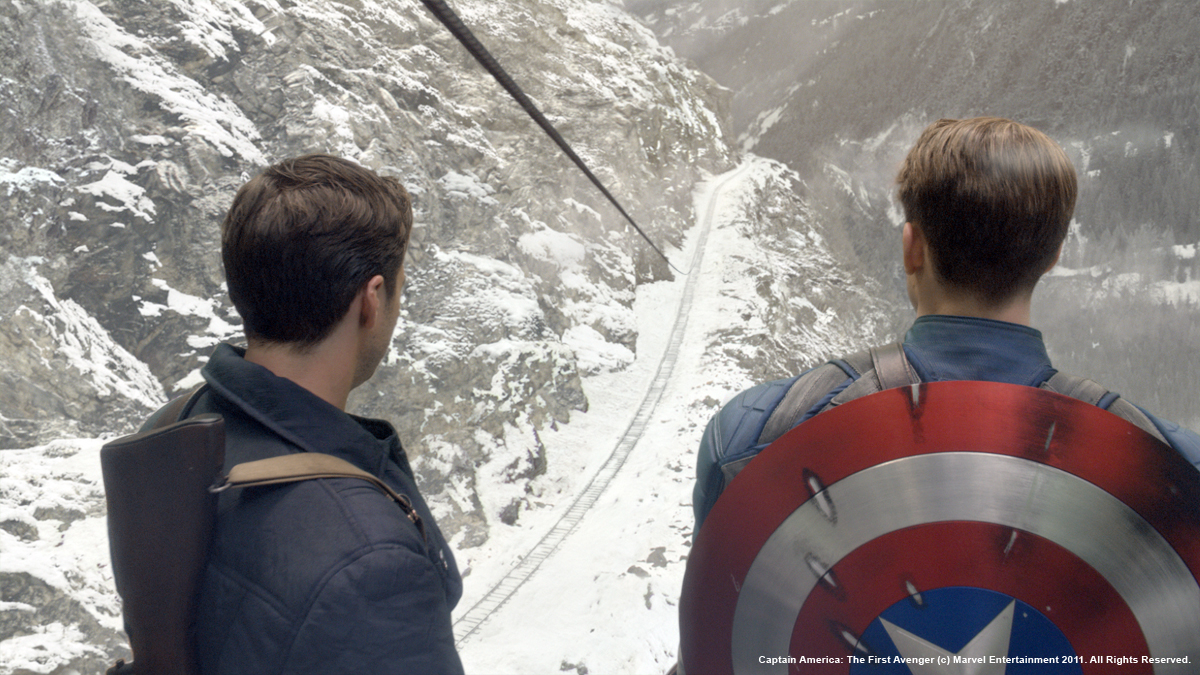
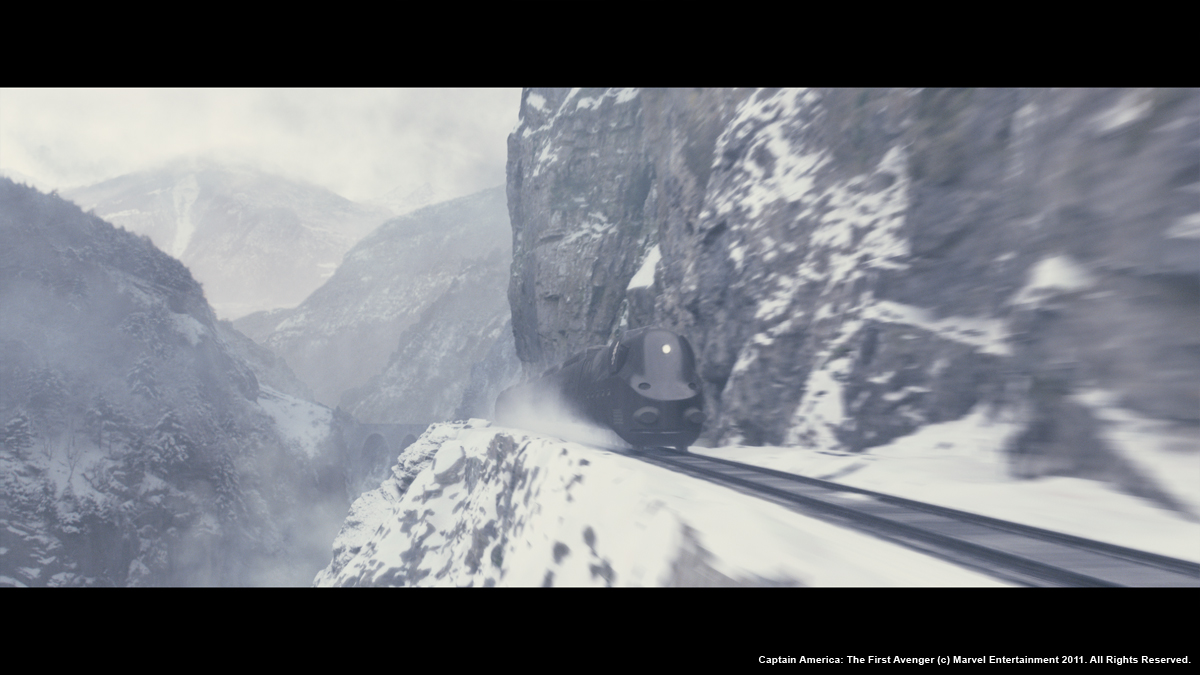
Can you tell us more about the impressive Alpine sequence for the Zola train?
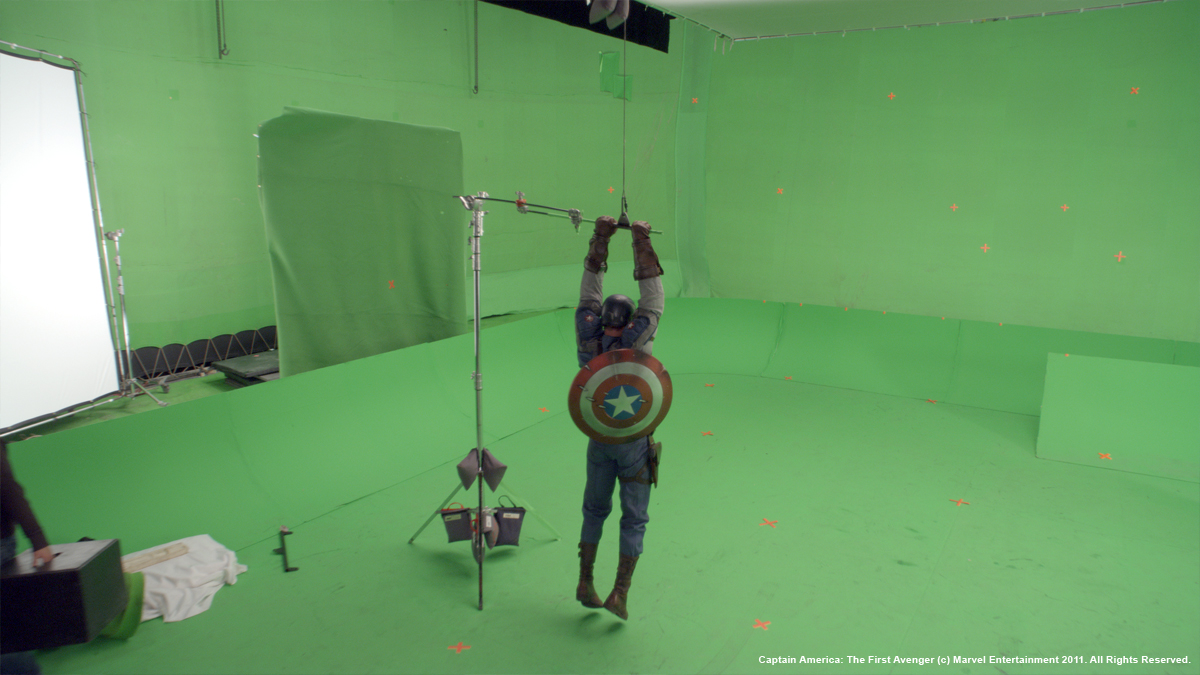
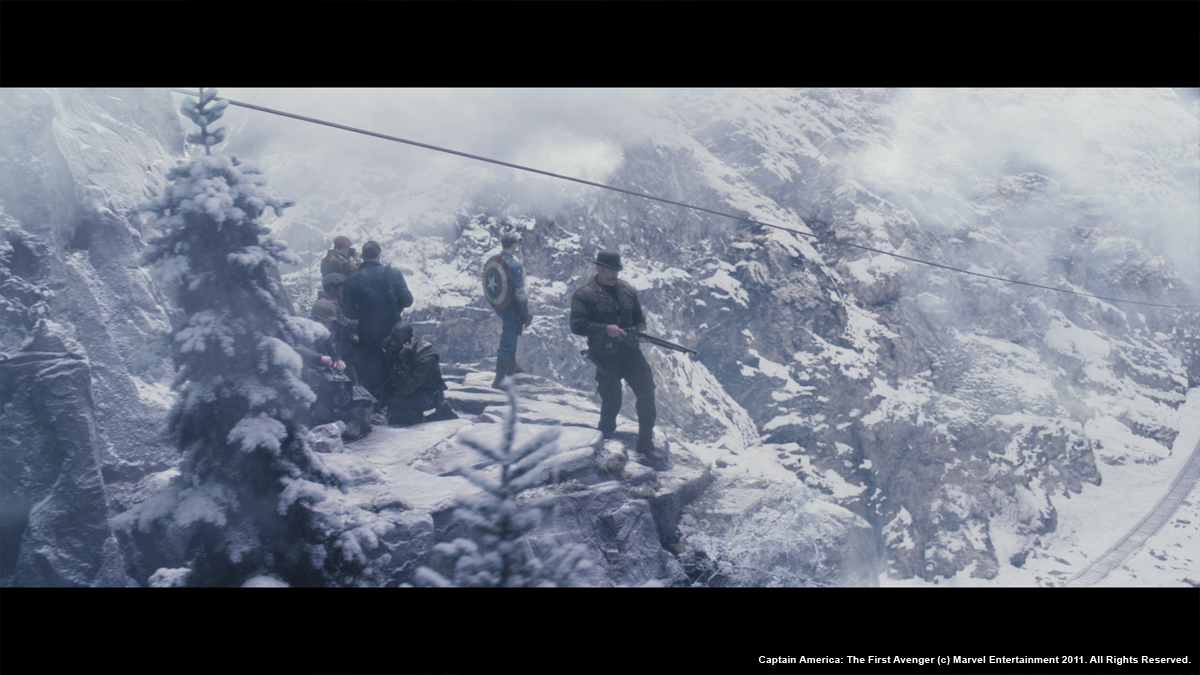
One of the most challenging sequences takes place in the Alps and sees Cap, Bucky and Gabe zipline down from a rocky outcrop onto to the roof of a speeding Hydra train. Foregrounds were shot at Shepperton and Longcross on partial set-builds and aerial plates were shot in Switzerland for the distant bgs. The Herculean task of creating everything else in between fell to Dan Neal who lead the sequence.

We built a digital version of the hydra train based on Art Dept plans and a partial set build of the top half of one carriage, digi-doubles of the actors, and all the atmospheric effects like snow, cloud and low lying mist.

DNeg got involved early to help plan a background plate shoot with second unit VFX supervisor Stephane Ceretti. The location for the shoot was in Switzerland, around Sion. The shoot was divided in 2 groups: the aerial Unit for the helicopter plates shot on Panavision Genesis and a ground unit with a tracking vehicle mounted with 2 Arri Alexa cameras on an Ultimate Arm. Dan also took thousands of tiled photographs of the environments and rock textures on canon 1Ds in order to build digital versions of the landscape.

Dan Neal continues:
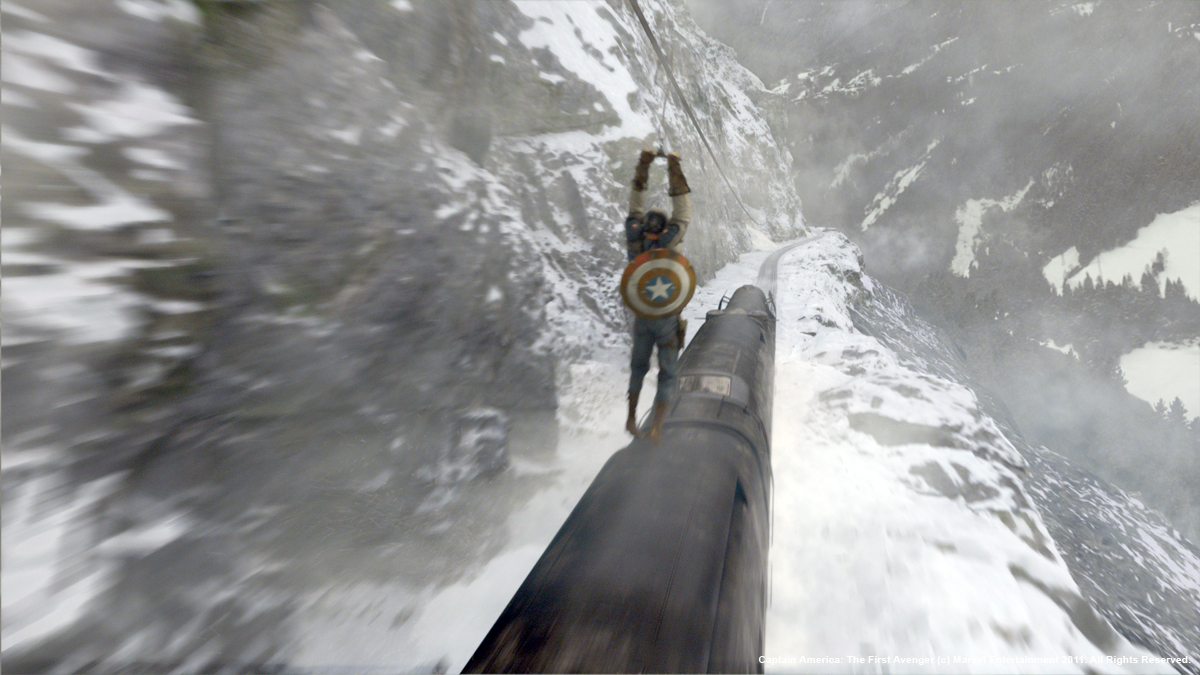
« We built the train model with an engine, 5 carriages and a caboose with gun turrets. This was then rigged with controls for the speed, the amount of movement between carriages and the banking. A separate rig allowed the artists to generate train tracks procedurally and constrain the train to the tracks. All this was animated in autodesk maya 2011. The textures of the train had to be seen fairly close. This meant having to use 3 high resolution textures of a resolution of 8000 pixels per carriage. In total, the train had 9 textures per channel (colour, specular, reflection, dirt, displacement, bump). Then each carriages had variations in the textures. This accounted for a total of over 80 textures. The texturing was done in Photoshop and Mari from the Foundry. The look development, lighting and rendering was done by David Mucci with Pixar renderman using HDRI image based lighting and raytracing. DNeg’s team also modelled, textured, and rigged the cable and zipline. The digi-doubles of Captain America, Bucky and Gabe were used in some shots at a maximum of a quarter of the screen height in pixels. They were constrained to the cable rig in a hanging position and were animated to the correct speed to land on the train.

To plan the whole sequence, production provided DNeg with a post-viz animation cut done by the Third Floor.

We then had to model the whole environment based on the layout of the shots to ensure geographic continuity in the sequence. This meant having to go from large vistas to hugging a cliff side when on top of the train. This was a challenge in itself as the resolution of the rock face needed to holdup to full screen with a train going past at 90 mph, therefore covering lots of ground in a single shot.

To this end myself and our in-house surveyor, Craig Crane, took our lidar out to Cheddar Gorge, surveyed a number of locations to produce a vast high resolution mesh. This was then handed over to Rhys Salcombe to be cleaned in 3D coat and textured in Mari using a projection technique. The photography was sourced from the rock faces corresponding to the lidar scans. Rhys also modeled and textured a couple of viaducts that we see at the start and end of the sequence. The entire landscape was recreated in maya, with the addition of trees generated in houdini. Finally, the snow was added by a procedural shader in prman. For the distant plates, we used a mix of matte painting projection and the background plates shot in the alps. Various layers of effects and atmospherics were also added by Howard Margolius and his FX team: snow falling, snow being kicked by the train, mist and clouds and one hero explosion when a hole gets blasted in the side of the train.

Was there a shot or a sequence that prevented you from sleep?
Not really. They were long days and once my head hit the pillow – that was it (laughs).

What do you keep from this experience?
Working with such a stellar crew here at DNeg was a privilege and a godsend.

How long have you worked on this film?
About a year with the bulk of the turnover coming in March.

What was the size of your team?
At its peak around 280 artists.

What is your next project?
I’m doing bits and pieces. Breaking a script down but not greenlit yet so won’t jinx it by putting it into print.

// A big thanks for your time.

// WANT TO KNOW MORE?

Double Negative: Dedicated page about CAPTAIN AMERICA on Double Negative website.

© Vincent Frei – The Art of VFX – 2011

GAME OF THRONES: Angela Barson – VFX Supervisor – BlueBolt

Angela Barson worked almost eight years at MPC, starting with compositing (TROY and CHARLIE AND THE CHOCOLATE FACTORY) and ending as VFX supervisor for films like CASINO ROYALE and QUANTUM OF SOLACE. In 2009, she founded BlueBolt with Lucy Ainsworth-Taylor and Chas Jarrett. Since then she has overseen the effects of films such as JANE EYRE or FAST FIVE.

What is your background?
I’ve worked in the film and TV industry for about 20 years. Initially in software development for Parallax and Avid before moving into post production as a compositor 11 years ago. After a year at the BBC I joined MPC where I stayed for 8 years. During my time at MPC I moved from being a compositor to being a VFX Supervisor. After leaving MPC I setup BlueBolt with 2 other partners, Lucy Ainsworth-Taylor and Chas Jarrett.

How was the collaboration with director Tim Van Patten?
Although Tim Van Patten directed episodes 1 and 2, he wasn’t the first director to come on board. We filmed episodes 3, 4 and 5 first with Brian Kirk, which meant Brian was the director we got to do the most planning with. Tim came on board when we were in the midst of filming and I was out in Malta. Most of my planning with Tim happened on the technical recces and whilst shooting.

Can you tell us how did Blue Bolt get involved on this project?
We were initially approached by Mark Huffam, one of the show’s Producers. Lucy Ainsworth-Taylor and I both worked on an independent film of Mark’s several years ago, and Lucy had kept in touch with him ever since. It took many months of bidding and meetings before we were awarded the job. It also took a leap of faith from HBO to award us the job. BlueBolt had existed for less than a year at the time and we had fewer than 10 staff, but they knew our history and trusted us to be able to deliver.

Can you tell us about the impressive wall of ice?
The ice wall was difficult as it had to really give a sense of height (700ft). The north side of the wall had to be vertical and look impenetrable, the south side of the wall was to look more man made. The practical base of the wall was a quarry that had been snowed up, so the CG wall had to transition from the quarry wall to full snow and ice.

We did a basic, textured build so that we could always get the layout and perspective correct. For each shot, additional DMP work was then done by Damien Mace to give it the snowy/icy look, with a lot of additional passes given to the compositor so they could manipulate the specular etc.

When they are on top of the wall, in the ice trench or looking out of the look-outs, we had to do set extension to the set build, and do some additional work to ice up the set further.

For the environment north of the wall, we created a number of matte paintings based on photos from Belfast, Italy, Switzerland and Finland. It snowed heavily in Northern Ireland towards the end of the shoot when I was there, so a helicopter was quickly arranged so I could go and photograph the Magheramorne Mountains and surrounding woods from the correct height.

How did you create the matte paintings of castles and different environments?
The approach for each environment changed depending on how many times the environment would be seen, what type of camera moves would be used and how many different lighting setups would be needed. There was a mixture of 2D DMP, 2.5D projections and full 3D approaches. Every building, castle and tower top-up had a basic model and basic texture created so that the shots could be laid out with the correct scale, perspective and lighting setup. This would be rendered as a base layer and then it would be passed to the matte painters to add the detail and finessing needed.


Are you involved to increase the gory makeup?
We did several shots where gore and blood had to be increased. For example the stomach being sliced open in episode 1 at the Dothraki wedding – there could never be too much gore!

How did you create the army of the King that arrives at Winterfell?
The army that arrives with the King was all done by replicating shot elements – no CG armies. It’s the Winterfell environment that’s almost fully CG.

Can you talk about the shooting of the scene where the boy is running on a rooftop and then down a tower? What did you do on these shots?
This sequence was predominantly shot a year earlier for the pilot, which means it was shot on film rather than the Alexa. The shots needed a combination of wire removals, some background composites and some tower top-ups. In the wide shot of Bran running across a tall wall, the environment is completely CG.

What was the size of the sets? Have you had some greenscreens?
The sets varied in size. Winterfell was built in the courtyard of an existing castle in Northern Ireland, so it was quite large. Green screens were erected in some of the areas where set top-ups were going to be needed. We built and textured and entire CG Winterfell which was used extensively for top-ups and full CG shots. For each Winterfell shot, Raf Morant added a lot of additional detail and lighting in DMP.

Castle Black was built from scratch in a quarry. One courtyard was built with its surrounding buildings that could be used for interior and exterior shots. It was built up to a height of about 30ft and we did CG extensions for anything higher than that as well as building a CG second courtyard.

Other sets were very small. The Top of the Ice Wall was built as a small section which then had to be extended in every direction, so lots of green screen, and the Sky Cell was built as one unit which we then had to extend. The sets were fantastic with an amazing attention to detail.

The Red Keep hardly existed at all as a practical build. The interior sets were all built inside the Paint Hall in Belfast, but the exterior shots were all created fully in CG.

Are there any invisible effects that you would reveal the secret?
There were a few environments that changed quite radically from how they were shot, changing cities to hills and sea to desert. Effects that you just wouldn’t expect to have been done.

What was the biggest challenge on this project?
The biggest challenges were probably the speed of delivery – 10 episodes in 4 months – plus the many layers of HBO producers and executives that were involved in the shot approval process.

Although we started CG builds in September, we didn’t properly start getting shot turnover until late January. This left us with 4 months to deliver all 10 episodes. Episode 1 had a huge number of VFX shots in it, and as it was the first time anyone had seen the VFX work, there was perhaps a disproportionate amount of time spent on changes. It was always difficult to keep the bigger picture/schedule in mind and not get too caught up in endless notes on Episode 1 shots. As we were creating CG creatures for Episode 10 we had to start work on them very early, before the clients were really ready to focus on them.

The shot approval process was always going to be a challenge. Working on a TV series was a totally different experience to working on a feature film where the director tends to have the final say. Each of the 4 directors on the series had 4 days to edit each of their episodes, then they were gone and the producers took over. The 2 writers also had an enormous amount of input and of course they understood the overall continuity better than anyone.

Was there been a shot or a sequence that prevented you from sleeping?
Yes, several! The dragon sequence at the end was one of the most stressful, but then CG characters always are. The entire 3D department and most of 2D worked really hard to get the dragons done and looking great in a very tight schedule.


The Eyrie arrival shot in episode 5 also caused us a lot of trouble. The layout and concept changed several times late in the delivery schedule in terms of scale and distance of the Eyrie, which meant re-doing the shot several times. 3 different matte painters produced versions, but unfortunately for Henry Baggett (our head of 2D), he ended up compositing every version.

What are your software and pipeline at Blue Bolt?
We use Maya and 3Delight for modeling, animation and rendering, Photoshop and Mari for matte painting and texturing, Nuke for all compositing. Our production management was done using Shotgun.

How long have you worked on this TV Series?
We started bidding and planning in April 2010. Filming began in July through to December 2010. Post started around September 2010s and we will be finishing up in May 2011. So by the end of it, I will have been working on the series for just over a year.

How many shots have you made and what was the size of your team?
BlueBolt completed around 300 shots. We did all of the complex environments, matte paintings, some big crowd shots and of course the creatures. We didn’t have to do much in the way of wire removals, blood additions, breath addition etc, as other vendors did these shots.

Our team reached about 30 people at its peak, with a half and half split between 2D and 3D.

What did you keep from this experience?
Never believe a TV post schedule that says you’ll get early turnover!

What is your next project?
We are just starting up on post for THE IRON LADY and SHERLOCK HOLMES: A GAME OF SHADOWS.

A big thanks for your time.

// WANT TO KNOW MORE?

BlueBolt: Dedicated page about GAME OF THRONES on BlueBolt website.

// GAMES OF THRONES – VFX BREAKDOWN – BLUEBOLT

© Vincent Frei – The Art of VFX – 2011

GAME OF THRONES: Ed Bruce – VFX Supervisor – Screen Scene VFX

Ed Bruce has worked for many years at Screen Scene. He started as an 3D artist, then Head of 3D and finally as VFX Supervisor. He worked on projects like the SILENT CITY, MY BOY JACK and ALBERT NOBBS Nobbs.

What is your background?
Many moons ago at the turn of the century, I started out as a runner having completed my degree in industrial design/product design realizing I was less interested in engineering but more the presentational aspect. The CAD part was the fun part.
After a few short months I was working as a 3D artist in a team mainly looking after commercials. A couple of years later I moved to Screen Scene where I continued working as a 3D generalist until I was made Head of 3D. Throughout my time in that capacity I attended many shoots, from commercials and films as a VFX Supervisor. For the past few years I’ve been Screen Scene’s VFX Supervisor and in 2010 we landed work on HBO’s GAME OF THRONES.

How was the collaboration with the different directors of the show?
Personally I got to work with 3 of season 1’s directors when providing on-set supervision. Each director had their different style and vision, but all wanted to get the best bang for their buck.
However my main collaboration was with the lead VFX Supervisor Adam McInnes, who worked closer with the directors to get their visual effects desires achieved.

Can you tell us how did Screen Scene got involved on this project?
With the production being in Northern Ireland there was interest in doing post south of the border. Screen Scene, being the largest and most comprehensive facility in the country which comes with a great reputation delivering high quality work; either doing VFX or sound & picture post.

Which sequences did you make?
Screen Scene VFX (SSVFX) looked after about 350 shots of the 686 total VFX shots in season 1. Screen Scene also housed the entire picture post and sound.

Can you explain the shots in which Bran is climbing on the tower? How was this sequence shot?
Obviously production couldn’t let the young actor climb the set unaided. Therefore he was supported by wire rigs. Some of the shots in this sequence came from the original pilot footage shot on film and some re-shoot material shot on the Alexa. There was also a variety in the way the rig was assembled. Some shots he had a front mounted rig, and in others a rear mounted rig. Sadly most of the climbing shots had very difficult rig removal due to the substantial rig size and its positioning. In many shots the rig would pass over Bran’s face, arms or torso, thus making it far more difficult to remove.
Also due to a tight production we were unable to shoot background plates or material for this sequence. This meant that it would have to be generated in CG. In SSVFX we have a great 3D team, who relished the challenge of creating the woodland backgrounds and grassy floors. By creating this environment in 3D it allowed us coverage for all the various angles and tracking shots.

How did you create the crow with three eyes?
The on-set VFX co-ordinators, Niall McEvoy and Colin McCusker would let you believe the most difficult aspect to these shots was placing the small white tracking markers on the Ravens heads. However, getting good 3D tracking from these shots was quite the task. This for me was probably the most important aspect of the shots. If the 3rd eye had not been tracked perfectly then the whole shot wouldn’t have worked. Once tracked by our match-mover Mike McCarthy, he then created a 3D model of the eye with a surrounding socket. Once this was animated and textured it was delivered to our compositors who had the task of blending the real feathers in with the generated ones. This was made more difficult by the fact that the raven turned in and out of the light. These shots were always going to be difficult to make completely believable because instantly people know there are no 3 eyed ravens. But our task was about making sure that the VFX was convincing and seamless.

How did you enhanced the crowd on the King tournament?
The crowd at the Kings tournament was a straight forward duplication using the many plates we shot on the day. As we only had a small number of extras, we shot fixed cameras high and low, where we wrangled and shuffled the people to ensure we had coverage throughout the shot. This meant that the VFX was more about stitching various takes together rather than creating elements.

We also shot some extras on blue screen which enabled us to fill small pockets. Also in these shots we added CG tents to fill out the area behind the main stand. There was a lot of rotoscoping but nothing too difficult.

Can you explain to us the horse death at the tournament?
I can assure people that no animals were hurt in the filming of this sequence. The actual horse decapitation was a well choreographed piece where Conan Stevens (The Mountain) used a blade-less sword to strike into a prosthetic animatronic horse head. Conan rehearsed many times with a full sword before tackling the real takes without. When it came to the VFX we had to orientate his wrists and hands to ensure the CG sword hit it mark. We then had to add a lot of blood and gore to increase its impact.
The shot proceeding the decapitation shot was made up of a couple of takes. One with the Mountain against a crowd and the other of a horse getting up, which required flopping and reversing. Once assembled together a compositor hand painted the neck wound onto the horse. Again we added blood and gore for dramatic effect.

How did you enhance the fight between Jaime Lannister and the Lord Stark guards?
Most of the fight sequences in season 1 had blood additions created in VFX, as it was very difficult to choreograph on-set blood spurts to be seen in frame. The fight between Jaime and the Stark guards had blood additions, CG spears and a CG dagger thrust into Jory’s eye. It was very entertaining to watch actors throwing imaginary spears. Again there was plenty of CG blood. Jaime stabbing Jory was a tricky shot that involved re animating Jaime’s arm, re animating Jorys head, adding a CG dagger, replacing Jaime’s face due to the re animation of his arm. Our compositor Alex Jacquet did a fantastic job of this very tricky shot. Also in this sequence most people won’t know that the spear that is stuck in Ned’s leg is also a CG spear.

How did you create the huge campment of Lannister army?
On set I realized that the only way to fill and populate these sequences was with CG extras. This wasn’t originally planned for nor even had a budget. Both myself and Adam McInnes, lead visual effects supervisor, knew this would enhance the shots and was therefore important to do right.
On set we took plenty of photographs of the solider extras front on and from the sides. This gave us modeling and texture references. Our artists then modeled and textured a few generic soldiers with multiple differences that meant we could re-use the characters to create over a thousand. Then they were rigged and ready for animation.

Our animator Vadim Draempaehl then created multiple animations from walking fast and slow, carrying things, riding a cg horse, standing talking/interacting, sitting down at tables etc. With this library of animations we were then able to multiply the characters over the pathways and non tent areas. We had specific areas where we wanted to place certain actions, and then using scripting methods spread the others across the scene without any of them walking through each other or floating. Then they were lit and rendered with multiple passes, diffuse, reflection and highlights, shadow etc and handed to the compositors who were able to balance them with the foregrounds live action people and the rest of the scene adding the CG tents, props and atmospherics etc. These shots also had considerable amounts of rotoscoping to tackle. I’m thoroughly delighted with these final shots. They’re good hidden VFX that helps the scene feel big and epic.

Can you tell us more about the shot showing the battle deads all over the field?
Having built many soldiers for the Lannister encampment scenes, we were able to re-use and animate/pose extras for the background of the after battle shots. We re-textured the CG characters, re-animated them, added CG horses, and placed many CG characters lying across the field. The foreground tree stump was also set alight by using blue screen elements we shot in our element shoot. These shots also had a lot of smoke and atmospherics added and a lot of rotoscoping of the foreground live-action people.

What was the biggest challenge on this project?
As this project was episodic, so where the delivery deadlines. Time was always a challenge. Our team worked a 6 day week for over 6 months to ensure every deadline was met at the highest standards.

Was there a shot or a sequence that prevented you from sleeping?
I always sleep like a baby, especially when working long hours. However there was one shot which caused a few tosses and turns. This was a Bran’s climbing shot. The rig he was suspended on went through his head, arms and back. The harness also reshaped Bran’s torso. This was the most time consuming shot that SSVFX had. We tried various techniques to remove the rig. The best result was where we had to fully re create Bran’s torso in 3D. We modeled Bran’s body, and animated it to match over the original. As Bran was moving quickly in rotation and position, this match animation and tracking was extremely difficult. In the end there was 222 reviewed versions of the shot.
Now when someone says they have a rig removal shot for me, I cringe thinking the worst.

What are your software and pipeline at Screen Scene?
SSVFX use NukeX; 3d studio Max with Vray; Eyeon’s Generation; Photoshop; and various other software and tools.
We develop individual pipelines for each job specific to their needs and requirements.

How long have you worked on this film?
I first got involved in the pre-production and shoot in June 2010 and we delivered our last shots in mid May 2011. So nearly a year.

How many shots have you made and what was the size of your team?
SSVFX completed 350 shots from 686 with a team of 19.

What did you keep from this experience?
It was a great experience working with HBO. I’ve always watched HBO shows and am now proud to be part of the community of people who have contributed that networks success. Personally I thoroughly enjoyed working closely with Adam McInnes, VFX Supervisor, and his VFX team of Peter Hartless, VFX Coordinator, Keith Mason, VFX Editor and Niall McEvoy and Colin McCusker on-set VFX coordinators. Adam is an exceptional talent in our field and I was able to gain/learn plenty from working along side him.

What is your next project?
We always have a few projects in the pipeline. One of which I’m delighted to announce. We are currently in previs on DIE HARD 5, the latest installment directed by the unparallelled talent of John Moore.
Keep an eye on my website for further announcements. Also, just for your readers, I am always looking for talented and motivated artists to work on our projects.

What are the 4 movies that gave you the passion of cinema?
There are so many movies that have motivated and excited me in this industry. As a child I was encapsulated by BACK TO THE FUTURE. It had a large impact on me. It was one of those films that had my imagination. Like so many STAR WARS fans I find myself still referencing that film.
If I had to say 4 films. Erm. I’d say, 1. BACK TO THE FUTURE 2. RAIDERS OF THE LOST ARK 3. JAWS 4. And a western probably THE GOOD, THE BAD AND THE UGLY. But the list is endless. With every year VFX takes further leaps and inspires me more.

A final note maybe?
GAME OF THRONES was a great project for us in SSVFX. I am very fortunate to have a great VFX team to work with, especially Sarah Mooney, VFX Producer, and Nicholas ‘Stocky Nick’ Murphy, VFX Production Assistant who both are integral to our success and the way we deliver quality VFX for every project we undertake. We all enjoy our work immensely.

A big thanks for your time.

// WANT TO KNOW MORE?

Screen Scene: Dedicated page about GAME OF THRONES on Screen Scene website.
Ed Bruce: Official website of Ed Bruce.

// GAMES OF THRONES – VFX BREAKDOWN – SSVFX

© Vincent Frei – The Art of VFX – 2011

RISE OF THE PLANET OF THE APES: Dan Lemmon – VFX Supervisor – Weta Digital

Dan Lemmon began his career with TERMINATOR 2 3-D at Digital Domain. At the same place, he will also work on TITANIC, FIGHT CLUB or THE LORD OF THE RINGS: THE FELLOWSHIP OF THE RING. He will work on two other THE LORD OF THE RINGS films at Weta Digital. In 2007, he is VFX supervisor for 30 DAYS OF NIGHT. Then follow up with ENCHANTED, JUMPER and AVATAR.

Can you tell us about your background before your first visual effects film?
I grew up in the 80s just as personal computers were becoming common in American households. I was fascinated with the idea of using them to make pictures, and I learned to write simple graphics programs. I was also really into movies, especially STAR WARS. My four brothers and our neighborhood friends would use our parents’ camcorders to make our own versions of STAR WARS and other popular films of the era. I had a vague idea that I wanted to work in movies when I grew up, but it was when the digital effects industry took off in the early 90s that I discovered my path into the business. I studied Industrial Design in university, which shared some skills and software with the visual effects industry, and I started interning at Digital Domain during my summer breaks. I worked on TERMINATOR 2 3-D, THE FIFTH ELEMENT, and TITANIC as part of my internships before I graduated and went to work full time.

How was your collaboration with director Rupert Wyatt?
It was a pleasure collaborating with Rupert and the rest of the film making crew. Everybody was very accommodating and wanted to make sure that we were getting what we needed from the shoot in order to make our apes look as good as possible and still deliver the film on time. We were pushing our performance capture technology in directions we hadn’t taken before, so there was a lot of experimentation and learning that had to happen on everybody’s part. We had to figure out how to get everything working on a live-action set, and that included figuring out how we were all going to work together. We needed to get good usable data out of the performance capture setup but didn’t want to slow down the production process.

This is his first movie with so many VFX. What was his approach about them?
I would describe his approach as story-centered. He was most concerned about working with Andy and the other actors to get great performances that propelled the story forward. He had a solid understanding of the tools we were using to capture those performances, but he wasn’t preoccupied with the technical particulars.  He made sure we understood what he wanted from the scene trusted us to come through for him. Rupert put his attention where it really needed to be, on the actors and the story, and that carried forward from shoot to post. As we started working on shots, his main concern was that we make sure we carried all of Andy’s performance across to Caesar.

Can you explain how the scenes involving Caesar and other monkeys were shot?
We started by shooting the scenes with all of the actors – the ones that play apes and the ones that play humans – acting in the scene together. Once the director was happy with that, we would pull everybody out and shoot a clean plate to help us with painting out the ape performers later. Sometimes we would leave the human performers in the clean plate depending on the nature of the shot, but the performance of the actors was always better when everybody was playing the scene together, so that was usually the take that would end up in the movie. When we started our VFX work, we would paint out the ape performer and replace them with the digital character.


Do you reuse the tools created for KING KONG and did you develop new ones?
We took a lot of what we learned from Kong and added to it. Our fur system was completely rewritten between Kong and Apes. Our skin and hair shading models have advanced considerably since then, and our facial performance capture technology has made strides as well. Our muscle and tissue dynamics have been rewritten, and we used facial tissue simulations for the first time.

The fur of your monkeys are amazing. Can you explain how you created the fur?
Thank you! Our fur and hair grooming system is called Barbershop, and it plugs into Maya and Renderman. It was written over the last several years by Alasdair Coull and a team of 5 other programmers, with input from Marco Revelant and our Modeling department. Barbershop is a « brush » based modeling tool that allows artists to manipulate a pelt of fur while visualizing and sculpting every strand of hair that will make it to the render. We also simulated wind and inertial dynamics, especially for the big orangutan Maurice, who had matted, dreadlock-like clumps of fur on his arms and legs.

Did you have filmed real monkeys on the set for light references?
Real apes were never used on set. We did use a silicone bust that had been punched with yak and goat hair as a lighting reference, but we found that the dark-haired humans in the plates were actually better reference. We also used the standard VFX chrome and grey balls for lighting reference.

Can you explain step by step the creation of a Caesar close-up shot?
The first steps are the photography and performance capture. Andy Serkis plays through the scene with the rest of the actors, and the motion picture camera photographs them while at the same time the performance capture system records the movements of Andy’s body and face. After the director is happy with performance, we shoot a clean background. The director and the editor go away and cut the scene together, and then they come back to us with the shots they want us to add Caesar to. We scan the film and process the performance capture data, retargeting Andy’s movements onto a chimpanzee skeleton. Our motion editors and animators work with the motion and facial data, cleaning up any glitches and making sure that the motion that is coming through on Caesar matches Andy’s performance. Enhancements are done as needed and once the motion is solid, we run a muscle and tissue dynamics pass that simulates the interaction of Caesar’s bones, muscles, fat, and skin. We apply a material « palette » to the result, which contains all of the color, wrinkles, skin pores, finger prints and other fine skin details. We apply a pelt of digital fur at the same time. We then place digital lights, paying attention to match the live-action photography and also to bring out Caesar’s shape and features. We then send this package of data to our bank of computers which render the Caesar elements. Compositors take those elements and composite them into the live-action plate. Because Andy and Caesar are different shapes, there are always bits of Andy that stick out outside Caesar’s silhouette and need to be painted out, so our Paint and Roto department use the clean plate to remove any extra bits of Andy that are visible after we drop Caesar into the shot.

How did you create the impressive shot that follows Caesar crossing the whole house from the kitchen to his room in the attic? Is it full CG?
That shot began with previsualization that roughly charted the path of Caesar as he moves through the house. Unfortunately the house did not exist as a complete set – the first two levels of the house were built on one stage, and the attic was on another. Also, the constraints of the set and the camera package didn’t allow for the plate to be shot in a single piece. We ended up shooting the plate in four different pieces and stitching them back together. There was no motion control, so Gareth Dinneen, the shot’s compositor, had to do a lot of reprojections and clever blending to bridge from one plate to the next. We also used CG elements through some of the trickier transitions. Once we had a roughly assembled plate, we blocked out Caesar’s animation. We did a rough capture with Andy on a mocap stage for facial reference, but because most of the action was physically impossible for a human to do, the shot was entirely keyframed.

The eyes of monkeys are very successful. How did you get this result?
We had the assistance of an eye doctor and we used some of his equipment to study a number of different human eyes at a very fine level of detail. We used what we learned to add additional anatomical detail into our eye model, and we also put a lot of care and attention into the surrounding musculature of the eyelids and the orbital cavity to try to improve the realism of the way our eyes moved. We also studied a lot of photo and video reference of ape eyes. We did cheat in a few places – the sclera, or « whites, » of most our apes eyes are whiter and more human-like than they would be on real apes. We cheated them whiter – as we did on KING KONG – in order to make it more clear which way the apes were looking, which in turn makes it easier for the audience to read their facial expressions. We justified our cheat by attributing the whitening to a side effect of the drug that gives the apes intelligence and makes their irises green. That is why the apes at the very beginning of the film have darker eyes that are more consistent with real apes – they haven’t received the drug yet.


Can you explain the creation of the great shot of Caesar climbing to the summit trees through various conditions and seasons?
That was a completely digital shot. We created the redwood forest using partial casts and scans of real redwoods as a starting point. We wanted to make each seasonal section of the shot distinct, so we did a number of lighting and concept studies to try to change not just the weather and season of each section, but also its visual tone. Caesar goes through four different age transitions in that shot, as well. We used two distinct models and four different scales and wardrobe changes to help communicate that change.

What was the real size of the Golden Gate set? How did you recreate this huge environment?
The set was about 300 feet long by 60 feet wide, and it was surrounded on three sides by a 20 foot tall greenscreen wall. The construction department built the hand rails and sidewalk that run down both sides of the bridge, but all of the cables, stanchions, and beam work was created digitally. The surrounding Marin Headlands, Presidio, harbor, and City of San Francisco were digital as well.

Can you tell us the creation of the shot showing the monkey jumping to a helicopter?
Each of those helicopter shots was its own puzzle. Some of the shots featured a real helicopter hovering at the Golden Gate Bridge set. Other shots were completely digital. A few of the shots used a 50/50 mix where the pilot and passengers of the helicopter along with the seats and dash of the helicopter were real, but the exterior shell of the chopper and the surrounding environment were digital.

Some shots involved a huge number of monkeys. How did you manage so many creatures as it is for the animation side and the technical side with your renderfarm?
We used a combination of our Massive crowd system and brute force. For distant shots with fairly generic running and jumping action we were able to use Massive to generate the motion and render highly-optimized reduced geometry. Medium shots that required more specific actions were usually a combination of keyframe animation and Massive, and we had fewer opportunities to reduce geometric complexity.

What was the biggest challenge on this film and how did you achieve it?
The biggest challenge was making a digital chimpanzee that could engage an audience and hold their interest, even through the mostly-silent middle of the film. We saw an early cut of the film that featured Andy before we’d had a chance to replace him with Caesar. What was surprising is that after a few minutes you forgot that you were watching a man in a mocap suit. You accepted Andy as Caesar in spite of his funny costume because his performance was so good. He was totally engaging and the movie worked really well. So we knew if we could just faithfully transfer Andy’s performance onto Caesar, Caesar could carry the film. That was a big challenge, though, because Andy’s and Caesar’s bodies and especially their faces are so different from one another. It took a lot of iterating and careful study to make Caesar look like he was doing the same thing as Andy. The scene where Caesar is up against the window in the Primate Facility, and Will and Caroline are on the other side of the glass – that was a particularly challenging scene for us in terms of matching Andy’s performance. His face was going through a number of complicated combinations of facial expressions, and he kept pressing the flesh of his face up against the glass. We knew it was going to be hard, but it was also a great proving ground where we could really push the limits of our facial rig.

Was there a shot or a sequence that prevented you from sleep?
The schedule was so tight there literally wasn’t time for sleeping! The Golden Gate Bridge sequence, in particular, was difficult because of the sheer number of apes that had to be animated and rendered. Because it was a big action sequence and the apes were doing very athletic things, there was a limit to what our human performers could do. In the busy sections most of the apes had to be keyframed, and that can take a long time to get right.

How long have you worked on this film?
I spent about a year-and-a-half on the movie.

What was the size of your team?
There were roughly 600 people who worked in some way on the visual effects for this film.

What are the four films that gave you the passion of cinema?
The films that really made me want to get into visual effects were the original STAR WARS trilogy, BLADE RUNNER, and later TERMINATOR 2 and JURASSIC PARK. JURASSIC PARK, in particular, was a big influence because it redefined what was possible in terms of bringing creatures to life on the screen. I was 17 at the time, and I remember sitting in the theater with my jaw on floor, thinking to myself, « THAT is what I want to do with my life.

A big thanks for your time.

// WANT TO KNOW MORE?

Weta Digital: Official website of Weta Digital.

© Vincent Frei – The Art of VFX – 2011

ATTACK THE BLOCK: Mattias Lindahl – VFX Supervisor – Fido

After telling us about his work at Double Negative on KICK ASS, Mattias Lindahl is back on The Art of VFX to tell us about his new project, ATTACK THE BLOCK, this time at Fido in Sweden.

How did Fido got involved on this film?
Double Negative, who originally was going to do all the VFX work on the film, approached us. Due to timing issues they found themselves short of resources and asked us to bid for the work. I was already familiar with the show since I was involved with it before I left Double Negative when the film was still in pre-production. I was originally set to supervise the work for Dneg, but since I had already decided to relocate to Stockholm, I had to pull out. I was of course thrilled that I still got to work on the film in the end.

How was your collaboration with director Joe Cornish and Double Negative VFX Supervisor Ged Wright?
Really good. Joe is really easy to get on with. Since this was his first feature he obviously had limited experience from working with visual effects. Even though his vision for the film and the look of the creatures was very strong, he was at the same time great at taking onboard ideas from us on how to solve creative and technical problems. I’ve known Ged for a long time. He did a great job presenting our work to Joe. He worked really well as a filter between us and Joe. Making sure the work was presented the right way. I traveled over to London a few times for key meetings. But other than that, most of the communication was done using Skype and Cinesync, which worked really well.

Which sequences did you made this show?
Our sequences where spread throughout the film. We did all the creature shots that needed a CG jaw.

How did you share the assets with Double Negative teams?
The only asset that needed to be shared was the look development Dneg had been doing on the fur. They supplied us with a pre-rendered 4k patch of fur which we used as a base for all the fur replacement on the creatures.

Can you explain to us the fur creation?
It was a combination of tricks really. Shots that did not show any great level of parallax were done completely in the comp. We tracked edges of the creature and used patches from the Dneg fur development to create a new spikier outline.
We created full on CG fur for all shots where either the creature or the camera was moving enough to show a shift in parallax. We created a rough model of the creature and made a rig that allowed us to both animate (or « roto-mate ») the creature to the plate, but also push the geometry around to fill in the areas that was needed in screenspace. A lot of time was spent on roto-mating the creatures. It was of course important that the mesh matched the plate on every frame, but we also had to make sure that the animation was smooth enough to not end up with any sudden twitchy moves that would then affect how the fur behaved.

What was the main challenge with the jaws and claws of the creatures?
One of the key issues with the animatronic jaws was that it did not have the right mechanics in it to show subtle change of emotion. Since these creatures does not have eyes and are mainly black, the only chance we had to get some sort of emotion or facial expressions out of them was through the mouth. The rigging of the jaw needed to be very comprehensive to allow for a number of extreme poses. But it also needed to give the animators a good chance to hit important beats like snarling, sniffing, frowning and of course the big impressive roars. The shading needed to match the practical jaw that featured in a number of shots. So it was important to get the hue, luminance and glows accurate. Magnus Eriksson did a great job with the modeling and rigging using ZBrush, Mudbox and Maya. It was shaded and rendered in RenderMan by Aron Makkai.

How did you animate the creatures?
Most of the time we would start off by “roto-mating” the creatures, using the plate. They had an amazing stunt team on set, so we tried to take as many cues from the original action as possible. In some cases we would go in and add a bit of extra movement to the wrist of the front legs, to make the running motion a bit smoother, or change the shape of the hind legs to make them look less human. The good thing about the creatures being all black apart from the outline was that we could reposition the jaw within the volume of the body. So we would again start off by matching the movement of the practical jaw from the plate. We would then go in and add secondary animation, like bigger head movements or aiming the “eye-line” differently to get a more powerful effect or make them look more threatening.

Where there some shots with full CG creatures?
Yes. A few new ideas came in to the mix late on where we didn’t have any creature plates to work with. So a few of the shots you see are entirely CG.

How did you manage the lighting challenge with a fur so dark?
It was important to Joe that the body of the creatures would never be illuminated. It is part of the storyline that these creatures are blacker than black. So we had to make sure that any highlights in the fur would only fall on the spiky outline and that the fur was always backlit. We created key light passes that the compositor could expand or contract depending on how much light scatter was needed for each shot. It was also important to keep an eye on the black levels in the comp. We had to always keep an eye on the base black levels in each shot to make sure we didn’t go below it.

Can you explain to us the creation step by step of the great shot in which Moses is chasing by many creatures in the corridor?
Oh yeah. This was one of those shots. When you first look at it you go… Ah crap. We are not going to get much sleep over the next couple of months. There were no dark corners to hide anything in this shot. It was brightly lit and a lot of creatures to add.
The main plate consisted of Moses running down the corridor being chased by 2 creatures. We where then given repeat passes shot on greenscreen using “poor mans moco”. (Meaning the camera crew doing the best to re create the same camera move over and over without the use of motion control) This meant that each greenscreen pass needed to be stabilized and then be animated by hand in the comp to make sure there were no sliding feet. Each creature was then tracked to allow us to replace the fur and add CG jaws and claws. We spent a lot of time getting the wrists on the front legs working since the men in suits was running with stilts inside the suits to extend the front legs. This made the legs very stiff and we had to add another joint to make the run work convincingly. Fredrik Höglin who was the main compositor on the shot did an amazing job pulling it off.

Have you created specific tools for this show?
No not really. We do a lot of fur at Fido, so we have already invested quite a lot of time perfecting that part of our pipeline. We are currently working on a tool called SpeedFur, which is amazing. We presented it at this years Siggraph. It was a shame that we didn’t have it finished in time for this show. But we’ll have to save it for the sequel… (laugh)

Did you change your pipeline to fit the show requirements?
No. Thankfully our pipeline is up to scratch to handle this type of jobs. We have a colour space controlled fully EXR based workflow. So it was very straightforward to take Dneg’s lookup table and view our EXR’s through that. This meant that we were absolutely sure that we were looking at exactly the same image as they were over in London.

What was the biggest challenge on this film and how did you achieve it?
Since the original plan wasn’t really to do this amount of work on the creatures at the time of the shoot, on-set data like lens sizes, lens height, set surveys etc was non-excitant. So it made matchmoving extremely challenging. A lot of work had to be done by eye. The matchmovers did an amazing job pulling it off at this high standard.

Was there a shot or a sequence that prevented you from sleep?
Other than the corridor shot mentioned before there was the sequence leading up to it where Moses jump through a room full of our creatures and fireworks going off. We composited lots of repeat passes of the creatures that had been shot with a locked off camera for each shot. Unfortunately the fireworks had been shot in such a way so we could not pick them out from the background. So we had to re-create them in CG. Joe really liked the look of the practical fireworks, so we had to make sure we matched the look of them. This would not have been a problem at all had we known about at the start of the show. But this came in really late, so we had a few sweaty moments there before we got it done.

What do you keep from this experience?
This was the first show at this scale that we have done remotely. I’m extremely happy with how smooth the communication with London worked. It proved that you can sit in a building in Stockholm and work directly with a production team in the UK.

How long have you worked on this film?
We started bidding and the concept work in August 2010. Shot production ran from October to February 2011. So 4 months.

How many shots have you made?
About 100.

What was the size of your team?
20-25 people at it’s peak.

What is your next project?
We are currently working on 3 features. YOKO, UNDERWORLD AWAKENING and KON-TIKI. Parallel to that we are doing a bunch of commercials.

A big thanks for your time.

// WANT TO KNOW MORE?

Fido: Official website of Fido.

© Vincent Frei – The Art of VFX – 2011