CAPTAIN AMERICA – THE FIRST AVENGER: Stephane Ceretti – 2nd Unit VFX Supervisor

Stephane Ceretti is back on The Art of VFX. After PRINCE OF PERSIA and X-MEN FIRST CLASS, he talks to us about his work on set on CAPTAIN AMERICA.

How did you get involved on this film?
Victoria Alonso, who is in charge of all the visual effects at Marvel, was looking for a second unit VFX supervisor for CAPTAIN AMERICA: THE FIRST AVENGER and she spoke with Diana Giorgiutti and Danielle Costa who were working on THOR to find out if they knew someone in London. I had worked with both of them before and they suggested that Victoria contact me, which she did. I met her in London, then went to LA for meetings with Method Studios, which I had just joined, and met with Mark Soper (VFX producer) and Chris Townsend (VFX supervisor) who were already preparing the shoot of CAPTAIN AMERICA. Looks like they all liked me and Method agreed to loan me out to Marvel for the duration of the shoot in the UK.

Can you tell us about your collaboration with director Joe Johnston and Production VFX Supervisor Christopher Townsend? How did you split the supervision work?
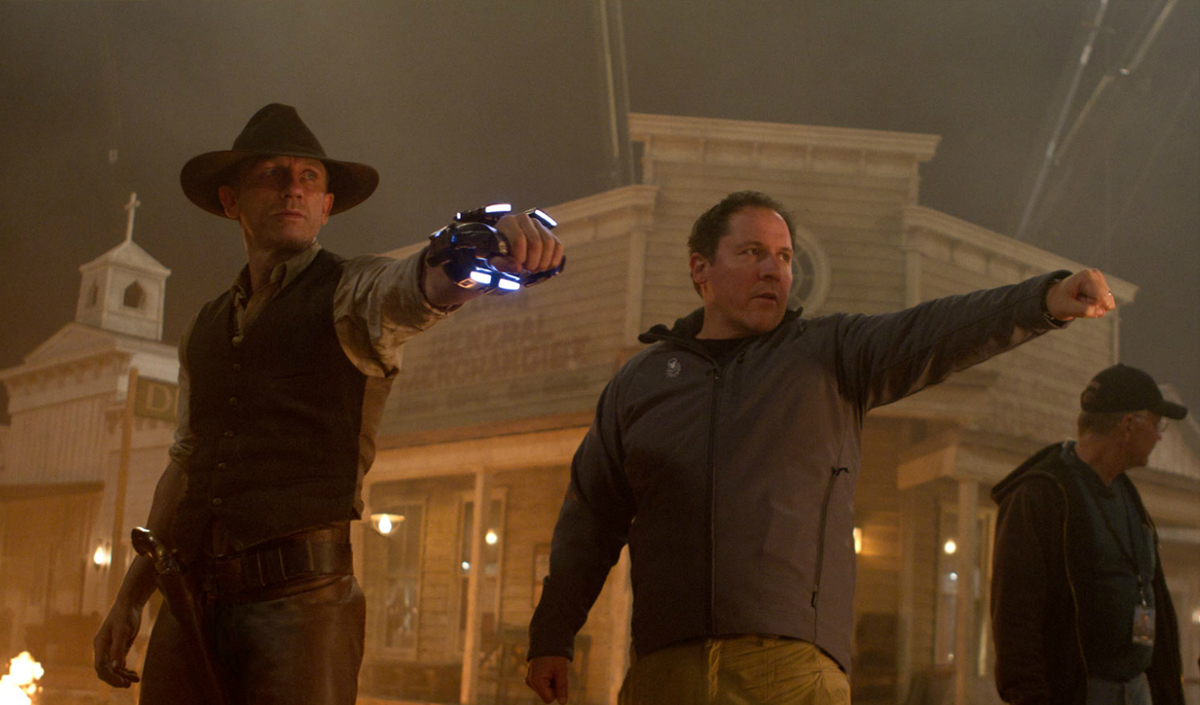
I was in charge of everything that would be shot on second unit, including all the plates we had to shoot in the various locations like Liverpool, Manchester, Wales and the entire aerial shoot in Switzerland. We had constant coordination meetings between Chris and myself and the VFX team to make sure that nothing was left behind. Sometimes second unit would start a sequence and we would hand over information to the main unit regarding what we had shot and the plates we had, and sometimes it was the other way around. The director, Joe Johnston, shoots in a very organic way, without previs, so we had to make sure we were prepared for any options. It was very intense because the units were not shooting in the same locations, so we had to make sure communication was constantly flowing between the two units. Chris was spending all his time with Joe Johnston gathering information. I was spending most of my time with the second unit director Jonathan Taylor. A large part of the second unit team had done a lot of the action sequences on the Bond movies, and we had a lot of fun with practical stuff to do on ‘Cap.’ I must say that they were all very helpful and consistently tried to provide the VFX team with all we needed.

What was the average size of the sets?
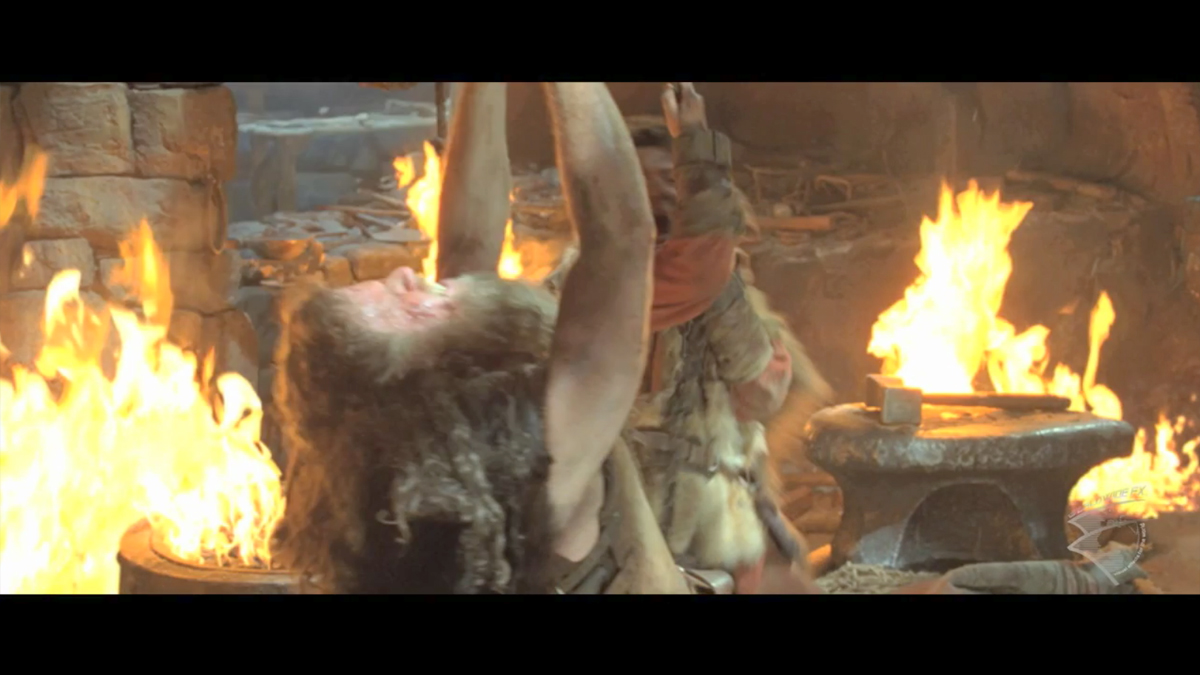
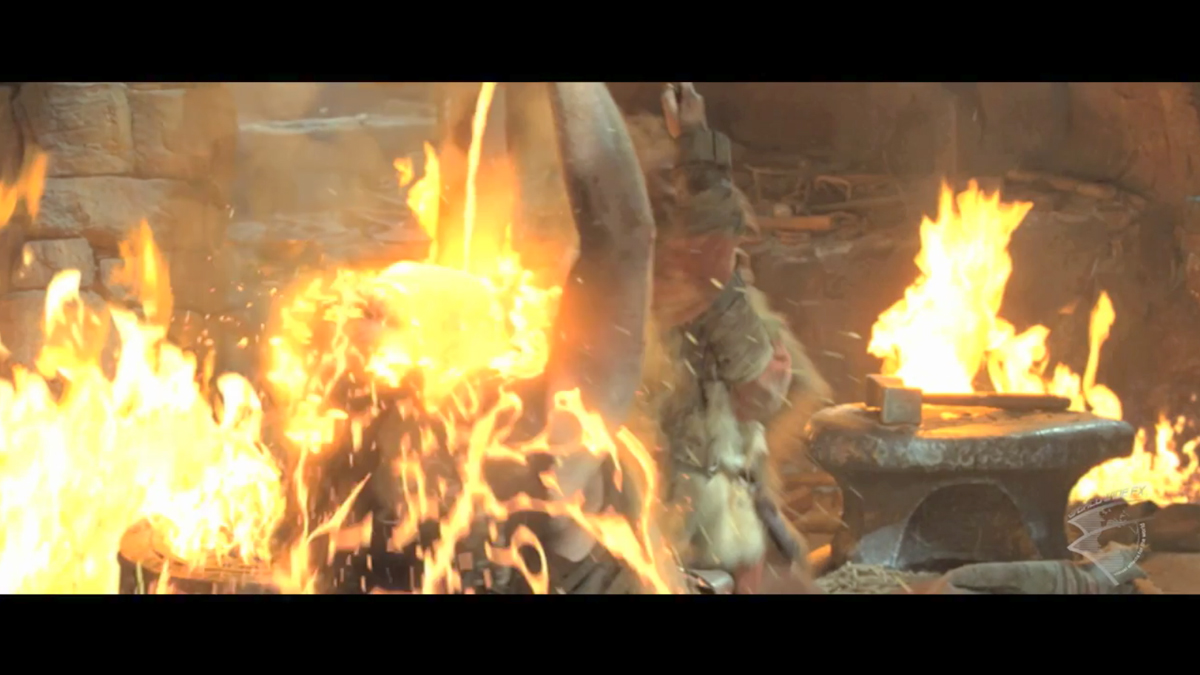
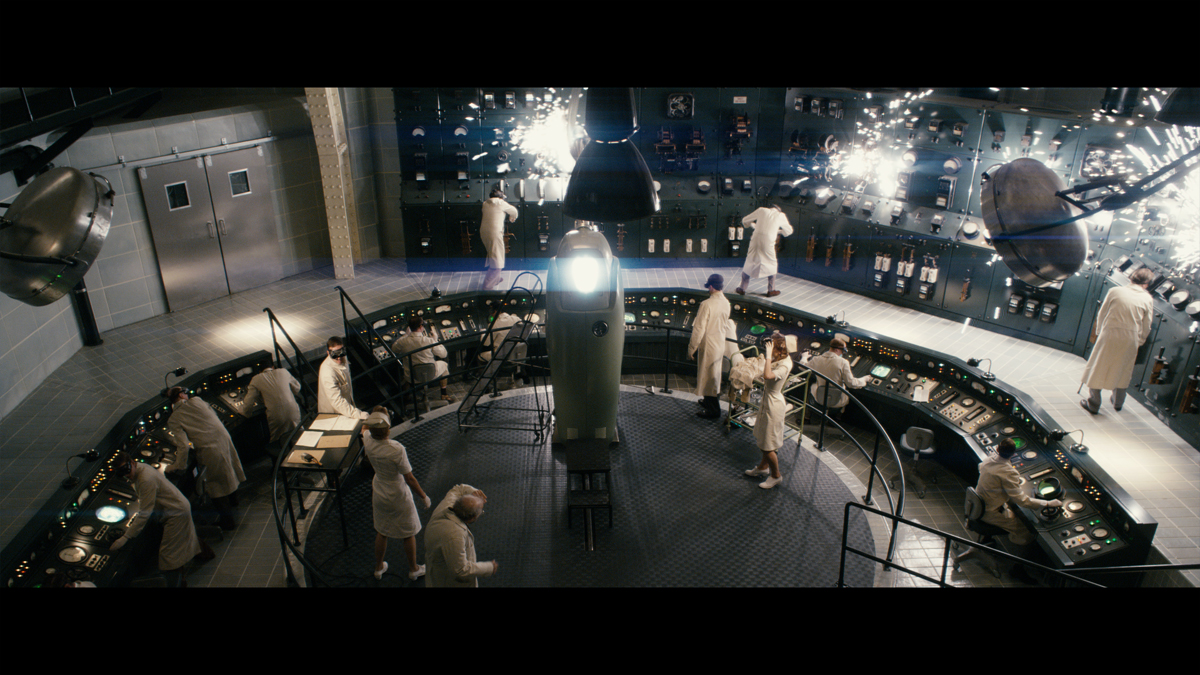
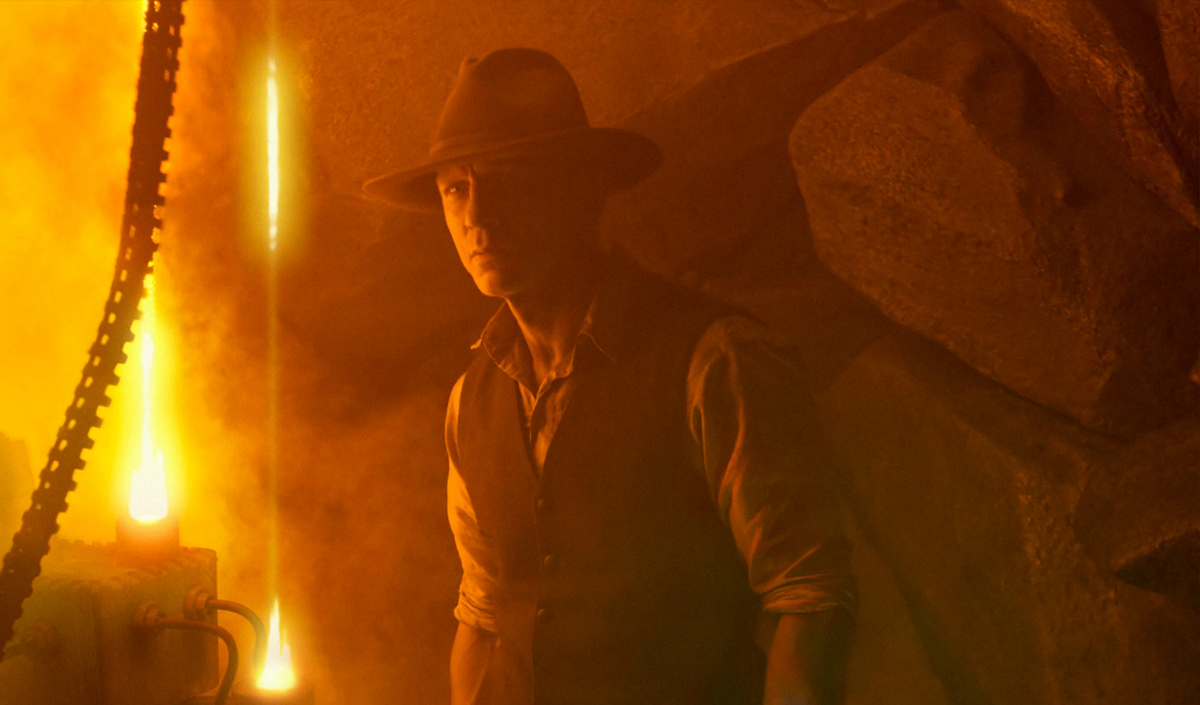
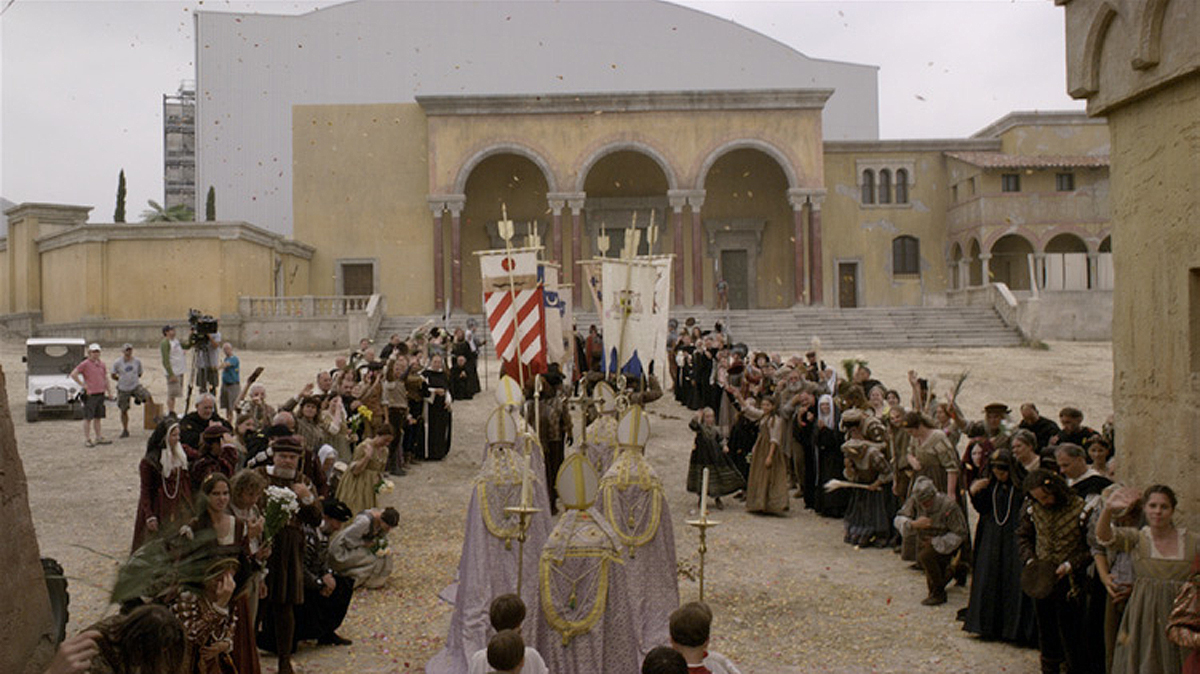
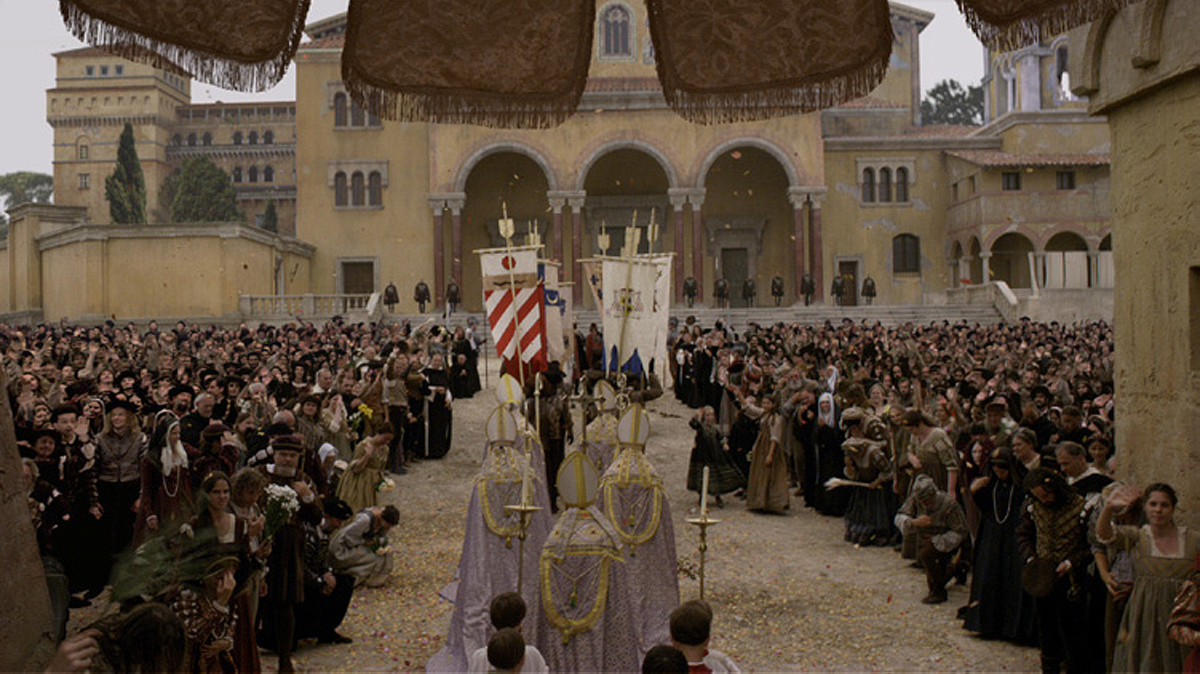
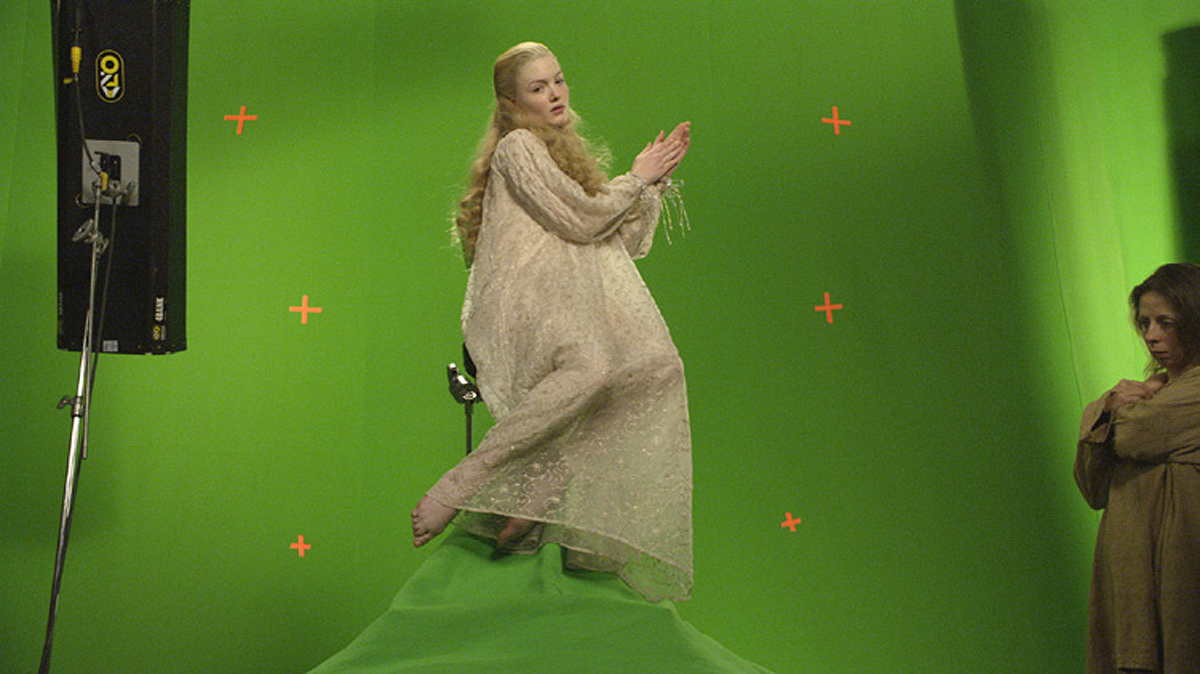
Well, we had from very small (a corridor) to very large streets in Manchester and forests behind Pinewood. Interior sets were really big and detailed. The Bomber was a huge set built on a gimbal which could be moved in every direction, and the Hydra Factory set used all of the space in the H stage at Shepperton. The NY World’s Fair set was built outside in Longcross and that was one of the biggest green screens I have ever seen.

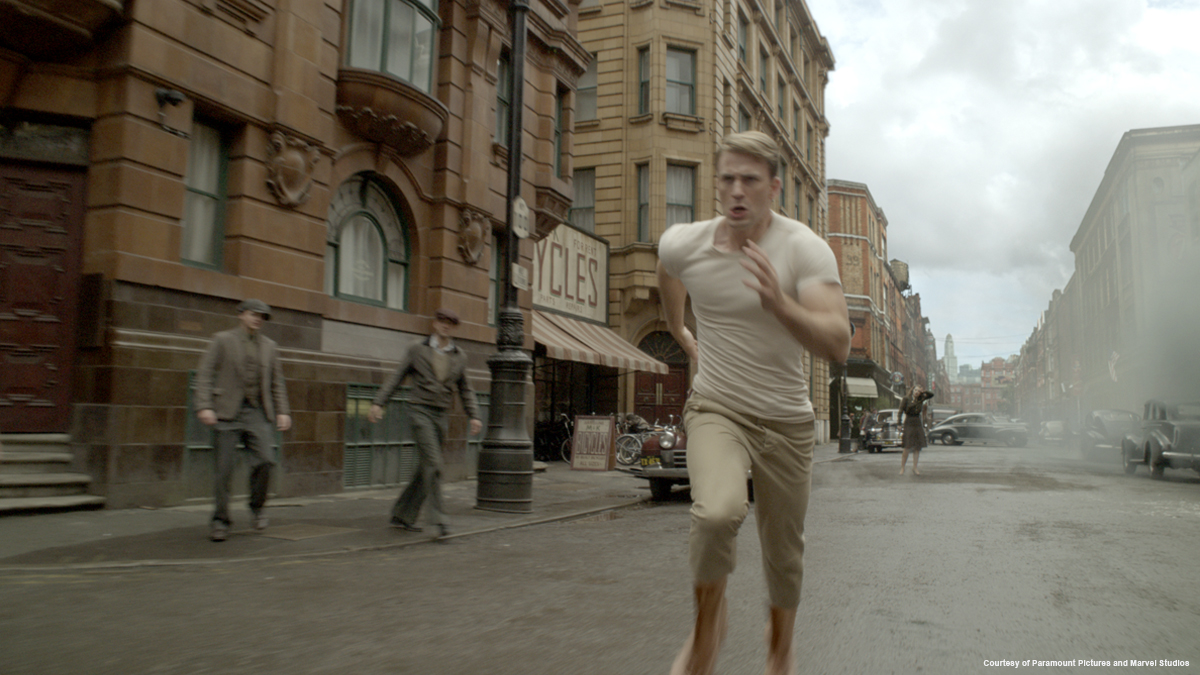
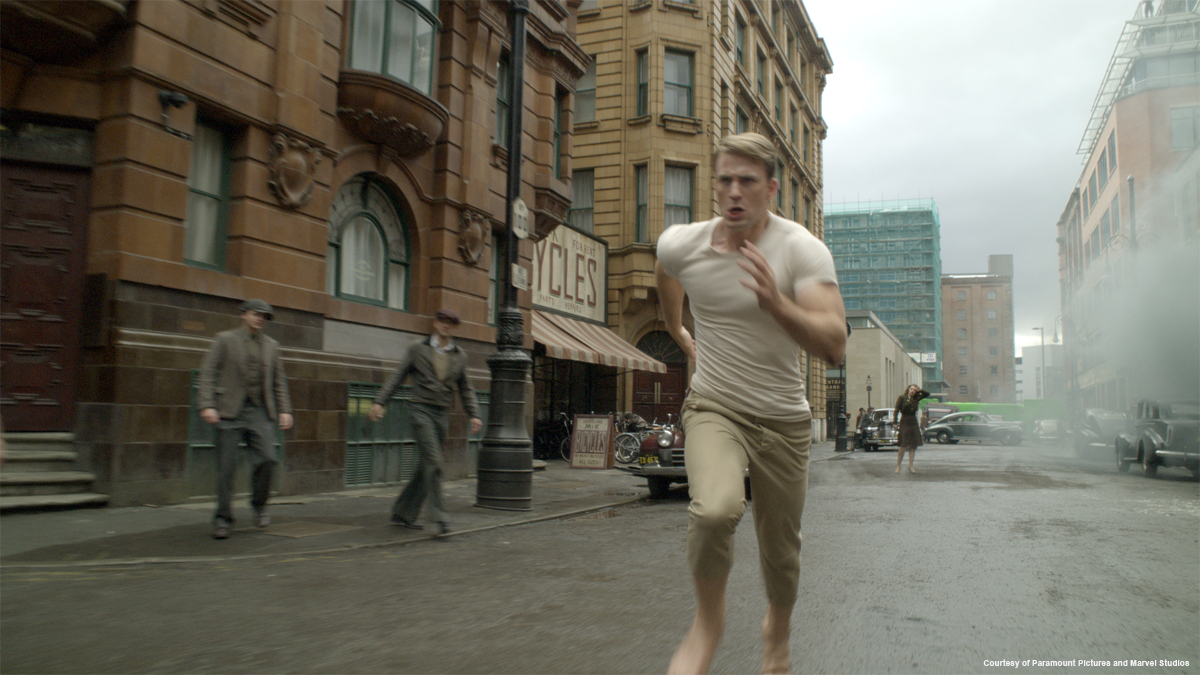
Our biggest exterior “sets” were definitely the streets of New York that we did in Manchester and Liverpool. Art department dressed a full street in Manchester to look like 1940’s Brooklyn and we had all the props and cars and extras to fill the street with the amount of life you would get there. These were huge open air sets.

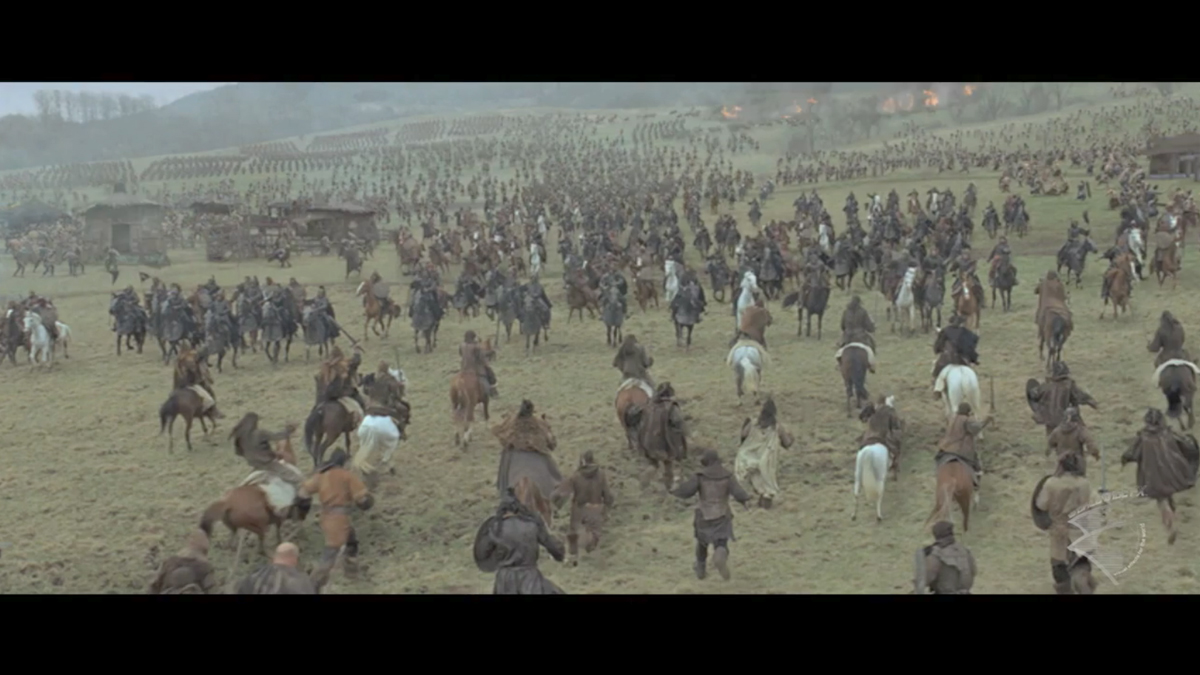
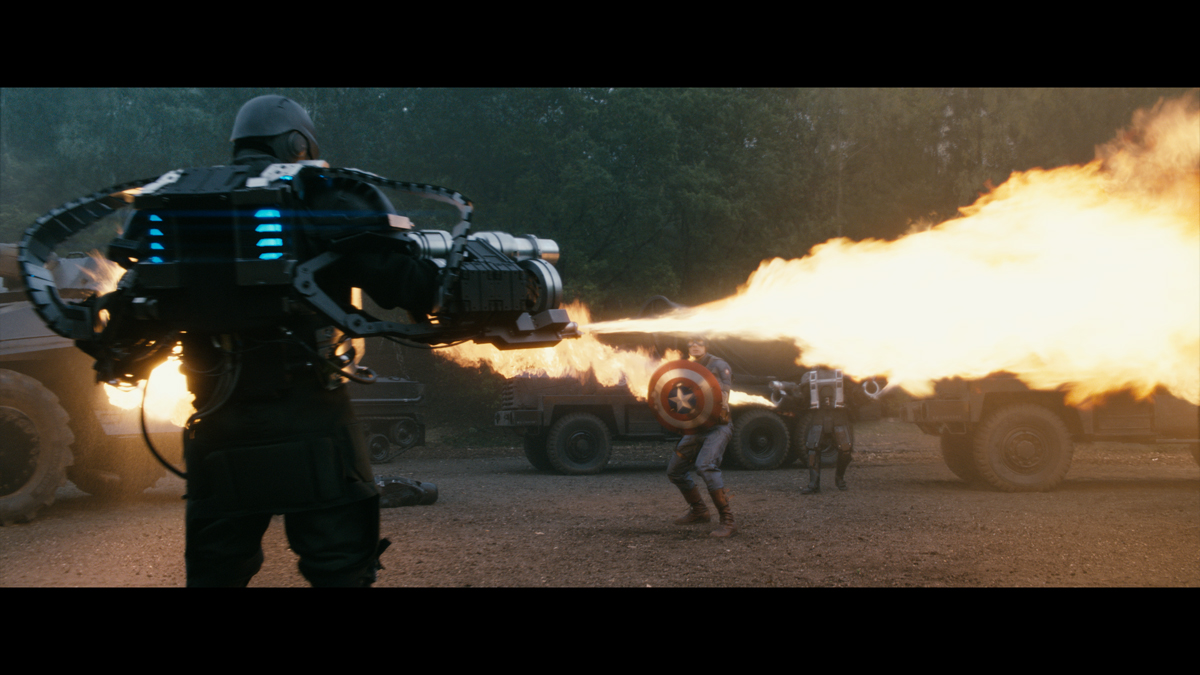
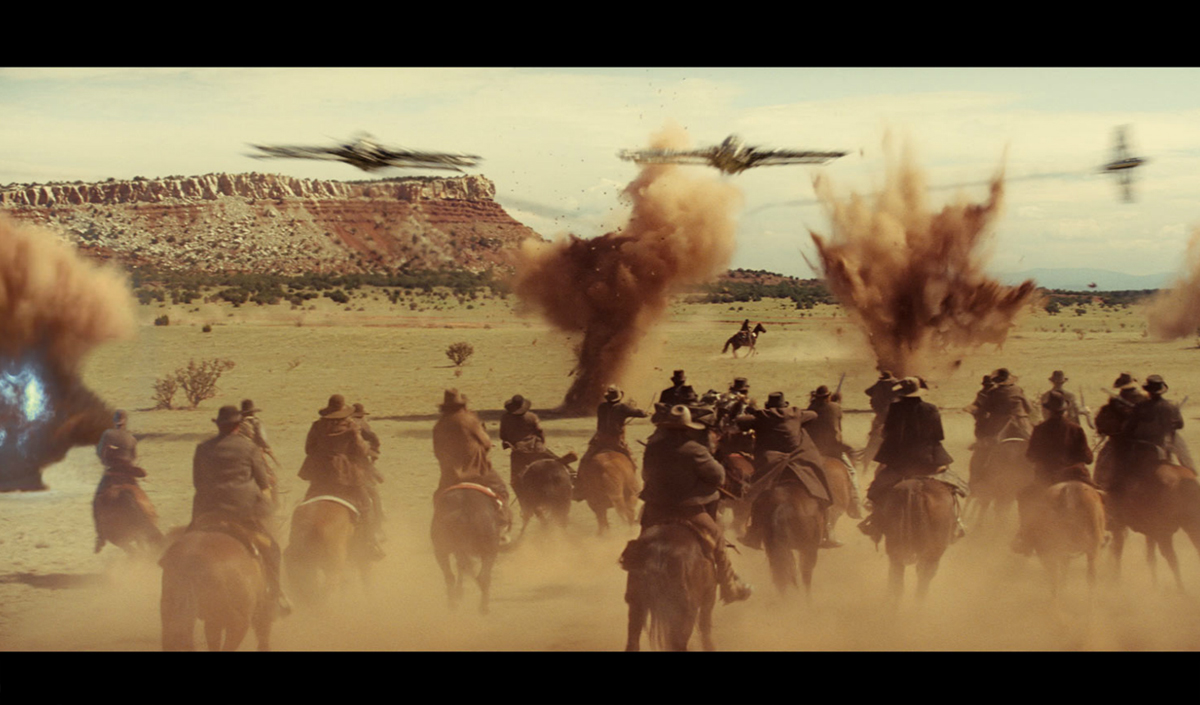
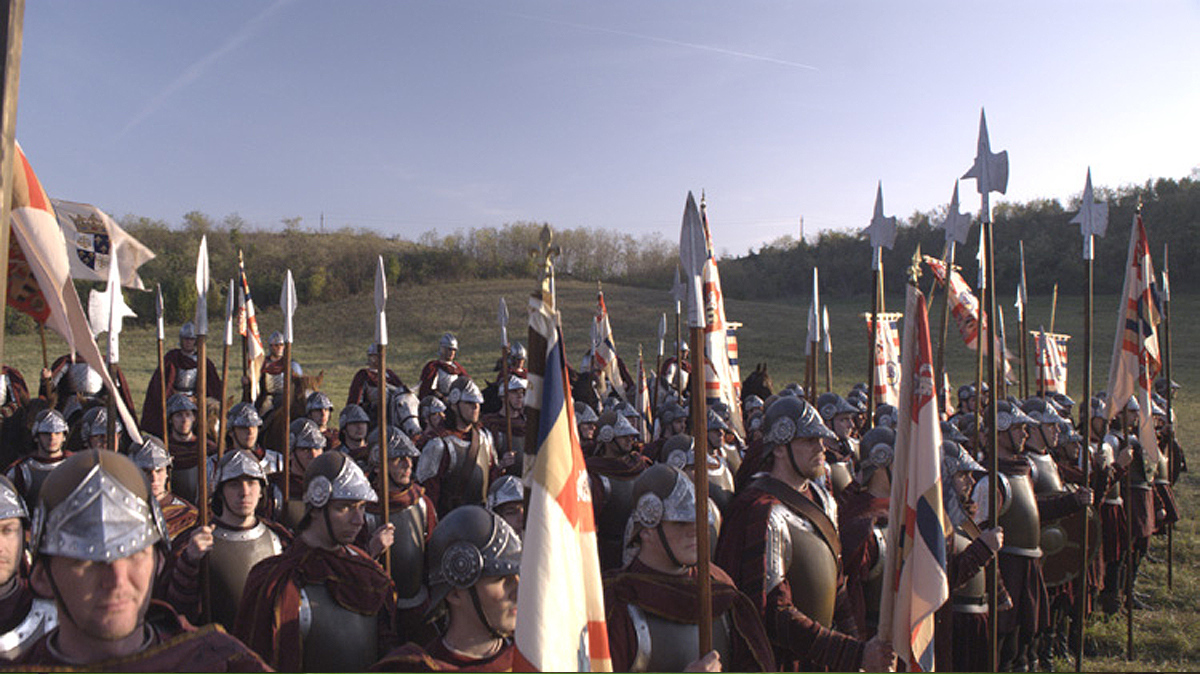
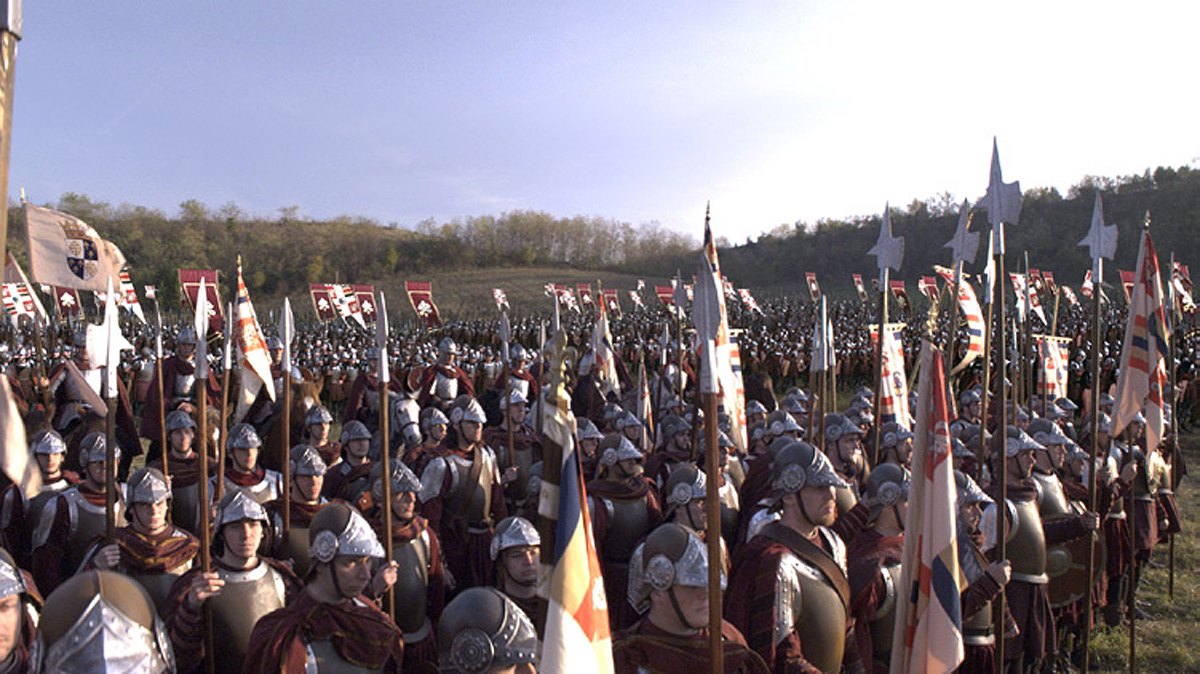
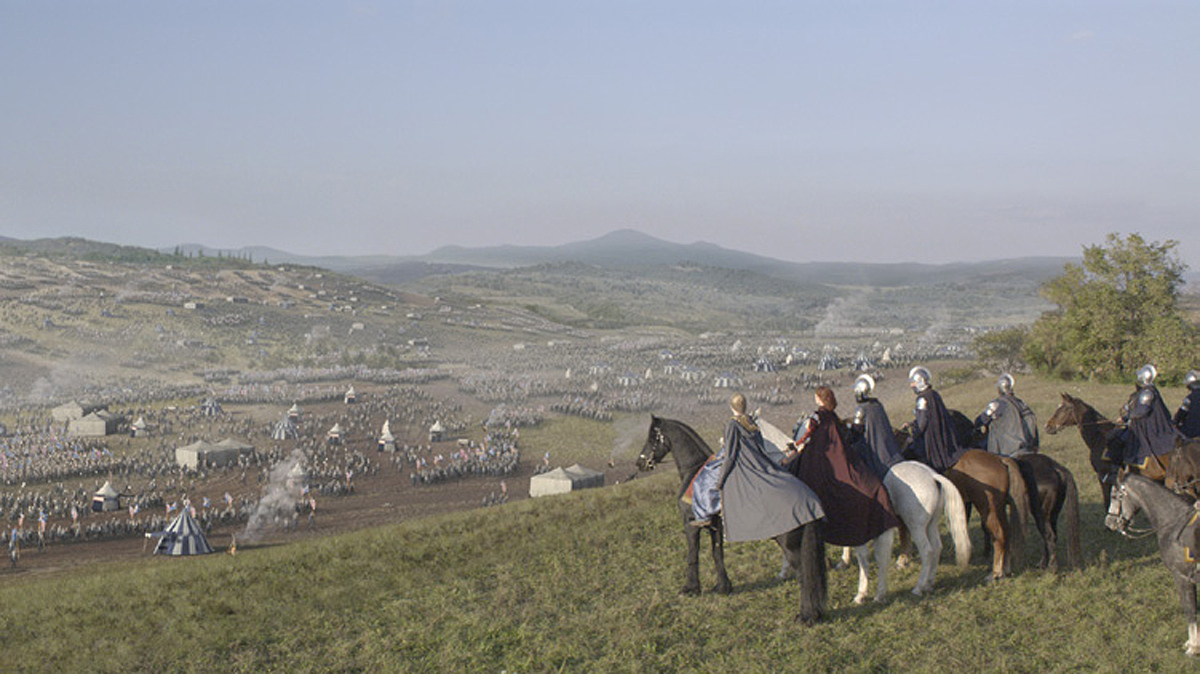
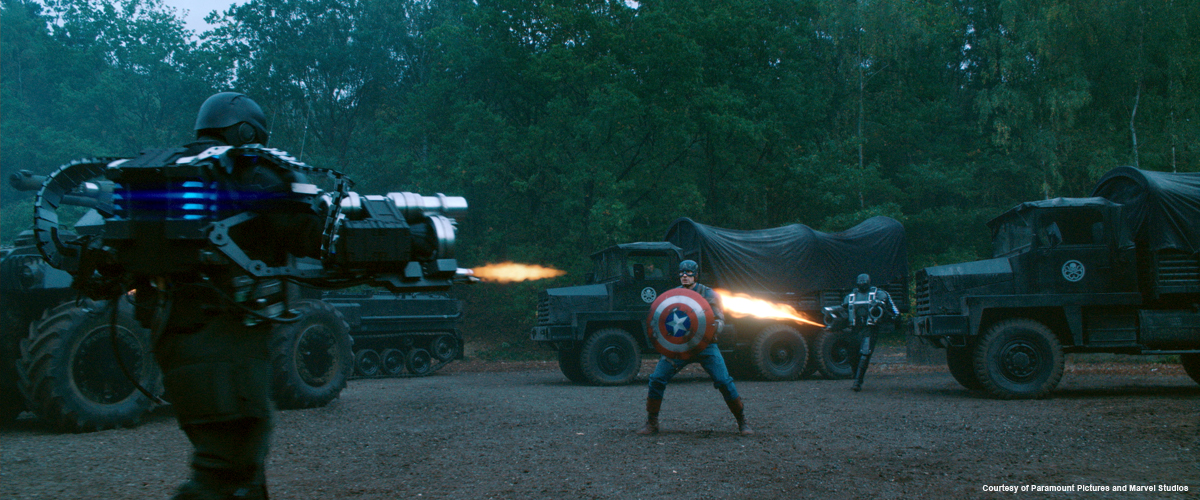
What are the important elements about the battle scene that you forward then to the different vendors?
There were a lot of plates shot for all the green screen elements. We shot plates for the car chase and the bike chase, as well as the train and plane sequence plates, which we shot in Switzerland. Also, we had a big element shoot at the end with countless explosions and various other elements needed for the entire show. We shot some crowd elements as well. It was a lot of things to track and ID so that we could insure everything was covered.

On top of that, the decision was made to shoot clean plates for every shot because of the post 3D conversion. We aimed to get as many as possible but sometimes in action sequences getting a clean plate does not make much sense, especially with that many cameras (up to five on the big action sequences, sometimes more) and lots and lots of layers with cars, crowd, smoke, explosions…

What is your equipment to identify and capture the information necessary for VFX?
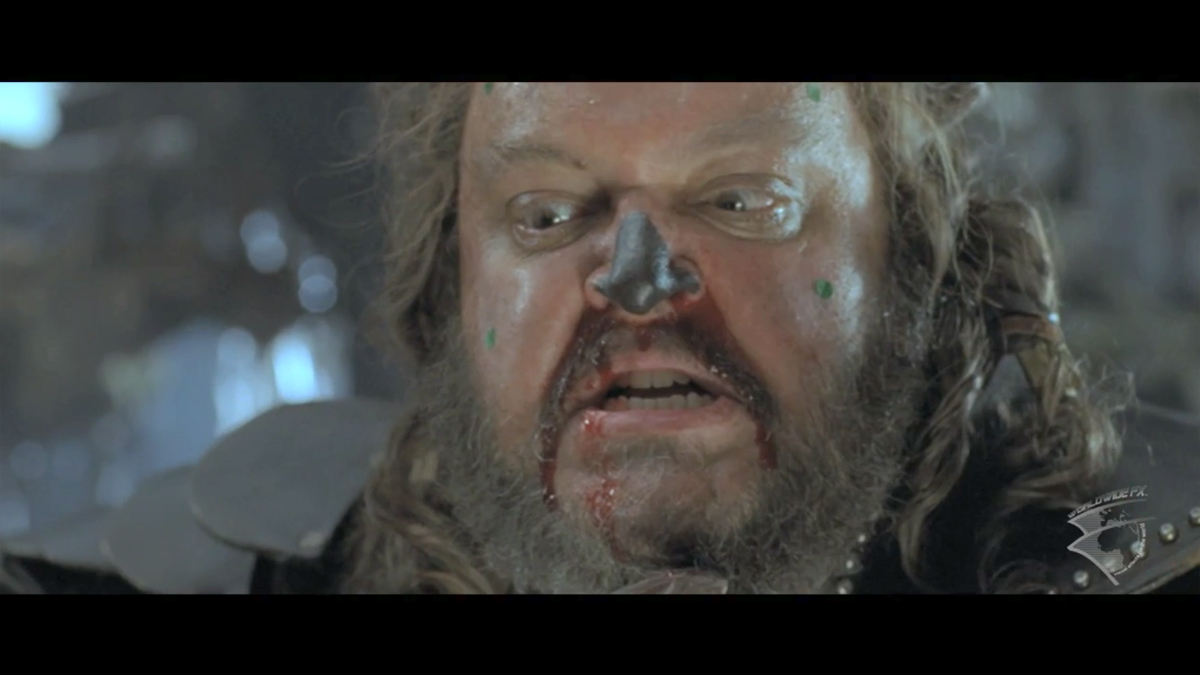
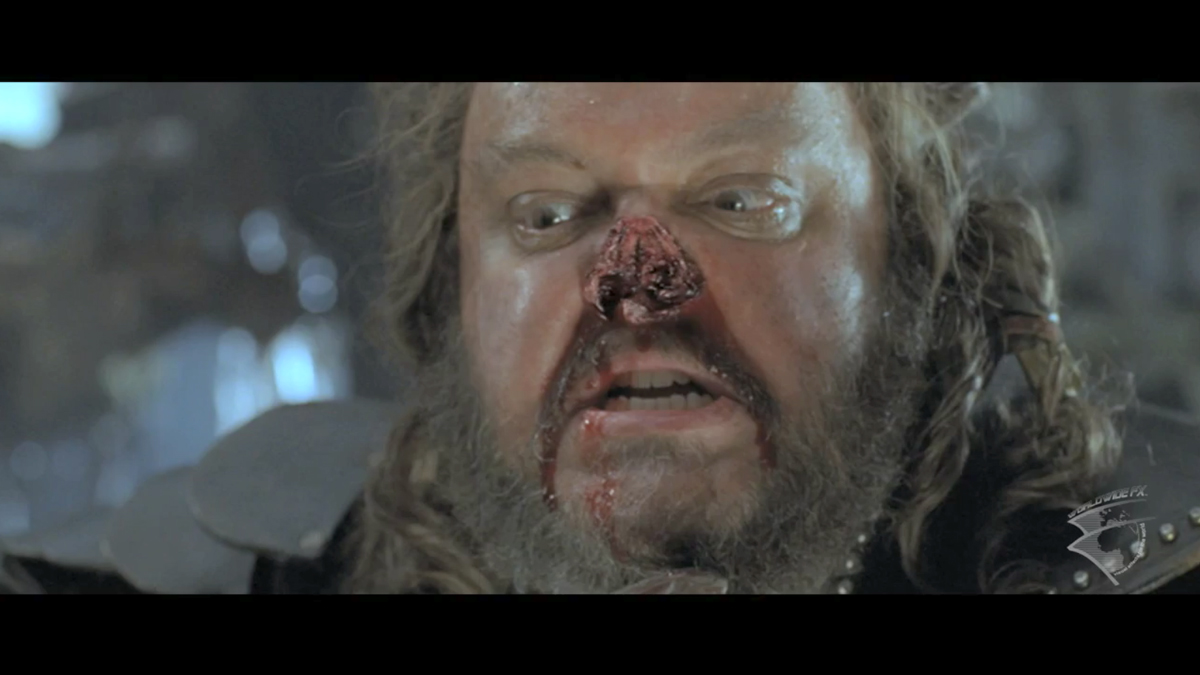
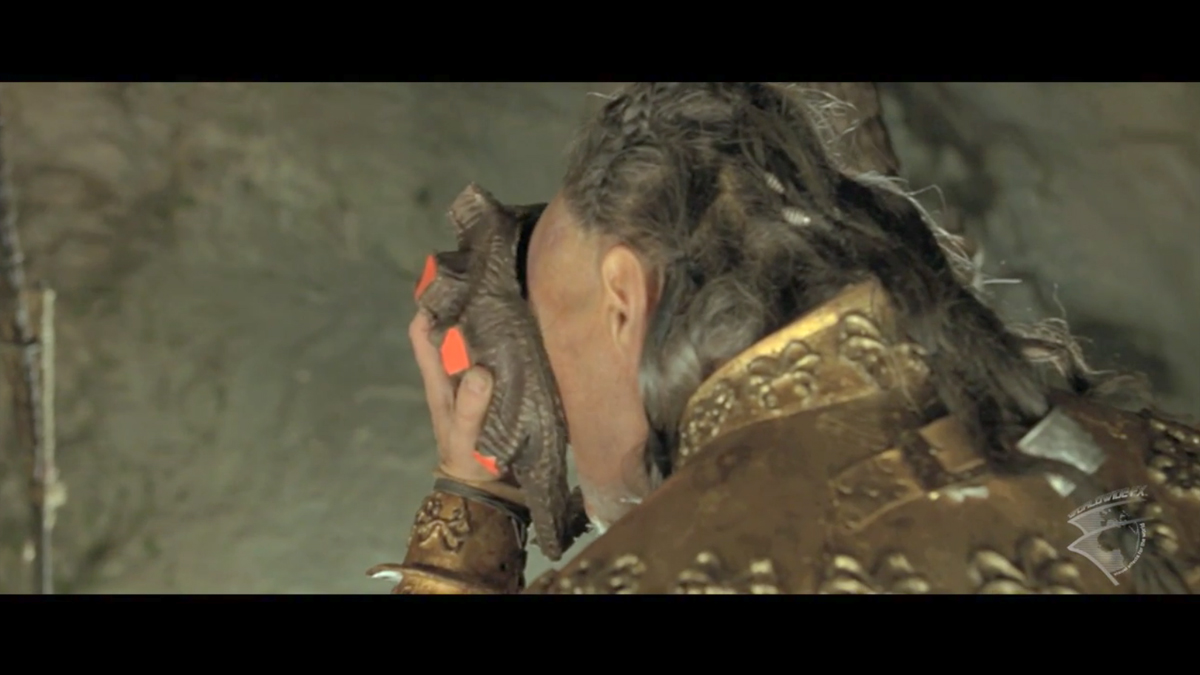
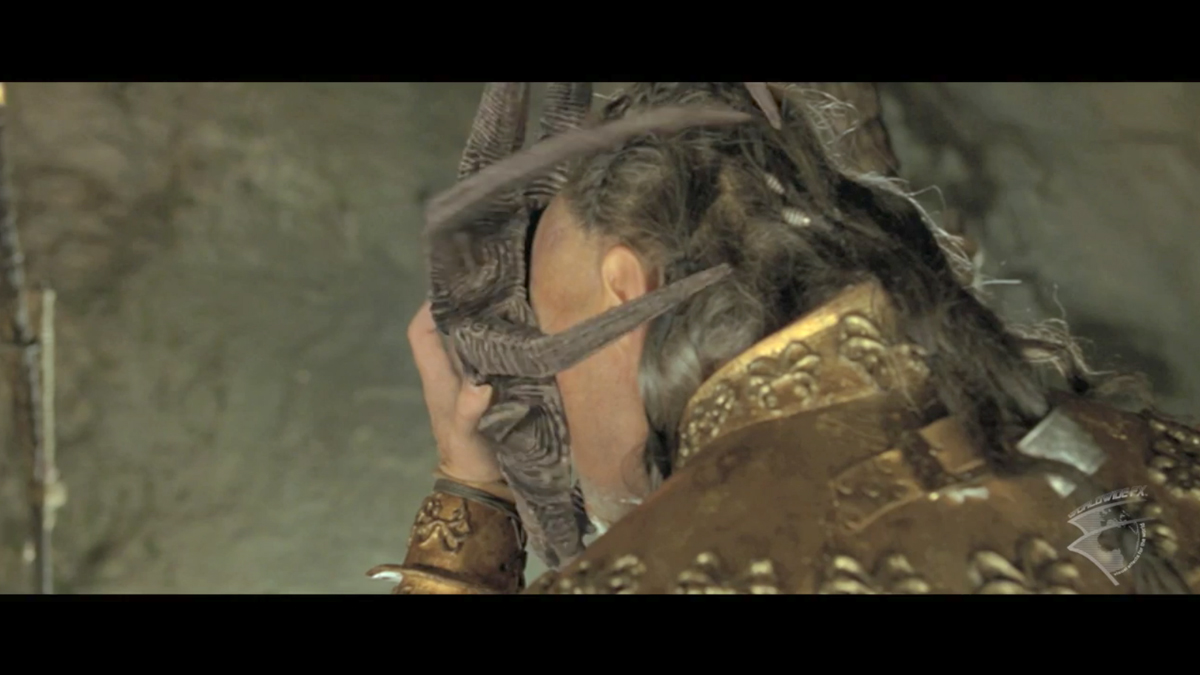
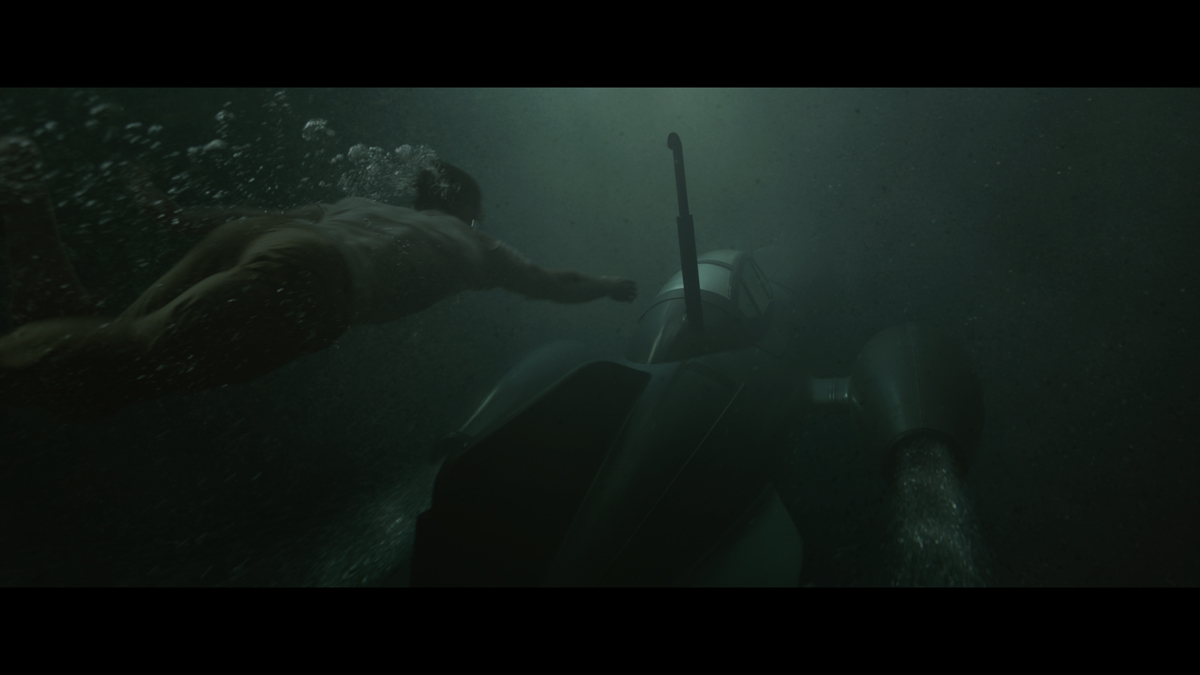
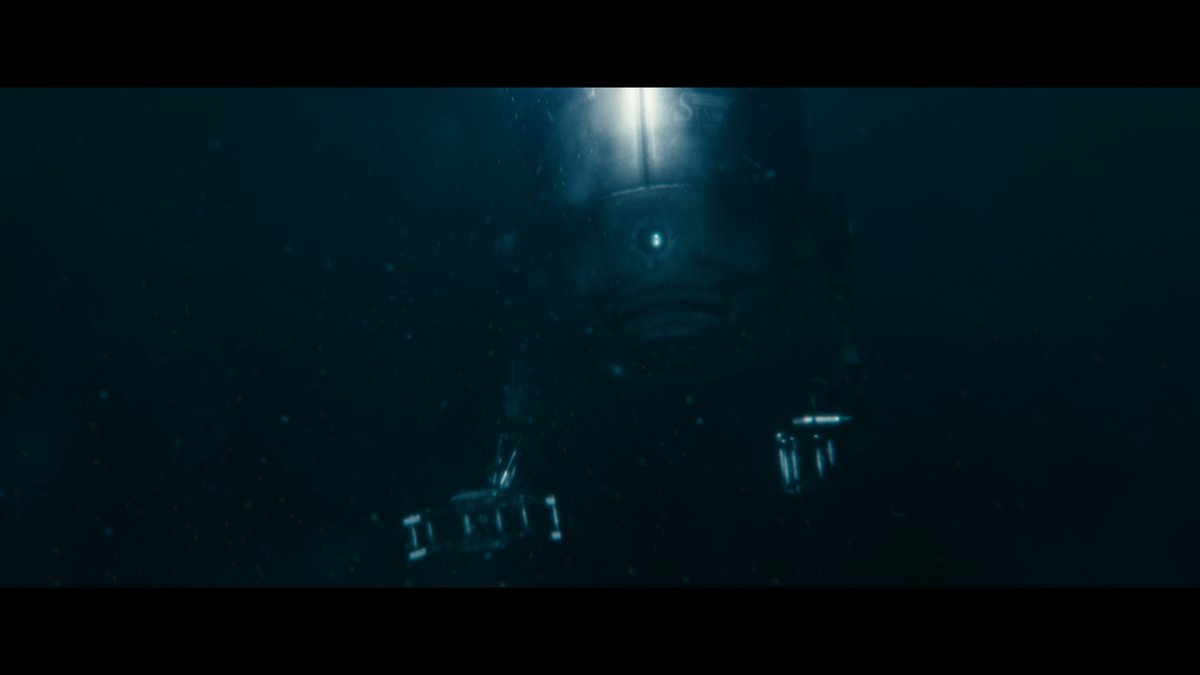
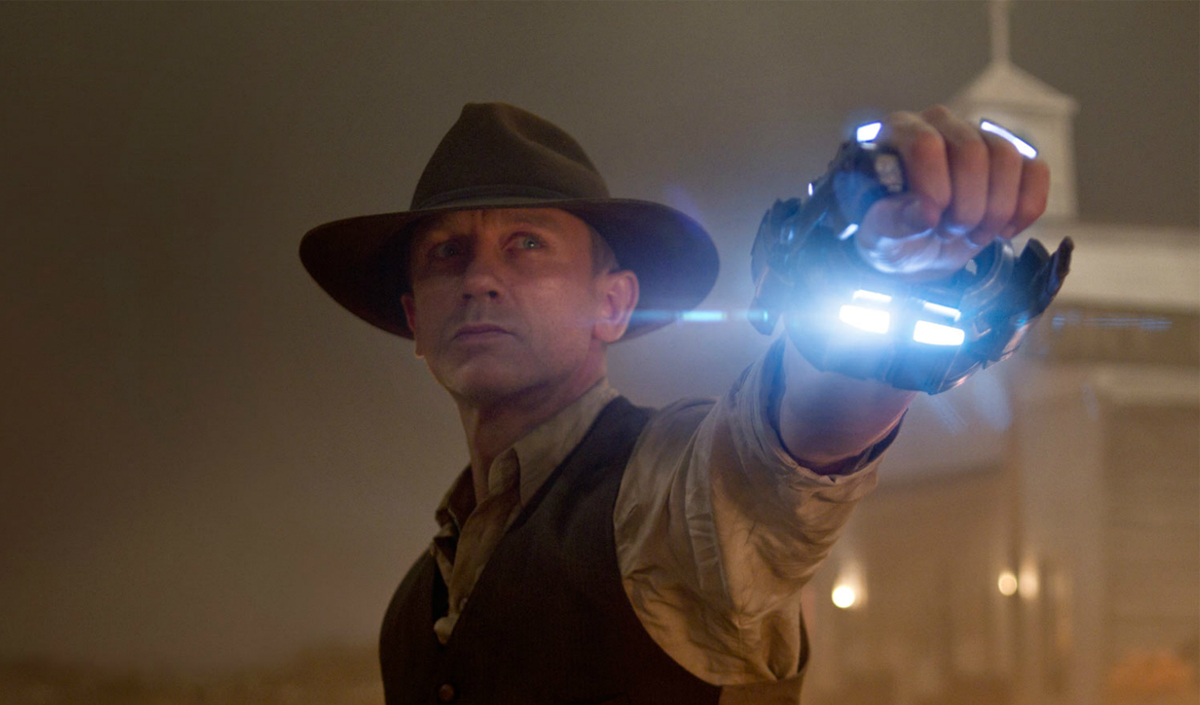
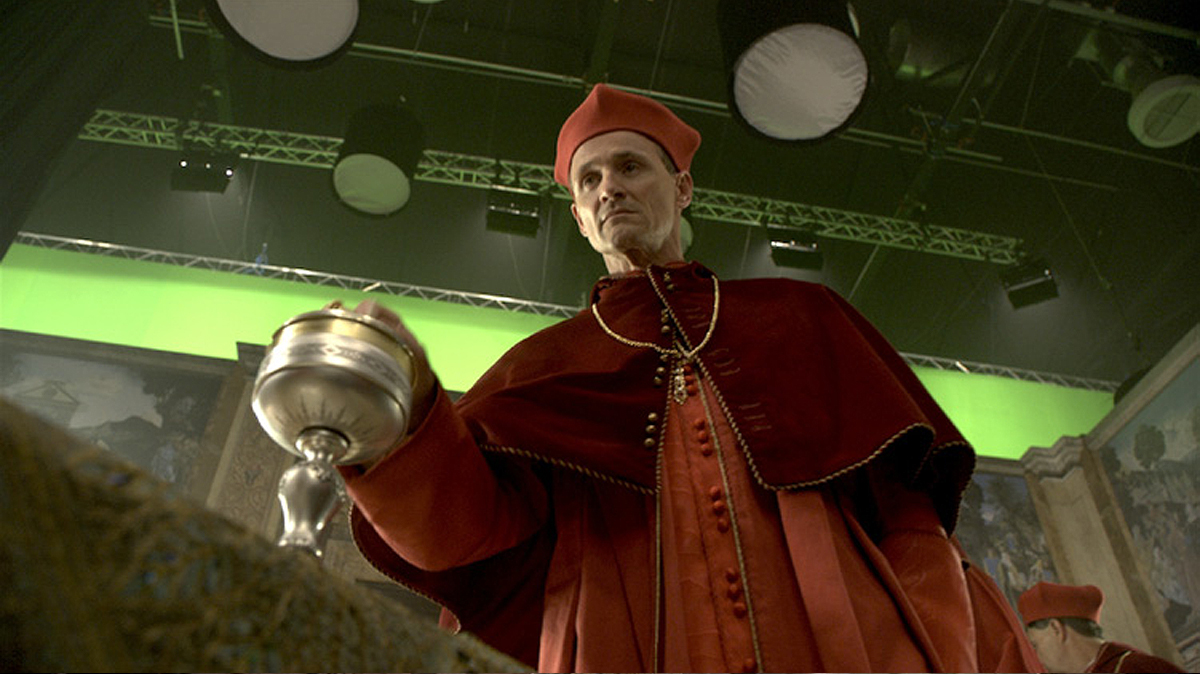
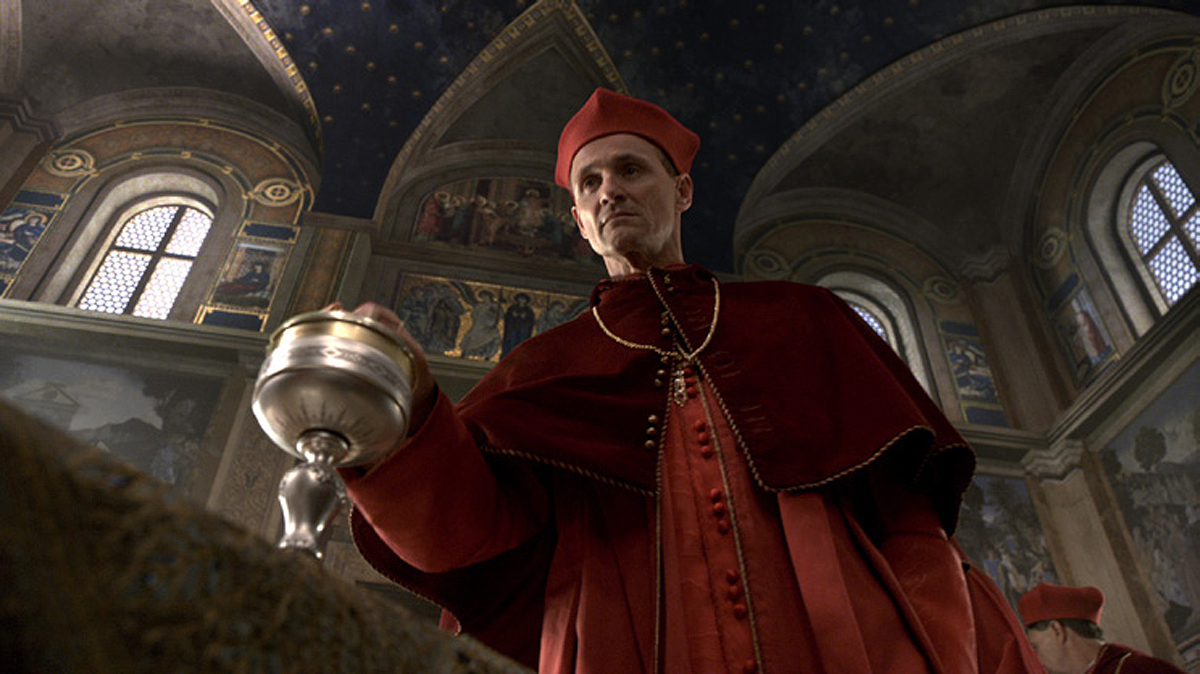
We had a great team of matchmovers. Mike Woodhead was with me in second unit all the time, as well as Natalie Lovatt who coordinated and gathered all the information to communicate to the main unit and later on to our vendors. The equipment we had on the set was quite standard with survey station, grey/silver balls and macbeth charts, and many digital cameras to gather textures and references. We also had witness cameras for all the scenes involving Red Skull. We did not do any of the skinny Steve work in second unit but we knew that all the fights with doubles of Red Skull could potentially need some work so we captured reference material with witness cams every time we had Red Skull with us for a fight or a stunt. We also did that for all the shots involving the ‘blue ray of death’ where we would have to paint out and vaporize people!

All sets were surveyed and scanned in 3D using a LIDAR. All the actors were scanned in 3D by 4Dmax, but that was taken care of by the main unit guys as they had the actors with them most of the time.

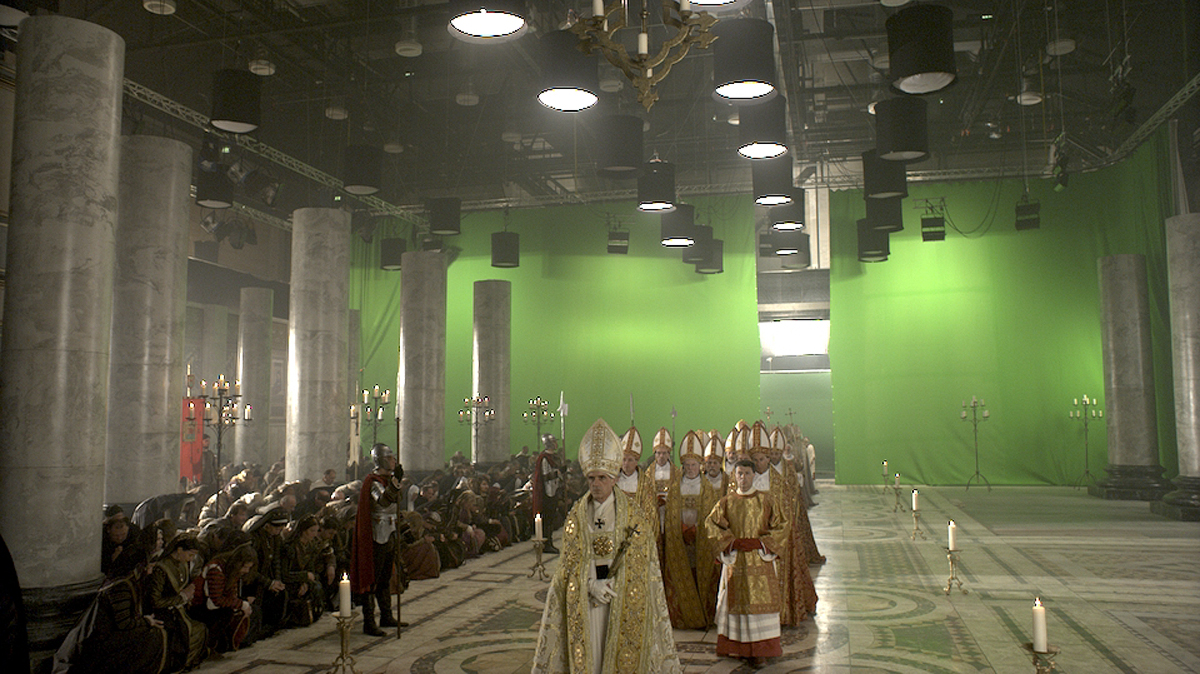
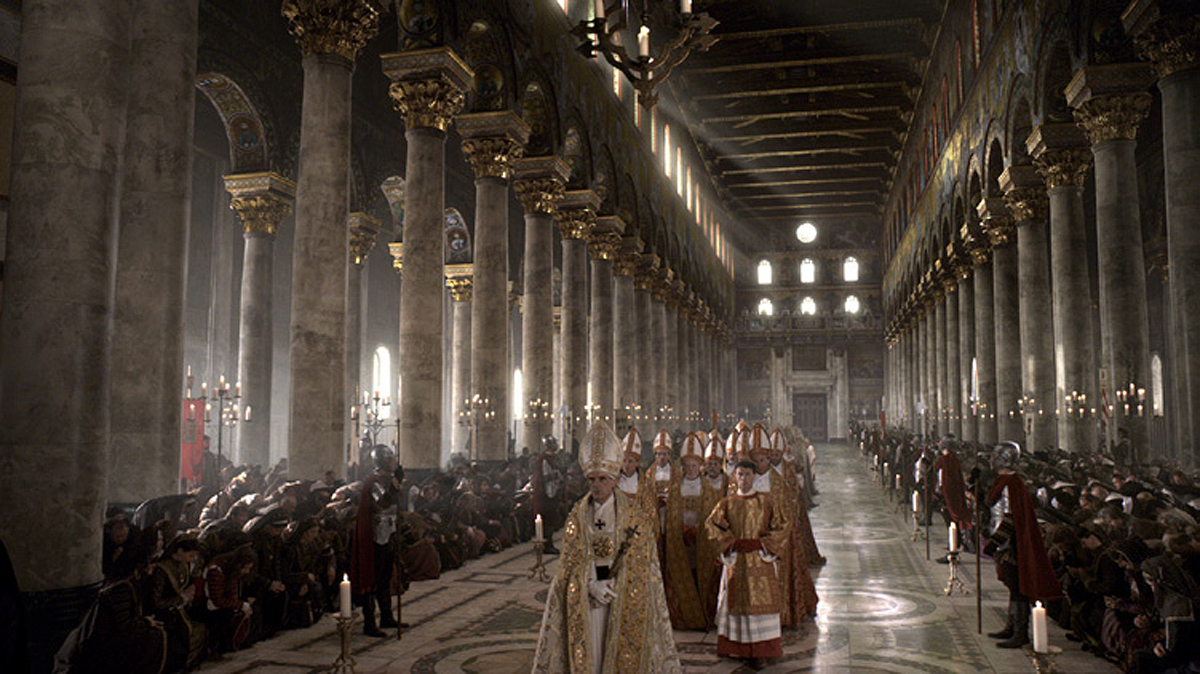
Did you use a lot of bluescreens?
It was green screens mostly because Captain America is blue! But we had a good amount of green costumes mixed in with this as well… but yes, the H stage in Shepperton and some of the Longcross set had huge amounts of green screens. But on location we tried to avoid having any of these and relied on rotoscopy to do the job.

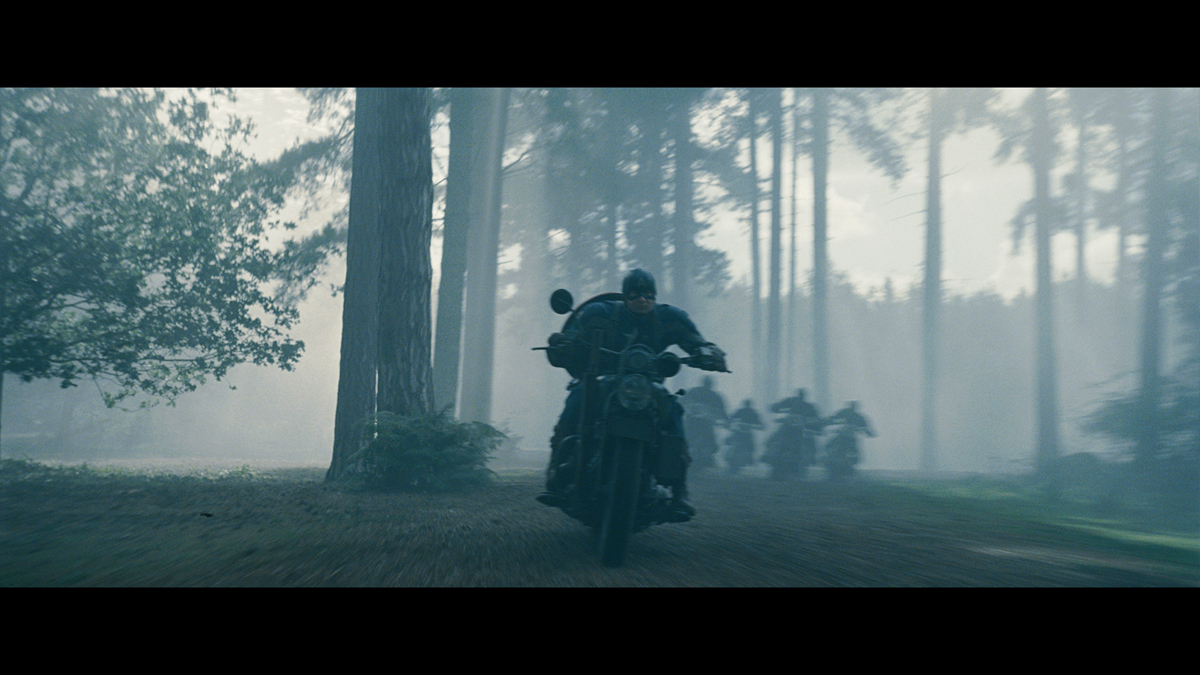
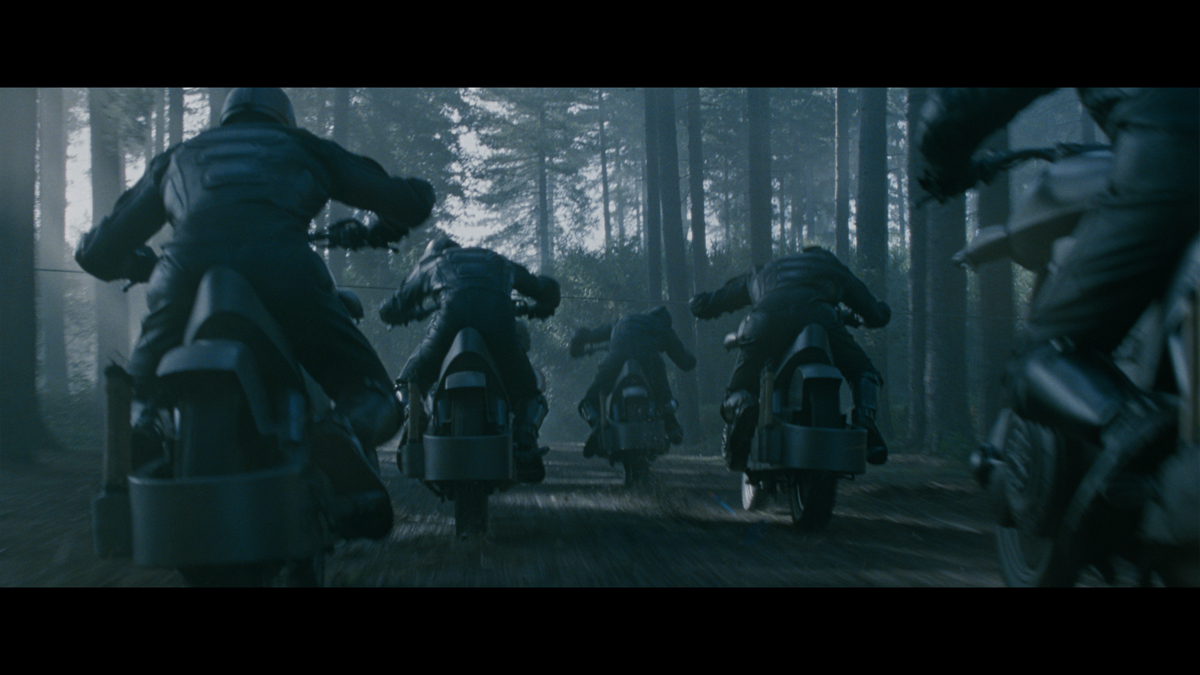
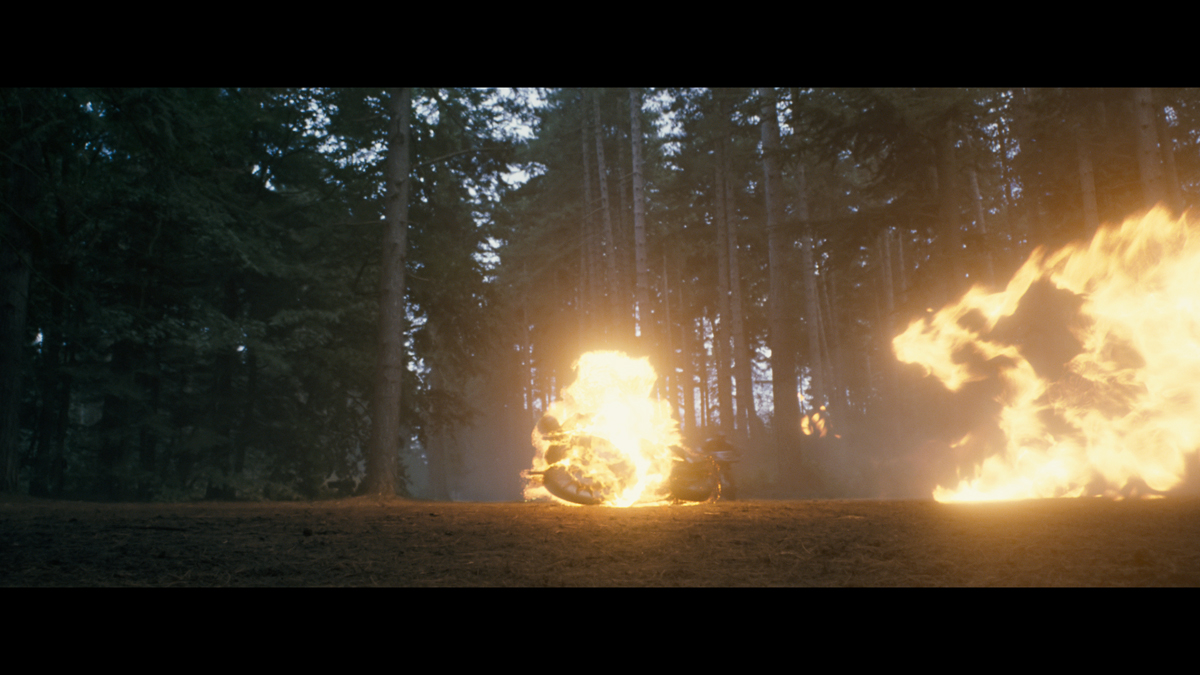
How was the shooting of the motorcycle chase sequence? What kind of effects and preparation does this sequence required?
Very cool, but very demanding. Shooting in a forest and having to run around miles and miles was quite tiring! Plus we had some issues with some of the bikes that were a tiny but capricious. We shot the chase in the back of Pinewood in a forest called Black Park, which you see in a lot of movies. It’s a great looking place and really perfect to shoot this kind of sequence. We had a small helicam to shoot from the air flying in between the trees, and then travelling cars and quads to follow the bikes and get some cool shots. We even shot some of the close up impact shots with canon 5D cameras, but I don’t know if they used them in the cut. A full cooperation between the stunts, the special effects guys who did the explosions and myself was necessary to make sure we would again get all the plates necessary for the green screen elements with the actors. I sometimes had my own camera splinter unit to collect plates while the second unit was shooting some other bits of the sequence that were not VFX related.
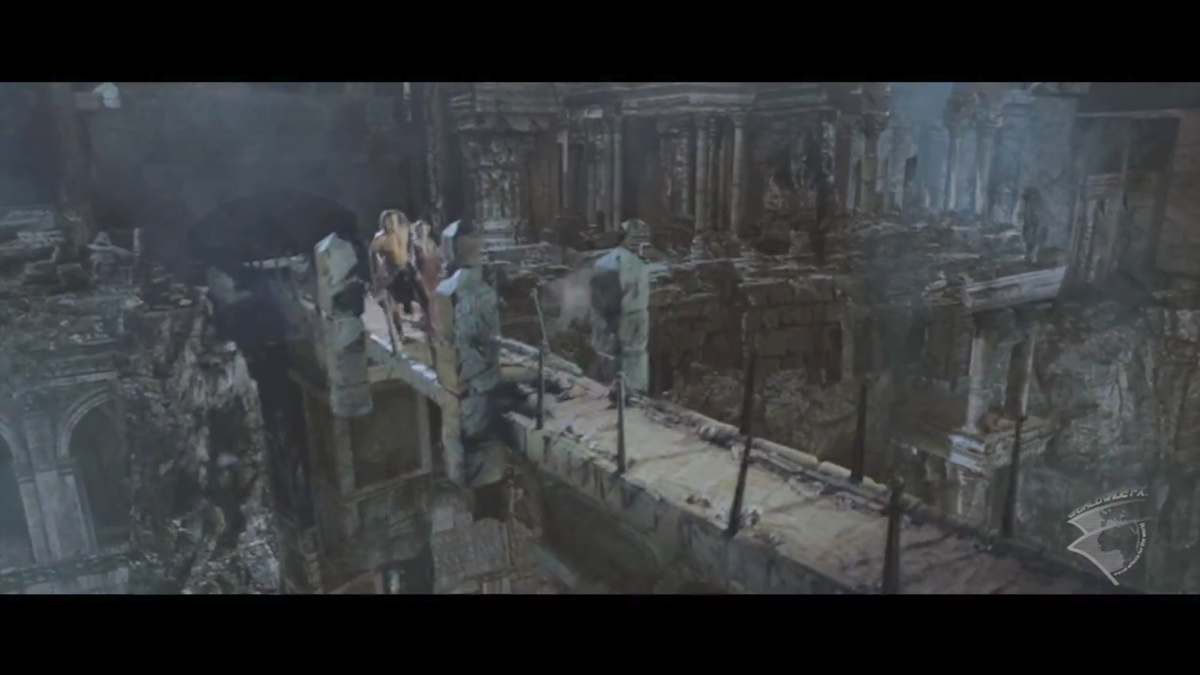
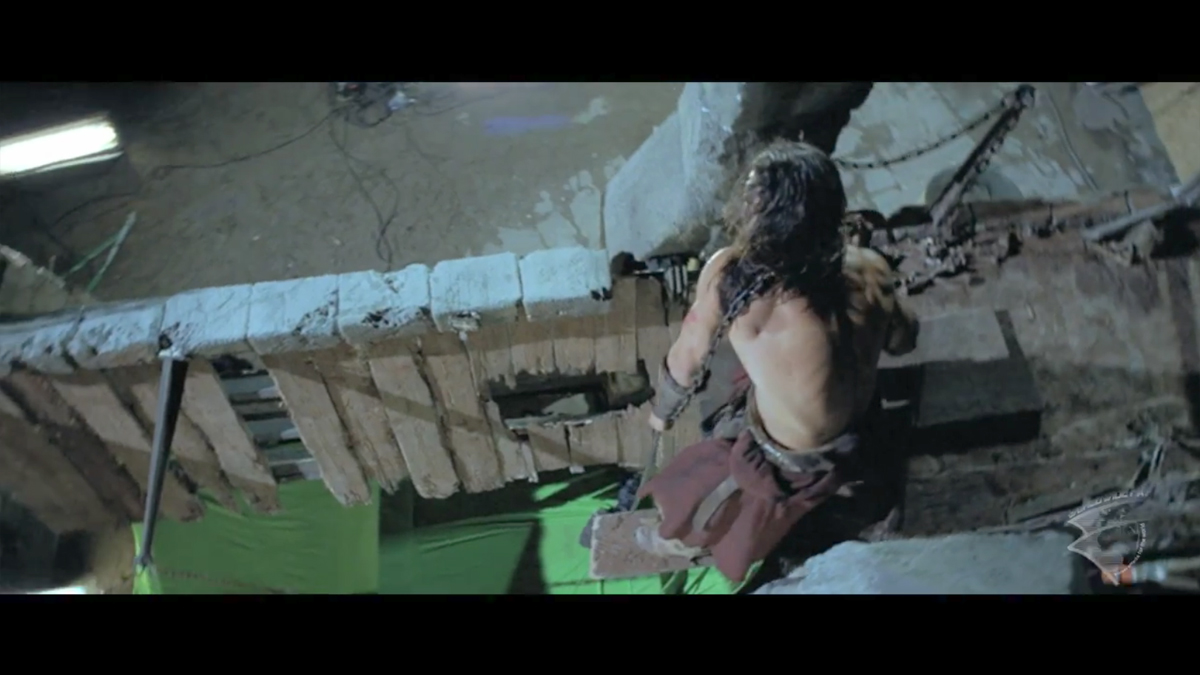
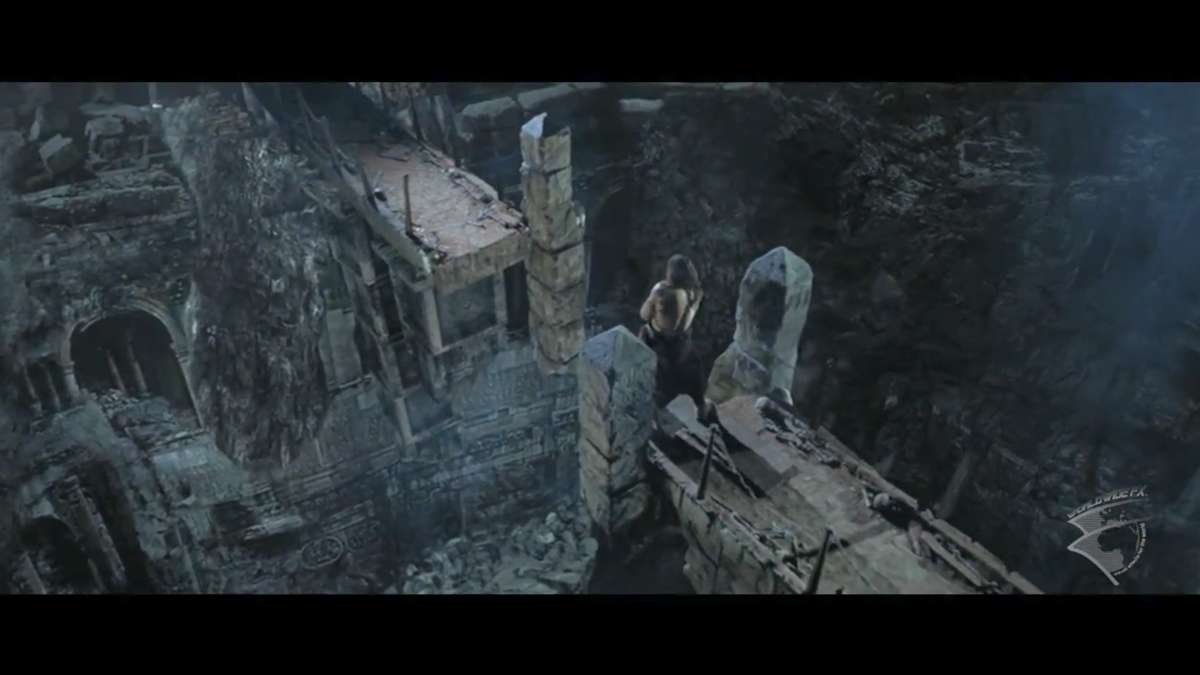
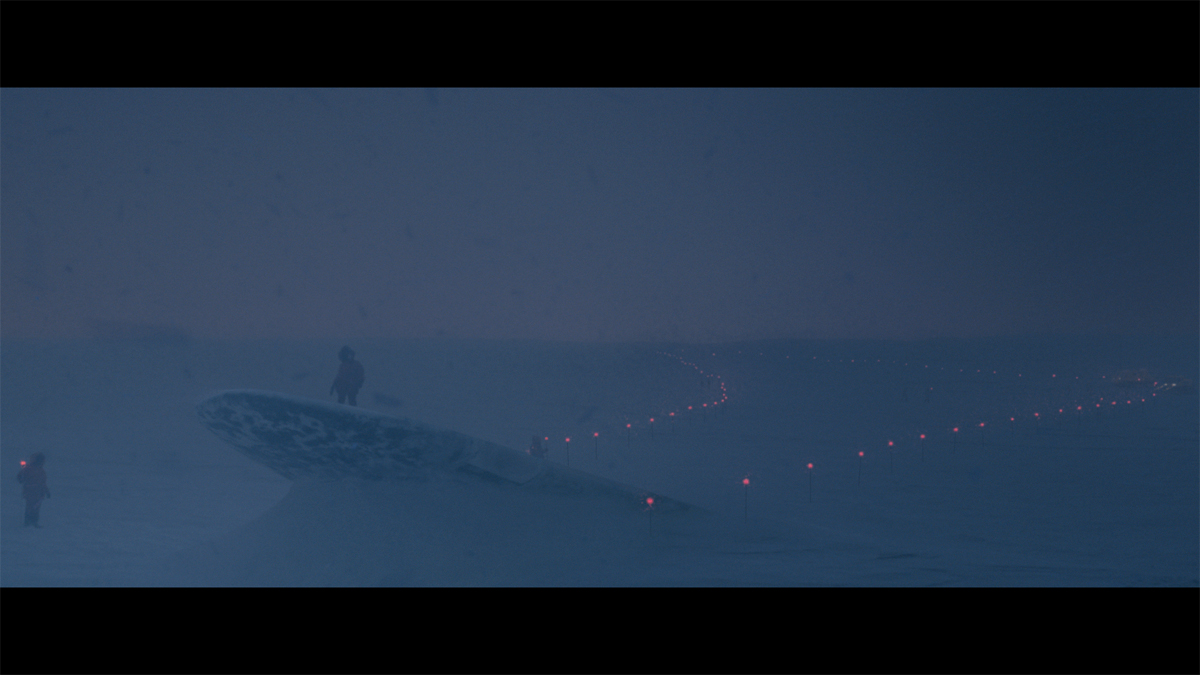
At the very end of the sequence, Captain America gets to the entrance of the hydra base and jumps on the ramp. That was shot in Longcross studios.

Can you tell us about the progress of one of your typical day?
Get up very early and get to the studio. Once on the set, make sure the team is ready, listen to Jonathan Taylor (second unit director) and Terry Madden (second unit First AD) about the news of the night, and then get on with shooting as much as we could!!! No days were the same to be honest, there were new challenges every day. I really had to be always aware of what my essential needs would be each day and what was absolutely necessary for us to get in terms of elements. But as I said earlier, the second unit team was great and cooperation was good all around.

How many shots were filmed on average by the second team?
I can’t really say, but a lot! I would say we shot around 600 to 700 VFX shots in second unit but not all of them make it to the cut, obviously.

How was the collaboration with film crews?
Excellent. It’s not always that you get such a high level of collaboration with VFX. We had a very good time working together.

What was the size of your team on the set?
Depending on the needs ,between three and five people, plus some of the vendors coming to visit on set from time to time.

Was there a shot or a sequence that prevented you from sleeping?
All of them, but I don’t sleep much anyway!

How much time have you spent on the shoot?
I worked on the movie from the beginning of May 2010 to mid December 2010. All of the shoot. I did not do the post as the guys were moving back to LA and I could not follow them. I moved onto X-MEN: FIRST CLASS in early January to supervise the post from London with John Dykstra in Los Angeles.

What do you keep from this new experience?
It was great working with Marvel for the first time! I think the Avengers project is a great concept and they’re building it with a lot of style. Working with Joe Johnston was a blessing. I enjoyed THE ROCKETEER so much when I was a kid, and CAPTAIN AMERICA: THE FIRST AVENGER had a lot in common with this film. The entire team was great, from the production design to the actors and all the technical crews, it was a real pleasure to be involved on this project.
Working with Chris Townsend and Mark Soper was awesome. We had a wonderful VFX department team: Jen Underdhal, Lisa Marra, Natalie Lovatt, and Ben Agdhami who were organizing and coordinating our crazy team with lots of dedication and style, and our matchmovers were always up for a challenge! We had a wonderful alchemy on the show and I think it shows in the final product.

What is your next project ?
I am currently in Berlin about to begin the shoot of a very ambitious and exciting movie which is an adaptation of a successful English novel.

A big thanks for your time.

// WANT TO KNOW MORE?

Method Studios: Official website of Method Studios.

© Vincent Frei – The Art of VFX – 2011

WE ARE THE NIGHT: Miklos Kozary – Compositing Supervisor – Elefant Studios

Miklos Kozary worked for studios like Mr. X or Pixomondo and participated in movies like SHOOT ‘EM UP, VALKYRIE or NINJA ASSASSIN. In 2008, he co-founded Elefant Studios and made the effects of films such as CARGO, or HELL.

What is your background?
I studied Computer Science, specializing in CG. After graduating I started working as a compositor for features and commercials in Switzerland, Germany and Canada. I co-founded Elefant Studios in 2008.

How did Elefant Studio get involved on this film?
I have worked with Alex Lemke, the vfx supervisor of WE ARE THE NIGHT, on a previous film project a few years ago and he asked us if we wanted to join the team, which we happily did.

What are the sequences made by Elefant Studio?
We worked on some parts of the bath sequence, where the main character’s wound is healing, on the sequence where the vampire ladies are standing on the balcony and are being hit by the sun and smoke starts to emerge from their skin. We also worked on some mirror replacement shots, on shots where the ladies crawl up the walls, jump out of an airplane and a few more. All-in-all it was 49 shots we were involved in.

For the sequence of the bath, can you tell us how the effects were created for healing and the hair growing?
The hair growing was handled entirely by Alex’s team in Munich. For the healing we created multiple matte paintings, illustrating the different stages of healing. We then used layered mattes to create a blend between them. To give it an organic look we created multiple levels of stitches that are growing inside the wound. These were all created using Sapphire’s Warpto plugin and simple paint strokes of the Roto node in Nuke. We then took this patch and tracked it onto the plate by connecting points of a spline warp to the tracking points.

How did you create the shots in which the girls jump out of the plane?
We did the compositing of the interiors of the airplane where the girls are opening the hatch and jumping out one after the other. The interiors were shot against a greenscreen on the outside, with all the crazy camera shake and flashing lights already baked into the plate. These shots were handed to us in the last minute so that was quite some fun!

How was the background created for those shots?
The background of the interiors was a plate shot on helicopter above Berlin, augmented with some smoke footage and the sky replaced by a matte painting.

Can you explain in detail how you erased the reflection of the vampires in mirrors?
We created a cleanplate from the footage by merging parts from appropriate frames and painting out the character. We then took this cleanplate, tracked it onto the action plate and roto’ed away the parts that weren’t used.

How did you create the smoke on vampires? Is it real elements or CG particles?
We were involved in the shots where the vampires are standing on the balcony. For these, we used live action smoke footage, that we were provided by Alex. Sometimes 15-20 layers were used, depending on the shot.

What was the biggest challenge on this project?
Maybe the wound healing. We only had a very short time to develop a look, that was highly directable and that could easily be applied to multiple shots.

Has there been a shot or a sequence that prevented you from sleeping?
I have a 2-year-old son who prevents me from sleeping anyway, so, no (laughs).

How long have you worked on this film?
4 months.

What are your software and pipeline from Elefant Studio?
We’re using Nuke and Maya as our primary tools. Our pipeline is built upon a proprietary node-based asset management tool that is tightly coupled with Shotgun. For dailies and color grading we use a Baselight system.

How many shots have you made and what was the size of your team?
49 shots with 4 compositors, me included.

What do you keep from this experience?
A small team of experienced artists, using a well thought out pipeline, under the right vfx supervisor, can work effectively from a remote location and deliver high quality work on time. And have fun while doing it!

What is your next project?
We just wrapped up work on HELL, executive produced by Roland Emmerich. We’re currently in production for a swiss feature film.

What are the 4 movies that gave you the passion of cinema?
Can’t narrow it down to 4 movies, but maybe 4 directors: Ridley Scott, Luc Besson, Michael Mann and David Fincher.

A big thanks for your time.

// WANT TO KNOW MORE?

Elefant Studios: Dedicated page about WE ARE THE NIGHT on Elefant Studios website.

// WE ARE THE NIGHT – VFX BREAKDOWN – ELEFANT STUDIOS

© Vincent Frei – The Art of VFX – 2011

AFTERSHOCK (TANGSHAN DADIZHEN): Phil Jones – VFX Supervisor – Technicolor Beijing

Phil Jones has been evolving for over 10 years in VFX. He worked at Technicolor and Toyox. In 2007, he left for China to support the launch of Technicolor Beijing. He oversees the effects of such films as THE BANQUET, KUNG FU DUNK, THE FOUNTAIN, or 2012.

What is your background?
My interest in FX began back in the 70’s after seeing some of Norman McClaren’s early work on 16mm at my local library. Three of his shorts that are stuck in my head to this day are: PAS DE DEUX, A CHAIRY TALE and BOOGIE DOODLE. Like many a film geek with access to an 8mm camera, I had to try out these techniques on my own. There weren’t any instruction books (that I could find) on the subject of animation and effects. So what followed was a lot of trial and error, and a lot of time spent waiting for film to be developed and sent back!

Those early days of experimentation eventually led me to Film/Television School, which in turn brought me to my first job at a television station in the graphics department. When the department decided to splurge on a shiny new SGI Iris 4D/35 and a cut of Softimage V1.65, my destiny was realized.

What sequences have you made on this movie?
As the production VFX Supervisor I was responsible for all the sequences in the film.

Can you explain to us the creation of Technicolor Beijing?
Technicolor created the Joint Venture in Beijing in 2007 to bring its expertise to the rapidly growing local Chinese feature film industry. Technicolor asked if I would like to move to Beijing to get the office up and running and to stay and work there. The initial build out included both VFX and Digital Intermediate departments. The VFX department started with 15 artists in 2007 and grew to over 100 in 3 years.

What is the formation of your artists?
By the time AFTERSHOCK was in production and the Beijing office had grown close to 100 artists including a 40 person Roto/Prep department. At that time there were 2 other shows pushing through the Beijing office alongside AFTERSHOCK. To ensure the deadline was met, some shots were outsourced to Blackginger in Cape Town, Loki VFX in Toronto and MPC in London. (yes, reverse out-sourcing!)

Was there a lot of visual effects school in China?
Yes, there are quite a few VFX/Animation schools in China, the majority are privately run facilities. In addition to those schools, many companies have their own long term programs training artists internally.

How was the collaboration with the director Feng Xiaogang?
I had worked with Feng Xiaogang on a some of his earlier films, beginning with THE BANQUET in 2005. AFTERSHOCK was the 4th film we collaborated on, so I knew Director Feng’s expectations and he entrusted me with the conceptualization and creation of the VFX sequences for this picture.

Can you explain to us the creation of the dragonflies and how you animated so much of them?
The director based the dragonfly sequence on eye witness reports from survivors of the ’76 earthquake. The plates were shot at a working steel plant on the outskirts of Tangshan with a Flying-cam. Blackginger created the ever increasing swarm of dragonflies in Houdini. The majority of the « secondary » dragonfly movement was from a particle simulation. The hero’s were hand animated for the specific interaction with the actors and background.

How did you create the mattes-paintings showing Tangshan?
The mattes of ’76 Tangshan were based around live action plates from the practical set, both pre and post earthquake. Two large miniatures of the pre and post earthquake were built by a local company to assist in filling in the surrounding areas. These miniatures were based on the thousands of archival photos made available to us. The matte painters had to fix a number of scale issues with the miniatures to get everything to « fit ». Some 3D was brought in to add people and some post-earthquake destruction to the large scale mattes.

Can you speak about the fall of the big crane? How did you create it and animate it?
Blackginger handled the modeling and animation of the crane and its subsequent crash through the breezeway in Houdini. Production had purchased an operational 1970’s era crane that was moved to and re-assembled on the practical set. Hundreds of reference photos and a Lidar scan were used as modelling/texturing reference. Animation was a combination of hand animation and dynamic simulations.

Can you explain in detail how you create the impressive shot where a guy jump off a building that fall on him few seconds later?
This shot was an addition that came later in the shoot. Multiple motion control plates of stunt people and practical effects were shot and then combined with a fully digital building collapse handled by the MPC team in London.

How did you create and animate the digital doubles?
There were only a few shots that required digital doubles. Two of them were the crane crashing through the balcony. Blackginger hand animated the 3-4 people being crushed on the balcony in Houdini. They also added digital « survivors » walking around in the destroyed city for the wide shots of the destruction. For most of the other shots plates with stunt people were shot and composited (with a lot of roto) into either practical or digital destruction.

Did you create some previz to help the shooting and the special effects team?
Yes, previz was done for the earthquake sequence which helped everyone plan the requirements for each shot. Due to the relatively short shoot schedule for this sequence, we in VFX were called upon to enhance the destruction in every shot of the earthquake sequence.

Can you explain to us how you create the building falling and destruction?
There were a few different ways the building destruction was created. A few smaller areas on the buildings were prepped by the Special Effects team for practical destruction. Due to the large scale of the set, and the wider shots requested, we enhanced all of these shots quite dramatically.

A huge practical set was constructed to stand in for the 1976 Tangshan neighborhood. It’s brick and mortar construction was strong and complete enough for us to shoot inside a few of the buildings. When shooting was finished in one area of the set, it was torn down for the post-earthquake sequence. They found that it didn’t take too much effort to knock the buildings down, so the plan for the destruction was changed. In the final cut some shots used the practical « pull down » of the buildings with stunt people somewhat close to the practical destruction or mainly composited in later.

For the larger scale destruction it was decided early on to use miniatures and plans were underway with companies in New Zealand. After production found out how easy (and relatively safe) it was to pull the buildings down, the plan was changed to shoot the large scale destruction practically and to have a « little » digital enhancement. A local pyrotechnical demolition team was also brought in to « implode » a few of the larger buildings, including the hero building at the end of the sequence.

The unfortunate result was the explosives required had to be relatively strong to destroy the brick and mortar. So the initial explosion blew the fronts of the buildings out with so much dust you couldn’t see the building falling down in behind. This threw a big wrench in the post-schedule as we then had to re-create the majority of the building destruction completely in 3D.

How did you create the crowd in the evacuation shots?
These shots weren’t technically complicated. Since there were only a few of these crowd duplication shots in the film they were done as basic multi pass composite shots, with a TON of roto. The decision to do it this was was easy since we had 2000 extras from Tangshan playing the survivors and over 500 soldiers form the army!

Can you explain how you create the helicopters armada during the 2008 sequence?
We were lucky enough to have access to a single Chinese airforce helicopter for 2 days during the shoot. During those 2 days it flew many sorties to get the shots the Director required. Fortunately, we were allowed close enough to get measurements and texture reference so the single helicopter could be duplicated in 3D, to the armada you see in the final shots.

What was your feeling when you received your Best Visual Effects at Asian Film Awards 2010?
That was actually quite the surprise for me, I didn’t even know that I had been nominated! The VFX Production Manager on the picture emailed me a chinese news report showing a picture of someone, credited as me, accepting the award! To this day, I still don’t know who the guy was…

What was the biggest challenge on this project?
The biggest challenge was the relatively short schedule for the complexity of the final shots.

Was there a shot or a sequence that prevented you from sleeping?
No, not particularly. Generally I don’t have any problems sleeping!

What are your softwares and your pipeline in Technicolor Beijing?
In Beijing all 3D was from Maya and rendered in Mental Ray. Blackginger and Loki VFX both used Houdini, rendered in Mantra. MPC was based in Maya with a huge amount of custom code for the dynamic simulations. All houses comped the shots in Nuke.

How long have you worked on this film?
We were involved in pre-production for about 4 months, the shoot took place over the course of approximately 6 months. From initial plate turnover to final shot being dropped into the DI was 6 months.

How many shots have you made and what was the size of your team?
Total number of VFX shots in the final cut was about 240 divided up as follows:
Beijing: 179 shots
Blackginger: 56 shots
Loki VFX: 3 shots
MPC: 2 shots

What did you keep from this experience?
I will never forget meeting and hearing the stories of the survivors, and seeing the resulting destruction from both the 1976 quake in Tangshan and the 2008 earthquake in Sichuan. Many of the stories really hit home while we were shooting in a city that was devastated by the 2008 earthquake. We shot for about 2 weeks in a city that was once home to about 200,000, it was completely desolate and mostly untouched since the destruction of a year earlier. All of the previous residents were still living in temporary buildings in the farmlands outside their former home. The fences around the perimeter of the city kept it’s previous tenants and any other unauthorized people away from the still standing, but very unstable buildings that remained. The speed of the evacuation was evident by the many personal items that still remained on the balconies, in the windows and even family photos laying in the silent streets.

A big thanks for your time.

// WANT TO KNOW MORE?

Technicolor Beijing: Official website of Technicolor Beijing.

// AFTERSHOCK (TANGSHAN DADIZHEN) – TRAILER

© Vincent Frei – The Art of VFX – 2011

CONAN THE BARBARIAN: Ajoy Mani – VFX Supervisor – Worldwide FX

Ajoy Mani began his career at Available Light Ltd where he worked on projects such as BLUES BROTHERS 2000 or MY FAVORITE MARTIAN. In 2007 he joined the teams of Worldwide FX to work on RIGHTEOUS KILL as VFX supervisor. Since then he oversaw the effects of films like THE MECHANIC or DRIVE ANGRY.

What is your background?
I started out doing CAD in 1988 and graduated from Arizona State University with a degree in Industrial Design. I started 3D modeling and animation as a direct result of background in CAD and Industrial Design. After college I started my career in visual effects at Available Light Ltd in Burbank, CA. There, I was mentored by John Van Vliet and Laurel Klick, both veteran visual effects supervisors. Back when I started as a digital artist, due to an acute shortage of digital artists, I was doing 3D modeling, animation, compositing and even some colour correction. I would get a shot folder on my desk and I would handle all aspects of it and see it to finish. I am thankful for that opportunity, because it gave me a more well rounded understanding of the whole visual effects process. I moved up the visual effects chain the old fashioned journeyman way. At Available Light Ltd, I worked on numerous Disney and Universal features. I met Scott Coulter, the Visual Effects Producer of CONAN THE BARBARIAN during my stint at Available Light Ltd. We worked closely on Disney’s MY FAVORITE MARTIAN for which Available Light was one of the primary visual effects vendor.

In 2001, I moved to NYC where I started a post production studio called Blinking Eye Creative Services. We primarily worked on commercials, documentaries and independent features. I helmed Blinking Eye Creative Services for 7 years.

In 2007, Scott Coulter contacted me to work on RIGHTEOUS KILL as the visual effects supervisor. This started my relationship with Worldwide FX as one of their visual effects supervisors. CONAN was the fifth feature I worked on with Worldwide FX. I was brought on during the post process to coordinate and oversee the visual effects post production pipeline at Worldwide FX. Worldwide FX is a full service visual effects house with two facilities. The primary facility is in Sofia, Bulgaria and the second is a brand new facility in Shreveport, Louisiana. I coordinated all visual effects post work between Sofia, Shreveport and editorial in Los Angeles.

What sequences did you make?
As visual effects post supervisor at Worldwide FX for CONAN, I oversaw all 1000+ shots that were produced between the two Worldwide FX facilities. I was intimately involved with all the work in the 3D, Simulation, Massive, Compositing, Concept and Digital Matte Painting departments at both facilities. I was very much in the trenches and flew between both facilities to ensure a clean delivery.

Can you tell us in details what you have done on the Conan’s village???
The village for the most part is a practical set, however, the water wheel and some of the key buildings were added as CGI elements. Another thing of particular note is that due to storyline continuity, we ended up replacing the entire background with snow clad mountains and cloudy skies. This was done seamlessly and the fact that it hasn’t been recognized as replacement is a sign that we have accomplished the the task successfully.


The movie shows lots of huge armies, can you tell us how you created them?
We had multiple plates of live action armies and for the most part the action in the near and mid ground was done in compositing using the live action plates. The sheer volume and numbers in the far ground was accomplished using Massive 3D agents. Detailed models of the soldiers and horsemen were meticulously animated by the 3D and Massive teams at Worldwide FX, Sofia. These were then made into Massive agents that interacted with each other digitally and were place in the final composites.


How did you create the arrows and their interaction with stunt men?
Some of the arrows were shot already stuck in the actors or on the shields. The arrows were then digitally painted out till the impact frame. A 3D arrow was then animated to the impact frame. For scenes with raining arrows, the shots were meticulously 3D tracked and 3D arrows were animated and composited on. For some shots, during editing, decisions were made to have arrows hit particular live action actors. For these shots, we animated the arrows 3D and tracked it stuck on the actors after impact. Those were technically more complex as we were 3D tracking the plate and the actors simultaneously.


A bad guy gets his nose cut off. How did you create this CG wound?
The actor had black paint applied to his nose along the point where the nose is severed. A CG nose was tracked onto his face and then swapped for a CG sliced off and bloody section of his face after the nose is cut. This again was a complex sequence, and a credit to the skill and long hours put in by the Worldwide FX artists.


Did you enhanced other wounds?
There was an incredible amount of wound enhancements in CONAN. There were countless shots with blood bag removal, blood splattering, beheadings, scar additions etc. In some some shots because they were flopped in editorial (horizontal flip) for story reasons, we had to take out a wound or scar on one side and place it on the other side to ensure continuity. Even the scar on Conan’s palms were digitally added and enhanced to ensure continuity.

How did you create the death of Conan’s father?
The molten metal was done entirely in 3D. Simulation department spent a lot of time getting the viscosity and sloshing of the molten metal right. Once this was accomplished, the 3D molten metal was placed to look like it was in the bucket and matched the live action plate to pour over Conan’s father. A 3D mesh matching Conan’s father was used to create the armature for the CG fire, burning flesh and collision object for the molten metal’s simulation. Molten metal is particularly tricky as its a light emitting source. Therefore, surrounding areas have to be affected with glow for the molten metal to live in the environment.


Did you develop specific softwares or tools for the fire and the molten metal?
Worldwide FX has a team of gifted software programmers. For the most part the packages being used here are all industry standard software packages like Nuke, Digital Fusion, Maya with Renderman compliant 3DLight shaders, Real Flow etc. We do a lot of custom scripting, shaders and plugins. The molten liquid was created using Real Flow. The resulting cloud points are then rendered in Maya with 3Dlight shaders. Worldwide FX has the most comprehensive visual effects management software I have ever worked with, that was 100% designed and programmed in house.

Can you explain to us how you proceed to create huge environment especially for the final sequence?
The final sequence was incredibly difficult and complex to execute. First thing we did was study the edit and design around it the cavernous interior city of Necropolis under Acheron. We designed an mapped out the entire environment to match the storyline and edit. Once we had detailed maps of the environment, we built the entire environment as a massive 3D mesh. The matte painters and texture artists then painted the mesh to create the complex environment you see in the movie. The 3D model was then broken off into manageable sections and tracked to its corresponding live action plate. Once this was done and tested, the 3D environment for the section’s texture map was enhanced and detailed by the matte painters and then rendered out. The rendered result was then composited to the live action plate with atmospheric elements and other enhancements.


What were the references and indications you received to design the huge underground environment?
The underground environment was never really planned out the way it was used in the movie. It had to be completely designed and created once we got the edit of the sequence was put together. It took months to plan and make the whole sequence gel right with the environment we designed around the sequence. Dylan Cole did the concept art and designed the look and feel of the underground city of Necropolis. We studied and used his artwork as reference to faithfully create the end result.


How did you create the mask with tentacles?
We had exact 3D scans of the prop mask. This was then re-topolised, textured and animated in 3D with bones. We were given clear instructions to animate the tentacles in a choppy way like fingers rather than smooth octopus like tentacles. The mask and Acheron was built on the bones of workers, so the analogy was to carry through the way the tentacles animated. They were animated to have a stop animation, bone like feel.


The final sequence shows huge destruction. Can you tell us how you create those?
A lot of this was shot live action and additional elements of debris etc was shot as well. The final sequence had a lot of CG enhancement and there were just a handful of shots in the final destruction that didn’t need any CG enhancement.

What was the biggest challenge on this project and how did you achieve it?
The most challenging part of the project was most definitely the final sequence in Necropolis under Acheron. It consisted of three sequences. One at the altar above the Necropolis, one in the well leading to Necropolis and one in the underground city of Necropolis. As I mentioned earlier, having to develop and design an environment from scratch around an edited sequence was incredibly arduous and involved multiple teams from several departments.


Was there a shot or a sequence that prevented you from sleep?
No, I sleep very well at night. I like challenges and I love coming up with novel solutions with the resources and time we have. So, as tumultuous and difficult as the experience on CONAN was (arguably the most difficult project I have been on), I never lost any sleep over it. Experience has taught me that fretting over an issue never results in good solutions. Whenever I am vexed, I clear my head and that’s more likely to produce a solution, than making the problem go around in an infinite loop in my head.

How long have you worked on this film?
I worked on CONAN for 9 months a third of the way into post production till the last shot was delivered.

What was the size of your team?
Worldwide FX’s Sofia team had 168 animators, 3D artists, simulation artists, designers, DMP artists, concept artists and support staff who worked on CONAN. Worldwide FX’s Shreveport facility had 55. Our total team came in at 223.


What is your next project?
I am currently back at Worldwide FX in Sofia, working on pre-production for EXPENDABLES 2 for which I am the shoot and post production visual effects supervisor. I prefer to be on a project as a shoot and post supervisor, that way I can ensure that I am involved right from the beginning and can pro actively reduce issues from occurring. Since I have extensive post experience, when I am on a project during pre-production and shoot, I can automatically red flag issues early that otherwise ends up later… every visual effects supervisor’s nightmare sentence, “They will fix it in post.” I expect that to be minimal on EXPENDABLES (laughs) It is definitely advantageous for a film project to involve VFX early. The up front costs to do this ends up saving exponentially more on the post side.

After the hard run we had on CONAN, I am delighted to be back with the battle hardened team at Worldwide FX to work on EXPENDABLES 2. Knowing we went to hell and back to make delivery on CONAN, I expect this to be a smooth run.

A big thanks for your time.

// WANT TO KNOW MORE?

Worldwide FX: Official website of Worldwide FX.

// CONAN THE BARBARIAN – VFX BREAKDOWN – WORLDWIDE FX

© Vincent Frei – The Art of VFX – 2011

CAPTAIN AMERICA – THE FIRST AVENGER: Dave Morley (VFX Supervisor) & Jason Bath (Executive Producer) – Fuel VFX

Dave Morley has been evolving for over 10 years in visual effects. He has worked on films such as MOULIN ROUGE, SEE NO EVIL, or CHARLOTTE’S WEB. As a VFX supervisor, he has worked on films like ROGUE, THE SPIRIT or AUSTRALIA.

Jason Bath is also evolving over the past ten years in visual effects. As VFX executive producer, he has worked on many projects in common with Dave Morley at Fuel VFX.

What is your background?
Fuel VFX is based in Sydney and has been in operation since the year 2000. Dave and Jason are two of the five owners of Fuel – Dave’s background is as a compositor, having worked on shows such as MOULIN ROUGE; Jason worked in the production department on feature films such as DARK CITY before becoming involved in visual effects production.

How did Fuel VFX get involved on this show?
Jason: We’ve been building a strong relationship with Marvel over the last few years. They were happy with the work we delivered on IRON MAN 2 which was the first film we worked with them on, and that was followed by THOR. So it’s a mix of gaining trust, developing a good working relationship with them, and of course continuing to deliver good work.

How was the collaboration with director Joe Johnston and Production VFX Supervisors Christopher Townsend and Stephane Ceretti?
Dave: Chris was our point-person on everything and was great to work with. He was always able to provide us with specific guidance for each shot but be open to any ideas we may have had to solve things too.

What sequences have you made on this show?
Jason: Our largest sequence in terms of shots was the Motorcycle Chase where the enemy pursues Captain America to the Hydra base, and an underwater sequence where Cap swims at a super-human pace to catch the character of Heinz Kruger in his one-man submarine.

We also looked after the opening sequence of the film where the wingtip of an aircraft is discovered in the Arctic ice, the set extensions in Radio City Music Hall, and the short sequence near the end where Howard Stark recovers the ‘cosmic cube’.

Can you tell us more about your sets extensions? How did you proceed for their creation?
Dave: The Hydra base is supposed to be nestled at the foot of the German Alps but was filmed just outside of London which doesn’t look like the Alps at all of course. So we built a digital environment that we called Box Canyon, and this was required for almost every camera angle.

The look and layout of Box Canyon was designed by Fuel’s art department, with significant input and references supplied by Marvel. Matte painting projection techniques were used to create the surrounding cliffs and the looming peaks of the Alps. These matte projections were integrated behind foreground trees and set dressing, such as the concrete ramparts, with yet further projection of matte patches. The rear cliff face with the large iron doors leading to Hydra’s underground cavern was a fully CG build.

The Radio City Music Hall scene was filmed on a small sound stage with green screen backdrop. As this location exists in the real world we placed the sound stage in a CG version of the real Hall and dressed it in patriotic in red, white and blue. Roving spotlights, a bit of smoke, and layers of crowd elements complete the Hall environment for the wide shot. To create the on stage entertainment we built CG props – the tanks, the large star, the rear-projected film of the bombers flying overhead, and the spurts of confetti. Multiple separate elements of chorus girls were also comped together.

Can you explain to us the shooting of the sequence in which Captain America is chasing a submarine? What did you do on it?
Dave: The Submarine Chase was filmed wet-for-wet in a tank. We match-moved the sub so we had a locked camera based on its movement; we then parented the camera and proxy sub geo together and animated additional movement on top to enhance the speed of travel. This was placed within our created underwater environment, which include the hull and rudder of a container ship, and the wharf wall and piers.

We added a lot of underwater particulates, seaweed, fish life and general waste to create a murky look to the water. The particles then helped us sell the speed that the sub is travelling at. Proxy geo of Cap was also match-moved in to allow for interaction of the particles around him and we also added a cavitation effect trailing from the sub’s engines.

How did you create the lasers, fire and water elements? Did you develop specific tools for them?
Dave: The FX work was achieved with a mix of Houdini and Maya. We have some custom tools for control of our fire sims which we developed further for Cap.

Can you tell us more about the motorcycle chase sequence? Did you enhance the environment? Did you create CG vehicles and especially for this chase sequence?
Dave: The motorcycle sequence required quite a range of effects work. We needed to create some digital doubles of the Hydra Bikers – as well as CG motorbikes for both Hydra and Cap. The Hydra tank was an actual prop and we received a scan of that vehicle which we then remodeled, textured, shaded and rendered from there.

There was a lot of FX simulation work in the sequence – flame-throwers and fire elements, explosions with raining dirt, the ‘blue bolt’ lasers, extensions of prop trees, as well as the Box Canyon set extension described above.

On top of all that the photography was a mix of location work and green screen that needed to seamless intercut together. We rippled the edges of Cap’s costume on his close-ups and added small wisps of dust to help sell the fact he was riding at speed. And we did a lot of digital grading work across the sequence to balance it all together so it worked as a single event.

How did you create the shot in which a Bathysphere retrieves the Cube?
Dave: Chris briefed this shot into us later in the schedule so it needed to be a fully CG solution – which was fine as we already had an underwater look set-up from the one-man sub sequence. We were given some art department sketches of the bathysphere. The director was generally happy with it, but wanted the design of the arms to change. We worked on the philosophy that, being a Stark Industries creation, the design of the arms should reflect early ideas of what would become the Iron Man suit. We ended up designing the new arms and embellished the actually tank a bit more in the modeling department. Texturally we based the bathysphere on a more traditional submersible of the era by making it copper, but this evolved into more of a gun metal steel.

The whole brief of the shot was to make the sub appear out of darkness through a lens flare to reveal the cub lying on the ocean floor. The whole environment was created including the ocean floor, sand, weeds, and underwater flotsum and particulates. We also had a few other shots where the cube was shown through a monitor on the boat, for these shots we also created particulate effects of the cube being pulled form the sandy ocean floor.

Can you tell us more about the creation and design of the Cube?
Dave: We created the Cube based on reference from THOR and it was probably the hardest part of the shot because it’s such an important part of the Marvel universe that they were understandably very fussy about what it looked like – we did a lot of versions!

How did you managed the stereo aspect of your shots? What kind of constraints did you encounter with stereo?
Dave: The film was shot mono and was underwent a post conversion so there weren’t really any constraints due to stereo. We had just been through the conversion process with Marvel and Stereo D on THOR so we understood what was required. We supplied mattes and elements where appropriate to Stereo D as well as Nuke scripts and geometry. For shots that were fully CG we rendered a second eye based on interocular information supplied to us.

Was there a shot or a sequence that prevented you from sleep?
Dave: I’m not sure it prevented us from sleep, but probably the single trickiest challenge was creating the shot were Cap’s motorbike runs off on it’s own towards the entrance to the Hydra base and explodes. The bike was filmed in camera but the timing and speed of it within the camera move just didn’t work and we spent quite some time coming up with various solutions with Chris and Editorial to make the shot work.

In the end it became a full reconstruction. We put in a digital bike and re-animated it. All the people in it became rotoscoped elements that were stolen from other shots and we added CG vehicles, explosions and debris to dress the frame. In the end the only thing left from the original plate was a truck that appears for the first 20 frames.

What do you keep from this experience?
Dave: This was the first film we deployed Houdini on. This was always going to be different for me, but to have CG supervisors Chris Horvath and Johannes Saam leading the effects team made the process easy and painless. It was great to see how our FX pipeline for the show could be so easy and seamless to get a large amount of shots through with an extremely short turnaround. I’m a convert!

How long have you worked on this film?
Jason: The schedule was just over 5 months and we delivered 120 shots.

What was the size of your team?
Jason: About 55 crew worked on the film at Fuel over the course of the project.

What is your next project?
Jason: We have a few projects currently in production, but the only one we can mention publicly at the moment is Ridley Scott’s PROMETHEUS for Fox – which of course is extremely exciting to be a part of. One of our recently completed projects, COWBOYS & ALIENS is screening in North America at the moment. We did some very complex CG fire work on that for Industrial Light & Magic which we are really proud of.

A big thanks for your time.

// WANT TO KNOW MORE?

Fuel VFX: Dedicated page about CAPTAIN AMERICA on Fuel VFX website.

© Vincent Frei – The Art of VFX – 2011

The 100th interview !

Hello everyone,

This interview with Roger Guyett about COWBOYS & ALIENS is my 100th interview!

I wanted to thank you all for your fidelity to my work.

A big thanks also to my first donors for their support!

Have a good read.

Best regards,

Vincent

COWBOYS & ALIENS: Roger Guyett – VFX Supervisor – ILM

Roger Guyett began his career in London and then went to America and worked at PDI before joining ILM. He will work on projects like CASPER, TWISTER or MARS ATTACKS! He will oversee the VFX for two Harry Potter (HARRY POTTER AND THE PHILOSOPHER’S STONE and HARRY POTTER AND THE PRISONER OF AZKABAN), STAR WARS EPISODE III: REVENGE OF THE SITH or STAR TREK. He received a BAFTA for Best Visual Effects for SAVING PRIVATE RYAN.

What is your background before joining ILM?
I worked in the Post Production business in London, doing computer graphics animation for commercials and broadcast TV. I then did some film work in England, just as digital FX were really taking off in the USA, and saw an opportunity to come to America. I initially worked for PDI (now Dreamworks) in California and then moved across to ILM – this was about 20 years ago.

How was the collaboration with director Jon Favreau?
Really great. He has a tremendous interest in the VFX process and is a big fan of ILM. He’s also extremely respectful of all his collaborators on the movie – he listens to people’s perspectives and is open to ideas but ultimately he’s the director. I really enjoyed working with him. He’s also a very funny man – and with the hours we work it really makes it very easy to be in his company.

What was his approach and expectation about VFX on this show?
He wanted to root the movie with a great sense of reality (as everyone does of course) but with the stark contrast in genres he really emphasized that everything must feel photo-real. This concern also came out of the fact that the final battle was set in daylight – harsh sun – and he felt it was a very unforgiving. Once he saw the first tests of the alien he was very re-assured. ILM has spent a lot of time developing their energy conservation lighting approach and it really paid off.

About the bracelet that carry Daniel Craig. Did you do something on it mainly when it expand or is it full Legacy Effects work?
Actually the props department built 2 versions of the wrist gaunlet from designs approved by Scott Chambliss (the production designer). One closed, one open. We did the transformation between the open and closed versions – we have a lot of experience with transforming-type objects (laugh). We also added the heads up display (HUD) and other smaller embellishments.

What were your references for the Aliens ships?
The ship was designed by the production design team (I want to say it was done by James Clyne – but I’m not completely sure). There was the large mining ship – that appears almost like a tower in the ground – and then the smaller insect-like (dragonflies were a strong influence) machines we called Speeders that we first encounter during the town attack sequence at the beginning of the film.

Did you use models for the Aliens ships and headquarter?
We built a small version of the large tower – which we sometimes photographed for reference on set. But all the work is really digital in the movie. Although the first 20′ of the tower was actually built as a practical set piece.

Can you tell us how you take light reference for the ships especially for the shots under bright sun?
We constantly shot both 18% grey spheres and chrome spheres for reference but also stand-in models for the ships so that we could get really good lighting reference for the ships.

Can you tell us more about the ship crashes into water?
We photographed a practical element of a shape (fairly close in size to the real thing) crashing into the water at speed. This was rigged by the practical FX team. That gave us something to frame on for the camera operators and a great starting point for the shots above the water. We then composited the CG ship over the practical element and added a lot of additional elements of smoke, water, etc. The shots below the surface were entirely CG. My favorite is the shot of the sinking ship heading towards camera – leaving a trail of debris – as its lights flicker out. That shot was composited by Francois Lambert. We had a fabulous CG FX team, led by Dan Pearson, who added were able to create all these great organic effects – including all the dust and debris around the Alien too in the battle scenes.

How did you design and create the impressive aliens?
The initial design was done by Shane Mahan and his team at Legacy FX. We then took that work and turned it into the creature you see in the movie. Martin Murphy did a really great job of all the texture work on the creature, while Michael DiComo and Robert Weaver did a lot of the shading work. Paul Giacoppo did all the modeling work.

Were there always full CG or did you use Legacy Effects models on set?
There’s very little of the practical puppet in the movie. Maybe 4 or 5 shots – all tight close-ups of its face. They’re all in one scene – the riverboat. The puppets were great reference for size and lighting and were an invaluable tool.

How were their presence simulated on set especially for the final battle?
We had stand-ins for the aliens – stunt guys wearing funny grey suits and hats – it worked up to a point but ultimately we needed some imagination for it all to come together. We directed the camera guys and described in great detail the action in each shot so they knew how to time all the camera moves.

What were your references for their animation?
Mark Chu, the animation supervisor, did a lot of research on creature movement, and did a significant number of tests on how the creature should move.
We initially thought about doing performance capture but couldn’t get the re-targeting to work in a way that we thought was appropriate – so it became all keyframe animation.

Can you tell us more about the shot in which an Alien died under molten gold?
Wow! That was our great FX team, this scene was led by Raul Essig, who spent most of the show dealing with gold. It’s a very complicated thing to achieve because of all the interaction and detail that’s going on – the gold is a molten fluid that solidifies, it’s also a light source, the alien is burnt
as the gold contacts him (generating flames)….there’s a lot going on!

How did you create the huge set extension in the cave?
That scene was shot with a very limited piece of set for the actors to interact with.

Can you explain to us the creation of the big final explosion?
That was a massive simulation event spear headed by Lee Urren here at ILM. It used all the new techniques that ILM has been developing to create these large scale explosions. It was a lot of work! Greg Slater composited the main shot together which had 100s of separate elements.

Did you develop specific tools for this show?
Yes – mainly to do with the way the molten gold.

Was there a shot or a sequence that prevented you from sleep?
Well, we had such a great team, I didn’t lose too much sleep…. but the molten gold was the most nerve racking!

What do you keep from this experience?
It was great spending time in New Mexico, the film crew were really talented. As well as working with Jon Favreau, I got to work with Matthew Libatique, who’s a great Director of Photography. A lot of great memories. Ultimately working with the FX crew every day is such an awesome job! There are so many challenges, and so many talented people at ILM (and all the other companies involved), its a great pleasure coming to work.

How long have you worked on this film?
About 20 months.

What was the size of your team?
Hundreds of people did the work across about 7 companies – but on set we had about 8 people.

What is your next project?
To early to say.

What are the four movies that gave you the passion for cinema?
THE MALTESE FALCON, APOCALYPSE NOW, THE GREAT ESCAPE, ALIEN… how’s that (laugh).

// A big thanks for your time.

// WANT TO KNOW MORE ?

fxguide: fxguide article about COWBOYS & ALIENS.

© Vincent Frei – The Art of VFX – 2011

HARRY POTTER AND THE DEATHLY HALLOWS PART 2: David Vickery – VFX Supervisor – Double Negative

David Vickery is working at Double Negative for nearly 10 years. He has participated in projects such as CHILDREN OF MEN, THE DARK KNIGHT or CLOVERFIELD. He oversaw films such as SHERLOCK HOLMES and HARRY POTTER AND THE DEATHLY HALLOWS PART 1.

What is your background?
When I left school I enrolled in an Art and Design foundation course, from there I went to De Montfort University to study a degree in Industrial Design and Engineering. 3D was a discipline I learnt to love whilst designing products and when I finished my degree I changed tack slightly to reflect this and enrolled in the MA in Digital Moving Image at London Metropolitan University. Double Negative was my first job in feature film. I joined D-Neg in 2002 as a General 3D Artist and worked my way up to the role of CG Supervisor on films such as BATMAN BEGINS, CHILDREN OF MEN and CLOVERFIELD. I’m currently one of Double Negative’s VFX Supervisors and have recently completed work on Guy Ritchie’s SHERLOCK HOLMES and HARRY POTTER AND THE DEATHLY HALLOWS PARTS 1 and 2.

What sequences have you made on this show?
We completed 410 shots for THE DEATHLY HALLOWS Part 2, which spanned over 50 sequences! Our team was split into two distinct ‘units’ to make working on the hugely varied content more manageable. The ‘Dragon’ team were responsible for the arrival at Gringotts, the cart ride down to the dragon’s vault and then all the shots with the dragon as it makes it escape across the Diagon Alley roofscape. We also did a large part of the look development and R&D for the multiplying treasure sequence which we eventually handed over to Tippett Studios to finish.

Any time you see the exterior of Hogwarts or the surrounding environment it was handled by our ‘Hogwarts’ crew and we completed all the FX work that goes with it. The shield creation and subsequent destruction, the collapse of the wooden bridge and the massive destruction that was wrought across the school by Voldemort’s army. All of this is D-Neg. It was a huge challenge for us – there were over 50 completely CG shots for the Hogwarts team alone.

About the Gringott ride sequence, how did you choreograph it? Were there a previs or a storyboard for it?
We started pre-production on THE DEATHLY HALLOWS Part 2 back in summer 2008 – whilst we were still working on THE HALF BLOOD PRINCE. Kieron Helsdon, one of our environment leads was installed in the production art department at Leavesden studios to begin constructing the previs for the cart ride. David Yates envisaged the sequence as a truly bone shaking, INDIANA JONES style mine cart chase so the shoot had to be planned meticulously to make sure that we got the live action elements that we needed. We spent a long time getting the previs right.
We then had to figure out a way of translating our carefully choreographed previs into live action footage. We used Maya to build a digital replica of the practical cart rig that John Richardson’s’ SFX team had built. Then wrote Maya scripts to transfer all the cart previs animation into a format that would drive the practical rig to move in the same way. We essentially ran the entire cart sequence as one massive motion control shoot.

Can you tell us how you build so huge an environment?
Stuart Craig’s team had crafted a beautiful clay sculpt of the Gringotts cavern. It was huge – measuring 6ft x 10ft and detailed the types of rock structures, location of the dragon vault and waterfall. It even included the helical twisting cart rails clinging to the rocky surface of the vast cavern. Kieron Helsdon went to an area on the west coast of Scotland called Ballachulish and photographed the vast slate edifices there as inspiration for the slate-like rock formations in the cave. These were later interspersed with towering limestone stalactites.

We started out in Maya building a digital replica of the art department clay model. We divided high resolution Lidar scans and manual theodolite surveys into many small manageable sections and rebuilt them as clean low resolution polygonal geometry. These pieces were then textured using a combination of projected photography and hand painted Photoshop textures with Mudbox sculpts to add a fine level of displaced detail. It was built in modular sections to allow multiple artists to work on it concurrently and so that it was more versatile when the composition of shots didn’t work and we had to start moving individual rocks and stalactites around.

How did you design and create the Gringott dragon?
Some of the first concept images we were given for THE DEATHLY HALLOWS Part 2 were of the dragon. They depicted an emaciated yet feral looking animal, sprawling in a dank and cavernous environment. We were also given concepts of the creature’s destructive climb to freedom through the foyer of the bank. Individual still images often give you a false impression of an objects shape. When you look around that same object in 3D it suddenly looks very different. We wanted to get the creature modelled as soon as possible to avoid this and really start to understand its form from all angles. Tim Burke envisaged the creature as an emaciated, malnourished, mistreated wild animal and David Yates insistent that the audience needed to emote with the creature – to sympathise with it but at the same time be terrified of it.

We began work on the dragon in summer 2008 with a small team. Two of our 3D artists, Kristin Stolpe and Andy Warren, created a series of 3D Maya models, Photoshop texture studies and Mudbox sculpts using the production artwork as a basis for their work. Even though Tim Burke was working on the THE HALF BLOOD PRINCE and prepping for THE DEATHLY HALLOWS Part 1 he still had time to come in and review our work on the dragon. We would show him our designs every couple of weeks. At this early stage the creature went through a lot of changes. We designed shackles, muzzles and harnesses that could be used to restrain the creature and painted high res textures to show how the dragon could be wounded, scarred and disfigured. There were hundreds of subtle tweaks and variations made to the design of the creature during this phase.

We also had Creature TDs scripting lots of new pipeline tools to handle the many layers of cloth, muscle, bone, skin and tendon simulations we knew would be required to create a convincing animal. Later the Dragon team grew to include almost 100 crew; a small army of Lighting Artists, Creature FX TD’s, Compositors, Matchmove and Rotoscope Artists

How was simulated the dragon presence on the set?
We created extensive previs for the entire of the dragons escape so when it came to shooting the film crew had a really good idea of where the dragon would be and actors knew where to look. When the dragon breathed fire the DOP directed interactive set lighting to illuminate the actors accordingly. There was no physical representation of the Dragon on set until the kids climb on its back, at which point we needed something for them to interact with.

What was the main challenge with the dragon?
Getting the lead characters to sit convincingly on the back of the dragon was a massive technical challenge for us. We really wanted to avoid the slow grinding mechanical feel that you often get when humans have to ride or interact with large imaginary creatures.

The first hurdle was creating a mechanical creature rig for Daniel, Emma and Rupert to sit on. We provided John Richardson (SFX supervisor) with our finished Maya model of the dragon and he used this to CNC machine a 1:1 scale 12 foot sculpt of part of the dragon’s back. Nick Dudman (Creature Supervisor) then used this to create a flexible foam latex skin that would form the creature’s hide whilst John Richardson built a mechanical rig to control its movement. The rig had pneumatic rams to drive the dragon’s shoulders up and down, twist the neck and spine in 3 places and lift the top of the tail. John detailed the components of his rig and we built our own digital version of it and constrained it to our 3D dragon in Maya. Our Lead Creature TDs Gavin Harrison and Stuart Love wrote a series of tools that allowed us to extract our previs animation and use the data to drive John’s mechanical rig. We could animate the creature in Maya, export the data and see the mechanical rig do the same movements on set but this time with the actors on the back!!

The dragon was such huge creature that once the rig was mounted on the motion control base at Leavesden its back stood almost 15ft off the ground, which you can imagine would be a pretty daunting thing to be thrown around on! The rig itself had a pretty good range of motion but was so heavy that it was never going to achieve the speeds we were seeing in our dragon previs. We had to adapt our shooting methods for each shot to make sure we got the most out of the rig. Some shots were filmed at 18fps and re-sped to make the dragon back appear to move faster. Other shots needed to be filmed locked off – the resulting plates would be re-projected into 3D camera moves to enhance the animation. We placed hundreds of colour coded LED tracking markers on the dragon rig so that later in Matchmove we could separate the rigs movement from the camera movement. In case we had to completely reconstruct the scene in 3D later we positioned 3 HD witness cameras to cover each shot from a wide angle and to give us extra texture information. Our 3D and 2D supervisors (Rick Leary and Sean Stranks) were on set throughout the entire shoot. They would take the video rushes from every shot, run a quick Matchmove and comp and then show it to the director to make sure we were getting what he wanted. By the end of the 2 week shoot we had a really rough version of the sequence with the actors actually sitting on the back of the mechanical dragons back! Even after all this work on set we still had to completely replace the practical rig of the Dragon with CG. It was only designed to give the actors something to interact with so it wasn’t even painted.

When the dragon escapes, he causes much destruction. Can you tell us more about that?
The scope of the damage and the fact that we had a massive dragon right in the middle of the shot made it necessary for us to build completely CG version of all the Gringott’s sets. Full scale builds existed in one form or another for each location, so we had great reference, but it meant we had to painstakingly recreate them all digitally, before smashing them up. We used Nuke to composite the dragon sequence. Robin Beard (our 2D lead) got us to render our environments into many layers. ID mattes to isolate different pieces of geometry, specular, diffuse, reflection, depth and atmos all in separate renders. He would re-assemble them in Nuke and it gave him control over every aspect of the look and it meant we would only render a shot once or twice before it could be finished in 2D.

D-Neg has fantastic tools for destroying things! We have a great rigid body simulation plug-in called Dynamite, which uses Maya forces and allows the use to specify real world values such as mass, gravity and even a materials coefficient of friction. Dynamite gives you incredibly believable results but you have to model your geometry in a very different way if you plan to use it.
If you want to destroy a wall, or a marble column you can’t just build and texture a simple polygonal plane or cylinder. Every brick has to be built and placed individually. You have to understand how something is made before you can destroy it. The desks in the bank foyer are all made up of individual pieces of wood. If you look closely, on each desk you can see scales and piles of money and they are all built as if they were real things. If you want them to look good, there’s no cheating or matte painting work rounds when you are doing destruction simulations.

About the school, can you explain to us how you create a CG version of it?
For the past 7 movies Hogwarts has primarily been a practical miniature, with digital enhancements. It’s a huge model, measuring over 20ft long and 10ft high. Tim Burke and Emma Norton realized that Hogwarts was going to feature so heavily in the final instalment of the franchise it would necessitate months and months of planning and shooting on the miniature stage. That is what led them to ask Double Negative to create a completely digital version of the school and its surrounding environment. It was such a huge undertaking. We had to build an environment that was over 10 miles long at its widest point and used over 3000 individually painted 4k textures. The school itself was made up from over 74 individual buildings all modelled to 3 levels of detail. All this information was specified in nearly 1400 blueprints provided to us by Stuart Craig’s Art Department.

Stuart’s team had been crafting the school for the last ten years and we had to live up to his very high production standards. We were given such a wealth of architectural information that we could have built the school for real if we had wanted – there was so much detail in the plans that it even covered profiles of the handrails that wound around the inside of the staircases leading up Dumbledore’s tower, nothing was left out.
The mountains surrounding the school are all real places in Scotland, but we quickly realised that no one place contained the right style of terrain to suit Hogwarts perfectly. In the end we photographed in many locations – Loch Schiel, Glen Nevis, The Three Sisters and Glen Coe to name a few. Kieron Helsdon then worked with Stuart Craig to compose the ideal environment to situate Hogwarts within. We ended up with a 360 degree collage of landscapes surrounding the school. Our task was to re-create this jumbled jigsaw of pieces and graft them together to create a single seamless environment.

When we went to photograph and survey the Scottish locations we still weren’t sure where the shots take place within our 3D environment. We had to cover every angle on the shoot and be able to accurately rebuild in 3D every location we visited. Our Lead 3D Environment Artist Pietro Ponti devised a rig made up of 3 Canon 1DS mkIV digital SLR cameras mounted side by side and pointing out the side of a helicopter. The three cameras were remote triggered and had their shutters synced. Pietro studied Google Earth and plotted out semi-circular flight paths around all of our mountains. The locations were a long way from each other but Google Earth data allowed us to determine the lighting and the sun’s location at any time of day and plot the optimum flight paths for the helicopter. The multiple camera positions on each location allowed us to use our proprietary geometry reclamation tools to re-build all of t he terrain and create textures from the photography at the same time.

Hogwarts buildings and environment changes a lot during the battle, how did you create those changes and destructions?
We had to build multiple versions of any buildings or structures that needed to be destroyed during the movie. As a bare minimum we had to build it in a complete and destroyed state. A great example is the wooden bridge, which had to be built from scratch four times using different techniques so that it would work for wide scope of shots we had to simulate and render.
The first model was for shots where we had to use CG to extend the partial set build visible in the live action plates. We couldn’t rely on the original set drawings that the construction team used. The actual sets often deviate from those plans and our digital set extensions had to match the live action very, very accurately. We used Lidar to survey the sets and rebuilt them from that.

The second model was built from architecturally accurate scale drawings. We built all the roof timbers, slates, floor joists and even down to the individual types of joinery used to connect the structures to each other. This information was all used in our rigid body simulation software ‘Dynamite’ to create the physically accurate FX simulations as the bridge was blown up. This resultant 3D model was incredibly dense and took a long time to render.
The third variation on the bridge build was a low resolution efficient render model that could be used in medium and wide shots.
The fourth and final wooden bridge was built in its post destruction state. Our FX simulations looked beautiful as the bridge exploded but it was very hard for the team to control the bridge so that it collapsed and left a nice looking structure. The finished destroyed model was completely art directed. The twisted remains of the bridge hand placed to get the best result.

What was the biggest challenge on this film and how did you achieve it?
The sheer breadth of creative work that D-Neg undertook for THE DEATHLY HALLOWS Part 2 made it a very challenging and rewarding project to supervise. One second you are looking at Elizabethan architectural details and the next trying to devise a way to obliterate a Snatcher as he runs through the Hogwarts shield. Great fun but hard work…

You’ve worked on four Harry Potter films. How did it feel to complete the saga?
It’s a very proud moment for me, and I know that everyone at D-Neg is incredibly proud of their work on the movie. They gave everything to make this last one the best!

Was there a shot or a sequence that kept you awake at night?
All of them! That’s what supervision is about. You get a lot of the praise when it goes well, but you also have to fix all the problems when its not.

How long have you worked on this film?
I started work on THE DEATHLY HALLOWS PARTS 1 and 2 in September 2009 and finished in July 2011!

What was the size of your team?
At its peak, Double Negative had 263 artists working on it.

What is your next project?
Nothing confirmed at the moment, I’m taking the opportunity to recover!

What are the four movies that gave you the passion for cinema?
ALIEN, BLADE RUNNER, THE DARK CRYSTAL and LABYRINTH.
I love all the beautifully crafted worlds and creatures that came out of Henson’s workshop. When I was growing up I wanted to do creature FX, but never really thought it was something that the average Joe could get into.

A big thanks for your time.

// WANT TO KNOW MORE ?

Double Negative: Dedicated HARRY POTTER AND THE DEATHLY HALLOWS PART 2 page on Double Negative website.

© Vincent Frei – The Art of VFX – 2011

TRANSFORMERS: DARK OF THE MOON – Scott Farrar – VFX Supervisor – ILM

Scott Farrar began his VFX career with STAR TREK: THE MOTION PICTURE. He joined ILM in 1981 and works on most legendary projects of the studio like the BACK TO THE FUTURE trilogy, WILLOW, WHO FRAMED ROGER RABBIT or JURASSIC PARK. As a VFX supervisor, he worked on movies like BACKDRAFT, MINORITY REPORT or the TRANSFORMERS trilogy. He received an Oscar for Best Visual Effects for COCOON.

What is your background?
I studied filmmaking at UCLA, and received my BA and MFA from there. After graduating, I worked as a freelance cinematographer and editor on industrials, commercials, ride films and films. After working on STAR TREK: THE MOTION PICTURE, I realized I really preferred visual effects photography over live action. I was hired by ILM in 1981 and have loved the atmosphere there that allows us to experiment. Of course I’ve been part of the transition from photo-chemical to computer graphics, and that change has given us so many new possibilities for making great images.

How was this new collaboration with director Michael Bay?
I have fun with Michael. We both strive for great photography and we both place a great deal of emphasis on lighting, composition, movement, texture, color and mood. He gives me a lot of freedom to try things- if my crew and I come up with a good idea, it’s in the movie.

You supervised the two previous films. Can you tell us what are the major changes in this new film?
The goal with any sequel is to come up with new ideas, something you haven’t seen before. Early on I suggested we go to extreme-slow-motion, go darker and moodier in some scenes and try new ways to show the transformations. I think we did all these things I tried to improve the illusion of how real we could make our shiny metal robots, so we do many things to enhance their surface textures, colors and the way light reflects from their parts. And we re-work parts of their body and face to look « cooler » or to add different pieces to act better.

But the biggest change was to make this film in 3D. We shot a large part of the movie on stereo cameras, so when we make or render a robot for one eye, we must render it again from a slightly different angle for the other eye. That may sound simple, but by the time you finish putting the
shot all together, or compositing the shot, you will add 20 to 30 percent more work to the shot.

What was your feeling to find again these robots and Michael Bay?
It’s like working with old friends. We have really gotten to know these robots and their personalities to the point where we know how they should respond as characters. It’s exactly like working with actors, knowing their differences from each other.

How did you create and animate the impressive Shockwave?
I think you mean Collosus, the 150 foot long snake-like creature. He was so complicated that he took 6 months for Rene, one of our best model-makers, to finish him. Animating him took longer because he had so many body parts.

Can you talk about his rig and the animation of its tentacles?
The hard part in rigging him is allowing the rings on his body and tentacles to spin as he moves across the ground or through the building. His animation and position on the building is done first, then we destroy the sections of the building where he is placed. That involves many computer-simulations: breaking glass, metal, cables, beams, smoke, fire, sparks, concrete, dust and liquid.

The render times for Collosus entwined with the Tilted Building were the highest in ILM’s history: 288 hours per frame! And that is just for one eye, and sometimes the computer would choke on a frame and we had to start over. That’s because both objects were reflecting the environment, and that is a complex algebraic calculation. To compare, the longest render on the last TRANSFORMER’S was 36 hours for an IMAX frame. Over 50 different specialists worked on this shot.

Have you developed specific tools for the destruction of so many environments? Such as warehouses of Chernobyl and Chicago?
Yes. Mostly, we shoot real locations and build from real photography. I shot aerial shots, or plates, from a helicopter for 6 weeks in Chicago, for instance. We also sent a crew from our Digital Matte Department to shoot a complicated assembly of all the buildings along the river in downtown Chicago, and 3 other areas as well. Our new tools are used to stitch 1000’s of photographs together to create a 3 dimensional virtual « city » in which we can fly or position a camera anywhere. It is photo-real, and you cannot tell it is a re-creation of buildings. It’s very cool.

Can you explain to us, step by step, the creation of the incredible shot where Shia Leboeuf is ejected in the air from Bumblebee on the highway and then finds himself back on board Bumblebee? How did you create it?
I knew I would need to photograph Shia for at least part of this shot, because digital doubles of actors still do not hold up well, especially in a slow-motion shot where you can study every emotion on his face. So, we flew Shia on wires in front of a bluescreen, and shot him at high speed. We also photographed a real location with the road and bridge for reference, using stills and movie cameras. And we shot a plate of Shia in the real car for the final part of the shot.

We built the background from the stills, changed the lighting, and created the camera move. Bumblebee was an animated car transforming into robot, then changing back to car, and with a wipe across screen, we end with Shia settling in his seat in the car. Real Shia switches to a DigiDouble when Bumblebee grabs him and goes into a roll. The bottle truck and all the gas bottles, debris, smoke, sparks dust flame shooters and broken glass are all separate animated elements. That’s it!

Robots are changing very often. Have you set up automatic transformations to help your animators?
No. All the transformations are custom, and are hand-done by very smart artists.

The fighting in hand-to-hand combat between robots are very numerous. How were they choreographed and how did you animate them?
On the first film, Scott Benza and Rick O’Conner, our Animation Supervisors, used reference footage from Hong Kong fight films. And Michael Bay shot reference with his stuntmen for us to copy, because our moves weren’t too cool yet.
On TRANSFORMERS 2, we were getting better, but we did have a stuntman come to our building to help shoot more reference with our animators.
On TRANSFORMERS 3, Scott and Rick were so good they didn’t need any help, and surpassed anything they had done before!

How did you create so much destruction in Chicago? What was the real size of the sets?
No sets. All real backgrounds with damage, fire and smoke tracked into the camera movement.

Can you talk in detail about the collapse of the tower cut by Shockwave?
The basic break and fracture is relatively simple. The body animation and speed of fall are worked on in simple form until it looks cool. Then the tentacle movement refined until it makes sense to camera. It’s the 100’s of layers of breakage and damage that make it look real.

What were your references for the many vessels of the film? How did you then designed and animated them?
The main production art department comes up with the designs. I think the big breakthrough was when our animators came up with the idea that the fighters could transform, just like the robots.

Some shots show dozens of ships and robots in the same frame. How did you manage so many elements?
One item at a time is placed, animated or moved, then we watch the shot and adjust speed, composition and number of elements based on composition.

How do you integrate your robots so perfectly in such a amount of explosions and dust?
Great artists do amazing things. We shoot everything, real, dirty, with lots of pyro and dust in the shots. We use roto to fit the robots in, and try intricate choreography to animate to the movement of the robots to fit in the plate. If the robot does not integrate well into the dust, for example, the compositor adds many new layers over the robot to give the illusion that our dust element is part of the original dust element. It’s a magic trick, really!

Was there a shot or a sequence that prevented you from sleep?
I always sleep well, just not enough hours sometimes. These movies are many months long, like a long-distance run.

Will your Singapore division has been working on this film?
They did more shots on this than in the past, over 150. The work was great. And they did just about everything in each shot, since they have increased their artist base.

How long have you worked on this film?
18 months, a year and a half.

How many shots have you made and what was the size of your team?
580 shots with 355 artists at the peak of production.

What do you keep from this experience?
You can accomplish a lot if you have great people on your team. And I did, I’ve worked with a lot of my crew on all 3 films. So we’ve built a lot of history, experience, ideas and reliance on one another. Creating things together is a thrill.

What is your next project?
Vacation!

What are the four films that gave you the passion of cinema?
THE 7TH VOYAGE OF SINBAD, BEN HUR, THE GREAT ESCAPE and THE GOOD, THE BAD AND THE UGLY (one more FRANKENSTEIN!).

// A big thanks for your time.

// WANT TO KNOW MORE ?

fxguide: fxguide article about TRANSFORMERS: DARK OF THE MOON

© Vincent Frei – The Art of VFX – 2011

THE BORGIAS: Doug Campbell – VFX Supervisor – Spin VFX

Doug Campbell began working in visual effects since over 25 years. He participated in many TV series like STARGATE: SG-1, STARGATE: ATLANTIS or KINGDOM HOSPITAL. At Spin VFX, he worked on films such as OUTLANDER, LEGION or BATTLE LOS ANGELES. In the following interview, he talks about his supervision work for the series The Borgias for which he received an Emmy Awards nomination.

What is your background?
In the early 80’s, I graduated from classical animation at Sheridan College. I then started working at a small, but cutting edge, visual effects company where I did every job a VFX artist could do but specialized in motion control cinematography. When digital came to be, we bought the first Quantel Harry in Canada and we were one of the first adopters of Alias PowerAnimator and Discreet Logic’s Flame. Since then, I’ve always been immersed in new technology that is critical for projects like the THE BORGIAS.

How did you get involved on this project?
I was asked to join the SPIN team by their Executive Producer, Neishaw Ali. I then met with the producers from Take 5, we got along really well and were on the same page creatively. They asked if I would do some set supervision for production in Budapest and then return back to SPIN in Toronto to do the post.


How was your collaboration with show creator Neil Jordan? What did he expect for the visual effects?
Neil is a fabulously creative director. Working on his production of THE BORGIAS was truly an honor. He has a clear vision for authenticity and historical accuracy to reflect 15th century Rome.

Can you tell us the real size of the sets?
The Korda studio backlot, which was a recreation of St. Peter’s Square, was built for the most part, between 2 or 3 stories high. We had to top up everything above that or extend their depths, which included St. Peters Basilica, the Chancelaria, the Bell Tower, The Leontine Wall, and all of Rome beyond the physical set. One third of the Basilica interior was built up to 20 feet tall and we then extended and/or topped it up to look so vast.


Can you explain to us, step by step, how you created the different set extensions?
We had Lidar scans taken of everything we were extending which helped immensely in doing proper asset builds and layout. Undistorts were done on the plates, PFtrack was used to get camera data, and geo was all laid out in Maya. Rendering was PRMan and we comp’ed in Nuke.


How did you proceed for the crowd multiplication?
We created our own assets and animations and used Massive to drive them. Cloth sims of woman’s dresses, flags and banners were done after that. Most of the time, when large crowds of Nobles, Peasants, French or Papal Armies were seen, they were Massive.

Can you tell us a little more about the shots showing the huge armies?
We had to build shots with 25,000 French soldiers and 2500 Papal soldiers, including various cannons, wagons, men on horseback, and their campgrounds. This was always utilizing Massive. We created the required animations and our FX team sim’ed it all together, and placed them onto Lidars of the backgrounds. Our CG Supervisor built a bunch of tools to make it all render efficiently in PRMan. Sounds easy but it’s not!


About the matte-paintings, how did you create the shot with the riders and the coast?
Pesaro Castle, far back on the distant hillside was created as a matte painting and in Nuke we tracked it to the plate, warped some sky movement, created cloud shadows moving over the terrain, added fishing boats, crashing waves, and of course, birds.


How did you create the shot of the blond girl flying to the ceiling and being part of the painting?
After some previz, Lucrezia (Pope Alexander’s daughter) was shot on greenscreen where we did a track and got her into a 3D environment in Nuke. We built the BG with primitives and projected high res textures onto them then, added some lighting and shadows. We exported the Nuke camera to Maya where we did a very subtle fx sim of dust floating by in the air. Her final ethereal look was done with creative compositing.


Did you create digital doubles for the stunt and gore scenes when soldiers are being hit by a cannonball?
Yes digital doubles were primarily used for these gruesome scenes. We also shot prosthetic limb elements on greenscreen. Blood was always added digitally.

What was the biggest challenge on this project and how did you achieve it?
We had created some amazing models but with all the details we needed, they became very large. We also wanted all the subtleties that make up a photo realistic render but had a television delivery schedule which was extremely tight. Our CG Supervisor decided that PRman was the only way to do this so he developed some cutting edge tools to do full ray tracing, GI including full color bleeds, deep shadows, volumetric lighting, etc with fantastic turn around times of a few minutes per frame. Once all the dev time was in place, the schedule was attainable and we had amazing CG elements to work with.

Is your pipeline different for a TV show than a feature film?
We were using SPIN’s feature film pipeline with a few modifications that were made to accommodate the tight schedule. We treat all our shots with feature quality in mind.


What is your feeling to be nominated for an Emmy award?
I feel grateful and honored. Our team worked extremely hard on this project and a formal recognition in the form of an Emmy nomination is absolutely wonderful.

Was there a shot or a sequence that prevented you from sleep?
There were some big episodes, especially episodes 7 and 8, where we had the same time frame to do 3 times the volume of other episodes. There may have been some lost sleep at that time.

What do you keep from this experience?
I had so many great experiences, but the most inspiring was working with the SPIN crew. The sense of camaraderie and creativity that ignited during this project made for one of the best working environments I have ever had.

How long have you worked on this project?
We were building assets in June 2010 and deliveries started in November. We wrapped in early May 2011.

What was the size of your team?
We had between 30 to 40 artists working on THE BORGIAS.

What is your next project?
I’m presently back in Budapest filming season 2 of THE BORGIAS. It’s going to be really great!

What are the four films that gave you the passion of cinema?
BLADE RUNNER is my top film, inspiring me hugely.
2001
STAR WARS
FANTASIA (all of Disney’s early animated films were very influential).

A big thanks for your time.

// WANT TO KNOW MORE?

Spin VFX: Dedicated THE BORGIAS page on Spin VFX website.

// THE BORGIAS – VFX BREAKDOWN – SPIN VFX

© Vincent Frei – The Art of VFX – 2011