PIRATES OF THE CARIBBEAN – ON STRANGER TIDES: Anders Langlands – CG Supervisor – MPC

Anders Langlands is working at MPC since 2004. Has participated in such films as HARRY POTTER AND THE PRISONER OF AZKABAN, CHARLIE AND THE CHOCOLATE FACTORY, 10,000 BC and CLASH OF THE TITANS.

What is your background?
I got a degree in Computer Animation, then started at MPC 8 years ago. I’ve been here ever since.

How was your collaboration with director Rob Marshall and Production VFX supervisor Charlie Gibson?
This was the first time we’d worked with Rob Marshall and Charlie Gibson, and the experience was fantastic. We dealt mainly with Charlie and he was a real pleasure to work with, making the process very smooth for us.

What are the sequences made by MPC?
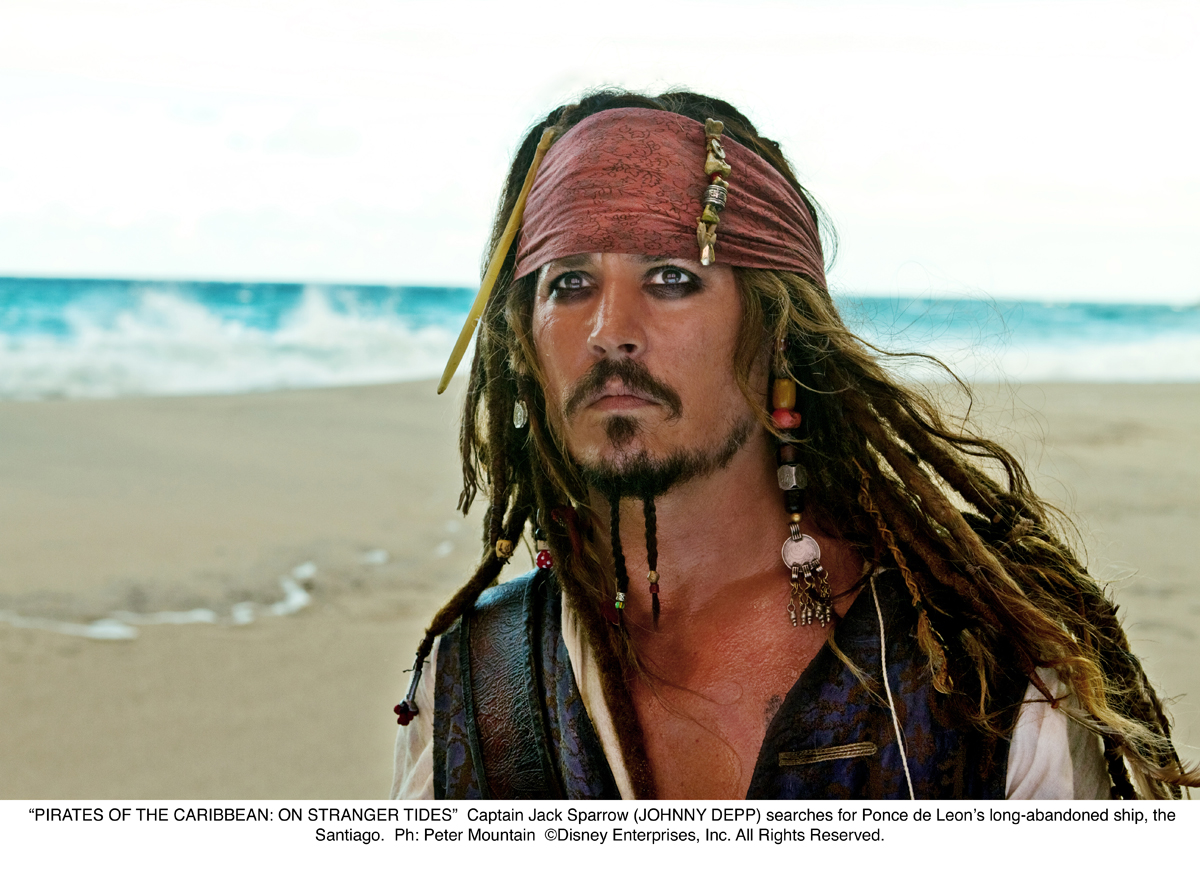
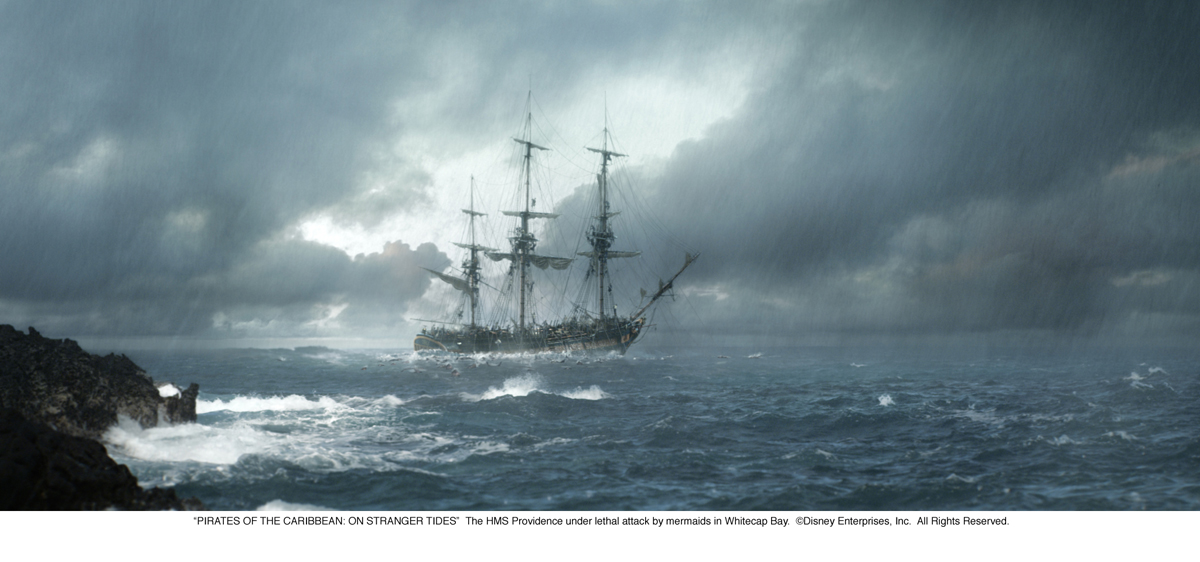
Initially we were asked to do the sequence where Jack jumps into the chasm, the sequences where Blackbeard’s ship comes to life, the sequence where the Providence is sunk, the sequence where Jack and Barbossa are in the tipping wreck and the sequence where Jack is escaping from the Spanish in the palm tree grove. As the project progressed we took on some other bits and pieces as well, including shots of the mermaid’s whip-like tendrils for the mermaid attack sequence.

How did you create the ship of Blackbeard?
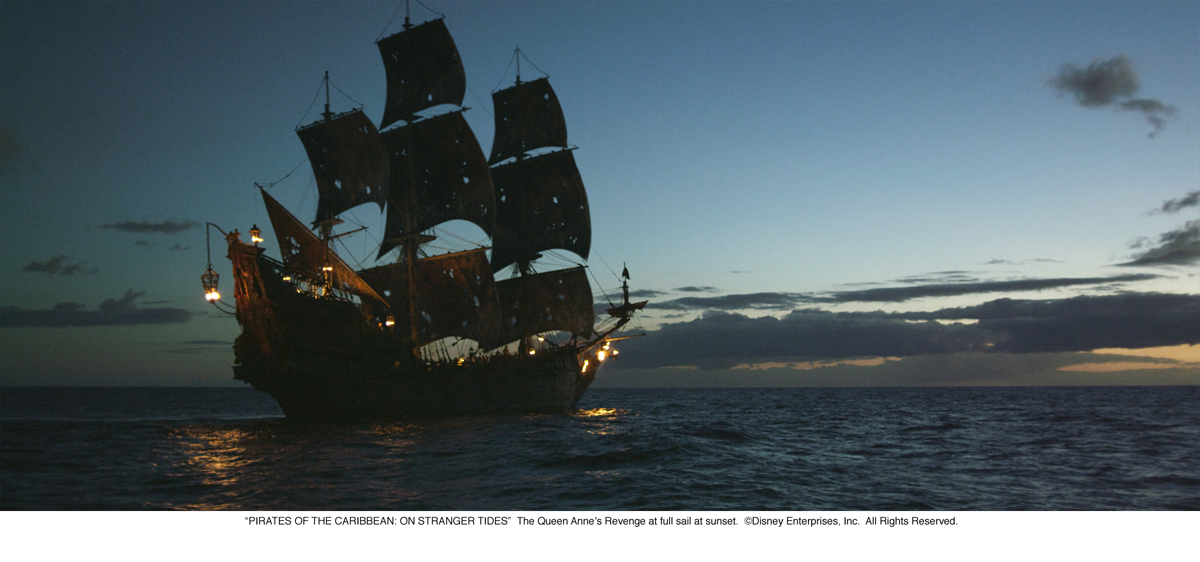
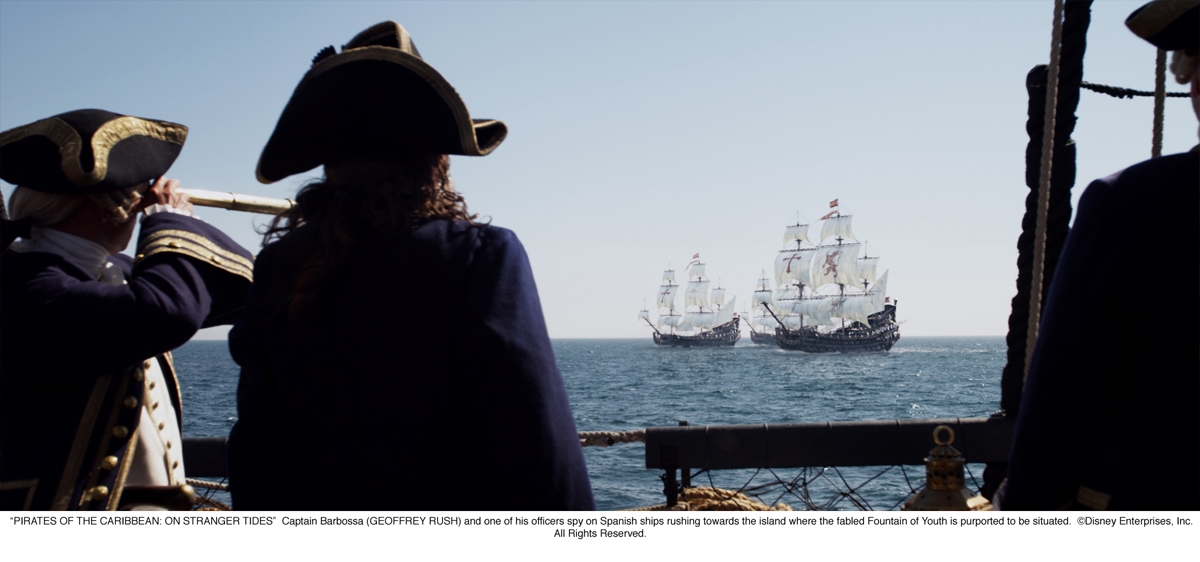
Our in-house photographer, James Kelly, flew to Hawaii for a few weeks to take extensive reference photography of the Queen Anne’s Revenge (QAR) as it was being constructed. Although we did have LIDAR of the ship, it was only of a portion of the hull as the boat was already in the water so obviously scanning an object moving up and down on the ocean from the shore isn’t going to do much good. They had to hang the scanner off the side of the ship in order to get anything. The scan was useful for checking proportions, but our modeling lead, Giles Davis, had to rely on image modeling techniques to get an accurate match for the whole ship. Since we would be directly extending the ship upwards, we needed it to be very accurate indeed.

Is there any shots in which the boat is full CG?
Only one in the final cut I think, which is a shame as the assets team and the lookdev artist who handled it, Arturo Orgaz-Casado, did such a great job of it we thought it looked better than the real one! Actually if you look carefully you can also see it on the river in the Disney logo sequence before the film starts.

How did you animated the ropes that catch the sailers?
For the pirate rope sequence we had various technical challenges to overcome and this involved a series of rigs to be developed to cater for each type of scenario. Types of challenges included snaking living ropes, ropes whipping through the shot to more difficult ropes entangling and tightening around the pirates and of the ropes themselves. All these scenarios each had a specific scripted rig build.

These rigs all used new technology we created primarily for the Nagini character we were animating for the final HARRY POTTER films and further developed to cater for our needs for PIRATES 4. We developed a new ik spline solver called the ‘curve sampler node’ which allowed for ropes to travel along the paths of the spline without the rope geometry stretching, allowing the animators control and confidence that where they were keying action to be, would be where it would stay, even if other parts of the rope were moving. This was not achievable with the standard spline solver. It also allowed for breaking away from this spline to ‘key’ on top of the path animation to give even finer control.

By far the most tricky and fiddly parts of the sequence were when the ropes wrapped around the pirates themselves, this involved roto-animating all the live action pirates in the plate painstaking completed frame by frame by our talented roto-Animation artists. These CG copies of the pirates were then handed over to animation to add the ropes to interact and perform with them. We wanted to give the ropes a hint of personality and referenced real snake motion so they didn’t feel just like an inanimate rope being manipulated by a guy off camera but had a life of their own. The end result was to make sure that the audience felt the ensuing chaos was building throughout the sequence and that the unfortunate pirates didn’t stand a chance at fighting back right through to the final wide shot of them hanging helplessly in the rigging.

Did the ship sails caused you some troubles?
Most of our QAR shots required adding additional sails to the top of the ship (they only built the lower ones practically), or completely replacing all the sails as the wind was often blowing in the wrong direction on the day of shooting. This led to some incredibly complicated comp setups since we wanted to keep as much of the real ship as possible. The more complicated shots had dozens and dozens of CG layers, splitting out the sails, ropes and masts so that they could be properly inserted into the live-action vessel. Stereo of course made this even more complicated, but our comp team handled it brilliantly.

How did you create the impressive cliff and Jack Sparrow’s jump?
This shot actually started off as two shots. They filmed a stuntman jumping off the top of a cliff on location in Hawaii, and then him landing in the pool below. The original idea was for us to blend the two by extending it in the middle in order to create the effect that it was a 100’ jump instead of a 20’ jump. As time went on it became clear that we were going to need to do a full-CG shot to create the action the director wanted.

Having plates to start from was a great help. Our environment team, led by Eddy Richards, reconstructed the edge of the cliff from a mixture of the plate and photographic reference from the location, then extended this down to create the full height of the cliff, working in a mixture of Maya and Nuke to do the projections.

For the waterfall our FX lead, Michele Stocco, created many different particle and volume simulations using Flowline, which were combined with live-action elements and projected textures in order to give the waterfall the right sense of depth.

Finally, we animated our Jack Sparrow digidouble to do the jump, using the performance of the stuntman as a starting point. In the final version, the only parts of the live-action plate that remain are the water immediately around where Jack lands, and the splash from him hitting the river.

What was the biggest challenge on this project?
Definitely stereo. For shots like the ropes sequence, where you have CG elements interacting directly with live action, the 3D placement of your CG objects has to be absolutely bang on for it to work. Getting that right was particularly tricky.

What was your feeling to be part of the Jack Sparrow saga?
Obviously the Jack Sparrow character is iconic in modern Hollywood film-making. I guess kids today will look back on him with the same fondness I look back on Indiana Jones from when I was a kid. To be a part of something like that is very exciting for all of us.

Has there been a shot or a sequence that prevented you from sleeping?
Haha! All of it?! No overall it was a great experience. The ropes sequence and some of the full-CG shots were particularly challenging, but we have a fantastic team here so I was never really worried.

How long have you worked on this film?
From start to finish about 9 months. Actual shot production was about 6 months.

How many shots have you made and what was the size of your team?
In all we did 305 shots with a team of around 90 artists, plus technical and production support.

What do you keep from this experience?
The whole experience was a lot of fun, and I was very proud of how well we adapted to our first stereo project, from pipeline and R&D, through to the artists themselves, everyone stepped up to the challenge perfectly.

What is your next project?
I’m currently working on WRATH OF THE TITANS which is going to be a lot of fun.

What are the 4 movies that gave you the passion of cinema?
RAIDERS OF THE LOST ARK, PREDATOR, THE THIRD MAN and POLICE ACADEMY 4: CITIZENS ON PATROL.

A big thanks for your time.

// WANT TO KNOW MORE ?

MPC: Dedicated page about PIRATES OF THE CARIBBEAN: ON STRANGER TIDES on MPC website.

© Vincent Frei – The Art of VFX – 2011

RANGO: Henry Hobson – Creative Director – Prologue Films

Trained at the Royal College of Art, Henry Hobson joined Prologue where he created the titles of many films such as SHERLOCK HOLMES, THE WALKING DEAD or THE THING. In the following interview, he discusses his work on RANGO.

What is your background?
An english designer, hailing from Stonehenge. I studied at the Royal College of Art, and a long history working at Why Not Associates in London; primarily on motion projects that use handmade or analog processes. I crossed the ocean to work at Prologue Films becoming creative director soon after.

How do Prologue got involved on this film?
Prologue was asked to to get involved because of projects including SHERLOCK HOLMES, ROBIN HOOD and ROCK AND ROLLA, also because we had worked for Blindwink (Gore Verbinksi’s company), designing and producing their studio logo animation.

How was your collaboration with director Gore Verbinski?
Gore’s faith and trust was amazing, he put absolute power in myself and my team, allowing us to really have fun. He simply said after choosing the design: « I want it like that, exactly like that don’t change a thing, now go away and make it! » which is pretty great.

Have you received any specific indications or references from him?
The one key area that he really wanted to make sure happened was the inclusion of the animated mariachi’s, these sections allowed me and the 3D team to play with the classic moments from rock history, from the two smashing their guitars, a hendrix mariachi owl burning his, windmilling, sliding on knees, and of course the overt tribute to Dick Dales Misirlou at the very beginning of the sequence.

What was your approach for these titles?
Building on classic spaghetti western cinematic moments, a vivid color palette and the key scenes from the film it was to capture the fun and energy the film has. My vision for the main-on-end title sequence involved a visual that was constantly shifting in and out of the environment, while retelling the story in a very cool, fun way. Each character was represented by their main characteristics – i.e. mustaches, eyes, cacti, accordions, desert elements – all set against the vibrant score which was a perfect image to Dick Dales Misirlou.

How was the assets exchange with Industrial Light & Magic?
For us it was getting the 3D character files, these were great as we got them pre-rigged allowing us to spend all the time having fun with the animations. The most insane file we got from them was the canyon, we got this amazing 3D replica of the grand canyon, absolutely huge just stunning detail.

How have you created and reinterpreted the characters and the different locations?
Firstly we choose a scene, whether it was a iconic cinematic moment, a fun freeze frame or something that allowed for an interesting fresh take on the magnificent visuals already constructed in the film. Then this was broken down, simply illustrated, tagged with a motif from the film, sunsets, cactus and such like that. From this a typographic look was designed by hand for each of the cards and finally the characters were intricately broken into a pattern of scales. The process ranged from hand drawn and painted typography, through detail character illustrations and layers of scanned in textures and papers to build the background elements.

Can you explain in detail the creation of animations?
The character animations were done in two ways, some 2D character animations with simple graphic character moves alongside some 3D mariachi moments which acted as fun ways of playing with the camera. The 3D characters allowed for us to show the classic rock guitar moments in a great way. The other elements, backgrounds environments etc, we have built layers of paper and scanned textures to create a cut out colorful world, in which the characters could interact.

How did you manage so many elements for this long animation sequence?
The key for this was to have one central location, a folder which contained the layered photoshop files that everyone was working from, layered in a particular way so that when a file is updated the animations were immediately updated. A separate folder worked in the same way with the typography, so that we could keep updating credits (as well as extra languages) right up to the last minute without dramatically affecting the animators workflow.

Can you tell us about the creative process that brought you to this beautiful style and render look?
The reason the sequence is so colorful is as a direct reference to the chameleons changing color palette, so we could have Rango moving through scenes changing color to reflect each new place. From this colorful base I then looked for scenes and sequences that the colorful environments would work with, underwater, cacti worlds, epic roger deakins sunsets canyon flythroughs and cantina bars.

What was the biggest challenge on this project?
Without a doubt the biggest challenge was the time, with a very supportive client, time was the biggest enemy. Only five weeks to turn around a full sequence. Of this it was the 3D scenes that slowed us down the most, our 2D elements fitted together pretty easily which left us spending most of the time to work out how to best integrate the two animation techniques.

How long have you worked on this film?
5 weeks with a few weeks of preparation and design, before that the project had laid dormant for nearly a year!

What do you keep from this experience?
I now have some beautiful handmade typographic illustrations on my desk!

What is your next project?
I’ve just finished some very simple sequences for a few films coming soon, THE HELP, THE THING as well as creative directing a host of elements in X-MEN FIRST CLASS. But the most interesting for me is the new sequence for FRIGHT NIGHT.

What are the 4 movies that gave you the passion of cinema?
THE 39 STEPS, THE THIRD MAN, THE LADYKILLERS (1953) and ALIEN.

A big thanks for your time.

// WANT TO KNOW MORE ?

Prologue Films: Dedicated RANGO page on Prologue Films website.

// RANGO – END TITLE – PROLOGUE FILMS

© Vincent Frei – The Art of VFX – 2011

X-MEN FIRST CLASS: John Dykstra – Visual Effects Designer

John Dysktra is a pioneer in visual effects. He is responsible for the creation of Industrial Light & Magic, he has won two Best Visual Effects Academy Awards for STAR WARS and SPIDER-MAN 2. He developed also the first computer-controlled motion control system called the Dykstraflex, which earned him an Scientific and Engineering Award. Her career includes movies such as STAR TREK: THE MOTION PICTURE, FIREFOX, BATMAN FOREVER, SPIDER-MAN 1 & 2 and HANCOCK.

How did your collaboration with director Matthew Vaughn?
I was excited about working with Matthew because of his attention to character development and his irreverent approach to the superhero genre. Fortunately we had a good first meeting.

What was his approach about visual effects?
Matthew prefers to create as much of the imagery as possible using practical effects. He wanted to work with the actors to block the scene and work out the performance even when we were going to replace some of the characters and most of the environment. Some things simply weren’t possible to shoot practically. For those we relied on a very talented group of vendors to digitally enhance live action and to create entire shots with digital resources. Time also played a big role in determining what we did and how we did it.

This should have been a real challenge to create the mutants effects especially when some of them already shown in previous X-MEN movies. How did you approach this challenge and achieved it?
We designed the way mutants exhibited their powers as if we had no film history to deal with. What was the coolest looking manifestation? Once we had a range of ideas for each mutant we began considering how they related to mutants in previous films both visually and in the X-Men comic world. Where it was the same character we had seen before like Mystique, we tried to relate the effect to earlier visuals. Where there was a family tie in comic book genealogy we tried to relate our characters power to a family similarity like Havok is Cyclop’s brother. In some cases we had no real visual reference so we simply chose the visual that we liked the best.

Can you explain how you selected the various VFX vendors?
We looked at a lot of reels and talked to several supervisors. Our VFX producer Denise Davis had extensive experience with the majority of the vendor pool. It was her knowledge that informed all of our vendor choices.

How was the collaboration with various VFX supervisors?
It was great working with Supes that knew the strengths of their organizations. We were working to tight time and budget constraints and the knowledge of the vendor supervisors critically informed all of our mutual creative decisions.

Did you create previs for some sequences include the impressive final battle?
We did extensive previs for most of the third act. These sequences were so complex that it was going to take all the time we had to execute them. As a result the previs that we did in the first days of the film became the “footage” that our editor cut for the final sequence. The cut sequence then informed what shots we ended up completing. It turns out the first shots prevised were some of the last shots delivered.

How did you design the effects of Azazel teleportation?
We came up with a nice transition effect that echoed the teleportation effect of Nightcrawler, he is supposed to be Azazel’s son. And we added a touch of fire.

Can you tell us about the shooting of VFX sequence such as the attack of Azazel in the CIA building or the final battle?
The final sequence was shot on a beach in Georgia on the U.S. east coast. We had to shoot the sequence in the winter so it turned out to be very cold. From the previs we knew we were going to have to add CGI Russian and American Navy’s to the ocean off the beach. Time constraints limited how much set we could build to we had to add the wreck of Shaw’s sub and the X-Jet as CGI elements. The wind blew so hard that it was impossible to have practical smoke on the beach so we had to add most of the smoke in post composite. A cold snap killed all the palm trees that were supposed to provide the background for the set so we had to add digital palm trees. The weather varied the lighting so much that we had to replace many of the skies. Other than that it was easy.

How did you come up with an impressive shot where Sebastian Shaw destroyed the lobby of the CIA with a huge wall of fire?
We visited a location in London that was circular. Matthew liked it very much and when we were discussing how Shaw should display his power it just seemed natural that it should shoot out and wrap around him.

Speaking about Sebastian Shaw, how did you design the effects of energy absorption and its almost demonic appearance at the end of the film when it ingests nuclear energy?
We started with illustrations. We created a CG version of Kevin Bacon and shot him performing his interpretation of what his expression and body language would be while he absorbed energy. We then added distortion to the CG version of Kevin and mixed in composite with the live action performance. He is good and grotesque.

The mirrors in the hidden room of Sebastian Shaw should have been a nightmare to shoot. How have you managed and done those shots?
We shot the actors in a green screen room with a the floor and a couple of set pieces. Then all the reflections were added as CG assets. That means that 95% of the set, all the reflections of the actors, all the environment and all the destruction that happens in the sequence were CGI.

Can you explain to us the death shot of Sebastian Shaw? How was it created?
We simply added a CG coin and wound to the live action shot of Kevin in the destroyed mirror room.

How was did you follow the VFX work progress with VFX vendors around the world?
We used Cine Sync and conference call connections. For preliminary reviews and then reviewed full resolution files in a screening room for final approval. We and our vendors had very long days because of time zone differences.

Can you tell us your feeling to mix with superheroes with retro look movie?
I didn’t feel like there was any limitation to what the mutants could do based on the period of the film. Mutant powers are timeless. I felt more like we were using new technology to make a very accurate record of events that happened in the 60’s. It didn’t need to look like it was shot in the 60’s it just needed to feel like what we were seeing was of that period.

What was the biggest challenge on this project?
Time, time and time. This is the shortest production/post period for a film of this scope that I have ever worked on.

Has there been a shot or a sequence that prevented you from sleeping?
The most difficult shots were shots where more than one vendor had to provide elements. “Shared Shots”. They were very difficult to coordinate because invariably one vendor had to finish their portion of the work before the next vendor could begin. There were “Shared Shots” in most of the major sequences.

How long have you worked on this film?
Almost exactly one year.

How many VFX shots are on the movie?
About 1150 shots

What do you keep from this experience?
That Good Fortune was with us. Even with the exceptional collaboration and cooperation of all the creative elements that made up X-MEN everything had to go exactly right in the post phase of this movie. And I do mean everything! And thankfully it did.

What is your next project?
I’m attached to direct a project called SUPER ZERO that is being produced by Rhythm & Hues.

What are the 4 movies that gave you the passion of cinema?
2001: A SPACE ODYSSEY, MARAT/SADE, SILENT RUNNING and STAR WARS.

A very big thanks for your time.

© Vincent Frei – The Art of VFX – 2011

PIRATES OF THE CARIBBEAN – ON STRANGER TIDES: Greg Oehler – VFX Supervisor – CIS Hollywood

After he has discussed about his work on THE GREEN HORNET, Greg Oehler is back on The Art of VFX and explains his work on the new Jack Sparrow adventure, PIRATES OF THE CARIBBEAN: ON STRANGER TIDES.

How did your collaboration with director Rob Marshall and production VFX supervisor Charlie Gibson?
Because our body of work was fairly modest, I did not meet with Rob Marshall at all. Our interface with Charlie was largely done remotely and through his producer, David Conley.

How does CIS Hollywood got involved on this film?
CIS Hollywood has worked on all of the PIRATES OF THE CARIBBEAN movies and has enjoyed a very good working relationship with Charlie Gibson and his teams.

What are the sequences made by CIS Hollywood?
We have two sequences that bookend the movie, the old man clutching the book being pulled from the water at the beginning and Jack stranding Angelica on the island at the end. The rest of our shots are spread out throughout the body of the film.

Can you explain in detail your work on the sequence with Jack and Angelica on the small island?
As Jack and Angelica were supposed to be rowing out in a remote part of the Caribbean Ocean, our main task was to remove the land masses that existed behind the actors. While not too technically challenging, we aimed to keep our work seamless and invisible.

On set pictures

What did you do on the leg of Barbossa?
In these shots, Barbossa’s peg leg was a prop attached to Geoffrey Rush’s knee. We removed his leg from the knee down.

Can you explain in detail your work on the different retiming and fix?
Most of the re-timing shots took place during various sword fighting scenes. The re-time was to speed up the action since the actors could not wield swords safely at full speed. These would not normally be difficult shots, however, building a specific and fluid re-time that was identical and properly offset for stereo right and left eye proved to be a challenge. No single re-timing application was sufficient and many of these shots became full, multi-layered composites.

Can you tell us about the book that takes the old man came out of the sea?
The book was a set prop originally passed up for any effects work. The film’s producer, Jerry Bruckheimer felt the book looked too clean and new for something that had been under the water for 200 years. We created some simple CG geometry and projected some vetted artwork. This got us mostly there. The remaining challenge was to insure our 2D texture would work in stereo. We used lighting cues inherent in the original photography to aid and guide this process.

How did you create the set extensions? And what was the real size of these sets?
These were not as much set extensions as they were partial set replacements. A stereo 3D film forces you to find different solutions to old problems. On this film, we had to remove several prominent lens flares and rigs. Painting is not always a desired solution for lens flare removal on 2D movies, much less 3D movies. On several of these shots, we re-built set pieces and atmospherics and offset one eye to another, similar to a 2D to 3D stereo conversion.

Does the stereo caused you problems?
I have had prior experience with stereo, however, audiences have become more sophisticated and the need for stereo alignment between eyes is more refined, thus, greater attention to stereo offsetting is mandatory. Working in stereo did change the way we approached many issues, the flare removals and re-time, as I mentioned, but also in forcing us to look at our work in a very different way, literally. Without a solid pipeline for looking at and assessing stereo images, this work could not have been done in our time frame. In addition, there were occasional anomalies with the non-dominant camera, shot through a mirror in this case. This prompted us to work beyond the alignment software and, in some cases, align shots via compositing.

What was the biggest challenge on this project?
The biggest challenge for us was negotiating through the stereo issues in the boat sequence of Jack and Angelica at the end of the movie. Production had some difficulties with the stereo camera equipment during this sequence which created a disparaging gap between foreground and background distances between the right and left eyes. The stereo software we used, Ocula, which worked brilliantly in most instances, could not manage such a gap and we had to devise other ways compensate. Many of these shots had to become fairly involved composite shots in order for the eyes to align properly.

What was your felling to be back with Jack Sparrow?
I really like these movies. When they first started the PIRATES OF THE CARIBBEAN franchise, I would not have guessed they would be so much fun to watch, much less, to work on.

Has there been a shot or a sequence that prevented you from sleeping?
Only in the few occasions we had to work into the night.

How long have you worked on this film?
Our schedule ran from late January to early April of 2011.

How many shots have you made and what was the size of your team?
Our final shot count came in at about 70. The team we had was fairly small, myself plus three, sometimes four.

What do you keep from this experience?
Anytime one gets to work on a blue ribbon project like this, one gets to feel charmed. Additionally, it is always pleasant working with Charlie and his team and it is a joy to work with the team we have here.

What is your next project?
I am currently working on THE ODD LIFE OF TIMOTHY GREEN.

A big thanks for your time.

// WANT TO KNOW MORE ?

CIS Hollywood: Official website of CIS Hollywood.

© Vincent Frei – The Art of VFX – 2011

PIRATES OF THE CARIBBEAN – ON STRANGER TIDES: Simon Stanley-Clamp – VFX Supervisor – Cinesite

Simon Stanley-Clamp began his career in feature film at Mill Film with LOST IN SPACE. He remained there until 2003, he has supervised the compositing of movies such as GLADIATOR and BLACK HAWK DOWN. He joined Cinesite in 2003 and oversees movies like MOON or CLASH OF THE TITANS.

What is your background?
I began my career creating high-end vfx, idents and graphics for commercials and TV. My first feature film project was a pre-visualisation role for LOST IN SPACE (1998). Before joining Cinesite I was at Mill Film, where I comp supervised and digitally supervised on many films including GLADIATOR (2000) and BLACK HAWK DOWN (2001) and various HARRY POTTERS. I made the move to Cinesite in 2003 and have supervised many of the company’s projects including the award-winning MOON (2009), CLASH OF THE TITANS (2010) and now PIRATES OF THE CARIBBEAN: ON STRANGE TIDES (2011).

How was your collaboration with director Rob Marshall and production VFX supervisor Charlie Gibson?
It came down to budgets really as the tax break the production received for shooting the film in the UK meant that some of post work had to be awarded to UK companies. Also Pat Sandston, associate producer, had worked with us before so he knew what we were capable of creating.

How did Cinesite get involved in this film?
We were sent the script and pitched for a large chuck of the work. In the end we were awarded about 300 shots. This was Cinesite’s first foray into stereo visual effects and required building a new pipeline to accommodate stereo files. Once the pipeline was in place we did some test shots – including footage from our work on CLASH OF THE TITANS.

What are the sequences made by Cinesite?
Our main sequence was the dramatic carriage chase through London. For this we were tasked with creating large-scale photorealistic 3D environments. The complex 3D environments included full CG street builds with detailed period buildings, as well as set and background extensions. Atmospheric smoke, smog and fog were added to enhance the old London feel, with extras, shot in stereo as blue screen assets, were extracted, put on cards and placed in true stereo 3D space, to appropriately match the photography and flesh out the London street scene.

Other shots we worked on include creating Barbossa’s peg leg throughout the film by replacing the blue sock Rush wore on set with a digital peg leg. And creating highly detailed CG poison dart frogs in four different colours.

Can you explain the shooting of the chase sequence in London? What was the actual size of the set and bluescreens?
The film was shot in native stereo 3D using Red One cameras and Pace 3D camera rigs. It spans across four different locations, from Hampton Court Palace through to Greenwich, Middle Temple and at the studio in Pinewood. The main part of the chase takes place in Greenwich where we replaced four large bluescreens with Digital Environments – 3D modelled buildings added in true stereo space. Two of the bluescreens were 250ft.

How did you create these realistic environments?
The buildings were realised using photographic reference from the Greenwich area and csPhotoMesh, which is our proprietary photogrammetry and 3D scene reconstruction software. Given a set of digital images of a static scene, CsPhotoMesh produces a textured 3D mesh accurately representing the scene geometry and 3D cameras matching the original photos positions.

Have you created digital doubles for Jack Sparrow and to populate the streets?
We didn’t create digi-doubles of Jack Sparrow. To populate the street scenes extras were photographed in stereo, on blue screen, extracted, re-projected onto cards in Nuke and placed in the 3D scene.

What Barbossa was wearing on the set to simulate his wooden leg?
To aid in the removal of his real leg he was wore a blue sock with tracking marks that were placed every 90 degrees so we could get a full track of his leg. Using Maya we created a digital wooden peg leg it’s then placed back in to the scene from the 3D derived track, the leg still required some hand animation to get the movement and timing correct – the brief is for his leg to be completely rigid, but in reality, Geoffrey Rush often bends at the knee. We had a practical leg onset to shot for lighting references.

How was created and composited his wooden leg?
The peg leg was built in Maya, tracked in 3D Equaliser and composited in Nuke.

The work to recreate the scene behind the wooden leg had to be very long. How did you do it?
This was quite a time consuming task. When you think that someone’s leg and foot is much wider than a peg leg, it required a lot of work to rebuild parts of the image that were covered by Rush’s real leg. Details like this should go unnoticed by the cinema audience, but they’re often the trickiest tasks to do. I spent time on-set taking lots of reference photos – so we were able to work from these to fill the gaps in digitally.

Can you tell us about the frog and red ones in the Barbossa jar?
We created CG frogs in four different colours and heavily textured – including details such as sub-surface scattering to give them a moist translucent look. In the film the frogs are really shrunk down so they probably didn’t require as much detail, but they look great and we always enjoy creature work. They were modelled in Maya.

What was your feeling to be part of the Jack Sparrow saga?
It’s a great feeling to be associated with such an established franchise. And it’s great that the first 10-12 minutes in the film is uninterrupted Cinesite work.

What was the biggest challenge on this project?
I’d have to say that it was the tracking, it has to be spot on due to the stereo environments.

Has there been a shot or a sequence that prevented you from sleeping?
Not really.

How long have you worked on this film?
The shoot took place in October 2010 and we delivered in April 2011, so just over six months.

How many shots have you made and what was the size of your team?
We completed 300 shots and the team was 98 artists.

What do you keep from this experience?
I’d have to say to be mindful of the stereo agenda on shots and always listen to your stereographer.

What is your next project?
I’m now working on the Disney/Pixar film, JOHN CARTER OF MARS, that’s due for release in 2012.

What are the 4 movies that gave you the passion of cinema?
BARBARELLA (1968)
SILENT RUNNING (1972)
DARK STAR (1974)
WITNESS (1985)

A big thanks for your time.

// WANT TO KNOW MORE ?

Cinesite: Official website of Cinesite.
fxguide: Article about PIRATES OF THE CARIBBEAN – ON STRANGE TIDES on fxguide.

© Vincent Frei – The Art of VFX – 2011

VES Open Letter

Little exception on The Art of VFX, here is a very important news.

the open letter of the Visual Effects Society about the deteriorating conditions in the VFX industry:

http://www.visualeffectssociety.com/node/2425

THE PREY: François Ferracci – VFX Supervisor & Co-founder – Pik.sel

François Ferracci has worked for 10 years as a graphic designer and has created many film credits as FROM PARIS WITH LOVE or Sheitan. He founded Pik.sel with David Goldenberg.

What is your background?
I worked for 10 years as a graphic designer, compositor and freelance motion designer.
I worked on FROM PARIS WITH LOVE, SKATE OR DIE, THE NEW PROTOCOL, directed a dozen movie titles (SHEITAN, KING GUILLAUME, FROM PARIS WITH LOVE, PIECE MONTEE, LULLABY FOR PI …), supervised music videos and commercials. Then I finally decided to start my own company, Pik.sel, with a sound designer, David Goldenberg. We decided to set up a post-production company on a human scale, and to combine our skills and expertise in both image and sound.

How did the collaboration with director Eric Valette and VFX supervisor Laurens Ehrmann?
I know Eric from his previous film, which I had supervised the effects, and it went very well. We have combined our strengths with Plug Effects for this film and co-supervised the film with them. We are naturally distributed the sequences with Laurens Ehrmann to oversee the movie. It was very rewarding and interesting to work with him.

How do Piksel got involved on this film?
Eric contacted us very early in the film. He wanted us to realize the VFX for the film and feel « at home », able to react very quickly on our proposals, in a light-sized structure of post-production and have some contacts for the best possible result. I realized all the storyboards for action sequences and VFX sequences. We could therefore anticipate early all possible technical solutions in relation with the cinematographer Vincent Mathias and production designer Bertrand Seitz. This allowed us to know very quickly what kinds of effects we were going to shoot.

What are the sequences made by Piksel?
We made the sequence of defenestration of Albert Dupontel and a policeman, all the muzzle flash and bullet impacts, Prison and TV screens compositing, screens and video feedback from the police, stabilizations, paint work, a digital wounding.

How did you shoot the elements for many monitors and TV screens and how did you created them?
The footages composited in the screens were shooted by the second crew. We made the designs when they were needed, then we have composited them. The screens on set were just turned off. We then tracked and « lit on » them.

What references have you received from production for the screens?
These screens were already shot in DV in order to have a look a bit degraded. We pushed a little this degradation, added drops, made color grading.

Can you explain what you did for the stairs sequence?
We performed a double pass when Albert Dupontel jumped on the policeman before take him in a fall. On a second shot, we had to isolate Alice Taglioni in a another take, rotoscoping her, and then integrate her in front of the exploded window, because it was not on the real location.

How does the impressive fall of Dupontel and policeman and how was she shot?
For this fall, we had to connect the fall with the real location and a set in studio. Albert Dupontel and the stuntman he pulls in his fall have first jumped from the third floor of a building in the Paris region, windows closed. Then one floor of the facade was reconstructed in a studio. We then connected the two falls.

Can you explain your work on this sequence?
We blew the windows with debris shot on green screen at 100 fps, created CG debris, we did 2 matte-painting, sets matching, paint work (technical team, safety boxes, cameras), some rotoscoping . It was essentially a big compositing work.

How have you recreated the set for this fall?
We reconstructed the set mainly from photos taken on location at 360 degrees.

Can you explain the design and creation of beautiful end credits?
We started with the idea of red bars to remind the universe of prison. From there, we pushed this concept to a long backward traveling through the bars to remind the evasion of the character. We have composited within the bars of characters portraits. There was a lot of try, lighting research to get to the final result. This work was done in collaboration with one of our designers, Serge Miot.

What references have you received from the director?
Eric Valette had a lot of ideas, we explored a few tracks together, to end to this final result. He gave us great freedom.

What was the biggest challenge on this project?
Give an overall VFX coherence and they have to be mostly invisible, realistic.

Has there been a shot or a sequence that prevented you from sleeping?
Not really, maybe a shot a little « tricky » where we have to clear a car and move it forward a few meters. The shot was long and a little hard to track.

How long have you worked on this film?
3 months with titles.

What are your software and pipeline at Piksel?
We work primarily with After Effects for compositing. It is a flexible and powerful tool that allows us to work at the same time compositing and motion design for the titles designs.

How many shots have you made and what was the size of your team?
About sixty shots and 3 artists.

What do you keep from this experience?
A real pleasure and a wonderful collaboration with Plug Effects.

What is your next project?
The main title of the movie POSSESSION that we just shot. An animation of a logo in stereo, and a TV show project.

What are the 4 movies that gave you the passion of cinema?
Tough question … BLADE RUNNER, HEAT, GOODFELLAS, BONNIE & CLYDE.

A big thanks for your time.

// WANT TO KNOW MORE ?

Piksel; Dedicated THE PREY page on Piksel website.
Plug Effects: Official website of Plug Effects.

// THE PREY – VFX BREAKDOWN

// THE PREY – TRAILER

// SHOWREEL 2011 – PIK.SEL

SHOWREEL PIK.SEL 2011 from Francois Ferracci on Vimeo.

© Vincent Frei – The Art of VFX – 2011

THOR: Vincent Cirelli – VFX Supervisor – Luma Pictures

Vincent Cirelli and his team are back on The Art of VFX. This time, they talk about their work on THOR.

What is your background?
Vincent Cirelli is the supervising creative at Luma Pictures with more than 40 films to his credit. With a background in art direction and years of practical, hands-on experience in visual effects production, he possesses the rare combination of artistic and technical skills necessary to lead large teams of artists on complex visual effects projects.

How was your collaboration with director Kenneth Branagh and Production VFX supervisor Wesley Sewell?
Payam Shohadai, Executive VFX Supervisor // We worked closely with Wes throughout the job to bring Kenneth and Marvel?s vision of Thor to life, exploring theoretical topics such as the motivation behind the movement for a metal suit of armor, and the « science » behind Thor’s physical transformation from a mortal back into a god. We really enjoyed examining the various ways to meld and integrate elements of Thor’s mystical world into the grounded reality of « Midgard » (Earth) in a believable and photo-realistic way.

How did Luma Pictures get involved in this project?
Payam Shohadai, Executive VFX Supervisor // Our Director of Business Development, Lindsay Hallett had previously worked with client side VFX Supervisor, Wesley Sewell, so when she landed here at Luma, they reunited and established the relationship between Luma, Wes and Marvel. In the initial meeting, it was decided that Luma would do a test based on a very art directed type of storm described by Wes. In just a handful of weeks, Luma pulled out all the stops and created a full sequence, sound and all and won a fantastic piece of the film.

What are the sequences created by Luma Pictures?
Steve Griffith, VFX Producer // Luma did over 300 shots on the film. Some of the larger sequences included the opening sequence where Thor comes to Earth, the amazing battle between Thor and The Destroyer and the Bifrost arrival effect on Earth. Luma also contributed casket FX, a desert town extension and various miscellaneous FX.

Can you tell us what information you received to create the arrival of Thor on Earth?
Steven Swanson, Senior Producer // Luma had a meeting with Wes very early on in which he passionately explained the moment Thor comes to Earth and why. Beyond the customary storyboards, previz, onset reference, and conceptual artwork, we received a fascinating array of reference materials involving rocket-engines, tornadoes, storm-clouds, lightning, and aurora borealis. It was great fun doing research for Thor.

How did you create the storm?
Vincent Cirelli, VFX Supervisor // Luma developed the Bifrost Storm sequences that deliver Thor, The Destroyer and The Warrior Three to Midgard (Earth). The event is a carefully choreographed series of effects that begin as an aurora borealis, and builds into a churning supercell sheathing the portal mechanism, the Rainbow Bridge.
We defined the sequence using detailed concept art and animated primitives to block out the look and timing of the shots. In parallel, a partitioning system and visualization tool was developed that allowed us to art direct and proof out simulations quickly without having to deal with dense data sets until we were ready to render. The simulations were developed using FumeFX, Maya and bevy of home grown tools.

Can you explain the creation of The Destroyer?
Richard Sutherland, CG Supervisor // Marvel provided a 3d sculpt of the Destroyer, along with photo reference of an almostfull-size model that had been built. After reviewing the reference, and discussing with the director how the destroyer should move and what he should be made of we produced a series of concepts showing the Destroyer composed of individual metal slats that would slide against each other as he moved. With this concept approved we built a model, slat by slat, in Maya and rigged it with a custom built system to assure that each moved in concert with the others.

What were your references for The Destroyer and for its animation?
Raphael A. Pimentel, Animation Supervisor // In animation, an abundance of references were used in molding The Destroyer’s swagger and iconic battle poses. Some of the most used materials were comic books, armored knight battles, suited bomb squads units and wild west films (for the face off at high noon showdown with Thor).

Pavel Pranevsky, CG Supervisor // For the metallic surface of the Destroyer, we researched weathered and worn battle armor as well as gun metal reference. While seemingly simple, achieving the final look of the Destroyer was more complex than it seems. The final metallic look was a combination of shader layering and compositing techniques, that allowed us to finely tune his appearance on a shot-to-shot basis.

How was the shooting of the sequence where the Destroyer destroys the small town?
Justin Johnson, Digital FX Supervisor // Shooting the plates for that sequence was very exciting. The pyrotechnics team demolished the town over a few day period. They were rigging buildings with gasoline and flying debris, using cables to fly cars and stunt people through the air. We would go in after each shot and shoot chrome balls, HDRI, and color charts. The data wranglers were on set constantly recording camera data on 6-7 cameras for each shot. We were using our DSLRs to shoot video and stills of everything on set, capturing as much visual information as we could.

How his presence was simulated it on the set?
Justin Johnson, Digital FX Supervisor // We had a full-scale replica of The Destroyer that initially stood 9 feet tall (but was made much taller once CG) and could be wheeled in and out of the set as needed. It was useful as not only reference plates, but also gave the actors and crew an idea of what exactly was destroying the town. Although we were able to take the look of The Destroyer a step further in our CG incarnation, the practical Destroyer plates shot on set served as a priceless tool to lock down the look of the surface properties in the given environment.

Was the metallic look of The Destroyer a challenge to achieve?
Pavel Pranevsky, CG Supervisor // The look of the metal was fairly complex, and certainly presented some technical challenges. Because The Destroyer was so reflective, it was imperative that we got solid on-set lighting reference to make sure that the character looked like he « belonged » in the plates. We carefully matched up HDR images captured on set, with partial photogrammetry of the set environment, camera projections of plate photography as well as various smoke and fire elements, to create a kind of virtual environment for The Destroyer to reflect. On the technical side of rendering and compositing The Destroyer, we had to strike a good balance between clean useable renders and acceptable render times.

How did you create the interactions between the Warriors and The Destroyer, especially the shot where Sif jumps on his back?
Raphael A. Pimentel, Animation Supervisor // The most enjoyable shots for an animator to work on are the ones where digital characters interplay with the actors. In the sequence where Sif attacks The Destroyer, the footage was shot with Sif standing on a platform over a green screen back drop. The platform was then lowered from a 45 degree angle to a resting horizontal position. Luma animators then took this footage into Maya, in order to accurately retime the footage with an animated reacting Destroyer. Also giving more freedom to the animator to enhance Sif’s jumping distance and impact. Luma animation takes pride in maximizing the interaction of characters by combing through the frames looking for (the subtle) key points to play out actions that might call for reactions and vise versa, creating a granular fine relationship between the subjects and maximizing on the believability of the scene.

Pavel Pranevsky, CG Supervisor // Our animation team did a stellar job of doing digital-double matchmoves for all the character interactions with the Destroyer. A digital double of Sif was rigged and animated to match her real performance, which we could later use in lighting and rendering to simulate the interaction with our cg character. We used projections of plate photography, combined with some texture work from our asset department, to achieve a seamless match between the real Sif and our digital Destroyer.

The Destroyer uses a beam of fire, how did you design and animate it?
Richard Sutherland, CG Supervisor // Based on the initial concepts from Marvel, we did a variety of tests to find the right balance between fire and energy in the beam. It had shoot quickly, like a laser, but seem like it was made of fire. Finding the right balance of licking, trailing flame and hot energy core was tricky, but I think we found a good balance. In the end the beam was a combination of volumetric fire simulations, and rendered geometry.

How did you create the arrival of the hammer and the armor of Thor?
Richard Sutherland, CG Supervisor // We had a bit of artistic liberty on that particular part of the sequence. The travel of the hammer from the Shield base to the town was pretty locked down, but the transformation effect concept was not entirely finished when we started in post production. We have a very talented technical animator, who came up with a few different examples of the armor forming on Thor’s body using a variety of hand animated and procedural techniques. Once a concept was approved he added a bunch of lighting to tie the formation together.

Can you explain the creation of the impressive fight between Thor and the Destroyer? With so many elements to manage, was this complicated to execute?
Richard Sutherland, CG Supervisor // For the Thor and Destroyer battle, we received plates and post-viz from production for each shot. Then our animation team blocks in the action of the Destroyer and his beam, any storm or debris elements, and a digital double Thor where needed. Once the blocking is approved and animation is completed, the shot goes through our lighting and effects teams. Lighting produces renders of the Destroyer and Thor, while the effect team provides storm elements, beams and explosions. Our compositing team layers all of these elements over the plate making everything fit together to complete the shots. The more complex shots of the Destroyer and Thor fighting in the storm could sometimes include over 100 render passes! We completed those shots in stereo, so each render pass had both a left and right eye, doubling the data and management overhead. Fortunately, we have a wonderful shot tracking system we developed which helps all of our artists stay synchronized. Each artist can publish elements to be included in the final shot, and the compositors receive notifications of new elements to include which they can automatically bring into their Nuke scripts.

What was the biggest challenge on this project?
Steven Swanson, Senior Producer // The majority of our shots were relatively epic in that they had many, many CG elements (the Destroyer, dust debris, smoke, ash, fire, storm clouds, lightning etc). In particular, Destroyer and Bifrost arrival look development extended well into the shot production schedule, which meant we had to rapidly propagate changes to a significant number of shots. In addition, sequence edits were constantly improving which required being nimble in all departments. In my book, the real heroes of THOR were the outstanding production side team and Luma’s own rock stars who rose to the occasion to meet these creative and logistic challenges.

How long did you work on this film?
Steve Griffith, VFX Producer // From asset creation, through shot production and 3D deliveries, the whole project took 15 months – from start to finish.

What was the size of your team?
Steve Griffith, VFX Producer // Our crew for this film was roughly 80 team members (the vast majority being Luma?s core staff), between sups, artists, production management, and support staff.

What do you keep from this experience?
Vincent Cirelli, VFX Supervisor // There is a profound amount of detail and energy that has been injected into the DNA of all the Marvel characters and their worlds, and it is with this measure of scrutiny that we poured over every element we created in CG for THOR. I believe this to be the key to Marvel’s substantial success and very loyal fan base.

What is your next project?
We are currently in production on X-MEN: FIRST CLASS, NOW, CAPTAIN AMERICA: THE FIRST AVENGER and FRIGHT NIGHT.

A big thanks for your time.

// WANT TO KNOW MORE ?

Luma Pictures: Dedicated THOR page on Luma Pictures website.

// THOR MOVIE CLIP – Meet the Destroyer

© Vincent Frei – The Art of VFX – 2011

SOURCE CODE: Yanick Wilisky – VFX Supervisor VFX & Co-founder – Modus FX

Yanick Wilisky worked nearly 10 years at Hybride where he participate in projects like SPY KIDS, 300 or SIN CITY. In 2007, he founded with Marc Bourbonnais, Modus FX. He supervised the effects of films as MR. NOBODY, BARNEY’S VERSION or THE AMERICAN.

What is your background?
It all started in 1986 when I saw my first CG short film TONY DEPELTRIE. It was love at first sight. It’s only several years later that I graduated from a computer graphic program. Got my first internship at Fantome in Paris which where producing INSEKTORS at the time. Got my first contract at Mainframe Entertainment in Vancouver to work on BEAST WARS and REBOOT. After a few years I moved back to my hometown in Quebec to join the team at Hybride where I worked on more than 25 films over 10 years. I then moved on and founded Modus FX with Marc Bourbonnais. We will be celebrating our 4th anniversary in July!

How was your collaboration with director Duncan Jones and production VFX supervisor Louis Morin ?
I have work with Louis on five films including SOURCE CODE. Louis is a truly wonderful visual effects supervisor. He has a collaborative approach to the creation process that highly motivates a team and the end result reflects on screen. It was my first experience with Duncan. I was a big fan of his earlier work (MOON) and its always very exciting to work with a visionary director. The whole team knew they were in good hands and we gave Duncan everything we had.

How did Modus FX got involved on this show?
Louis contacted us in the winter of 2010 asking if we would be interested in doing some previz on his next production.We had already received the script and were very impressed with the potential so we jumped on the opportunity. At the same time, as the previz was progressing, we started looking at potential sequences and assets for which Modus FX could make a difference in the film.

What are the sequences made by Modus FX?
We ended up doing the vast majority of the CG train shots (aerial, medium and close-up shots), the « Glenbrook Station » area (CG Suburbs, CG Surroundings, Set extension of the station, CG Parking lot), a few interior train windows, a few explosions, Chicago mayhem sequence (crowd simulation, traffic jam) and most of the CG assets (stunt doubles, CG vehicles, CG environments).

Can you explain to us in details the creation of the CG train and its integration?
The train was build from original design that was provided to us by the art department. We recreated it part by part, accurately, from existing references we had found from our research. We ended up doing over 3,000 train pieces. Most of these parts had a very reflective surface. Louis provided a few hundred HDR shots of a similar train from every angle which was very useful. The other challenge with such a reflective surface is all the reflection from the surrounding interaction. We solved this challenge using three different techniques (CG Doubles, Passenger plates used as a reflection pass and additional passenger projected when needed).

What was the main challenge with the train creation?
To photo-realistically obtain the proper reflection property of all the pieces of the train was the biggest challenge of all.

How did you create the Glenbrook station and its environment?
We started by creating a 2km aerial map based on accurate data from the Chicago area with streets, vegetation, ground elevation, traffic lights, etc. We based our train station distance from downtown Chicago with information from the script: We knew the train was stopping at Glenbrook at 7.45am, knew the speed of the train, how much time before the explosion and its exact position at that time. Once the 8km distance was confirmed we then started laying all our shots with our accurate CG model of Chicago. We created a vegetation bank of all type of trees in the Chicago area. And we finally created a bank of CG cars for the parking lot. With all these assets in place it was then easier to create a realistic surrounding environment.

How was the collaboration with the others VFX vendors and the assets sharing?
Modus was providing the majority of all the assets to the other vendors and since we were all using similar CG software packages it eased up the process. We could then exchange scripts with the other vendors so they could understand the structure before implementing it back into their pipeline.

How did you create the evacuation scenes of Chicago?
We had a plate with cars passing in them which where very useful for references. The layout was created from actual photos from the location from different points of view. We created the traffic jam simulation and the crowd evacuation with Massive. Duncan kept on asking for more people and more cars which was the perfect thing to ask in this situation. It definitely pushed our limits in optimizing and rendering capabilities.

Can you explain to us the explosion shots and in particular the one with Jake coming in front of us?
We had to create a specific kind of FX where the explosion detonate right behind Jake and he is thrown towards the camera. Louis Morin had filmed some fantastic interior train explosion elements which we used as a base. We started the action with the live acting of Jake Gyllenhaal and we did the CG takeover on a few frames after that.

What was the biggest challenge on this show?
Every aspect had its own challenges: for the train, it was the close-up shots, for the mayhem/evacuation, the heavy simulation and geometry, and for the CG environment of the train station, it was to recreate an environment so that people would never feel it’s not real even though more than half of it is computer-generated.

Was there a shot or a sequence that prevented you from sleeping?
It was the biggest project that Modus had overtaken in its young history. We did have more then a few late nights but never one that stopped me from sleeping. I needed every single minute of rest I could get because there would be more challenges to overcome the next day.

What are your software and your pipeline at Modus FX ?
We use Autodesk Softimage as our main CG package, The Foundry’s Nuke for compositing, Side Effects’ Houdini for simulation, Massive for crowds and Assimilate Scratch for daily reviews and digital intermediate.

How long have you worked on this show?
We ended up working 8 months on SOURCE CODE.

How many shots have you made and what was the size of your team?
We completed 98 shots and provided 60 CG backgrounds to various vendors.
We had up to 75 artists at some point in the production.

What did you keep from this experience?
The Best. Honestly. Louis was great. Duncan was great. Got invited to the premiere during the SXSW in Austin, TX. We can totally achieve the best of the best when we work as a team like we did.

What is your next project?
We are currently working on IMMORTALS (Tarsem Signh) and EVERYBODY LOVES WHALES.

What are the four movies that gave you the passion for cinema?
Hard one. FIGHT CLUB blew my mind and got me very excited. THE MATRIX, definitely. I would have to say EVIL DEAD from Sam Raimi got me hooked pretty early and most lately INCEPTION. There is obviously a lot more but there the first one that popped.

A big thanks for your time.

// WANT TO KNOW MORE?

Modus FX: Dedicated page about SOURCE CODE on Modus FX website.
fxguide Article about SOURCE CODE on fxguide.
Source Code: Swiss Official website of SOURCE CODE.

SOURCE CODE – VFX BREAKDOWN – MODUS FX

© Vincent Frei – The Art of VFX – 2011

SOURCE CODE: Louis Morin – Production VFX Supervisor

Before overseeing movies, Louis Morin was a freestyle skier then began working on commercials. In 2000, he joined Buzz Image where he oversaw such films as THE AVIATOR, THE FOUNTAIN, or THE ETERNAL SUNSHINE OF THE SPOTLESS MIND. In 2006, he became freelance supervisor and supervised the VFX for films like I’M NOT THERE, THE AMERICAN or MR. NOBODY.

What is your background?
One day at 14 years old, I went to see 2001: A SPACE ODYSSEY. I was hooked, I wanted to make films like this! How can a guy can make movies like this? So I became a World Cup freestyle skier, I shot ski films, made commercials with intensive vfx, and work ten years at Buzz as a vfx supervisor.

How did the collaboration with director Duncan Jones?
Duncan knew what he wanted to do with this movie. He inspired himself through Gondry’s methodology. So what’s best than hiring the VFX supervisor of ETERNAL SUNSHINE!
Duncan gave me his trust pushed me even further to make VFX as good as possible. Although we didn’t have the A studio level of vfx budget on this film.

For more infos: http://www.mtv.com/news/articles/1661141/source-code-jake-gyllenhaal.jhtml

Does his experience in visual effects with with his first movie, MOON, helped hime to handle this project?
Any experience is a valid one, on this movie we opted full CG for the train where in MOON they shot miniatures. Also his commercial experience was always of use to challenge me and his way of always finding cool references to inspire us.

Can you tell us how you get involved on this movie?
SOURCE CODE was planned to shoot in Montreal. They contacted me and as my Michel Gondry connection was a selling point.

How was the shooting of the sequence in the small station? What was the actual size of the set and where did you shoot this sequence?
We started to shot right in the middle of winter, the temperature in Montreal was minus 18degree celcius, we were supposed to shoot exteriors before shooting the train in studio.
In pre production I offered them to shoot the other way around. The producers looked outside at the blizzard and gladly accepted. This would mean we wouldn’t know what we would get for the exterior train plates. Our DOP, Don Burgess devised a shooting plan with a general ambiant light with little light interaction. We would then add light interaction in post. Rodeo FX devised and wrote scripts to have interactive light reacting to background plates.

So when it was time to shoot our train station which was in Ottawa the production lost the location. Barry Chusid, the production designer, proposed to build a set, we agreed to build only the first level, there would be no tracks, no train, and the crew parking on the other side would act as the one of the station. All this became a heavy duty vfx sequence, adding a roof cg is fairly easy and looks great. But we pushed the envelope as Duncan wanted a better, more realistic parking opposite the train station. So based on the references I shot in Chicago, Modus had to rebuilt the whole parking cars, street, trees, suburbs and Chicago skyline in CG.

Can you explain to us how you choose the different VFX vendors?
I have through years worked with extremely talented artists, I keep track of them and follow them wherever they go. On MR. NOBODY, I used 3 vfx houses, Rodeo FX, Modus FX and Fly Studio. On SOURCE CODE, we added 3 more so we had 6 houses total, Oblique FX, Mr. X, et MPC Vancouver.

How was the sharing of the different assets between the vendors?
We try to develop a collaboration in between houses so this way we can tackle projects that would normally go to London, LA or New Zealand. This film is a good model of this kind of strategy, it was a good rehearsal, as far as cg train model this great, for the new task of the parking lot it could have been better.

How was created the CG train?
As always we had multiple reference HDR stills and live shoot references. With this Modus created seamless CG train.

Can you explain to us how you planify and shot the backgrounds for the train interiors?
We used a multi camera system, rented from Mike Wassel that he used on TOKYO DRIFT. We had 2 set of 3 35mm cameras with 21mm lenses at 20 degrees each converging as much as it is physically possible their nodal point. All these were synced together. These created 5K plates that were stitched and to fit various lenses and camera angle. So we shot on a real train through the windows, all the side, front and back plates needed. We also shot this at our set train station location with all our extras. Then all the magic of compositing came into play to fit those plates on 357 green screen shots. Rodeo fx had the lead on this endeavour with help from by Mr. X.

Did you use some digital doubles?
One amazing single shot from Colter (Jake Gyllenhaal) in a vestibule jumping off the train landing on the sidewalk. Duncan wanted a Grand Theft Auto video game raggedy doll stunt. He sent me references of Endorphin a software body simulation.

We used it as a first pass, but Oblique ended up redoing everything in animation. The shot starts on a single take of Colter jumping off in the studio, he then becomes completely virtual to catch up the real Colter finishing the roll on the train platform studio piece. Oblique did a fantastic job on the virtual stuntman it looks really good!

Can you explain to us how was created the crash sequence of the train?
In Chicago heading to the airport after our location survey, I spotted a train overpass. I was thinking out loud and mentioned to Duncan that it would be great that the train crashes onto a super highway.
Enough was said, Duncan started to work on boards with this in mind.

Then came the multiple versions, 65 animatics, done by Modus. We had train car crashing, in a suburby area on a busy commercial street. We also had some dramatic helicopter views, building burnings, car crashing, everything that we couldn’t afford! So we had to comprise the level of action. In post, Duncan and Paul Hirsch the editor chose some helicopter train shots I did near Chicago. During the shoot as a bonus material I was trying to link the train with the Chicago skyline. Duncan used these shots and linked the train, the explosion and Chicago. So we had to go back to Chicago to cover the missing plates on the ground and moving train for this new location.

Are you involved on the bomb look in the van?
The original bomb was just a flight case, a dirty bomb. « Not dramatic enough », said Duncan, « I want the whole truck filled with explosives. » So Pierre Simon Chaput Lebrun, who as a teenager , blew a few things, came up with a design that Duncan couldn’t refuse! A full enhanced bomb with CG explosives mounted on a rack inside the empty van.

Can you explain to us the creation of the impressive slow-motion explosion shots?
Duncan had his themes design for each 8 minutes and each explosions, One of them was the poetic explosion. When you get that kind of guideline it is certainly inspiring. I thought it should be intelligent fire. Then in pre-production, Don Burgess, the master of light, said to me « I’ve heard this before! On BACKDRAFT, they shot inverted sets, so I requested from the production a real size vertical black train with explosions coming up toward dummies matching our actor’s positions! We shot this with the Phantom at super high speed so we could then ramp the shot.

How were made the shots with the interferences including the one with Michelle Monaghan in which the noise appears on her face?
Duncan wanted a skype glitch fx in 3D. So we tried a lot of variations playing with the triangular approach of our transitions. I wanted to play with a technique inspired by Picasso’s abstract synthetism period using triangle to create and or disguise a character. So we used our body scan done by XYZ and played with thoses polygons shifting changing lighting, texture perspective, etc.

Can you explain the creation of beautiful shot in which all passengers are time frozen?
We did a crane shot in slow motion with static characters. We added a few CG still elements like coffee drop, volumic rays in dust. We added a CG tanker train and a CG superhighway based on HDR plates shot in Chicago.

How was your collaboration with the different VFX supervisors?
After MR NOBODY, a bunch of the artists knows me and also know how to blow me (no pun intended!). The guys are always there with inventive solutions. We are all in the same boat, we are trying everything possible to make the film looks good.

What was the biggest challenge on this project?
Dealing with a short shoot schedule, consequently a tight budget, always under the gun, making sure I get the shots we needed. That was the most difficult challenge.

Was there been a shot or a sequence that prevented you from sleeping?
No, I had very little sleeping time, so for these few hours I was dead asleep!

How many VFX shots are in the movie?
Around 850.

How long have you worked on this project?
One year.

What did you keep from this experience?
The pleasure of making Duncan happy.

What is your next project?
I am ON THE ROAD with Walter Salles directing.

What are the 4 movies that gave you the passion for cinema?
Kubrick 2001 for his hidden Neitzsche ode, Hitchcock for his masterful craft on VERTIGO, PSYCHO, etc. Eiseinstein for his innovative shooting and editing in POTEMKINE and OLD AND NEW. And Zemeckis for his innovative use of vfx in FORREST GUMP using them tell his story and on top of all these, Gondry for his genius mind (quoted worldwide 15,649 times as a genius) on ETERNAL SUNSHINE OF THE SPOTLESS MIND.

A big thanks for your time.

// WANT TO KNOW MORE ?

fxguide Article about SOURCE CODE on fxguide.
Source Code: Swiss Official website of SOURCE CODE.

© Vincent Frei – The Art of VFX – 2011