Danny Yount, Creative Director at Prologue Films, accompanied by Daniel Klohn and Miles Laurisden talks about their work on TRON LEGACY. Prologue is a studio specializing in the design of film credits and motion design. They worked on films such as IRON MAN 2, THE LOSERS or SHERLOCK HOLMES and TV show like THE WALKING DEAD.
How was the collaboration with Joseph Kosinski?
It was a wonderful collaboration. He’s a director with a great design sensibility. He knew I was a fan of the first film and have designed things that referenced it (IRON MAN 1 end credits) so as you could imagine I was very excited to talk about TRON LEGACY with him. We met shortly after we completed the SHERLOCK HOLMES titles and during our last push to finish the hologram VFX for IRON MAN 2.
What did you do on this movie?
We designed the end credits, the Disney castle logo, the memory sequences and the TV news sequence that reported Flynn’s disappearance.
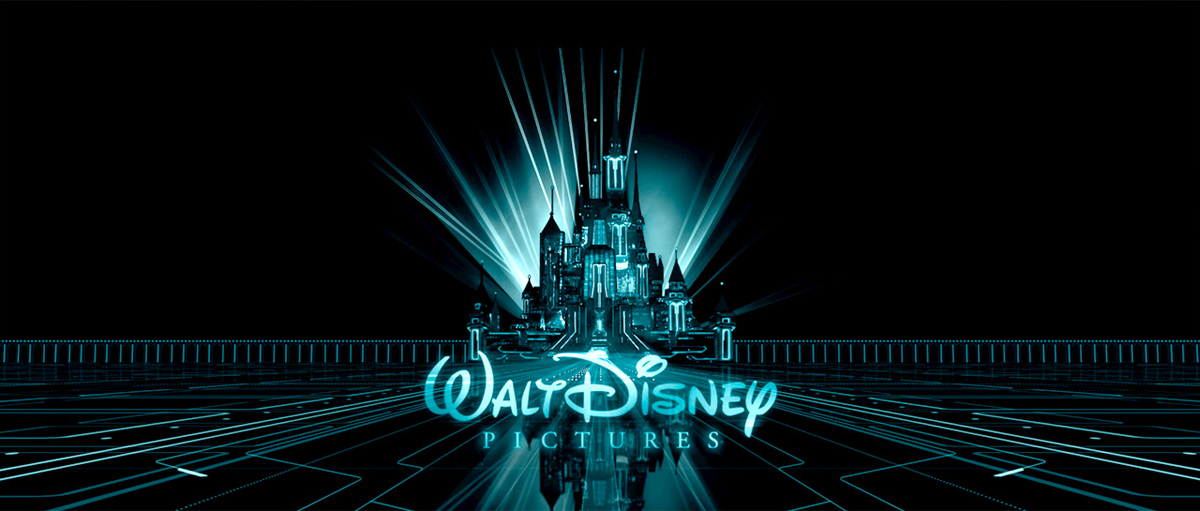
The Disney logo revisited for this movie is very dark and techno. Can you explain how you design it?
We were initially given the task of merely updating the castle to suit the film using the existing logo that flies down from the sky. We went through several ideas to test the water of how much we would be able to push the look of the traditional Disney vibe into a Tron space. I was afraid that if we went too far we would be forever cast out of the Magic Kingdom but I underestimated the bravery of the filmmakers who wanted to arrive at a very Tron-like Castle, which Daniel Klöhn designed.
What indications and references have you received from the director for the main and end titles?
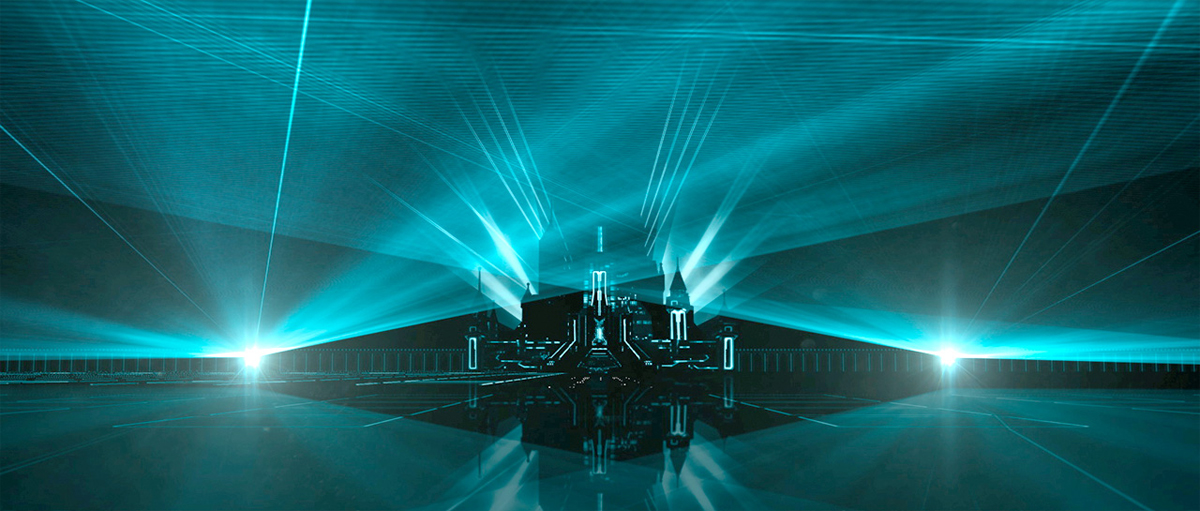
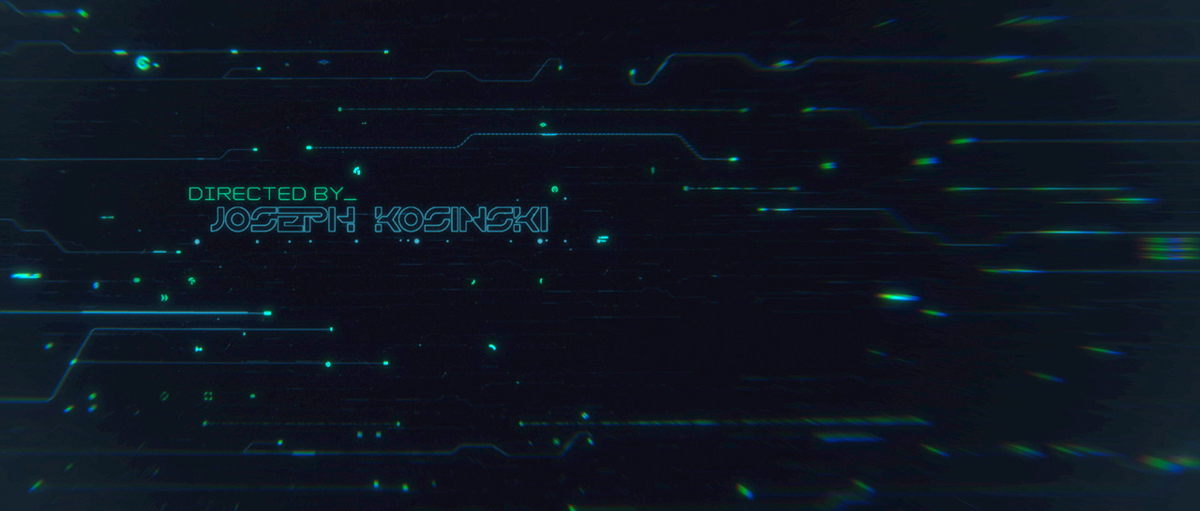
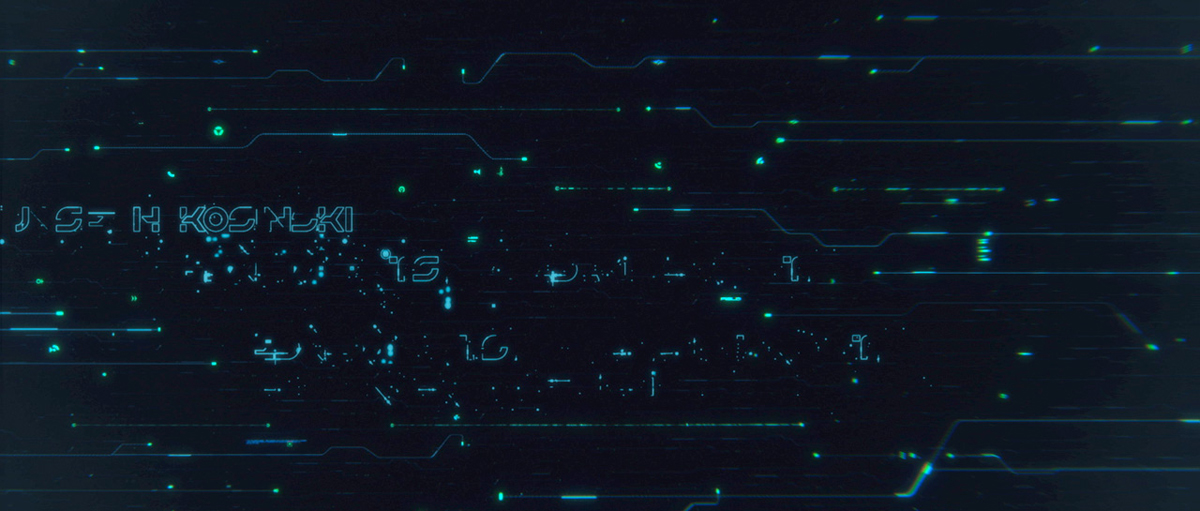
They had very utilitarian view of the end titles – that it was to be type only. I think that knowing what we usually do with end credits, they were a little apprehensive about making something with « too much design », as the film already had plenty of great CG, but once we started pushing a type-only sequence to incorporate more elements and really take advantage of stereoscopic 3D space, they began to warm up to what we brought the table. I think we all understood from the very first CG test that Joseph Kosinski had made to sell the idea of the film that this was something very special and celebratory in terms of design. I liked the very detailed type animations that designer Daniel Klöhn was making and thought it would be good if that somehow it all felt like a graphic representation of the Grid. We also spent a lot of time adding detail to the climax of the sequence – the TRON logo. I added a lot of detail and digital branchings to it to have it feel as though it is the center of the entire piece – as though you are in the core of the Grid. It took several months to incorporate everything but the results turned out great I thought.
How did you create the beautiful opening title where we go from a CG wireframe to a city?
That was made by the director and his team at DD.
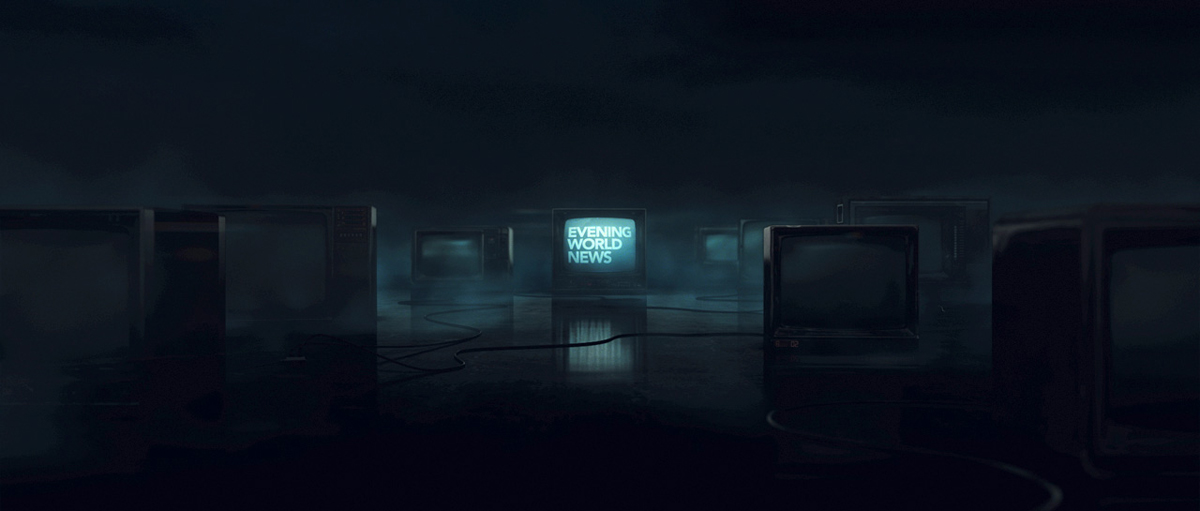
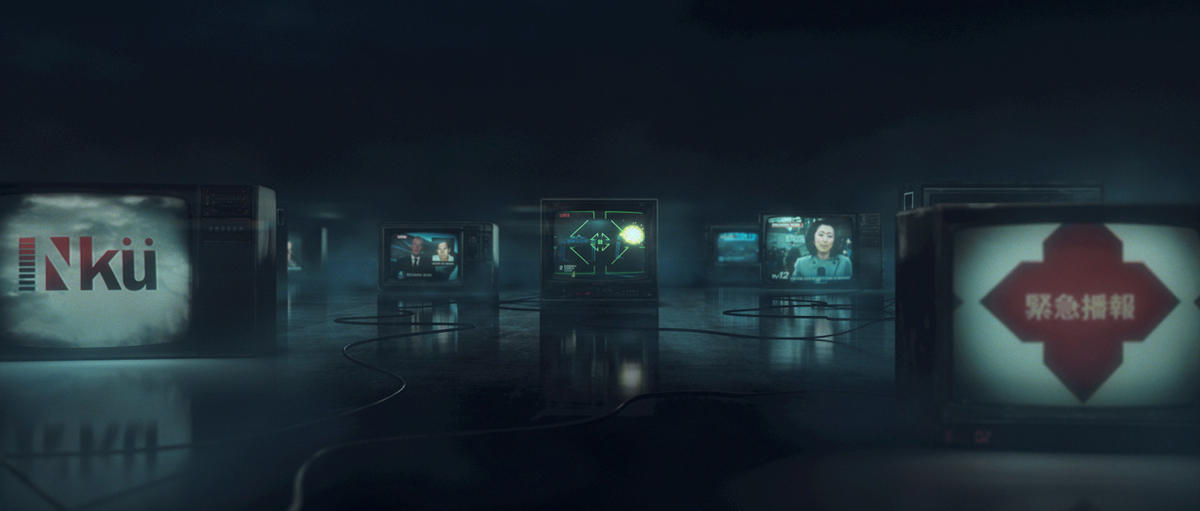
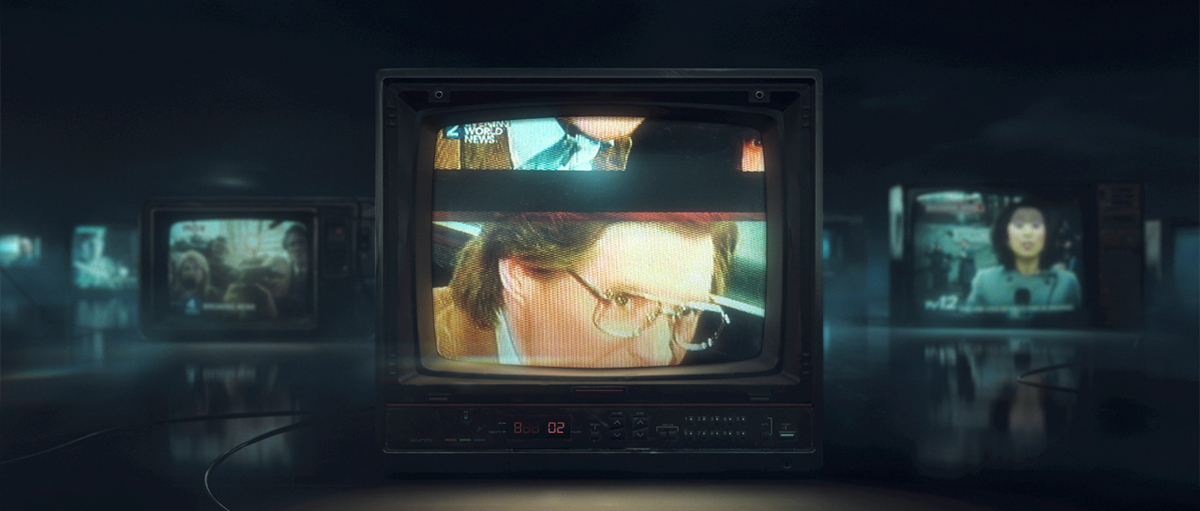
What were the challenges to the TVs sequence?
The assignment was to give the viewer a brief retrospect of what had happened to Kevin Flynn since the last film. His idea was to do this using 80’s television sets. That gave us the ability to communicate a barrage of reporting worldwide simultaneously. They had and edit made of storyboard frames they had made. The challenge was to have the news broadcast work without real newscasters, so I thought it might be good to have it feel like a special reporting segment that used in-house promo material from Encom.
The problem was that it still looked too digital and not like real 80’s video, so we turned off all the video plug-in effects we had and decided to shoot everything running on monitors with old video cameras from that time period. Compositor and Technical lead Miles Lauridsen and animator JD Burditt spent many late nights getting the look down using that technique.
How was the collaboration with Eric Barba and the team of Digital Domain?
Terrific – great people with detailed notes on everything. It helps a lot to work with people who know what they want and know what they are doing.
Can you explain the creation of the shot with the ePad from scratch to the final compositing?
It really came to us as a « oh by the way we also need this… ». So I designed something quickly that animator Takayuki Sato did in a very short time. It needed to do was communicate that Encom’s OS was being hijacked virally.
Did you have to show some specific information on the ePad interface?
Yeah – we just needed to communicate in an interesting way that the Encom OS was being downloaded as a bit-torrent.
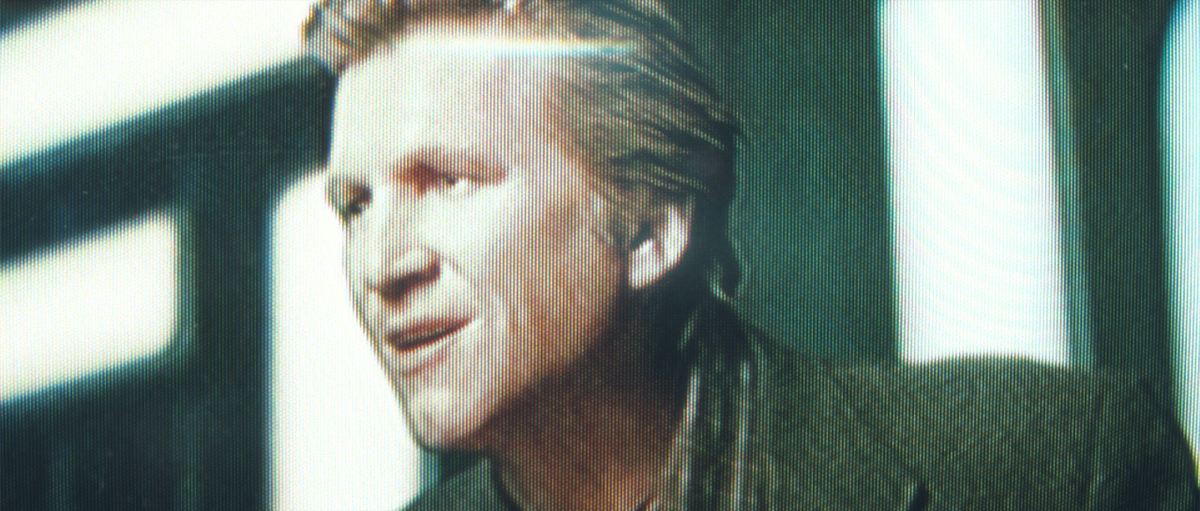
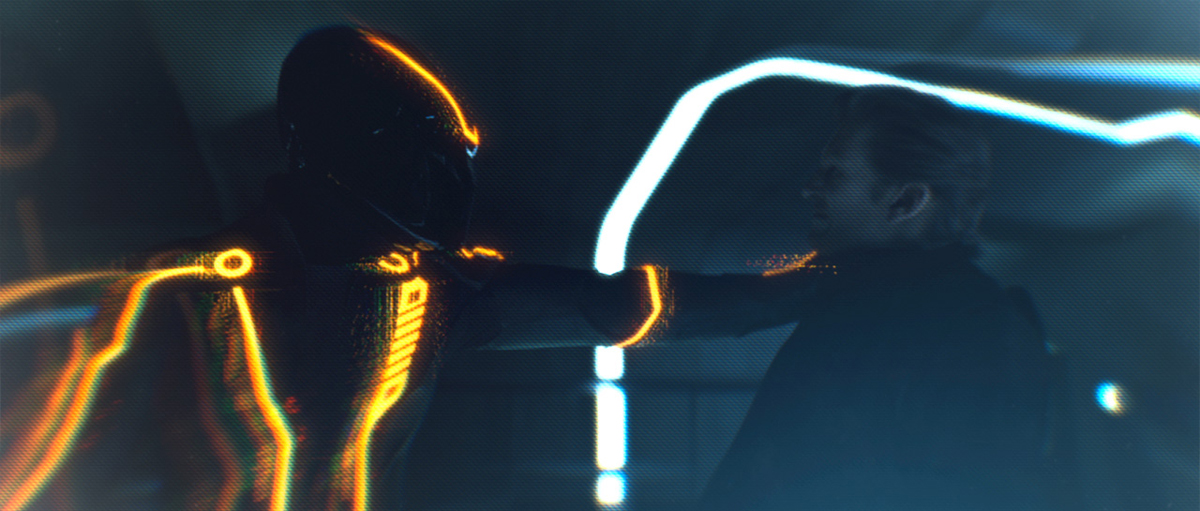
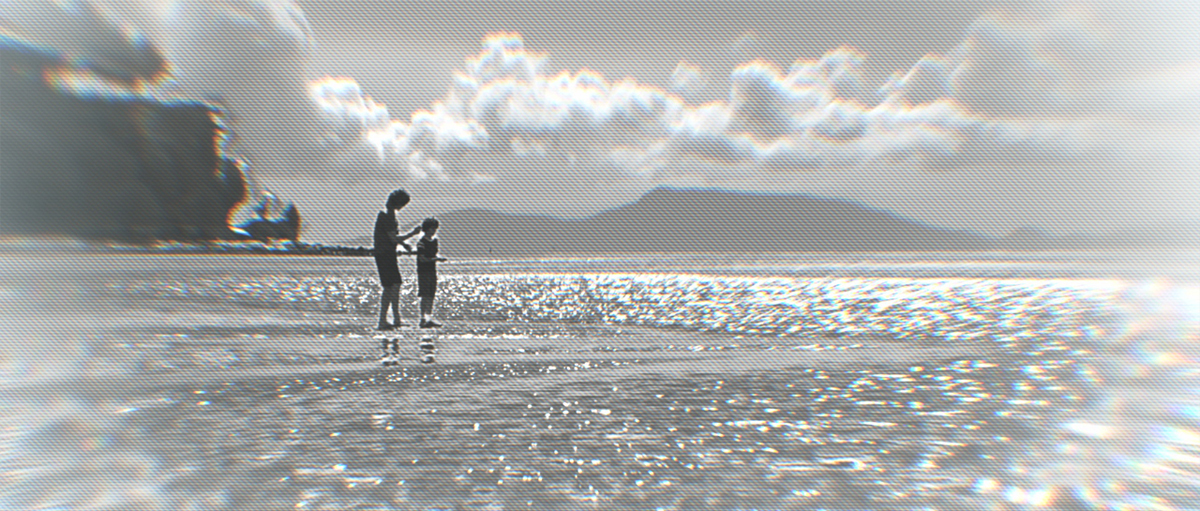
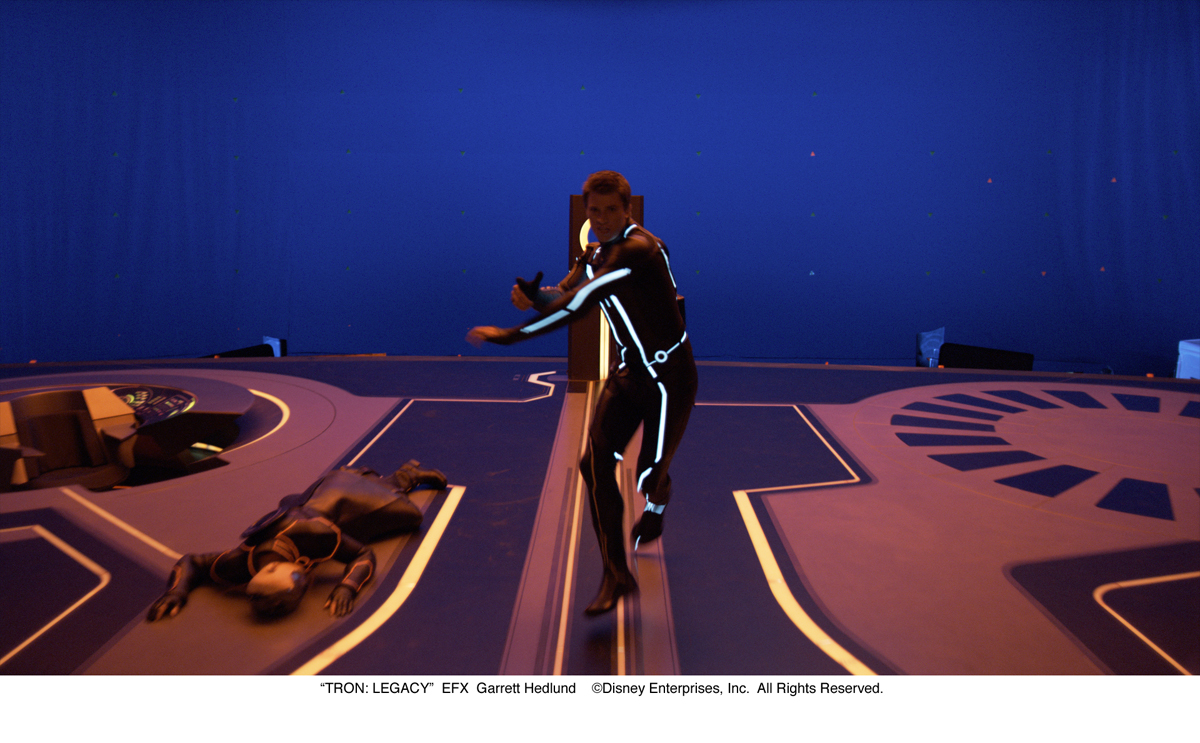
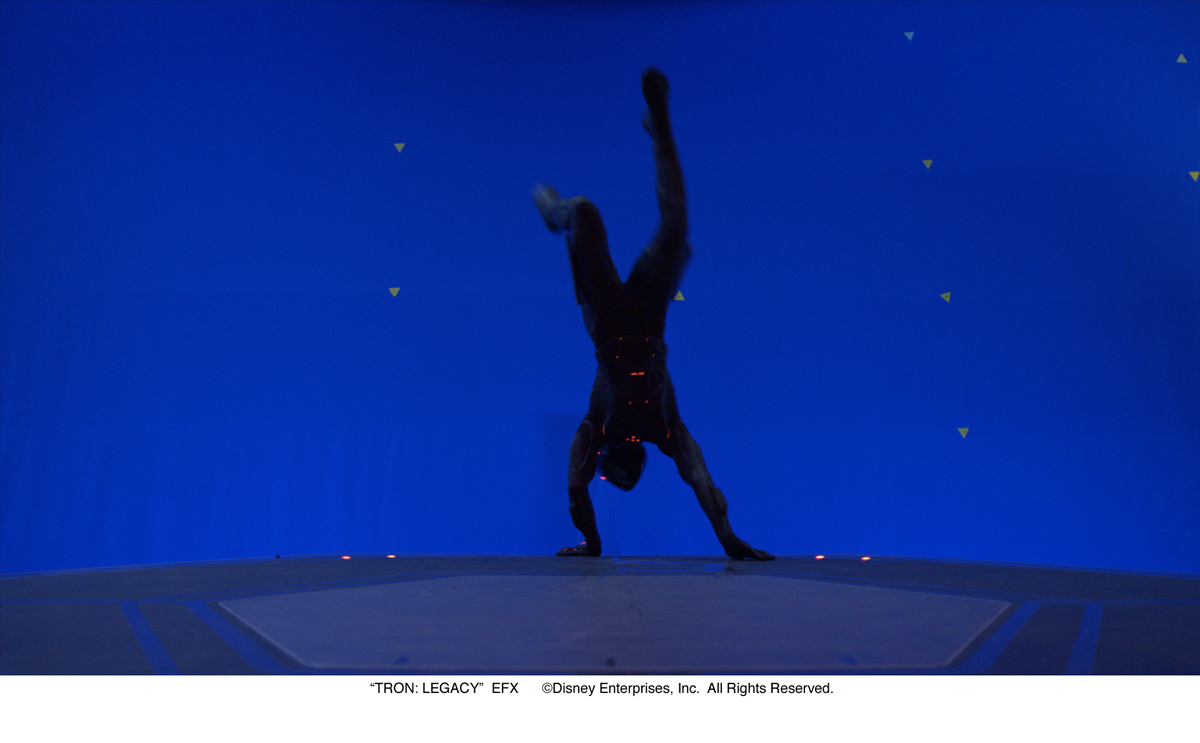
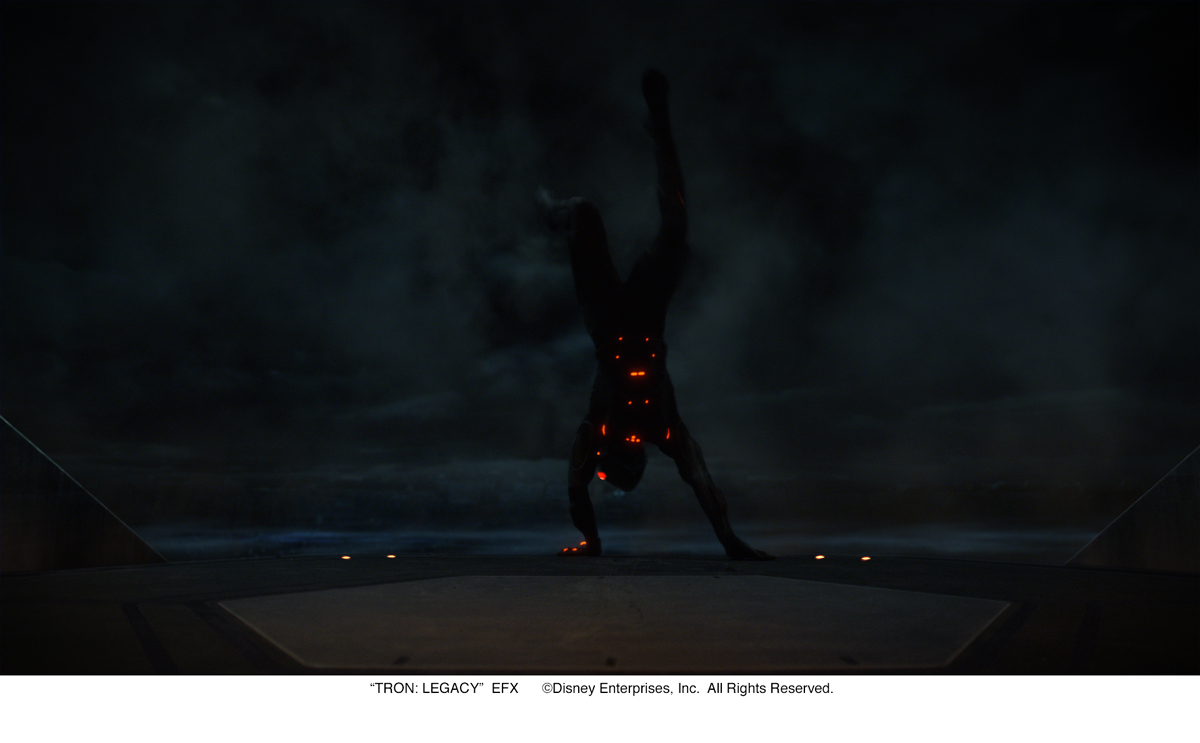
How did you design the look of the flashback Flynn shots?
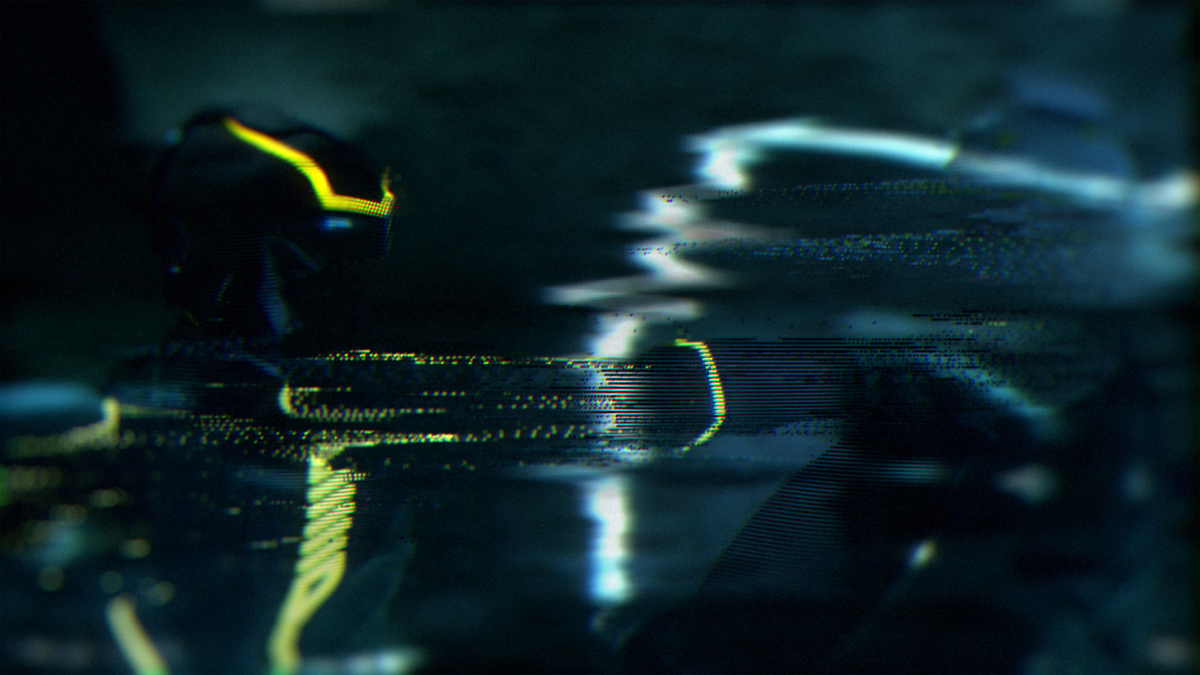
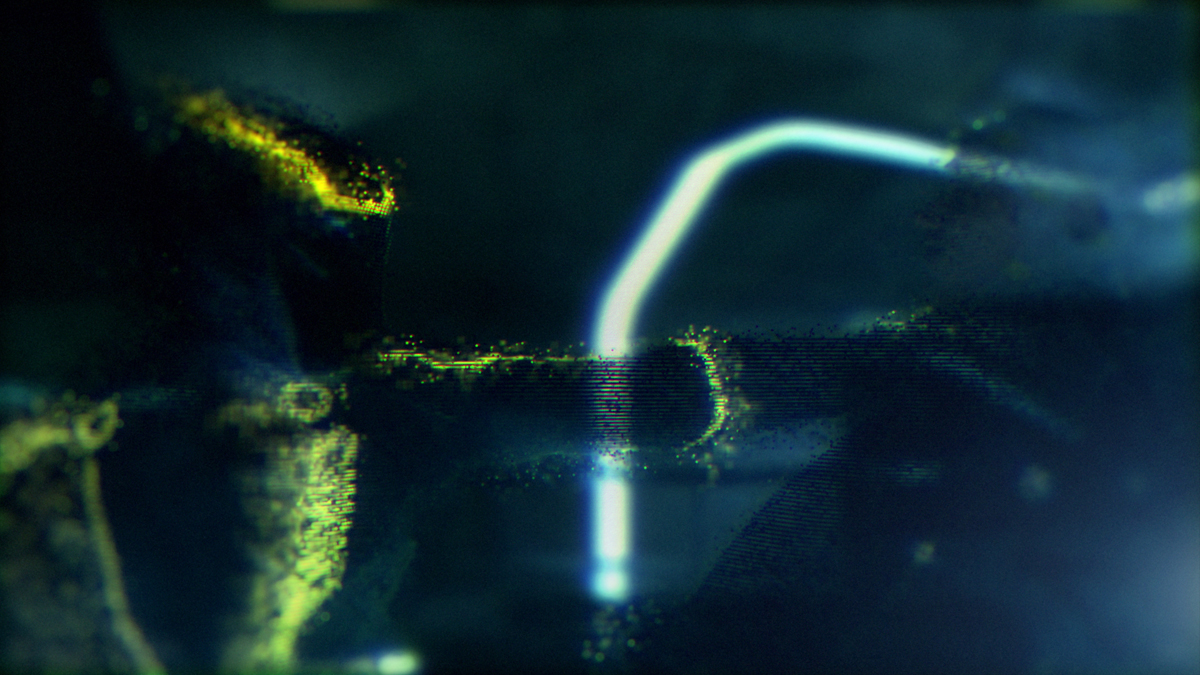
We were given sequences and asked to make them look like they were being viewed within a sort of a futuristic monitor. They needed to feel like memories so we distorted the edges a bit and warped the image to give it a curved surface feeling. We developed several looks for this – everything form a retro film look to analog video to digital. What seemed to work best was sort of an analog / digital hybrid so that they felt like archival material. For the fight scene I thought it would be interesting if impacts would cause the video to glitch a little. We also did a lot of work to add camera shake, sparks and flares to the scenes to help amp them up a little. For the final touch compositor / technical lead Miles Lauridsen came up with a nice hex pattern look for the surface of the display.
Can you expound on any technical tricks or requirements the flashback sequences required? Miles Lauridsen: The flashback sequence technical brief was to take 2d footage (single view) and convert it into something that felt like viewing a tv set in stereo. After receiving a detailed creative roadmap of the project created by Danny in After Effects, we set about the process of placing footage, lens flares, light reflections and dust textures on geometry in Maya. Footage was mapped to a card at the back of the scene with the additional textures of dirt, dust and glitches placed on various curved planes closer to camera to give the feeling of a space between tv tube and the surface glass. We rendered out stereo views of this and added a distinctive ‘hex’ effect to give the feeling of a refractive or pixelated grid covering the television tube in the final comp.
Here are some concepts below:
Did the stereo aspect caused some problems to you on technical and artistic levels? Miles Lauridsen: Stereo certainly adds another level or two of complexity and challenge to any project. Technically, you’re dealing with twice as much data and any small change upstream requires a solid workflow to propagate those changes out to all artists and software packages working on a particular shot. Artistically it allowed us to add an extra element of emotion and life into shots that were already effective without being stereoscopic. One of the challenges was making sure that the design and creative dictated the stereo and not the other way around. In this way we were able to use the stereo aspect to focus the eye on certain elements of design and use it as a tool in a similar manner to a filmmaker using depth of field or blocking to tell their story.
What was the biggest challenge on this project? Miles Lauridsen: The biggest technical challenge was probably sharing and managing stereo camera data between 5 different software packages: Maya, Houdini, C4D, Nuke and After Effects. For the end credit sequence a custom stereo camera rig was built to allow attachment to Daniel’s animated camera in AE, and then data was baked out for Maya and converted to FBX for portions of the main title done in Houdini.
Daniel Klöhn: For the end credit sequence we started working with two cameras. one starting from the beginning, one from the middle and later on we had to move the whole world space to join them together. Another challenge was that the sequence contained over 30,000 of layers in AfterEffects, which brought the software to its ultimate limit, so we had to create several precomps to make the layers work and visible inside the software interface.
Was there a shot or a sequence that prevented you from sleeping?
As with any project there are several, but that is mostly due to our own obsession with detail. The 3D was a challenge for us as this process is still relatively new, but we eventually worked out the kinks as time went on. The main problem really was the amount of data and render times since everything had to be rendered with 2 cameras. All in all though everyone did a tremendous job of delivering on time.
How long have you worked on this show?
Starting with early concepts around 8 months total with most of the work during the last 4 months.
How many shots have you done?
About 14 shots in stereo – 20,000 final frames total. The frames required for the end credits were about 80,000 before final comping.
What did you keep from this experience?
The thing that impressed me the most was how much fun it was and how surprisingly fresh a new translation of an old idea can become. I thought the filmmakers did an amazing job of translating that so we were so happy to be a part of it. And when you have that kind of enthusiasm in a team of great people like we had the excitement just becomes infectious.
What is your next project?
We’re pitching on some things that I’d love to share but can not right now. I can tell you it’s another superhero film though which looks promising so far.
A big thanks for your time.
// WANT TO KNOW MORE ?
– Prologue: TRON LEGACY page on Prologue website.
– fxguide: TRON LEGACY article on fxguide.
Co-founder of the studio Mr. X in 2001, Aaron Weintraub oversees many films like A HISTORY OF VIOLENCE, SCOTT PILGRIM VS THE WORLD or REPO MEN. He recently completed the VFX supervision of THE FACTORY.
What is your background?
6 years 3D and compositing for commercials, music videos, broadcast design. 11 years feature films and co-founded Mr. X in 2001.
How was the collaboration with Joseph Kosinski and Eric Barba?
We flew down to Digital Domain (DD) as we were first being considered for the project to meet with Eric, who briefed us on the sequences, the design and style of the show, and the work we would be undertaking. Everything we worked on went through Eric first to present to Joe. Dailies sessions were done first with Eric to review the work and when a shot was approved, it went into Joe’s dailies to be reviewed. As most of the dailies sessions were done while we were in Toronto, we were video-conferenced into DD’s theatre so we could see what they were seeing, and discuss the work.
Can you tell us how Mr X got involved on this show?
Originally DD was to be the only vendor, but as shooting progressed, the size and scope of the VFX work grew beyond anyone’s expectations. At that point, Disney and DD began looking for other vendors that they could partner with who were capable of handling the work. They visited companies all around world, looking at not only the quality of their past work, but also the pipeline, infrastructure, and talent pools that were available. After being vetted technically and artistically, we began a back-and-forth bidding process while DD determined the most suitable sequences and shots for us, and were ultimately awarded the work.
What sequences have you made?
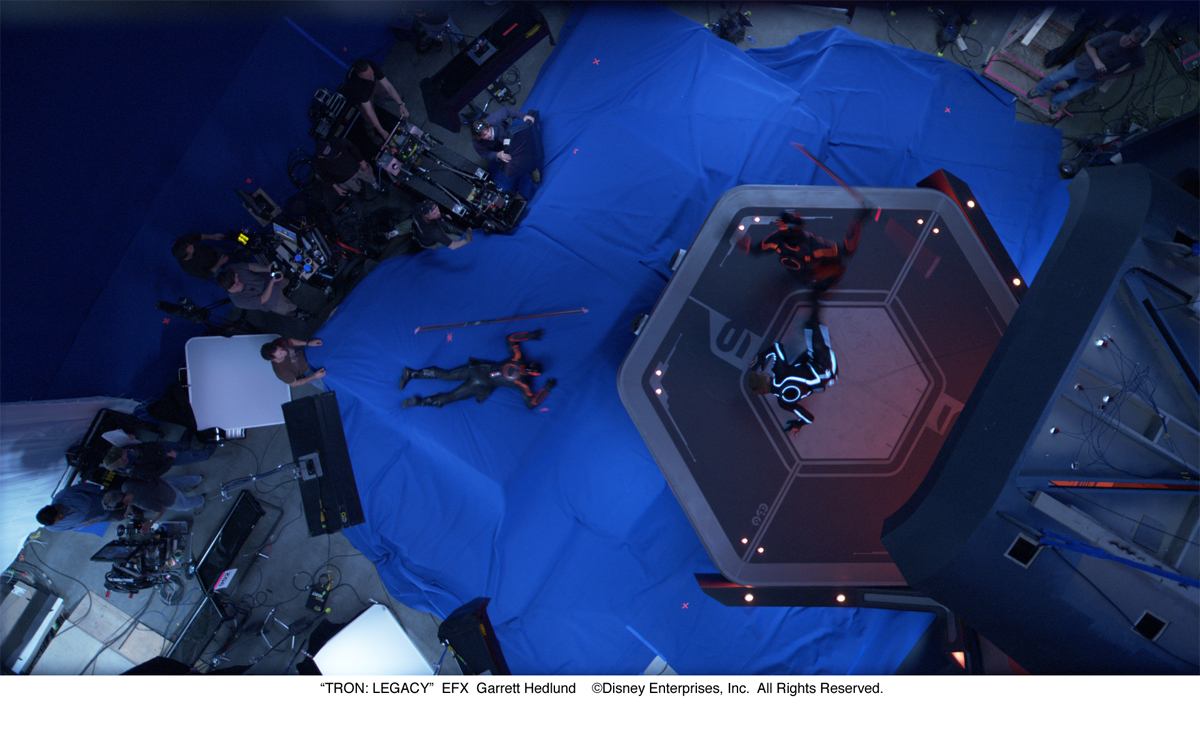
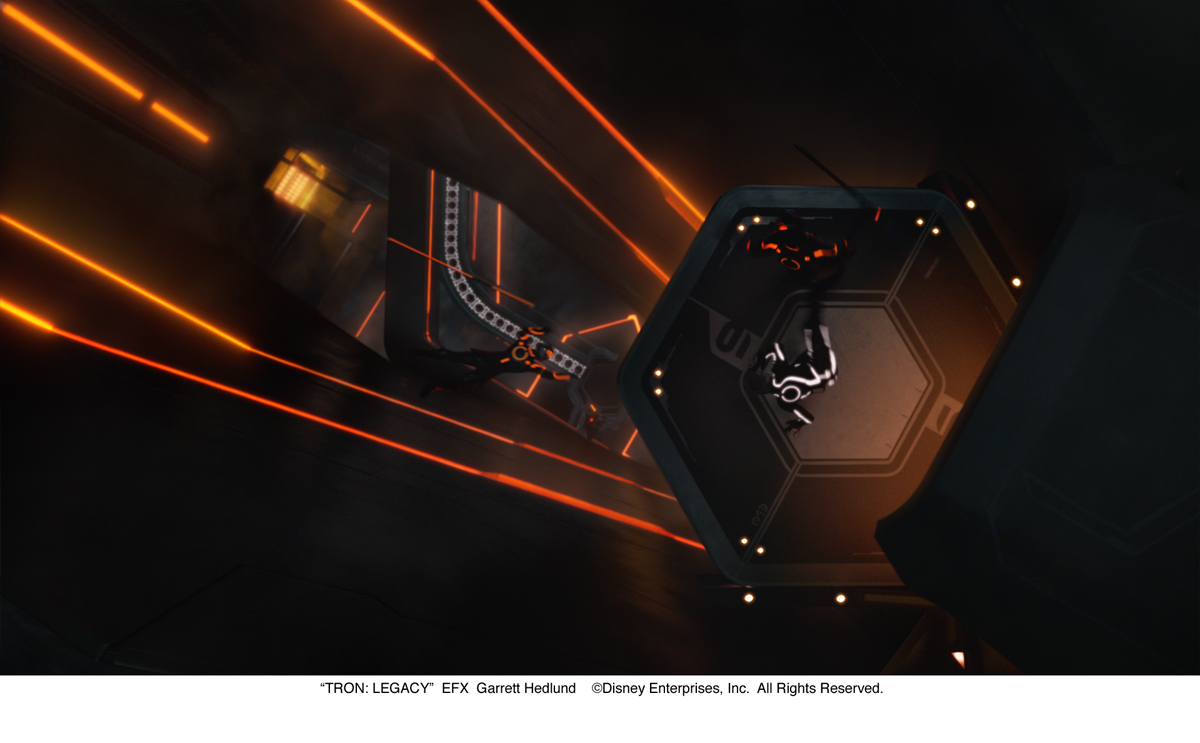
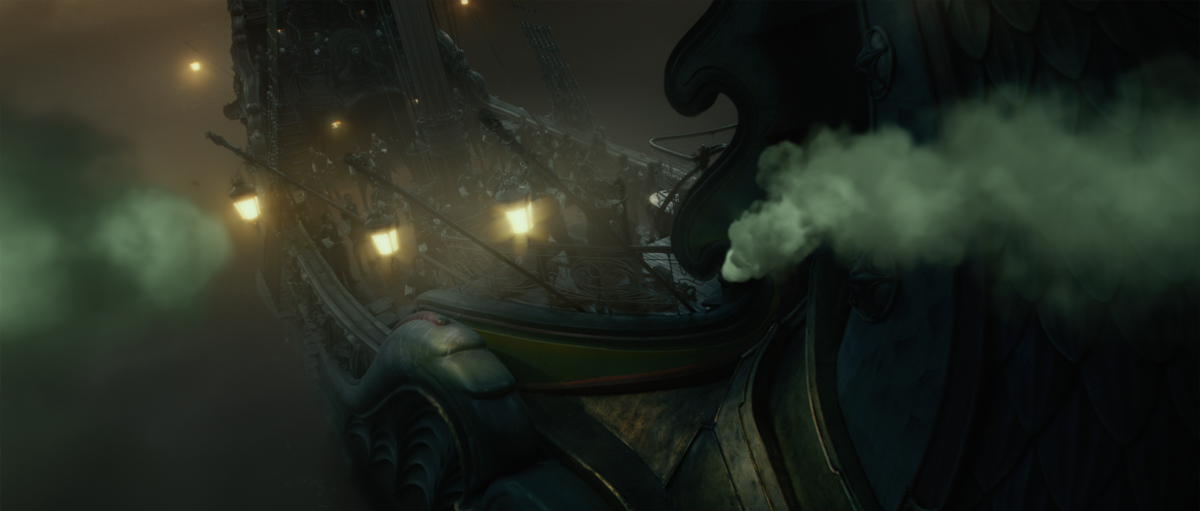
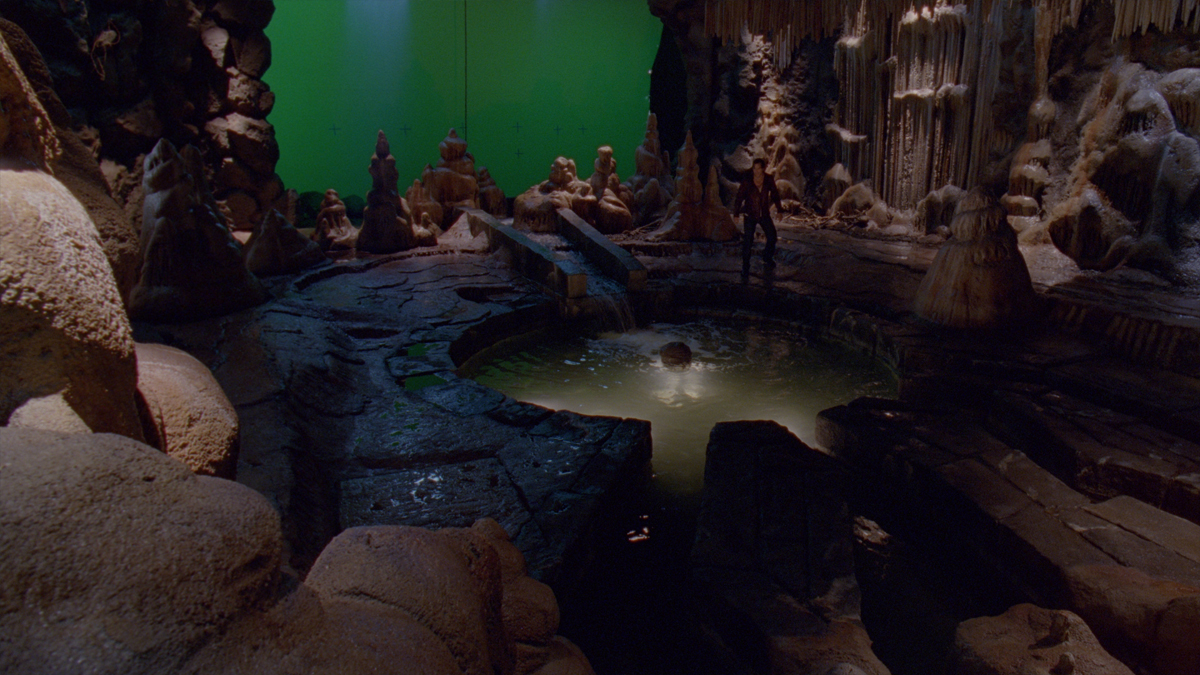
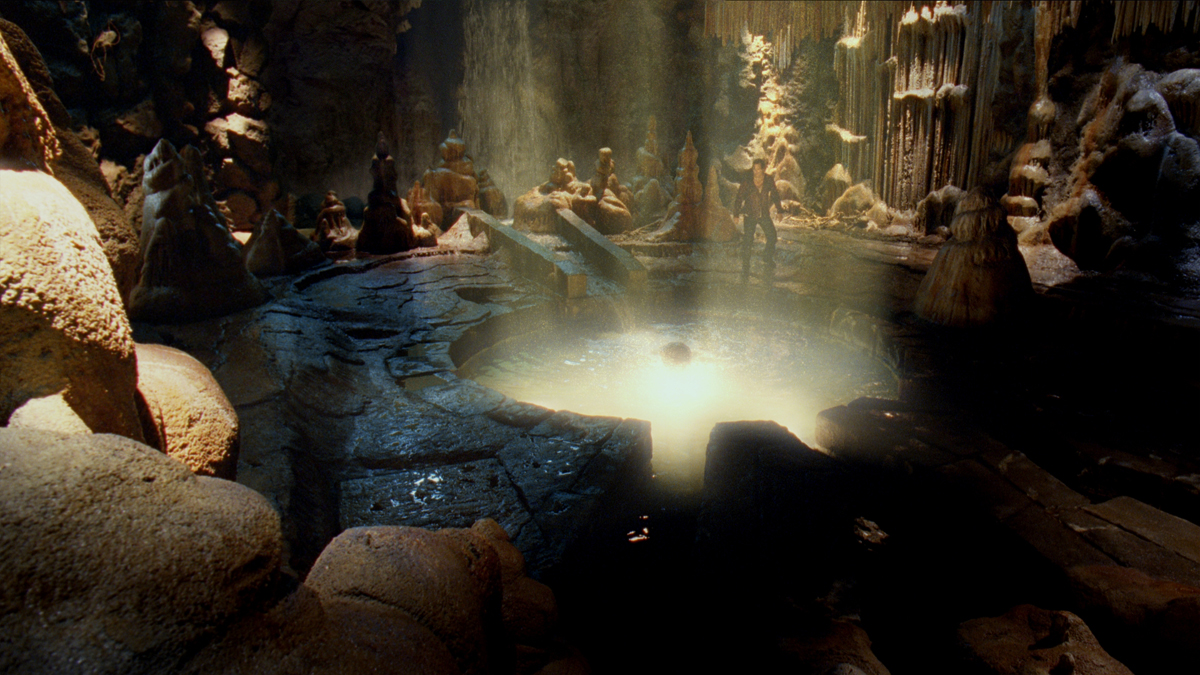
We worked on the « Rectifier Interior » and « Rectifier Bridge » sequences, which take place in the film just as the Solar Sailer docks in Clu’s mountainside base (the « Rectifier »), and ends just before Clu and the Blackguards jump out of the throneship to begin the Lightjet Battle chase sequence. The sequences include the Quorra/Rinzler fight, the creation of Clu’s army, Clu’s speech, Sam reclaiming the disc and fighting with Rinzler, Quorra’s rescue, and the Lightjet escape.
Have you received any assets from Digital Domain?
Yes, many. The Rectifier is populated by a lot of vehicles that came to us basically finished from DD, since they appear in other parts of the film (tanks, recognizers, military vehicles, throne ship, sentries, 3-man lightjet, character digidoubles). For assets specific to these sequences that hadn’t been fully completed by DD, we received the previz models, along with all the designs and concept art to allow us to clean up the assets and detail them out. Most of our asset design time was spent on the actual rectifier itself, both the exterior, as well as the detailed interior with its complex ceiling catwalk and crane gantry systems. We did a lot of work on the Solar Sailer as well.
How was the collaboration with the teams of Digital Domain?
There was very tight collaboration with DD. Shots went back and forth all the time, with both companies working on different pieces of the same shot simultaneously. We tried to work to maximum efficiency so that there was as little duplication of work as possible. From the beginning, we knew that a portion of our shots would be shared with them, especially the Clu head shots. For those shots, DD would send us the initial tracked camera which we would use to generate the environment, composite everything except for the head, and send the Nuke script and elements back to them along with the precomped shot minus the head. The Jarvis de-rezz was another example of this, where DD completed the effect since they already had the de-rezz tool working on their hands. There were also a number of shots where we completed modeling, layout, and animation, and handed geo back over to DD for final lighting, rendering, and compositing. Our pipelines needed to be very compatible, using all the same technical specifications for scene scale, world coordinates, camera specifications, naming conventions, etc.
What was the actual size of the set?
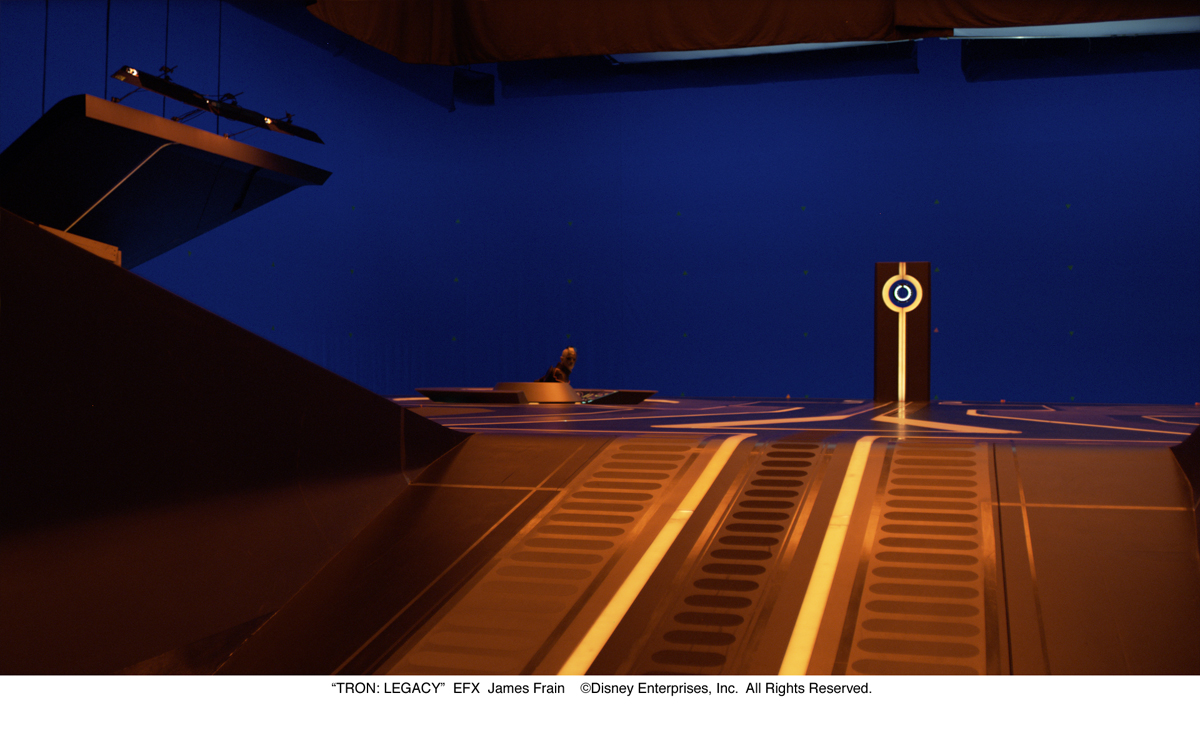
In the Solar Sailer and docking area inside the Rectifier, one and a half cargo pod lengths of Solar Sailer were built, and these were only built three cars wide (the fourth one was added digitally). There was a single exit staircase built that led down to a piece of floor just large enough to accommodate the Quorra/Rinzler fight. There was a small section of catwalk rails built, again just large enough to contain the action of Sam and Kevin Flynn. For Clu’s speech, basically only the floor and podium existed practically. The throne ship was the most complete set, with the throne room itself being mostly all practical except for the ceiling and the cones of silence. The bridge area only had a floor created, and there was a single elevator platform extending out the back side.
Did you created digital doubles?
We received them from DD for Sam, Flynn, Quorra, Jarvis, and the sentries.
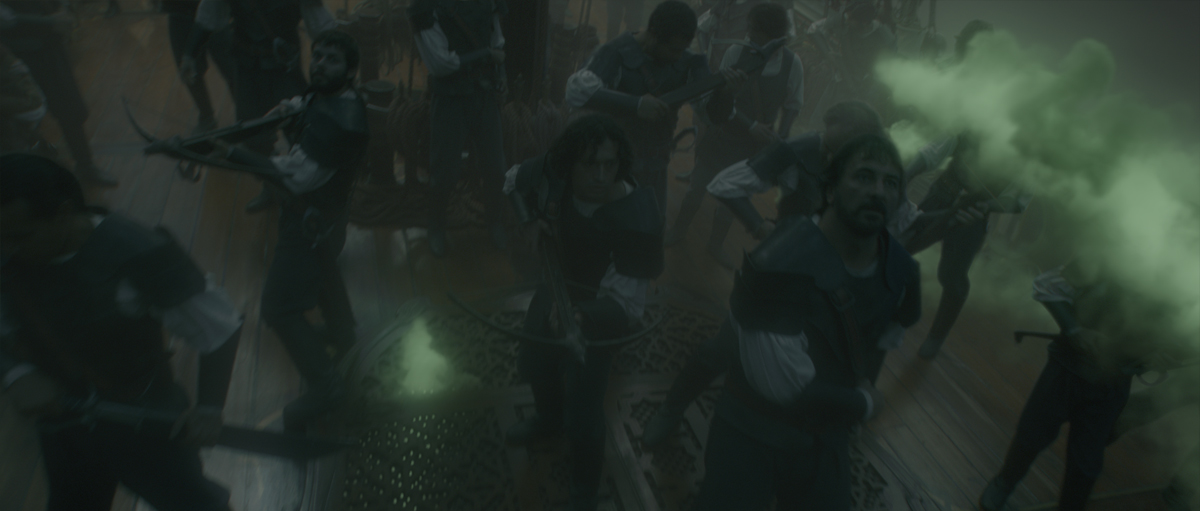
How did you create the army of Clu?
Starting with the basic single sentry model that we received from DD, we created several deformed models and alternate textures to distribute variations in body type, height, and facial characteristics. We created a library of animation cycles for the actions that were required in the sequence (at rest, chanting, cheering, banging staffs), and wrote a tool to pseudo-randomly distribute the cycles, models, and textures within the scene.
What references have you received for the Rectifier?
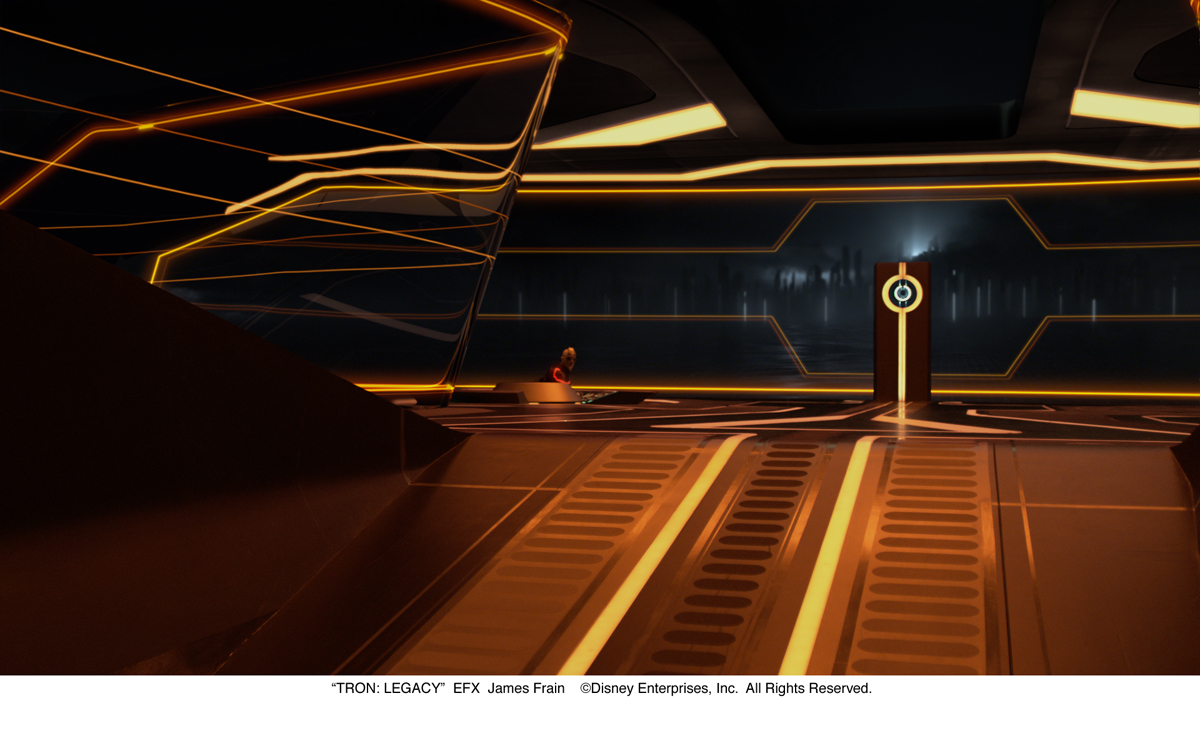
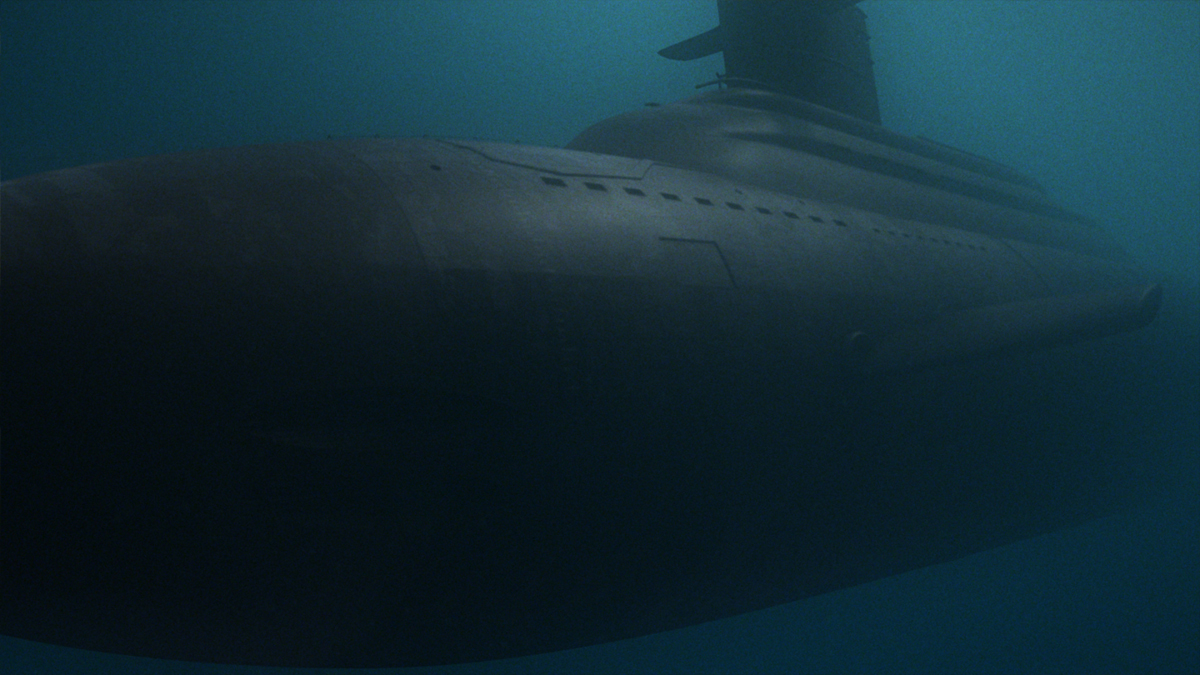
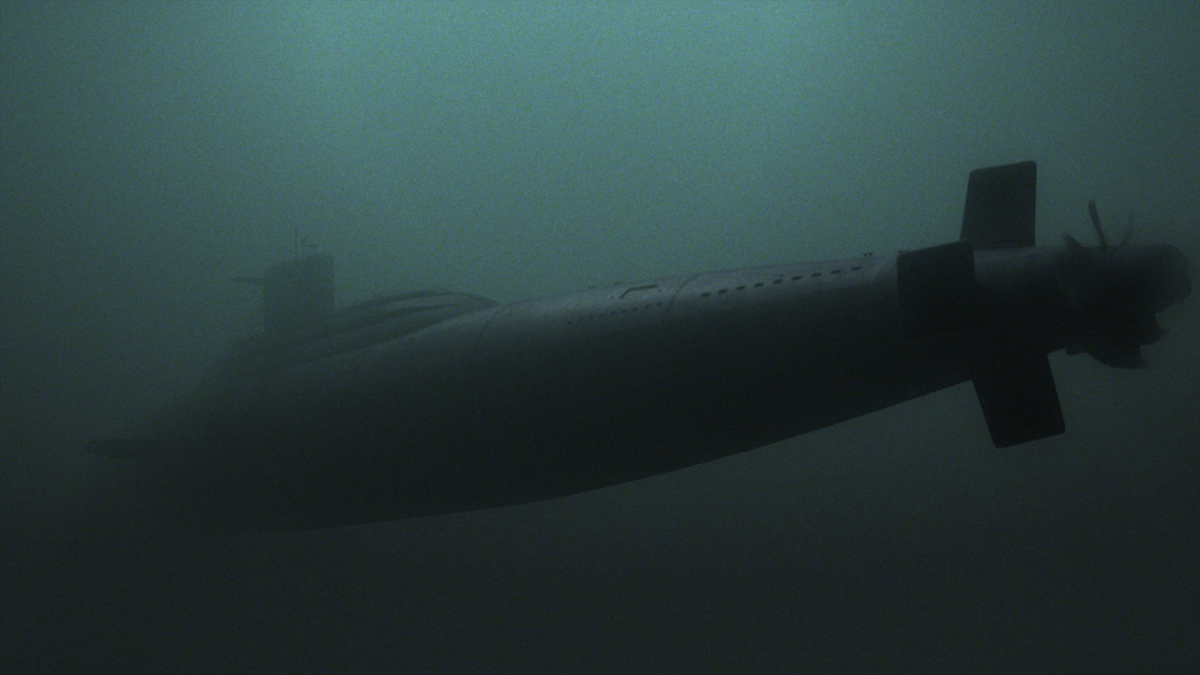
There was a lot of amazingly detailed concept art created for the film early in production that showed the views inside the rectifier. It was always a struggle to come up with a real-world physical material counterpart, since ultimately, it was supposed to be something that existed only inside Tron World. There were discussions about the amount of cleanliness, the amount of scuffing on the floor, and what levels would be appropriate for a surface that has armies marching and tanks driving on it for years, but also, conceptually, being a perfect digital creation. That being said, we did have to match into the physical sets, though often these were replaced with wholly digital environments. The closest real-world reference we received for the Rectifier surface were photographs of black submarines.
How did you create this huge environment?
Using DD’s previz model as a size template, we remodeled the rectifier using the concept paintings and blueprints generated from the art department as reference, making sure all the detail was apparent, and that where no exact reference was available, that the style was consistent with the rest of the environment.
Have you created some set extensions for the sequence where Sam Flynn gets back the disc from its father and fights?
Yes, the ceiling in the throne room was completely replaced, as well as the glass doors. The glass windshield was created in the bridge environment. All the exteriors, including the sea of simulation, and the portal and monoliths, were created digitally as well.
What references have you received for the creation of the LightJet?
DD had sent us their model for the 3-man LightJet, since it was used extensively in the following sequence. We had to do some extra work on it for our sequences, since for example, the cockpit wasn’t modeled or rigged to open up in the version we received. We also had shots which showed a clearer view of the interior of the canopy, so that had to be detailed out as well.
Can you explain how you created the escape sequence of Sam Flynn and Quorra? All the shots are 100% CG?
Some were 100% CG, like the shot where they burst through the throneship glass and their chute deploys. The shot where they rush towards camera used a photographed element of Sam and Quorra suspended on a rig while the camera flew past them, and the following shot where they fly away from camera down to the floor is all-CG. When they finally crash to the floor, the actors were on a safety wire and landed on a piece of practical set (which was eventually replaced), and had a CG chute attached to them in a completely CG environment.
Did the stereo aspect caused you some troubles?
There’s the obvious addition of work that comes from having to render and composite everything twice, but a lot of the trouble comes from dealing with the imperfections in the practical stereo photography. A lot of time was spent correcting vertical disparity and polarization artifacts, and making sure that the camera tracks were absolutely perfect. A lot of the usual 2D tricks that you have on a traditional monoscopic film just don’t work in stereo. Even something as simple as scaling an element up or down to change the apparent distance to camera now comes with a host of other issues such as ensuring that the IO is correct for where you want to place the element, as well as the proper convergence within the scene. Because the images were so high contrast, with bright, sharp glowlines on dark suits, we also had some serious ghosting issues, where the picture from one eye would be slightly into the image of the other eye. Fundamentally this is a problem with the projection system and the glasses used, and future technologies – for example, beaming the image directly onto the viewer’s retina – may completely eliminate ghosting as a problem altogether, even when viewing stereo films made today. For right now though, it was definitely a consideration which often caused us to have to reduce the stereo effect so the stripes wouldn’t double-up as severely.
Did Mr X Montreal worked on this show?
No.
What was the biggest challenge on this project?
There were many challenges on the project, but one of the major ones was the amount of retooling the pipeline to get in sync with what DD was doing and what they had built already. We dove head-first into V-Ray relying on some of DD’s knowledge, but ultimately needed to figure it out and R&D our own pipeline tools for it while were were in production. We also increased our renderfarm and server storage to keep up with the demands of the project.
Was there a shot or a sequence that prevented you from sleeping?
Ha.. yes, all of them.
What is your pipeline and softwares at Mr. X?
We added V-Ray to our pipeline since that’s what DD was using. Our traditional CG pipeline used Maya for modeling and animation, Houdini for lighting, and Renderman to render the images. Effects in Houdini, rendered in Mantra. Compositing is done in Nuke. For TRON, we replaced the Houdini-Renderman portion of the pipeline with Maya and V-Ray. There was definitely a learning curve, but we continue to use V-Ray on other projects now, where it’s appropriate, now that we have a bit of a tool base written to make it workable.
How long have you worked on this film?
9 months from first turnovers to final delivery.
How many shots have you done and what was the size of your team?
211 shots were worked on by our team of around 80 people.
What did you keep from this experience?
It was a great experience working on a film where the anticipation of the fans and world-at-large was so high. There’s an enormous amount of satisfaction knowing that your work is definitely going to be seen and appreciated by fans for what it is. On a lot of the films we typically work on, our presence is invisible, and the goal is to not be noticed or get in the way of telling the story. On TRON, it was very much the opposite of that, and we had to make sure that everything was absolutely perfect to withstand the scrutiny of the most discerning of audiences.
What is your next project?
Currently in production at Mr. X: THREE MUSKETEERS 3D, THE THING, HANNA, THE VOW and SILENT HILL REVELATION 3D.
What are the 4 movies that gave you the passion of cinema?
Hard to narrow it down, but: THE GODFATHER, A CLOCKWORK ORANGE, STAR WARS, 2001: A SPACE ODYSSEY.
A big thanks for your time.
// WANT TO KNOW MORE ?
– Mr. X: Official website of Mr. X Inc.
– fxguide: Tron Legacy article on fxguide.
This Tuesday marks the first anniversary of The Art of VFX!
I wanted to thank you all for reading me every week and to be so many to follow my interviews.
You are several thousands to come every month from more than 140 countries.
The site has over 48,000 hits since its creation.
I am truly touched that you are so many to appreciate my work!
I am pleased to share the messages I’ve received for this event:
Vincent, Congratulations on your 1st Anniversary of The Art of VFX. Thank you so much for providing such insightful details from the front line creative leaders of our industry. You provide respect and acknowledgement to the true artists who are responsible for the execution of stunning visuals in todays feature films. Keep up the great work.
Jeff Campbell
Visual Effects Supervisor
Spin VFX
//
Happy 1st Birthday The Art of VFX. I have really enjoyed reading what other supervisors around the globe have been up to this past year. Keep it coming!
Mattias Lindhal
Visual Effects Supervisor
Fido
//
The Art of VFX is one of the best sites on the web for detailed interviews with the best VFX artists. Vincent goes beyond the work to find out why we get into this business in the first place.
Paul Franklin
Visual Effects Supervisor & Co-founder
Double Negative
//
Congratulations on your 1st birthday, you’ve posted some very interesting interviews over the past year.
Michael Ellis
Visual Effects Supervisor
Double Negative
//
The Art of VFX continues to be a valuable resource to the visual effects community. Since its inception, one can rely upon your articles for valuable insights and information not previously available. Keep up the great work!
Josh Comen
Principal
Comen VFX
//
Happy Anniversary « Art of VFX »! It was a great honor to be a part of your first year’s golden collection of inspiration, love for big cinema and like-mindedness! May the heroes continue to annihilate evil with lots of blood splatter, fire balls, light sabers and other joy bringing butcher ustensils in the coming years!
Simon Otto
Head of Character Animation
Dreamworks Animation
//
Happy first year of your site. I like the way you include artists of different levels, for consistently honest and insightful interviews. best of luck in the years to come.
Adam Valdez
Visual Effects Supervisor
The Moving Picture Company
//
Congratulations on your 1st anniversary! Here’s to many more years of interesting interviews.
Daniel Leduc
VP & Visual Effects Supervisor
Hybride
//
Happy Birthday Art of VFX! Keep up the good work covering the VFX scene! All the best for the future!
Kevin Mack
Visual Effects Supervisor
Mack Art Productions
//
The Art of VFX’s website is an excellent resource for us. The articles are deep and insightful and packed with everything we would want to know about the production of so many high-end studios. Happy 1st birthday Vincent!
Danny Yount
Creative Director
Prologue Films
//
The Art of VFX, a great site for VFX enthusiasts, professional and amateur. The interviews are interesting and highlight the real issues facing the post-production industry. Good luck and happy birthday «
Mathilde Tollec
Lighting TD
The Moving Picture Company
//
The Art Of VFX contacted me for an interview on the work I did at MPC on Prince Of Persia. I was really impressed by the quality of the questions and the way that they translated it in a very faithful way.
Since then, I am a constant follower of the blog and I am very pleased to see how it has been developing in the last year. The interviews are always interesting to read and the fact that they cover both supervisors and sequence or discipline leads makes it even more exciting, giving us an in-depth review of the work achieved on big studio movies as well as smaller independent projects.
I wish a long life to The Art of VFX blog, and looking forward to reading more and more interviews about the great films coming out this year.
I have really enjoyed reading The Art of VFX over the past year. Not only does it have great breakdowns and interviews on first rate projects from around the globe, it also doesn’t localize the discussions to specific roles on projects. The articles speak with Supervisors, Artists, and Designers alike and provide insight into all different parts of post production.
Happy 1st year to Art of VFX and thanks to Vincent for his constant enthusiasm and energy to put together all those great interviews.
Guillaume Rocheron
Visual Effects Supervisor
The Moving Picture Company
//
Happy birthday Art of VFX. Having access to so many people and information in such a short time is something rare. I hope this will continue for many years.
Nicolas Aithadi
Visual Effects Supervisor
The Moving Picture Company
//
I am pleased to share with you this new year!
A very big thanks to:
All my readers.
All the interviewees.
BUF, Brainstorm Digital, Cinesite, Comen VFX, Double Negative, Dreamworks Animation, Filmgate, Framestore, Hatch FX, Hybride, L’E.S.T., Look Effects, Mikros Image, The Moving Picture Company, Pixar Animation, Prime Focus, Prologue Films, Postmodern Sydney, Rhythm & Hues, Rodeo FX, Spin VFX, Trixter, Worldwide FX.
20th Century Fox, Red Lorry Yellow Lorry, Universal, Warner, Walt Disney Pictures.
After several years at Zoic Studios as a TD and engineer, Justin Ball joined the team at Brainstorm Digital. He participated in many projects such as BURN AFTER READING, DUPLICITY or THE ROAD. It also oversees the effects of several films like BROOKLYN’S FINEST, or LETTERS TO JULIET and THE ADJUSTMENT BUREAU.
What is your background?
I studied sculpture, animation, and programming at Pratt Institute in New York. I had my first real exposure to CG and VFX while working at Curious Pictures in New York, in the model shop, building the last of the handmade puppets for their stop-motion kids’ show on HBO, A LITTLE CURIOUS. It was there that I experienced firsthand the industry’s real push to go digital. After teaching animation at another NYC university while finishing my undergrad at Pratt, I moved to L.A. and started working for the then-start-up, Zoic Studios. I functioned mainly as an engineer
and TD there, working side by side with amazing artists, supervisors and creative directors who really gave me a passion for the industry and the work that we do. Eventually, I changed roles at Zoic and got more into effects. Soon after that, I moved back to New York to help build Brainstorm Digital, a new all-film VFX house in Brooklyn.
Over my years at Brainstorm, I rose from being an engineer/TD to an effects artist to my current position as VFX Supervisor. I come from a very technical background, but have also always had the passion for the creative. VFX Supervisor is a great mix of disciplines. You get to work and design really creative shots, and then figure out how in the world you will make them work, both on set and back in the office. It really requires many skill sets.
How was your collaboration with the various directors of the series and especially with Martin Scorsese?
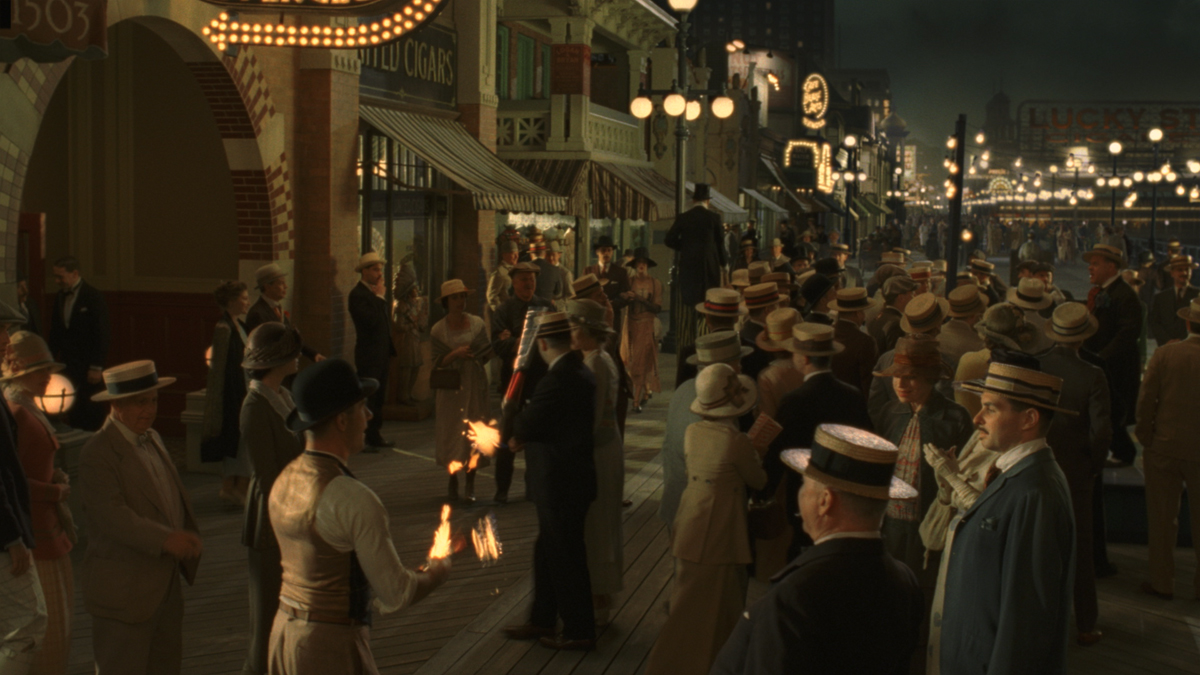
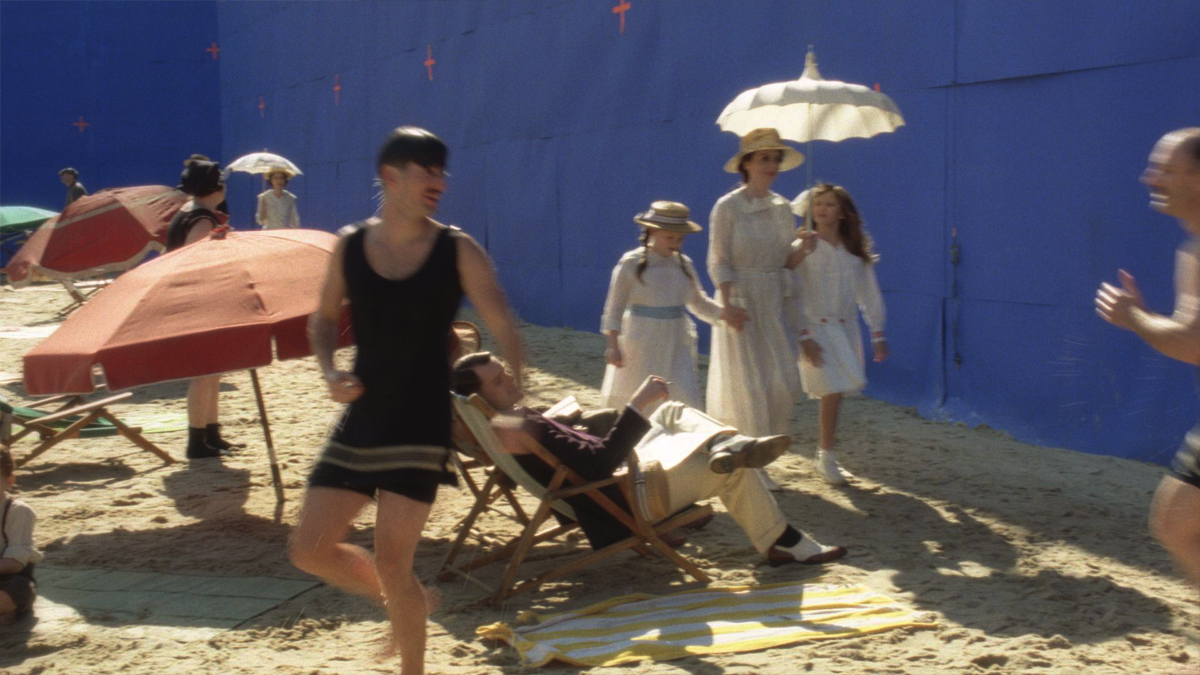
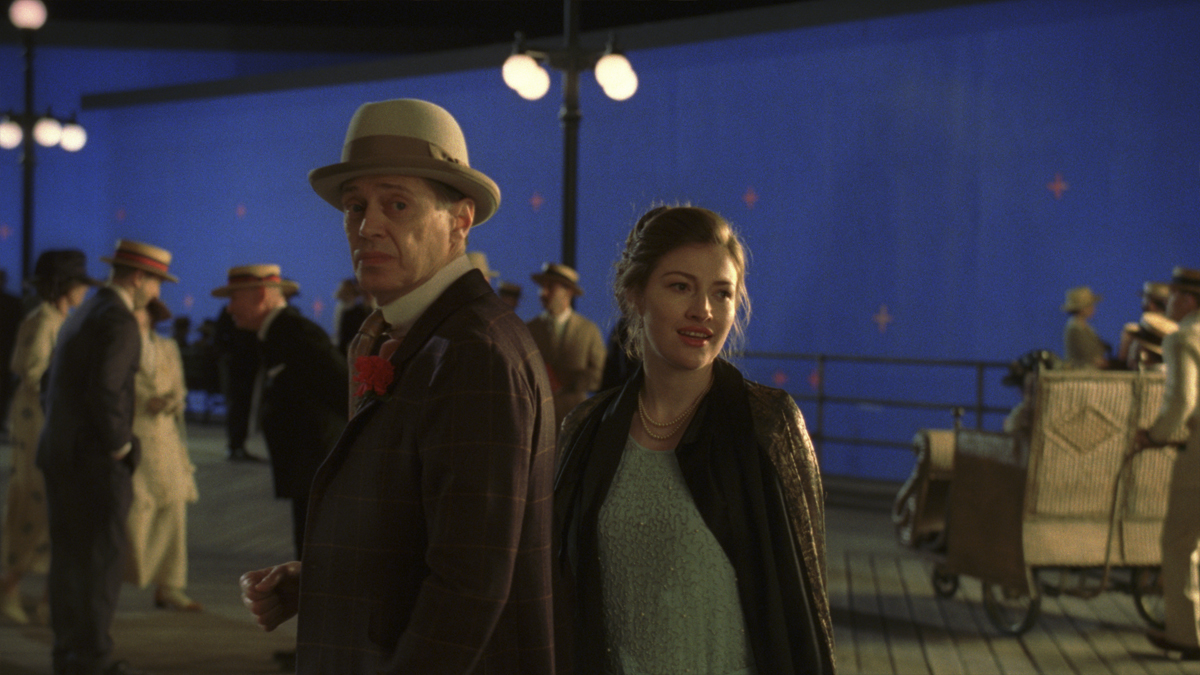
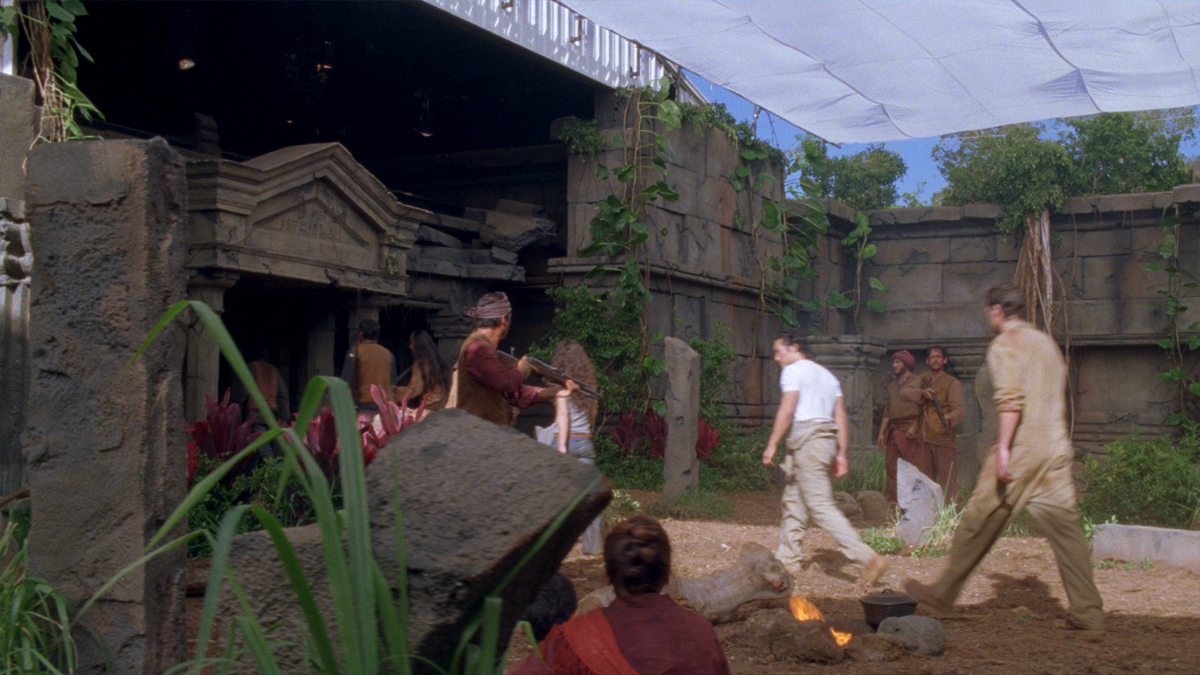
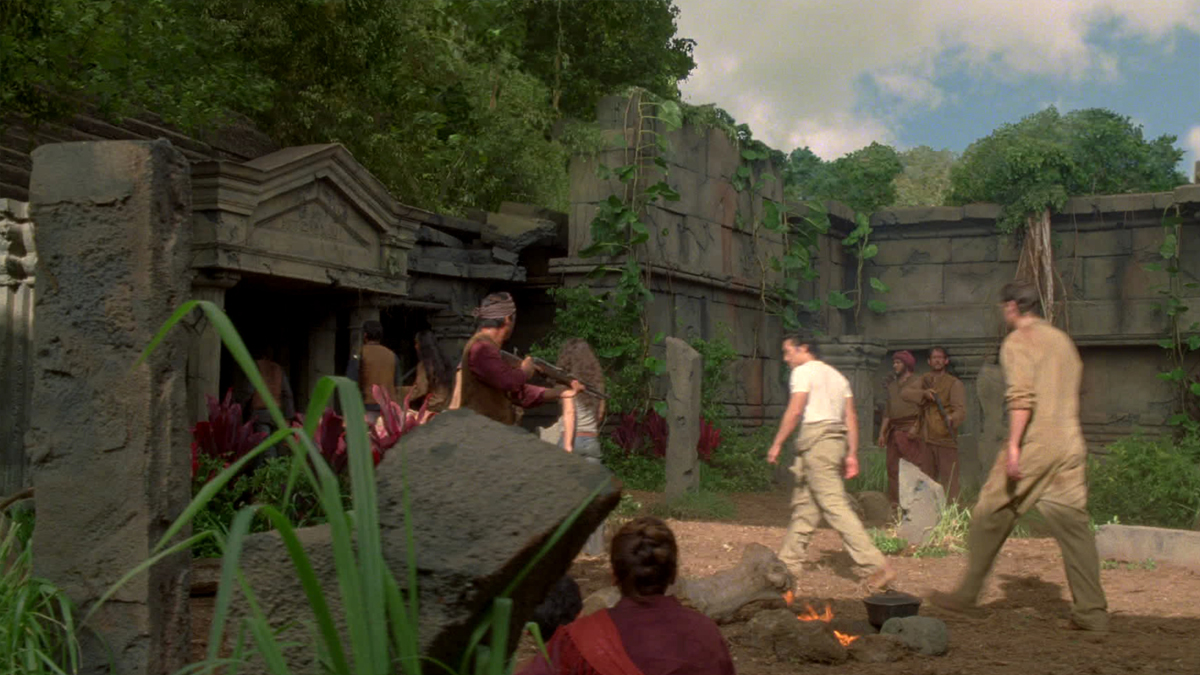
It was very interesting to work with all the directors. It was a first for me to have that many different creative ideas and approaches centered around a single project, giving every episode a totally unique feel. The biggest challenge was the informational gap in dealing with the complex filming location of the boardwalk set. So there was a lot of work and discussion every episode with the new directors to bring them up to speed as quickly as possible on the difficulties of the location. One of the nice things was that we had alternating DP’s for each episode, and over the course of the season they became well-versed with the shortcomings of filling in the big blue box. After the initial ramp-up period at the beginning of the season, it became a well-oiled machine.
Working with Scorsese was fascinating. We weren’t able to spend much time with him due to how busy and in demand he is. But I must say it was a huge pleasure to both watch him work and to work with him. He was a tremendous asset for us, as we would approach him with options and he could be extremely decisive about the approach and direction he wanted to go. So the lack of one on one interaction was more than compensated by the precise amount of direction and information we were provided.
Can you explain how Brainstorm Digital got involved in this project?
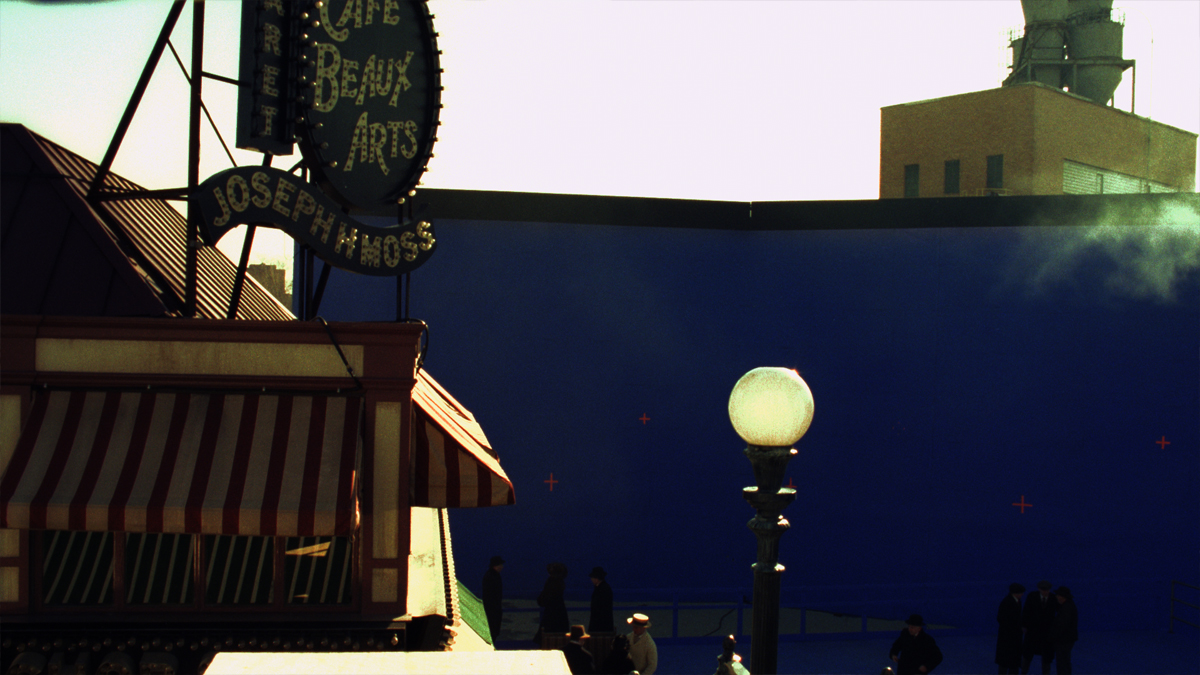
In late 2008, we were approached by a producer friend who was attached to the project. Back then, it was just a loose idea and everyone was trying to figure out how to pull it off. One of the key elements up for discussion was how and where to film a 1920’s Atlantic City. Initially, there was an overwhelming push to try to film the project on a sound stage, which was a big « no-no » for us. The feeling was that even though we could manage to do the filming inside, and certain issues would be lessened by filming in a controlled environment, the show would never feel as if it were taking place on an actual, outdoor, seaside boardwalk. So for the first meeting with Executive Producer Eugene Kelly, we put together a rough projection test with some sky and water plates we filmed, to help illustrate how VFX could help the show and more importantly, how much set would have to be built.
We started by going out to Brighton Beach in Brooklyn to film some open coastline with recessed buildings. We took our HD camera and played with some camera moves on the beach. We then took that back to the office and built a 3D camera from the data we’d collected. Then, using archival photographs provided by the production historical researcher, we started to formulate a plan. One of the difficult issues was at that point in time we did not have an overview image of what the whole Atlantic City boardwalk looked like back then. I spent a long time studying antique photographs to find images that overlapped and structures that were geographically located on the boardwalk. We centered our test around the Blenheim Hotel because it was the most visually interesting structure located on the boardwalk in 1920. The original Atlantic City boardwalk was a constantly evolving attraction; from year to year the entire place changed dramatically. Buildings were torn down, and others were erected in their place, with even more floors and levels added to already existing buildings. Finding a way to recreate a realistic period set from the old, dynamic boardwalk was an interesting challenge.
After deciding a geographic location to base the test, we built a loose projection system in Nuke. Using black-and-white photographs, we built a portion of the boardwalk set to make the test. With our initial test, we were forecasting that production would only need to build about 160 feet of set before VFX could take over. The issue with that was that it limited the filming options for the series. So eventually we all decided to extend the set another 100 feet to around 270 feet.
What references did you have for the streets and the pier of Atlantic City?
Production had hired a researcher, Edward McGinty, to help research all aspects of the show. Either the production VFX Supervisor, David Taritero, or Ed would track down any imagery or ref we would need if we could not find it ourselves. This was such an amazing asset for us to have in helping develop the realistic vintage look for the show. We also worked very closely with Robert Stromberg, who was a matte painter and VFX Designer for the series.
Were you involved in pre-production in order to help the shooting? Did you create some previzualisations for this?
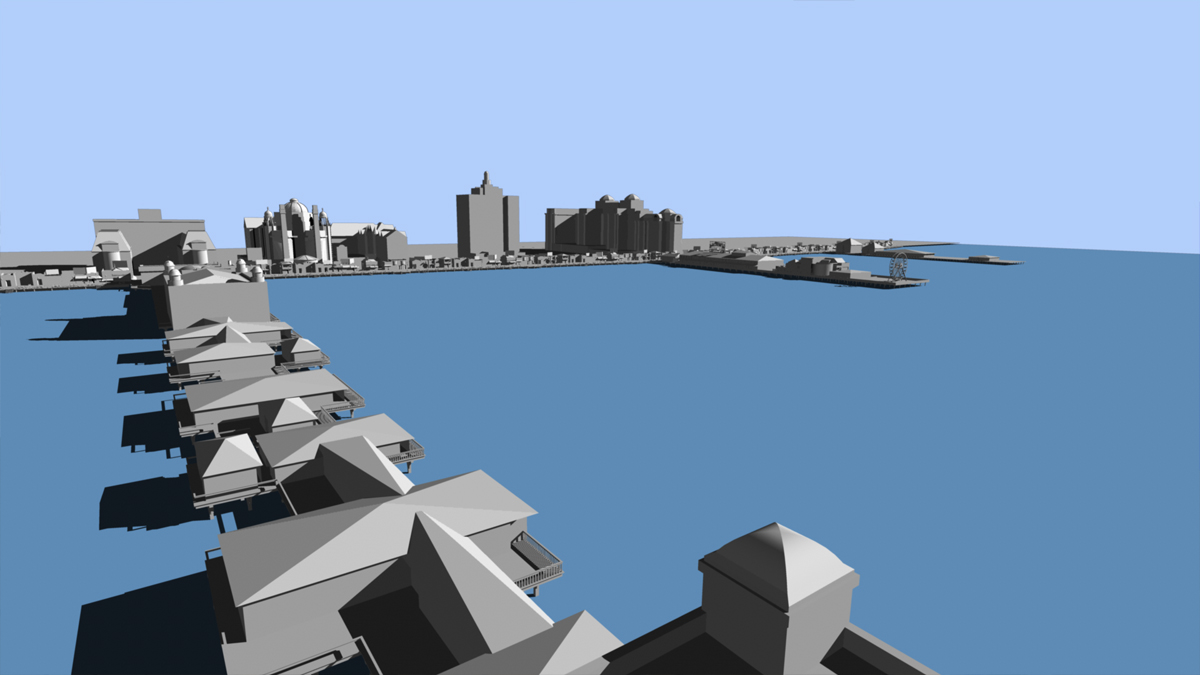
Yes. We were heavily involved with every aspect of the design and building of the set. From helping to pick the location, to previzing the set, to designing the backlot, we were there all the way through filming. It started early on from that first meeting with the Art Department. We hired an art director from the HBO team to build us a scale 3D model of the set as the Art Department was designing it. Even though we were usually about a week behind the Art Department, we always had a scale 3D model in Google Sketch-Up. And while the Art Department was working on the details, we would work on the world beyond the set, both the placement of period buildings and also the practical elements surrounding the present day set. We used this model to help us visualize the layout of the bluescreen and how to design the space of the backlot.
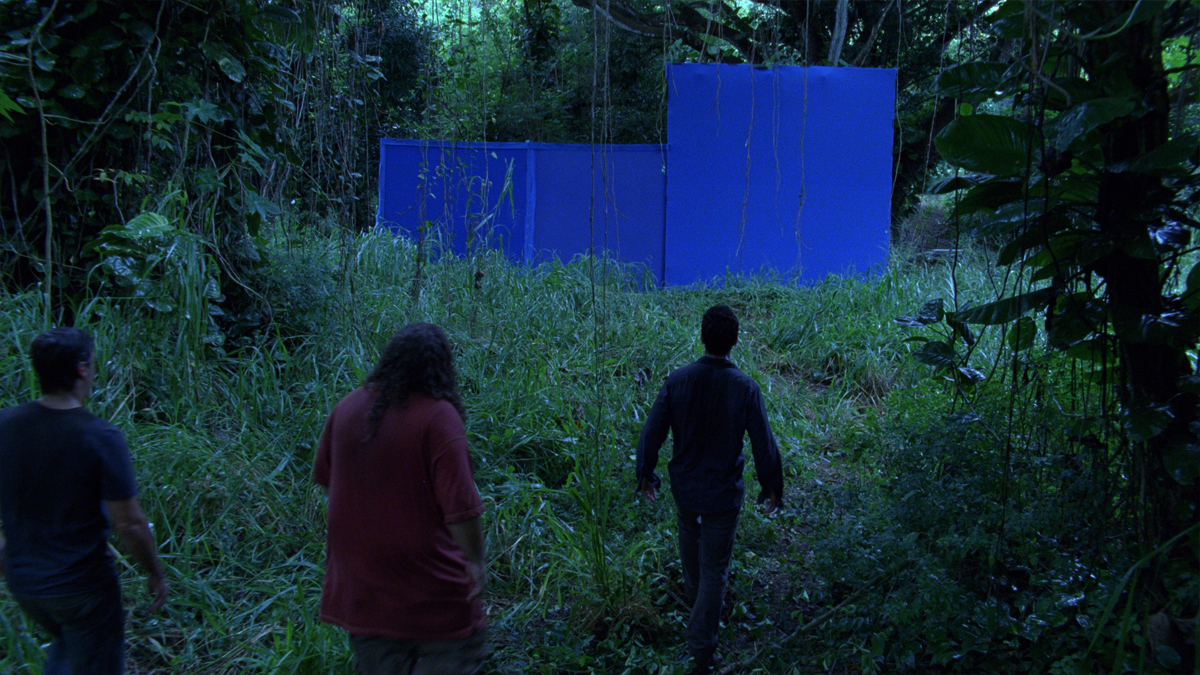
The bluescreen in itself was a difficult challenge to take on, because we were not sure how best to rig something that large. We went through many different ideas about how to make it work. We had thought about cloth draping systems all rigged on wires, or systems with traveling 40×40 bluescreens, but knew that those could not cover the scope of the set that we were building. A bad bluescreen setup could lead to problems while shooting with lengthy re-set times, and on an episodic shoot, this was not really an option. We also needed something that could stand up to a New York winter, a huge challenge in itself. We were in constant contact with David Taritero, who was going to be the production VFX Supervisor for the show, but was still in L.A. finishing up post on HBO’s THE PACIFIC while all of this was going on. Fortunately, we were able to share ideas with him while going though the design stage. Dave had used a similar curtain system on THE PACIFIC and was able to give us a firsthand account of the pluses and minuses of that approach.
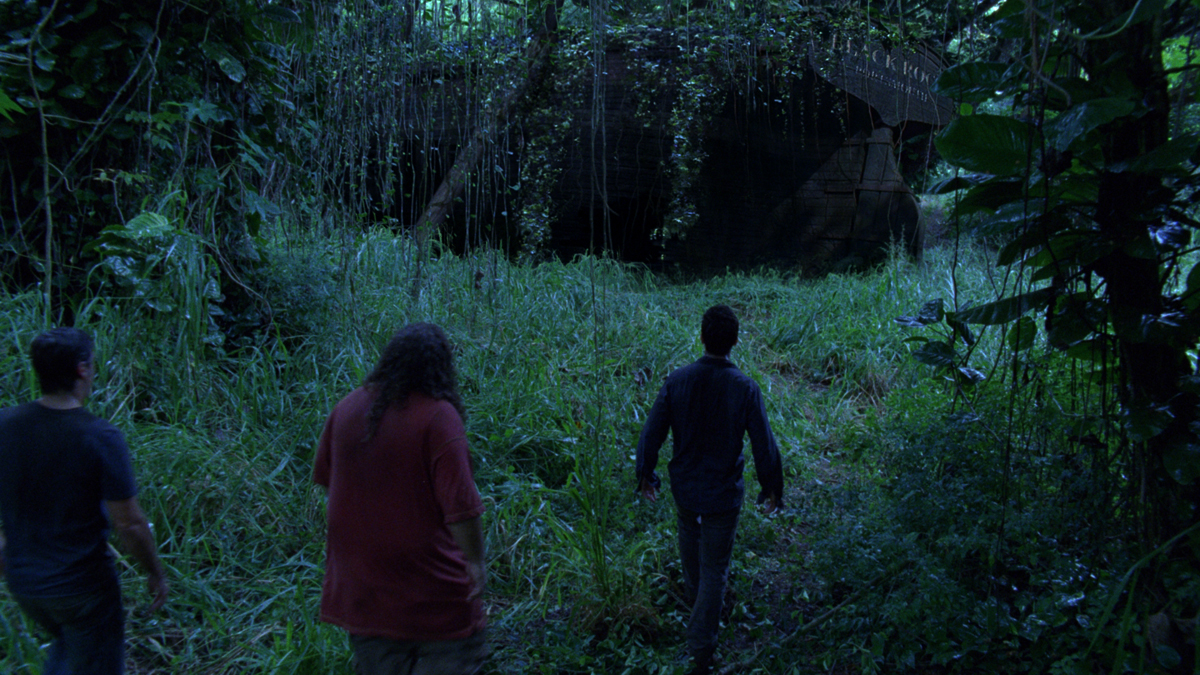
While researching this issue, I came across an article about the movie CHANGELING, where they mentioned that they used a shipping container as a green backstop for their backlot because it was a cheap but solid structure. When I read this I thought it was the perfect solution to our problem. We proposed this to production, and after we convinced them that the containers would also provide storage on a backlot that had very limited working space, they agreed. A secondary benefit of building a huge wall out of shipping containers was that it provided visual protection of the set from onlookers, along with weather protection. The set was built in an empty lot in Greenpoint, Brooklyn, right at the edge of the East River. Without that protection, the winter would have been much harder on both the filming schedules and the actors, not to mention the complications that can arise from curious crowds.
Using the 3D model, we were able to lay out the placement of the containers within the physical space of the backlot. We were also able to map out the number of containers to use along with seeing what they would look like in that environment. Since we built the set in real-world scale, I could plant a camera on the elevated production set and I could see what we would see once the set was built. This let us map out how high the wall needed to be to cover certain elements that we did not have control over, such as buildings across the street and even the Chrysler Building across the river. We were also able to test camera heights and lenses to know ahead of time when an actor’s height would break the coverage of the blue wall, revealing the real sky behind them.
This setup was extremely useful for the DP’s to get an understanding of the working conditions of the boardwalk even before it was built. We spent multiple days with Stuart Dryburgh, the DP for the pilot, working on angles and shots before the set was even complete.
About the shooting, were you able to shoot all you need in front of a bluescreen or did you need some extensive roto?
We were able to have quite a few production days in front of the bluescreen to film actors and background to get different elements. One of the issues we had was that the show takes place over the course of a year, so the people elements that we filmed early in the season would only work for a portion of the episodes. There were also many different types of attire and day and night scenes where we needed to fill people in. For the most part we were able to get all of this covered to a usable extent. But for some of the beach scenes, we weren’t able to get everything we needed due to camera moves in the original plate and weather problems at the beach. So in a few shots we did have to get into roto extractions to help cover the camera moves.
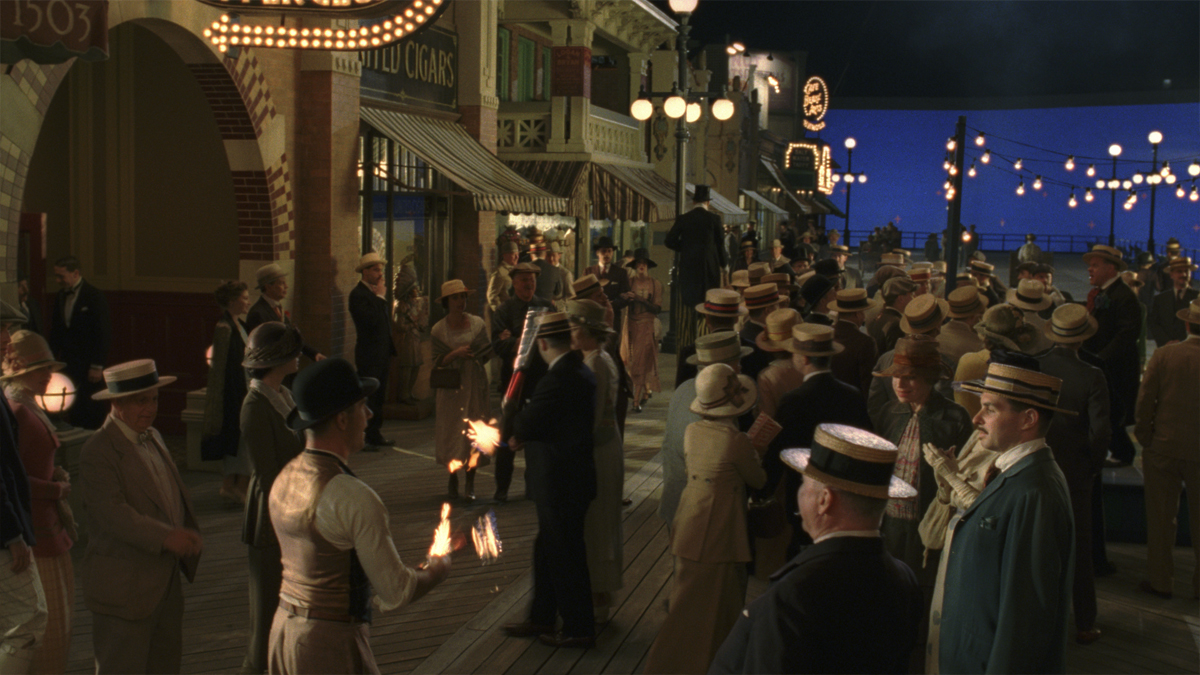
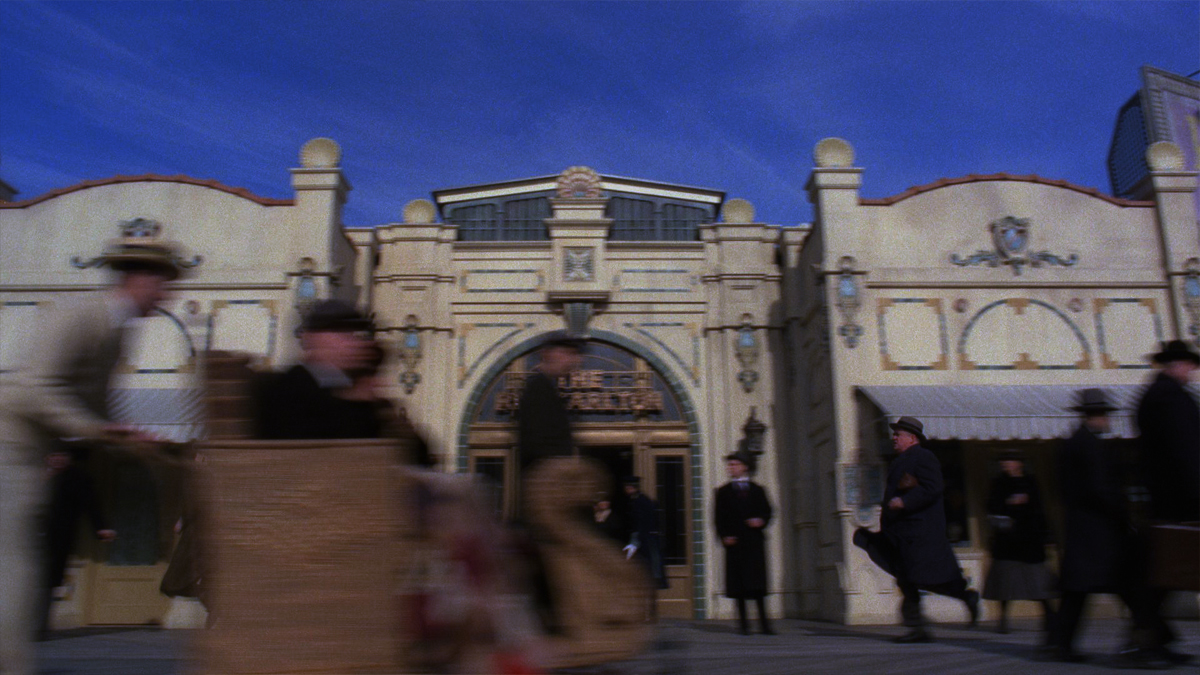
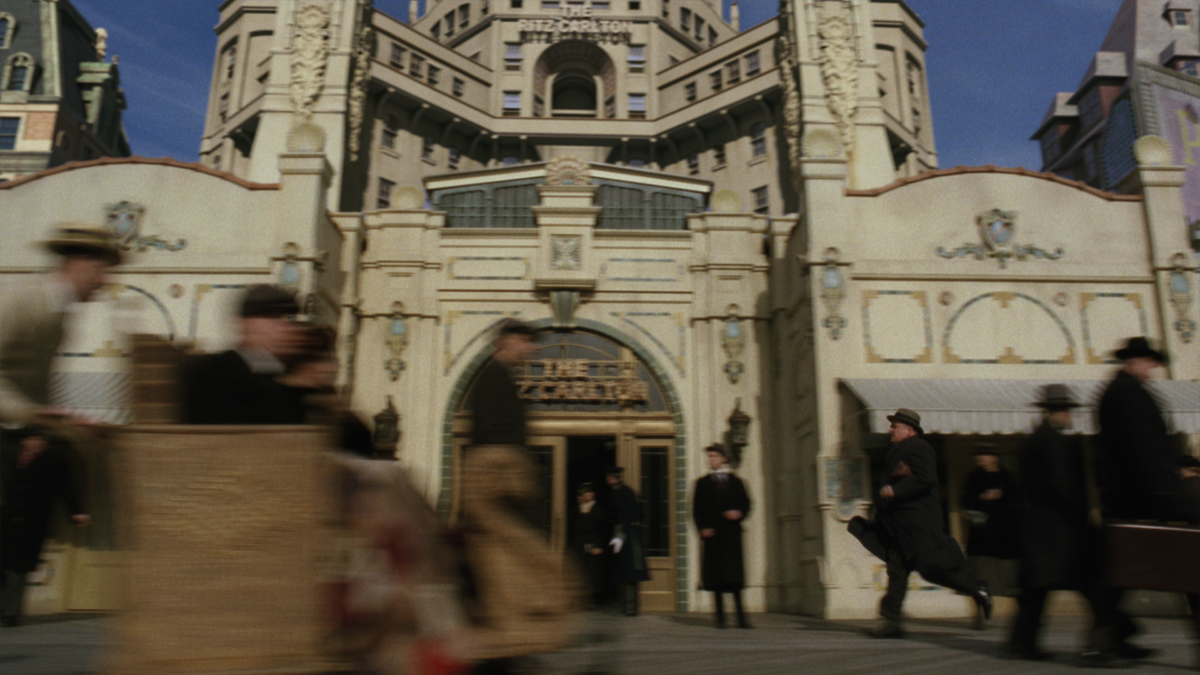
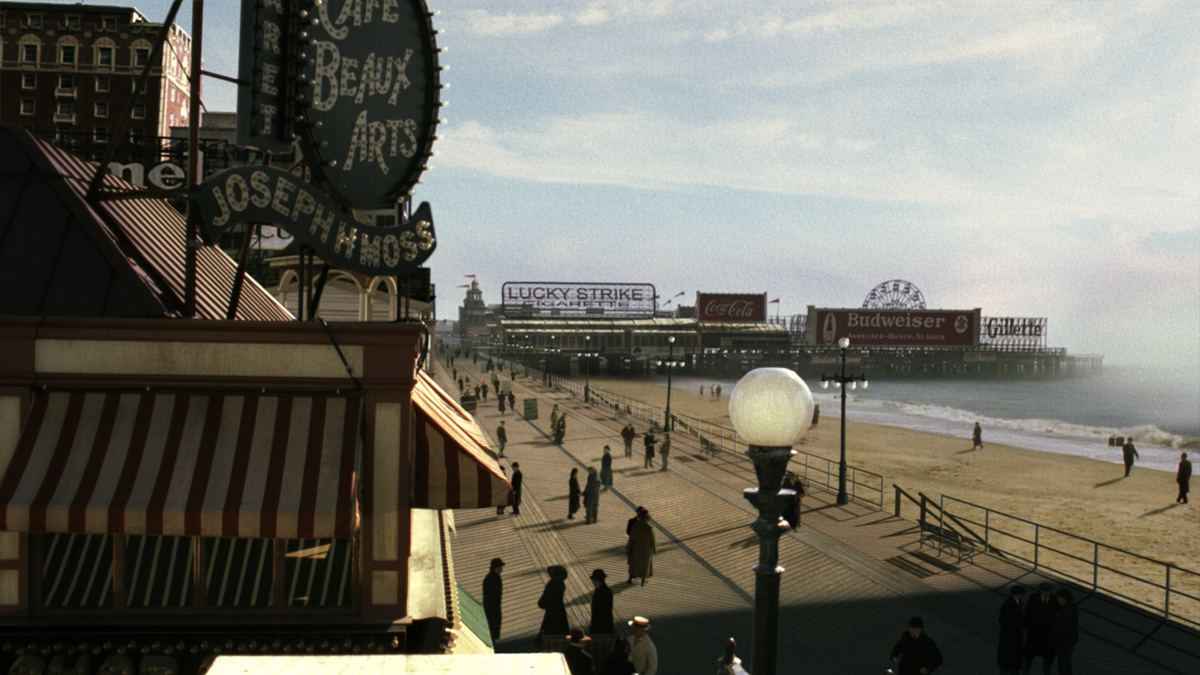
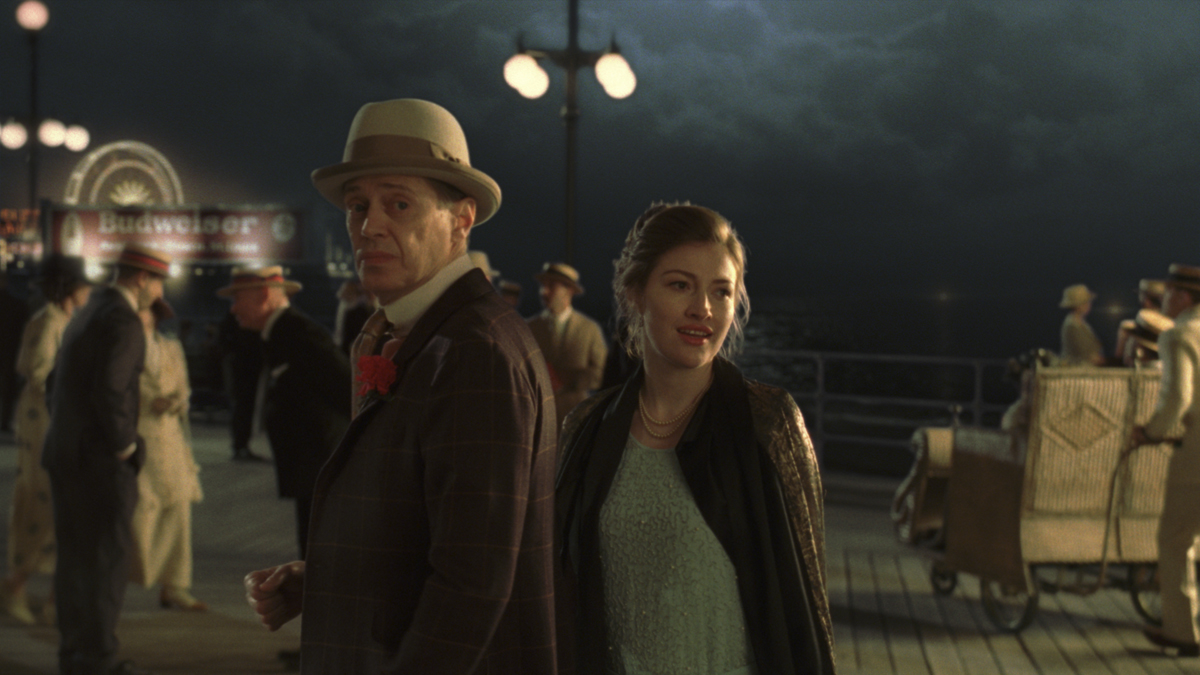
Can you explain to us in detail how you recreate entire streets and the pier?
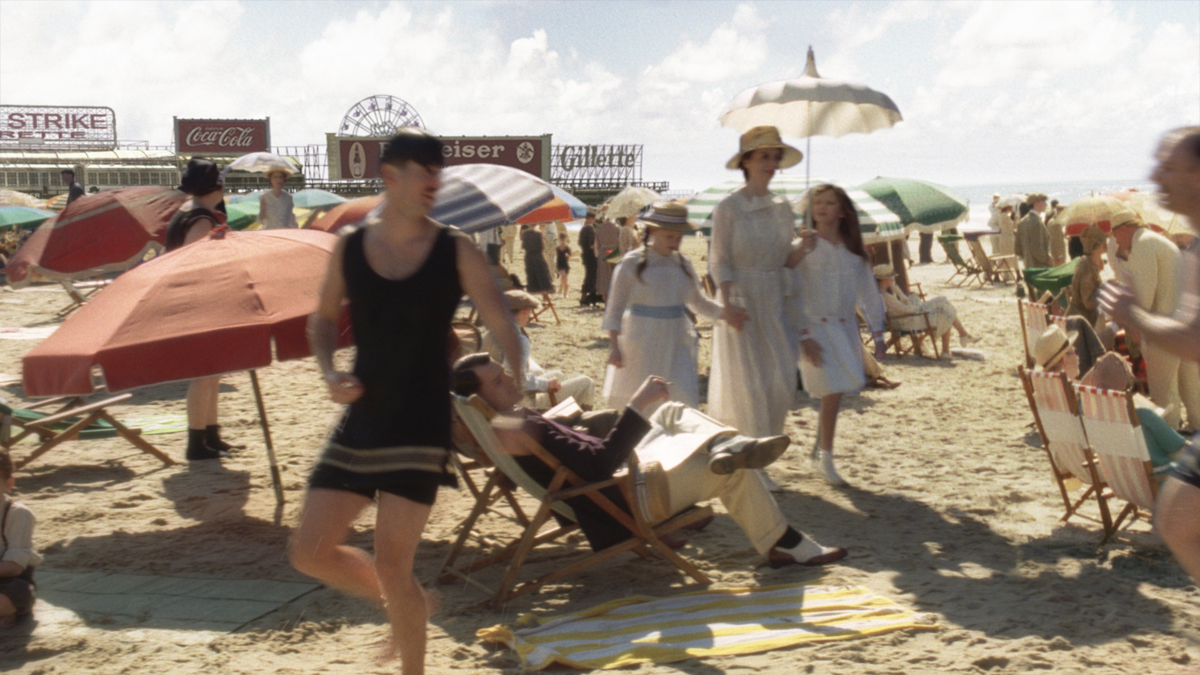
The approach we took for these shots was that we would use matte paintings and projection setups in Nuke wherever we could get away with them. Initially, David and the production team and I discussed building the entire boardwalk area in 3D, as it was a finite space and we could build it as an easily reusable asset for years to come. But when first embarking on this project, none of us could know how much or how little we would see beyond the practical set, so we opted to do more paintings in the beginning. And when you have access to the talent of Rob Stromberg for your paintings, that’s a very easy decision. But over the course of the season we started to pick out more and more « featured » structures that became 3D models and independent assets.
Knowing the limitations of time and resources for this project, I wanted to use Nuke whenever we could to get the most out of our 2D team as possible. We relied heavily on 3D camera tracks and projection geometry to build a large part of the world seen in BOARDWALK EMPIRE.
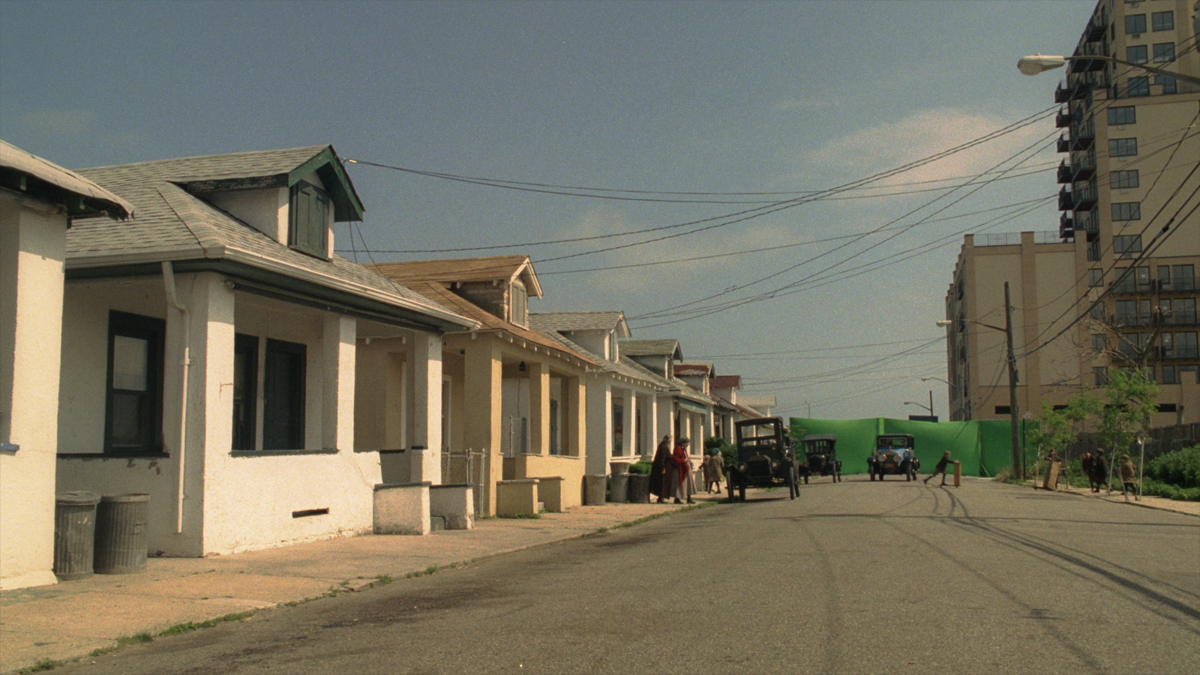
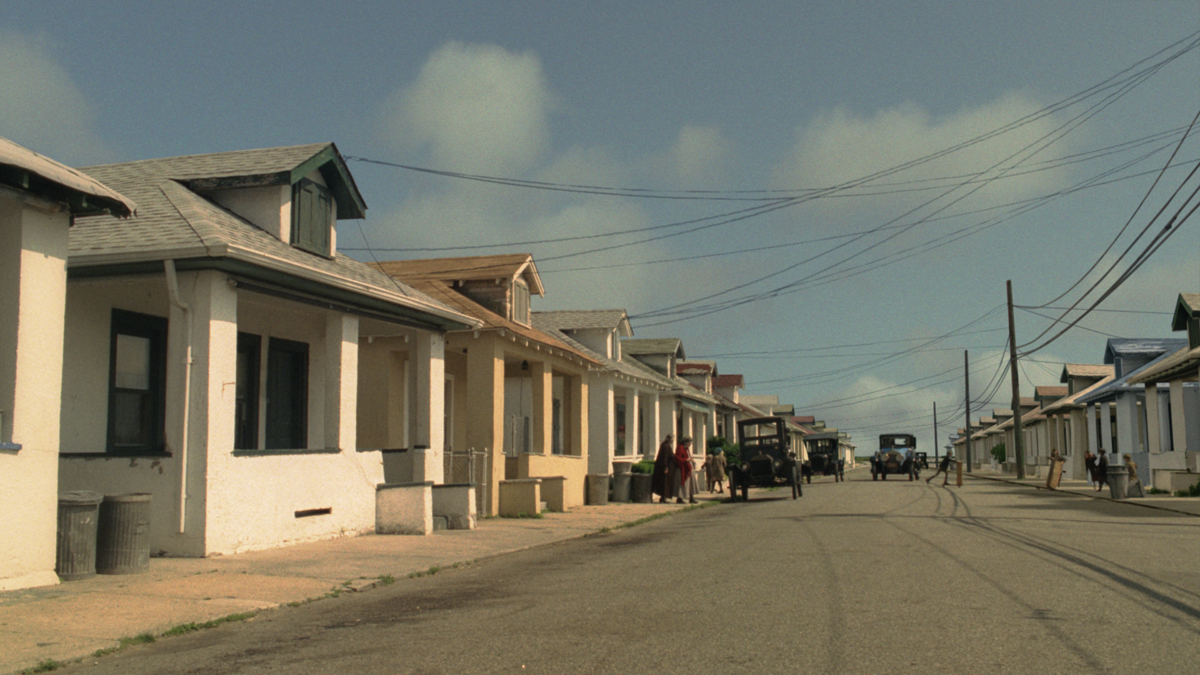
In Episode One, we see a beautiful panning shot on Sewell Avenue, this street with old 1920’s beach bungalows that still exists out in Rockaway, Brooklyn. The problem was that only one side of the street actually had the appropriate houses. On the day of filming, I shot images of every house that was dressed for filming from every angle I could get. We used these images as well as still frames from the plate footage to re-project the surface back onto 3D-modeled houses. The houses were built very loosely in Maya and then brought into Nuke’s working space. We surfaced all the buildings in Nuke except when we needed some shadow casting passes. We would then kick that back to 3D for a good shadow pass. We also rebuilt the electric lines and poles in Nuke along with the ground plane and full sky replacement.
As for the boardwalk shots, depending on the camera move we used different techniques, but it was along the same lines as what we did for the street. We had the pre-viz model we built to scale in pre-production as a starting point, which gave us a lot to work with. That model was converted to Maya from Sketch-Up into a few different resolution levels. Then I would use the low res version on-set with my laptop to build camera moves on the fly for the directors, and back in the shop we used it for projection or, depending on the detail, for 3D renders. We also used this model with our 3D tracking team. So every shot on the boardwalk that went into 3D tracking lived exactly where it was filmed on the real set. We could turn over grey shaded renders to the matte painting team, placed with the proper perspective and vanishing points already mapped out. It really helped our build time in terms of the painting portion of the process. We would also pre-light the grey shaded models so the renders could almost serve as an underpainting. The water was just filmed water plates that were tiled out and placed on cards in Nuke.
In both types of shots, the real feat was to use the strengths and size of our 2D team and to not overwhelm our 3D crew. Using projection setups the way that we did really let our 3D guys operate in more of a supporting role and let the 2D shoulder the mass of shots, so we would not be stuck behind rendering bottlenecks from the 3D side.
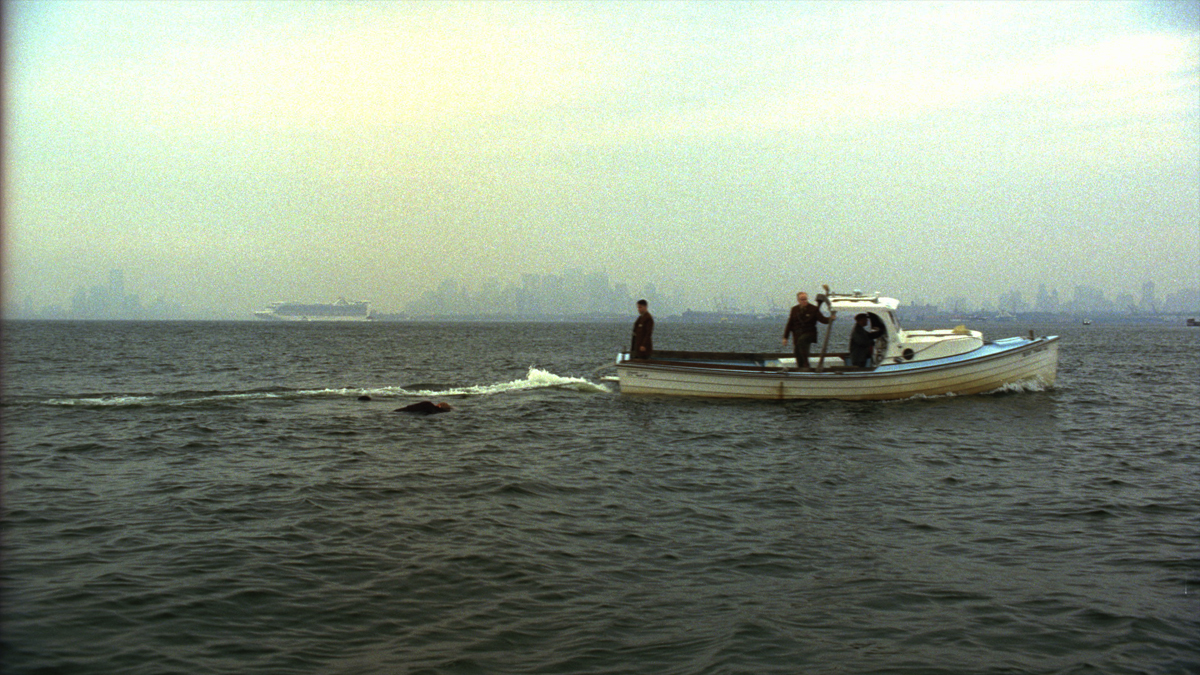
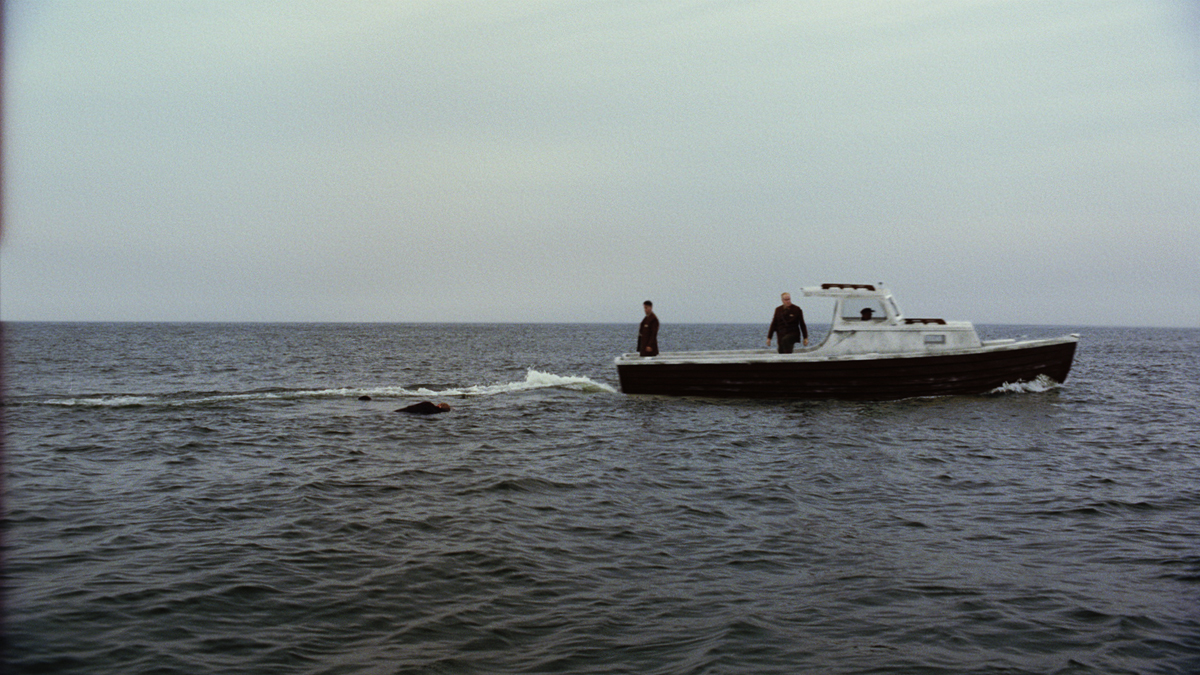
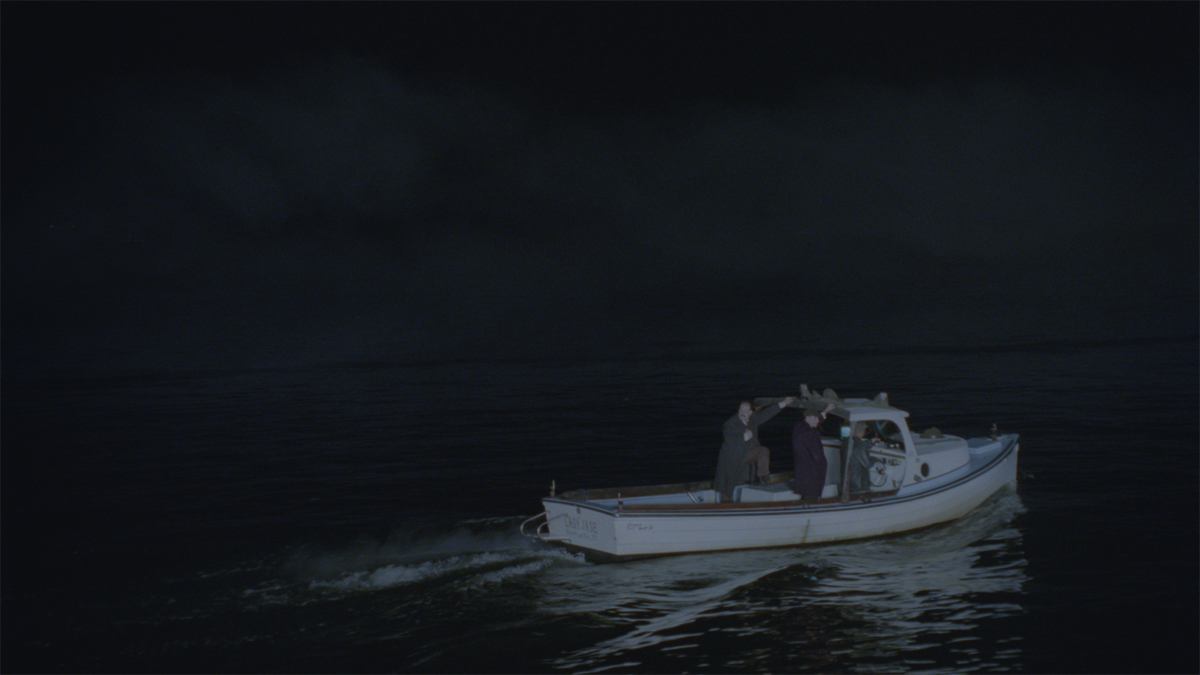
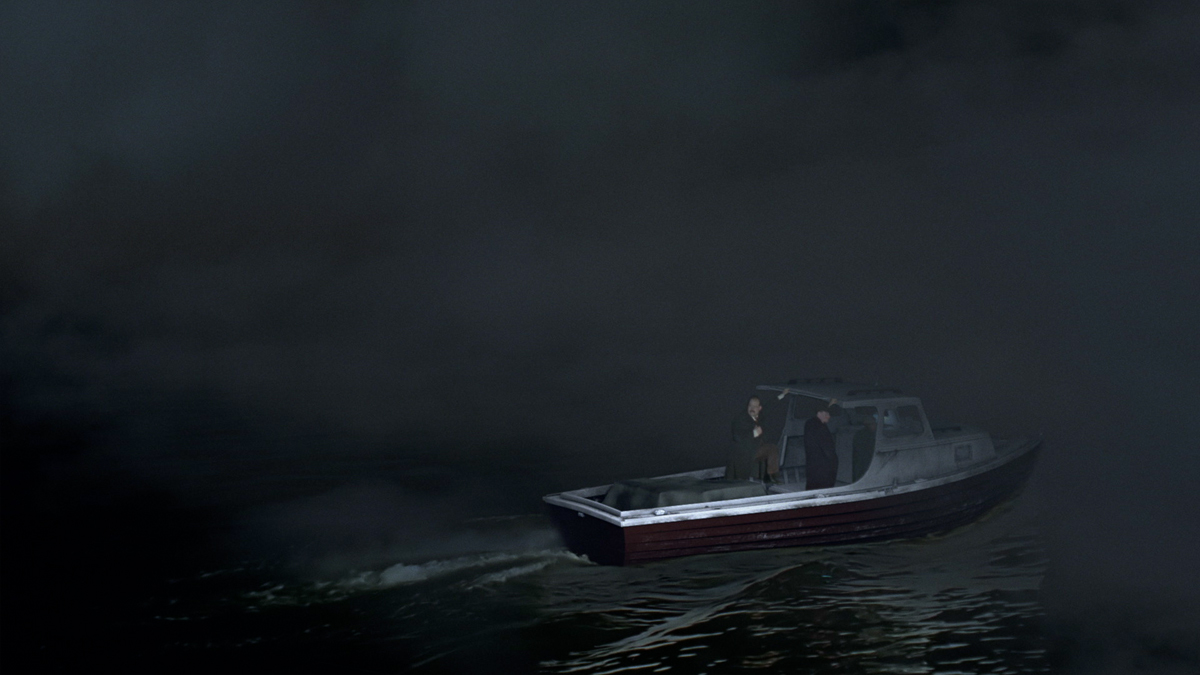
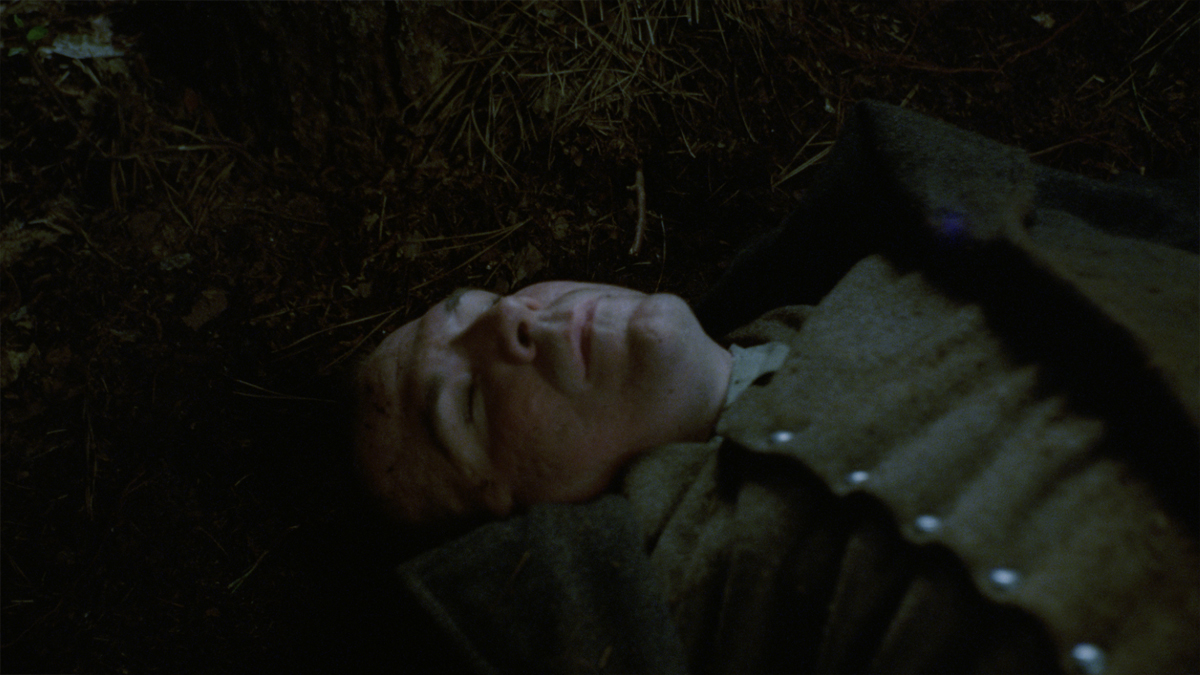
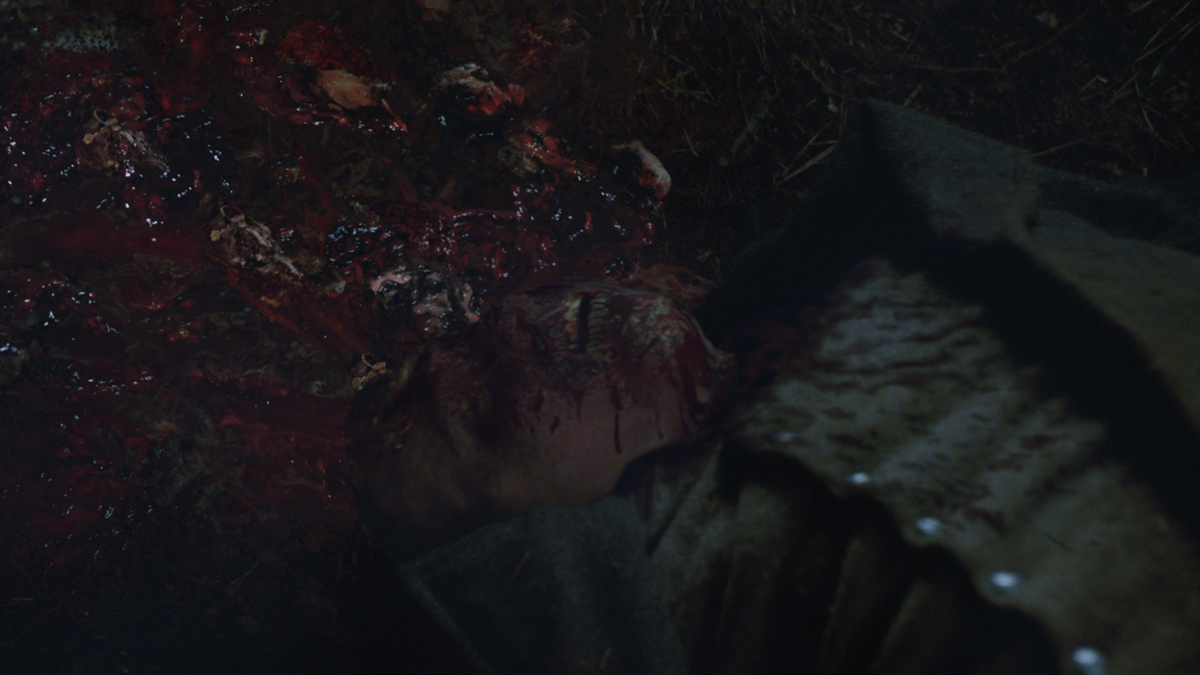
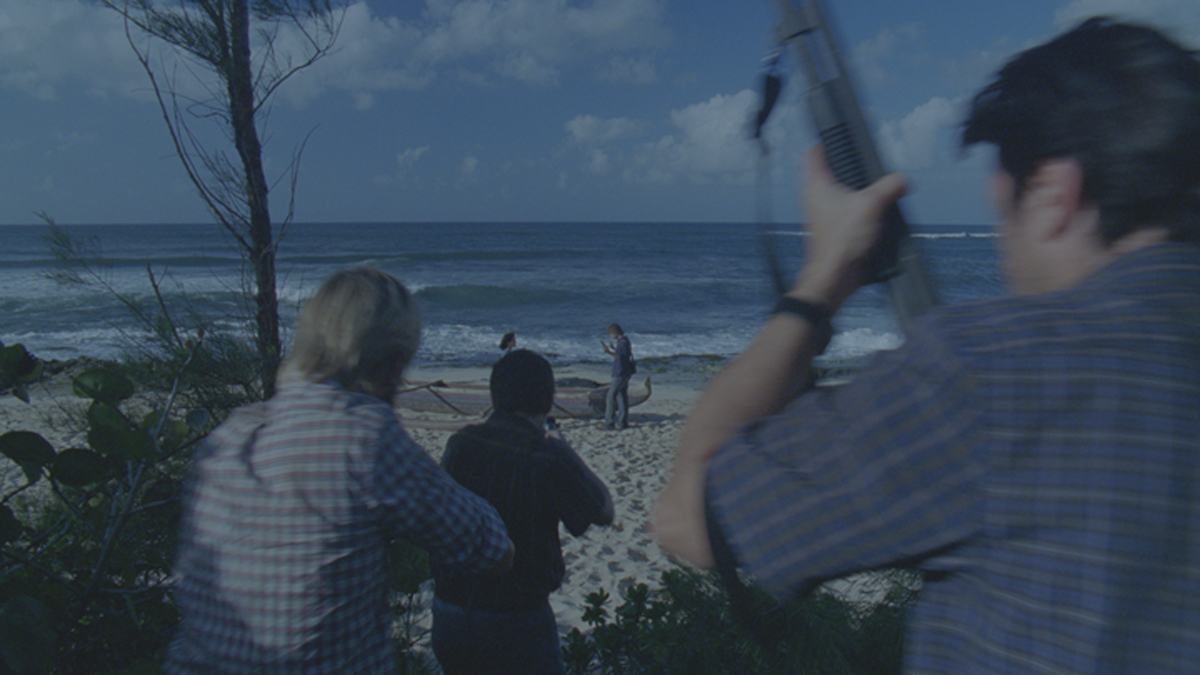
Were you involved on the sequences on the ocean including the shots in which a character is thrown into the water?
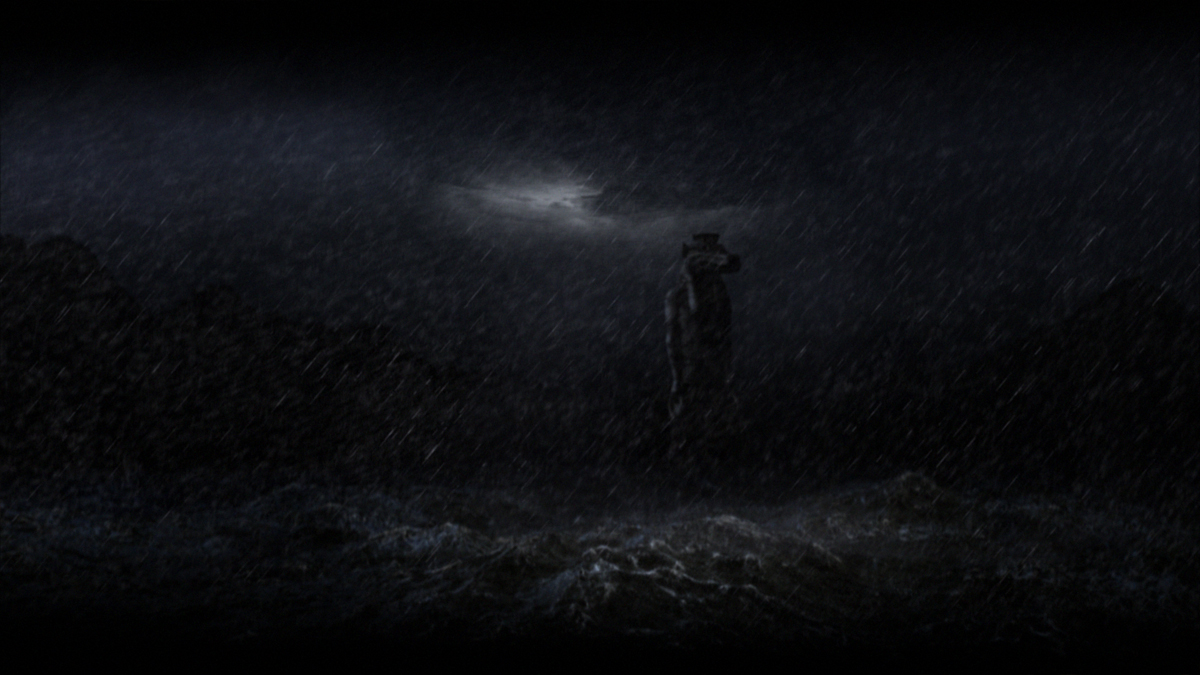
Yes, and this is a bit of a funny story. All the shots with the smuggler boat were set to be a VFX split day to shoot both the « dumping the body » shots and the opening shot of the show, where the boat is moving away towards Atlantic City at night. When we were riding to the set that day, Richard Friedlander, Brainstorm’s VFX producer, got a call that the hero boat was taking on water on its way to the set. When we all arrived to the set we assessed the situation there were really only two options: either we would have to shut down and postpone the filming day till the boat could be properly fixed, or we could fix it in post. Robert Stromberg, the production VFX Supervisor for the pilot, pulled me aside and asked how I felt about doing a boat replacement. This was something that neither Brainstorm nor I had done before, but I was very confident that we could do it. So we had the boat team pull up all the boats that were similar in length to the hero boat until we found one that could work for our purposes. It was the approximate length (just a few feet shorter), and it had low enough rails on the side that we would not have any obscuring issues with the actors.
As this was an all-VFX shoot day we had a lot of opportunities to shoot safety plates to help us with the final assembly of the shots. We began by shooting the actors performing the actions in the stand-in boat out on the water, as we had planned to do with the hero boat. When we heard the news about our our hero boat, we requested that it be brought over on a trailer so that we could get the measurements and reference images for the CG replacement. When it arrived, we hatched another plan. We would also reenact the water scene on the drydocked hero boat.
Now keep in mind that we had planned to do all of our shooting that day from a 50-foot Techno-crane. So we set the camera up on the crane and were able to swing it around into many different positions and angles without ever having to move the base. That saved us a huge amount of time between set-ups on a day that was quickly becoming a mad scramble, all because of one leaky boat. Filming from the crane-mounted camera, we performed the body toss on the drydock boat from many different angles with stunt actors and landing pads. While we were waiting between setups, we would swing the crane over the water and film matching water plates for the angle. We used a tugboat in the water hitting the throttle to create churning water for the plates.
In the end it was up to the director to put the scene together the way he liked. When we received the working edit, we saw the issues we were up against. Some of our shots were re-envisioned in the edit, but luckily with all the coverage we shot that day, we had the pieces to put it together.
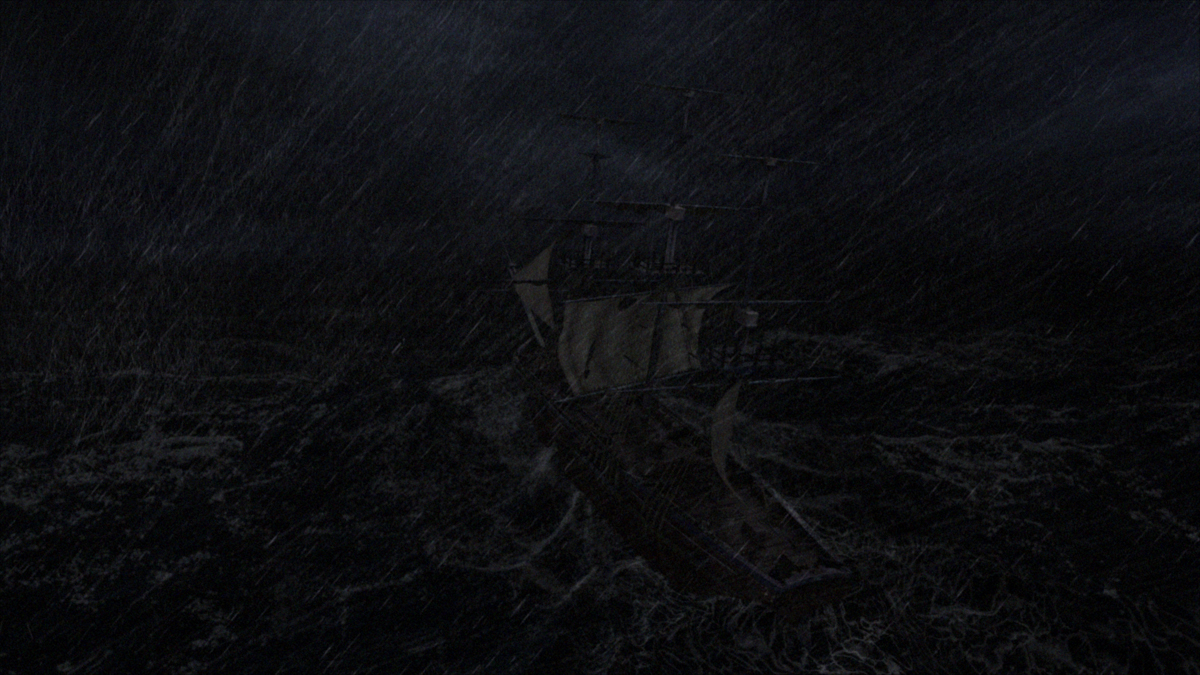
The boat replacement shots did have some interesting complications to them. We modeled the boat from measurements and photographic reference. Once we had the boat modeled and matched-moved to the production plate, we found that the difference in scales of the boat was much more apparent than we expected to see. In certain instances we had to do scaling adjustments to help it sit better into the plate. We also found that the position of the cockpit and some other key features on the boat were not really in the exact location, so it took some clever work on the part of our 2D and 3D teams make everything feel right. In certain instances we did have to do some rebuilding of the actors to help sell the effect.
The other issue we had with the boat was the water interaction. I had hoped that we could steal more interaction from the plate, but since the hero boat had a white hull, and was shorter than the replacement boat, we had to resort to some help from 3D. We used Houdini to both enhance the boat and water leading edge interaction along with enhance the splash when man was thrown overboard. The end results are great, but it took some quick thinking to make it happen.
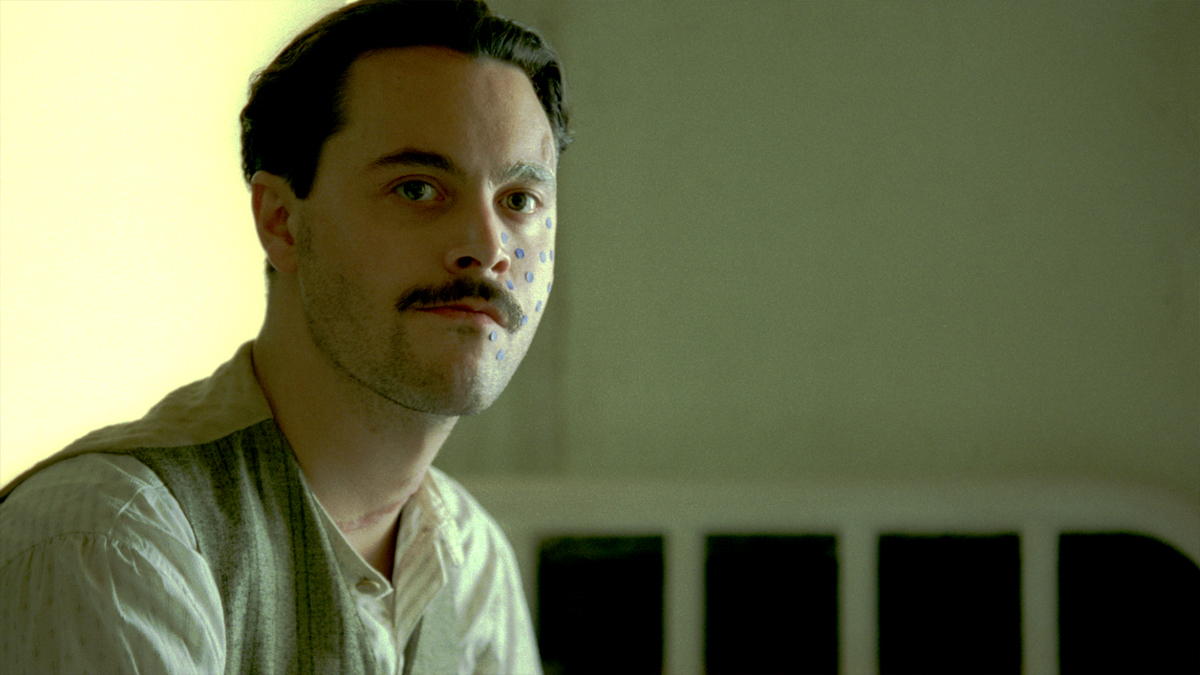
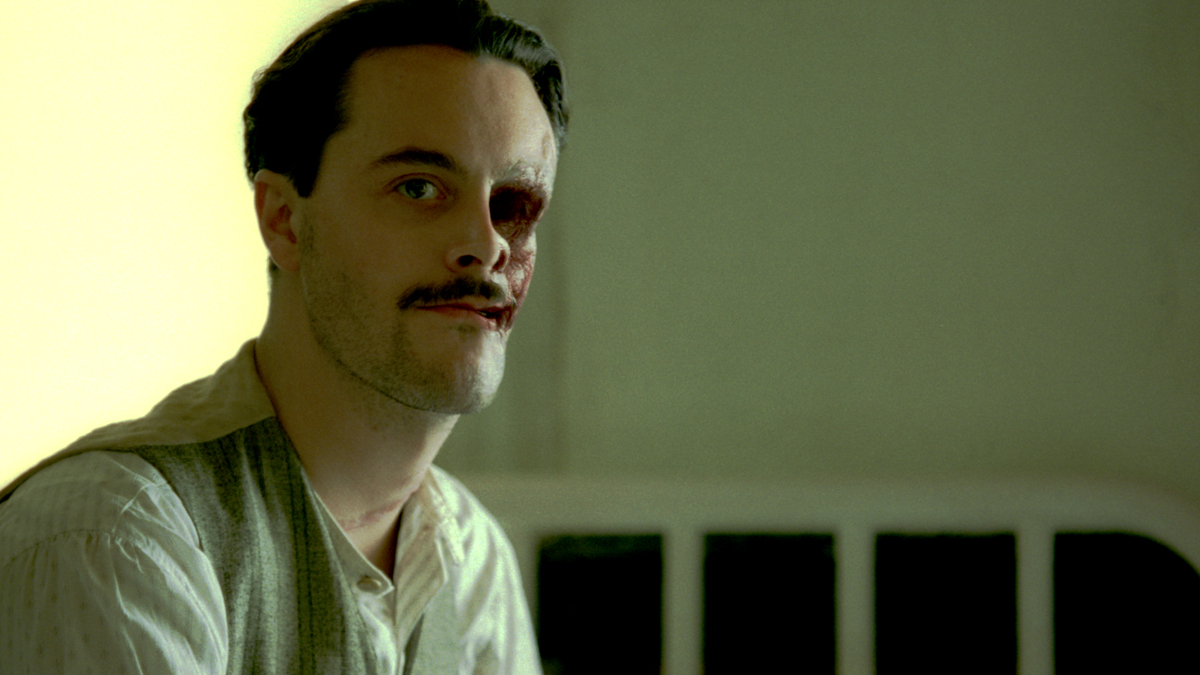
Can you explain how you created the impressive war wound on the face of one of the characters?
When this topic came up in pre-production, we were worried that the effect would be too big and complicated for us to pull off on an episodic show. The scarring on the face of Richard Harrow was not to be a superficial wound, but rather something that had taken away part of his face. Dave Taritero and I came up with an initial plan for the face shots: make everything as simple as possible. No camera moves, no talking, just a straight reveal. This is how we approached the shots in Episode Seven when we first meet Richard. The idea was to cut down on any of the complex roto work or carving into his face to make the deformation look real.
The shots we did for Episode Ten, where Richard is in the living room on the couch, featured rapid movement, a moving camera, and lots of talking—not simple at all! But since we had already revealed Richard, there was no turning back. For the Episode Seven shot we had resorted to a bit of trickery, with a loose face model, matchmove, and re-projecting the face in Nuke. We pushed that shot about as far as we could go with our sort of mishmash 2.5D approach, and it worked nicely. But for the Episode Ten shots, we knew we would have to be very creative and really get our hands dirty.
When looking at how to complete this series of shots, I came up with a different approach. Matchmoving a head is a pretty simple thing to do, especially for just a handful of shots, and all we really needed was registration of the wound as we would be taking over all of that portion of the face. We enlisted the help of an old modeling buddy of mine, Brian Freisinger, and a character animator, Anton Dawson, to rig and deform the face to match sync. I took photos of the actor’s face from every angle I could and sent that info to Brian, who built us a pretty perfect face match.
Once again, the production team provided us with all the research we needed, and what we learned was fairly horrifying. We had great examples of the scarring and skin grafts, burns, and all sorts of other trauma that these men had to live with after World War I, and how they used actual tin masks to cover their deformities. We went through a rather long design cycle for the look for the face for these shots. It took us a while to figure out the type of deformity he had and how it would react with his face. The placement of the wound did provide a challenge, as the actor still had the front and rear of his jawbone intact, but a gaping hole in his face and a missing eye. Making the wound look ghastly enough without overdoing it was a bit of a balancing act.
Ultimately, the Episode Ten shots were rendered out of Maya using mental ray and comped in Nuke. One way we helped our compositors was to provide them with a UV map of the face so that they could apply grades and corrections to specific spots, to keep the shot from going back to 3D once the animation and lighting were locked.
What was the biggest challenge on this project?
I think the biggest challenge on this project was twofold: dealing with the sheer amount of data constantly coming in, and managing the shooting schedule at the same time. We were in post on the show while a large portion of the series was still filming. So we were working on shots as they were filmed, planning new shots, reading scripts, filming elements, and then also working on set with David and the directors to help visualize and realize the world we were creating. It was intense.
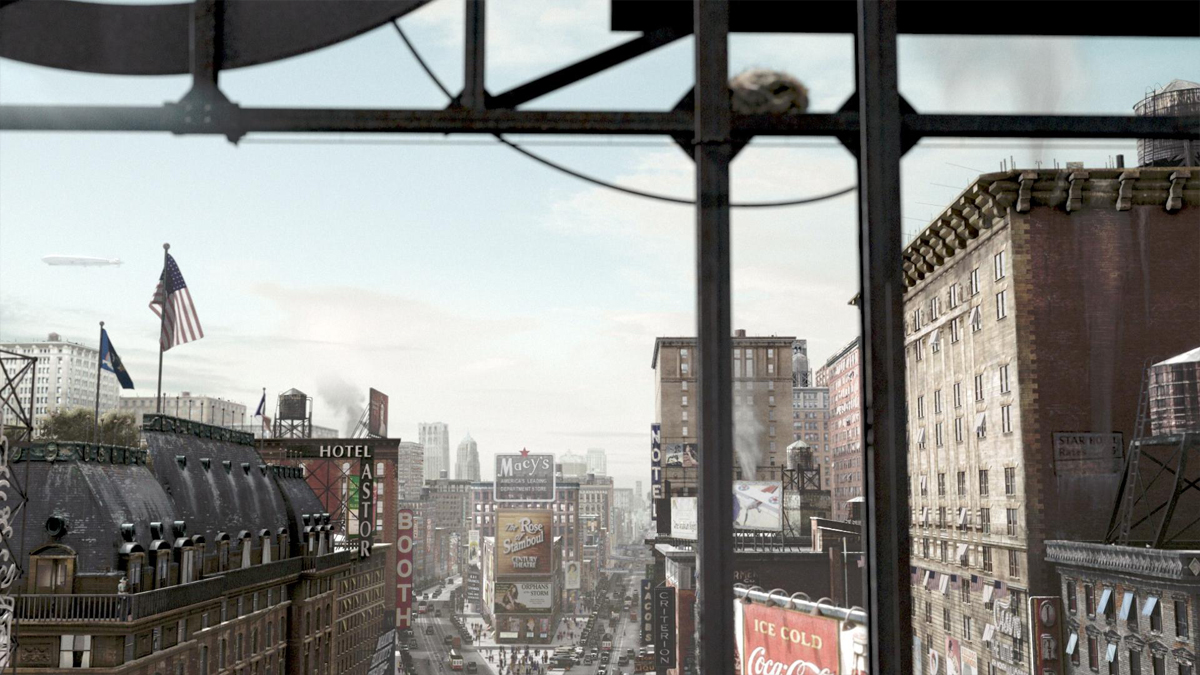
Was there a shot that prevented you from sleeping?
Yes–the Episode Two Times Square shot, definitely. It was a total unknown. It was Brainstorm’s first fully CG shot, and it had to be a photorealistic recreation of 1920’s Times Square. You might be amazed by the lack of imagery available of Times Square in 1920, especially from a high-angle camera position. It really just doesn’t exist.
We added a lot of little details to help sell the feeling of Times Square, with endless revisions and much tinkering to make it work. What is your pipeline and your softwares at Brainstorm Digital?
We primarily used Nuke as our compositing package (but Shake still makes an appearance every now and again), and Maya for 3D. We also use Houdini for the snow and splash effects.
How long have you worked on this series?
We have been on the project for close to 22 months, from the original pitch all the way to the completion of Season One.
What did you keep from this experience?
This project was an amazing opportunity to work with some of the best talents in the field of film and television today. Working hand-in-hand with the writers and directors from THE SOPRANOS and THE PACIFIC, along with multiple Oscar winning directors and artists, was an amazing experience for me. Few other projects will pull that many different talents from all over our industry into one place.
What is your next project?
The project we just finished together is THE DILEMMA for Ron Howard, and we’re in prep mode for Season Two of BOARDWALK EMPIRE.
What are the 4 movies that gave you the passion of cinema?
This is tough–there are so many.
JURASSIC PARK (The film that really pushed me down the path of VFX)
THE SHINING
2001
BRAZIL
A big thanks for your time.
// WANT TO KNOW MORE?
– Brainstorm Digital: Official website of Brainstorm Digital.
– fxguide: Article about BOARDWALK EMPIRE on fxguide.
// BOARDWALK EMPIRE Season One – BRAINSTORM DIGITAL – VFX BREAKDOWN
After several years of freelance work, Frazer Churchill joined Double Negative which is one of the founders. He participated in many projects such as PITCH BLACK, BELOW or ENEMY AT THE GATES. In 2001, he became supervisor and handles the visual effects of DOOM, SAHARA or CHILDREN OF MEN.
What is your background?
I was a freelance graphic designer before working in video post production in the mid-nineties. I then moved into title design and film fx and went on to be a founding member of Double Negative. I developed a career as a digital artist and then VFX supervisor. I supervised DOOM, SAHARA & CHILDREN OF MEN.
How was your collaboration with Edgar Wright?
Edgar is an auteur, he has a unique style of film-making that is unmistakably his, yet he is still very open to input. The way the film looks is due to the collaboration of Edgar, Oscar Wright (Edgar’s brother, the film’s concept designer) Bill Pope, Marcus Rowland, Myself and Andrew Whitehurst (CG supervisor)
Have you used some motion designers for some sequences?
We had 150 digital artists working on the show from all backgrounds, some of them have motion graphics experience.
Can you tell us about the shooting of the first fight? And what have you done on it?
The first fight in the film is the Patel fight. This was a complicated fight to plan and shoot. We had already shot a short piece of the sequence during the test shoot and this helped us establish some key techniques but there was still a lot of work to do.
The Patel fight introduces the viewer to the hyper-real Manga-esque world of Scott Pilgrim, the film up until this point has played relatively straight, at this point in the story Scott Pilgrim shows it’s true colours and takes a sharp left turn. Matthew Patel bursts through the Ceiling of the Rockit nightclub and attacks Scott while he’s playing on stage. Matthew flies through the air, lands on stage, faces off with Scott then charges across the stage, get’s kicked up into the ceiling of the club, where upon Scott leaps from the stage, flies up to the ceiling catches Patel with a mid-air uppercut and then lands a repeated volley of punches on him while ascending to the ceiling of the nightclub at which point he smacks him down from the ceiling to the floor.
A kung fu style battle then takes place on the nightclub floor until matthew Patel levitates and begins an aerial bollywood style song and dance routine during which he summons four winged demonic hipster girls who bombard sex-bob omb with a deluge of fireballs.
The whole sequence was shot using a combination of bluescreen photography and in-situ on-set photography. Parrallelogram stunt rigs, wire work and jogging treadmills.
Matthew Patel’s flying pose was shot on a parallelogram rig against blue with an interactive light sequence rolling over him and wind machine to create movement. The interactive light was created by a series of programmed parcans and a rolling mirror.
For the punching and spinning, we used the phantom camera and shot at 288fps. Cera was shot on set punching 2 lighting triggers that set off four photoflash bulbs, Cera’s punching action was shot twice, one tight medium shot of him blocking and punching and one wide shot of the follow through KO punch, we then morph transitioned between the two shots two create a crash zoom out, this was augmented with camera shake and “colour shake” in which the image would cycle through frames of block colour which added a very stylised feeling of impact. The element of Patel being punched out was shot on a P-rig, Patel was manipulated by Brad Allen’s stunt team in blue suits while Bill Pope provided a 70kw “lightning strike” interactive light to create flashing KO light on Patel as he spun out of frame in digital slow mo.
The whole shot was composed around the “Krowww” and “kpok” sound effect graphics which we took from the comics and overlayed live on set to get good composition and line-up on the day.
In the final composite put together by Ian Copeland there are Handrawn flash frames during the impact flashes, these were provided by Oscar Wright, the film’s concept designer.
In another action shot Patel runs across the stage at Scott during which the proportions of the room stretch and distort as they do in Manga animation, in the finished shot the camera appears locked to Patel’s legs as he runs. To achieve this we shot Patel on a blue jogging treadmill to capture a “camera locked” aspect on his running legs, we then shot Scott, Kim, Stephen and Johnny stills on the Rockit set with a dolly move .
CG floor was created and then animated to match Patel’s treadmill legs, CG set wall was also added later, Anime zoom lines and lens flares were comped in to create the final look.
A dynamic low angle shot of Scott kicking Patel was accomplished using stunt performers on wire rigs who later had their faces replaced. The impossible focal length change during the crash zoom was created using close and distant camera positions morphed together.
The Final Anime backgrounds for the sequence were created using a combination of plate photography and digital stills. Working with with 2nd Unit DP David Franco, I shot travelling plates of the Rockit set using a 50ft techno crane. Compositors worked through the material to come up with a photographic version of a “Naruto” style speedline background.
Patel’s song and dance sequence was choreographed to music written by Dan Nakamura. Patel was shot in situ in the Rockit set on a fork rig performing his dance routine, photoflash bulbs were triggered at the appropriate times during the live playback to sync with the appearance of the demon hipster chicks and fireballs.
The idea for the four demon girls is that they all look identical but have slight differences in their performance, the way we acheived this was to shoot the same girl on a fork rig with a four camera array on bluescreen, this gave us a slightly different angle on each girl relative to their position in the air. We shot numerous takes of her running through her routine which enabled us to use different takes for the different girls giving us a synchronised but not identical performance from each of the girls. One girl pass was shot with a spotlight on to create a pass that we could place in the spotlit area of the hero plate. Flashbulbs were fired in time with the song playback to synchronise with the Hero Matthew Patel performance.
The Hipster chicks were given CG wings, an ethereal glow and ghostly transparency in compositing. Fireballs, flames, debris and magicdust were also added. Fireball effects were created by Aline Sudbreck using in-house software squirt. CG wings were built and animated to complement the dance routine, while Kate Porter oversaw compositing of the sequence.
Did you create digital doubles for the fights?
The actors trained for a long time with Stunt Co-ordinators Brad Allen & Jackie Chan’s stunt team so they were able to do a lot of the fighting and physical stuff for real. We did create quite a few digital doubles for the more extreme moments in the fights. We would always start the effect with an actor on a rig, shot against bluescreen and then take over with a digital double. I think you’d be surprised by how much of the fighting is actually performed by the actors.
Did you create previz for the different battles?
We previs’d the Katanyagi scene and the Lucas Lee skateboard scene.
How did you create the impressive downhill skateboarding?
Scott challenges Lucas lee to show off his skateboarding skills by getting him to grind down the big staircase leading up to Casa Loma. This sequence sees Chris Evans ollying up onto the railings and grainding his way down to the street below. In the world of Lucas Lee “There are like 200 steps and the rails are garbage”.
The sequence sees Lucas hopping from rail to rail, pulling an aerial 360 degree rail grab, a backside toeslide and other radical moves, all of this is punctuated with on screen sound effects, flurries of snow and plumes of sparks.
A previz model of the Casa Loma staircase environment was built using location photography as reference and the sequence was animated using a digital Lucas Lee. The sequence underwent numerous revisions in the edit suite before it was locked.
The previz models of portions of the steps and their associated CG camera positions were placed into a maya scene of the bluescreen studio, this enabled us to create the physical layout for each of the shots. Art dept provided the practical railings and platforms that doubled for the CG set. All the stunts were shot entirely against blue using wire work and gimbles. CG environment was created based on extensive location photography and lit using HDRI derived CG lights. Once again The Casa Loma staircase is an exaggerated version of reality, we played very fast and loose with the spatial relationships and increased all the distances and changed the layout to create the breakneck Anime flavoured action set-piece. The final sequence has matte paintings of the Toronto skyline, CG steps, CG trees, CG snow flurries, CG sparks, lens flare elements, 2D graphics, bluescreen stunt performers, bluescreen actors, CG coin explosions, CG & photographic smoke elements. Chantelle Williams created the CG environment using Maya and Renderman. Steve Tizzard oversaw the creation and compositing of the action sequence.
Only the first shot in the sequence was shot on location at Casa Loma with Chris Evans ollying up onto the railings with a wire assist, he pulled it off in two takes, that shot is completely real!
What have you done for the scenes with the Twins?
In one of the more spectacular fight sequences Sex-bob-omb have to face off with the Katanyagi twins in a battle of the bands at huge warehouse party. Sex bob-omb start to play a track written by “beck” called threshold whereupon the Katanyagi twins fire up their synths and blast Sex bob-omb off the stage with a devastating sound wave from their huge speaker stack, the wave also blows a hole in the venues roof.
Sex-bob-omb recompose themselves and start to play again, snow is falling through the hole in the roof and as they start to play the snow dances in time to the music. The Katanayagi twins summon 2 huge snow dragons from their speaker stack they coil through the air, breath snow fire on Sex bob-omb blowing them off the stage.
The fight resumes with Sex bob-omb summoning a sound yeti from their amplifiers, the dragons & yeti battle for supremacy in a huge aerial striuggle while Sex bob-omb and the Katanyagis play. The fight intensifies and finally the yeti bashes the snow dragons heads together and they fall onto the Katanyagi stage destroying the twins, their synths and speaker stack in a huge explosion of coins and broken speakers.
The scene was pre-vizd at Double Negative, so the choreography & basic look of the creatures was to some extent designed prior to shooting. The scene took 2 weeks to shoot and was shot with on-set playback to sync all the elements of the peformance, using the previz we marked the position of the creature in each shot with a weather balloon, this also acted as a CG lighting reference. Bill positioned long sequences of lights which were programmed to follow the creatures movement providing interactive lighting at the correct spatial positions.
Colin Mcevoy animated the creature fight while Markus drayss and Lucy Salter designed the complex particle system that defines the snow dragons. The dancing snow system and the Katanyagis soundwave effects were created by Alexis Hall using Houdini & Maya.
One of the features of the Sound Yeti is that it’s covered in “sound fur” which reacts to the music. CG supervisor Andrew Whitehurst wrote a piece of software called the waveform generator which converts data from the audio files into animation data which drives the amplitude and frequency of each spike of the sound fur. The end result is a relentless bristling movement on the yeti which is driven by the music.
Ultimately the look of the yeti harks back to hand drawn animation, one of the first briefs for the creature was to make it like the “creature from the ID” from the film FORBIDDEN PLANET. The final Yeti look is a combination of hand animation, complex particle system dynamics and audio driven animation.
In the fights big finale the dragons fall onto the katanyagi twins demolishing their stage in a spectacular explosion enhanced with a scott pilgrim signature shower of coins. The basis of the explosion was a practical gag rigged by Laird McMurry with pyrotechnics provided by Arthur Langevin. The explosion was enhanced with Rigid body dynamics using in-house software “Dynamite” and coin particle simulations, provided by Chris Thomas and Federico Fasselini. Composited by Keith Herft. The final shot is a seamless blend of Live action and CG destruction mayhem.
As production VFX supervisor, can you tell us what are the sequences that were attributed to Mr X and why?
Mr X created the stylised exteriors of Toronto, lots CG falling snow and snowy Backgrounds. Mr X are based in Toronto where the film is set and shot, they were very keen to work on the film, their previous work was great and Dennis Berardi & Aaron Weintraub (the VFX supervisors) are great guys.
Is there any shots that prevented you from sleeping?
The birth of my daughter halfway through the shoot!
How many shots did you made?
1200.
What was the size of your team?
About 200 people.
What did you keep from this experience?
The best projects involve a director with a clear vision and extensive collaboration between department heads.
What is your next project?
I’m talking to Edgar Wright about his next film
What are the four films that gave you the passion for cinema?
Can I have seven?….
STAR WARS: I was 7 when it came out and it blew my mind.
A MAN CALLED HORSE: I was 10 when I saw it and knew it was good but I didn’t know why.
TIME BANDITS: I was 11 when I saw this and it changed my life.
HIGH PLAINS DRIFTER: Revenge from beyond the grave, perfect cinema.
LA HAINE: Made me want to be a film maker.
ELECTRA GLIDE IN BLUE: Best last shot in any film, ever.
ONCE UPON A TIME IN THE WEST: Will anyone ever make a better film than this?
A big thanks for your time.
// WANT TO KNOW MORE?
– Double Negative: Dedicated page about SCOTT PILGRIM VS THE WORLD on Double Negative website.
– fxguide: Article about SCOTT PILGRIM VS THE WORLD on fxguide.
Matt Johnson work since over 15 years in visual effects at Cinesite. He participated in many projects such as EVENT HORIZON and LOST IN SPACE. And supervised a large number of show from KING ARTHUR to THE GOLDEN COMPASS passing by V FOR VENDETTA.
What is your background?
I guess I’ve been interested in visual effects from the age of six. I can still remember leaving the cinema after watching STAR WARS with my father, deciding there and then that I was either going to be an astronaut or work in movie visual effects.
I started making films at seven, reading Cinefex at 11 and got into the industry straight after graduating from film school, making coffee!
I joined Cinesite and worked my way up to visual effects supervisor and have supervised everything from Bruckheimer’s KING ARTHUR, through to the destruction of parliament in V FOR VENDETTA, to Drew Barrymore as a talking Chihuahua.
How was your collaboration with Angus Bickerton and Michael Apted?
I’ve known Angus for years; we share the same geeky interest in old school visual effects. I first worked with him when he was supervising THE LEGEND OF PINOCCHIO, on through to LOST IN SPACE and BAND OF BROTHERS. I’ve always admired Angus’ creative and technical abilities and he’s always been a pleasure to work with.
This is the first of Michael’s projects that I’ve been involved with. He always seemed to have a clear understanding of what he was after and how it related to the broader narrative of the movie.
What are the sequences made by Cinesite?
Cinesite had quite an eclectic mixture of sequences, from the digital buildings and matte paintings of the Lone Islands through to the complex fluid simulations of the White Witch and the tendrils of mist.
The green mist made me think of THE CITY OF THE LOST CHILDREN. Was it a reference requested by Michael Apted? What references he gave to you?
THE CITY OF LOST CHILDREN is a wonderful movie, but it wasn’t foremost in our minds when working on the sequence. We pretty much had free reign to design the shots, working with Angus. Personally, my biggest visual reference came from the finale of RAIDERS OF THE LOST ARK.
How did you created and animated this mist?
The mist is supposed to represent the forces of evil encroaching upon the crew of the Dawn Treader. The ghostly trails were created in Houdini and proprietary fluid simulations tools. Animations were blocked out in Maya for each tendril shot. We decided to use eels to represent the fingers of the mist. The sinister appearance of these eels naturally lent themselves to the movement of the mist. Once the block out animation was approved, the team were able to derive fluid simulations from the data, produce numerous lighting passes and animate the fluids to interact with the live-action elements in the plate. This meant rotoscoping the mist around the cast and props on the deck to ensure that it was realistically interacting with the live-action environment, which had been shot in front of a blue screen stage.
Can you explain the creation of the environment around the Dawn Trader?
For the sequence involving the tendrils of mist the Dawn Treader has ventured into what looks like an underground cavern, except the rocks and columns are all made of moving, glowing mist. This cavern was initially blocked out in Maya, therefore we were able to establish a continuity for the columns of mist across the entire sequence. Once the layout was approved, the scene file could be passed over to the 2D artists, who used the 3D aspects of Nuke to create the mist environment for their shots. This was created using projected digital matte paintings with subtle animation to impart a sense of movement and multiple layers of rendered 3D mist.
Have you used the projection of matte paintings?
The projected matte painting is a very useful technique, which we used to impart a sense of dimensionality to what was traditionally a ‘flat’ effect. We used this technique both in the ship environment and the Goldwater Island sequence.
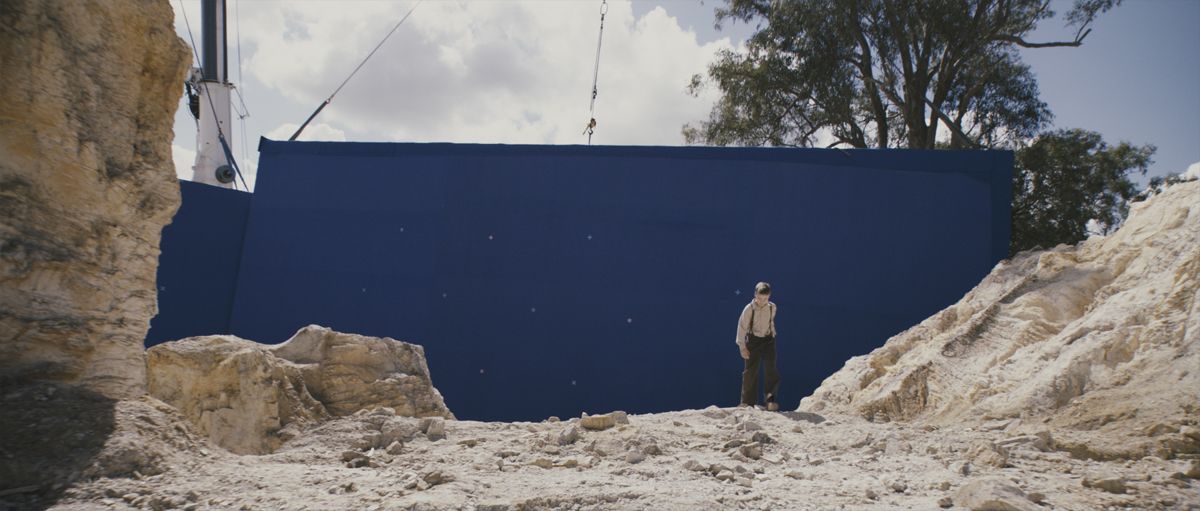
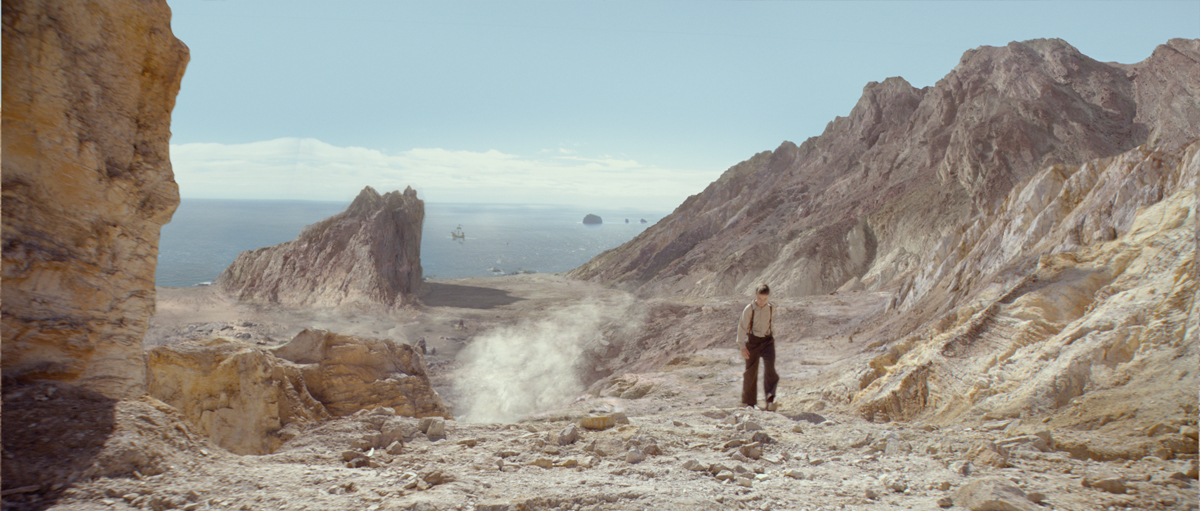
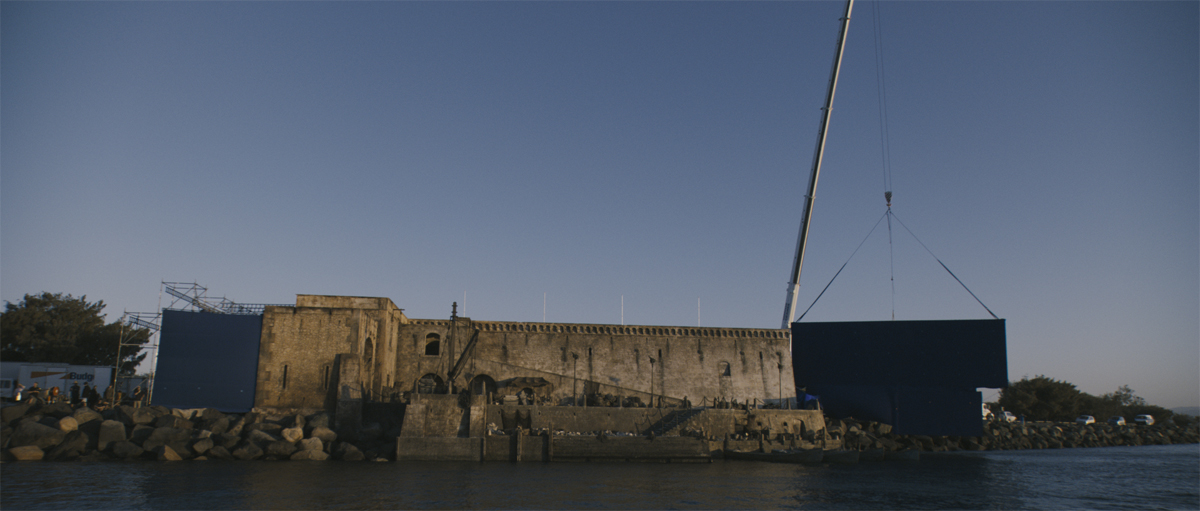
How did you create the set extensions on the Goldwater island?
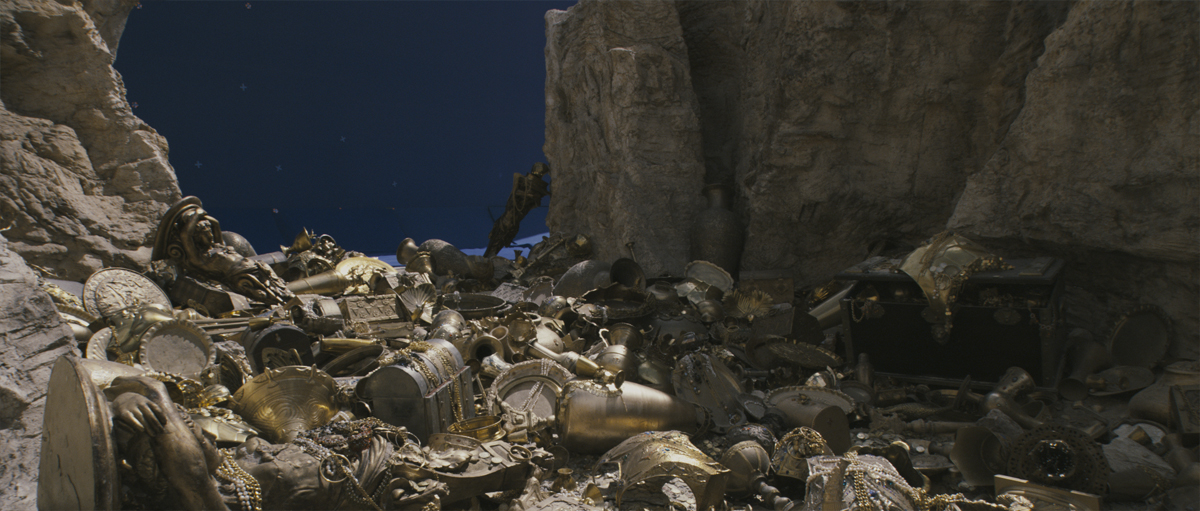
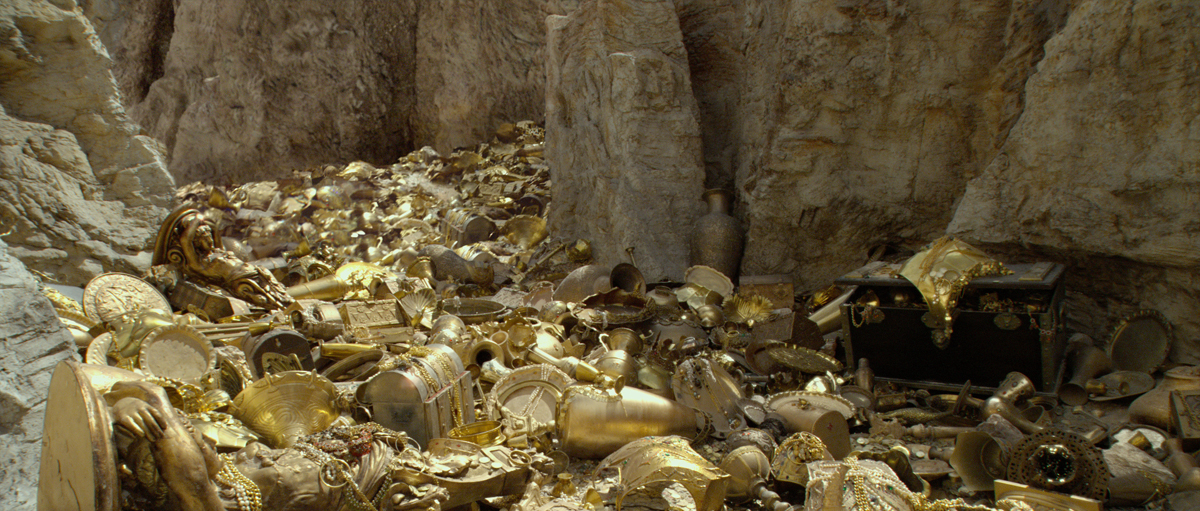
In this sequence, Eustace, Edmond and Caspian venture onto a barren, volcanic island. We had to digitally enhance the live-action photography shot at Stapleton Quarry in Queensland, Australia to extend the scope of the scenes. For example, we would take live-action footage of the boys walking along a sandy path and replace the background with a mountainous, digitally matte painting. These matte paintings were projected onto digital mountainous topology. This allowed us to create a natural sense of parallax as the camera moves through the frame. We also created a bejewelled valley – a long canyon filled with golden treasure, extending the small set piece with digital projected matte paintings and digital geometry that makes the golden canyon stretch for miles.
What was the size of the real set for this sequence?
The bejewelled valley set piece was about 4-5 meters high and stretched back 10-15 meters.
How was the collaboration with MPC for scenes involving the Evil Mist?
The main collaboration with MPC was to ensure that our cavern of mist for the tendrils sequence married up with their environment, where the sea serpent attacks the Dawn Treader. We both paid careful attention to each other’s work, to ensure the looks matched throughout.
About the White Witch, did you created a digital double of Tilda Swinton?
The White Witch is an iconic character throughout the Narnia movies. The challenge in Dawn Treader was that she needed to appear as though made by the evil tendrils of mist. We subtly blended Tilda Swinton’s performance with our fluid effects work to create the desired effect. First, we created a 3D version of Tilda. This was used to roto-animate her performance to ensure that our digital model lined up with the live-action blue screen photography. This animated digital Tilda was used to drive the fluid effects that created undulating tresses of hair and her misty form. We treated the live-action photography in the comp to smooth and soften her appearance and give it a more ethereal appearance, selectively replacing her body with generated fluid mist. The movement on both the mist and her hair was driven by the Witch’s movements through the frame, giving a natural dynamic to our work.
How did you create the city?
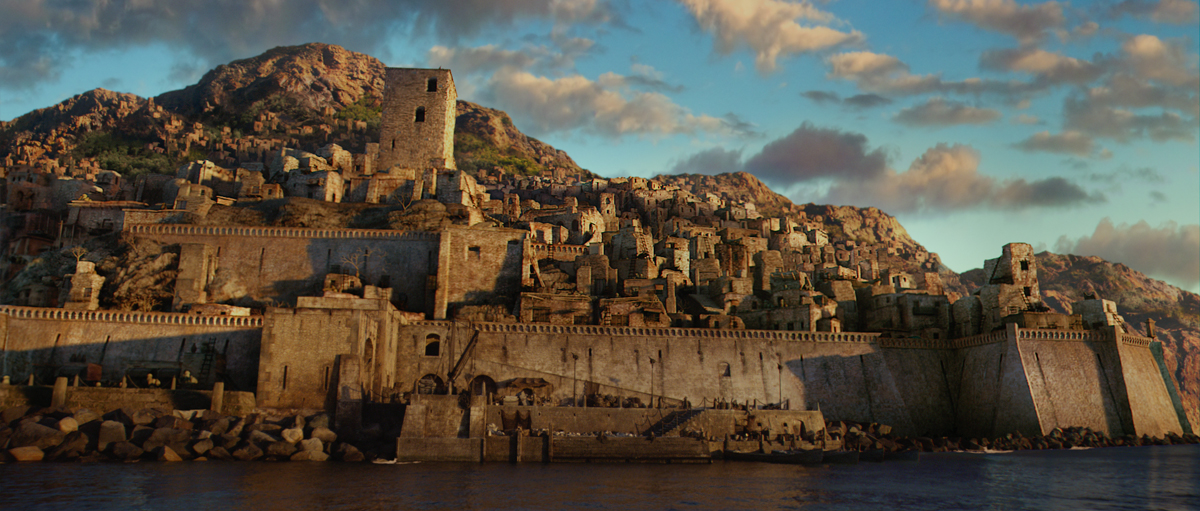
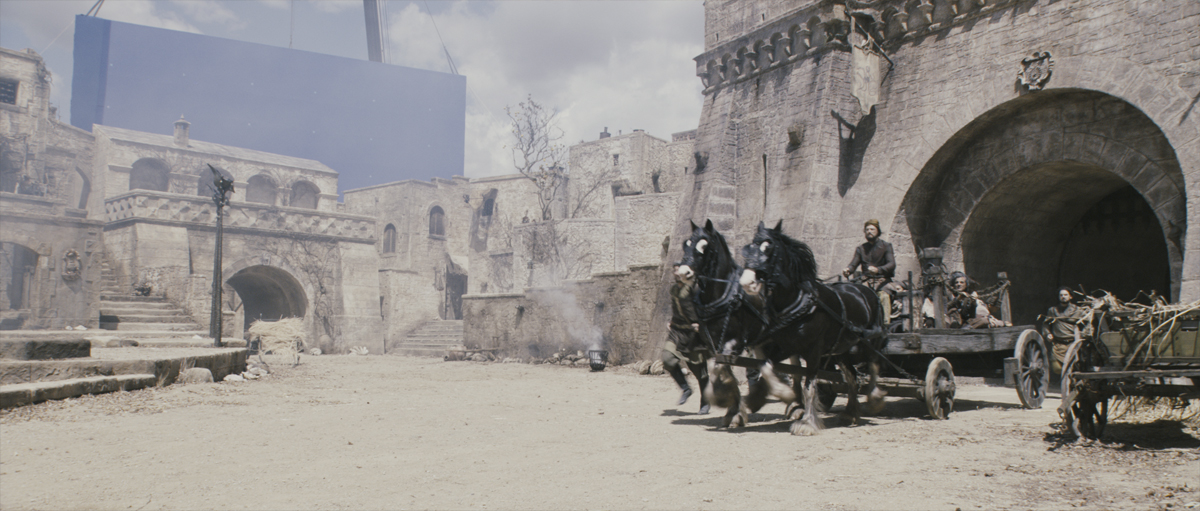
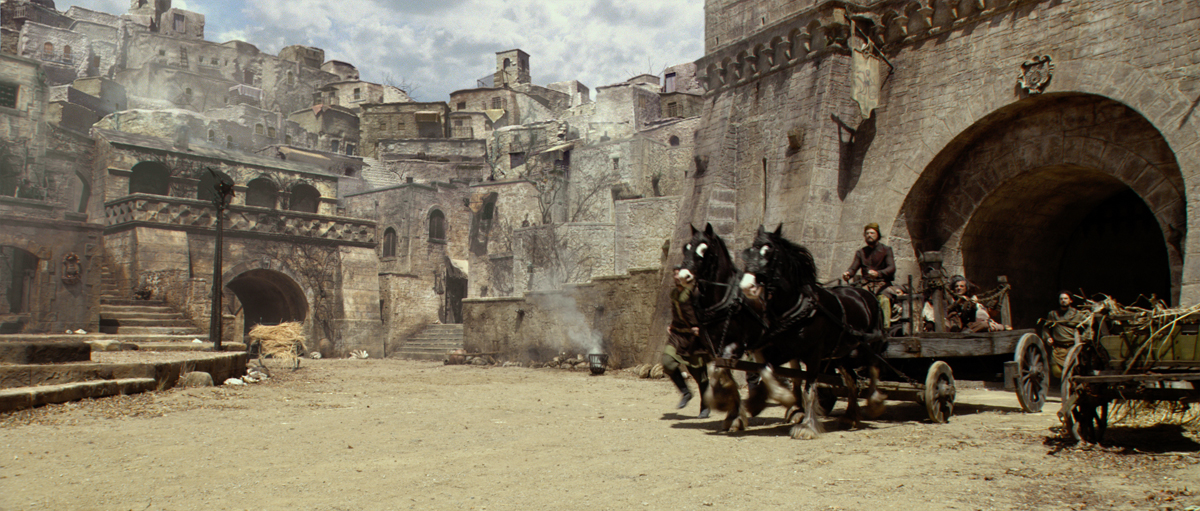
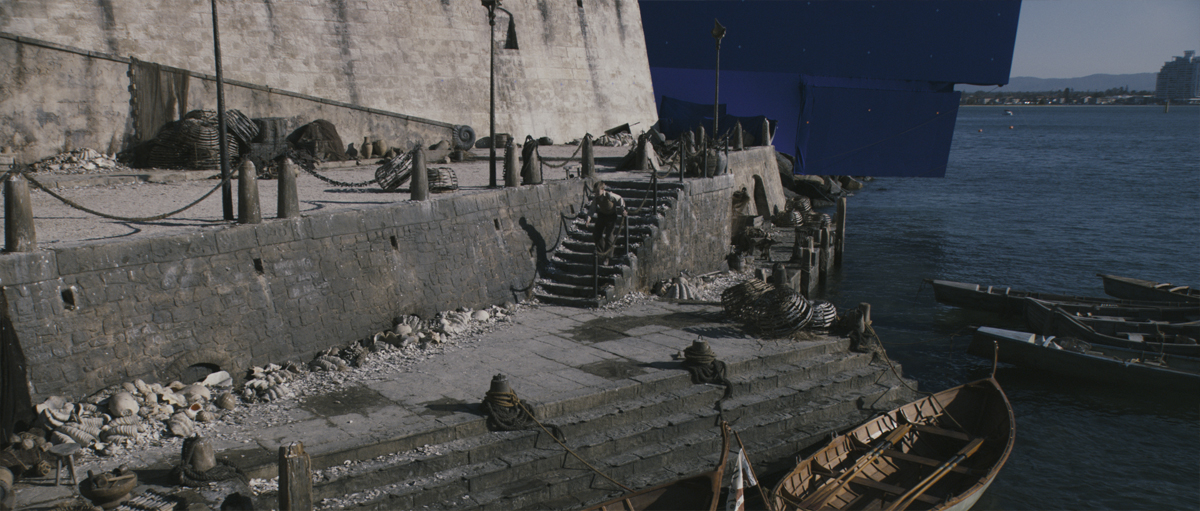
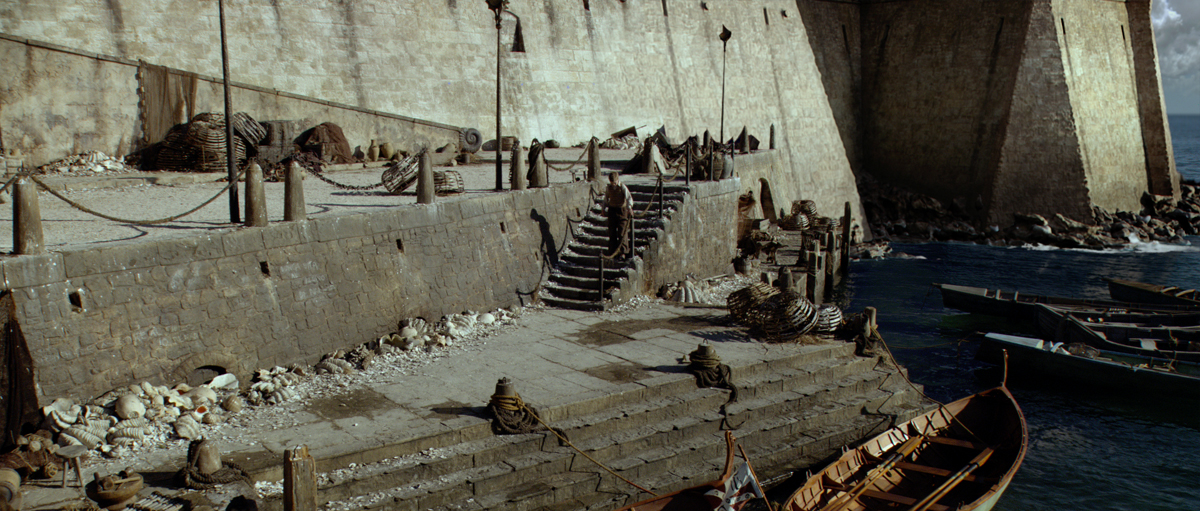
The Lone Islands are the first port of call for the Dawn Treader. They initially arrive at what appears to be a deserted city. Some of the city was filmed on location in Australia and a partial set for many of the lower buildings was created on set.
The extensions used a variety of techniques, from fully-rendered 3D buildings through to projected matte paintings. The main challenge of the sequence was to integrate successfully the digital extensions with the weathered sandstone appearance of both the practical location and studio set pieces.
What were you references for it?
The client supplied concept art to us, along with photos of a town called Cappadocia in Turkey, where the small, single story huts built into mountains had the look that they wanted to use.
What was the biggest challenge on this film?
I think the most interesting work on the movie was trying to impart a sense of character and purpose to what might have appeared to be lifeless fluid effects. It was interesting trying to make ‘smoke’ appear to be evil and threatening.
Is there a shot or a sequence that prevented you from sleeping?
It’s funny, but at the end of every show there’s always a period where sleep is the last thing on your mind!
What do you keep from this experience?
I think that the best things you can take from any experience are the opportunities to work with different artists. We were fortunate on DAWN TREADER to have some terrifically creative artists and I’m just pleased that their hard work makes me look good!
How long have you worked on this film?
Personally, I came onto the show quite late in the day, however other members of the Cinesite team had been involved since pre-production. I was involved for the digital post production phase of the project.
How many shots have you done and what was the size of your team?
We completed 186 shots on DAWN TREADER and our production team numbered about 70 people.
What is your next project?
I’m currently supervising Cinesite’s work on the next instalment of the X-Men series, X-MEN: FIRST CLASS. It has a completely different set of challenges, but I’m not allowed to discuss any of them at the moment!
What are the 4 movies that gave you the passion of cinema?
Four films – that’s tough. Can’t it be 400? I guess in no particular order they would be A MATTER OF LIFE AND DEATH, BLUE VELVET, ALL THE PRESIDENT’S MEN and STAR WARS (but you guessed that). Ask me the same question tomorrow and I’ll give you four different movies!
A big thanks for your time.
// WANT TO KNOW MORE?
– Cinesite: Official website of Cinesite.
– fxguide: Complete Article about NARNIA 3 on fxguide.
Adam Valdez began his career at Tippett Studio in 1990 where he worked on great projects such as JURASSIC PARK or STARSHIP TROOPERS. After a transit at PDI, he joined the team at Weta Digital working on the first two LORD OF THE RINGS. In 2004, he moved to London and worked since then at MPC.
What is your background?I began working on visual effects in 1990, at Tippett Studio. I was lucky to join when miniature work was the primary tool set. Over time we learned the computer by necessity. I then spent a couple of years at PDI before going to Weta in 1999. That was the very beginning of the LORD OF THE RINGS movies there, and we had a lot to build and get organized for the movies, and Weta itself. After four years there I moved to England to join MPC, where I am now a visual effects supervisor and part of the company’s management team.
How was your collaboration with Angus Bickerton and Michael Apted?
Really good. Michael trusted Angus, and I feel Angus trusted us. Michael stayed focused on the film, the story, what he wanted out of each scene. That really helps us when the director gives us space while also being decisive. That said Angus brought a lot to the show, designing solutions to tricky scenes. You can’t expect anyone to have all the answers when you begin, so you just hope that the collective will work well together, and help each other find the right answers as you go. I think we had that on this film.
What are the sequences made by MPC?
We contributed 700 shots in 30 different scenes. Highlights are:
– The debut of the Dawn Treader, arriving to save the kids as they have been transported to Narnia.
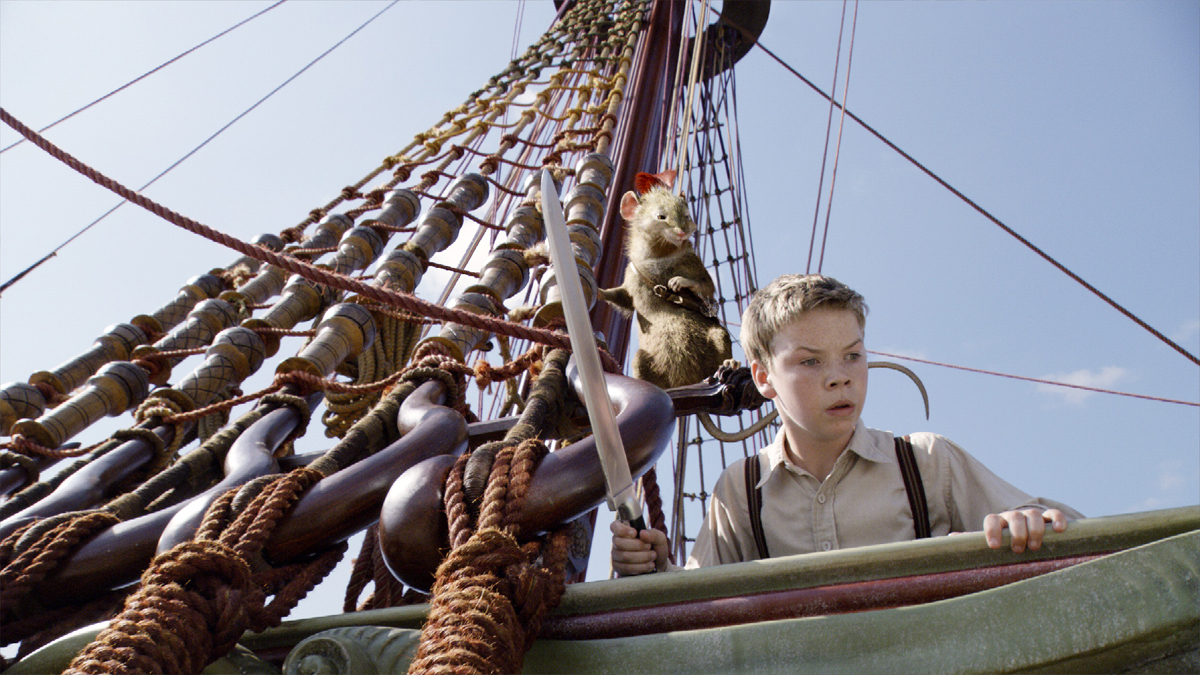
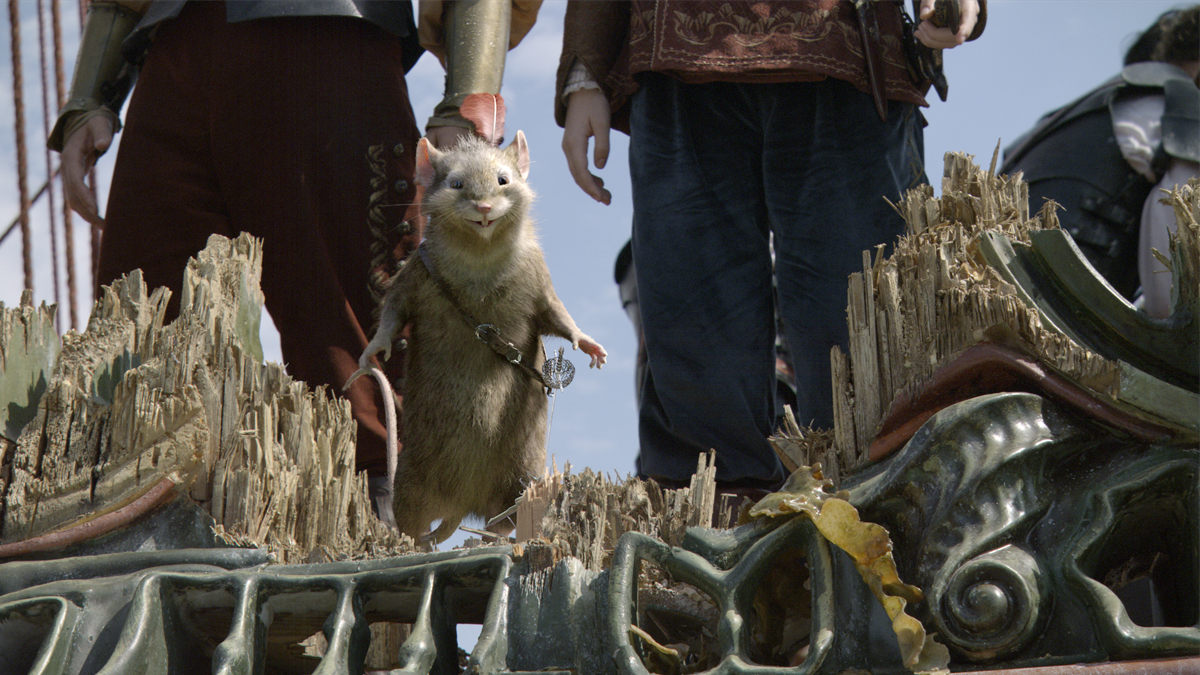
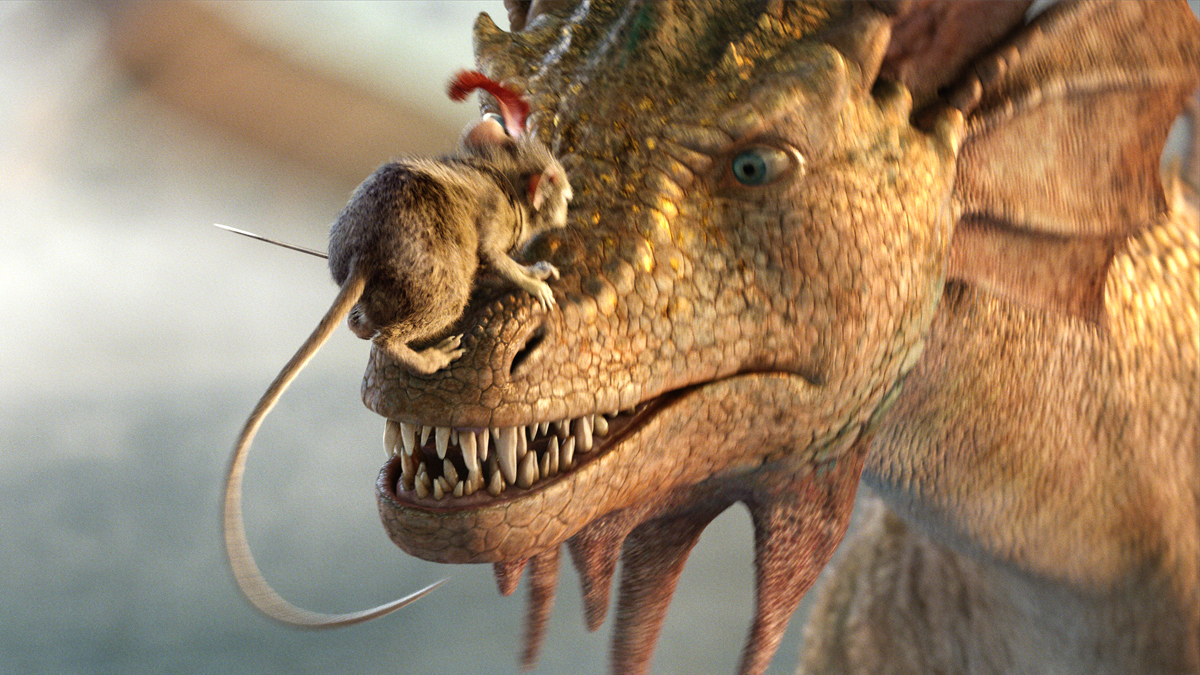
– Scenes of Reepicheep and the boy Eustace, as they meet and have a really cool sword fight across the ship’s decking.
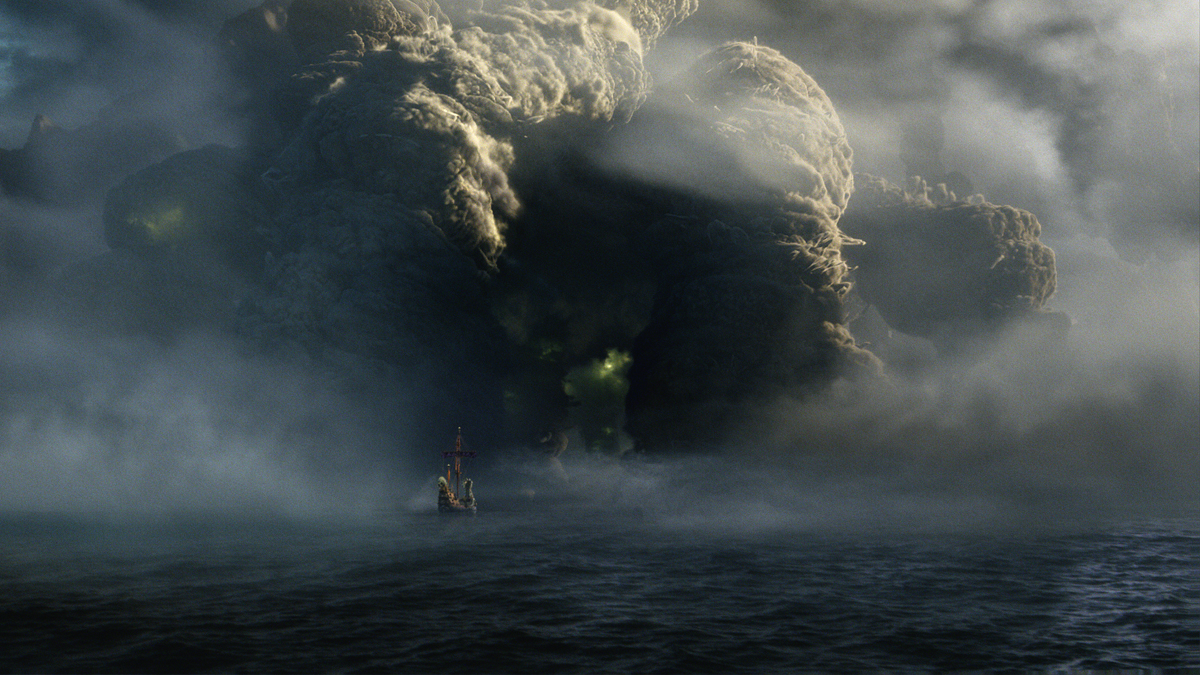
– A storm at sea, with lots of fully CG water and ship shots.
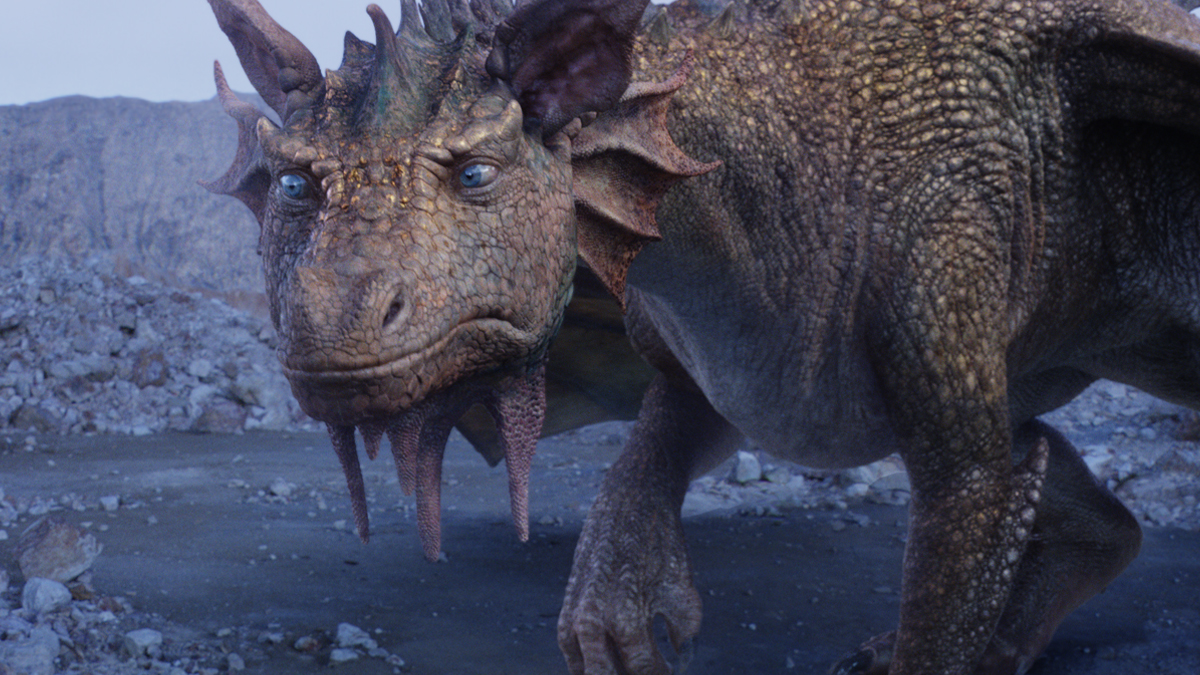
– When Eustace is transformed into a Dragon, we have some initial flying scenes as he tries to communicate to his cousins, but ends up damaging the ship. The Dragon Eustace quickly helps out when the sea provides no wind for the ship’s sails, and he has to pull the boat with his tail. Again we did more shots of the Dawn Treader travelling in different scenes and times of day.
– The film’s last act is built around this massive misty island which is more like a giant living entity. We created Dark Island for outside wide views, and then an elaborate interior environment. Suddenly they find themselves battling with an enormous Sea Serpent, and for about 200 shots, everything but the actors and the boat’s deck was created at MPC.
– Finally the evil mist dissipates, and our heroes discover a Sea of Lillies, leading to Aslan’s country.
Can you explain how was the shooting involving Reepicheep?
Reepicheep scenes were straight forward to shoot. Will Poulter, who plays Eustace, did a great job of both action and physical comedy. Normally we would have a simple object representing where Reepicheep was. In the case of the big sword fight scene, some very good previs was done by Mike Makara’s team, and that helped everyone understand what they were shooting.
What are the technical improvements of Reepicheep from NARNIA 2?
He didn’t change that much in his technical implementation. We changed his face model slightly – moving the eyes forward for better closeups – and aged his body and fur groom a little. The animation rig was also rebuilt from scratch, to give better control and speed to the animators. This included a bit of work to his mouth.
The integration of Reepicheep in the environments and with the characters is impressive. How did you achieve that?
I think our hair rendering and lighting was improved on this film. The lookdev and lighting guys, lead by CG Sup Kevin Hahn, really attained a high level of photographic believability in his integration. And of course our compositing team, lead by 2D sup Charley Henley brought it all together. We take a mixed approach of scientific based lighting with lighter and compositor control to fully realise our CG integration. You start with all the reference, HDRI photography, and reality based shading, and then you work that, dial it in by eye, until you have the materials and light behavior which also has appeal to it. Reepicheep needs to feel in the shot, but he also has a soft, cute quality. I find that even though our shader writers, look dev people, lighters and compers are doing everything possible to get it technically correct, they still have to watch a character as it passes through different lighting environments. We work as a team, reviewing past successes and current shots to make sure Reepicheep always feels and looks like Reepicheep. It’s a lot of work!
What was the biggest challenge with Eustace the dragon?
Probably again finding and then keeping a consistent, unique quality to his skin under different lighting conditions. I mean he was a pretty difficult character in a lot of respects: facial design, skinning and deformation, texture detail. And he was a very saturated, rich looking creature. So you’re in that place where you’re mixing fantasy and reality, and that’s always tough. This film had lots of work in the sky, which is a tough one – because we don’t often witness objects floating in the sky – so it was tricky to make him feel like he was in a vast space while in close up, for example.
Have you used filmed elements of Will Poulter for the facial animation of the dragon?
Will did film one small moment for us, while we were shooting in Australia. It was referenced, but really the rhythm of the scene changed once we got the dialogue from Simon Pegg, and our animation supervisor Gabriele Zucchiele
What were your references for the Sea Serpent and the Evil Mist?
The Sea Serpent went through several designs. A great designer we often work with, Stephane Levallois, provided this really far out design which everyone liked. Maybe it was going to be too scary, but we went for it. In fact the film makers wanted it to have a stage further for the last part of the battle – somewhere to go – so we designed this fully articulated body which splits open revealing all these little sharp arms. With this kind of stuff there really isn’t reference – but our art director Virginie Bourdin did shoot a bunch of fish, ocotopus and such creatures for master texture work. This was used directly by the asset guys to build the creature.
The evil mist was a slow evolution as well – something we found along the way. Actually in our first weeks on the show the studio wanted to know just what this thing would be, and we did a test composite using some fx renders of underwater explosions we had done for GI JOE. Charley Henley retimed this material, warped it, and eventually put it on top of a matte painting done by Paul Campion. Angus wanted to imply more of a corporeal feeling – that it had almost a giant octopus like body with arms reaching out. That was our basic design going forward, but the trick was then how not to make it look like a volcano or hurricane – but something alive and new. Again, we referenced volcanoes and large scale pyroclastic events, but found the distinctive factor was how it moved – harkening back to the original comp test. Carlos Ramos did some great simulation work here, creating a throbbing, ebbing sort of feel on a large scale.
How did you animated the Sea Serpent and the hundreds of little paws?
Lead Rigger Ben Jones actually wrote a script in Maya which gave the animators some automation for this. This provided a bed of disgusting, boiling for the bulk of them. But the animators did dial in specific animation on lots of shots. Luckily the little claws were only out for the last beat of the scene!
The battle between the Dragon and the Sea Serpent is truly spectacular. Everything is in CG, it must have been a real headache to do. Can you explain the creation of this sequence and how you manage it?
This scene took many passes to come together. The previs was worked on for over a year by Mike Makara’s team. The shooting cut of this work had lots of inconsistencies due to the long time span, but in the end in captured the intended action. We shot from that, for weeks, on the blue screen stage in Australia, on the deck of the Dawn Treader. There were giant water canons, the ship was rocking, the damage to the boat was being built up – it was an interesting shoot. Michael Apted was pretty amazing how he kept all the continuity in his head, and adapted various new beats of action he wanted to establish with the actors. To keep the audience with the heroes as the fight progressed. Once we had an assembly, our layout team, headed by Paul Arion, began the painstaking process of establishing spatial continuity, while recreating the basic blocking of the serpent so that editor Rick Shane could get a meaningful cut together. After that, the animators worked through the scene, piece by piece, largely on a schedule determined by the needs of the water effects guys. We would present this work, get notes, and then the animation went through technical animation for skinning, fx, lighting, etc. The compositing group was simultaneously setting up the environment based on fx-renders of the dynamic columns, fx-renders of mid ground standing mist, and environmental matte painted dome elements from our environment guys. So it all game together piece by piece, based on a strong foundation.
How did you handle the enormous number of particles for the Evil Mist and the digital ocean?
Not easily. These types of simulations are mainly difficult creatively, and then the big challenge is in rendering. We have techniques at MPC for rendering large scale phenomenon, either fx or cities, trees, crowds… but it’s never simple.
How did you create the Dawn Trader? Was there some full CG shots?
There were many full CG shots. This was a highly complex, very accurate model based on a lidar scan of the actual set build. That build was the deck, prow and tail, and only a portion of the mast. Any time in the movie you see a full sail or full mast, you are seeing our work. Classic ‘helicopter’ shots or any big wide shot will feature a fully CG dawn treader. The sails and rigging were modelled and then simulated using syflex cloth software.
Have you developed specific tools for this movie?
Not really. For this film it was really nice to just get all of our department leads to jump in, doing what they do best. We got to focus mostly on animation, story, mood, design, and polishing comps. That was nice.
How was the collaboration with Framestore with sequences involving Aslan?
Great. We work with Framestore, Double Negative, and Cinesite quite a lot on large films. There are many friends between the shops. And while there is a high level of competition, there is also respect. The critical mass of artists in London provide an offer to the movie making world, and none of us want to jeopardize that. It’s never easy to share shots – particularly in the case of Aslan and the Dragon – when we had to share ground terrain, cameras, backgrounds. We had a few back and forth rounds on that to make sure the shots would mesh together. It was confusing, but ultimately we were all toasting with drinks at the end of the show. They’re great guys.
Is there a shot or a sequence that prevented you from sleeping?
No. This was a large project, and I’d say the size of the crew and number of shots provide the most stress. You have to try and be clear about what everyone should be doing every day, every week. You have to know where you’re going creatively, and in your construction strategy for each type of shot. So you always have time frames where you’re sailing through fog. But I’m lucky to have had an amazing production team, great supervisors working with me, and a whole bunch of really dedicated lead artists. Those lead artists are like the sergeants of your army – running small teams of people towards goals you need to hit each week. They make it all actually happen. That helps you sleep.
How long have you worked on this show?
From first breakdowns and bids, probably 2 years. But really from Shoot to Delivery was about 1 year. That includes building all the assets, covering the set work, post-vis, production and final delivery. Stereo added another 6 weeks after that.
What do you keep from this experience?
Know creatively where you’re going. Keep your team informed. Anticipate your client’s needs. Let the scene tell you what it needs.
How many shots have you done and what was the size of your team?
We worked on over 800 shots, with 700 ending up in the final delivery and in the film. If you count everyone involved in London, Vancouver and our Bangalore India facility, 400 individuals worked on the show. At its peak, our crew was 200 active artists.
What is your next project?
I’m doing a couple of sequences for JOHN CARTER OF MARS which is being directed by Andrew Stanton at Pixar. It’s a sci-fi classic being done in grand style. It should be fun.
What are the 4 movies that gave you the passion of cinema?
I got hooked as a kid. There have been many films since then which I love and remind me why I’m doing this very difficult job. But when I was a kid, it was:
STAR WARS – the original movie. What can I say – an experience like nothing I’d ever known.
CLOSE ENCOUNTERS OF THE THIRD KIND. Scared the crap out of me, but also has this dreamy, epic tone that few films have topped in my book.
The JAMES BOND films. The appeal for a young boy is clear.
EAST OF EDEN. I saw this by mistake – at « The UC Theater » in my home town of Berkeley California. It was a revival house which played a new film every day – and often marathons. I think I went expecting MAD MAX or something like that – and ended up fascinated by the raw emotion that James Dean brought to the screen. The intensity. I’d never seen anything like it. And it stuck in my brain.
Adam Avitabile worked for over 10 years at Look Effects. He has participated in numerous TV series as MALCOLM IN THE MIDDLE, ARRESTED DEVELOPMENT, PUSHING DAISIES or LOST. His career also has a lot of movies like ROCKY BALBOA, APOCALYPTO, LITTLE MISS SUNSHINE or THE WRESTLER.
What is your background?
I originally went to school to be a screen writer. I knew that I had always wanted to work in the film industry to some capacity, but was unsure how. Growing up as a writer, I figured that screen writing would be the obvious choice. After a few years I realized that, although I loved the process of writing, the reality of making a living at it was difficult at best. I started to really take a look at what I liked about movies. I had always been a science fiction fan, so I knew that the fantastic interested me. After college I started taking some basic 3D effects classes. I then moved to Los Angeles, was lucky enough to meet a few people in the industry, and landed my first entry level compositing job. All of training was on the job. I started working in Chalice and After Effects, but then quickly moved into using the Flame. A few years after that I got my first Visual Effects Supervising job and the rest is history.
How did you get involved on this finale season of LOST?
Look Effects had done some cleanup work on LOST during it’s 4th season. When it came time for their 6th and final season, the producers decided to make a regime change in the Visual Effects department. They had remembered the work we had done in season 4 and called us in to meet with the producers. I went through a couple of rounds of interviews but eventually got the job as the Supervisor.
Can you explain to us how you created the set extensions such as the tower or the cave?
Most of the set extension work we did was accomplished by using 2D matte paintings and tracking them into the production photography. We knew that we would not have the time (or the budget) necessary to do fully realized 3D environments, so we approached these shots from as much of a 2D perspective as possible. Both the Tower and the Cave were digital matte paintings. For the cave wall, we shot some water elements that we then composited into the matte painting to create the waterfall within it.
Can you tell us about the old boat and the shots where it is in a raging ocean. How did you create them?
For the old boat, which was called the Black Rock, we used a couple of different approaches. When you see the boat washed up in the jungle, it was a digital matte painting. When we saw the boat in the water, the entire shot was a CG creation. There was an actual detailed model that had been made of the ship that we used for texture and modeling references. We then created and animated it in Maya. For the stormy sea the ship was traveling in, we created all the water and spray elements in Houdini and composited the entire lot using Shake.
How did you created Smokey and integrated it into the shots?
Smokey was created in Maya as an animated bone chain with attached particle emitters. We then shaded the particles to look like smoke. Light flashes and final compositing were then done in Shake. Smokey was by far the biggest challenge we had to face during our time on Lost. We were tasked to not only get up to speed with Smokey in a very short amount of time, but to also try and improve upon earlier iterations. It was definitely a chore.
Did you use models?
Besides the model of the Black Rock that we used for texture references, and some low detail models the art department put together to illustrate certain locations, there were no physical models used on Lost.
What references did you have for the submarine?
Mostly what the art department could muster up. The problem with looking for images of submarines is that they are usually only shown with it’s top half out of the water. Trying to get images of what the underside looked like was difficult. We ended up piecing together a couple of different submarines models to get the desired look. It really ended up being more about whet looked the coolest.
For the final episode, you have created 350 shots in a month. How did you do that?
To this day, I’m not quite sure how we got through that time. It really came down to the artists we had been working with throughout the entire season. They had all been along for the ride and really wanted to see it through to the end. No one was sure how many shots we would be facing during that final stretch, but everyone was willing to give it their all to get through it. One thing we did do to keep everything a bit more organized was to split up all the big sequences between certain supervisors at Look Effects. I would oversee the entire show, but we had one guy supervising the cave sequence, and one guy supervising the fight on the cliff, and so on. It helped the artist to have a point person to go to. If it had just been me, they would have had to wait that much longer for comments. Really, we just approached it as an « all hands on deck » situation.
Can you explain to us how you created the 3D plane?
The Ajira plane was created in Maya and composited mostly in Shake and Nuke. The difficulty creating the plan was the we were beholden to match the practical set piece that the art department had built out in Hawaii. The problem was that that plane was constructed out of wood where an actual plane would be constructed out of metal. It was a fine line we had to walk between making the plane look as real as possible, but also have it match the set piece. I took hundreds of set photos of the plane to give our modelers and texture artists enough information to use. We then would have long discussions about how much we should deviate from the set piece in order to make our CG creations look as real as possible.
During the finale, how did you create the island that is sinking into the ocean?
The sinking island was a shot that came in late in the game. Instead of making an entirely CG island, we decided to use one of our island matte paintings we had used in the past as our base plate. We then added a few CG elements created in Maya of some crumbling and eroding rocks that we composited in Nuke. We added a bunch of 2D water and smoke elements that we composited around the base of the island to give the sense of water being kicked up by its sinking. Add a liberal dose of camera shake, and there you have it.
What are your pipeline and your softwares?
Look Effects’ software pipeline is mainly dominated by Maya for our 3D needs and Nuke for our 2D compositing needs. We are supplemented by Shake, After Effects, and Flame.
Most of your effects are invisible. Of which are you most proud of?
I personally love « invisible effects ». No matter how great a CG creation might be, there is always an aire of « unbelievability » if you will. Nothing gives me more joy than when someone has no idea what exactly we did in a particular shot. The proudest invisible effect we did for Lost for me was actually in the premiere episode. It was a small thing, but I think we pulled it off rather well. It’s the scene where our heroes are transporting the wounded Sayid by stretcher in the underground tunnel. At a certain point they come across a hole in the ground that looks down into a cavern below. In actuality that hole was a green piece of cloth with a few tracking lights on it that the actors inched around. We made a matte painting of the floor beneath and then added some CG debris so that when Hurley shined a flashlight down it, the light would create the proper shadows. When it was all said and done a friend of mine commented on the cool two story set they had built for us. He had no idea that underground cavern revealed by the hole was never there in the first place.
Is there a shot that prevented you from sleeping?
I don’t know if it was one shot or not, but I know I did lose some sleep over the Smoke Monster. I knew, as a fan of the show, that Smokey would be one of our biggest challenges. I remember when they handed me the first script, all I kept thinking was, « please don’t let Smokey be the first thing we have to do… please ». Not only was Smokey in that script, but it turned out to be the biggest Smokey scene in the history of the show. We had next to no time to get up to speed. It’s truly a credit to our team of artists. We went through countless iterations of Smokey over about a 4 week period. How does he react to hitting other objects? How can we advance his animations? How can we make him look realistic in some very unique lighting environments? These were all questions that we had to answer in extremely contracted R&D period. I know I defiantly woke up with cold sweats a couple of times during that process.
What did you keep from this experience?
Although I will always be extremely proud of the work that we accomplished on one of the biggest television shows in history, truly the greatest thing I kept from my experience on LOST was the fact that I actually met my future wife while filming on Oahu. I will always have LOST to thank for that.
What is your next project?
After Lost I needed some time to regroup and get my life back in order. I spent some time traveling, but when I returned I went back to my roots and worked as a Flame artist on BLACK SWAN. Supervising wise, I am now doing in-house supervising on the ABC show NO ORDINARY FAMILY.
What are the 4 movies that gave you the passion of cinema?
It’s almost cliche now for people in the effects industry, but anyone who knows me (or have ever stepped into my office) knows that STAR WARS has been a huge influence on me. Other than that, I am a Terry Gilliam nut, so movies like BRAZIL and TIME BANDITS also played a part. I’d also have to say that TRON was one of the first movie that got me interested in what computer graphics could do.
A big thanks for your time.
// WANT TO KNOW MORE?
– Look Effects: Official website of Look Effects.
– fxguide: Article about LOST on fxguide.
After working several years at Toybox and Mr. X, Andy Robinson joined Cinesite in 2004. He worked on numerous projects such as V FOR VENDETTA, THE GOLDEN COMPASS or THE DARK KNIGHT.
What is your background?
I began my career as a camera assistant and editor. I joined Cinesite in 2004 and have been involved in many of their high-profile projects including GENERATION KILL, for which we won an Emmy Award for Outstanding Achievement in Special Visual Effects. I also led Cinesite’s key sequence on THE GOLDEN COMPASS where lead characters Lyra and Mrs Coulter travel to London in a computer generated air balloon, surrounded by a stunning panorama of London. In recent years I’ve been heavily involved in Cinesite’s work on the HARRY POTTER series and supervising our 2D work on the films.
How was your collaboration with Tim Burke, the production VFX supervisor?
Tim and I have worked together for a number of years now, since HP6 (HALF BLOOD PRINCE) and have developed a very strong working relationship. Tim has a good sense of what David Yates is looking for in his visual effects sequences and is always keen to provide us with as much insight into what David would expect of a shot, so we can direct the efforts of our teams effectively and efficiently.
What are the sequences made by Cinesite on this movie?
We were tasked with creating Lord Voldemort’s snake-like nose, the ghost of Dumbledore, a Patronus doe and the wreath of Christmas roses conjured by Hermione at Harry’s parents’ grave. We also rebuilt the set for Godric’s Hallow in CG; as well as 2D and CG set extensions, full CG environments and CG snow in this scene. And we additionally created the environments for the Windswept Hill sequence, which involved shooting terrain photographs of Malham Cove in Yorkshire and compositing them into the digital scene.
Did you used some footages of Sir Michael Gambon for the ghost of Dumbledore?
Yes, Sir Michael Gambon was shot in front of a green screen for the corridor scene, which we used as the basis for our effects.
Did the length of the Patronus doe shots caused you worry?
We didn’t have a problem with the length of the shot, but we did have to work on the shot for over a year as the Director’s vision changed as the shots evolved.
How did you get involved in compositing on the aspect of the Patronus doe and its particles?
The background plates were shot with a live action dog wearing a blue LED light suit, which walked the path that the doe would travel, so we got all the interactive lighting on the ground and the branches in camera. The fully groomed CG doe, along with the many 3D fluid effects passes, were combined in Nuke and then blended off and diffused, in many places almost completely transparent, especially along the back edges. This sense of transparency gave the ethereal impression of the doe not being entirely in our world. We also created smoke in Nuke which cascaded off and around the doe to help this ethereal look.
Did you use the 3D capabilities of Nuke? And on what sequences?
Nuke’s 3D capabilities were heavily used across all sequences and shots on this film. Tracking is increasingly a regular part of the pipeline process so we use Nuke’s 3D capabilities for tracking as much as we can. In particular, on Voldemort’s nose, being able to unwrap the CG and Live action heads for more precise paintwork on a flat texture was very useful. The Godric’s Hollow digital environment extensions benefitted from Nuke’s 3D capabilities as we were more accurately able to place objects in the correct depth. In the Windswept Hill scene, we were able to visually judge the camera’s position across multiple shots to more realistically position a background panorama and make the scene continuity work.
What was the real size of set for the Windswept Hill sequence? How did you expanded this landscape?
The real size of the set was around 30 by 30 feet. The full CG environment in the establishing shot of Windswept Hill was built from a set of HDRI texture photography and photogrammetry taken on location in Malham Cove in Yorkshire. Working with the client, we developed some detailed pre-vis so that we could prepare to shoot our stills and production could approximate the camera move to shoot a live-action element of Harry and Hermione.
We took stills at ground level and augmented them with photos taken from a helicopter. We then used our proprietary photo-modelling software to reconstruct the geometry and projection cameras for this environment. The same technique was used to extend the top of the cliff using modelled cliff rocks. We also used the same set of stills to generate a digital matte painting of the sky and were then able to composite Harry and Hermione back into our full CG shot.
For the balance of this scene we used the same set of stills and Nuke was used to create post-vis views of each key angle with 16K stitched HDRI panoramas projected onto spheres. Using the tracked cameras oriented to the practical set, we were able to interactively position every shot’s camera in real time to help orchestrate the background continuity of the scene. For areas of the practical set needing extension, digital matte painting extensions were created using reference textures and then projected onto displaced planes in Nuke which lined up with the practical set seamlessly. Green screen keys were particularly difficult due to the bright nature of the background skies vs. the comparatively dark colour of the green screen.
Have you developed specific tools to help you in compositing?
Nothing developed specifically for Harry Potter. Potter was one of the first projects to exclusively use Nuke, so as part of the transition from Shake, all of Cinesite’s proprietary Shake tools were being ported over to Nuke. There was a process of evaluation and debugging throughout the project.
What was the biggest challenge on this film?
Our biggest challenge was by far the duration of the project. Some sequences were worked on for over a year, so keeping perspective and ideas fresh was a challenge.
Was there been a shot or a sequence that prevented you from sleeping?
No. We have built a very strong team, of both production personnel and artists. We always plan ahead and try to schedule ourselves properly to complete the work without breaking ourselves. Being the 7th Harry Potter movie, Tim and his production team have a very well established pipeline and always provide us with as much clear direction as they can. It’s really a pleasure to work on these movies.
How long have you worked on this movie?
Initial bidding and design began in May 2009.
What was the size of your team?
I lead a core team of 9 compositors.
What did you keep from this experience?
It is a real honour to play a part in bringing to the screen the final portion of such a cinematic legacy.
What is your next project?
I’m currently supervising Cinesite’s 2D work on HARRY POTTER AND THE DEATHLY HALLOW Part 2 so my journey with Harry hasn’t ended just yet!
What are the 4 movies that gave you the passion of cinema?
1. LAWRENCE OF ARABIA
2. STAR WARS: A NEW HOPE
3. ALIEN
4. THE INSIDER
A big thanks for your time.
// WANT TO KNOW MORE?
– Cinesite: Official website of Cinesite.
– fxguide: Article about HARRY POTTER AND THE DEATHLY HALLOW Part 1 on fxguide.
Pour offrir les meilleures expériences, nous utilisons des technologies telles que les cookies pour stocker et/ou accéder aux informations des appareils. Le fait de consentir à ces technologies nous permettra de traiter des données telles que le comportement de navigation ou les ID uniques sur ce site. Le fait de ne pas consentir ou de retirer son consentement peut avoir un effet négatif sur certaines caractéristiques et fonctions.
Fonctionnel
Toujours activé
L’accès ou le stockage technique est strictement nécessaire dans la finalité d’intérêt légitime de permettre l’utilisation d’un service spécifique explicitement demandé par l’abonné ou l’utilisateur, ou dans le seul but d’effectuer la transmission d’une communication sur un réseau de communications électroniques.
Préférences
L’accès ou le stockage technique est nécessaire dans la finalité d’intérêt légitime de stocker des préférences qui ne sont pas demandées par l’abonné ou l’internaute.
Statistiques
Le stockage ou l’accès technique qui est utilisé exclusivement à des fins statistiques.Le stockage ou l’accès technique qui est utilisé exclusivement dans des finalités statistiques anonymes. En l’absence d’une assignation à comparaître, d’une conformité volontaire de la part de votre fournisseur d’accès à internet ou d’enregistrements supplémentaires provenant d’une tierce partie, les informations stockées ou extraites à cette seule fin ne peuvent généralement pas être utilisées pour vous identifier.
Marketing
L’accès ou le stockage technique est nécessaire pour créer des profils d’internautes afin d’envoyer des publicités, ou pour suivre l’utilisateur sur un site web ou sur plusieurs sites web ayant des finalités marketing similaires.