Karen Goulekas is back on The Art of VFX. In the following interview, she explains her collaboration with director Rian Johnson and the various challenges she encountered on this project.
How did you got involved on this show?
My agent told me about it and got me a meeting with Ram Bergman – and from there, a meeting with Rian Johnson. Sounded really cool – so – the rest is history!
It’s the first feature of Rian Johnson with VFX. How did you help him on this aspect?
First film with so many vfx I guess. He came in pretty cynical about vfx in general – kept referring to them as “cartoons.” I kept telling him that he only notices the “bad” vfx – but the good stuff is seamless and he wouldn’t even realize he had just seen an effect. But he wasn’t buying it!
But – once we got into post it all changed. He would come in every day so I could show him all the work that had come in from our vendors. I had a 2k playback using tweak RV – so we could zoom in and draw notes on the frames and all that good stuff. He got pretty into it – picked up the lingo too! He would say “Is that a halo? Is there a tracking bump?”
Happy to say, that at the end of the show, Rian no longer thought all visual effects looked like cartoons! Yay! Mission accomplished! And we can thank our vendors for all their hard work and creative collaboration for that!
What was his approach about the visual effects?
He always wanted to shoot as much practical as possible which I believe is always the best approach. He was very cautious not to overuse vfx or do things that would make them jump out at the audience. That’s a good thing!
The movie shows a near future. Can you tell us more about your work with the art department?
The Art dept, led by our Production Designer, Ed Verreaux, gave us concept art for ideas about what things could look like. But, unlike a lot of shows I do, we didn’t start any vfx development until we got into post. At that point, we started with the cool ideas from the art dept and continued on from there.
How did you create the futuristic city and the various vehicles?
The future cities, both here in the U.S. and in future Shanghai – were created by Atomic Fiction. They started off with 2D concept art and from there branched out into full layouts using a combination of 3D buildings, 2.5D camera projected buildings and 2D distant skylines. It all went very smoothly thanks to the fact that Rian is very clear about what he wants. Atomic would put all kinds of cool ideas in front of us and Rian would say yes or no or we’d throw out an alternate idea to what they had proposed.
When a director is so decisive about what he likes and doesn’t like it gives us way more time to finesse the work and make it look great. Otherwise – you can get stuck in concept art land and run out of enough time to make the work look really great. But in this case, we got through the concept design very quickly which left us enough time to work on the meat of the shots!
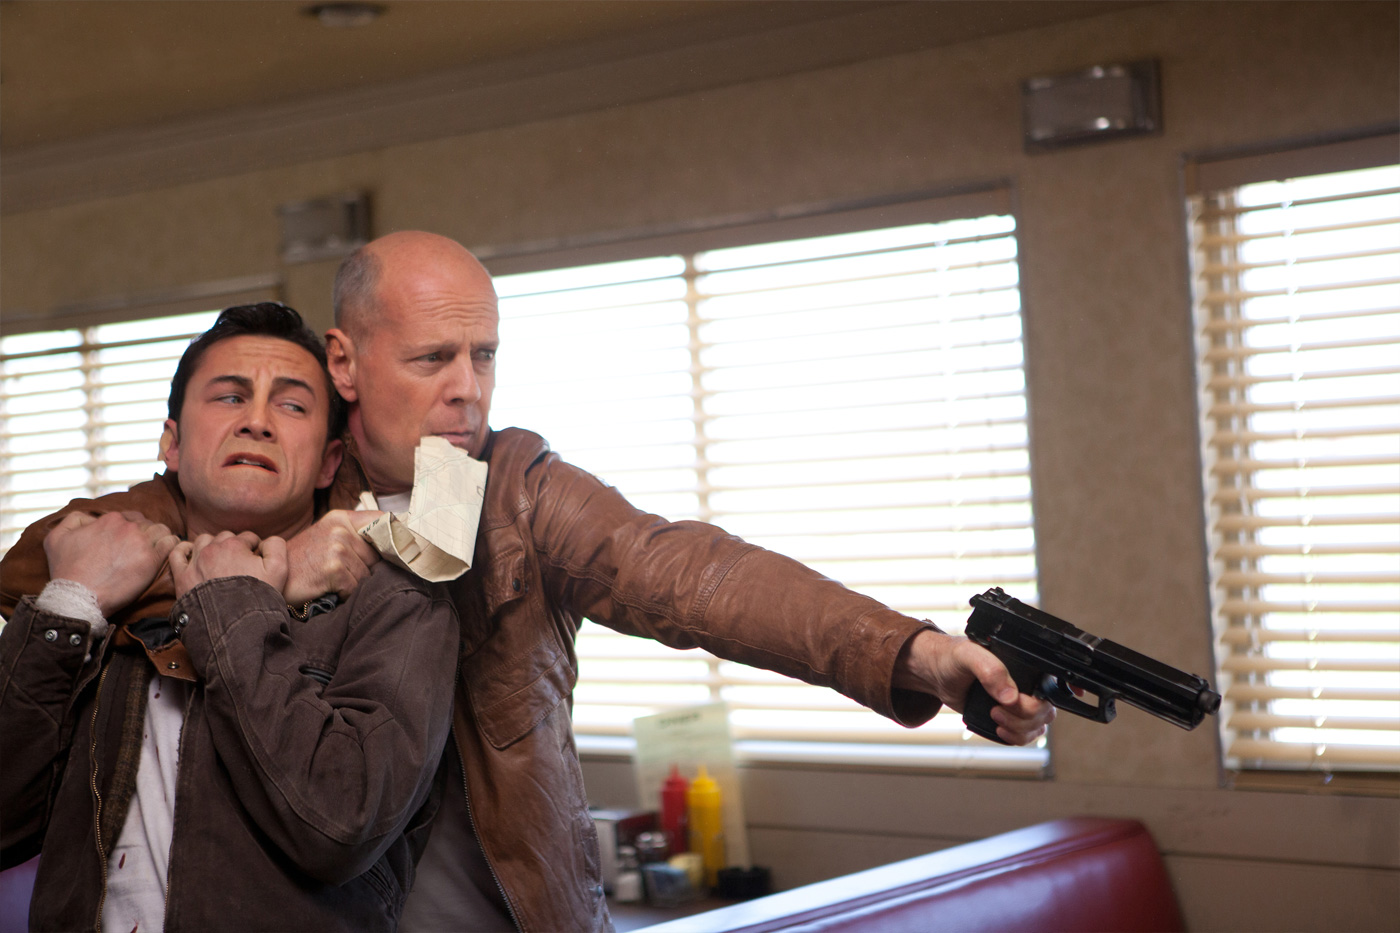
Can you explain to us in details how was created the impressive sequence of mutilated Old Seth?
Old Seth was created by Hydraulx. During shooting, I opted to use a couple of canon 7D’s as witness cameras to accompany the main film camera. By placing these two additional cameras at approximately 45 degree angles to the main camera, we could provide Hydraulx with the means to extract the camera move and figure out Old Seth’s position in 3D space and be able to rotomate his body motion.
We also placed dots on his hands and face during shooting. We used a plastic mask, created from a life cast of Old Seth’s face, that had holes drilled in it where the tracking markers should go. This helped ensure that the tracking marks were in the same place on his face each day which greatly helps in post. We used green dots for day time shots and white fluorescent dots for night shots.
We also did a full body and head cyberscan of Old Seth. With all this data, Hydraulx was able to begin their work. The hardest shot in the film is the one where Old Seth crashes his car into a telephone pole. First, we had to blend the two plates – one with the stunt driver and one with Old Seth. From there, Old Seth gets out of the car and his legs disappear as he walks.
After a lot of thought, it was decided that our best approach would be to completely replace Old Seth from the waist down with CG. I remember the horrified look on Rian’s face when I first told him that this is how we decided to do the shot… I said, “Don’t worry! It’s Hydraulx!!”
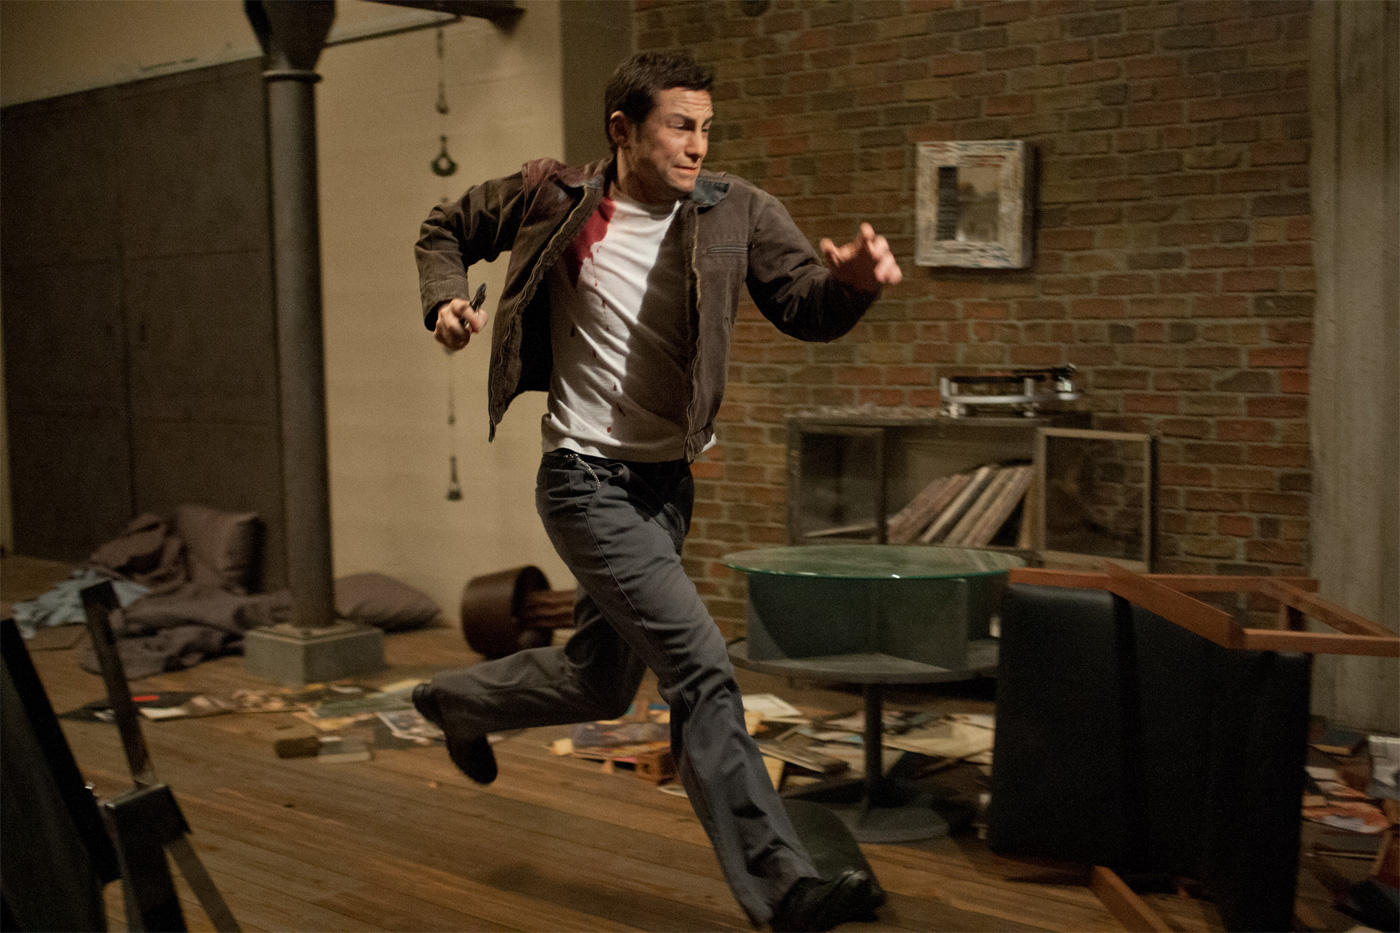
At a moment, Joe is falling while escaping his apartment with the camera following his fall. Can you explain this beautiful shot?
This shot is really cool – done in camera with the exception of rig removals and the CG Gat Man that falls to the ground behind the car at the end which was done by Atomic Fiction. They had young Joe up on the escape ladder and then a stunt man lower down on the building who fell from the building to land on the car. Cool shot…
The movie features many gore shots especially during gun fights. Can you tell us more about your involvement on these kind of shots?
Hydraulx did all the blood splatter shots. Love that stuff. We had some practical blood shots that Rian liked so we were able to zero in on what the blood hits should look like very quickly. We also shot some practical squib hits during shooting. The SFX dept put blood squibs on 1′ square boards and then covered them in gs cloth. We shot at tons of different angles. Although we ended up doing CG blood, these squib elements were very helpful for the cloth tearing effect we captured. We could use these to track onto the bodies of the guys getting shots and it would look like his clothes had been ripped open and then we could have our cg blood shoot out.
Can you explain to us in details the impressive establishing shots of the futuristic Shanghai?
These were done by Atomic Fiction. The first one – the aerial shot – began as a piece of stock footage of San Francisco! We changed the bridge and futurised the big boat below – but that was all that was left of the original plate once we were done adding a kazillion buildings. One of my favorite shots. All the others were done like all the other city shots – first 2D concept, followed by a combination of 3D, 2.5D and 2D elements to create the end result.
How was filmed the shots with the flying bike?
We had a big pickup truck that towed the bike on a flat bed. The rig could be set up so the bike could be behind the truck or on the side of it – whichever gave us the least amount of headache for removing it in post. Of course, we also shot clean plates to go along with the main plate. Hydraulx then added the thrusters, heat distortion and dust fx that came from it.
Can you tell us more about the bike creation?
The bike was practical in all the shots except for when it comes flying out of the dust cloud that Joe kicked up with his gun. We had shot it with the practical bike – but needed a different trajectory for it to travel – and also needed it CG for when it first impacts the ground and starts to break apart
The editing style is pretty slow with long shots. Does this causes you some troubles?
No just makes it take longer to track and roto and stuff like that – but I wouldn’t call that a trouble – just the nature of the beast!
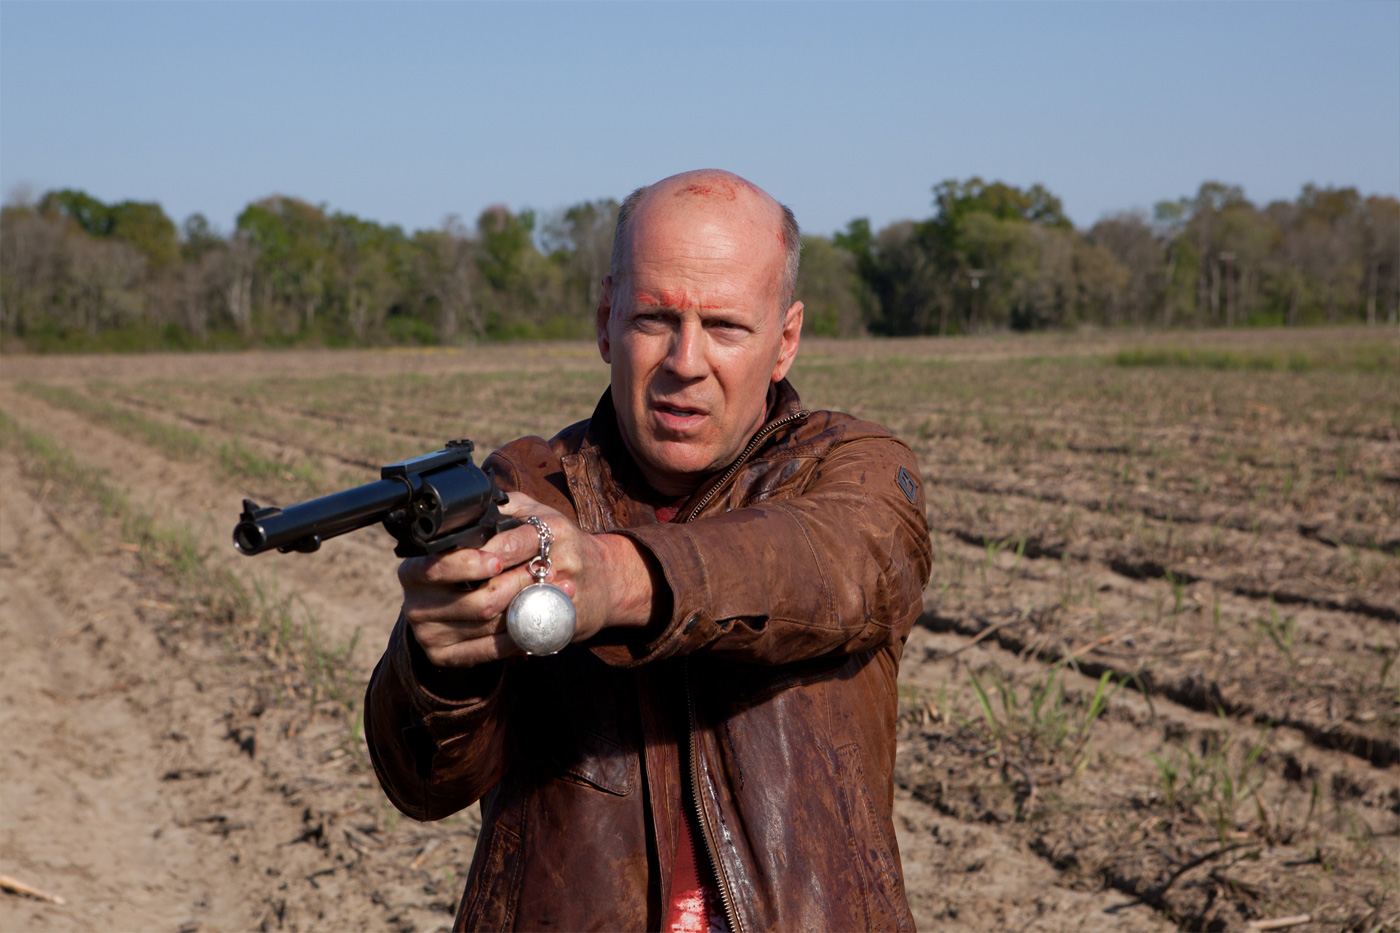
The first time when Bruce Willis appears in front of Joe, there is a cloud with a very specific look. Can you tell us more about it?
Yes, Rian wanted something unique in the shot that would ensure that the audience realized that we were seeing the same scene over again. We discussed birds at first, but then decided to go with a cool looking cloud trail.
Can you tell us more about the impressive car crash caused by Cid?
These turned into quite tricky comps that Hydraulx pulled off for us! The car flip was practical – but not shot in the actual location where it needed to be in the film. So, we had to do background and road replacement, rig removal galore, dust removal and then add cg dust with action that better suited the shot. Hydraulx also replaced the bottom undercarriage of the car with a cg version which was a better alternative to trying to paint remove all the rigging!
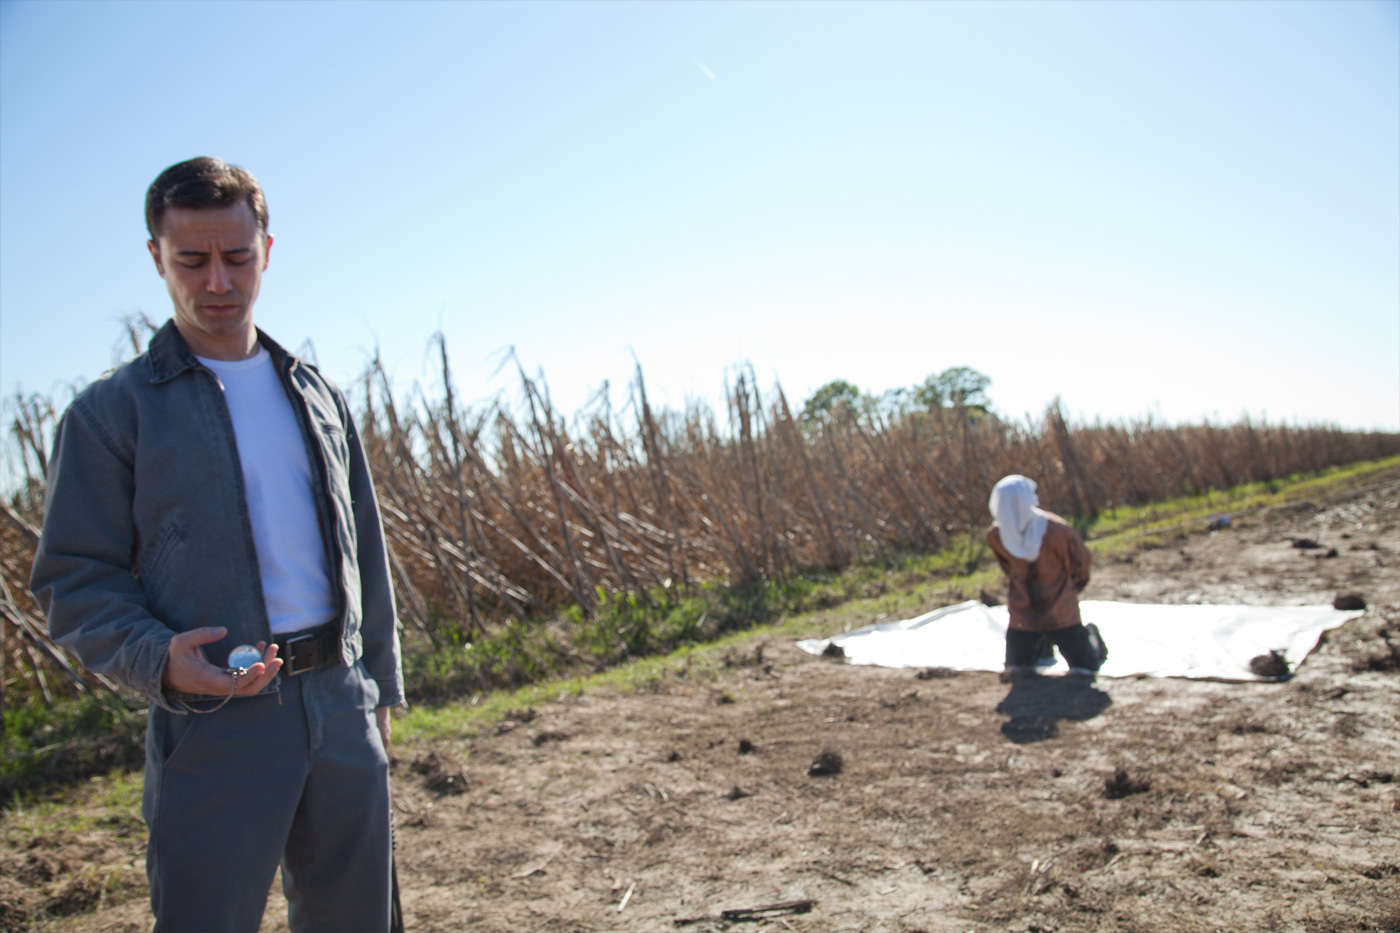
About Cid. How did you design and filmed his destructive super-powers?
Well – the super cool shot of Jesse exploding was done by Hydraulx. Rian described it as needing to be a beautiful and surreal shot where the blood almost felt like a flower blooming in super slow motion. It was one of those shots that just needed experimentation to nail down what would look right – but Hydraulx was very quickly able to get some ideas in front of us and we nailed the concept down pretty fast so we could get into the nuts and bolts of the shot.
Can you tell us more about the creation of his super-powers?
The final sequence where Cid creates the shock wave across the sugar cane field and causes all the dirt and sugar cane bits to swirl around in the air was created by Scanline. They were really fast about getting previs in front of us to nail down the amount, speed and action of the debris. Once we would nail the basic timing and feel down, we got into the specifics of what all the pieces looked like.
Scanline totally understood what we were looking for – to the point where they became like mind readers! Rian and I would look at their shots and circle pieces that we thought looked too cg, or didn’t like the motion or wanted to lose, etc. Then, I would get on a cinesync with Scanline – but almost every time when I would start to go over the notes – they would say, “Yes Karen – we already knew you and Rian wouldn’t like those pieces so we’ve already rendered a new version that will be on the ftp shortly!”
I would always laugh and say “I don’t think we need any more cinesyncs! You guys already know what our notes are before we even tell you!” Awesome when you have that type of creative mind meld…
How did you split the work between the various VFX vendors?
Hydraulx did:
– Blood fx
– Highway confrontation dust fx
– Slat Bike
– Old Seth
– CU on Joe’s eyeball when he puts the drops in his eyes
– Truck flip shots
And a bunch of others
Scanline did:
– The finale sequence!
Atomic fiction did:
– All the city work, aerial vehicles
– Gat man falling to ground
– Life support device that was on top of Seth on the operating table
– Fertilizer device
The vendors are all over the world. How did you organize yourself to follow their work?
Pretty easy to do these days with a 2k playback and ftp! We downloaded the work that came in every day and I loaded it into tweak RV. I would always have the previous version included so I could show Rian what we had previously seen to remind us of what our notes were and then compare it with the new version.
We could also annotate the frames in tweak RV which was great because I could circle the specific areas that our notes referred to so they had a visual reference of what we were babbling about. And, then, as needed, I would do cinesync sessions to discuss any notes that weren’t clear enough without more explanation or to answer any questions that came up.
Even though Hydraulx was here in LA, I think I only went over there 3 or 4 times – you can just review so many more shots in a day when you do it all on your 2k playback than you can if you are driving back and forth to facilities! And with us all using the same efilm look up table we could also be sure we were seeing the same color, contrast, etc.
Is there any invisible effects you want to reveal to us?
Like any film – there are a lot more vfx shots that we touched that no one would ever realize – basic stuff like sky replacements for continuity, adding extra sugar cane to cover up the dead and sorry sugar cane that was there… stuff like that!
What was the biggest challenge on this project and how did you achieve it?
The biggest challenge was the budget! We got really lucky. I was really stressing how to get it all done for the money we had because there was a lot of work that required an A-list vendors. But, fortunately for us, A-list companies like Hydraulx, Scanline and Atomic Fiction were really interested in the project and the work came at a time when they had some available resources – so they were all able to work with us on the price. I never would have believed we were going to get high end vendors like that on our show when we first started! So very lucky indeed!
Was there a shot or a sequence that prevented you from sleep?
Old Seth keep me awake for a bit – until we figured out that we were going to replace his body from the waist down! The city shots were worrisome because we all know how that kind of city work can jump out at the audience in a film if it’s not done correctly. Also – the dust cloud on the highway – even though we do cg dust a lot – it is still hard to make it look photoreal. And, of course the finale sequence with everything flying around…
But when you have good vendors – no need to worry so much, right? (laughs)
What do you keep from this experience?
This was my first indie that I’ve done from start to finish. I wasn’t sure what to expect at first but I walked away from it really enjoying the experience. I got to wear a lot more hats than I do when on a huge tent pole film and I really enjoyed the enthusiasm everyone had for working on it. I will definitely be doing more indies!
How long have you worked on this film?
1.5 years! Hard to believe – I started on the film in Oct 2010, then took an 8 week hiatus right after we finished shooting in Shanghai in April 2011. We finished post on the U.S version in March 2012 – but then I stayed on to complete another 50 shots for the china version until Aug 2012.
How many shots have you done?
388 for the U.S. version. Another 50 for the china version.
What was the size of your team?
This is the trippy part… it was so small and we had so much fun! During shooting it was just me and two data wranglers on set. Then, in post, in addition to me, we had our vfx producer, Dane Smith, and a coordinator – we had 3 across the length of the show – but our main coordinator was Matt Lloyd.
And since the edit was done pretty early on, we only had our assistant editor, Joseph Kirkland on with us during post. So, the four of us would show up each day and work and laugh and then laugh some more. Rian would come in once a day and we would see Ram Bergman here and there to check up on us and make sure we weren’t blowing the whole budget… (laughs)
It kinda felt like 4 college friends hanging out in the dorm making a movie each day…awesome…
What is your next project?
Don’t know yet! But I’m ready for something juicy! (laughs)
Paul and Christina Graff are the founders of Crazy Horse Effects. Before that they worked on many projects at Digital Backlot such as THERE WILL BE BLOOD, THE AVIATOR or TROPIC THUNDER. In the following interview, they talk about their collaboration with director Oliver Stone.
// Paul Graff’s Answers:
Can you tell us more about the creation of your studio Crazy Horse Effects?
I used to work on movie sets, and met some VFX people on set in Germany in the 90’s and got interested that way. I then went to Screen Design school, and started doing films titles for students that I was friends with. I then worked for German TV for a little bit, before coming to the US in 2001. The first project I worked on in the US was CORONADO; an indie movie that was eventually released with Blockbuster.
I started working with a VFX agent after CORONADO, and a few movies later ended up as a Compositor at CafeFX working on MASTER AND COMMANDER. There I met Robert Stromberg, who was Supervising and Matte painting. We hit it off, and after that started working together. We started doing shots from my house essentially and then I worked on a bunch of movies for his company Digital Backlot. I started running his company for him with my wife, Christina as Producer when Robert started to get busy with AVATAR. I supervised THERE WILL BE BLOOD and thereafter came JOHN ADAMS for HBO. After JOHN ADAMS, we founded our own company, Crazy Horse Effects and have essentially had the same team ever since.
There were two things I wanted to do: Be a VFX Supervisor working on set. The other thing I wanted to have was my own company, so they both came into reality with Crazy Horse. We try to be an exceptional company that puts poetry, or something “extra” into every shot we touch. I think that VFX, a lot of time, gets lost in the technicalities, and the artistic vision can be lacking, and that’s what we’re trying to provide.
How did Crazy Horse Effects got involved on this show?
Actually we saw an interview with Oliver Stone on Bill Maher and he was talking about some history project he was working on. Before we went on a long deserved vacation we wrote him a letter saying that we were interested in working on his history project because we had the same political views and wanted to help him with his vision. He called us back and ended up hiring us on the spot for WALL STREET. It was a very crazy ride, and we ended up with his respect. He asked us to be a part of WALL STREET: MNS, UNTOLD HISTORY OF THE US and SAVAGES. We have been working with him as a part of his team ever since.
How was the collaboration with director Oliver Stone?
Olive Stone is like a Thunderstorm. You have to think on your feet, you have to be flexible, but you also have plan things out as best as possible and be ready to go with whatever is happening on the day. You have to be able to adjust strategies on the fly. It’s nice to work with Oliver because we really feel like we’re a part of the creative team, even asking us for our opinions from time to time.
Can you tell us more about your work methodology between you?
It’s the same as it always is. You start with the script. But Oliver Stone is a writer, so the script keeps changing. A lot of times, it’s pretty clear what is going to be needed. You try to discern what can be done with SFX, VFX and Art Department, and then you have to be on set and really make sure that no unnecessary costs are being racked up and at the same time know when and where you can say, “We will take care of this later.”
The movie features an impressive of various film aspects. How were you involved with that?
Oliver Stone is not afraid of mixing formats. From the script, it was obvious that there were going to be a lot of video conferencing taking place. We used several cameras to get the necessary footage without adding to the already pretty tight shooting schedule. During the laptop Skype conversations, instead of using the laptop cameras, we placed a 5D camera with a fisheye lens on the laptop just out of frame of the A camera and were able to acquire hi-res footage to later be composited into the screens. Particularly during the scene where Blake Lively gets slapped around. This footage turned out very interesting, because it was acquired immediately in the seen. The camera was extremely close to the action. In another scene where one cartel member gets killed, we mounted a go-pro camera onto the prop sticks that they used to push the victim in the space of fire. A whole host of other video cameras were used simultaneously – all in addition to the main film cameras. Later, during post production, it was our job to convert the look of some cameras into others in order to maintain continuity.
The movie is quite bloody. Can you tell us more about your work on this aspect?
We tried to avoid having to create closeup exit wounds, but there were a few cases where that was necessary; particularly one shot where one of the Mexican sniper’s head explodes towards camera. For obvious reasons, we were not allowed to shoot that live action.
What are the four movies that gave you the passion for cinema?
Moby Dick
2001: A Space Odyssey
Eternal Sunshine of the Spotless Mind
The Big Lebowski
// Christina Graff’s Answers:
What is your background?
I’m a lefty. Enough said.
Can you tell us more about the creation of your studio Crazy Horse Effects?
Crazy Horse Effects (CHE) was born out of a collaboration with Robert Stromberg’s company, Digital Backlot. Paul and I helped run Digital Backlot for Robert for a few years, but when Robert wanted to focus on production design and didn’t want to have a company any longer, Paul and I created Crazy Horse Effects. We essentially continued operations as CHE, working with the same artists that we worked with at Digital Backlot. CHE specializes in the creation of cg environments, compositing, matte painting, designing and supervision and the production of visual effects.
How did Crazy Horse Effects got involved on this show?
Paul and I did the visual effects for Oliver’s WALL STREET: MONEY NEVER SLEEPS, as well as his documentary series THE UNTOLD HISTORY OF THE UNITED STATES and a little work on CASTRO IN WINTER. Oliver was pleased enough to ask us to become part of his core team moving forward.
How was the collaboration with director Oliver Stone?
It couldn’t be better. It is an exciting collaboration. We get involved in the early stages (during pre-production) to contribute to the design of the vfx. He invites our full participation in designing and shaping the visual effects. The collaboration with oliver is always outstanding. I love him. He is truly a stimulating person to work with and he challenges our artistic vision. Besides, he’s a lefty. I love and respect Oliver immensely.
Can you tell us more about your work methodology between you?
Oliver’s way of working means being receptive to a constantly changing cut of the film; which means you have to be able to quickly understand and fulfill last minute requests, think on your feet and be full of ideas. Working with Oliver as much as we have, I feel like we’re on a similar wave length, which empowers us to at least think that we have a basic understanding of what he would like to see. Particularly from the first read of the script, i’m already thinking in the back of my mind how to envision the creation of the effects. A lot of the time, first impressions are the lasting direction of where they go, because i am able to access the essence of what the shot is trying to say in the context of the film.
What was your approach with the creation of the different matte-paintings?
Honestly, there were very few matte paintings in SAVAGES.
The movie features an impressive of various film aspects. How were you involved with that?
Oliver likes to work with various film and video formats. He mixes media a lot and is not afraid of the source material and its resolution. SAVAGES integrates some old movies, TV shows, amateur video footage, video chat and hacker software.
CHE designed the look for the all of the footage except the hacker software which Mike Sanchez did for live playback.
For video chat footage:
Paul thought of the idea to use a Canon 5D and 7D with a fish-eye lens on set to capture the video chat footage from the correct perspectives. We designed the chat “look” for each scene with the correct interface. Our material was then eroded to mimick chat footage we are used to seeing regularly in our own homes. There is a mix of film material, actual low res video chat footage captured on the computer and canon 5 & 7D footage.
For amateur video footage shot by the “Mexican cartel gang”:
The look took some time to come together for the Mexican cartel footage. The scene is dark and grotesque, so it was important to get it right.
At a moment Ben and Chon attacks a cartel convoy. Have you extended the car explosions of this sequence?
The SPFX Supervisor, Mark Byers is primarily responsible for the awesome explosions. He did such a great job, that there was very little left for us to do.
Can you tell us more about the design and creation of the map showing the plane moving from Mexico to USA?
We are working on Oliver’s new documentary for which we created a ton of various maps. The idea for this map came out of that work.
The movie is quite bloody. Can you tell us more about your work on this aspect?
The movie got bloodier the longer we worked on it. Bill Corso was the make-up FX artist on SAVAGES and he is a master at wounds. We took our cues from him and even collaborated with him during post. The bloodshed in Mexico is a reality and we could not diminish the severity of it by showing bad wound and blood work. It had to be real. Once Oliver saw that we could delver that type of effectiveness, he kept asking for more.
Have you collaborated with KNB for the gore effects?
No.
Can you tell us more about the sequence in which Lado is hitting a guy with two whips?
We shot for several days, and it was a very visceral experience. the scene is gruesome. It displays the worst qualities humans can have, and that was the point of the scene for me. In order to take the scene a little bit further, we thought of attaching small “go-pro” cameras to the prodding sticks used when the torture victim was set on fire. We also set up multiple cameras from surveillance perspectives (in addition to what the DoP used) to facilitate communication for the video conferences.
The tricky thing is this: When you’re writing, you have many tools (alliteration, percussion, hyperbole) to convey the emotion of the scene and the character’s experience. With a visual art like film, you have to do that with images. I think it is for this reason that Oliver likes to use illustrative sequences. It allows him to show you where the character is going in their mind and give you a piece of their emotional experience. This kind of story telling was used in this scene, and it’s always exciting to work on scenes with Oliver that are as visceral as this.
Is there an invisible effect you want to reveal the secret to us?
Well, truthfully, you shouldn’t be able to detect any of our work. What was most fun was shooting the back of the Mexican cartel guy’s head off because we got to produce our own VFX shoot with Bill Corso and Mark Byers to make it happen. Love working with those guys.
What was the biggest challenge on this project and how did you achieve it?
It’s funny, but the hardest sequences we created didn’t stay in the movie. Right before we polished those sequences, they were cut from the film.
Was there a shot or a sequence that prevented you from sleep?
Many.
What do you keep from this experience?
We love oliver stone. he is brilliant. That is what we think every time we work with him!
How long have you worked on this film?
One year.
How many shots have you done?
We did about 350 regular shots for SAVAGES and several sequences which all contained about 10-20 shots within each sequence each. It probably was over 400 shots in the end.
What was the size of your team?
We work on several movies at once, so SAVAGES had about 15-20 people working on it at any given time.
What is your next project?
Many. Finishing LIFE OF PI and the gangster squad now. working on IDENTITY THIEF, BOARDWALK EMPIRE and a few other to be disclosed later. also still trying to finish oliver’s documentary: THE UNTOLD HISTORY OF THE US.
What are the four movies that gave you the passion for cinema?
To answer that you should know when our formative cinema years were. That would be the 70s and 80s for me. I cannot just pick four. Here’s what is off the top of my head:
2001: A SPACE ODYSSEY
ONCE UPON A TIME IN AMERICA
THE CONVERSATION
TO KILL A MOCKINGBIRD
BUTCH CASSIDY AND THE SUNDANCE KID
MIDNIGHT EXPRESS
IN THE HEAT OF THE NIGHT
THE FOG OF WAR
DOCTOR ZHIVAGO
PLATOON
THE LOST HONOR OF KATHARINA BLUM
THE BIG LEBOWSKI
THE STING
PAPILLON
MY LIFE AS A DOG
THE CONSTANT GARDNER
INCIDENT AT OGLALA
LEN LYE’S FREE RADICALS
HEAVEN CAN WAIT
M: EINE STADT SUCHT DEN MÖRDER
APOCALYPSE NOW
SPLENDOR IN THE GRASS
WALTER RUTTMANN’S OPUS
ROCKY HORROR PICTURE SHOW
ALMOST FAMOUS
ETERNAL SUNSHINE OF THE SPOTLESS MIND
ARGO
RESIDENT EVIL RETRIBUTION is the largest project made at Mr .X and they won’t be too much of two to explain their work on the visual effects of this show. Eric Robinson is back on The Art of VFX after telling us his work on THE THREE MUSKETEERS and is accompanied by Ethan Lee.
What is your background?
Ethan Lee // Sculptor turned classical Animator, turned Character/Pipeline TD and CG Sup. I have worked in VFX for 13 years, 6 of them at Mr .X. I have a fine art background but have always had a tendency toward the technical. Trained as a classical animator later transitioned to 3D.
Eric Robinson // I’m a Digital Effects Supervisor and resident stereographer, at Mr. X Inc. for the last three years. I started out as a generalist and moved into a compositing role at IMAX working on both traditional IMAX 3dstereo documentaries and stereo conversions.
Mr. X is a long time collaborator of Paul W.S. Anderson. How did you approach this new movie?
I have now worked on four of his productions and have found that Paul likes to work in an organic manner. He loves to riff on ideas to see where the visual effects can go. The relationship gives us the trust to help develop a shot. This trust affords us a fair amount of influence for the direction of the visual effects. Our guidance helps Paul get more bang for his buck, as we can suggest an option that will give him not only the story points that he needs but also be cost effective for the budget. With that in mind we tried to develop a pipeline flexible enough to allow us to turn around notes very late in the calendar. The way you perform at the eleventh hour is the difference between success and failure.
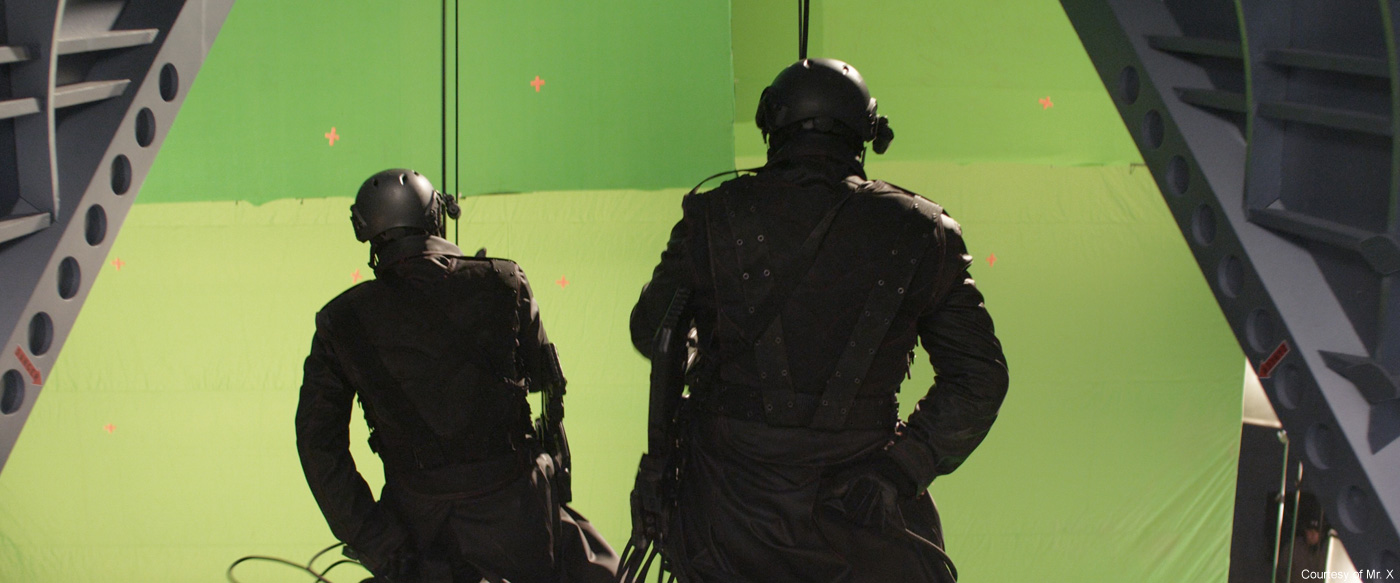
The opening sequence is really impressive and ambitious. Can you tell us more about the shooting of it?
Mr X. is crucial to the creation of such sequences as we work with the director, beginning at the previs stage, to shape the sequence before a single camera rolls.
For this and all the sequences in RE5 we worked with the director’s storyboard team and our previs department to fill out the boards with 3d blocking as the frames were approved. The careful planning of the previs not only helps shape the movie but allows the setups to be as quick and efficient on the day for shooting.
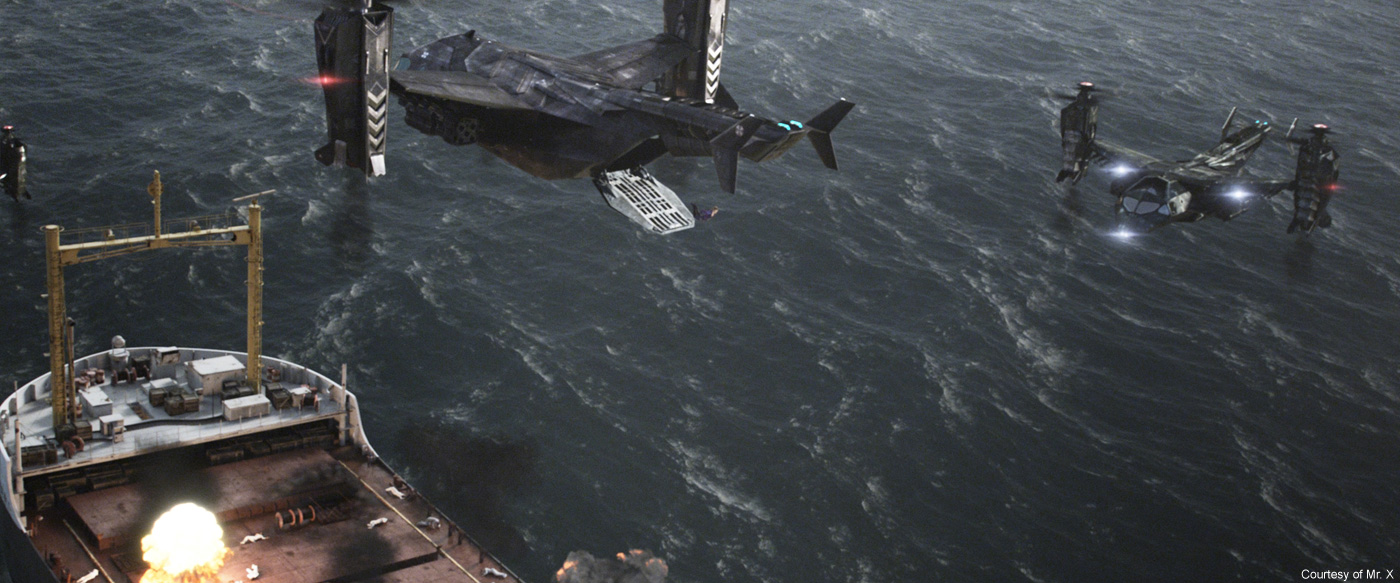
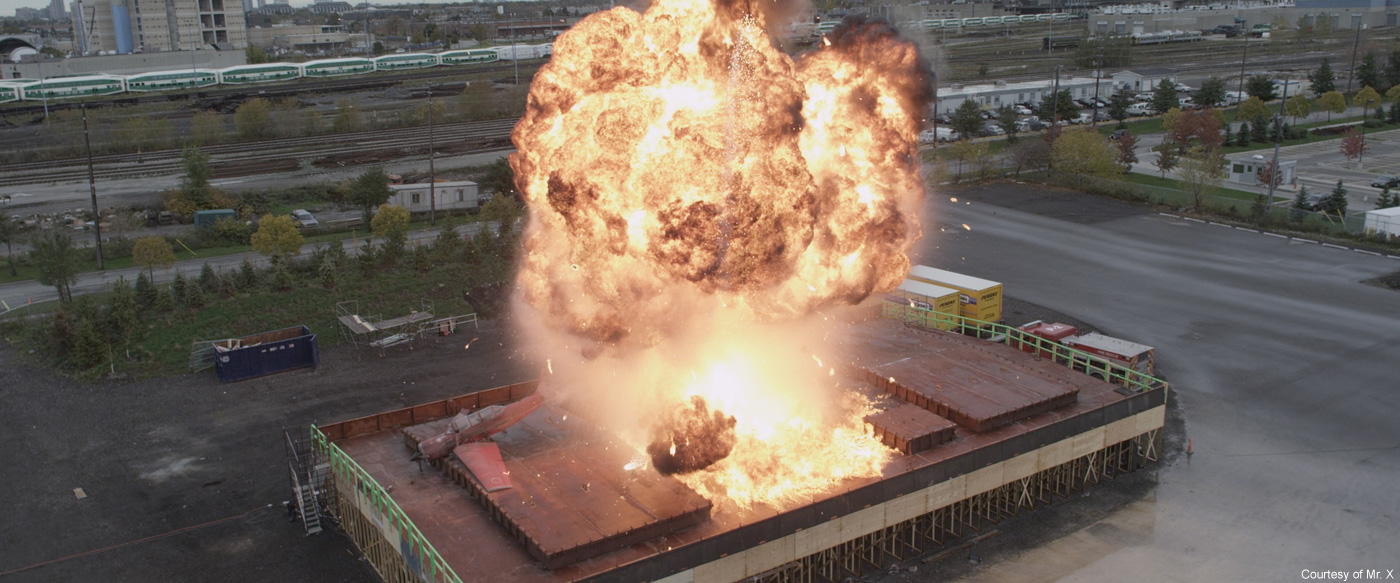
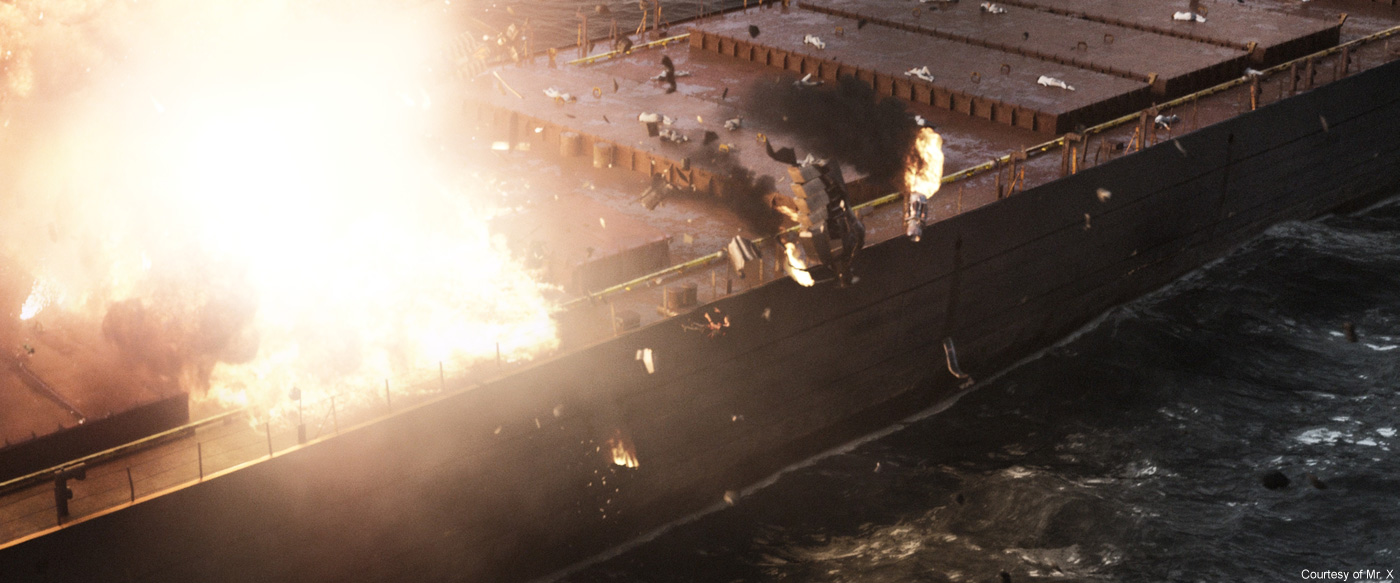
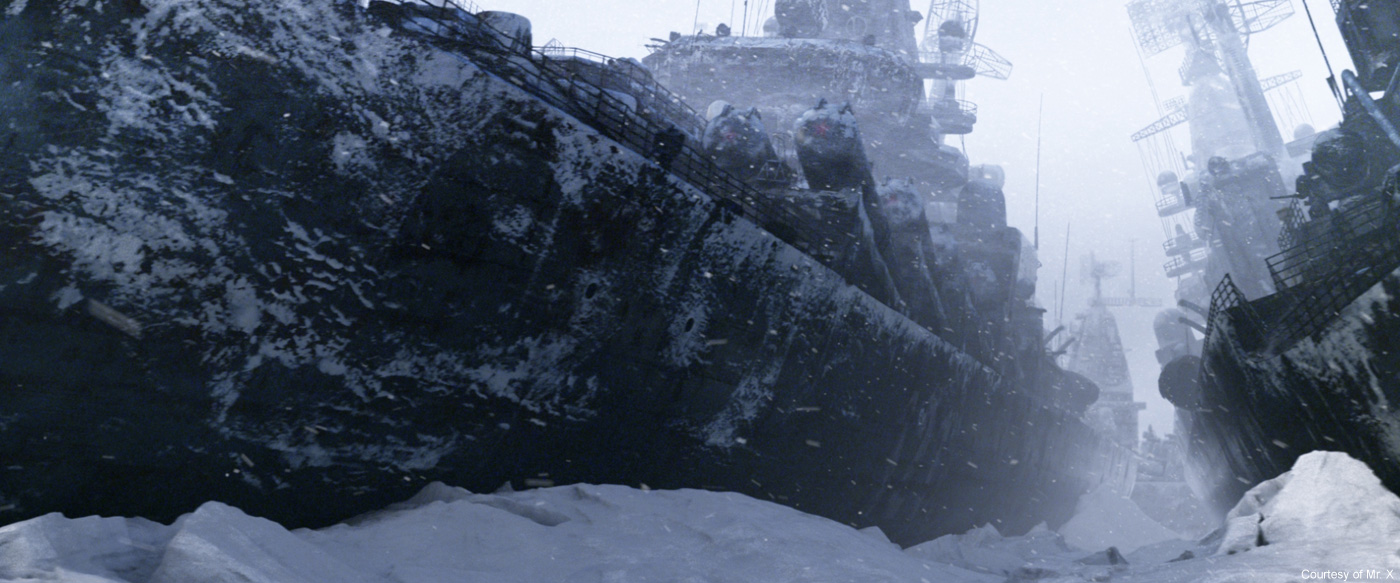
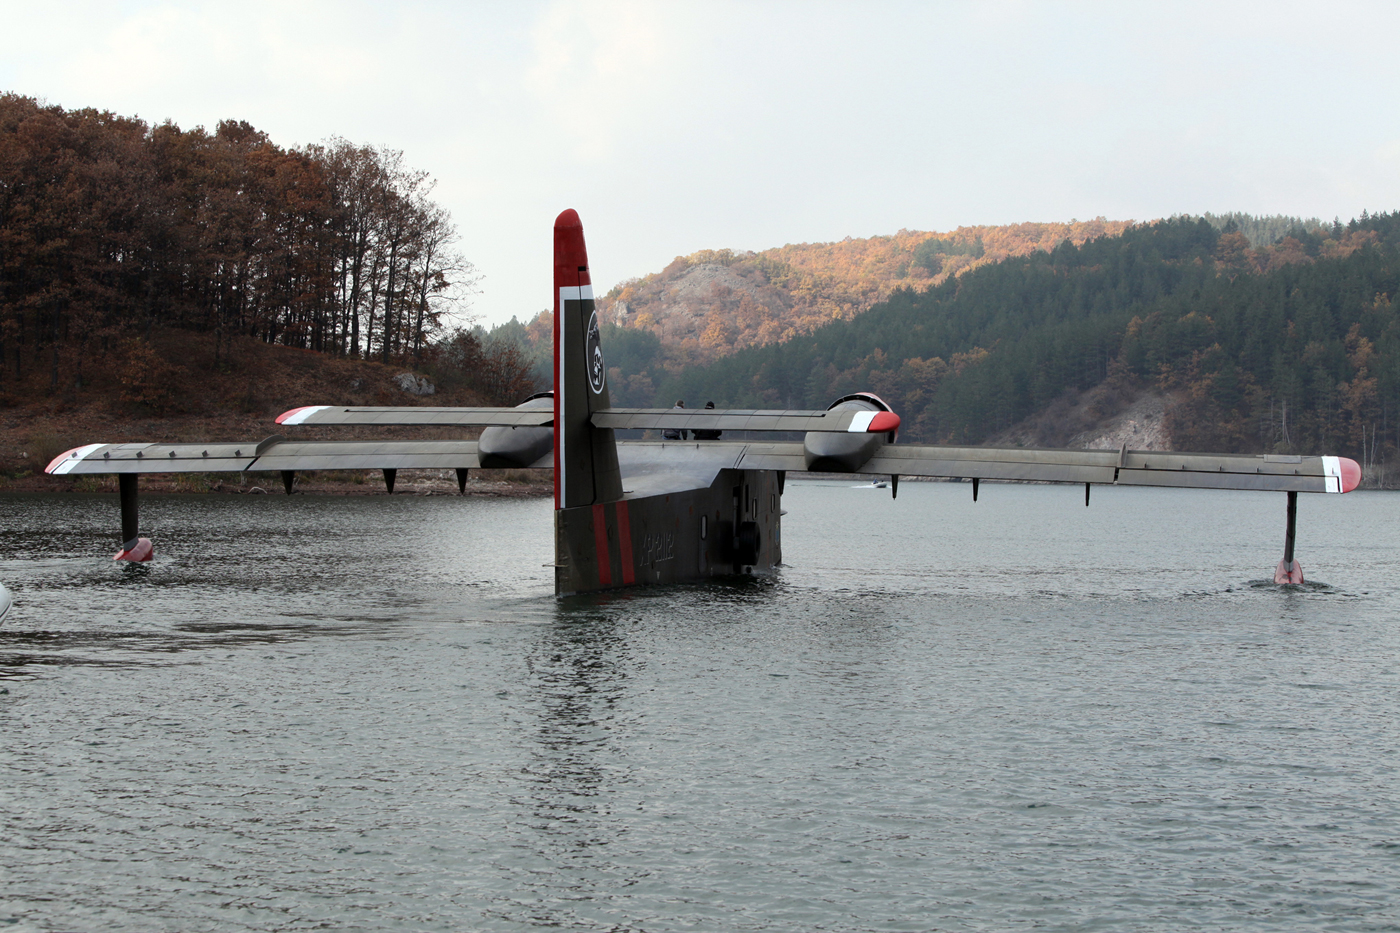
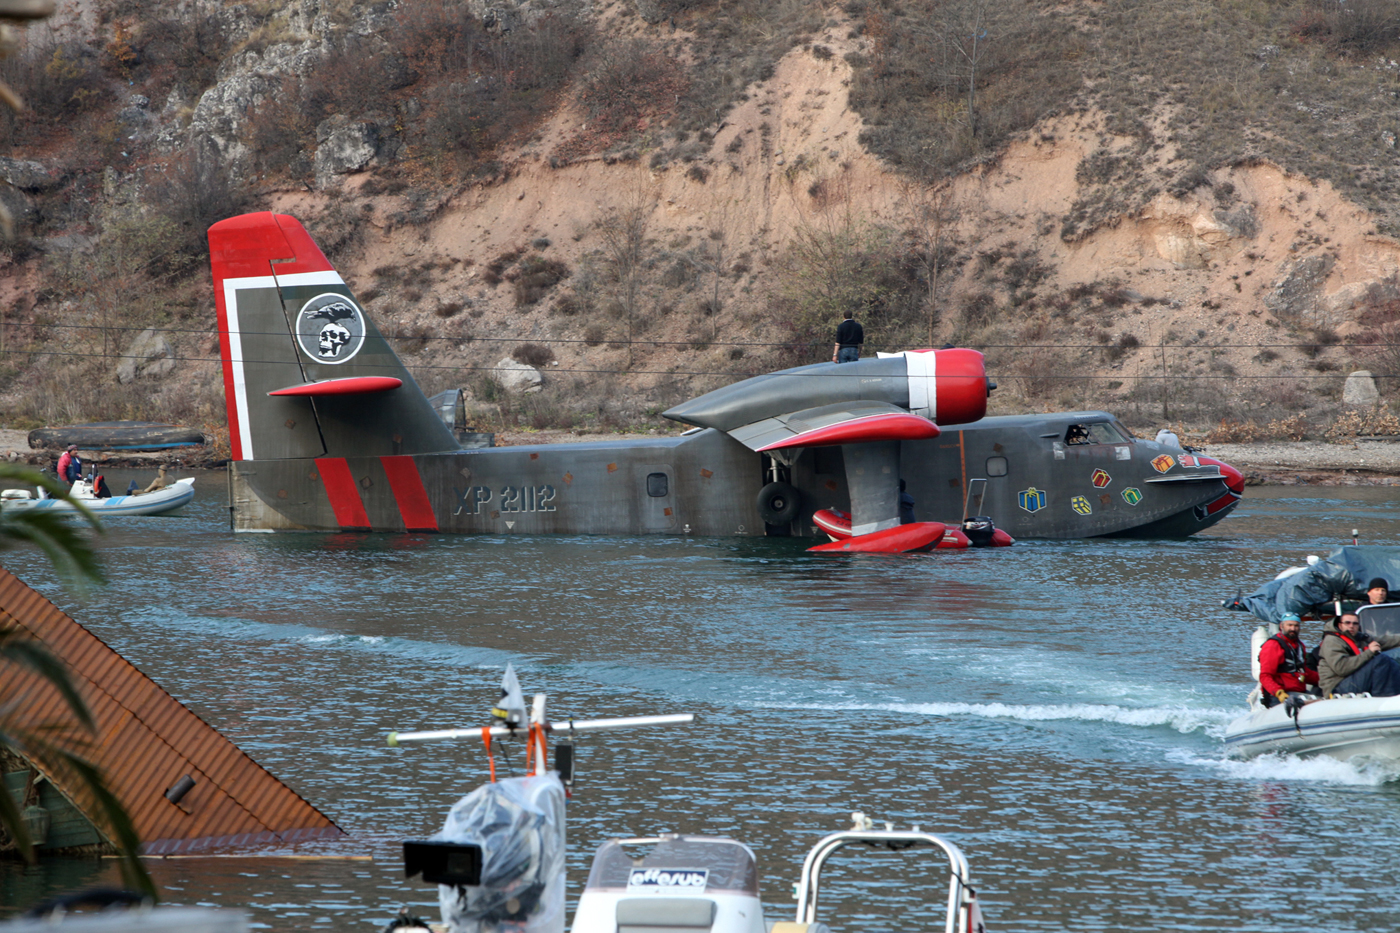
How did you create the huge armada that attacks the boat?
The initial truck in of the attacking Osprey squadron was supposed to be a straight reuse from the previous movie. But after cutting it side by side with the newly upgraded and rendered Osprey from V-ray it was clear we needed to re visit the whole shot.
Using the old shot as a framework we transferred the animation and layout to all the newly upgraded assets. Everything had been revisited, the Arcadia, the water, the sky, the survivor crowd, digital doubles and of course the Osprey.
The ocean in every shot in the sequence was 100 % CG and in most of the wide shots everything was 100 % CG. This was an interdepartmental harmony exercise as all were involved. Animation in Maya provided the main action of vehicles and big debris plus animated the digital doubles. These actions were exported through Alembic to Houdini for destruction rigid body sim, fire, explosions, water sim, jet wash, strafing and rocket trails. The rigid body sims were exported again back to Maya for lighting in V-ray.
Can you tell us more about the tentacles that came out of the zombies mouths?
This was also an asset from the previous iteration of the franchise, RESIDENT EVIL: AFTERLIFE. The Majini was also upgraded for our updated the V-ray/Alembic pipeline. The model was originally created from a scan of a physical model created by the special makeup effects designer, Paul Jones. The topology was reworked and the textures enhanced. The Base rig was built with our in-house modular auto rigging system. It needed to have flaring and tensing and a post build script was made to built a surfaced based deformation to give it a more organic nature plus more localized control, than a straight blend shape would afford. This rig allowed the animators to easily perform the tentacles in a wide variety of shapes for the many actions required. To put the Majini in the mouth of the actor a digital double head sculpt was made and rigged. This was then carefully match moved to the exact action of the actor. The plate was then projected on the model and baked into an animated texture in uv space. The resulting animated texture allowed the animators to deform the neck and mouth of the actor with the rigged head as the proboscis emerged from the mouth. HDR domes were acquired on set and used with V-rays pbr engine to light the creature.
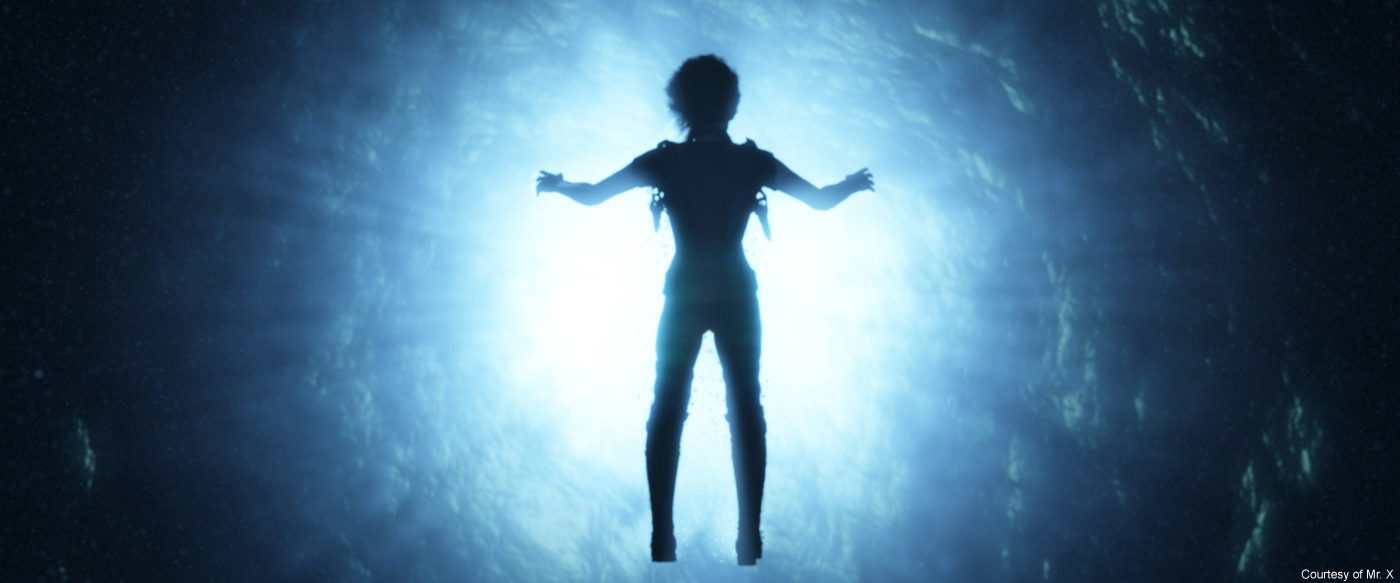
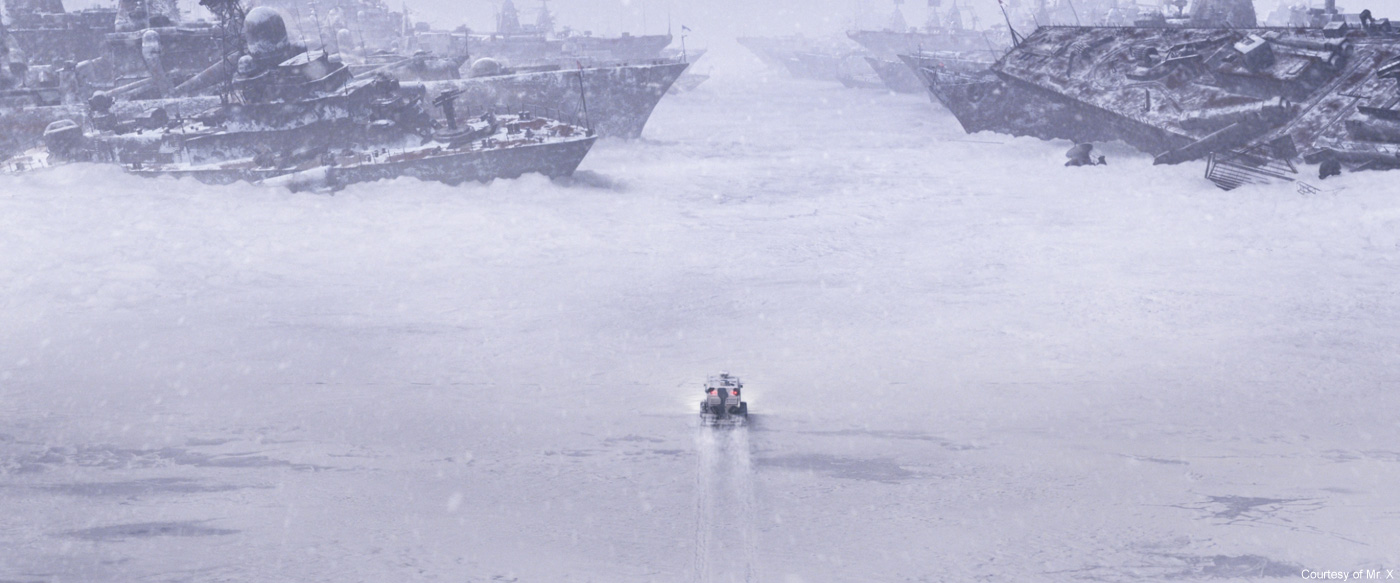
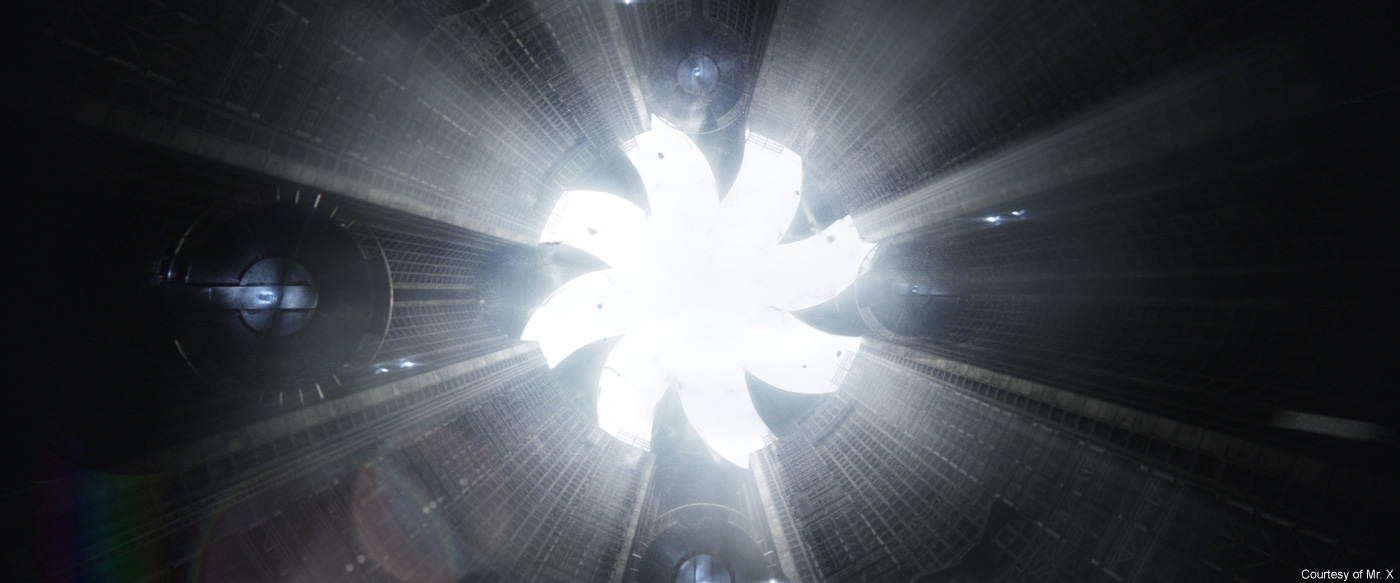
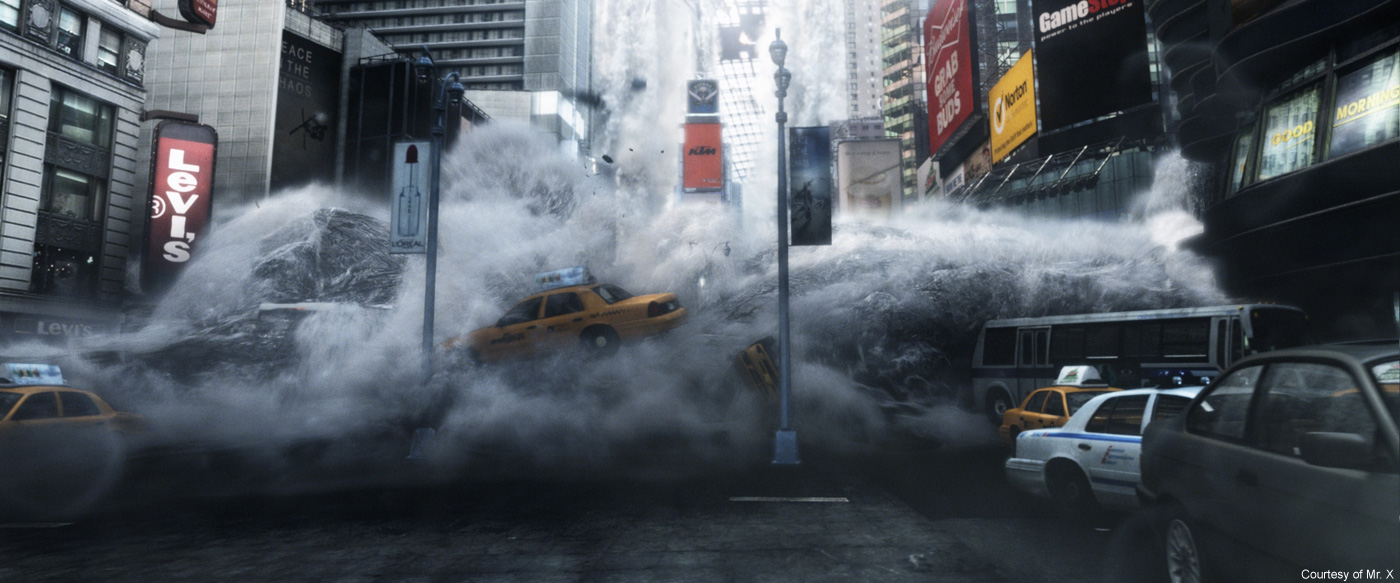
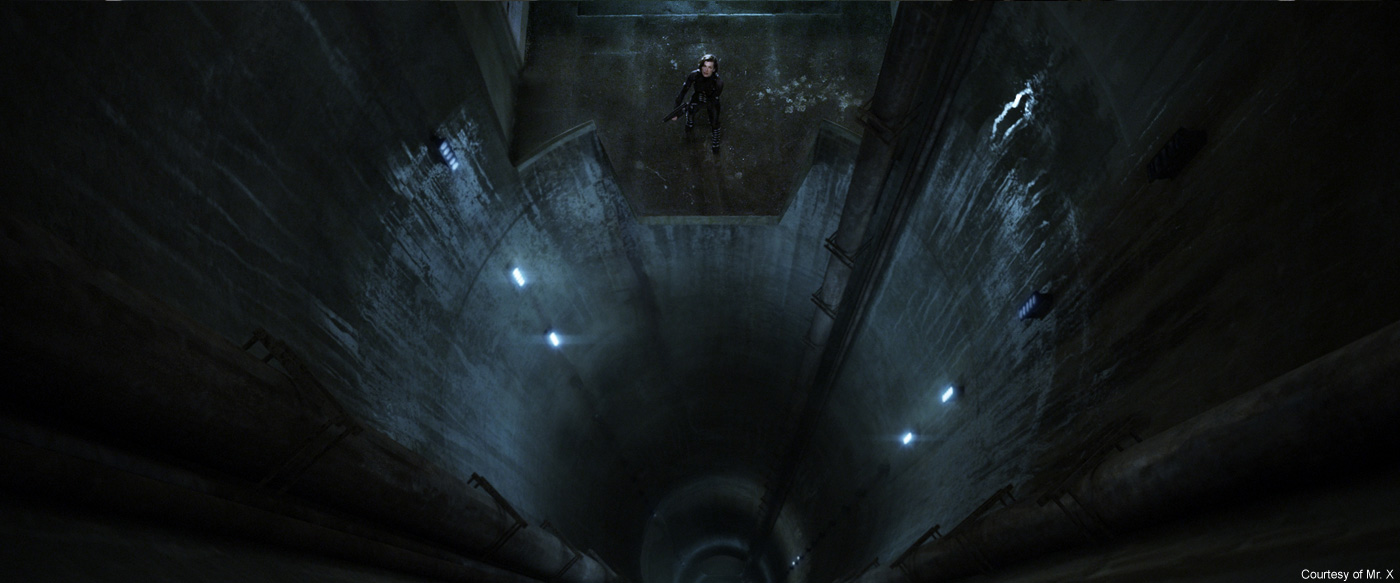
This new movie is the most ambitious in terms of variety of environment and scale. Can you explain to us in detail the creation of the impressive shot that starts with Alice, goes through the underwater facility and finishes over the ice?
We began with a plate of Alice and Ada Wong in a window. With the camera pulling out to show a huge expanse, a massive facility was required to be built around them. In the story, the interior of the “test floors” was described as a kilometer wide and 300 meters high. And this was just for the “Suburbia” zone. In addition we needed environments for Times Square, New York, Red Square Moscow, the Submarine pens, and a host of others. The production designer, Kevin Phipps and his team were able to provide a rough outline for the facility. We took these initial designs and expanded them as well as adding tons of small details to help convey the huge scale. The control room, where Alice and Ada are looking through the window was a fully textured and lit asset. The surroundings were a combination of modeling and 2.5d projections and matte painting. The final model was over 12 million polygons!
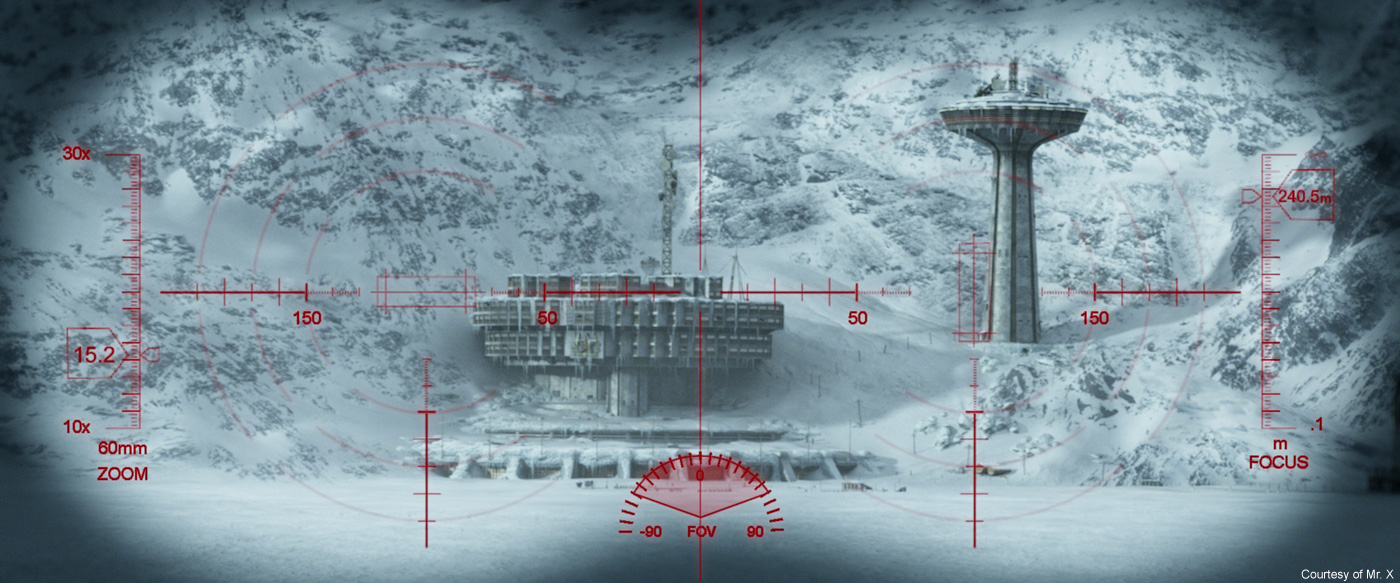
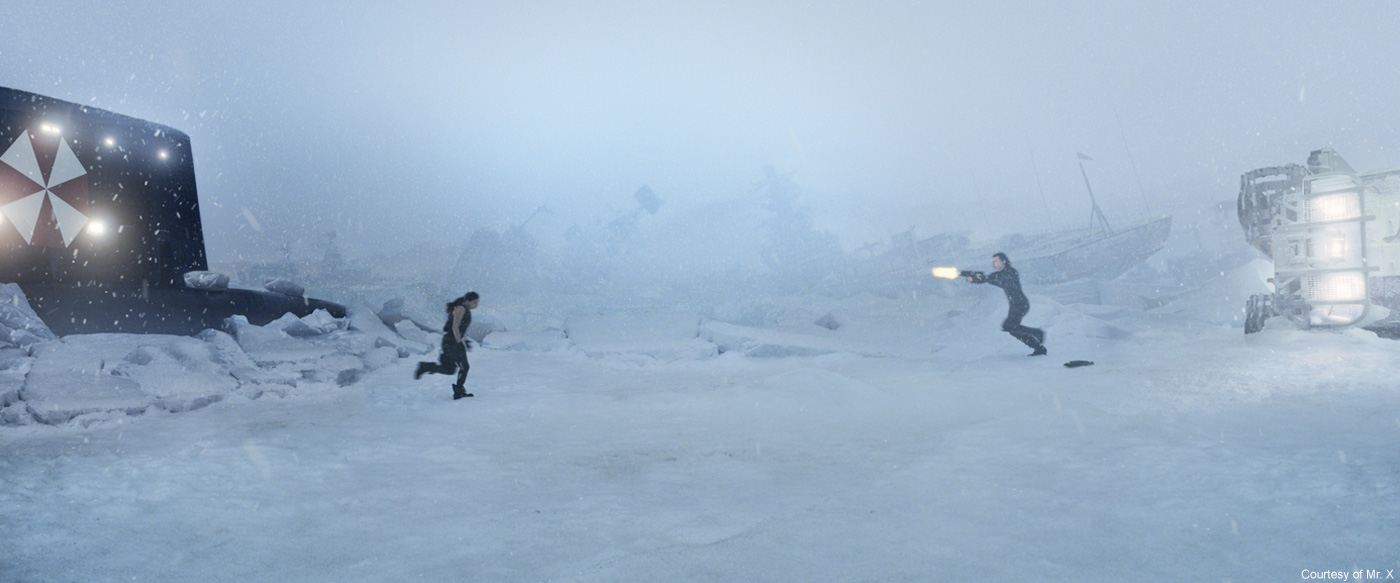
How did you design and create the outside facility on the ice and the huge platform?
We worked from concept sketches from the production designer, and then did additional design iterations with the director to get a final look. The initial concept was inspired by a real hotel in Russia. As this moment in the film takes place in Kamchatka, Russia we started with as many reference photos as we could find. The creative objective was to have a cold, desolate environment. The aboveground portion of the facility is actually a cover for the underwater portion as described elsewhere in this article. The facility is a combination of rendered assets with matte painted and projected elements. To bring the environment to life, we added as much interactivity as we could, while trying to preserve the desolate feeling. Drifting and aerial snow were simmed by the FX team. Small details were added, like hand rails, utility sheds, even icicles.
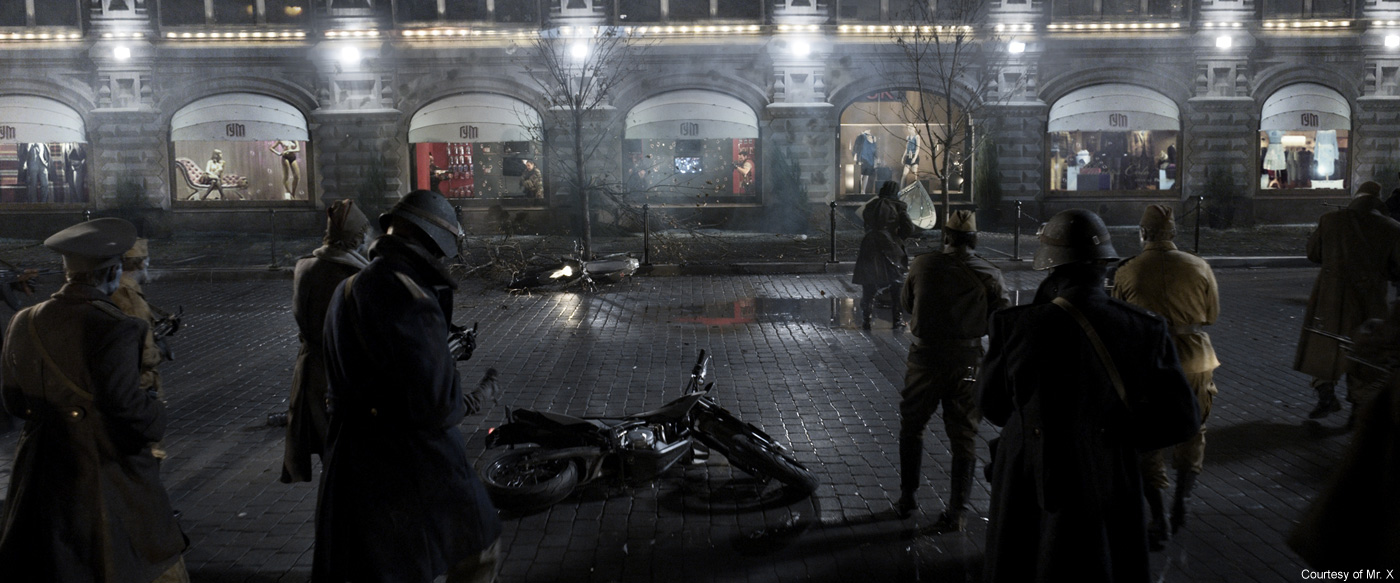
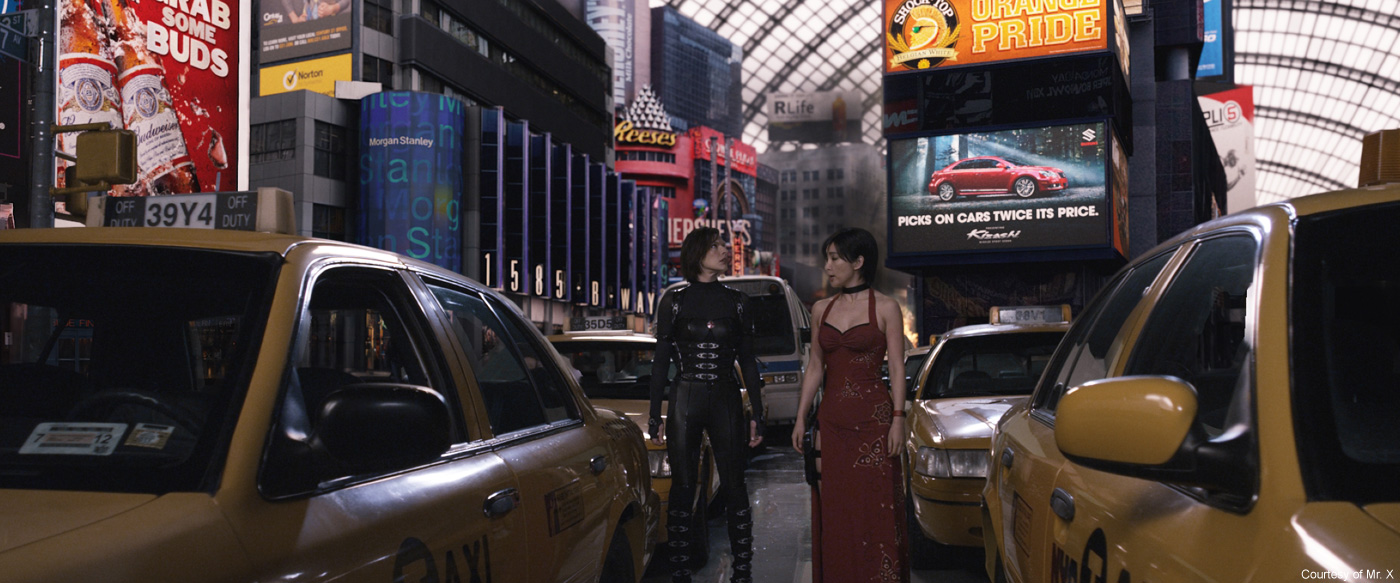
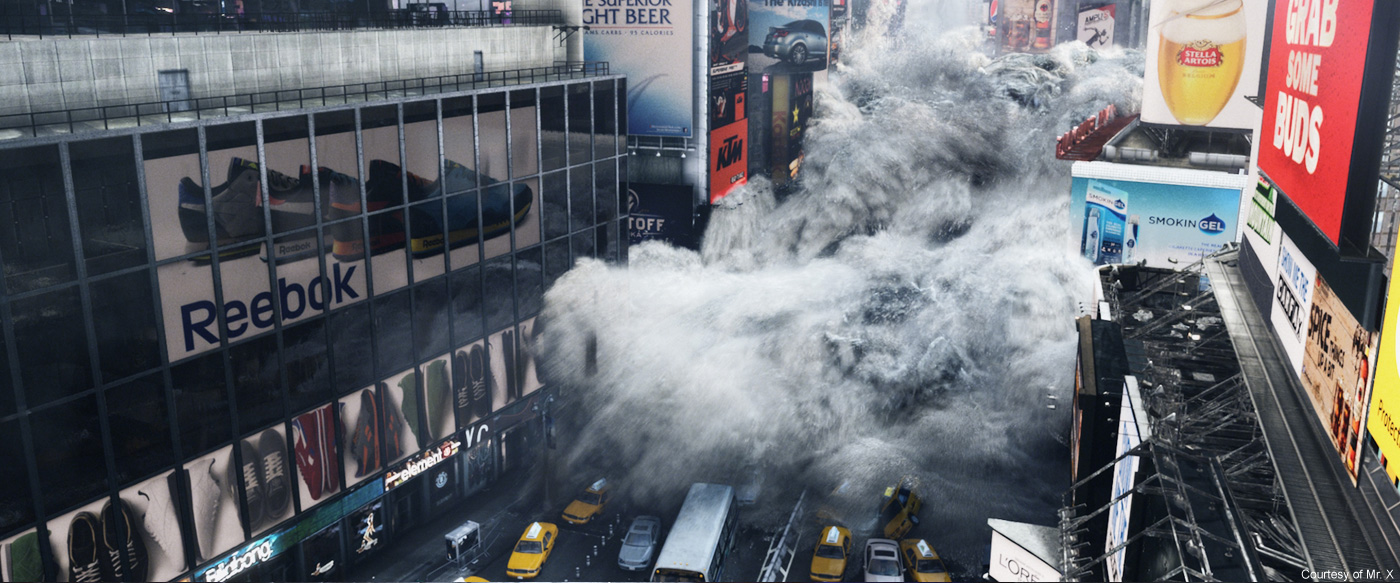
At a moment Alice fights Axemen in New York. How did you create this environment?
To speed up the process of the environment build we decided to purchase the Time Square model created for the production of I AM LEGEND. This moved the layout and build forward quite a bit but to work in our Mari matte projection pipeline it required uving of the model which was painstakingly done over a few weeks. To most efficiently produce matte paintings we pushed the model through previs to get the camera angles locked this was done to prevent the matte department painting up parts of the environment that would never be viewed.
The matte paintings were built from a library of stills that were acquired during a photo survey in New York where Sean Mills and Anna Joukova risked life and limb hanging off a 53’ scissor lift and building ledges. The view dependent matte projection approach is a clever method to preserve and appropriately use resolution, plus still gives you a fair bit of freedom to move the camera within a matte painting. This projection method was also mandatory for stereoscopic to create parallax. All the close up cars and street were shot in front of green screen, tracked and projected mattes composited in.
How did you augment the fight with the Axemen? Prime Focus takes the credit for this.
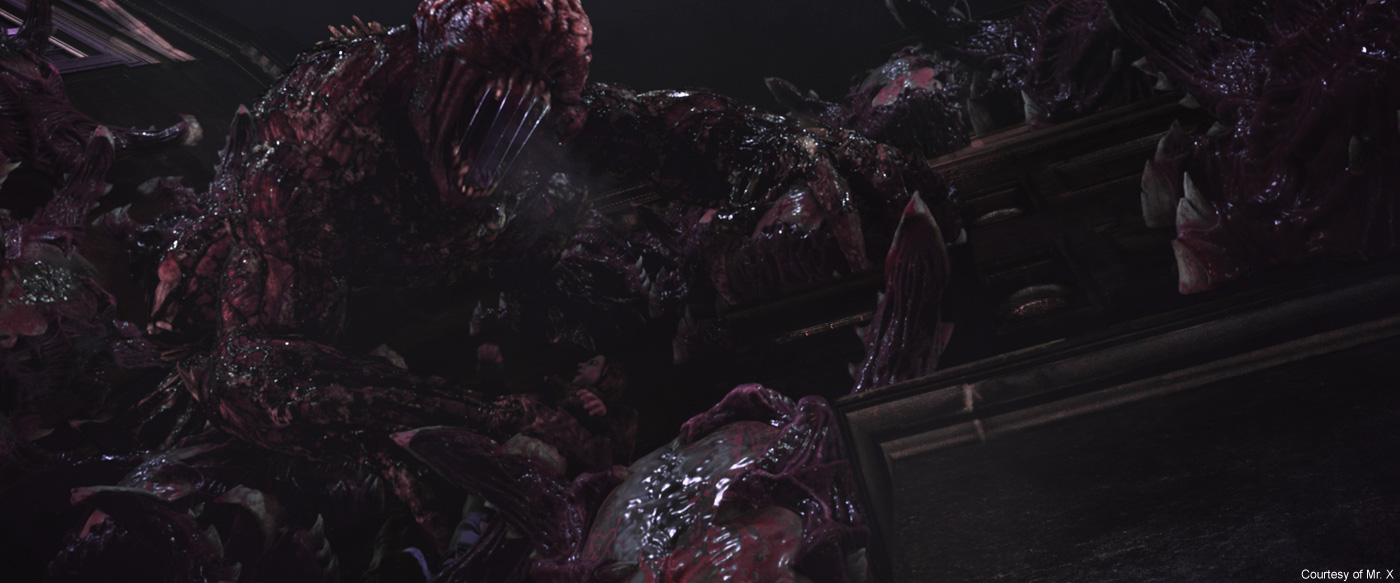
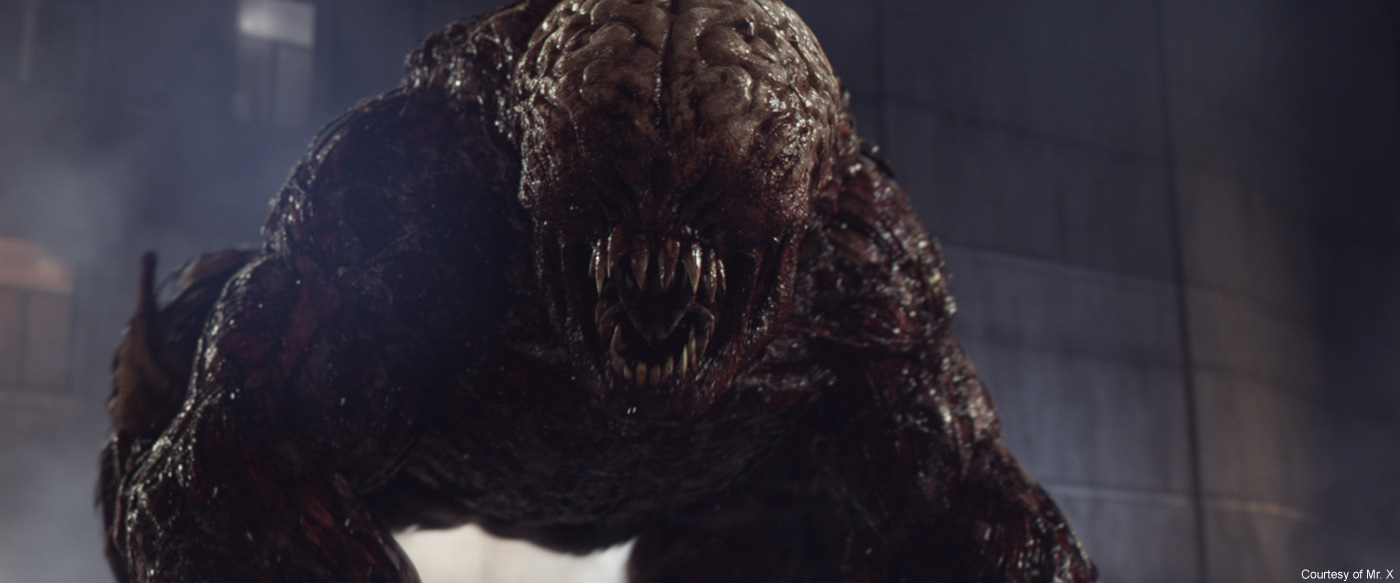
The heroes are attacked by a huge monster. Can you tell us more about its design and rigging?
The Uber-Licker is Mr.Xs most ambitious creature to date. It needed to hold up being viewed not only full body but in full close-up.
Taking this into account we knew this would be an exhaustive build. We begun the process without external concept art and it was tasked to an in house concept designer Furio Tedeschi to create a design. Working from video game concepts and the previous movies as a guide and with the mandate to make the licker UBER, he roughed out a concept in Z-brush with a quick paint over. To bring the licker up to UBER level we knew we needed a new twist on the design, this is where the shredded skin idea arose.
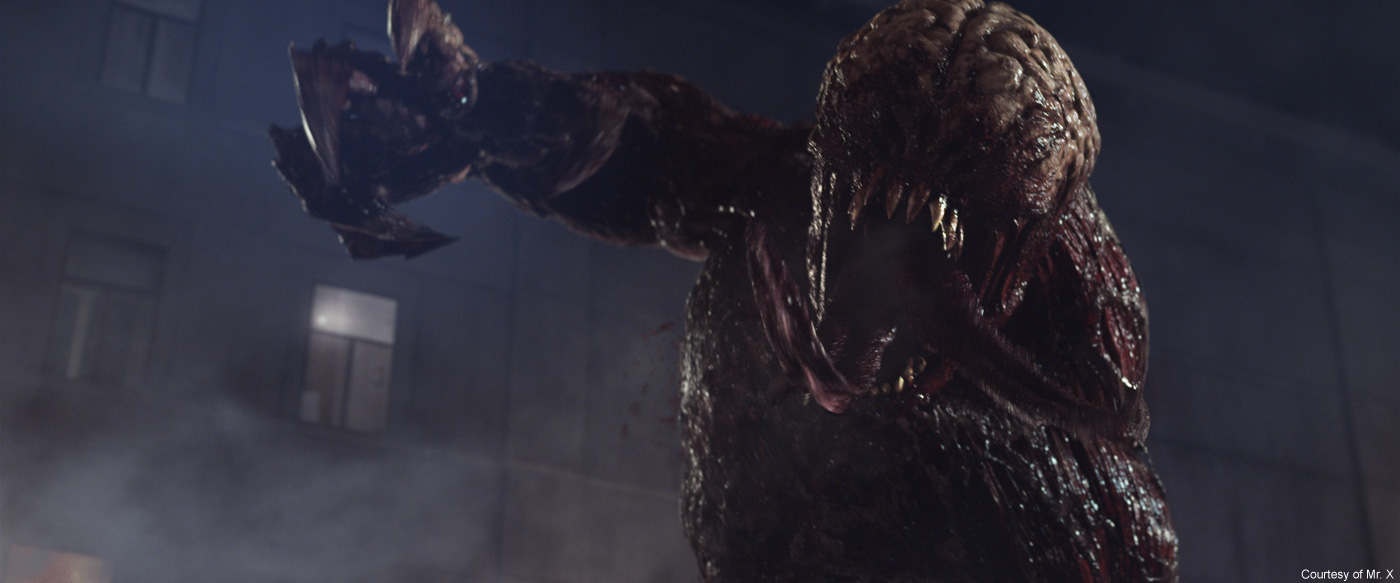
The base concept was that the regular licker had been infused with super steroids that caused tremendous growth all its muscles and bones tearing through the skin. After the concept was approved Lead Creature modeler Sean Mills brought the concept to reality. Paul Anderson had first wanted the creature to be bigger than T-Rex size but it was found during previs that it made it next to impossible to frame it in any sort of shot, and it was then scaled down. The new size, while big enough to completely fill the frame in a medium wide shot at the previous size would have only shown a fraction of the beast. All the individual muscles were built and textured as this was necessary to realize the shredded/splitting skin effect. Again the Modular auto rigger was used to build the base of the rig. The majority of the muscle action and skin sliding was achieved with basic skincluster deformation and sculpt deformers and in certain problem areas Maya muscle was used. To reach the proper level of believability, the creature required a muscle jiggle simulation and finaling pass. The wrapped skin and muscles with such tight tolerances invariably crashed through one another in heavy deformation points on and off. The finalizing pass corrected any crashing and was also used to sweeten shots with view specific flexing straining and pulsing veins. The Uber-Licker’s main weapon was the double 20 foot spiked tongues that could be shot out of the monster’s mouth.
Understanding the limits of regular spline based IK it was decided to create a custom plugin for better deformation and control. The spit and breath effects were initially tasked to the FX department. Because of our Alembic pipeline, the compositors were able to track 2d spit elements in 3d on the Uber-Licker’s actual animated geo and composite the elements in stereoscopic space.
How did you manage the animation challenge of it?
The animation team referenced a bunch of animalistic styles of movement. Each animator was allowed to give their take on the movement. There were a wide range of styles Bull, Cat, Bear, and Gorilla. After viewing the various styles Paul felt the cat like movement most embodied the predatory nature that he envisioned for the creature. Understanding the motivation of the creature the rig was revised to help animation realize the catlike poses. Animation took care of all the big actions but jiggle simulation and finalizing was employed to add the nuance that is very difficult to realize with hand animation.
How was his presence simulated on set?
All the Uber-Licker sequences were carefully story boarded and pre-vised. These were shown on set to the actors and DP to help visualize where the creature was and what it was doing. A full size print out of the head was affixed to a pole to approximate its height this was used for eye lines and framing. For lighting reference an unarticulated prosthetic version of Uber-Licker’s clawed hand was fabricated by Paul Jones.
Due the size of the hand at one point to run it through a location it was affixed to the top of a golf cart and driven around. On set this was referred to as a “high five”!
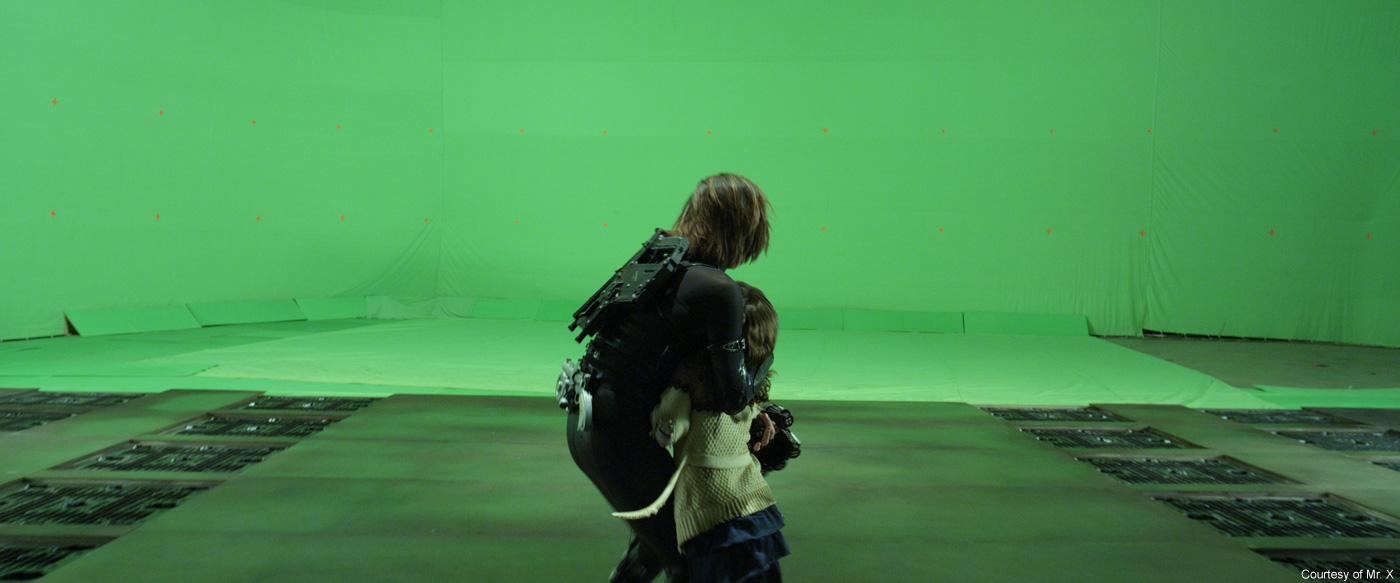
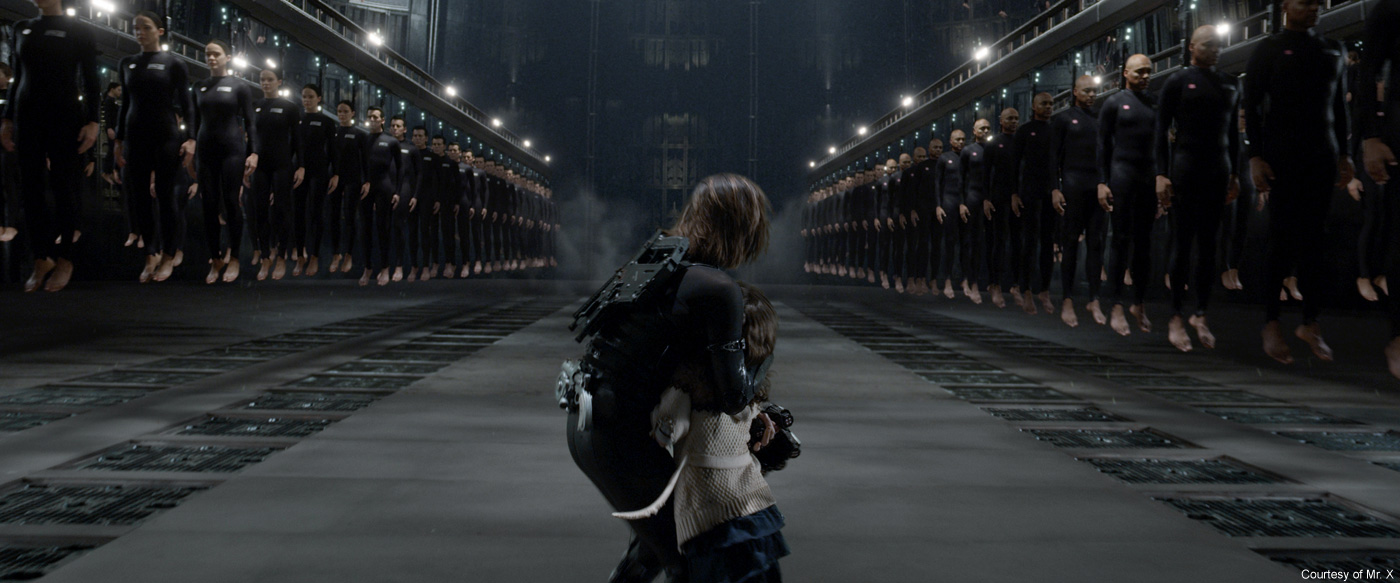
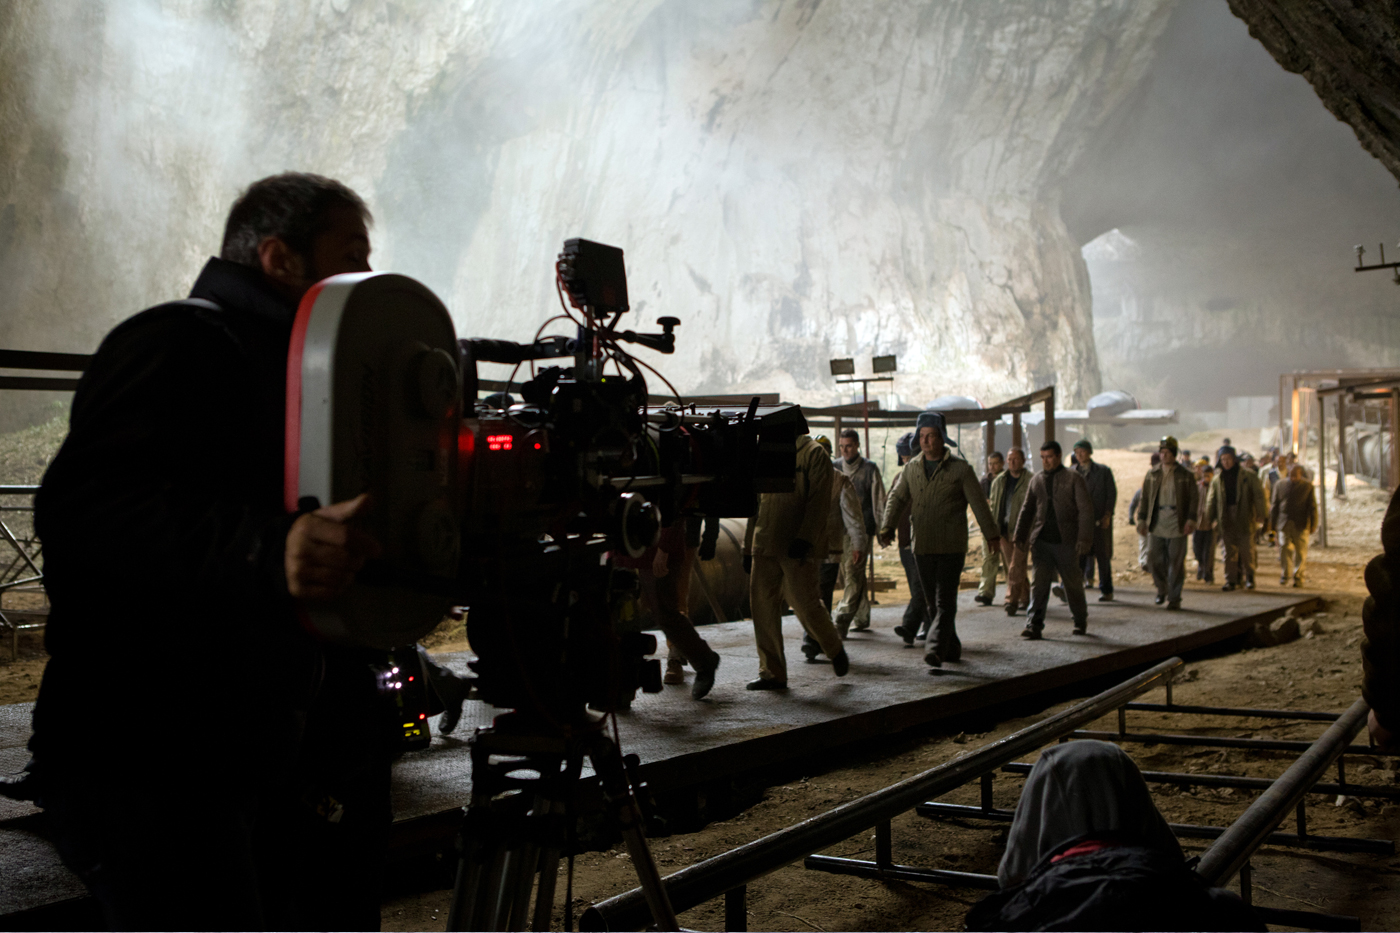
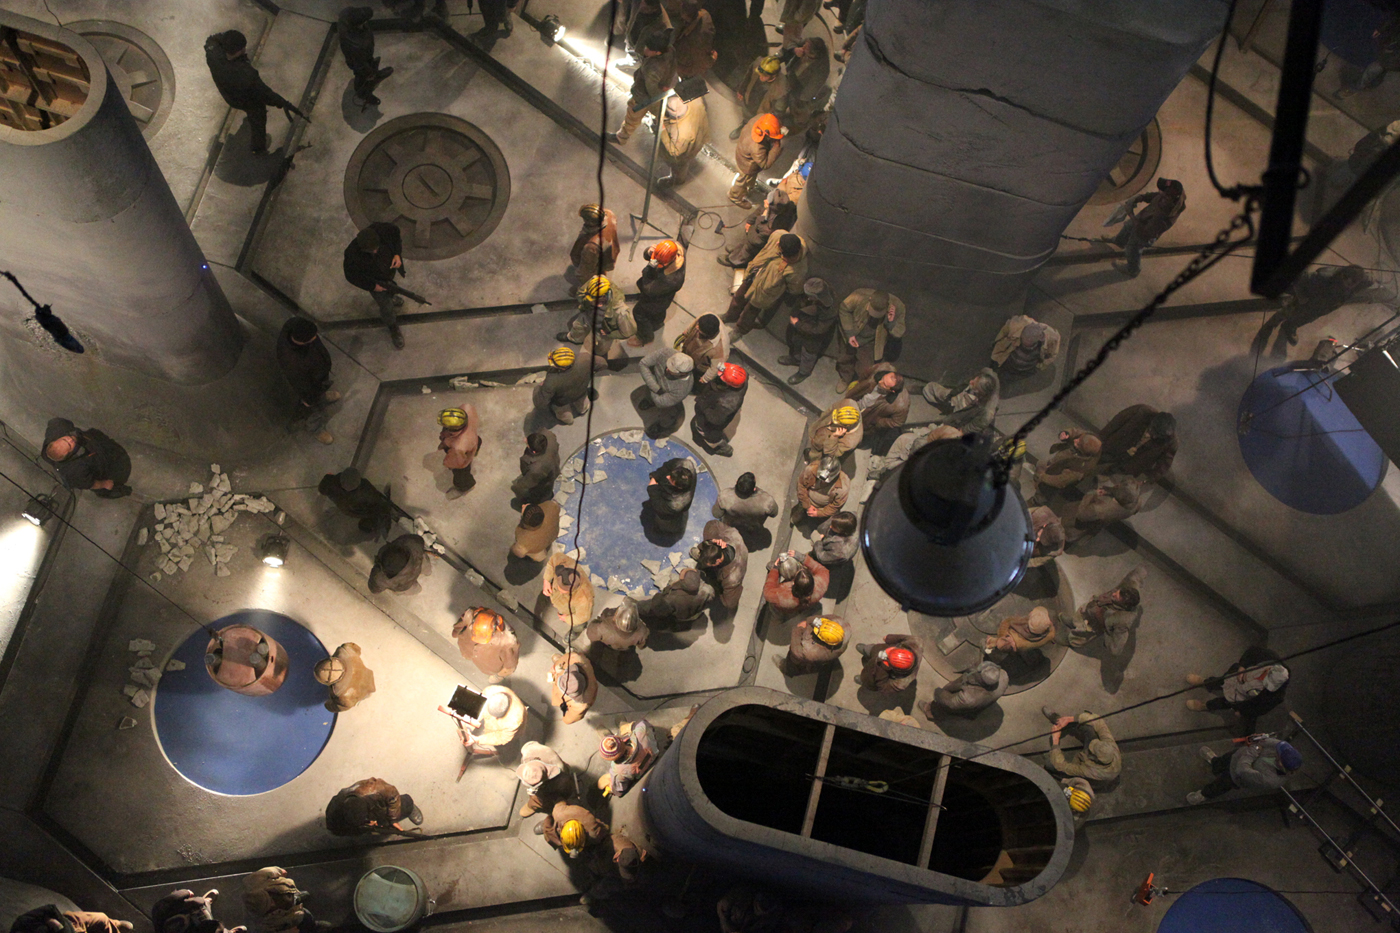
Alice and her daughter discover an huge clone factory. Can you explain to us in detail its creation?
This sequence was planned as a half practical comp solution with digital doubles to fill up the mid and background. A motion controlled rig was set-up to provide multiple passes of the actors to be composited to create the effect. After a few initial comp tests with the footage it was decided that the performances of the actors were unsatisfactory. Turning to the Modelling and Texturing department we decided to upgraded the mid to background digital doubles to hold up in full body full frame and closer. All the Digital doubles were created from scans of the actors retopologized reprojected cleaned up and then textured in Mari using supplementary reference stills shot on the day of the scans. These upgrades allowed us to turn almost all of the clone shots in the sequence into full cg. The crowd animations swaying down the track for all the wides and background were done procedurally in Houdini and exported to Maya as a point cloud and Vrmeshes sequences instanced to the points for rendering with V-ray. For the full body shots of the closest rows the procedural animations lacked the proper amount of nuance and where replaced with hand animated sway cycles.
How did you manage so many elements?
Complex shots are created by having key people that can be trusted to oversee their part of the pipeline. Linking these people allows all of parts to mesh into the final frame. Building an information infrastructure is a Necessity. Relying solely on it to organize it all or piling all the responsibility of keeping it all straight on one person, is unreasonable. Hiring and trusting people to do their jobs plus nurturing open communication will galvanize your pipeline more that any asset management system.
Some shots feature many characters such as the people on the boat and the zombies in the water. Can you tell us more about this crowd creation?
The survivors on the deck of the Arcadia for the most part were hand animated. One wide shot showing all of them at once they were instanced V-ray proxy meshes hand placed by an animator. The Undead pulling Rain into the depths were also hand animated. We simply split the crowd into four sections and distributed it between four animators and they brute force animated it. Sometimes the simplest solution is the best.
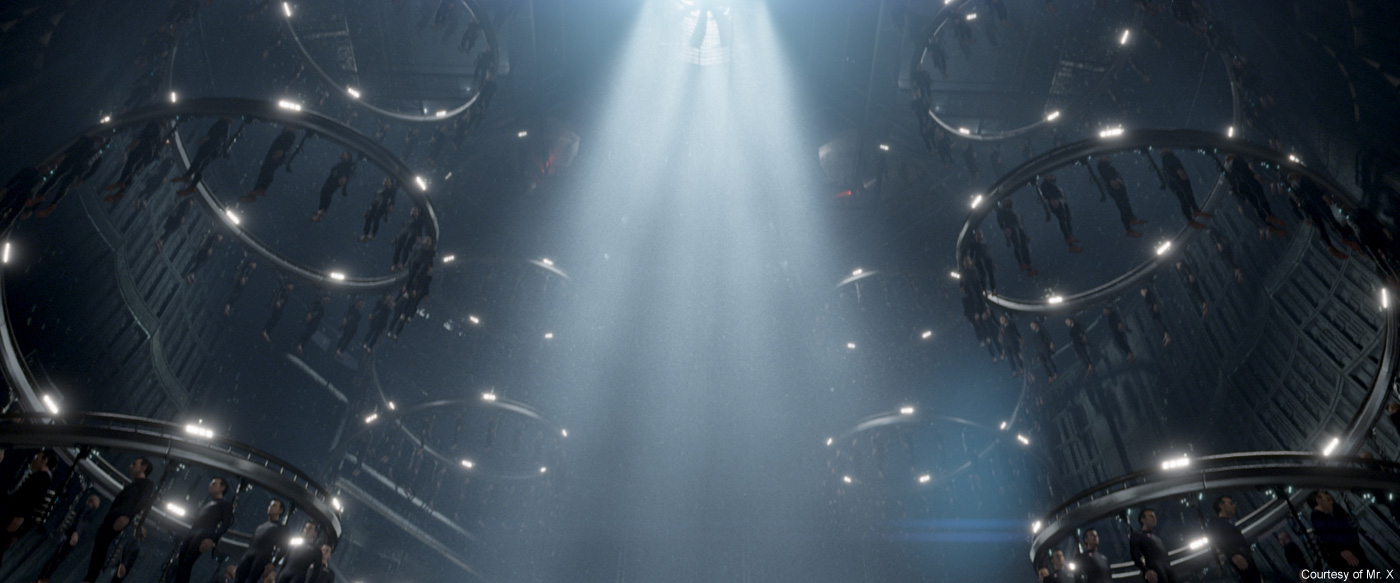
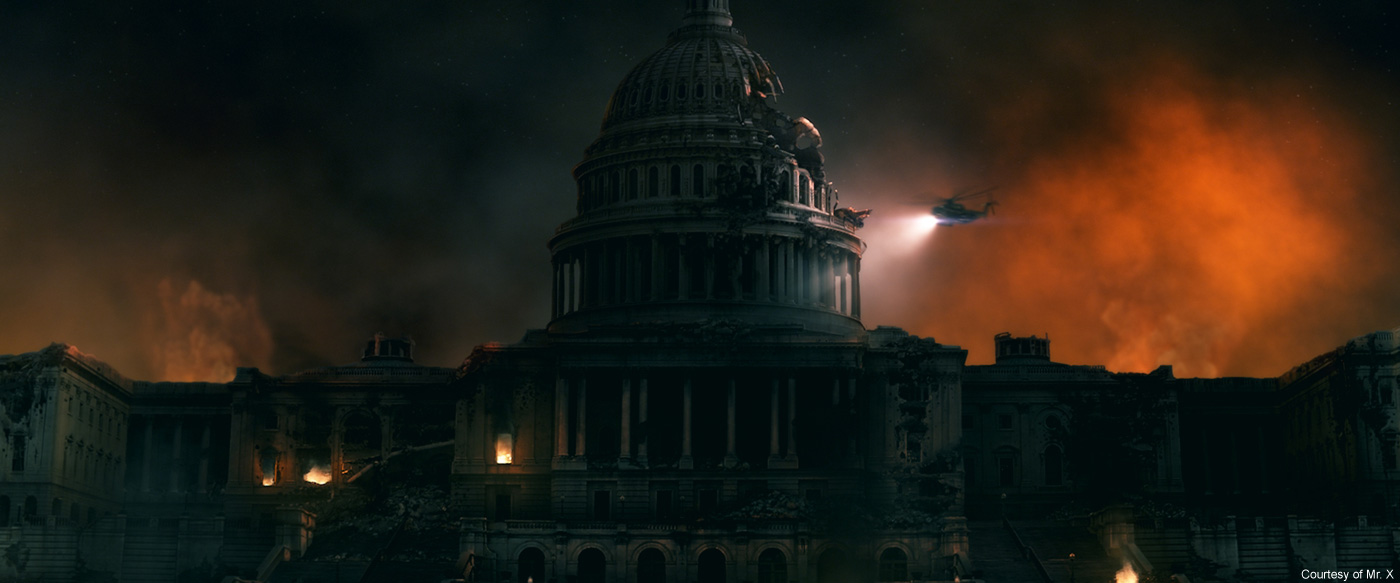
The movie ends on a apocalyptic pull back. How did you create this great shot?
Let’s break it down:
The biggest shot in Mr. X’s history.
Asset count 2977 minus the undead hordes.
60K undead in the horde.
12,601 published asset versions.
47 artists and Tds.
Rendering time for one eye on one computer would have been 1241 days, 2hrs, 37 minutes.
This is shot became about coordination and communication. We found that creating one point person overseeing the organization of a specific part of the shot was the only way to keep it straight. We had one person on layout in the compound that divided it into quadrants and wangled all the soldiers animations and vehicles for cross-overs and crashes. For the Undead crowd animation provided walking, milling, clawing cycles that were distributed and randomized by in house horde system in Houdini. Mantra was used to render the 60k worth of undead leveraging its delayed load features. All the winged creatures were hand animated by the animation team and the distribution of the flocks was managed by defined zones and a continuously updated slapcomp of rendered animations. The fire, columns of smoke, and flamethrowers were simulated in FumeFX in 3ds Max. The interactive lights on characters and vehicles were achieved by exporting low res skinned versions of the fire sims that could be used as mesh lights in V-ray and Mantra. The final composite was approached in a similar divide and conquer method, the shot was sectioned in zspace into several precomps that were overseen by several senior artists.
How did you divide the work with the other vendors?
We used outsourcing as a way to help alleviate the pressure due to the volume of the shots. There were key beats in the film that we always knew we were going to do.
What was the biggest challenge on this project and how did you achieve it?
Inter-departmental hand offs and communication. Amazing Meticulous Production managers and Leads.
Shot volume was a tremendous challenge! 3DStereo results in twice the amount of rendering and data storage. As well, the show was shot on RED EPIC, usually at 5k resolution. During production we purchased an additional 100TB of fileserver space.
Was there a shot or a sequence that prevented you from sleep?
There wasn’t really, I kind of live for film.
The bigger the challenge is the more I enjoy it.
What do you keep from this experience?
Tech and Infrastructure will get you only so far People are how movies get made.
How long have you worked on this film?
12 months from previs to final delivery.
How many shots have you done?
Final shot count 700.
What was the size of your team?
Largest we have ever been, yet it was only 135.
What is your next project?
ROBOCOP, THE MORTAL INSTRUMENTS, VIKINGS and CARRIE.
What are the four movies that gave you the passion for cinema?
AKIRA, PULP FICTION, LEON and BLADE RUNNER (I know big surprise).
His book continues the theme of the family starting in the film by starting with his elder in a long original show presentation with rich collections of photos. Then explains the genesis of the project in particular highlighting the involvement of Johnny Depp. Come next the family album, each character got his presentation text with production photos and of course behind the scenes pictures. Many great sketches of Tim Burton illustrate this first part.
One of the most impressive chapters is the sets. First of all, the beauty of the illustrations created by the team of Rick Heinrichs but also by their large size such as Collinsport harbor that was built from scratch in Pinewood Studios. We also see that the Collinwood mansion gets a miniature version. The book offers us a visit in the middle of the decorative elements like the various paintings, the impressive chandelier or the many advertisements for Collinsport stores. The costumes are not left with the presence of numerous sketches and photos showing the team at work on the actors. Not to mention the makeup and prosthetics with impressive dummy body created for the character of Helena Bonham Carter.
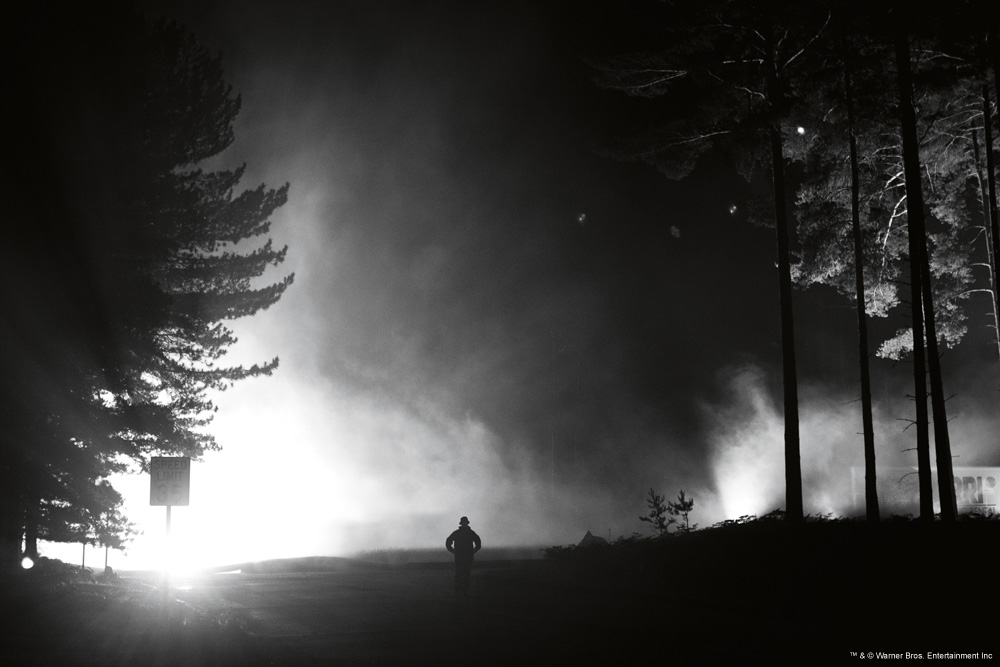
Then comes the Shooting part that allows us to see the work of cinematographer Bruno Delbonnel and his team. The supernatural side of the film also highlights the work of stuntmen and special effects such as the wire effects or the impressive mansion fire. On various pictures we can see the collaboration of Tim Burton and Bruno Delbonnel and also to realize the impressive size of the crew.
Something rare enough to be reported, the family of postproduction, especially the visual effects and the editing, is not forgotten and is entitled to his chapter with many images revealing the behind the scenes of several effects such as the statues grasping Barnabas. We discover a beautiful sketches by Tim Burton for the cracking effect of the face of Angelique. The book ends with a final series of team backstage photos team and portraits of the cast.
Anton Yri began working in the VFX on BATMAN BEGINS at The Senate VFX in 2005. It has since remained in the studio and has participated in numerous films like THE DA VINCI CODE, HELLBOY II: THE GOLDEN ARMY or KICK ASS and also on TV shows like ROME, FLASH FORWARD or LUTHER.
What is your background?
I’m originally from New Zealand, but now live and work in London. I began my journey into the world of vfx by completing a compositing course at Escape Studios. From there I got my first position at The Senate in 2005 working as a roto artist on BATMAN BEGINS, and have been with them ever since!
How did The Senate get involved on this show?
We were lucky enough to be involved with DARK SHADOWS from an early stage as we had worked with Angus Bickerton on a number of films previously. From reading the script there were a number of shots that were identified early on that would require significant vfx work. Angus asked us to do some concepts and pre-vis that would help during filming of these shots. He would show these to Tim Burton to get his feedback on the ideas. Pleasantly, a number of these early concepts made it into the film.
How was the collaboration with director Tim Burton?
It was slightly daunting working on a Tim Burton film, as I grew up watching and enjoying his films. He is a fantastic director with a unique and identifiable style of filmmaking and he will certainly not settle for anything that does not match his vision. On a day-to-day basis we primarily discussed our work with Angus, who would carefully digest and pass on necessary notes from reviews with Tim.
What was his approach about visual effects?
He didn’t want the effects in the film to encroach too heavily on the story, so he veered away from anything too elaborate. There was a decision made to mostly rely on practical sets and miniatures for the environment side of things. But he certainly isn’t afraid to use visual effects as long as they enhance the story he is trying to tell.
How did you collaborate with Production VFX Supervisor Angus Bickerton?
We have worked with Angus on a number of his films, THE DA VINCI CODE, ANGELS & DEMONS and THE CHRONICLES OF NARNIA: THE VOYAGE OF THE DAWN TREADER to name but a few. It is always a great experience working with Angus, as he is exceptionally knowledgeable and passionate about film and visual effects. We worked closely during filming on a number of elements shoots, primarily providing camera data, measurements and angles for filming actors in front of green screen that we could composite into the Collinwood Manor under-construction shots as well as Angel Bay Cannery. We also provided tracked cameras and data as well as attending the one-third scale Collinwood Manor shoot.
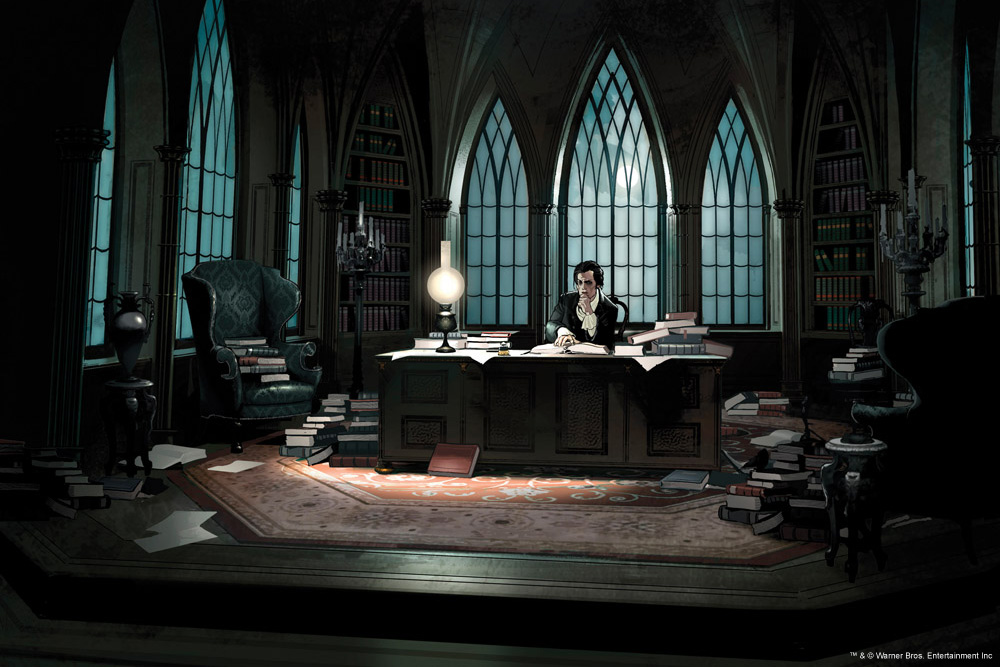
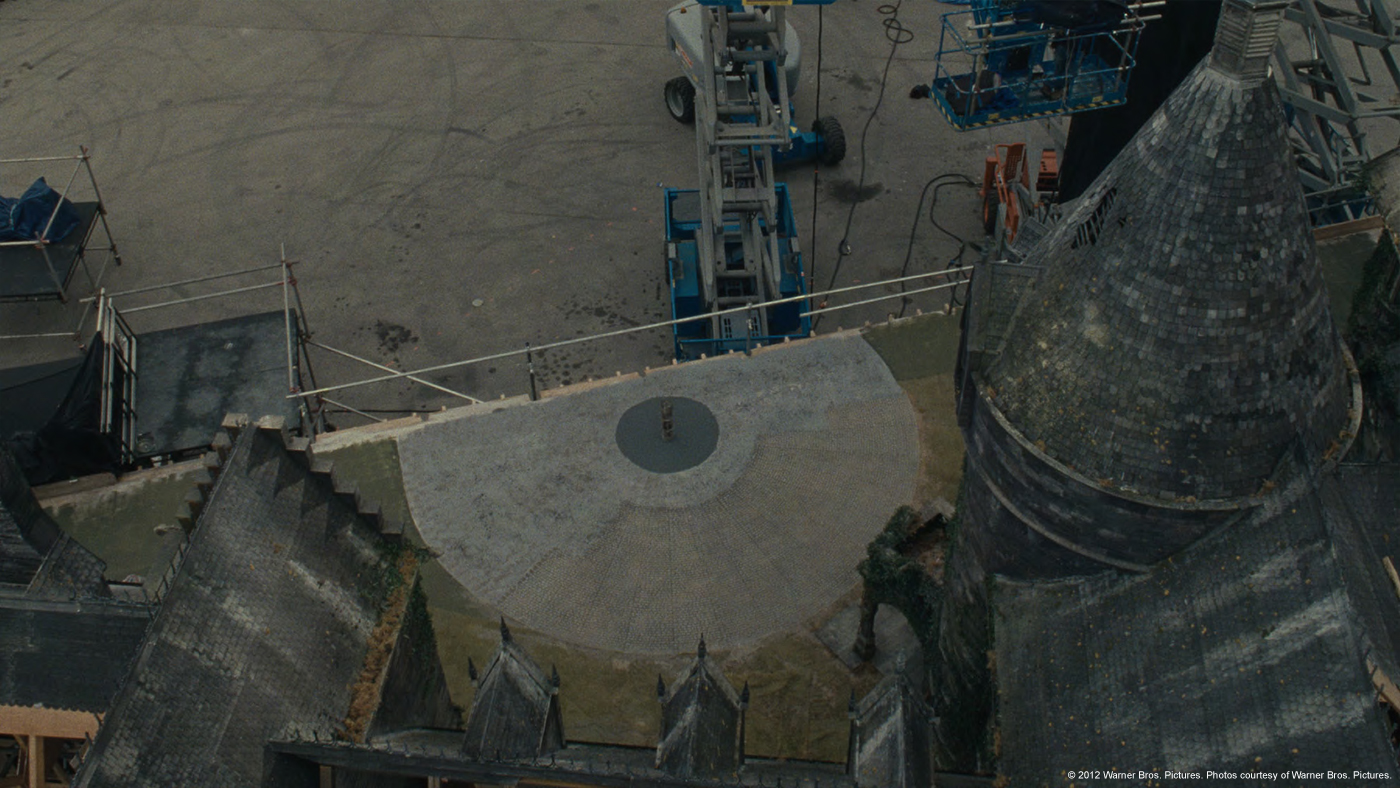
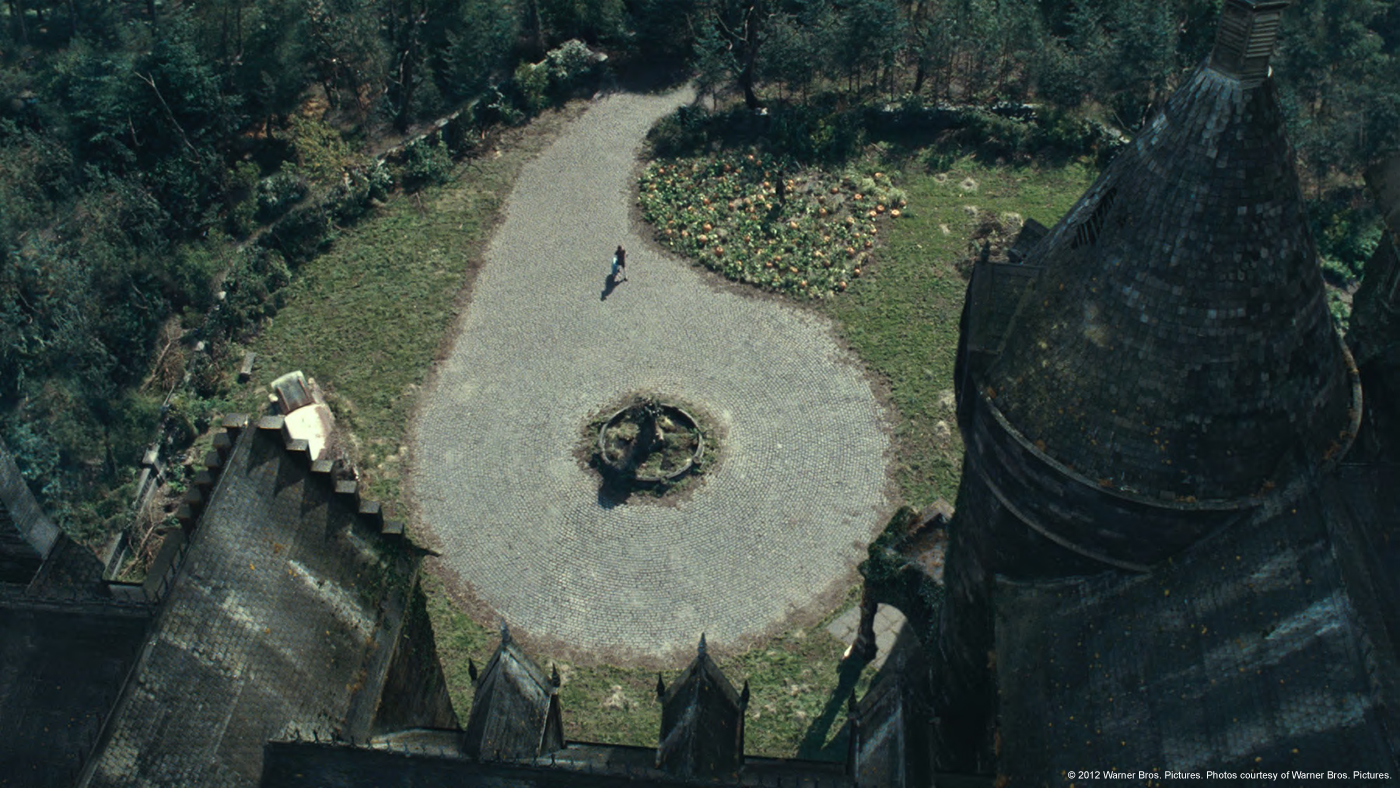
Can you tell us more about the impressive shot showing the Collinwood Manor under-construction?
From the word go this was always going to be our most complicated shot. The idea behind the shot was to show the relationship and distance between the town of Collinsport and Collinwood Manor and also showing the Collins family watching the construction of their vast new home. Angus gave us some initial guidelines as to what Tim wanted to achieve with the shot. We set up a camera in Maya with some basic geometry of the manor and surrounds and rendered some basic pre-vis ideas to get an idea of how long the shot would need to be and what the camera would need to do. It was imperative that even though this was to be a fully constructed shot that the camera move would need to be based in reality, so as not to jar with the rest of the film. So in the end we attached the 3D camera to a virtual 20 ft techno-crane and put it up in the roof of the manor.
Using a Lidar scan of the Collinwood Manor miniature, the 3D team had an accurate model of the front half of the house. From this they had to literally tear off the walls and roof and build an internal structure of the house based on research done into 18th Century building techniques. With such a vast expanse, hundreds of wooden beams needed to be added in order to give the manor sufficient scale and structure as well as many other items you would find on a building site of that magnitude, such as buckets, ropes, tool boxes, tools etc. CG period scaffolding was then added to the exterior. An animating CG crane was also added to the foreground to add more dynamism to the shot. To add life to the scene, 18th Century construction worker elements shot on green-screen were added around the various walkways and scaffolding.
How did you create the huge environment around the Manor?
We were provided with a 3D model of the Collinsport area by the Art Department and used this for our layout. Once we had the pre-vis signed off, we started creating the distant view of Collinsport using matte paintings and sea plates which were used as projections. As the manor was surrounded by pine forest, close and mid ground trees were fully CG and rendered as instances. Angus provided us with a large library of hi-res stills and plates that we could use for skies. Additional haze and atmosphere was added using filmed elements and distant CG seagulls wire liberally scattered about.
Can you tell us more about the sequence in which Barnabas is released from his coffin and attacks some workers?
This is a fast-paced action sequence whereby a construction crew discovered a buried coffin whilst building a McDonalds Restaurant. We were tasked with building a CG 1970’s style McDonalds restaurant, as well as the huge glowing McDonalds sign, a lot of wire-removals, blood spurts, animating CG coffin lid and chains that Barnabas bursts out from, as well as various other compositing work.
Angelique owns a big Fish canning factory. How did you extend the live action elements?
The original set consisted of a small section of the factory, with a single conveyor belt, surrounded by 25 or so workers. The factory needed to be extended back, to create a vast, bustling production house. Using the set as reference, the main walls of the building were extended back to increase the size of the factory by around 300%. The extra space was then filled with three more conveyor belts, again constructed and animated in CG, and dotted with another 60 or so worker elements – all placed on 3D cards to maintain realistic perspective and parallax. Other areas of the cannery were augmented with additional fish can conveyors, steamers and steam elements. The exterior was also replaced using a live action element of the Pinewood harbour set.
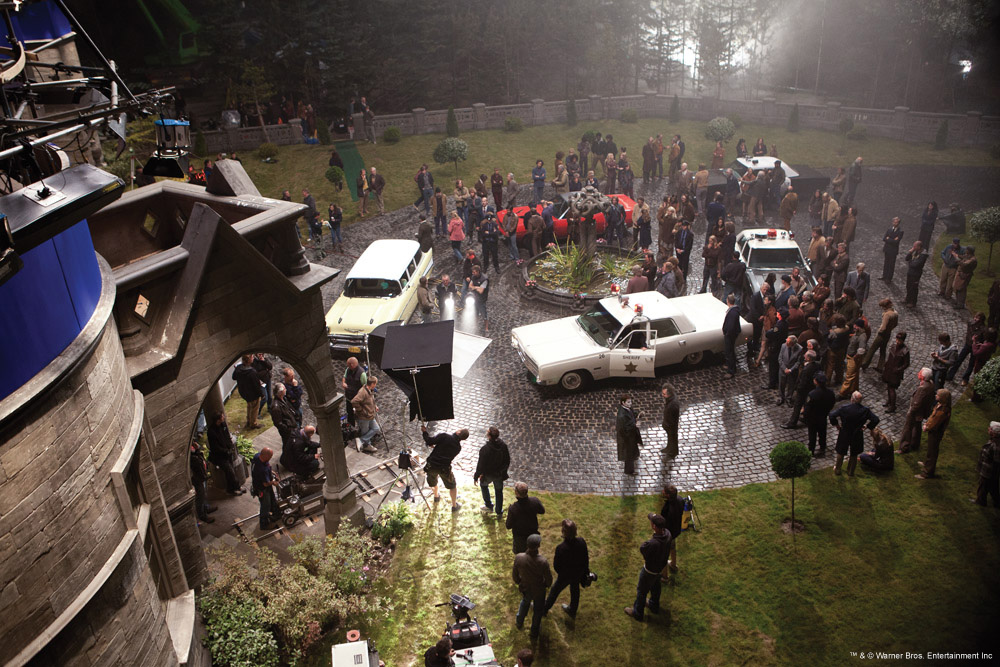
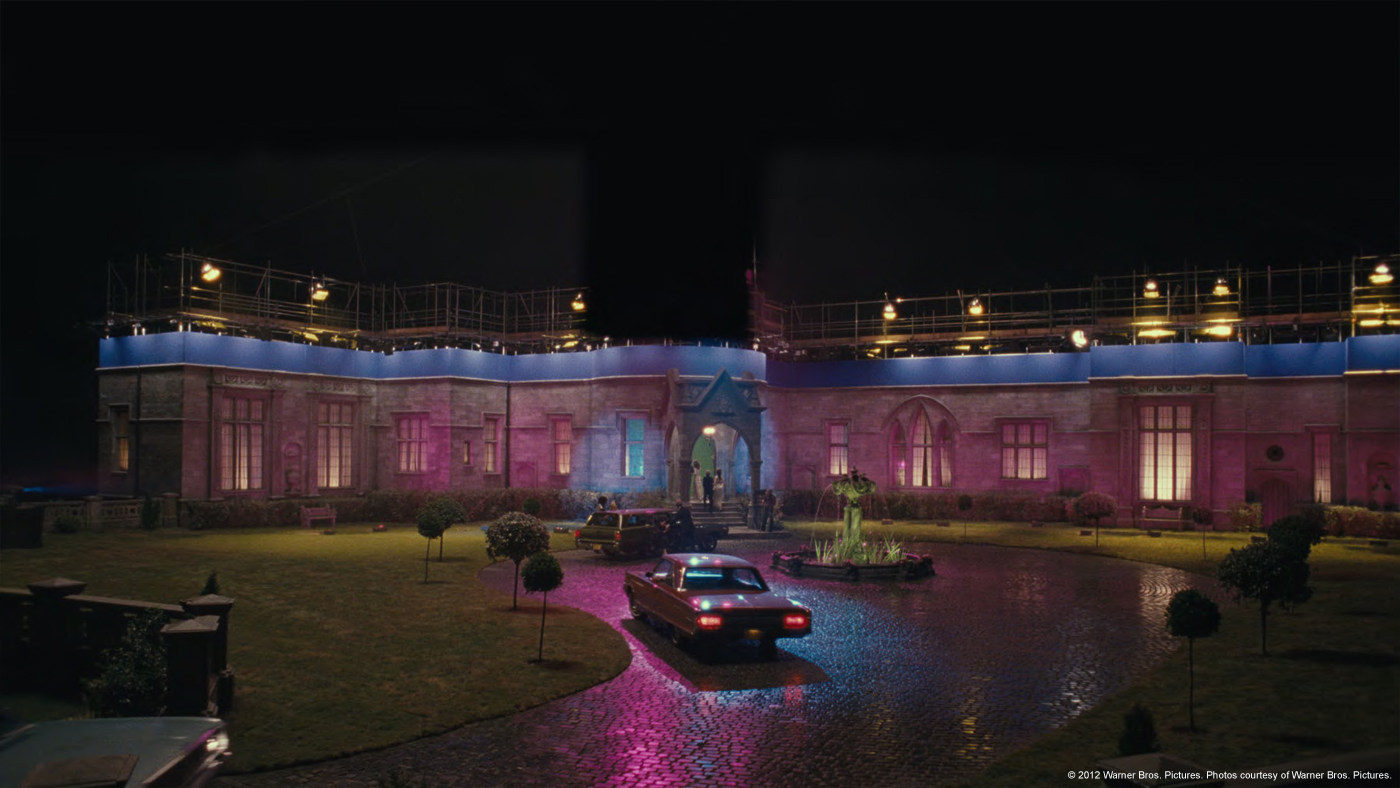
There is a moment that is a Happening at the Collinwood Manor. Can you tell us more about your work on this sequence?
The main shot we did on this sequence was a wide establishing shot of the manor as the numerous guests pull up in their cars and venture into the party within. This started out as a fairly straight-forward miniature composite, but Tim felt that there should be a lot more people and cars that were shot on the main live-action plate. Angus shot a number of extra kit-set model cars that he had positioned and lit to fit in the scene. These worked very well and saved us having the build these in CG. We also needed to add a number of extra people walking into and milling around the front of the manor. We didn’t have any specific elements so we had to make do with some green-screen elements shot for a different scene. Thankfully Angus also got some of the vfx production staff to dress in some hip 70’s garb and provided those as elements as well.
Can you tell us more about the shots on the Manor’s balcony and the coastline environment?
The balcony scenes were shot on a sound stage in front of green-screen, so we needed to create the entire distant coastline environment as well as the tops of pine trees to add some depth between the balcony and the horizon. Our lead matte painter Doug Winder pieced together a large panoramic view using dozens of high-res stills provided by the production that we could use for all views off the balcony. We used a tiled sea plates and added glinting highlights from the town in the distance which added some lovely shimmering circles of confusion throughout the sequence.
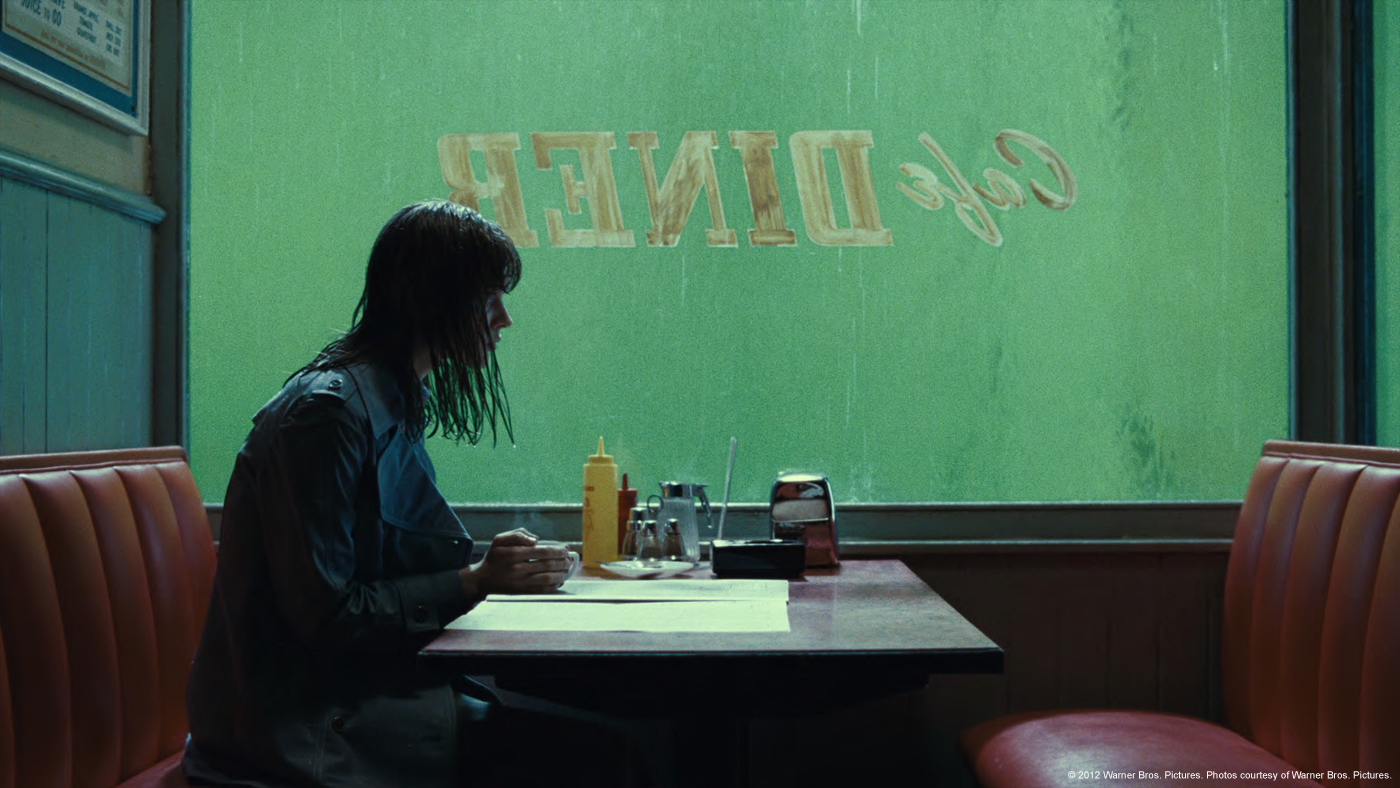
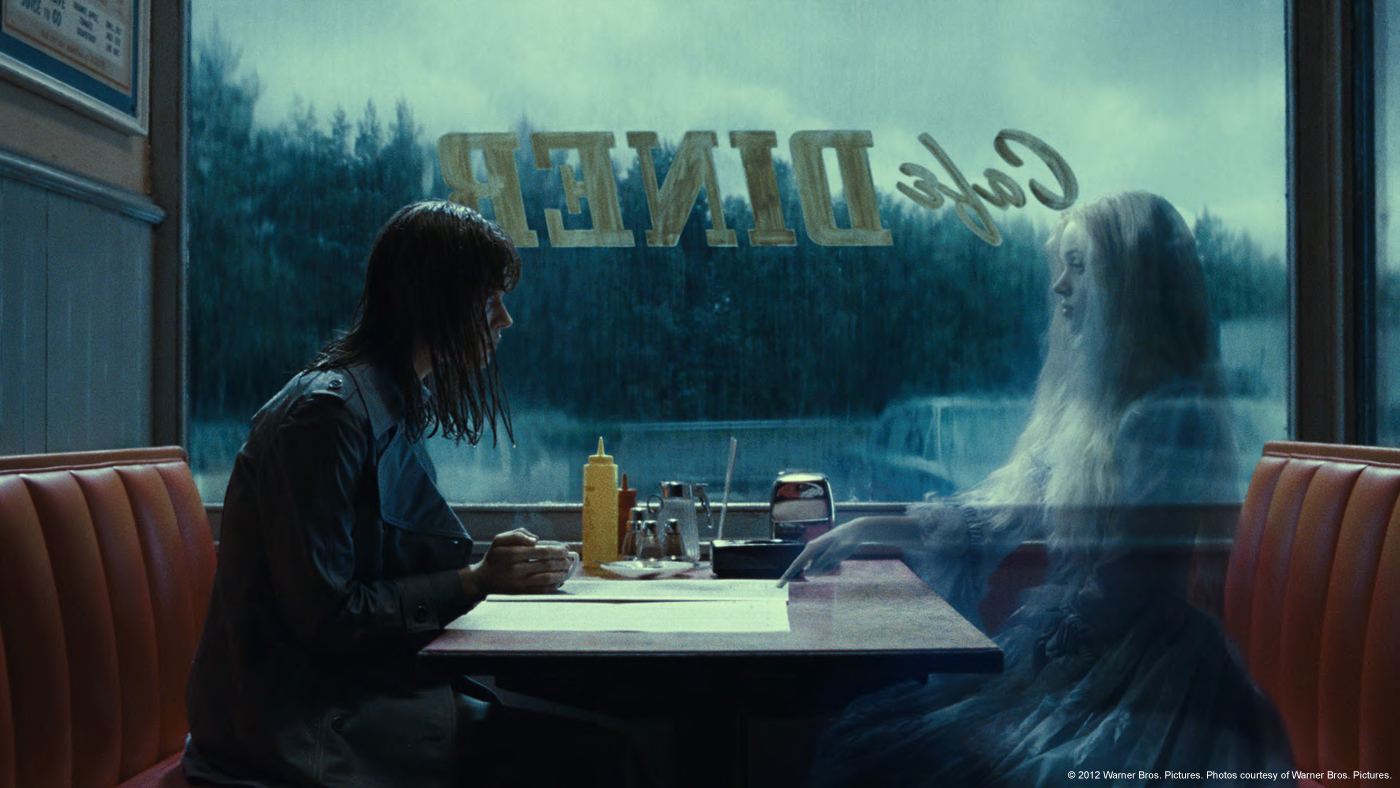
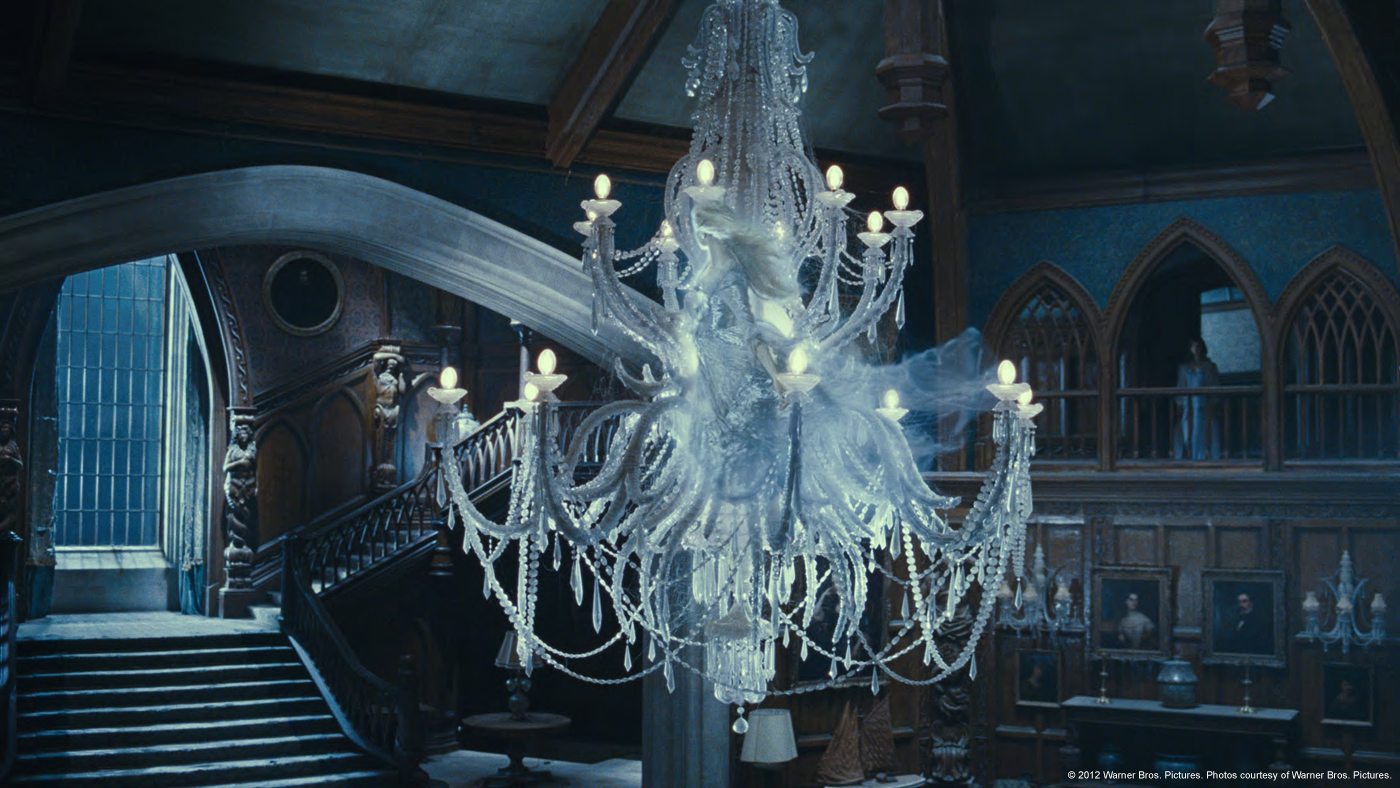
The movie features some ghosts. Can you tell us more about the design process for the ghost aspect?
As stated earlier Tim wanted to avoid anything too magical, and the ghost of Josette appears numerous times throughout the film. So her general look was constructed in 2D. She needed to be subtly transparent, and also appear ethereal with out going over the top. In the end we used heavily manipulated flame elements to drive a distortion and movement around her edges as well as cause a disturbance on the environment behind her. We were also provided with ‘reflection’ passes, as she floats down the hall she casts a bright reflection on the wall to help sit her into the environment. This required getting accurate 3D tracks of the main plate, as well as the various reflection passes and effective 3D stabilizing these passes before compositing them back onto the main plate. This was all achieved using Nukes various tools.
Can you tell us more about the CG crab that crawls on Josette body?
Tim Burton wanted to push up the weirdness factor on Josette, so when she first appears she has more of an impact. So it was decided that as Victoria unveils her by pulling off a bed-sheet, she has a cluster of crabs sheltering on her skin. These all skitter away as the sheet is pulled away. In the following shot, as she begins to speak, another single crab emerges from her mouth. The crabs were modeled and textured in Mudbox, then animated in Maya. We used matchmaking software to track the camera, and also matched her movement using a cyberscan of the actress. Blend shapes in Maya were used to simulate her speaking when it comes out of her mouth. These were really tricky shots to get right, and they came to us quite late in the schedule so I was really pleased with how well they turned out. A lot of credit has to be paid to our CG Supervisor, Marty Waters who put in a lot of work to get them right.
Can you tell us more about the cracking effect on Angelique?
The premise is that Angelique has a porcelain-like outer shell, which cracks when she becomes angry or damaged. As she spies Barnabas kissing Victoria on the balcony, she seethes with jealousy and cracks for the first time in the film, from the top of her head down to her chest. To achieve this effect, Angelique’s body was matchmoved in 3D using a cyberscan of Eva Green, with a matte painted crack then projected onto the geometry and revealed piece by piece, to give the appearance of a fault line travelling down her body. We did rely heavily on Mocha for some sections to get the tracking spot on, especially in the softer areas of her skin.
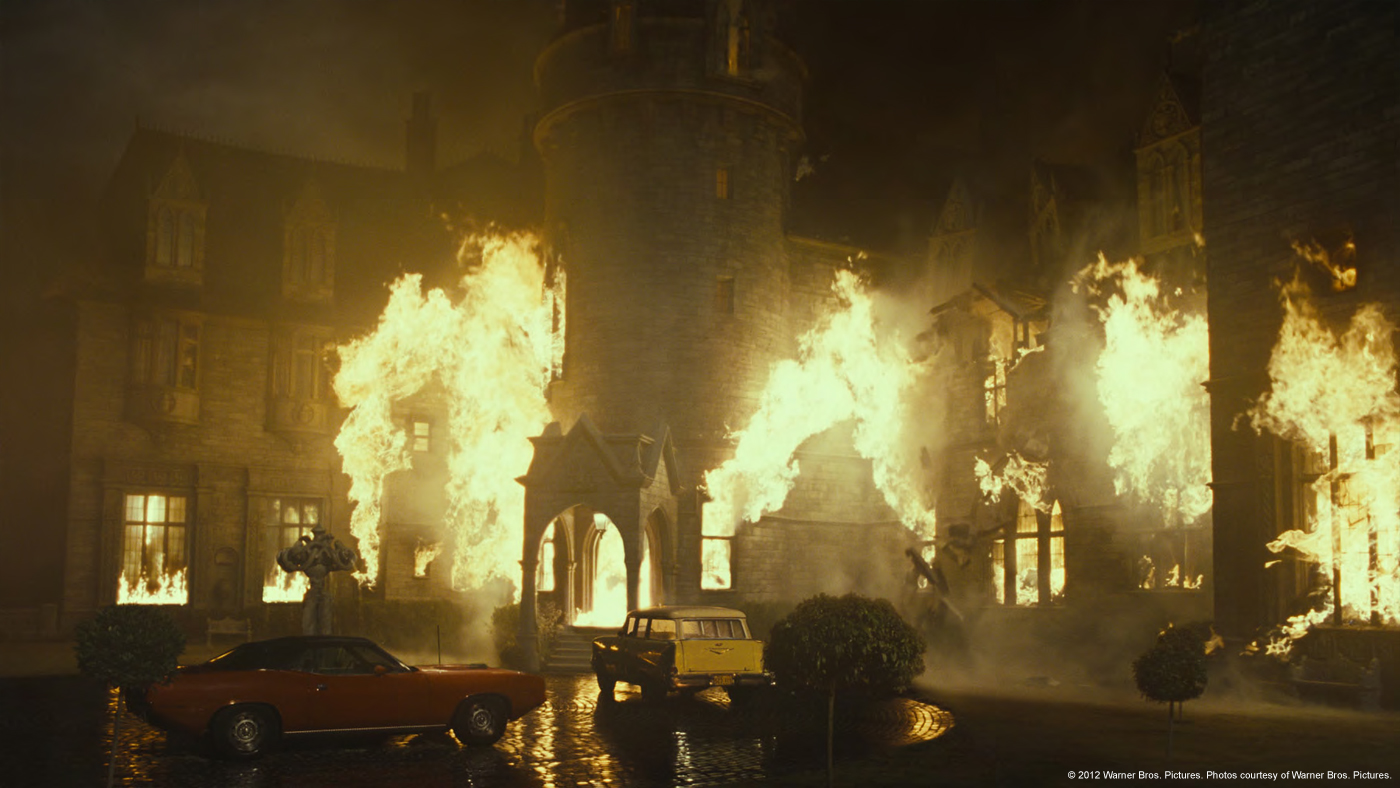
Can you tell us in detail the burning Collinwood Manor?
For the Collinwood Manor Burns sequence, the model house was set alight and filmed at high speed, to help give the flames a greater sense of scale. These model elements were then blended with the life-size foreground of the manor, and supplemented with additional flame elements where necessary. Foreground smoke elements and an overall fogging to the shot helped create the illusion of a raging inferno.
What was the biggest challenge on this project and how did you achieve it?
There we so many different challenges it is difficult to pick one.
Was there a shot or a sequence that prevented you from sleep?
I don’t recall getting a lot of sleep for the duration of the project, so I guess all of them!
What do you keep from this experience?
I personally learned far more working on this film than I anticipated, especially in regards to filming and working with miniatures. It was also a fantastic experience seeing and working around the astonishing sets that were constructed for this film. Lastly, working with such a great team here at The Senate, everyone worked extremely hard and produced a lot of work that we are really proud of.
How long have you worked on this film?
I have been involved for about 15 months, though really only full time for the last 8 months.
How many shots have you done?
Approximately 185.
What was the size of your team?
About 30.
What is your next project?
TOTAL RECALL.
What are the four movies that gave you the passion for cinema?
THE LORD OF THE RINGS TRILOGY
STAR WARS
INDIANA JONES
SPINAL TAP
A big thanks for your time.
// WANT TO KNOW MORE?
– The Senate VFX: Dedicated page about DARK SHADOWS on The Senate VFX website.
Rudi Holzapfel is back to science fiction (he had talked about his work on TOTAL RECALL) and to The Art of VFX. In the following interview, he talks about the challenge of creating the slow-motion effects on DREDD.
How did Baseblack got involved on this show?
We got approached by Tim Field, one of the VFX producers on the show. Baseblack has a long working relationship with Tim.
How was the collaboration with Prime Focus VFX Supervisor Jon Thum?
We would usually meet with Jon once or twice a week and discuss what he was looking for in our particular shots. As most of our shots had to do with fluid simulations, blood, spittle etc. we usually looked at other shots where real fluids were used on set to talk about how things were to look.
Dredd is a hard-boiled movie with lots of blood. Can you explain to us how you created and manage the slow-mo blood and the slow-motion shots?
The biggest challenge with all the shots in slo-mo, especially with the blood and gore was probably getting the look of the blood right. It has some qualities that make it stick, stretch and glitter in a specific way that is very different from water. Finding reference, or even imagining what it might look like and agreeing on a look was difficult. Another thing that turned out to be more difficult than first imagined was the fact that the simulations often wouldn’t scale. We would do a lower resolution layout that looked good, but once you tried to scale it up, it just didn’t translate and the final result would look different. In the end we did all the basic simulations in Real-Flow, ingested them into Maya and added bespoke animation on top of the particle simulations to achieve the desired outcome.
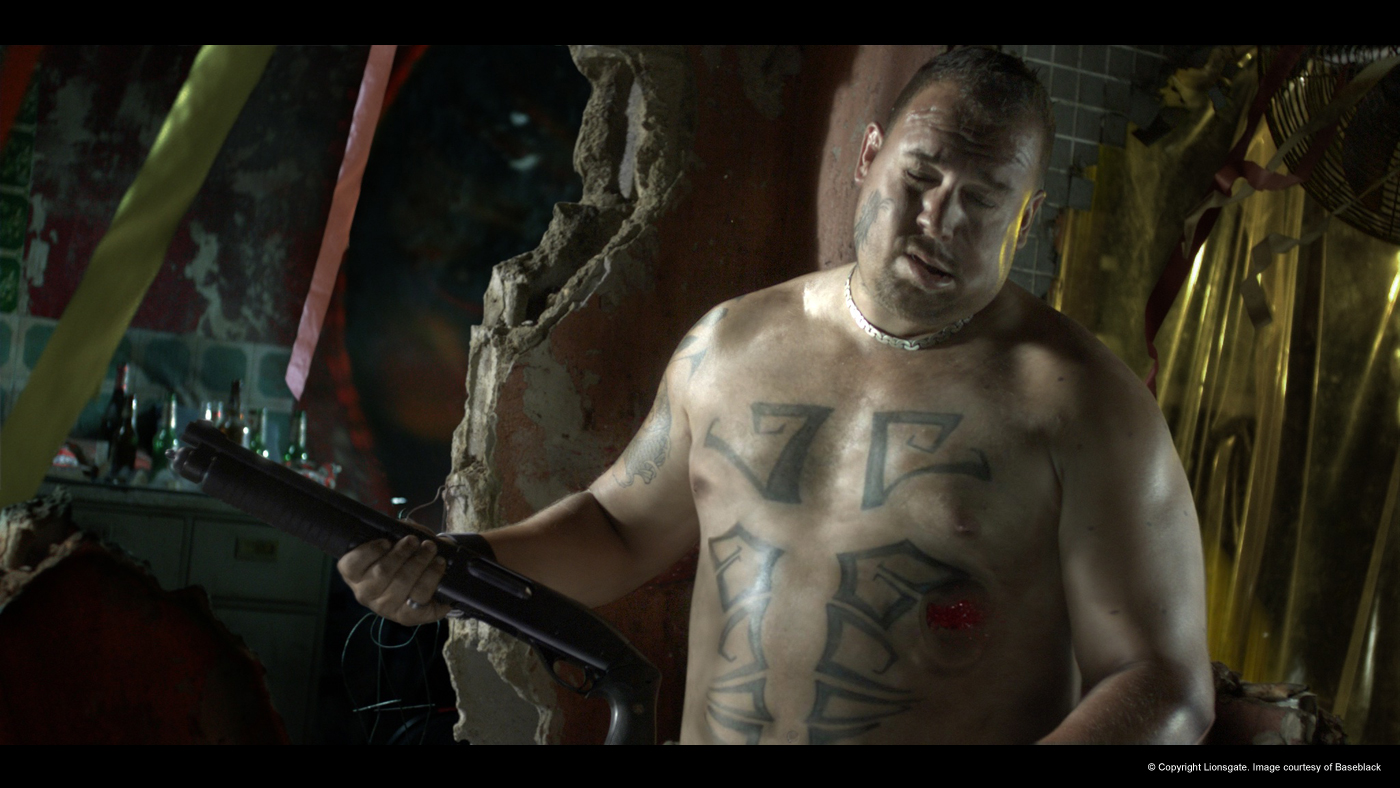
Can you explain to us in details the soft body simulations?
I guess you are talking about the fat guy’s belly. We build a digital version of the guy’s torso including a simple muscle system to provide collision for the outer skin as well as give some deformation. We then fired a digital bullet through the new skin and used Maya’s cloth simulator to derive the final movement of the skin and fine-tuned it all with a lattice-deformation rig over the top and then fine-tuned some more with the muscle system.
Have you recreated the set and some elements for this sequence?
We didn’t so much replace backgrounds as we married several plates together. Sometimes this was based on greenscreen, but a lot of it was roto. On some of the blood-simulation shots we had three layers, a distant background, a midground with some poor victim and some special effects guy creating wind, smoke, sparks etc. and finally a foreground. To compose the shots we also mirrored backgrounds and midgrounds at times, respeed things and dramatically resized the foreground to fit with productions redesign of the final shot. That often meant creating depth, creating IO etc. from scratch.
How did you design and created the muzzle flash of Dredd gun?
We had a look at a lot of photographs, but some videos or film references, but most of those were actually already CG. They might be what we think a muzzle flash looks like in super slo-mo, but they weren’t the real thing. We did eventually find something on a ballistics expert site in the US that was very helpful and we went with that. In the end it became something stylish and dreamy, druggy, that might or might not be real. After all, this is a muzzle flash as seen under the influence of “slo.”
Can you tell us more about the assets sharing with Prime Focus teams?
We didn’t share any of our shots with other facilities until the very end when Prime Focus would add the “slo-mo effect,” a dramatic grade and extra particles, that they had developed, so we didn’t have to share assets at all.
Did you develop specific tools for this show?
Nuke does provide a lot of the stereo functionality already, so for us it was mainly integrating Real-Flow into our pipeline and setting up our 3D pipeline to render for two eyes eventually.
What was the biggest challenge and how did you achieve it?
The biggest challenge was building Real-Flow into our pipeline, getting it to work properly with our then Maya – Mental Ray pipeline. We had lots of problems initially, but we did eventually solve them, probably through sheer persistence. The other challenge was making a soft-body behave the way we wanted to. There was a scene when one of the guys, a rather big fellow, gets shot by Dredd and when the bullet enters his naked upper body, the whole thing was supposed to wobble and react in a very specific way to the impact. That took a lot of trial-and-error until we figured out a way to control the simulation to the degree necessary.
Was there a shot or a sequence that prevented you from sleep?
As we didn’t work on a sequence per se, it could only be a shot that might have kept me from sleeping. And although I didn’t lose any sleep over any of the shots, it did take us a long time to figure out how to best control the soft-body animation of the fat belly in one of the shots. To get it to the point where we were all happy with what we saw took numerous simulations and a fair amount of research.
What do you keep from this experience?
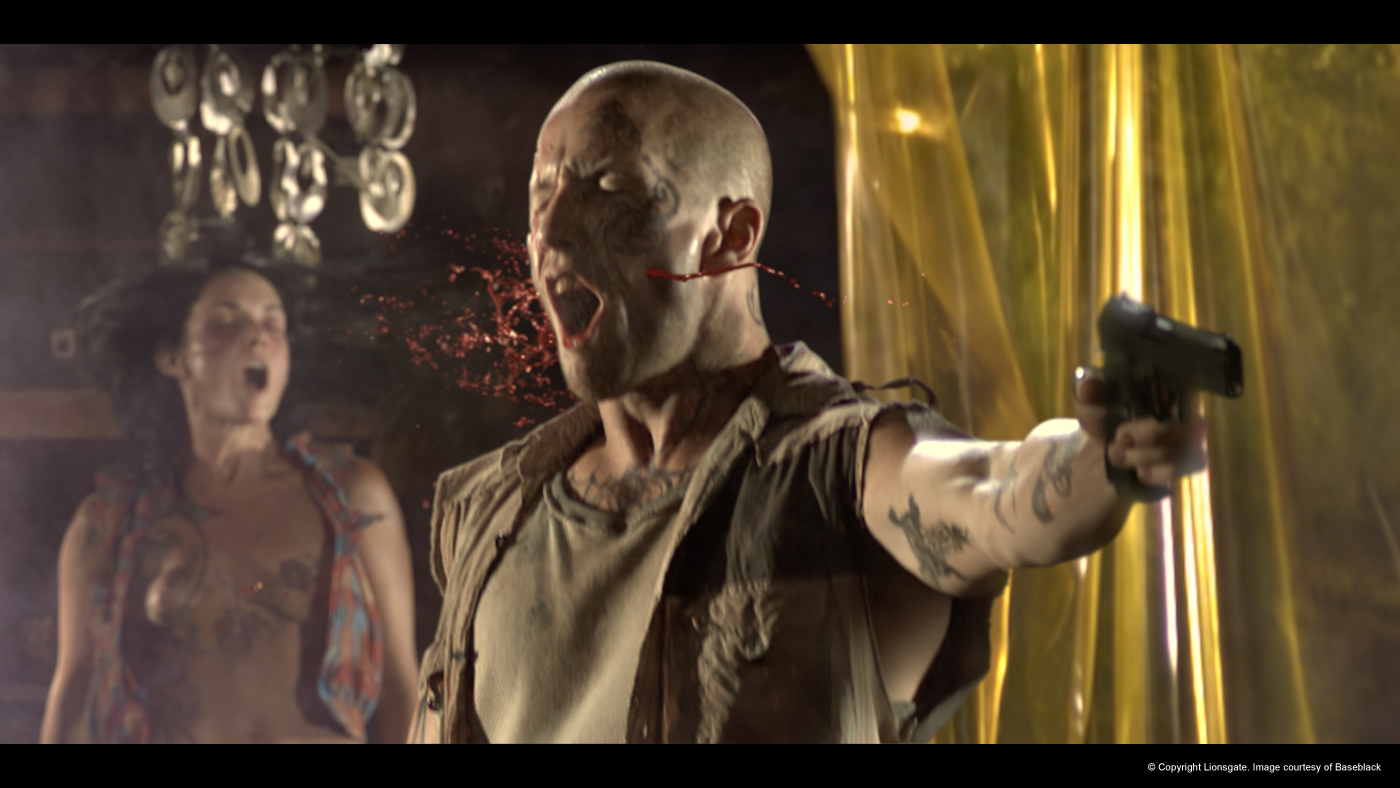
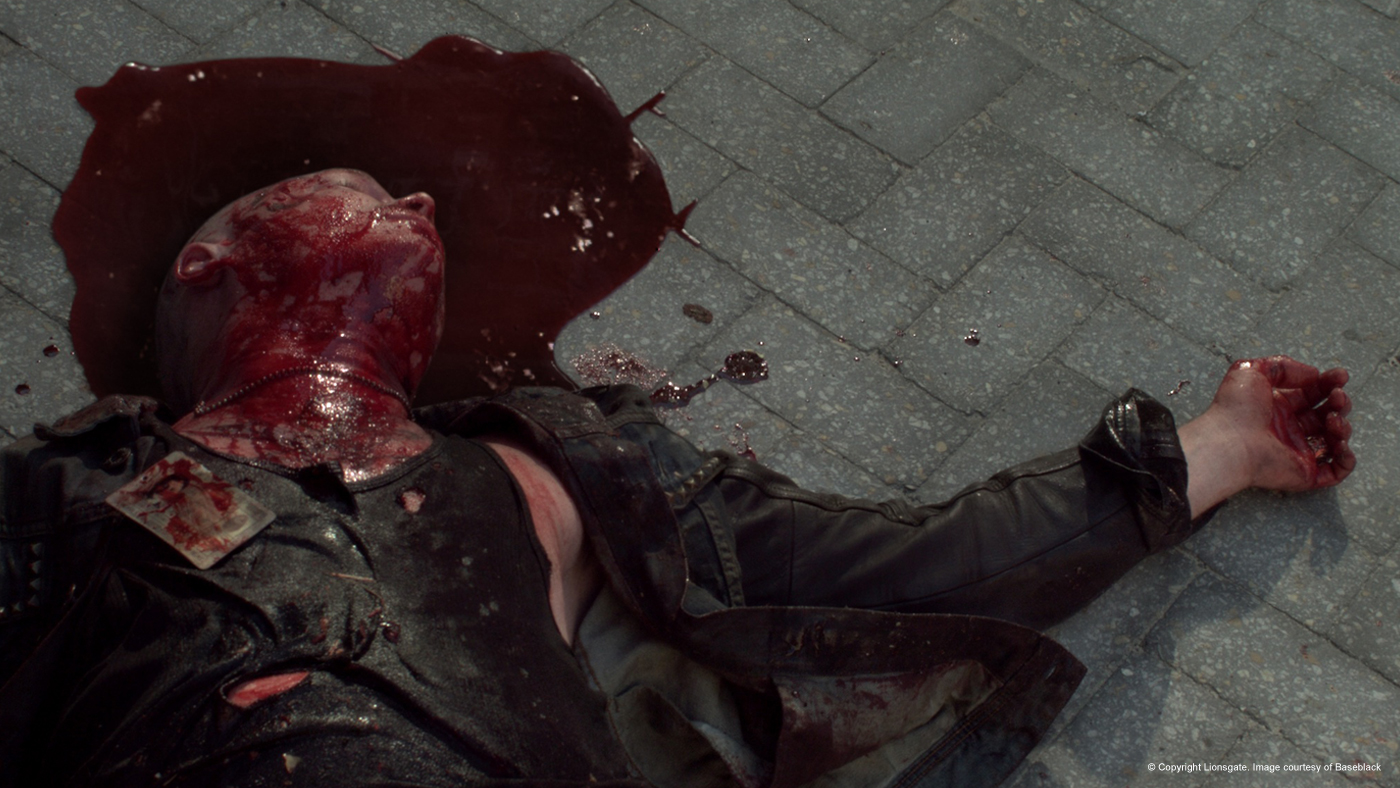
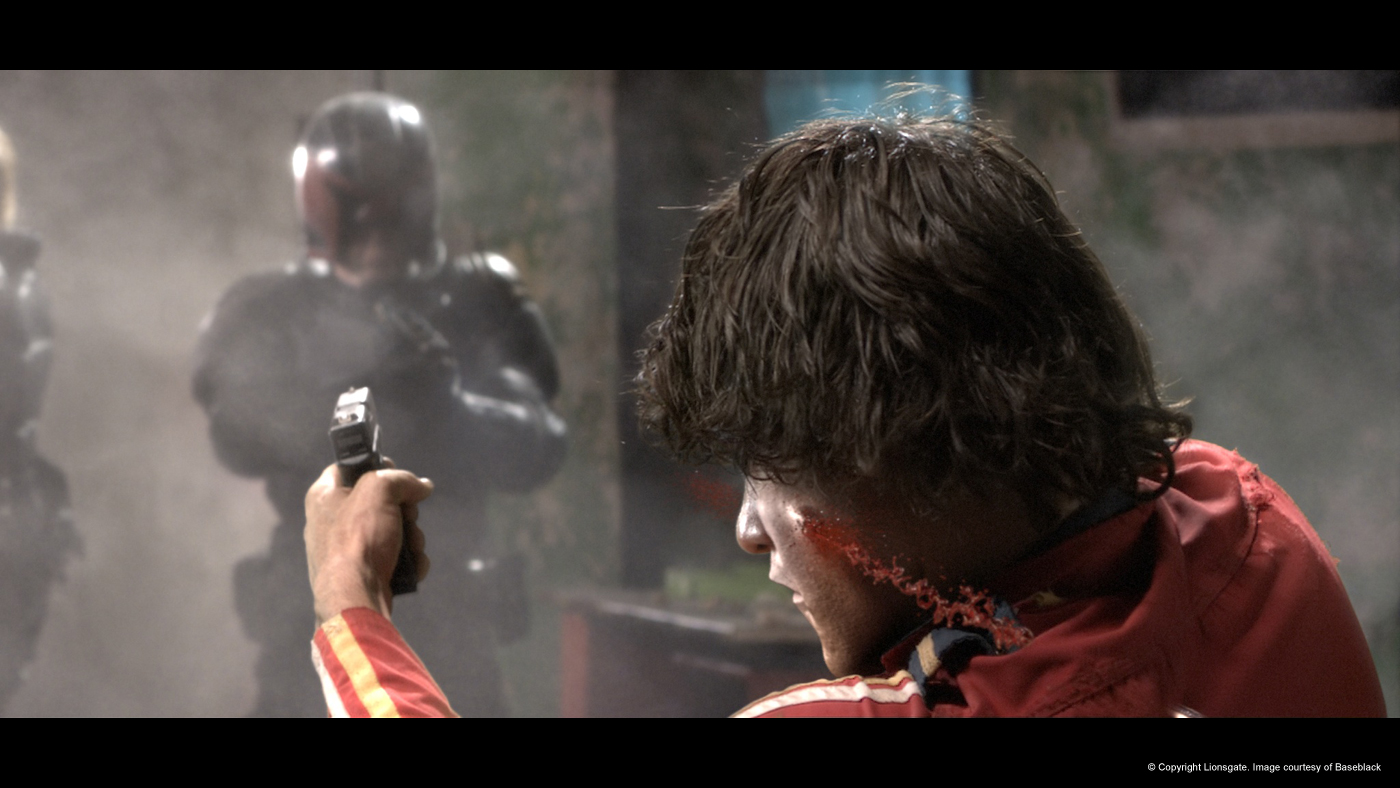
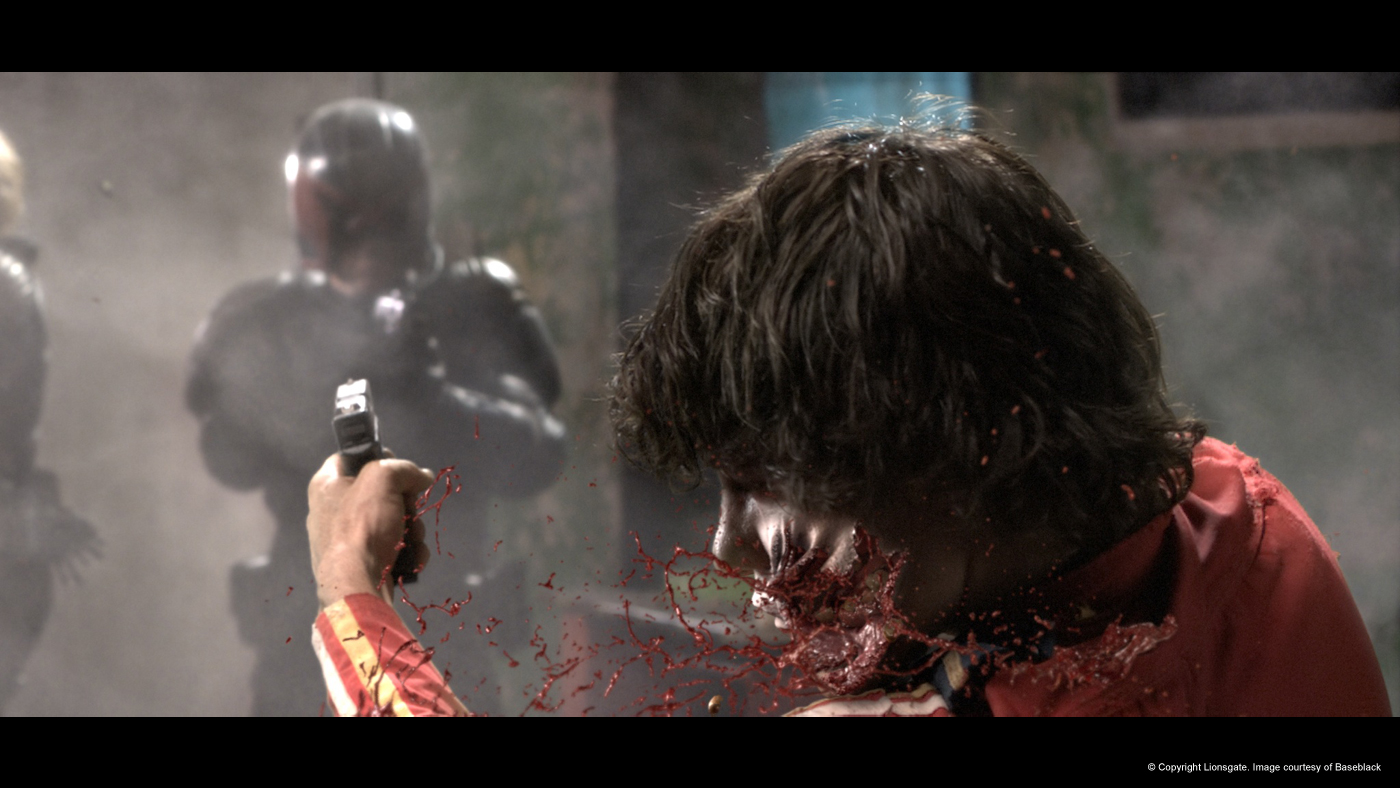
There are two particular shots that stand out. The first one is where Dredd is in the background and shoots a guy through his mouth and cheek with blood, teeth, tissue flying everywhere, eventually out of frame and into the audience.
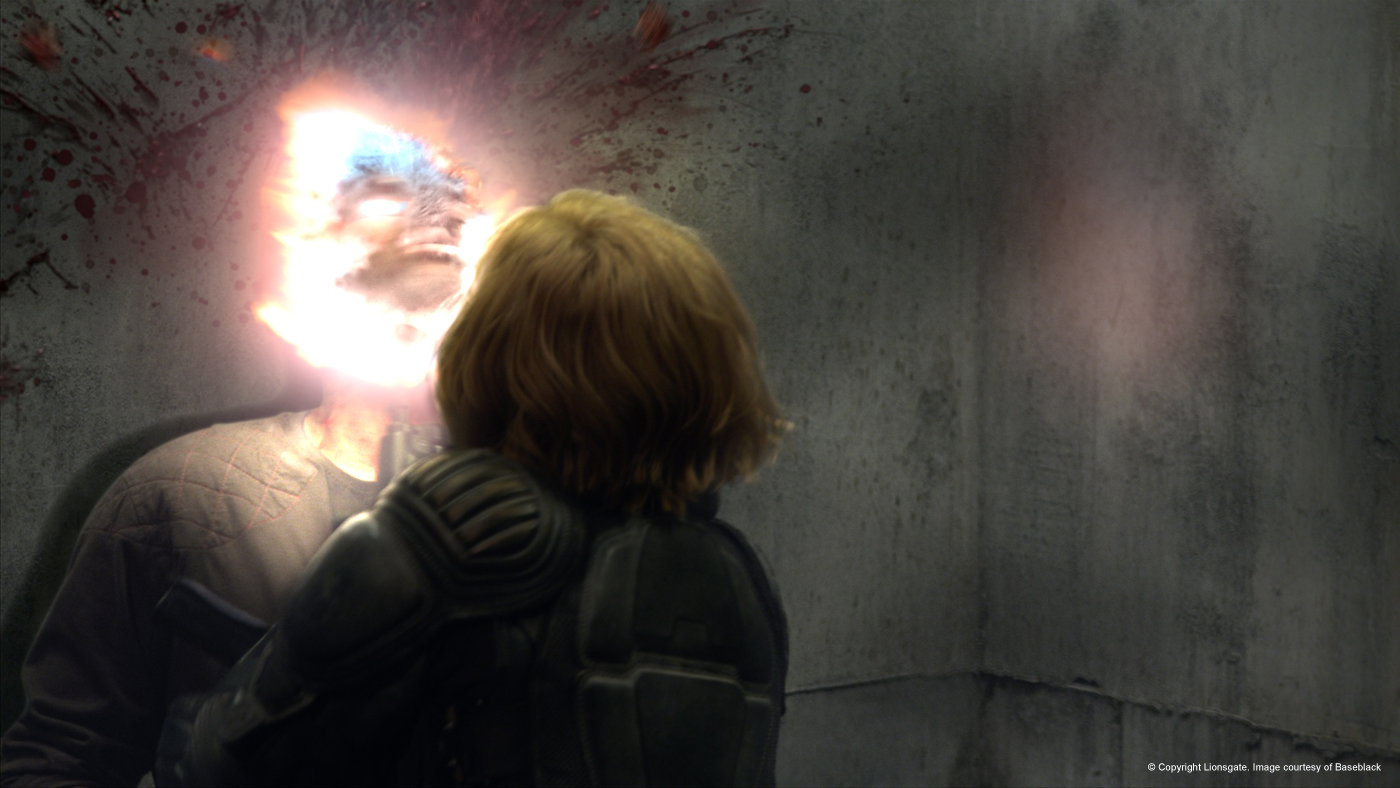
The second one would be where Anderson shoots a guy’s head off at very close range. This was created in mono to be converted and one or our compositors literally ended up almost painting the shot frame by frame, because Jon had so much very specific feedback for this shot. We are a small facility that tries to deliver bespoke effects, and to be able to deliver [all] these shots in the way we did, that was pretty amazing. The team here is pretty amazing.
How long have you worked on this film?
We worked for about 5 months on DREDD 3D.
What was the size of your team?
It was 12 people, pretty much evenly split between 3D, 2D and production/editorial.
What is your next project?
Currently we are working on 47 RONIN.
A big thanks for your time.
// WANT TO KNOW MORE?
– Baseblack: Dedicated page about DREDD on Baseblack website.
Jon Thum works in visual effects for over 20 years. He worked in London, Australia and the USA. He has participated in projects like DARK CITY, THE MATRIX, PITCH BLACK or TROY. He won an Oscar for Best Visual Effects for THE MATRIX.
What is your background before joining Prime Focus World?
I’ve been in the industry for over 20 years. I did a masters degree in Computer Graphics then worked as a 3D animator and Flame artist in London in the early 90s. I went on to work in Australia and the US on feature films, and was recognized with an Academy Award as a VFX Supervisor on THE MATRIX, before collaborating with the Wachowski Brothers again on THE MATRIX RELOADED. I returned to London in 2004 to work on a number of Hollywood blockbusters (including TROY, CHARLIE AND THE CHOCOLATE FACTORY, PRINCE CASPIAN, SUPERMAN RETURNS [also nominated for an Academy Award] and QUANTUM OF SOLACE).
How did Prime Focus get involved on this show?
I met Alex Garland, the writer/producer and main creative force behind the film very early on and helped him out on some “pitch-vis” to get the film green-lit. Then Michael Elson, Co-Executive Producer on the film, contacted me with a plan to start a new Prime Focus VFX facility in London. The film allowed us to effectively build a new VFX facility from scratch, growing from a few people in a small office to over 200 in our new building on Bucknall St.
How was the collaboration with director Pete Travis and what was his approach and expectation about VFX on this show?
Our art department, led by Neil Miller, was involved very early on working with Alex to develop concepts and designs for the film even before Pete Travis was on board. So there was already a starting point from a look and design point of view. When he did come on board, along with the DoP Anthony Dod Mantle and production designer Mark Digby, the group of us sat through all kinds of mood reels and reference that we’d prepared to nail down the look and feel of the film. It was a great collaboration.
Mega City One is a massive endless city. Can you explain to us in detail about its design and how you created it?
For us it was important to ground our visual effects in the real world, so when South Africa became the most practical and cost effective shooting location we started basing our Mega City One concepts on parts of Johannesburg and Cape Town, and those concepts held true right through to the final shots on film. For our establishing shots we used helicopter footage to turn Johannesburg into Mega City One, cutting whole blocks out of the city, replacing them with jammed freeways to add to the crowded claustrophobic feel and extending the horizon to infinity. We also added in surveillance drones to enhance the oppressive atmosphere, which allowed us editorially to tie in some of our action sequences with the Halls of Justice communications centre. That way our establishing shots of Mega City One became part of the story. Then, in the bike chase scene, some of the seedier streets of Johannesburg and Cape Town became the foregrounds for us to composite in our Mega City One backdrops.
How did you collaborate with the art department and production designer about the creation of Mega City One and Peach Trees tower?
We had a relatively low budget for such a VFX heavy film so it was approached in a different way from the start and was very much a collaboration between the filmmakers (DNA Films) and Prime Focus World. As VFX Supervisor I was involved very early on in the design stage and we were able to develop our assets alongside the conceptuals for the film. When Mark Digby (Production Designer) came on board we aligned our art department, led by Neil Miller (Prime Focus VFX Art Director), with his.
As I mentioned above, we all sat down and watched mood reels, and chose films and reference we liked – so aesthetically we were all on the same page; director, DoP, production design and visual effects. The main theme for the film was gritty and visceral. Brutalist architecture from Eastern Europe and the Italian film GOMORRAH were strong references for us in designing the look and feel of the megablocks. In addition, producer and writer Alex Garland was the main creative force behind the film and was a big 2000AD fan. He was in regular contact with John Wagner (Dredd creator) about the direction we were taking, and John had input on all the conceptuals we were making for the film.
What was the real size of the set inside Peach Trees?
A corner set was built that was 3 floors high and about half the intended width of the atrium, which had been designed to be 40m x 40m. This set had to be reused over and again to represent the various stages of Dredd’s ascent though the building. That meant we had a lot of VFX shots to produce, close to 300 out of a total shot count of 650, ranging from small set extensions to complete CG builds. We couldn’t possibly build the CG model with all the detail needed for every eventuality, so for this we frequently used the technique of paint and reprojection. With this method we had a basic textured build of the atrium that could be redressed to represent the different floors. We would render the CG but then paint on top extra details such as graffiti and scorching to the concrete, vents and shop signs to the walls. The painted frame would then be reprojected back onto the geometry and rerendered. This makes for very efficient turnaround and allows for quick creative iterations on the final shot.
There is a Slo-Mo drug used in this movie. Can you tell us more about its beautiful design and its creation? How did you manage the super slow-motion shots?
The main draw for me when I read the script was the slo-mo sequences. Although in the end they weren’t technically the hardest shots to achieve, they were at the centre of the story and had to work well for the film to work well. We were interested in capturing the unexpected and from that perspective wanted to shoot as much live action as possible. We looked at lots of slo-mo stock footage to get a feel for what would look great but also tell the story. It had to be hypnotic for the drug to make sense and we wanted the violence to somehow look beautiful.
We knew we’d have to add VFX for the blood and gore when people are being shot, so for reference we fired bullets at blood bags and prosthetic skin and noticed the stringy nature of the blood and the shock wave impact of the bullet on skin.
We shot as much of it as possible in layers so we could control the action and in VFX we added particulates in the air to add depth to the stereo. The slo-mo “look” was developed over a period of time and consisted of separating out the colours and objects in the scene and taking them in different directions with hue and saturation. Add to that some sparkles in the highlights and some heightened stereo and we had our drug look.
Dredd kills a bad guy by burning his head. How did you create this shot?
We actually put that shot out to The Mill – they did a great job of creating this shot with a full CG take-over of the actor’s head.
(Note: Here’s the link for the DREDD video breakdown from The Mill work)
Have you created some previz for specific sequences?
We prevized five sequences, of which two were mainly to look at the use of stereo cameras. So we prevized everything in stereo and firstly got a feel for using stereo cameras in two key action scenes – the white-out attack and the car chase. The white-out attack was a precursor for a test shoot where Pete and Anthony could experiment a bit with the stereo, and it gave them a good starting point. The car chase previz helped us to design some generic styles of shots that we thought might work well in stereo and allowed Pete to try out the kind of shots he was would normally shoot in a 2D film. It turned out that most of his shooting style worked well in stereo.
The other three were prevized for more practical reasons – the 76th Floor destruction, the phosphorus attack and the Ma Ma falls sequence. The 76th floor had to be prevized to work out how we could re-use sets that we’d built and how much the special effects team needed to prep for. The phosphorus attack similarly for special effects to prep their stuntmen on fire, and additionally for VFX to work out what plates we needed. And for Ma Ma falls there was a lot of greenscreen work that we needed to figure out.
The movie features a huge variety of screens. Can you tell us more about their content design and creation? Especially about the Peach Trees CCTV.
They were all essentially done by one artist using After Effects. The design was based on a kind of future-retro technology where we assumed that most of the technology available to the masses was similar to how it is now. It was frozen in time because of a nuclear war and had at best been maintained. The judges however had developed better technology for their guns/surveillance etc. – so we were allowed to give them a bit more.
Some slow-motion shots are quite impressive and gory. Can you tell us more about your work on the sequence in which Dredd attacks gang members in an apartment?
All of those shots required CG embellishment of some kind, commonly to add particulates in the air to increase the stereo effects and then add the saturated look as previously mentioned.
Some of the trickier FX shots in that sequence were handled by Baseblack. We shot the actors with compressed air forced into their mouth/stomach to create an impact for the bullet hits or force of the explosion. One of those shots needed no embellishment (the rippling stomach from the door explosion) but others required CG takeover for the actual bullet hits such as the two who are shot in the mouth and the fat guy who is shot in the stomach. Those shots were body tracked and reprojected to add the rippling skin impacts, plus a complete CG build for the interior of the guys mouth. Most of the blood is CG and the look is based on the reference we shot. In addition Baseblack did a nice simulation for the slow motion muzzle flash from Dredd’s gun. The idea was to see beauty in the violence so we were always aiming for something aesthetically pleasing.
Ma-Ma and her gang uses Gatling guns against Dredd that causes massive destruction. How did you create those shots?
For the ‘Destruction of the 76th Floor’ scene, we were to keen to use as much in-camera special effects as possible i.e. practical squibs and explosions. To that end there were a number of sets built that could be destroyed, rooms, corridors etc. – and one atrium set on the back lot that could really be blown up. However it wasn’t nearly enough and there remained a massive amount to do in visual effects to get the scene to where it should be. Everything is in there – tracer fire, wall destruction, debris, smoke, fire, blood hits, CG extensions, fully CG shots. It had to feel really dangerous and completely over the top.
Later, Dredd uses incendiary ammo against the gang. Can you tell us more about its creation?
For the phosphorus attack we shot with practical fire effects as much as possible and then added a lot more in post. The phosphorus trails were of course CG and done in Houdini. Making the phosphorus travel relatively slowly was a challenge, we wanted to have enough time to linger on the explosion of finger trails yet keep it feeling dangerous and real. The fires we added were a mixture of elements and 3d fires. It was a very tricky compositing job with smoke and fire, stereo plates and 2d and 3d elements.
Can you explain to us in detail the creation of the impressive death of Ma-Ma in slow-motion?
We shot Ma Ma on a rig against greenscreen and against the set. There is interaction with real smoke as she falls but the glass is all added as CG elements. There is one shot that is completely CG with her digital double falling in real time against our digital set and CG smoke. In the final shot we split open a reprojected CG face with CG blood to create a stylized finale to her fall.
Did you develop specific tools for this show?
As a general rule on DREDD 3D we used Maya for animation/layout, 3DE for tracking, Guerilla for lighting/rendering, Houdini for FX, Photoshop for matte painting, Nuke for compositing. The technology we use is mainly in the integration of this software and creating an environment that empowers the artists to do the craft that they do well.
What was the biggest challenge and how did you achieve it?
The most challenging aspect was the fact that the film was shot in native stereo. This adds a lot of complication to the visual effects. The level of difficulty is much greater, especially at the start and end of the pipe. So camera tracking needs to be much more accurate, and paint and roto is much harder. Then at the end compositing is harder. The problem is that any work you do on one eye needs to match exactly the integrity of the stereo in the other. It needs sub-pixel accuracy to work. CG FX work can also be challenging because you can’t rely on 2D tricks to help them out.
Was there a shot or a sequence that prevented you from sleep?
Not one in particular.
What do you keep from this experience?
This was a true partnership between the filmmakers and the VFX house, to the extent that Prime Focus World became part of the filmmaking process. This doesn’t happen very often, in my experience. It offered huge advantages in that PFW were able to offer up creative ideas to not only better the final outcome of the VFX but also add economic advantages, making the process more streamlined, being more efficient in the execution of the VFX and avoiding conflict between the creative forces in the latter stages of the process as everyone is on the same page from the beginning.
How long have you worked on this film and what was the size of your team?
About 70 Prime Focus artists in London produced the 650 stereo VFX shots over a 24 week VFX production period, delivering around 90% of the visual effects in the movie.
What is your next project?
The next project we are working on is WHITE HOUSE DOWN, a Roland Emmerich film.
What are the four movies that gave you the passion for cinema?
As a kid it was Sean Connery’s Bond films, which I saw as reruns at the local cinema.
Later it was art house movies like BRAZIL, BLUE VELVET, REPO MAN. For VFX the game changer for me was TERMINATOR 2.
A big thanks for your time.
// WANT TO KNOW MORE?
– Prime Focus World: Dedicated page about DREDD on Prime Focus World website.
Georges Tornero is evolving in the visual effects since almost 15 years. He has worked for many studios such as Duboi, Modus FX, Rodeo FX or CGEV. He has participated on many projects like Asterix & Obelix : Mission Cleopatre, Le fabuleux destin d’Amelie Poulain, Alexander or Jane Eyre.
What is your background?
Well this will be now 15 years that I’m working in postproduction, in compositing. Mainly on feature films, on softwares such as After Effects, Flame and Nuke today.
I worked with studios like Duran Duboi, Eclair, Efx India or Modus Fx Fx and Rodeo in Montreal. Since 2012, I am with CGEV (Compagnie Générale Visual Effects) where I supervise compositing.
On which sequences have you worked?
I mainly worked on Stadium and Molène sequences.
The film has a huge variety of screens. How did you work on that?
As usual, we filmed all those shots with screens that broadcast a green uniform background. Then, in post production, was replaced the green by the elements that have been selected or filmed elsewhere by the director, then we add all the necessary techniques for the proper integration of these elements into the TV (defocus, grain, brightness, distortion on the image for some old TV, etc.).
Can you tell us more about the scenes involving a ball?
Many balloons are real in the film, the actors have a certain talent to kick a ball… However, there are some sequences where we had no choice but to create a CG ball to help achieve some accurate shots (kicks, penalties) or some technically complicated figures (juggling). The actor then faking a kick without the ball, and then, once the shot on our screens, we only need to add a CG ball to get the desired path.
Does the actors were free in their movement or should they follow a choreography?
There was no choreography for the football scenes. We did not interfere in their comedy by imposing precise movements. We give them “carte blanche” to do what they want. Olivier Dahan, the director, preferred that they find their own play style, quirky, unlikely to increase the impact of comic. This is why Gad Elmaleh has a very personal way to juggle in the film.
What was the size of the field of FC Molène?
This is a field of normal size, located in the heart of the Fontainebleau forest.
Was there bluescreen around the set or did you rely on roto?
Many roto, only roto and lots of hair reconstruction.
Can you tell us more about the creation of the background with many boats?
It was an interesting part, because we had to replace the background, a forest set, with a set of sea, with boats, fumaroles, etc..
It is a mixture of matte painting and filmed elements. We had as references the other shots that were filmed in front of sea at other moments in the film.
Did you need to do face replacement for the football scenes?
No, all the actors have a real talent for this sport. There was no digital doubles.
How do you populated the various stadium?
Alain Carsoux and Guillaume Le Gouez have filmed the crowd elements in multipass. Different angles, different places and reactions. We reassembled the layers to fill the stadium in Nuke. The tracks were made either camtracker of NukeX, or Mocha, or even 3dEqualizer.
Is there an invisible shot that you would like to reveal to us?
I think we have nothing to hide.
What was the biggest challenge on this project and how did you achieve it?
The challenge was to find the best solutions to not go into a lot of CG crowd process – either by particles or by Massive for example – that we would put us out of deadline.
With a schedule so tight – 3 months – we had carved our pipeline closer. We need to well select the shots to do in Carnap, in corner pin or just in 2D for example.
At the peak of production, we were barely thirty artists.
Was there a shot or a sequence that prevented you from sleep?
No, there was no sleepless night, just a little dense days, but on a short period of time.
What did you keep from this experience?
The confirmation that a well-prepared shot will be a well made shot.
How many shots in the film?
In all, over 360.
How long have you worked on this film?
12 weeks.
What is your next project?
I am currently working on LES REINES DU RING by Jean-Marc Rudnicki and the next one should be the new film by Jean-Pierre Jeunet, SPIVET.
What are the four movies that gave you the passion for cinema?
Difficult to answer. Say after the period of Disney – BERNARD AND BIANCA for example – then spaghetti westerns – THE GOOD, THE BAD AND THE UGLY, … – I think science fiction films like DUNE or BLADE RUNNER made that today I often have a pen in my hand.
After explaining the MPC work on PROMETHEUS, Charley Henley is back on The Art of VFX. It details his work on TOTAL RECALL.
How did MPC get involved on this show? MPC joined the show in the last 6 weeks of post. At that time we had good resources available as we’d just completed PROMETHEUS and WRATH OF THE TITANS. We’ve worked extensively with VFX Supervisor Angus Bickerton in the past and as he was to supervise shots that weren’t done by the main vendor Double Negative.
How was the collaboration with director Len Wiseman and Production VFX Supervisor Peter Chiang?
Most evenings Angus Bickerton would do cinesync reviews with Len who was in LA. We’d send our WIP dailies through and get videoed feedback and drawings. Working from London with the west coast of America can be very efficient in this way as you can submit work at night and have feedback by the next morning, the artist comes in the next day with the Directors feedback for his shot. The video and drawings Len did on the shots also gave us a very direct link to Len’s ideas.
What have you done on this show?
MPC joined the show planning to do 30 or so simple sign and monitor replacements, but this quickly escalated to 120 shots including full CG tunnel and Fall shots, Full CG Helijet crash shots, the anti-cognition collar FX and the end scene which involved CG set-extension, Matt painting and CG vehicles.
Can you explain to us your work on The Fall and especially the zero G shots?
We did a collection of 12 or so all-CG shots where the Fall is traveling through the shaft from one side of the earth to the other. This included shots for the moment where the Fall reaches the center of the earth and it becomes a zero G environment. We used a model and base textures from Dneg for the tunnel, but it turned out to be quite time consuming to transfer the assets to MPC’s pipeline. On top of this we had to do a lot of look development for each shot, designing the lighting setup to show the scale, we also played a lot with speed and motion blur settings to get a convincing and interesting look to the tunnel walls as they wiz past camera. For shots where the camera is locked to the tunnel matte painters worked directly on the PRman rendered colour pass with the brief to add scale and realism, we projected details of dirt and added decals and service enclaves to the structure.
The model of the Fall was large and the tunnel moved fast showing a lot of geo to camera and so the early render times were too high. We had to save time on the fast moving shots to give us some design iterations so we baked some of the lighting in as a texture to get the overall look. We then ran a separate interaction pass with lights from the fall onto the wall and visa versa, Supervisor Marian Mavrovic’s Compositing team took these passes and combined them with the baked render and then created a sense of depth with atmosphere and, as the Fall gets closer to New Asia, FX rain and splashes. Fitting for Len’s style on the show we also added a lot of lens flares and effects such as and water on the lens diffraction.
How did you design the anti-cognition collar effect?
The idea is this collar projects a photorealistic holographic head of a preprogramed character around the wearer’s head; it’s a futuristic Spy’s mask. We did shots of the collar malfunctioning as Quaid walks through security. It starts flicking between the different heads in its memory, and then it breaks down completely and reveals Quaid.
A hero plate of Quaid was shot for real and then repeat performances for each character were filmed to roughly match Quaid’s original. We decided up front we needed total control over these elements, so after creating basic 3D models from scans each of the performers heads was roto-animated in 3D space. MPC Compositing Lead and Supervisor Axel Bonami then camera projected each live-action head onto the roto-animated CG head and unwrapped that to make an animated texture map, this effectively lined up all the performances perfectly and gave us a flat surface on which to map matrix textures and design the transitions on. All four heads blended together perfectly, and it looked convincingly three dimensional around the surface of the head, even though all the design work was controlled in 2D and done in Nuke. Noise and block patterns were created so that different parts of the four different heads would appear here and there which created a very interesting collage of all the different faces flicking around and mixing together. We wanted it to feel tangible and in the world and not just a graphic, so we incorporated some shadowing from one face to the next and blended this with an organic breakup to the blue digital mesh effect.
What references did you receive from production for this collar?
Some tests had been done for a trailer version before we started so that was the springboard. We ran a number of animation and texture tests till we found something Len liked the feel of, from then on it was just a matter of refinement.
Can you tell us more about the set extension for this sequence?
After Quaid and Lori fight within the ambulance, where MPC did a number of monitor inserts and an anti-cognition effect, Lori gets shot and we are out on top of the skyscraper and in the middle of the aftermath of the Falls destruction with Rescue services, Press and crowd all over the place. This scene was mostly shot on a green screen set with only the doors and interiors of ambulances built for real. We created the ambulances from scratch and added a lot of crowd using green screen elements production had shot. We added CG rescue-harriers flying around in the background and the odd hovering fire truck. The cityscape in the background was a Digital Matte Painting and for the mid ground a CG set extension lit and rendered to fit the DMP and set lighting, we added rain, rain splashes and smoke in compositing. To design the look of the scene there was also a lot of sky and grade development work needed to find the right type of light to convincingly integrate the interior shot sets into a digital exterior.
How did you create the clamps explosions?
For explosions we used Real elements mostly. We animated CG pieces flying and exploding debris and integrated them into real fire explosions elements that were carefully choreographed to match previs.
This sequence ends with lots of ambulance and crowd. Can you tell us more about the ambulances creation?
For the wide angle shots we modeled and textured to a relatively low level of detail and then we used a Matte Painted pass, based on real photography of metal bumpers, tail lights and dirt, to increase the quality of the textures for the close up shots. Comp then combined the best of a lighting pass, mostly reflections and shading, with this projected Matte Painted pass and created animated flashing lights.
How did you collaborate with the Double Negative teams for the asset?
We had a direct phone line to DNeg over the first few weeks as they scripted us a road map for the tagging of their textures, this was needed to help in converting their assets to MPC’s pipeline. They are only round the corner from out London facility so our CG supervisors Sheldon Stopsack and Max Wood met up with their counterparts when needed. The assets were huge and it was actually quite a time consuming process, good communication really helped.
The movie wraps up with newsreel footages of people cheering. How did you create those shots?
In a rough cut we had as a guide, Len had cut in some footage from helicopter views of news footage with crowds gathering, our challenge was to capture this mood and do a version representing downtown New Asia after The Fall had been blown-up and everybody is cheering in the streets. We had to find the most efficient approach to get something photo-real in the short space of time, generated effectively from scratch. We started by creating some very basic models for the ground level of the Colony using photography of the set, with this we blocked out the CG camera’s, later extending it to create a downtown area with waterways and boats. Rather than going fully through a texturing and lighting pipeline we did a hybrid Matte Painting and lighting approach only rendering a basic lighting pass for reflections and water interaction. Compositing Supervisor Marian Mavrovic set-up a 2 1/2D approach to creating the crowd. We needed close up and wide views of photo real people, we shot elements of about 20 people in various costumes, doing different performances. To layout the crowd we used our property CG crowd tool Alice, this gave us the numbers and enabled us to do iterations of crowd density and positions with Angus and Len. Once the layout was locked we wrote a tool to export the Alice positions to cards in Nuke, to which the crowd elements were attached, then we could dial in different parts of the performances to taste. Rain, atmosphere and lens effects were added in compositing.
What was the biggest challenge on this project and how did you achieve it?
The biggest challenge was dealing with the tight timeline. We had six weeks to complete, which included getting all the assets shot ready.
To get through all the set-up work we divided up all the issues so we could tackle everything in parallel. We pushed a lot of WIP work through the pipeline to make sure all the team was working on the shots as soon as possible and we didn’t have anyone waiting for the department before them to finish.
Was there a shot or a sequence that prevented you from sleep?
The bid CG tunnel shots took a long time to get shot ready, meaning we couldn’t even see a test lighting render for weeks as the asset for the Fall was so big and there was so much transferring work to do.
What do you keep from this experience?
I realized what a great luxury it is to have decent prep time, something missing on this show! But also how much great work can be done quickly with a strong team. It was a pleasure to work so intensely with a very talented crew.
How long have you worked on this film?
6 weeks.
How many shots have you done?
120 shots.
What was the size of your team?
Crew of just over 100 were involved at some point over the 6 weeks.
A big thanks for your time.
// WANT TO KNOW MORE?
– MPC: Dedicated page about TOTAL RECALL on MPC website.
Ajoy Mani is back on The Art of VFX. After explaining the effects of Worldwide FX on CONAN THE BARBARIAN, he tells us about his work on THE EXPENDABLES 2 and its many challenges.
How was your collaboration with director Simon West?
For a VFX supervisor, Simon is a great director to work with. He has an excellent understanding of the VFX process and therefore communication was a breeze.
I went to Bulgaria six weeks before the shoot for pre production. Since the movie had an unusually compressed completion time line, we had to do a lot of things in parallel including meticulously planning and starting on VFX well before the shoot. I met Simon during pre production. Simon has a very visual mind and he is very detail oriented. Since WWFX has a talented concept department with former comic book artists, we offered Simon the option to do detailed storyboards. In addition, we did a lot of animatics, especially for complex scenes like the plane crashing in the cave. During this phase, I met with Simon almost daily with the story board artists, and we fleshed out detailed storyboards. This was particularly helpful for me, as I was able to use the storyboards as a reference to do a detailed VFX breakdown and make more accurate estimates.
During the shoot, I was always within reach of Simon. As things evolved on set, I would communicate with Simon on contingency plans, options and additions from VFX. Simon is well versed in what VFX can offer him and he would constantly look for ways to get bigger results from VFX via enhancements. We built a lot of the set, vehicles and other assets digitally during production, as I determined they may come up in post. We shot extensively in Bulgaria and later in New Orleans and Hong Kong for the Jet Li sequences.
We worked together during the director’s cut phase of post production out of his editorial in Santa Monica. During this phase, VFX provided an array of options for Simon as the edit fleshed out. As we had modeled most of the assets during production we were able to create segues and options on the fly for Simon and the editor, Todd Miller. Most of these would start out as an animatic that Todd would plug in to the edit. World Wide FX (WWFX) would turn a lot of these around in less than a day. Todd would then retime and fit these in the edit. Once Simon got his fit, we would flesh the shot to finish.
What was his approach about the visual effects?
Simon has a lot of experience with visual effects. Most of his movies have had ample amounts of VFX and therefore, working with him was extremely rewarding and efficient. Since Simon has a complete knowledge of what VFX can offer him, he utilized VFX from the start. We started working with him during pre production and therefore could plan and offer a lot of options for the shoot. Simon worked very closely to the storyboards, so most of the shots were already well prepared for. We always took some safety shots for additional options at the edit stage. As production ensued, there were constant adjustments with VFX picking up the slack on set changes. Simon is constantly evaluating the entirety of the shoot and constantly juggling all the tools each department offers him for his final vision. During post he was constantly pushing for the “maximum bang for the buck.” He understood the resources involved in VFX, and why I had to shuffle certain resources to match his priorities. It was a pleasure collaborating with Simon.
The movie opens with an impressive and long action sequence. Can you tell us more about the preparation for it?
The opening sequence is by far is the grandest from a VFX point of view. Of the 1547 VFX shots in the movie, over 20% of the VFX shots were in the opening sequence. Sly and Simon really wanted the opening sequence to set tone for the whole movie, so a lot of time went into prepping for the first reel. The entire opening reel at the South Asian militia camp was first conceived by the art department to match the script. However, it was shot at four different locations. VFX provided the matte paintings and extensions to stitch it all together.
The movie opens to what looks like wastelands right outside the militia camp. This was shot in the rural farm lands just outside Sofia, Bulgaria. VFX did extensive set extensions to this to match to the story line. The opening shot is a matte painting, which establishes tropical jungles right behind the entry to the camp. The urban sprawl of Sofia in the distance was painted out, and the snowy mountains and sky adjusted to a more tropical.
Once the Expendables breach and head towards the gate, the next location kicks in. This was shot at Nu Boyana Film Center in Sofia. The back-lots were built like the encampment between the sound stages. Everything up to the Expendables zip lining is shot at Nu Boyana Studio. We worked very closely with the art department, props, SFX and stunts to make sure that we had all our options covered.
The zip-lining part is shot at a third location at a park on the west side of Sofia. Bear in mind that principal shooting started first week of September, and by the time we got to the park to shoot the zip lining sequence, most of the trees had yellow leaves or were already bare. It took a combination of prop trees and CG to get the forest to look tropical South Asian.
The final part of the opening reel was shot at a lake outside Sofia called Ognyanovo. Again, most of this was shot during the height of autumn and beginning of winter. We used a lot of matte paintings and for shots involving too big a parallax shift, jungles tracked and rendered in Vue. A lot of the plates there had snow and bare trees before the matte painters at WWFX changed the entire terrain. All the shots with Billy the Kid sniping was shot against bare rock. WWFX’s matte painters built the tropical background and interactive elements.
During this sequence, Stallone throws a moto to a helicopter. Can you explain to us in detail how were created those shots?
Originally this was designed as an SFX and props stunt. However, due to production limitations and the time frame we were all working under, the results didn’t look convincing. The motorcycle is a Rokon which is an all wheel drive motorcycle. I figured we would have to get into this part in some way, so we measured and built the Rokon in CG during production. We also built the helicopter as a backup. The helicopter is a militarized version of the MBB Bo105. During post production, it was felt that the prop helicopter felt too static and the Rokon’s flight path looked too artificial. Even with the cables painted out it looked unnatural. So we ended up completely painting out the prop helicopter and the Rokon and replacing them with full CG versions.
How was created the new Expendables plane?
The Expendables plane went from just a plane during early pre production to a supporting character. It is a Canadair CL-215. It was built as a fire fighting flying boat from 1969 to the last in the series being made in the 1990’s. It is a very impressive plane in its own right, but the movie version was militarized the Expendables way.
As the script got fleshed out more and more, the plane took on additional capabilities. Capabilities that is physically impossible. The challenge was to make the plane look like it could do all these tasks without drawing attention. For example, during the lake sequence, Simon wanted a cool way for the jet skis to drive into the back of the plane. The back of the plane is like a knife edge and this is physically impossible. Including driving up two 255HP Jet Ski’s in the back. We had to work closely with the editors to come up with a way to pull this off without drawing attention to this issue. The nose canon was designed by the art department. However, in reality there is no space to place a canon of this size in the plane, so that had to be cheated as well.
Knowing the plane had taken on the life of a character and its intentions to perform beyond its real capability, five different versions of the plane come together to form the on screen plane. We started building a CG version of the plane during pre production by working closely with the art department designs and plans. Building the CG model this early helped flag issues before construction, and gave art department and props the ability to visualize the final result. The CG model helped act as a unified reference for all the versions of the plane. This was a first for me as VFX usually is running around at the end trying to get all the versions to look the same to avoid continuity issues. This process was very helpful and efficient overall.
The five versions of the plane are:
1. Real Canadair CL215 for the wide shots of the plane flying and taking off from the water. A real plane was flown in from Turkey and painted to match the designs from the art department.
2. The team at props built an incredible, full size amphibious version of the plane. It has no propellers. So for all shots of the plane in the water, VFX added the propellers. This was used for the most part during the river chase sequence.
3. An interior version for interior shots. This was built a third bigger to ensure it could accommodate the Expendables comfortably.
4. A front fuselage section on rails for the plane crash scene in the cave. In the end, we only used a handful of shots with this and replaced it completely with the CG model. This was because the practical model just wasn’t moving fast enough on set. Even when shot at lower frame rates, the plane didn’t feel fast enough for the crash.
5. Finally, the all CG model.
Can you tell us more about the big explosions on the lake with many soldiers inside the flames?
I worked closely with SFX to figure out how to do this during production. In the end, we decided to shoot this with no dummies. It was shot with only the props. SFX did a good job with this explosion and it looked fantastic. This was shot by the second unit. They used two cameras from the outer banks and two Canon 5D’s in crash boxes. During post, this section of the sequence was in constant motion with shots being dropped and replaced until 3 weeks before delivery. The Massive team at WWFX, under Nikolay Gachev animated the soldiers getting blown up. We got the animation of the guys getting blown up worked out first. That way when we did get lock, we could change the digital camera angles and match it. This element was then comped into the explosion.
How did you create the dam structure and the environment?
The Ognyanovo Lake is a reservoir behind a dam. But, the dam is so far down from where we shot, that we could only see a bit of it or it was not visible at all. During pre production, I felt that it was imperative we capture the Lake Ognyanovo in summer when the area was still green. So, I had sent out a team to photograph and measure the banks with Total station. Danail “Dundee” Hadzhyiski, the first unit set supervisor and the data wranglers photographed all possible areas we could possibly shoot at, including the dam. The final dam ended up being a composite of the dam already at Ognyanovo and another dam site we shot at, Studena dam. The set photographs and measurements were used to build a composite dam that was then tracked and placed in the shots. The editors would choose shots based on the performance of the boat plane. We had to go in and then move the CG dam closer or further to match the feel of the plane approaching the dam.
As mentioned above, we photographed the area in summer to capture as much green as possible. A lot of this was then used to build some of the matte paintings. For some of the establishing shots, we had to completely rebuild the foliage as a matte painting to make it look tropical. All the lake shots were done in autumn or winter. For a lot of the closer shots, we rotoed around the trees with yellow and red leaves and tweaked it tropical green.
The reveal of Vilain and his team are dramatic with the strong fog. How did you create these atmospherics effects?
This was particularly difficult as the cut kept changing till weeks before delivery. We had to treat the fog sequence in a linear way so we could build the fog layers and do the reveal right. Steve Ramirez, the VFX editor and I would try and make estimates as best as we could from Editorial in LA. I would then relay to Stefan Tchakarov the VFX studio supervisor at WWFX. Based on how the cut was coming together, the shots were prioritized and individually rotoed out as layers. As soon as we got lock, Steven and I would assess the shots and then alert WWFX on what percentage to pull back the fog for each layer. This went back and forth for a while before we got it right. But, we worked as efficiently as possible under the circumstances.
We had a similar situation with the fog in the New York Set sequence when Chuck Norris reveals himself. This sequence was shot over several months under different conditions, so there was a lot of disparity in the fog levels. The shots had a lot of practical fog in it, we had to add to each and balance it out so it read the same.
The movie features an impressive number of various environments. What references did you received from the production and how did you create these environments?
We were working on a compressed timeline for finish and Scott Coulter; the VFX producer had me brought out to Bulgaria early during pre production. This turned out to be very helpful as I was able to go on all the location scouts. This helped me plan out the reference shoots well before principal photography started. I had set photographers and data wranglers at all the locations. We used a combination of a Total station and photogrammetry to take reference. We had take photographs for two purposes; first for photogrammetry, which requires a parallel path to the surface, and the second for textures. The cave by far was what we spent the most time taking reference images of. The Devetashka cave is a protected cave and therefore, I knew we would lean a lot on the CG model. The reference and measurements are a passive process, so we spent a lot of time here.
For the props and studio sets, I was in daily contact with the art and props department, and as I would see designs being approved by Simon, I would have it sent over to WWFX to start modeling. In return, as soon as the models got done, I would offer that to the art and props department should they need it for visualization. We used photogrammetry on the studio sets, even on the ones which didn’t at the time seem to need any VFX. It turned out to be a good idea, as we ended up doing a lot of segue shots using this information. All the weapons used were also meticulously photographed and measured.
Can you tell us more about the huge cave in which Vilain searches for the plutonium?
The cave is a combination of a real location at the Devetashka cave and a studio set. The Devetashka cave is a network of caves that is 2.5Km deep and the cave roof as high as 60M in places. It’s the biggest cave I have ever seen. It was not known to modern science till the 1920’s. It has had human habitation for over 70,000 years from early Stone Age to Roman era. It also houses a massive colony of bats and numerous species of birds. During WWII, the Nazi’s used it as a fuel bunker. It is so massive; their container trucks would drive into it. In order to facilitate this, they built a bridge from across to the river to it. The Soviets destroyed it when they over ran Bulgaria. Production rebuilt this bridge so we could access it. All in all, this is a very sensitive area. As a result, production was careful to limit the lights in the cave and explosions and gun fire was not allowed. This put a lot of restrictions on SFX and other departments.
Knowing this, I knew a lot of this would fall on VFX. The vault area of the cave was shot on a studio set. So we had to come up with a way to marry the two. We took extensive reference images and measurements of the cave so we could rebuild it in CG. This part of the movie was also being tweaked till weeks before delivery. The size of the vault area kept changing; we would mockup the cave to serve the cut, and then wait for approval before we patched in our new version. WWFX built a composite whole of the entire cave with the vault and the cave subway car (dubbed the Travelator) and started adapting it as the cut came along.
All the massive pillars in the cave are CG as well. The ones where we see the Expendables saving the workers were shot on a sound stage. But, they were only 6M high. The rest is all CG extensions. The two massive pillars at the entrance of the cave were also just 6M high and CG extended all the way to the cave ceiling.
What was the real size of the cave sets?
The Devetashka cave system is quite extraordinary. The entrance alone is 35M wide and 30M high, about 40M in; the ceiling hits 60M high! In some places the ceiling is 100M high. About 200M in, the cave split into two arteries. The one to the left is over 2Km long.
The plane crash happens in the section before the cave splits. The artery on the left is where we see Vilain dismount from his black Range Rover and onto the cave subway car (aka the Travelator). The story called for a massive concrete wall cutting off the artery from the main cave. The story point was that Vilain dynamited through this and found the hidden vault. Due to the sensitivity of the cave, there are weight limitations on construction. Only the first couple of meters of the concrete wall was built. All the rest is CG set extension. Including the dynamite scoured opening.
What were your references for the cave subway and how did you create it?
An actual Travelator was built during production. Props and art department cut two vans and built the Travelator. It was supposed to be reminiscent of a 1950’s design. During production, as soon as I got wind of the Travelator under construction, I sent a team out to measure and photograph it. By the time production was over, WWFX had built a detailed CG replica of the production Travelator.
During production there were restrictions to putting rails in the cave to move the Travelator. As a result, we ended up entirely painting out the production Travelator and replacing it with the CG one. Both the exterior shots of the Travelotor traveling in the cave are 100% CG. WWFX did an amazing job merging the CG Travelator with the live action footage. It was painfully roto intensive. The pylons and power cables for the Travelator are CG too.
Can you explain to us in detail the creation of the plane crash into the cave?
The cave crash was always the sequence we pegged as the most VFX complex. During pre production, we first storyboarded the entire sequence with Simon. After Simon approved the storyboard, we did a flat shaded animatic version of the plane crash so that we had a visualization of how it would look.
Originally, I had designed the impact part of the plane crash to be a third scale miniature shoot. In order for this to work, we would digitally wrap the cave behind the miniature, so the miniature was to be shot in a sound stage with green screens. The idea was to use a combination of the CG plane and the real one for the flight up to the cave mouth and pick up the crash with a miniature. The part where the plane’s front section drags through was going to be a section that would run on rails in the cave.
Due to production constraints the miniature shoot was cancelled, which meant the sequence now relied heavily on CG. As a result, as soon as the production was complete, we prioritized the model of the plane and the cave to be finished. As soon as post production started, Simon sketched on a map of the cave where he would like to have the cameras. The idea was to place cameras where we would logically place real cameras, including crash boxes. The whole crash sequence was already done as an animatic from pre production. We placed cameras as Simon marked them out throughout the CG crash zone. The animatics were then handed to Todd Miller, the editor and Steven Ramirez, the VFX editor who then cut in the CG cameras of the flat shaded animation. Once the CG animatic clips were fit into the cut and locked, we then proceeded to finessing the animation and adding details and simulations. This whole section changed numerous times and we were adding new clips up to three weeks before delivery.
In the end there are just a handful of live action shots in the cave crash. The section of the plane built for the plane crash in the cave had an issue. The plane wasn’t moving fast enough and even shooting at a slower frame rate didn’t help it. So most of the live action shots were taken out and replaced with CG versions. The live action plane didn’t have matching dings and damage, so those were matched as well.
WWFX handled the entire cave crash sequence, where it was fleshed out from the animatic to finish. Between the simulations and the renders of the cave, some of the shots would take weeks to render, so it had to be done very efficiently as there was very little time to make changes. This sequence didn’t come together till a few days before delivery and was definitely one of the hardest in the movie.
Did you use models on this show?
Originally, a miniature of the plane was scheduled to be shot for the plane crash, but had to be scratched due to production restraints. The MBB Mo105 helicopter in the opening sequence was a model too, but we ended up completely replacing it with a CG one which had more articulation. The helicopter in the hanger during the Christmas/Hector fight is a shell model. The entire sequence required us to add a main rotor, a tail rotor, lights and rotor wash. This was the most efficient way to do it as the story line had the helicopter starting up and going to an idling mode. We waited till the sequence was locked and then timed the rotor’s speed and rotor wash so it looked seamless throughout.
There are a lot of smoke, fire and explosions in this movie. Have you developed specific tools for these FX?
All the smoke, fire and explosion simulations done by WWFX were done using a combination of Houdini, Real Flow, Phoenix and Maya Fluids. The cave crash and the tank explosion sims were a combination of Houdini and Maya Fluids. The falling pillars in the vault room were done using Houdini and Phoenix. WWFX is a beta tester for Phoenix plug-in for Maya which is built by the Chaos Group. Chaos Group is based out Sofia, Bulgaria as well.
We shot a lot of explosion and smoke plates, but as the cut changed, very specific behavior was required from fire and smoke. The simulation department at WWFX was working around the clock to get these assets to the compositors.
The movie ends in an airport. Can you tell us more about your work on this sequence?
The airport sequence was the second most difficult sequence. However, this is one of the few sequences where everything went according to the way it was planned and we weren’t scrambling to re invent the wheel during post production. This part of the cut relatively stayed the same, so we had ample time to work on it.
The airport sequence was shot at four different locations. The drive up to the airport and the lobby fight was shot at Plovdiv Airport. While at Plovdiv airport, I sent a photographer out to shoot numerous spherical rig, bracketed, 360 degree shots. These were then stitched together to create a light probe for 3D and a spherical or lens specific output for compositors to replace the BG for the other locations. We used the exterior of Plovdiv airport on all the other locations.
The second location was the hangar. This was shot at the helicopter and aircraft hangars in Sofia airport. This served as the exterior shot of when Vilain’s trucks drive into the hangar. The interior is where the Christmas/Hector fight occurs. Things of note on the exterior shot of this location; the aircraft parked outside the hangar is 100% CG. Plovdiv airport and the planes in the background behind the fence is a CG addition to bring the two locations together. The number 3 on the hangar door is a CG addition as well.
The third location is the Military Building in Sofia, Bulgaria. This is a commercial building that is right bang in the middle of the city. The building is surrounded by dense buildings and traffic. We had a wall of blue screen around the building. This location was used for all the shots when the trucks drive through the glass, into the airport, and then exit on the tarmac side. The compositing on this was extremely well done by the team at WWFX. They used the 360 plates we shot in Plovdiv to completely replace the exterior view so that it felt congruous. At the entry point we put in the parking lot side view and the tarmac view on the exit point.
The fourth location is a sound stage at Nu Boyana Film Center. This served as the engine repair room in the back of the hangar where the Barney/Vilain final fight occurs. Reliance Media works out of Burbank was given this sequence. It consisted of a lot of face replacements, wire removals and the addition of the chain that Barney fights Vilain with.
During production we hired Plowman Craven out of UK to send a mobile team to come on set and digitally scan all the actors, and photograph the textures. These were then cleaned up and textured by WWFX. When Reliance came on board, these models where handed over to them and they handled the face replacements during the fight sequence.
Worldwide FX had worked on the first EXPENDABLES. What are the main changes on the pipeline and organization sides?
The pipeline and organization was different ground up. Unlike the first movie which had a generous production and post schedule, THE EXPENDABLES 2 had a pre production to post delivery schedule of a year. That meant we had to work extremely efficiently and build a parallel pipeline. As soon as I was engaged during pre production, as I would see set and props finished, I would send in a team to measure, photograph and CG model it. By the time production was over, we had modeled and built most of our CG assets. In fact, a month before the end of principal photography the first few finished shots were already coming out of WWFX.
The first EXPENDABLES was mostly finished by WWFX’s Shreveport, Louisiana facility. EXPENDABLES 2 did not have the participation of the US facility and was handled by WWFX’s primary facility in Sofia, Bulgaria. I had previously worked with the Sofia facility on CONAN THE BARBARIAN and therefore a solid foundation to work with.
Though the first EXPENDABLES had a lot of effects, EXPENDABLES 2 was far more ambitious in the scale and complexity of the effects. The final product had 1547 visual effects shots. Out of which 1186 shots were done by WWFX in Sofia.
The remaining 361 shots were split amongst five additional vendors. TATA Elxsi out of Santa Monica did a lot of the green screen shots. Reliance Media Works out of Burbank handled a lot of the shots from the Barney/Vilain fight as well as some of the blood hits and explosion during the airport lobby fight. Malditochroma from Argentina was contracted some of the wire removal and background replacement shots. El Ranchito out of Madrid worked on some of the green screen shots of the interior cockpit of the plane as well as wire removals during the ZIP sequence. They also did the parachute that opens when Jet Li pops out of the plane. A few additional green screen driving shots were done by R-Team out of Sofia, Bulgaria.
The pipeline for EXPENDABLES 2 was unusual, but very efficient. WWFX is wholly owned by Nu Image/Millennium Studios, the production company. WWFX was started and run by Scott Coulter in 1999. Scott is Nu Image/Millennium’s VFX Producer. As a result, we engaged WWFX from preproduction which was a great boon for a movie made on such a compact timeline.
How did you split the work between the different vendors?
WWFX was fully engaged from the onset of the movie. We couldn’t engage the other vendors till the cut was locked, since otherwise it would be chaotic. Up to that point WWFX was working on 2360 shots for the movie. Not all of them lived in the movie at one time. Just over 800 shots were dropped and replaced with new shots just two months before delivery. WWFX had their plate full. By the time we had lock, we went over all the shots, preferably as a sequence that we could parcel out for bids. The idea was to prioritize the complex work for WWFX and take out all additional sequences that took up resources that hindered WWFX’s delivery.
After the shoot wrapped in Bulgaria, New Orleans and Hong Kong, I then moved to editorial in Los Angeles. Editorial’s core consisted of Todd Miller the primary editor, Nathalie Samanon the post supervisor, Steven Ramirez the VFX supervisor, Adam Duthie the assistant editor and me. In addition we brought on Steve Moore as a second VFX editor when it came down to crunch time. I would communicated daily with Stefan Tchakarov the studio supervisor at WWFX and keep him abreast of movements at editorial. Stefan and I fed off the same database and were constantly adjusting resources and play according to movements at editorial. The cut was not locked till two months before delivery, which made it difficult for us to engage outside vendors. Until the cut was locked, the show was entirely handled by WWFX. Once we had the cut locked, within a week we had engaged all five vendors. All assets and work till that point was then handed over to the vendors. All finished shots came into editorial where we cleared them out once they passed 2K screening.
How was the work organized between the various branches of WWFX?
WWFX in Sofia is housed in a massive cold war era building on the Nu Boyana Studio Lots. The studio’s day to day operations are run by Jordan Markov and the studio is supervised by Stefan Tchakarov.
During pre production I worked primarily with the art and concept department under Simeon Asenov. Two of the concept artists, Pavel Bayraktarski and Svetoslav Hristov, did all the storyboards and we worked in conjunction with the art department in a symbiotic way. Once we started on animatics, the CG department under Dobri Georgiev came on board. As we started getting more plans and materials from the art department, the CG department started to model and texture them.
During production, I had two set supervisors. Danail “Dundee” Hadzhiyski with the first unit, and Nikolay Gachev with the second unit. Nikolay also heads the Massive department. Each team had a data wrangler and we had a visual effects coordinator. In addition, we had a set photographer. This entire team came from WWFX as well.
Right before principal photography started and I had a good idea of the scope, the project manager Radoslav Misarokov and his project coordinators started fleshing out the database. The VFX coordinator department was led by Nikolai Peshunov, who I was in constant contact with throughout the project.
Once shots were broken down, it then went to the sequence lead attached to the shot. The four sequence leads are Danail Hadzhiyski, Nikolai Gachev, Stanislav Dragiev and Alexander Valev. They would then seek out the departments to get the assets required for compositing.
If it required 3D elements it would go to Dobri who would then parcel it out to his sub departments. Modeling would go to the modeling department under Ivaylo Ivanov. For animation, it would go to the animation department under Kamen Stoykov. Texturing happened at the texture department under Georgi Gavanozov. The Layout department is headed by Svetoslav Petkov. The lighting and rendering department is headed by Angel Ivanov.
Starting with CONAN THE BARBARIAN, WWFX started a digital matte painting department. For EXPENDABLES 2, Metin Gungor who also worked on Conan supervised the digitial matter painting department.
Tracking was then sent to the tracking department under Peter Tomov. Once tracking was complete, the shot then went to the compositing supervisors Kremena Ganeva, Petar Keranov and Delyan Ketipov. Once the comps were at a point where they got preliminary approval, the simulation department under Boyan Stoyanov kicked in. Simulation is so render and resource heavy that this was started only after we had at least a soft lock on the shot. The compositors relied heavily on the Rotoscoping department under Dobromir Hristov, whose team painstakingly took the plates apart into layers. Finally once a shot got 2K approval, it went to the dust busting department under Krasimir Mayorov who made sure the frames were ready for film out. The I/O department handles the shipping and electronic transfer of all files.
All of this is held together by WWFX’s proprietary VFX management software, TRAK, built by its own tech department headed by Peter Marinov. The IT day to day is managed by Nikolay Kondarev. Trak is the most sophisticated and complete VFX management software I have ever used. I had total access to the entire pipe from editorial and I could coordinate and fine tune everything in conjunction with Stefan via this system. A powerful tool that helped me manage the whole delivery with just a couple of VFX editors from editorial. My VFX coordinator in charge of vendors, Yana Georgieva was based in Bulgaria, but using Trak and email, we were able to manage this with no issues. We had vendors on three continents and in five countries for EXPENDABLES 2; Bulgaria, India, Argentina, Spain and US.
What was the biggest challenge on this project and how did you achieve it?
In this type of film making, VFX is the glue that keeps it all together. If there is a lapse by any of the other departments, it automatically becomes a fix for VFX. It’s the last line of defense. Even during edit, when there are story line adjustments, I would offer full CG construct shots as segues. My biggest challenge was to make it my business to know what all the other departments are doing. Since I am left with the final pieces in editorial, I see things globally. For example if there are five action versions of the plane built between three departments, I felt it was imperative I get in there and make sure all of them are congruent. Otherwise, it will add numerous painful shots to the VFX bin for continuity fixes. Experience has taught me to get make it my business to make sure these continuity issues are caught as much as possible early. I would much rather focus my efforts on shots that deserve the effort. Working between the various departments without stepping on any toes and flagging issues without causing a ruckus was a challenge.
For me, technical issues are routine and somehow we always find a way to solve it. But managing people, expectations and delivery, that’s where the challenge is at. Easily the biggest challenges arise a few weeks before delivery, when finishing touches are still being put on shots. People who see the unfinished shots in preview assume this is final. Keeping cool and ploughing towards the finish line without losing my focus was definitely a massive challenge.
Was there a shot or a sequence that prevented you from sleep?
I don’t really lose sleep over work. I know I perform at my peak, and that’s really what it’s going to be. The plane crash sequence definitely had me nervous. The problem with a complex all CG sequence like that is, there are a lot of moving parts. The whole sequence was scrubbed and redone six weeks before delivery. Which meant we were starting everything from scratch on these render heavy behemoths. The sequence didn’t come together till a day before the delivery deadline. Meanwhile, everyone in editorial is nervous a month before delivery. They would look at the work in progress and be concerned. I would have to explain to them that it’s not even half way there, and shots like these don’t come together till critical layers, like atmosphere, simulations and color correction comes together. It’s hard to convince people about what it will look like in the future when only I can see it in my head. As a result this was extremely stressful till the final delivery. Of course, I would have loved to work another six weeks on these shots to meet their full potential. I originally had four months set aside for this sequence. But the way the cut came together, we had six weeks.
Given the time and circumstances, WWFX came through with flying colors. We had great chemistry at editorial from Todd the editor, to Nathalie the post supervisor to Steve the VFX editor; this really helped me stay on point. All the producers and especially Scott Coulter, the VFX producer was always behind me, that kind of support goes a long ways to get a good night’s sleep.
What do you keep from this experience?
Speak out early and quick. Even if I have to step on someone’s foot, its best to deal with it early during production. Otherwise, VFX gets left with the pieces to pick up. It will only end up backing up towards the end when you least need more stress. This experience has certainly clarified the need for me to be proactive during production. For example, if I see a light stand is visible in frame. Stop cameras immediately and take it out. Those valuable 30 seconds will save lots (hours/days/months) of time and money on the tail end. Great thing about THE EXPENDABLES 2 was that everyone from the director, DP, AD’s to editors had a lot of experience with VFX; they were all very cooperative and VFX sensitive.
How long have you worked on this film?
I started 28 July 2011 and I delivered on schedule on 6 July 2012.
How many shots have you done?
Total shot count for THE EXPENDABLES 2 was 1547 shots.
1186 was done by WWFX. 361 shots were the other five vendors. Additionally, 803 shots that were worked on were dropped six weeks before delivery.
What was the size of your team?
Total of 277 splendid folks!
97 from World Wide FX, Sofia
121 from Reliance Media Works, Burbank and India
20 from TATA Elxsi, Santa Monica and Mumbai
18 from El Ranchito, Madrid
12 from Malditochroma, Argentina
6 from R-Team, Sofia
+ 2 VFX editors and 1 Asst editor at editorial.
What is your next project?
I start on HOME FRONT starring Jason Statham on 21st September 2012.
Pour offrir les meilleures expériences, nous utilisons des technologies telles que les cookies pour stocker et/ou accéder aux informations des appareils. Le fait de consentir à ces technologies nous permettra de traiter des données telles que le comportement de navigation ou les ID uniques sur ce site. Le fait de ne pas consentir ou de retirer son consentement peut avoir un effet négatif sur certaines caractéristiques et fonctions.
Fonctionnel
Always active
L’accès ou le stockage technique est strictement nécessaire dans la finalité d’intérêt légitime de permettre l’utilisation d’un service spécifique explicitement demandé par l’abonné ou l’utilisateur, ou dans le seul but d’effectuer la transmission d’une communication sur un réseau de communications électroniques.
Préférences
L’accès ou le stockage technique est nécessaire dans la finalité d’intérêt légitime de stocker des préférences qui ne sont pas demandées par l’abonné ou l’internaute.
Statistiques
Le stockage ou l’accès technique qui est utilisé exclusivement à des fins statistiques.Le stockage ou l’accès technique qui est utilisé exclusivement dans des finalités statistiques anonymes. En l’absence d’une assignation à comparaître, d’une conformité volontaire de la part de votre fournisseur d’accès à internet ou d’enregistrements supplémentaires provenant d’une tierce partie, les informations stockées ou extraites à cette seule fin ne peuvent généralement pas être utilisées pour vous identifier.
Marketing
L’accès ou le stockage technique est nécessaire pour créer des profils d’internautes afin d’envoyer des publicités, ou pour suivre l’utilisateur sur un site web ou sur plusieurs sites web ayant des finalités marketing similaires.