SNOW WHITE AND THE HUNTSMAN: Angela Barson – VFX Supervisor & Director – BlueBolt

Since his last appearance on The Art of VFX for GAME OF THRONES, Angela Barson worked on films like SHERLOCK HOLMES: A GAME OF SHADOWS and THE IRON LADY and also on the TV series GREAT EXPECTATIONS. She talks here about the many challenges for SNOW WHITE AND THE HUNTSMAN.

How did BlueBolt get involved with SNOW WHITE AND THE HUNTSMAN?
Cedric and Phil (the VFX Supervisors) came in to see BlueBolt in London and we showed them our environment work on GAME OF THRONES (season 1). They liked what they saw and not long after they asked us to bid on the castle and royal village work.

When we came on board, shooting had begun but there wasn’t yet an approved design for Snow White’s Castle. We needed to start building it in order to be ready for shot turnover at the end of the year, so we took on the design of the castle as well. When we were getting close to design approval, we sent James Sutton, one of our modelers, up to Pinewood so he could be as close to the clients as possible. He worked on the design for the castle in Maya, making changes immediately for the clients as requested. This really helped speed up the design process.

How different was it working with two instead of one visual effects supervisor?
We mainly worked with Phil throughout the post period, so it wasn’t really different for us. Cedric was always in the background with his comments and suggestions, but most of our feedback came through Phil. During the final weeks of post Phil was based in London, so we dealt directly with him on a daily basis and he had to do all the late night calls with the rest of the production team in LA.

How did you manage to cope with the tight post-production schedule?
The post schedule was very tough. The final sign off on the design of Snow White’s Castle happened about a month later than we’d hoped, which had a big knock on effect to the rest of our schedule. We were getting shots turned over to us in January that required the full CG castle, but the CG castle asset wasn’t complete yet as the design had only just been approved. The castle was such a large CG build, seen in so many different lighting conditions and states of disintegration, that it wasn’t possible to make many shortcuts. The pressure on the BlueBolt team to make up for lost time was immense. As we are a small company, it was a matter of utilizing everyone to the full. Artists would move from modeling, to texturing, to lighting, to dynamics, to compositing – whatever was required. I think the ability of our artists to be flexible and willing to turn their hand to anything, is one of the major strengths of BlueBolt.

In contrast, the design of the Royal Village was known early in the process, so we started the CG build of the royal village while the shoot was underway. By the time we were given shots to work on, we almost had a fully built and textured CG village. On the whole, the village shots went through very smoothly.

Our shot count also increased dramatically, from around 50 shots to 150 shots, and there were almost no quick and easy shots in amongst that. It was critical that we worked in a smooth and efficient manner in order to deal with the large workload in such a short post period. It was a very difficult juggling act for our production team, and under the calm guidance of Clare Norman, they did a fantastic job.

What sort of visual research was involved?
The team gathered a lot of images of castles in different lighting conditions. Getting the level of variation without it looking too busy, especially on the wider shots, was a challenge so we kept referencing real examples that we found and that Phil and Cedric sent to us. The clients were great at sending us visual examples of what they were after rather than just trying to explain it in words, which is always useful when dealing with artists.

What was your biggest challenge and how did you go about creating the solution?
The biggest challenge was creating the CG castle in the short timescale, and making it sure it could be rendered in time. The castle is such a large build and is seen from all possible angles and distances, that the level of detail in the modeling and texturing had to be very high. In some ways that then became the area of difficulty – getting the level of detail high enough for the close ups, but not too high for the wide shots. We textured the village in Photoshop, but when we moved onto the castle texturing it quickly became apparent that the number and size of textures required was too big for a Photoshop pipeline. We made the decision very quickly to move across to using Mari as it was far better at dealing with texturing on this large scale.

The fully CG castle shots were definitely the hardest to achieve. Where there’s something in the shot to match to for look and lighting, it’s always easier to get it right and have everyone in agreement. When it’s all CG it can be open to everyone’s individual interpretation. During the battle sequence on the beach we had many shots where we were adding the fully CG castle. As always happens, the lighting conditions changed quite dramatically between some shots. The backlit, atmospheric plates were much easier to work with than the front lit, clean plates, and there’s always the challenge of trying to introduce a level of consistency between the CG lighting regardless of the variation in the plates.

We added in a lot of additional atmospherics to the CG to stop it looking too clean and therefore CG. Small pockets of smoke, flambeaux, birds, sea mist, vegetation and people were added to bring the castle to life and give it a sense of scale.

What sort of set extensions and augmentation were you responsible for?
We were responsible for all the set extensions of the royal village in both the Magnus and Ravenna reign. This involved topping up the central houses as well as adding fully CG houses to extend the area.

We also did set extensions to Snow White’s Castle courtyard that was built as a set piece at Pinewood Studios. The plates for the main wide castle shots were filmed out in Wales where no practical build existed, so we built a full CG version of Snow White’s Castle in both the Magnus and Ravenna reigns. The number and complexity of the fully CG castle shots was far higher than we had initially imagined, but it was a great challenge and we have some fantastic shots as a result.


What was involved in seamlessly making set extensions and augmentation?
We started by getting a lidar scan of the set so that we could match our CG extension exactly. We also did an extensive texture shoot of the set to use as a basis for our CG textures. This had to be done twice for each set build as they were dressed differently for the Magnus and Ravenna reigns. We built the nice Magnus reign first, then added all the destruction for Ravenna as a second pass.

Creating the run-down Ravenna version involved destroying walls and roofs, adding additional staining to walls, having vines growing around the castle, blackening any timber and generally making it look more charred and neglected. This type of CG environment work is always fun to do.


How did you maintain a balance between the gritty realism and the fantasy elements?
The key was keeping the design and the scale of the detail realistic. Even though the castle is enormous, it is designed in a way that is structurally sound with a sensible scale to the stone blocks. The scale of features like doors, windows and buttresses are correct, and there is a lot of smaller detailing like vents in the roofs and timber struts to break up large surfaces.

We added lots of subtle variation to the stonework, as it could never have been built all from the same stone type in a short space of time. Staining was added to make it look as though it had been standing for many years and to give it an extra sense of realism. It’s the addition of all this subtler detail that helps keep it looking real.

Is there anything you would like to add?
Our challenge with this project was the scale of the 3D builds with such a short lead followed by a very short post schedule. The clients were great and the shots we were awarded were fantastic and the team at BlueBolt led by Henry Badgett and Raf Morant did a phenomenal job to produce such great looking work under huge pressure.

A big thanks for your time.

// WANT TO KNOW MORE?

BlueBolt: Dedicated page about SNOW WHITE AND THE HUNTSMAN on BlueBolt website.


© Vincent Frei – The Art of VFX – 2012

BATTLESHIP: Chris Harvey – VFX Supervisor – Image Engine

After he talked about his work on TRON LEGACY, Chris Harvey then joined Image Engine and explains to us his work on BATTLESHIP.

How did Image Engine get involved on this show?
The groundwork to getting involved in this show really started way back with DISTRICT 9. After seeing the film, ILM became very interested in our creature work and came up to Vancouver to discuss the potential of working together in the future. When the opportunity came up to collaborate on BATTLESHIP, and the need for a specialized crew to handle the look and performance of the Thug it seemed like a perfect fit and we all jumped at it.

How was the collaboration with Director Peter Berg?
That’s an interesting question really. The way the show worked, as an outsource vendor from ILM, we did not deal directly with Pete. Instead we worked with the ILM crew very closely and our work was simply presented alongside the rest of the work on the film… creating a single source of contact for Pete. Now that being said we were certainly “working” with him to create the sequence albeit not directly, and for us it went very well. Peter really liked our sequence and some of the things we were doing with the Thug, to the point that we often got notes like, “wow, that’s great… lets add it to all the other shots!” or “I like it, can we double or triple the length of the shot so I can see more?”. Its a lot of fun and very rewarding when the director is happy with what he is seeing and asking for more.

How did you collaborate with VFX Production Supervisors Pablo Helman and Grady Cofer?
It was great… I often talk to people about how collaborative and honest working with the ILM crew was. At Image Engine we dealt primarily with Pablo. He and I got along very well and enjoyed a similar sense of humor and vision for where we wanted to take the Thug. Both ILM and Image Engine has Thug shots to complete on this film so there was a lot of share in both directions. It was very refreshing to feel like there were no egos involved in the artistic collaborative process. If they came up with something cool they would share it with us and when we came up with something new we would share it back to them. And having that trust and creative feeling to be able to run with something and know that if it worked it would get rolled back into not only our work but the film in general was really a joy.

What have you done on this show?
Image Engine handled the Engine Room and Ship Deck sequence. After a small group of Thugs rescue a Regent, one stays behind to gather information about their human enemies… it is here that our sequence picks up. Initially the Thug is completely unconcerned by the humans on board, as he doesn’t see them as any kind of threat, instead he is simply more interested in gathering information. It might be interesting to know that this was something that changed during production – when we first started on the sequence we had a number of shots that showed the Thug smashing and cutting the engine room apart. Peter Berg decided he wanted to shift the focus, so our shots changed into repairing the practically damaged engine and coming up with a scanning tool instead. However, once the Thug is attacked… it flips back to all hell breaking loose and you really get to see the damage one of these guys can dish out! Throughout the rest of the sequence we see the Thug reign down havoc on the crew…that is, until Rhianna says “Mahalo” and blows him to pieces with a 5″ gun.

Can you explain to us the asset sharing with ILM teams?
As I mentioned earlier the development process and sharing with ILM was very collaborative, with assets, design and ideas flowing in both directions. Initially we received a Thug asset with some look-dev which was at about 75% completion. The material included a model, textures (with a texture breakdown document since we both have different pipelines), a few early motion studies and some turntables. The model we were able to pretty much use as was initially, however the design changed in a number of ways that I will get into in a moment. In terms of look-dev and model/texture ingestion that was spearheaded by Nigel Denton-Howes (CG sup on the show) and Rhys Claringbull (then Asset Supervisor), we took the textures and the turntables that ILM provided and translated everything into our 3Delight lighting and rendering pipeline. The rig was used only as a way to translate on-set imocap data as IE has a robust animation and rigging pipeline with a lot of proprietary tools… so it was better for us to build our rig from scratch. Jae Cheol Hong was our Lead Rigger and together with Jeremy Stewart (Animation Lead) he did a great job building a complex yet very animator friendly system for dealing with the Thug and all its Armour. Once we had these things “in the system” the actual work to bring him to the final level really began.

How did you take the Thug look development to its final result?
Once we had the basic asset ingested we started the long and highly iterative process of “finding the Thug”. Sometimes look development is thought of as shaders and textures. But we treated it far more holistically, it involved everyone, animation, rigging, shaders, textures, lighting and compositing. You needed to understand how he moved, his presence … how he would be lit and composited into the shots, the mood you wanted to convey. So as you can imagine the process took some time and was not completed before shot production began. Obviously the usual lookdev fundamentals apply, checking him in actual and multiple shot lighting conditions and compositions. But in this case the arching holistic approach worked well because I think it was how Pete looked at the development cycle as well…he never arrived at a, “ok the Thug is signed off on” prior to deep into shot development. And as you can imagine that meant design changes we would have to roll with throughout this process and into shot work. He got “thicker” through the torso and legs…giving him more bulk and mass, we added armoured boots to previously unclad feet, his tool hand went through a number of design changes/modifications, his visor changed, etc.. However because we planned for this style of development we have built a very flexible rigging and animation system and likewise lighting and compositing partnerships, so even though all of these changes came throughout actual shot production we were able to update and have most things just ripple through the shots without an immense amount of pain. In the end, getting to put so much creative design work back into the Thug was very rewarding. ILM gave us lots of space to come up with things we thought would work and in the end we would simply package it up and send it to them to integrate back into their Thug shots as well.

How did the DISTRICT 9 experience helps you with this show?
Having not been here during DISTRICT 9 this is a tough one to answer except to say that the crew that came off of that and subsequently THE THING had the right mix of experience to go into this show. In addition to that Image Engine’s pipeline is very well set up for this kind of work, and we continue to improve upon and push (and I should say push with an explanation point) everyday! The thing about the experience of DISTRICT 9 is that people knew what they had to achieve, they knew how to do it… all that was left to do was to raise the bar.

Can you tell us more about the impact of the changes for the Thug helmet?
The impact here had less to do with the overall helmet and really more to do with the visor itself. In the beginning the Thug was never intended to have a lot of facial animation due to the fact that initially the visor was supposed to be almost fully opaque. That changed one day, when we took one of the close-ups and decided to give more of a hint at the emotion the Thug was going through… revealing more of his eye and face. And much to the ‘chagrin’ of my producer (not really) Pete liked it so much that he wanted more of it, not only in that first experimental shot but in every shot…it opened up a lot of previously completed shots. But we all knew it was the right choice and that in the end it would only strengthen the character and strength of the Thugs performance.

Can you tell us more about the facial animations?
After the significant change to the visor it became very apparent that we would need a lot more performance out of the Thug’s face. It was up to our animation team to go in and add full facial animation (with some last minute adjustments to the facial rig) to a slew of shots. Jeremy and the team would carefully look at the actors facial performance, taking cues from both him and from the body animation they created for the Thug…and with small eye darts, blinks, nostril flares, scrunches, twitches, massage that character into the Thug. It was very important for Pete that the Thug could not only smash things but also emote. After we had the new animation, we needed to create some new lighting adjustments to add internal helmet lights. It became a balancing act of art direction between animation, lighting and comp to find the right mix of performance, light and visibility for each shot. Lighting provided separate key, fill and ambient lights as well as interior helmet lights which could be dialed in on a per-shot basis to get the best mix of reading the facial feature while keeping the Thug looking mysterious behind the visor.

How did you create the breath and condensation effects?
This was one of those things that we started experimenting with early on and Pete ended up liking it so much it ended up in pretty near every shot. Sometimes together with the body animation we could use this to help show emotion and character, and at other times it simply became a tool for adding visual interest to a shot. It was handled almost entirely in compositing with a couple of utility passes from CG. It became an interesting balancing act with the newly revealed facial animation I mentioned above.

Here is what our Lead Compositor Bernie Kimbacher had to say about it:
“On one hand we had to enhance the look of the visor and add some life to it, which we handled with cold breath and condensation elements and on the other hand we still had to get some of the facial expression across while not revealing too much of the Thug. In order to stay on top of our tight schedule we had to make most of these comp tricks as automated as possible, as setting it up for each shot would have taken us significantly longer. For the visor we mainly used a pass we get from lighting called ‘positional reference’. This allowed us to map different textures on the visor, which we could then animate to replicate the Thug’s breathing cycle.”

Can you tell us more about the transforming weapon hand?
The tool was a lot of fun, and its an area we got to play a lot with. It was pretty much an open book in terms of what it could do or become…so that’s how we handled it. But instead of handling it from a modelling or design perspective, we approached it from what initially might be considered a backward approach…we looked at its motion first and then backtracked from there. We pulled the animators into a meeting and basically gave them free reign to see what they could come up with… telling them to take the existing model and just start animating it into different configurations with only one rule, it shouldn’t feel like its something coming from nothing. And that’s just what they did… we produced lots of different variations and configurations of potential weapons and how they might translate into them. This allowed us to get a lot of flavours very quickly without long or tedious modelling… or considerations on the ‘how’ of things, and instead just focused on the coolness of the motion and silhouettes. We took the best and showed these to ILM and Peter. Once we had a design settled on, it went back to modelling to actually create the components that fit into what the animators had done, and the rigging team to create a rig that could actually support it. From there it just grew… Peter loved the tool so much that he kept looking for new opportunities to show it off, resulting in a number of different configurations and movements.

How did you achieve the lighting challenges?
HA…actually for me this was a lot of fun because in an early meeting with Pablo he made a comment about pushing a plate around a lot! This is not something you hear everyday in visual effects, though I think it speaks to Pablo’s experience … I think its something you should hear more. But more often than not the plate is king… MATCH the plate. Well after the call I had a room of people looking at me like they couldn’t believe what they had just heard… CHANGE the plate? I remember laughing and saying something like “This is great…we are free to be more artistic!” Essentially it boils to this: If, on the day, an actual Thug was on set… you know what, it might have been lit differently. And yes all the old rules still apply, you still have to sit it into the plate, but it meant we could alter the lighting in the plate to not only force the Thug into the plate but we could also move the plate to fit with the Thug.

Rob Bourgeault, our Lighting Lead put it like this:
“The resulting output from lighting was visually incorrect as compared to the plate with cheated intensities and positions; however, it gave compositing the necessary range to apply a post processing effect to the renders and thereby achieve the desired stylized look. Most of the artistic license existed in painting and shaping the character with very intense reflection cards to achieve the result that Peter Berg was looking for. We were often requested to add additional cards to accentuate the key and rim reflections of the character. This was done with special attention to the plate, looking for any opportunity to enhance the interactive nature of the character within its surrounding environment.”

Can you explain to us step by step the Thug destruction?
Blood – Sweat – Tears. We actually completed this to final twice. Originally the Thug was more or less engulfed in flame, utilizing a lot of practical effects… however, as our sequence progressed and with Peter Berg’s enthusiasm for how it was playing out overall, he requested a change. He wanted to make more of an event of the final destruction of the Thug, he wanted to see a visceral moment where the audience gets to see it torn to pieces and can cheer for. And in order to do that the effect became almost entirely synthetic, and to make sure we really nailed what Pete was looking for the second time out, we spent some time essentially postvizing out how the death would play out and the visual beats. This in itself was a bit of a process involving primarily Animation and Compositing with a bit of FX. However once everyone knew where we were going then it really was turned over to the FX team to start figuring out how the hell they would achieve this look. And to speak to that it’s better I let Jacob Clark, our Lead FX TD and Daniel Elophe, Senior Compositor, describe the process:

Jacob Clark: “With regard to the Thug destruction shots, nothing quite like this had been undertaken at Image Engine before. This was a very ambitious shot from day one, involving a fully computer generated character in broad daylight being torn apart in slow motion by a fire spewing cannon. The fire and smoke not only occupied a large section of the screen, but the fire had to interact with the intricately detailed armor of the Thug, which had almost 800 different interlocking metal shapes. The project required some heavy hitting fx power, and Houdini was chosen to handle the job. I have had a long relationship with SideFX software and have been very happy with their product Houdini in the past. With this in mind, I approached SideFX to use their new Houdini 12 beta version, which has great tools for addressing our volumetric needs in development. Our IT team was able to quickly integrate into the software into the Image Engine film pipeline. In the end, we used Houdini’s new volumetric technology quite extensively in the production of the Battleship Thug destruction.”

Daniel Elophe: “The most challenging aspect was that the fire needed to interact with the breaking thug, and move around/through pieces. There was a good solid month of back and forth, brainstorming and trying lots of variations of fire within the context of the explosion with Jacob running fire simulations from various body parts of the Thug. For me as an artist, this was the most rewarding part of the process, working extensively with Jacob and being given a lot of creativity and flexibility from Chris and our producer, Vera Zivny to explore what would work well.”

How did you create the various simulations for it?
Well, I am sure I looked at hundreds in dailies. But when I asked Jacob what the final tally was in the shot, here was his response:
“By the time the shot had finaled we had run over 80 different simulations of Fire and Smoke in the scene. With all of these simulation tests coming through, I have to mention Senior Compositor, Daniel Elophe’s fantastic ability to gather all of this together for the final completion. Each fx render had multiple passes, and if you were to add all these passes up with the renders of the Thug, Daniel was able to corral well over 100 different image renders to complete the shot!”

What was the biggest challenge on this project and how did you achieve it?
That’s tough to say on this one… aside from the final explosive death, the work across the board was fairly consistent… so one single item or effect is hard to pick, rather it was more the show as a whole single entity. I guess for me it might simply have been navigating a new facility. Being my first project here at Image Engine, a lot of the crew was new, it was a new pipeline, new tools and methodologies to how certain things are approached here. And so while I brought with me some of my own ideas and approaches I needed to grow with the people here and learn to trust them, and them me. We were lucky enough to be able to assemble the ideal crew for the show. All of the lead artists and production team had come from shows like DISTRICT 9 and THE THING, and along with their respective crews each played an instrumental role as part of a great team in making the sequence what it is.

Was there a shot or a sequence that prevented you from sleep?
No to be honest the show ran pretty smoothly and it was a lot of fun so I didn’t lose a lot of sleep over this one. That being said we did have a few shots that were more, shall we say “challenging” than others. In particular the Thug explosion/death shots. But in the end you have to trust your team to do a kick ass job and they did exactly that!

What do you keep from this experience?
Well, it was a great introduction to Image Engine for me, I got to get more familiar with their pipeline and the crew here. I also had a great experience working with Glen and Pablo from ILM, and I certainly hope to keep those relationships alive and work with them again in the future. Beyond that the thing you should always take away from a production: new ideas, new ways of looking at things and new friends… all of which live on to improve future work and your life in general.

How long have you worked on this film?
Image Engine was involved in this for about 10 months and it broke down roughly into 3 months of assets and look development, 4.5 months of shot production, with an extra 2.5 months of extra shot production using a reduced crew at the end.

How many shots have you done?
In total we have 77 shots in the film and worked on an additional 10 or so that didn’t make the final edit.

What was the size of your team?
Approximately 40 at its peak.

What is your next project?
There are a number of new projects going on here at Image Engine that the crew has moved onto. Neill Blomkamp’s next feature ELYSIUM (Sony Pictures International and Media Rights Capital), “R.I.P.D.” (Universal Pictures), and the show I am Visual Effects Supervising, Kathryn Bigelow’s yet untitled film.

A big thanks for your time.

// WANT TO KNOW MORE?

Image Engine: Dedicated page about BATTLESHIP on Image Engine website.


© Vincent Frei – The Art of VFX – 2012

PROMETHEUS: Paul Butterworth – VFX Supervisor – Fuel VFX

Last year, Paul Butterworth talked to us about his work on THOR. This time he explains the wonderful work of Fuel VFX on the film that marks the return to the SF of Ridley Scott, PROMETHEUS.

How did Fuel VFX got involved on this show?
We’ve known VFX Supervisor Richard Stammers, VFX Producer Allen Maris and Fox’s VP of Visual Effects Todd Isroelit for a number of years, and all were very keen to have Fuel involved on the film. We started work early on in pre-production with some concept and look development work for the holographic Engineers and the holotable, and it grew from there.

How was the collaboration with director Ridley Scott?
I attended some of the shoot at Pinewood Studios in London, and Ridley was fantastic to work with. At the time he was filming the Engineer running sequence, and I was very impressed with how focused and calm he was. Between takes, he would take the time to sit with me and discuss his ideas for a shot or a sequence. He would sketch what he wanted and that helped me and my design team immensely when it came to building on those ideas.

What was his approach about visual effects?
For Ridley was all about it looking great. The look was the most important thing rather than whether an effect had a scientific basis or adhered to any particular rules. That’s a good place to start to create great design work. Of course, to make sense of something as complicated as the Orrery we came up with our own rules as to how it should work which we workshopped with Richard, but Ridley wasn’t so fussed about what those rules were as long as it looked fantastic and the bigger story points were being served.

How did you collaborate with Production VFX Supervisor Richard Stammers?
I’ve known Richard for many years, so we’re very comfortable working together. He’s very collaborative and inclusive. Once we got into shot production, he was in LA and I was in Sydney, so we worked mostly via Cinesync where we could workshop ideas and he could provide direction or feedback in real-time. During the concept design and look development phase he was great at providing feedback on the many ideas we were presenting and guiding us on what was most relevant to Ridley’s ideas.

What have you done on this movie?
We were very excited to be given responsibility for most of the design-driven visual effects in the film which included some key sequences and story points. Fuel created the effects for the Orrery and it’s control desk energy; the holographic Engineer characters; the holotable on the bridge of the Prometheus; and the laser scanning ‘pups’ – these were all effects that we designed and conceptualized based on Ridley’s and Richard’s ideas and then developed into final shots. We also looked after the set extensions in the pilot’s chamber, the particle-like ‘tunnel effect’ that gets activated in the catacombs, and the 3D holographic screens in Vickers’ suite.

Fifield deploys laser scanning probes. Can you tell us more about their design and creation?
We did a number of styleframes showing how the lasers could look which Ridley really liked, but this effect is really about the motion of the lasers. So the FX department spent some time doing motion tests investigating how many lasers there would be, how fast they scanned, how much they flickered and how much contact with the set walls should be seen. The final look is based on the concept of three forward-facing lasers that map the environment ahead, as well as a curtain-type laser that does finer scanning of the immediate location.

On set, there was simply a prop of the probe for interactive or eyeline reference only which we removed and replaced. Sometimes the prop was suspend from a stick if it needed to hover in a particular place, and at other times they weren’t there at all. And there was never any red interactive light on set – we added all of that.

While the laser effects are primarily a 3D FX simulation, creating these shots were quite challenging for the tracking and comp departments. Given it was a stereoscopic film and the lasers needed to interact with various set, prop and character surfaces, that interaction had to line-up perfectly. There was a lot of hand-painting in comp, and repeated detailed camera tracking that caused some hair pulling and gnashing of teeth but the team pulled off the shots brilliantly.

Can you explain to us in detail the creation of the Holotable on the Prometheus?
The holotable was the first thing we had in look development and Ridley basically approved our first motion test of a tunnel writing on as the final look for that effect – and that’s the look that’s in the film. So we got off to a good start! Then it was a matter of designing the structure of the complete pyramid and having that write on over time throughout the film. We also designed various widgets, readouts and gauges that sit above the holotable. We put a bit of thought into what these might be – vital signs of the crew, atmospheric readings, probe coordinates etc.

At a moment, David activates a hologram that shows the Engineers in various rooms. How did you design the look of this hologram and how did you create it?
The design and development of the holographic Engineer characters was the trickiest of all our concept work. These characters are made from light and yet had to be mysterious and eerie. At times they needed to be an abstract volume of particles, and at other times you needed to be able to glimpse the Engineer. Ridley was especially particular about the look of these characters as they are so important to the film. It was a challenge for us to get these right and we spent a lot of time both in concept artwork and 3D R’n’D in Houdini to get there.

Once we had a good general recipe however we found that the look of the Engineers could vary considerably from shot to shot depending on framing, lens and lighting – mainly in terms of the readability of their volume. Given it’s a stereoscopic film those issues really jumped out. So the Engineers were ‘sculpted’ on a shot by shot basis, by controlling which particles are switched on or off, to ensure they read well in 3D.

Then there was their interactive light to deal with. That was relatively straight forward in the pilot’s chamber where we had a good lidar of the set but it was very difficult in the tunnels. The tunnels had a warm light in them which was unsuitable to the icy blue that the Engineers became, and the lidar we had of the tunnels did not pick-up the intricate details of the hewn rock surfaces very well. So we modeled our own extra detail into the lidar scan so that it had enough detail to create interactive lighting passes from the Engineers, and also used it to change the set lighting to be much cooler.

How did you create the great interaction between David and the holographic Engineers?
We had a lidar scan of David’s body that we used to hold out the particle effects, and his hair movement was filmed in-camera so this was relatively straight forward. The thing we spent the most time on was working out how quickly the particles that wrapped around him dissipated.

The Engineers employs an interactive map, the Orrery. Can you tell us more about this beautiful map?
The Orrery was developed at Fuel based upon the script pages, discussions with Richard, and with reference to a painting from 1766 that Ridley liked called ‘A Philosopher Lecturing on the Orrery’ by Joseph Wright of Derby. From there, our art department created a series of style frames, taking on board aspects of the different concepts that Ridley liked in each batch until we arrived at a final concept frame.

During that process we received a ‘Ridleygram’ (a simple hand sketch on paper by Ridley) that referenced frog-spawn and showed multiple spheres within the orrery. As the script outlined some sort of magnification function in the centre of the orrery, whereby an Engineer could study a star or planet more closely, we developed the idea that there were also smaller secondary spheres orbiting the centre. The idea being that these smaller spheres are pre-selected parts of the universe that have been magnified to a certain extent and are ready to be moved into the centre to be viewed even larger. The ‘gimble rings’ are a direct reference to the painting but in our Orrery we came up with the idea that the rings would hold DNA data of the galaxies or solar systems that the Engineers had mapped.

Once we had an approved design and motion test, building it was another matter, especially for a 3D stereoscopic production. To achieve it within the production schedule, we needed to rebuild and extend our deep image pipeline considerably. A wide shot of the Orrery has 80-100 million polygons which would be hugely expensive and time-consuming to re-render each time if Richard or Ridley had requested even a minor change, say, to the location of a planet or other single element. But we knew we needed to be prepared for that. So the deep image tools allowed our artists the ability to reach in and manipulate areas of their choosing in an interactive way, so they could re-render and re-comp that particular section only.

Can you explain to us step by step the creation of one shot of the Orrery especially the one with the Earth?
Once the Orrery design was locked off we built it as an asset that had distinct parts: the central data sphere, the rings, the secondary spheres, the outer layer of nebulas and stars (which we called the ‘known universe’), the planets, and targeting system. We quickly developed a low-res version of the Orrery that we used for blocking out the sequence to get approval for layout and animation of the various elements. Once that was approved the edit for the sequence actually didn’t change very much and we concentrated on taking the shots to completion as per the blocking.

The shot of David holding the Earth had a particular challenge because he was filmed holding a glowing white ball as a means to cast interactive light on him. The lighting worked great, however, it was decided a bit later that the Earth should be quite a bit smaller than the ball he was holding. So that shot has quite a bit of tricky facial and hand restoration on David.

What were the indications and references that Ridley Scott given to you for the various holograms?
I think we received only 3 or 4 bits of reference and some Ridleygrams. We were encouraged to come up with our own designs based on initial verbal briefs and worked closely with Richard along the way as we developed these ideas as per his and Ridley’s feedback. It was really rewarding to be given such creative responsibility.

Can you tell us more about the Engineer’s Control Desk?
Early on we were showed a quicktime called Magnetic Movie that Ridley really liked – he didn’t have something particular he thought it could be applied to, he just liked it. So when the opportunity came along to design the control desk energy, I thought it would be great to use magnetic movie as the inspiration.

As usual with our design process, we presented a number of conceptual style frames and Ridley chose one. Based on that, we presented another motion test with a few variations and Ridley selected one of those, so we developed that further and that’s what you see in the film.

Like the probe shots, the biggest challenge with the control desk energy was making sure it interacted with the set properly. Cue more hair pulling and gnashing of teeth. But again the team did a great job.

Have you created some animatics and previz to help the actors on set?
We didn’t create any previz, but we did have a motion test of the holotable scan effect that Ridley loved and he took that to set with him when filming the scene where the pyramid tunnels first begin writing onto the table.

Vickers’s suite features some holographic screens. Can you tell us more about these?
Our brief was that the wall in Vicker’s suite should be a perfect hologram, so it needed to look like the environment was real, as if you could step into it. For the alpine shot, our design team created a matte painting, dimensionalized it, and enhanced it with 3D trees, CG atmosphere and particle snow. We also dimensionalized the wheat field footage and re-created the moving wheat in Nuke.

How did you create the set extensions in the pilot’s chamber?
The set at Pinewood was huge and quite detailed, so we really only needed to top up the Pilot’s Chamber with the top third of the walls and a CG ceiling. There were a number of times we needed to replace the walls in full, mainly when we needed to relight them. We were provided with a great lidar scan of the set, which really helped set-up those set extensions to go through smoothly.

Ridley Scott’s return to SF is something highly anticipated. What was your feeling to be part of it?
It’s been extremely exciting for Fuel to be part of PROMETHEUS, especially having been able to inject a lot of our design ideas into these key sequences. Obviously there’s a rich history in the story, and huge anticipation from the fan base, so it’s also a privilege. Personally, I’m a huge sci-fi fan so it goes without saying that it’s been a dream project for me. Adding to that, working with Ridley and Richard has been amazing.

What was the biggest challenge on this project and how did you achieve it?
Probably achieving the Orrery, particularly the first sequence where David activates it and interacts with the elements within it, as outlined in the questions earlier.

Was there a shot or a sequence that prevented you from sleep?
Probably getting the look of the Engineers right. I don’t think we lost any sleep over it but we maybe held our breaths a bit. We were still trying to get them looking right at a time when we were hoping to be in final shot production but we knew we were on the right path.

What do you keep from this experience?
PROMETHEUS has certainly been Fuel’s biggest undertaking to date. It pushed us, but in a good way. I think we’ve matured because of it, and certainly our pipeline has matured. We’re very proud of the work we delivered and very proud to be associated with the film. Hopefully we’ve been able to show what we’re capable of.

How long have you worked on this film?
If you include the pre-production and design process, about 15 months. But we were in full production for about 7 months.

How many shots have you done?
About 210.

What was the size of your team?
We had about 70-80 people work on it over the course of production.

What is your next project?
We’re working on a few projects at the moment, but unfortunately aren’t able to publicly announce them yet. Our work on PROMETHEUS has certainly brought us a lot of attention which is very encouraging, and we’ve been invited to bid on a few more projects since the release of the film.

A big thanks for your time.

// WANT TO KNOW MORE?

Fuel VFX: Dedicated page about PROMETHEUS on Fuel VFX website.

// PROMETHEUS – SHOTS BREAKDOWN – FUEL VFX


© Vincent Frei – The Art of VFX – 2012

SNOW WHITE AND THE HUNTSMAN: Henry Hobson – Creative Director – The Mill

After he talked about his work on RANGO, Henry Hobson has worked on projects like THE HANGOVER PART II, FRIGHT NIGHT or THE THING. He returns to The Art of VFX to explain his work on SNOW WHITE AND THE HUNTSMAN.

How did The Mill got involved on this show?
The Mill has a long history of working with Visual Effects Supervisor, Cedric Nicolas Troyan, so when SNOW WHITE AND THE HUNTSMAN came along, The Mill was his first choice. I was brought in to expand upon the studio’s rich and fantastic heritage with my title sequence experience.

How was the collaboration with director Rupert Sanders?
Rupert comes from a graphic design background, having studied at Central Saint Martins College in London. We bonded over typography, and shared tutors (I also studied at the University of Arts London). Visually Rupert has a very strong eye for details and facets of the design which made working with him a very exciting experience.

Can you tell us more about your collaboration with Production VFX Supervisor Cedric Nicolas-Troyan?
Cedric, like Rupert has a great eye for detail and an immense capacity to create strong design concepts. Even though he was deep in thousands of other visual effects shots, he would always pop in for a chat bringing some great ideas and thoughts into the title development process. Working with him was a great pleasure and very inspiring.

What indications and references did you received from the director?
Rupert had a great image library for Snow White, from old Dore etchings to modern photographers. For the titles, however, we were happy to surprise him with some ideas of our own and were thrilled when he embraced them.

How did you approach this main title?
Initially, we wanted to approach the titles from a multitude of different angles, to explore various facets of the mythology of Snow White. Having been one of the designers of the SHERLOCK HOLMES titles with Simon Clowes, I was able to bring some clear storybook ideas, along with typographic routes and some exciting photographic options.

Can you explain to us step by step the creation of the main title?
After an initial brainstorming and exploration process, we settled on the dark battle idea which seemed to ring best with the dramatic tone of the film. We took the Colleen Atwood costumes to film their eloquent detail, an exciting moment as they were as staggering in person as they were on film. We photographed the costumes in extreme details and in the midst of action with some raking light. This then formed the bed of our design process.

With a lot of treatment and processing we then began to explore typographic options. Building rough edits with still frames before we got the green light to shoot the final piece with the phantom. The final processes were amazing combinations of our core team: Andrew Proctor with Eugene Guaran, Yorie Kumalasari and Ed Quirk. Manija Emran then joined the team to help steer the typography and created a beautiful and completely custom typeface.

Can you tell us more about the Phantom filming?
The first few times you use a Phantom, you really have to fight with yourself to not just play about, the possibilities are too great! With this shoot we had a great DP, Jim Matlosz, who enabled us to rapidly move between setups. He introduced some interesting lenses and techniques to help mimic the battlefield and helped enormously when it came to piecing the whole thing together. The ease of use of the camera allowed us to shoot far far more than we needed giving us a lot of great options during the editing process. We wanted to be able to blend between the two worlds, CG and in- camera, seamlessly and the camera really allowed us to do this.

How did you manage the shooting of the raven?
The raven was easier to work with than some of the stand ins! Shug (the raven’s name) was almost like a kitten – it was so playful and fun, and very friendly. On command it would flap, fly and jump. We could only work with it for short periods of time so it was great to have a creature so well trained.

Can you tell us in detail the creation of the shattering effect?
Rupert initially requested a flint like texture, with ripples of organic shapes in the broken pieces but as we got closer to the finish line, we eventually had to even up the shapes and make them more graphic. The realism of the ripples took the viewer away from the hard cut graphic nature of the sequence. We only had a couple of weeks to do this in, so it helped to work alongside Pixomondo and then add our own level of extra detail that was needed for our macro shots.

How did you collaborated with Pixomondo about this effect?
As we didn’t have a lot of time it was great to have references and some key elements (the knight’s suit) from the Pixomondo team. It allowed us to concentrate on the edit and the rendering to make sure everything sat well together.

Can you explain to us in detail the font creation?
After trying several fonts we had trouble really finding that perfect feminine font with a hard edge. When Manija Emran came on board, she expanded upon the traditional type selection by introducing the possibility of doing an entirely custom font. She took a font not traditionally used on screen because of its fine line work, and began to customize it. We ended up with a new font, Ravenna, with several options per letterform, which allowed for each name to have its own personality, without being too stylized.

It’s the first movie title sequence handled by The Mill from start to finish. What was your feeling to be part of it?
There have been a few others, but in the case of SNOW WHITE AND THE HUNTSMAN, The Mill handled the entire process from concept through production. Personally, I have worked on or led sequences such as RANGO, SHERLOCK HOLMES, ROBIN HOOD, LONDON BOULEVARD, THE WALKING DEAD and more so I was excited to bring that knowledge to a team with an extraordinary skill set. The whole office was really enthusiastic about the project so we had great support.

What was the biggest challenge on this project and how did you achieve it?
The biggest challenge was time, but with a very talented core team of compositors whose skills also included strong design sensibilities, got us the results we needed quickly and without much revision. Also having the whole team under the same roof at the new Mill L.A. facility allowed us to work with instant feedback and approvals that sped up and opened up the process really well.

What do you keep from this experience?
That the best way to work is in close contact with the team, to be able to work collectively on each shot.

How long have you worked on this film?
We were working on this for 6/7 weeks, the first month was ideas and concepts before we got down to a very tight last few weeks to complete the whole thing

How many shots have you done?
We did 32 shots in total to complete the whole sequence (although one of them was a 7 minute end crawl shot).

What was the size of your team?
We had 8 core team members, myself, Andrew Proctor, Lee Buckley, Eugene Guaran, Manija Emran, Ed Quirk, Yorie Kumalasari & editor Carsten Becker.

What is your next project?
Personally my next project is to direct my first feature film, MAGGIE, at the start of the new year followed by THE CAVES OF STEEL with 20th Century Fox later in 2013. I am also very much looking forward to working with the talented team at The Mill L.A. on their upcoming projects.

A big thanks for your time.

// WANT TO KNOM MORE?

The Mill: Dedicated page about SNOW WHITE AND THE HUNTSMAN on The Mill website.
Henry Hobson: Official website of Henry Hobson.

// CREDITS

Post-Production / VFX Company: The Mill
Mill Office: Los Angeles
Executive Producer: Stephen Venning
VFX Producer: Lee Buckley
Creative Director: Henry Hobson & Andrew Proctor
Colourist: Greg Reese
Typeface Designer: Manija Emran
Lead 3D/2D Compositing: Eugene Guaran
Additional Compositing: Ed Laag
2D Type Animation & Finishing: Justin Sucara
Editors: Carsten Becker and Stuart Robertson
3D Particles: Yorie Kumalasari
3D Modelling and Dynamics: Ed Quirk
Color Producer: LaRue Anderson

// END TITLE


© Vincent Frei – The Art of VFX – 2012

COSMOPOLIS: James Cooper – Lead Compositor – Mr. X

James Cooper has worked in several studios including Topix and Spin VFX before joining Mr. X. He has participated in films like RESIDENT EVIL: AFTERLIFE, HANNA or THE THREE MUSKETEERS.

What is your background?
I started in design and compositing and then moved into directing mainly for commercials and music videos before winding up a senior compositor and visual effects supervisor here at Mr. X.

Mr. X have collaborated on many David Cronenberg movies. How was this new collaboration?
Fantastic, as always. David, as well as being an amazing director, auteur and agent provocateur, is incredibly open and approachable on the visual effects front. He knows exactly what he wants, which in itself makes our lives so much easier, but is also very collaborative as to how we get there.


What was his approach about the VFX?
Because we had an established relationship he trusted us completely as to how to execute the effects. He had very specific ideas about the monitor designs and which driving backgrounds went where but left most of the technicalities to us.

What have you done on this movie?
We executed 385 vfx shots on COSMOPOLIS. The vast majority were driving composites where plates were shot inside the limousine with greenscreen outside the windows and we composited in matched perspective plates of Toronto standing in for New York City. In addition to that we also created content of both a graphic and live action nature for the various monitors inside the limo and some gunshot and knife wounds.


The movie features a huge amount of driving composites. Have you developed a specific methodology for these shots?
Yes and no. We did have a methodology for the driving composites however it was not developed specifically for this movie but adapted from the wealth of experience we have accumulated compositing these types of shots in the past.

How were filmed and organized all these backgrounds?
For each sequence inside the limo, background plates were shot on camera car driving through different locations in Toronto matching the angles from the performance footage. Because of the many different angles we could not match each of them exactly so we shot angles that could be manipulated into working for more than one performance angle and digitally adjusted them to work for each specific shot. All the background plates were then organized in our pipeline database with their respective performance sequences.


Have created some previz for the driving composites?
No there was no previzualization required for COSMOPOLIS.

Sometimes Eric Packer occults the windows limo. Was there an on-set effect or is it your work?
It was a combination of both, actually. Initially that was to be a practical effect but David wanted to have options as to when the windows became fully opaque and when they returned to tinted transparency. To this end he shot the parts of the sequences where he was certain they would be opaque practically but left numerous shots on the front and back end of those shots as greenscreen. This allowed him much more control as to the timing of when the windows fell into darkness and for how long and gave us references as to what they would look like fully darkened.

What references and indications did you received for the limo screens?
The production design team pulled many different references of stock market screens but also other data mining graphical interfaces and elements that seemed technically cool and relevant. They also created a number of preliminary designs according to David’s vision of what Eric’s high tech monitoring system might look like.


Can you tell us about the design of the various screens inside the limo?
The character of Eric sees much more than just price and volume variations. He has a unique ability to look at the many different patterns that the volatility of the stock, commodity futures and money markets generate, analyze them and predict where they will end up in the near future. Keeping that in mind we started with the production design references and adapted them, adding our own design elements and animations to create more visually interesting screens than might normally be seen on a trader’s monitor.


How did you create all these animations?
The designs were all created initially in Adobe Photoshop and then imported into After Effects where the animations were created. These were then brought into Nuke where they were composited into the various monitors matching the lighting and perspective in the scene.

Can you explain to us the shot in which Eric shots in his hand?
Well, in terms of visual effects I can. For motivation you’ll have to talk to Mr. Cronenberg. Apparently Robert Pattinson and his handlers balked at the thought of doing this as a practical effect so he just pointed the (unloaded) gun at his hand and pulled the trigger. We added the muzzle flash, smoke, wound and blood splatter in compositing.

Have you created some matte-paintings?
All the driving backgrounds were live action plates but we did do some matte paintings of the NYC skyline for a few of the street protest scenes.

Is there an invisible effect you want to reveal to us?
A particularly challenging shot has Eric entering an alleyway on a mission to confront his stalker. We needed to replace the building at the end of the lane way for continuity purposes but Eric passes through a chain link gate which is left swinging behind him. And, of course, the camera is moving as well. Production did not have a green screen big enough to cover the entire entrance to the lane way so we rotoscoped the gates, put them on cards in 3D space, tracked the camera and animated the roto to match the actual gate. All in all a very tricky shot.


Have you developed specific tools for this show?
I think a good effects house develops specific tools for every show.

What was the biggest challenge on this project and how did you achieve it?
Well, of course, making the driving shots believable was a challenge, particularly since David has a slightly surreal aesthetic even in his more, shall we say, realistic films. I’m not sure that he wanted the cityscape outside to feel too real. I would say the biggest technical challenge was in the keying. He wanted to shoot the interior of the limo with tinted windows in place in very low light. This presented some challenges in that the green screen luminance was considerably less than optimal and, because of the high ISO needed to shoot in such low light, was much grainier than ideal as well. Of course we wanted to keep every hair on everyone’s head in the keys so we spent a lot of time finessing them.


Was there a shot or a sequence that prevented you from sleep?
Perhaps the western economist having his eye stabbed out on North Korean television? From a technical perspective the gate shot and there was another interior limo shot which executes a slow, near 180 degree pan from one side of the limo to the other so matching the background move and perspective on that one was a challenge.

What do you keep from this experience?
That it’s a distinct pleasure to work with a director who knows exactly what they want and can communicate that effectively. That and we all learned a few more things about pulling good keys.


How long have you worked on this film?
We started working on the graphic treatments for the screens in July. The majority of the work commenced in the beginning of September and we delivered the film by December 16th.

What was the size of your team?
32 people in total including the production crew – with the majority of the team from compositing

What are the four movies that gave you the passion for cinema?
Only four?!
There are probably a hundred at least. In chronological order of my viewing them; STAR WARS, ALIEN, THE GODFATHER and RAGING BULL. And APOCALYPSE NOW and GOODFELLAS and BLADE RUNNER and MIDNIGHT EXPRESS and BONNIE AND CLYDE and 2001: A SPACE ODESSY and JAWS and BRING ME THE HEAD OF ALFREDO GARCIA and A FISTFULL OF DOLLARS and THE GREAT ESCAPE and THE DIRTY DOZEN and THE EXOCIST and THE SHINING and…

A big thanks for your time.

// WANT TO KNOW MORE?

Mr. X: Official website of Mr. X.

Note: Production: Prospero Pictures & Alfama Films, Producers: Martin Katz and Paulo Branco and distributed by Entertainment One.


© Vincent Frei – The Art of VFX – 2012

SNOW WHITE AND THE HUNTSMAN: Bryan Hirota – VFX Supervisor – Pixomondo

Since its passage in The Art of VFX for SUCKER PUNCH, Bryan Hirota worked on TREE OF LIFE and then joined Pixomondo to oversee the effects of films such as GREEN LANTERN, JOURNEY 2: THE MYSTERIOUS ISLAND and WRATH OF THE TITANS.

How was the collaboration with director Rupert Sanders?
Most of our collaboration with Rupert came through Cedric and Phil (the film VFX supervisors), however we did speak with him a couple of times. Rupert had a fantastic visual sense and ability to express it.

It’s his first feature film. How was his approach about VFX?
While it might be his first feature he’s had extensive experience directing commercials so he’s familiar with the VFX process. His approach was to have a fantastical component and/or idea and then aside from that conceit execute it in as realistic a manner as possible.

Can you tell us more about your collaboration with Production VFX Supervisor Cedric Nicolas-Troyan?
Cedric was great to work with. He was very straightforward and would quickly let you know if something was working for him or not. His long tenured relationship with Rupert gave him great insight into what Rupert was after and his own background as an artist allowed him to provide meaningful feedback.

What Pixomondo have done on the show?
The prologue battle which required aside from the shattering knights, modifying the terrain so that it had a scorched earth look, extending the dark army to be many times the size of the dark army photographed, extending the kings army including the calvary.

The assault on the castle at the end of the movie, we again extended the size of the attacking force, modified to beach and cliffs to ensure visually it didn’t repeat. Cleaned up the beach so it looked untouched… Added in fireballs and firery sand explosions and then arrows as they got closer.

Once they approached the castle and breached the portcullis we composited the beach exterior and added arrows and in a number of instances increased the size of the queens army.

There were a few other odds and ends like some additional arrow work like William’s introduction where he attacks the convoy, and when the dwarf gets shot. Also we created Snow White riding on a horse for Rhythm and Hues and Bluebolt and we animated a digital Snow White and Huntsman for the wide shot of them crossing the stream.

Can you tell us more about the filming of the prologue battle?
The prologue battle was filmed over a variety of days. This complicated post as the weather conditions varied. We had to modify the plates to unify them. On days where it’s was sunny, we had to downplay the sense of direct light and add the overcast feel from the other days.

For the shattering knight shots generally we had a clean plate without a dark soldier and one with so we always had good reference for what we waned the knight to look like.

For extensive shots of the dark army they were by and large digital as was the dilapidated terrain.

How did you create the various digi-doubles?
We built them from scans and photographic reference. The models were then constructed in high detail to allow for secondary movement via cloth simulations of the chain mail and cloth flaps, hair simulations for the pony tails. We compared the detail of our model against live action soldiers lit with the same lighting and revised until we couldn’t tell the difference of the digital knights from the live actin ones.

Can you tell us how you create the huge knights army?
Once we had a good looking soldier, we created reduced complexity versions of them to allow us to put hundreds of them together. For the wide views where you see the army in it’s full extent, we used Massive and arranged the agents in their desired configuration. They are ostensibly supposed to stand still but if they had no movement they looked like statutes. So we gave them a little bit of weight shifting/shuffled/etc. The line of calvary in the back were also done in Massive. For the lower angle shots where you saw a large army, we put our additional soldiers in max and applied some motion capture or hand animation as desired.

How did you manage the tracking challenge for the prologue battle?
Tracking markers were laid out on the terrain and certain trees. Also the area was extensively surveyed and lidar’d. We gave this information to our tracking team who did a fantastic job of solving for the camera.

Can you explain to us in detail the creation of the impressive effect of shattering knights?
Based on the description and artwork of what was desired, we knew from the start we weren’t going to be able to approach this with just a run of the mill rigid dynamics system. It was important for the art and gravitas of the event that the knights shatter in a very specific characteristic while also accurately preserving it’s volume and at the same time have a very specific type of shard shape for the final component. After the initial cut which breaks the knight along the force vector, the pieces have secondary and tertiary fracturing until the knight is reduced to it’s smallest shard components. It was important to the design of the system that the shatter be flexible enough allow the animators to change the animation of the knights or the strikes and then return a simulation in a reasonable amount of time to allow us to run iteration after iteration. Dynamic simulations are unpredictable by nature and without something like the shattering system Pixomondo developed inside max with thinking particles we wouldn’t have been able to convey the shattering in such an interesting and stylized way.

Can you tell us more about the final battle on the shore?
For the final assault on the castle, we started by extending the live action photography of Snow White and her army by extending the soldiers and riders to look like a large force. As they rode towards the castle, we added digital horses and soldiers as well to keep the size and scope of attack on a grand scale. We digitally redressed the beach to make it seem like a wider expanse. Bluebolt provided us precomps with the castles and we then also added arrows and fireballs launched from trebuchets.

Additionally, Pixomondo contributed to the final assault on the Queen’s castle toward the end of the film. Sharing work with BlueBolt, who created the castle, Pixomondo enhanced the battle by adding arrows, archers and fireballs. It digitally redressed the beach to make it seem like a wider expanse and supplemented the armies with digital soldiers and horses that amassed on the cliff overlooking the castle. Blending the digital VFX with practical effects, Pixomondo augmented real-life explosions in the sand and fireballs thrown by the trebuchets with CG simulations that matched their practical counterparts, blending in pieces of the practical elements wherever possible.

How did you augmented the explosions on the shore?
We augmented the real-life explosions with simulations of sand and fire/explosions. Also the fireballs would trail some light smoke that needed to be blown out of the way by the explosions.

How did you collaborates with other vendors on this show?
We needed our shards to match with Double Negative’s. While they didn’t have to be absolutely identical as they played out slightly different in each scene you needed to know it was part of Ravenna’s dark magic. Double Negative had created some turn tables of shards that demonstrated their shading characteristics which was that of a black shiny obsidian glass, and their sharp dangerous shapes. We took care to ensure as our soldiers devolved they broke down into those component shapes.

Since we were already doing horses, Cedric and Phil thought it made sense for us to create an element of Snow White riding on her white stallion. We create one element for Rhythm and Hues to use in their shot of Snow White approaching the dark forrest and another for BlueBolt to use when Snow White first escapes the castle and rides towards the village.

The were a handful of shots where we needed to incorporate work from Lola. We would use their work as a replacement for the scan when it was approved.

BlueBolt created the digital castle so on shots with our work and the castle we would receive their precomps with the castle integrated and we’d add out effects.

Lastly there were a handful of shots where we received a plate from Lola where they replaced snow whites face. We took that plate and digitally hid the huntsman and then handled those comps to Baseblack to extend the calvary.

What was the biggest challenge on this project and how did you achieve it?
The biggest challenge was creating the dark army and implementing their shattering in an manner that was both pleasing artistically but also realistic in it’s physical behavior. Implementation detailed above.

Was there a shot or a sequence that prevented you from sleep?
I don’t know if anything prevented me from sleeping, but we did spend quite a bit of time working out variations and tweaking the look of the shattering before we converged on a solution.

What do you keep from this experience?
I enjoyed very much the experience of collaborating with Rupert/Cedric and Phil Brennan. They all brought unique ideas and this movie has such a strong aesthetic running through it, that I’m really pleased with both the final results and the working experience.

How long have you worked on this film?
We worked on the movie for about seven months.

How many shots have you done?
About 270 shots.

What is your next project?
I am not in a position where I can talk about it yet, but I am very excited about it and can’t wait until I can.

A big thanks for your time.

// WANT TO KNOW MORE?

Pixomondo: Official website of Pixomondo.


© Vincent Frei – The Art of VFX – 2012

PROMETHEUS: Martin Hill – VFX Supervisor – Weta Digital

Martin Hill began his career in VFX at Double Negative, where he worked on films like BELOW, THE CHRONICLES OF RIDDICK or BATMAN BEGINS. He then joined Weta Digital for KING KONG. He worked on many projects like ERAGON, AVATAR, RISE OF THE PLANET OF THE APES or THE ADVENTURES OF TINTIN.

What is your background?
Originally I studied Architecture, then Mathematics at University of Edinburgh and then an MSC in computer animation at Bournemouth University. After graduating I worked at Double Negative for four and a half years before joining Weta Digital as a TD on KING KONG, after which I spent 5 years as the Shader Supervisor which included films such as AVATAR and THE ADVENTURES OF TINTIN. PROMETHEUS is my first show as one of Weta Digital’s Visual Effects Supervisors.

How did Weta Digital got involved on this show?
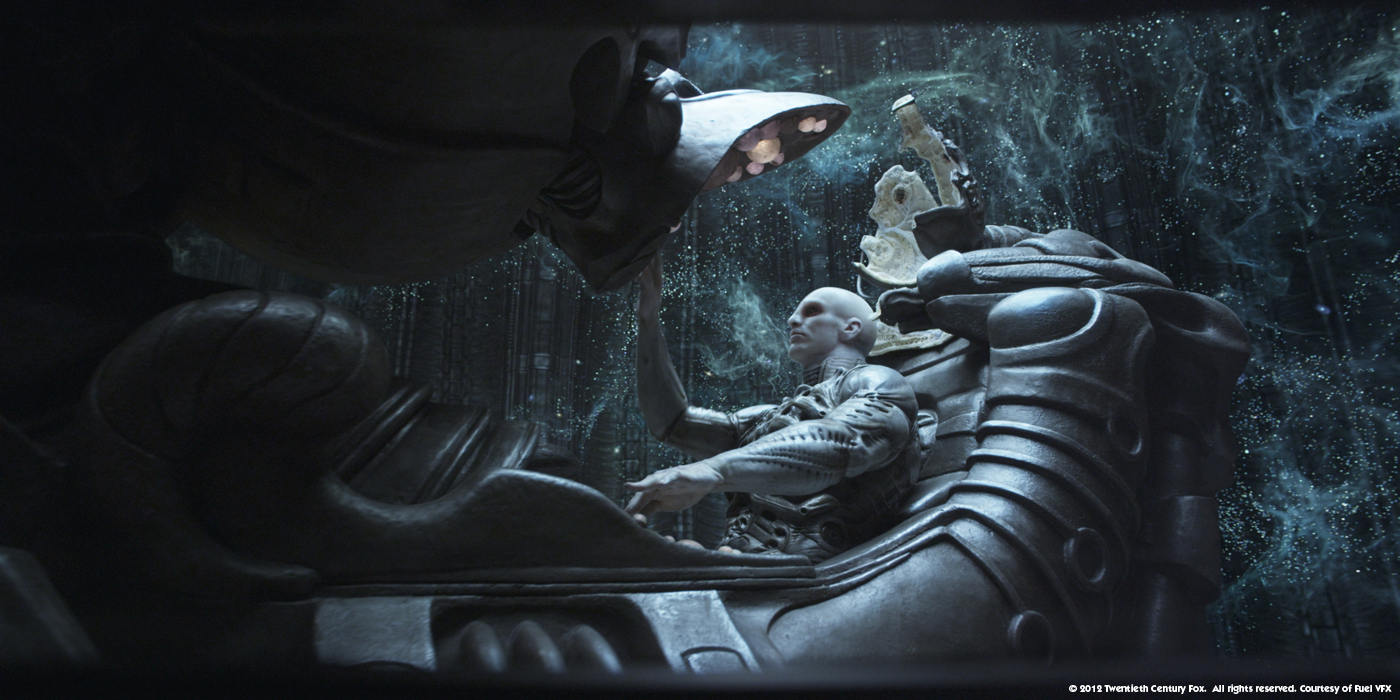
We were first approached in December 2010. Ridley had an early design for the engineer and had a maquette which he lit, put on turntable, shot some footage and sent it to us to see if we could match it. We built the model digitally from scans, recreated the material properties of the skin and added a facial rig so that we could articulate the model and bring it to life. The results gave Ridley the confidence to pursue using digital creatures for the film.

How was the collaboration with director Ridley Scott and Production VFX Supervisor Richard Stammers?
Ridley has a really strong vision in terms of what he wants, but is also very open to have ideas presented to him, so we were able to get involved with the design process and how creatures would move and look on some of the sequences. In some instances there was a creature that already had a maquette built and had a design which we would match and enhance to make sure it was able to articulate in a realistic way, where a puppet was more rigid or unnatural. In conjunction with Richard Stammers we were able to collaborate and design the vision that Ridley wanted.

What was his approach about visual effects?
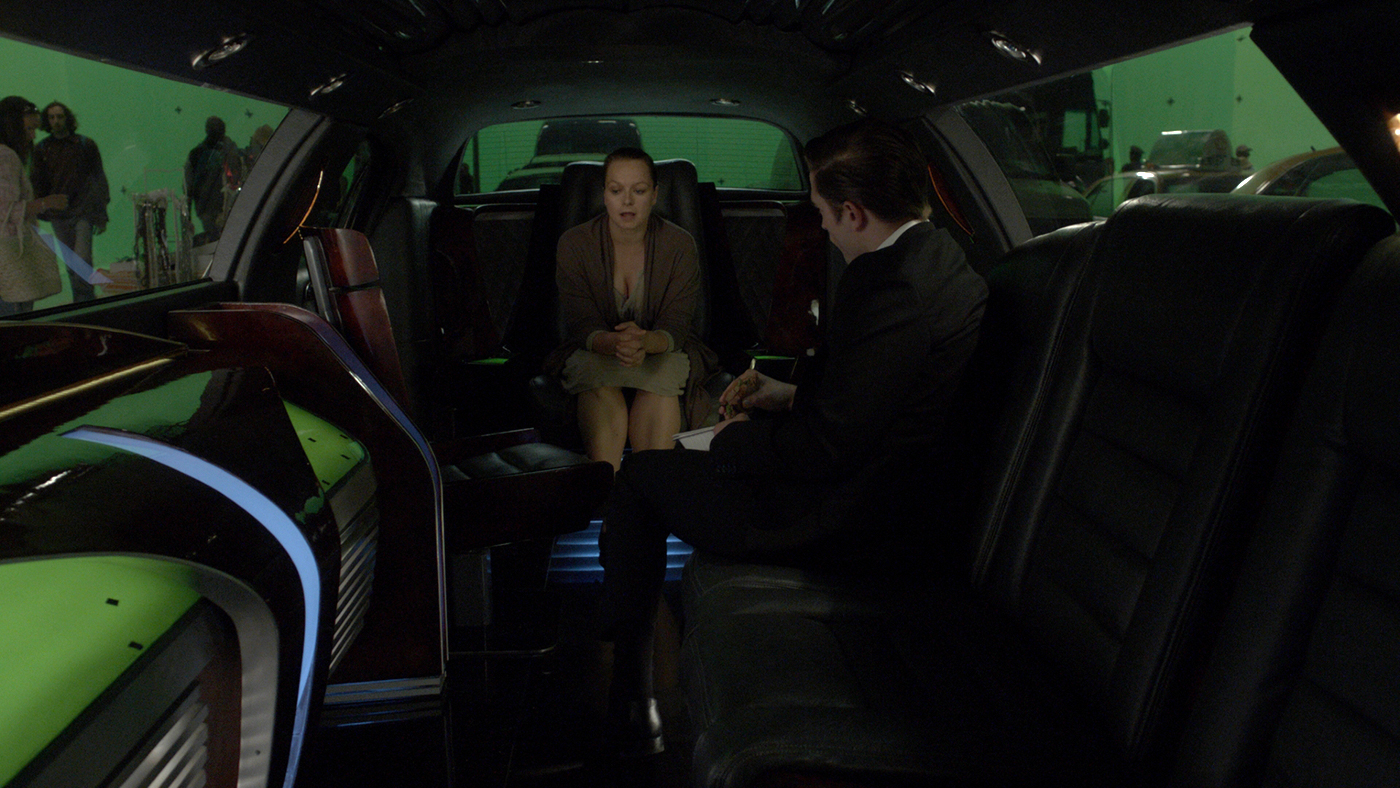
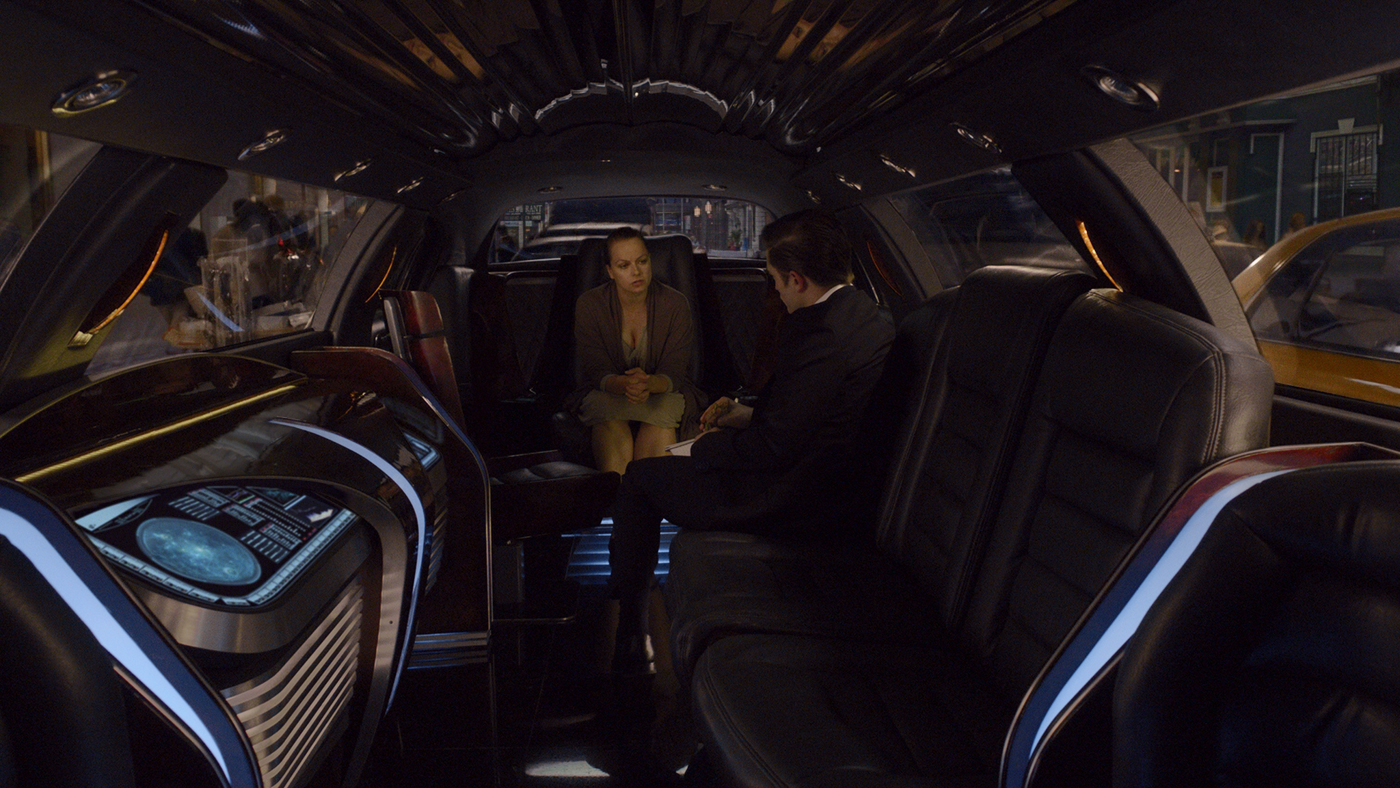
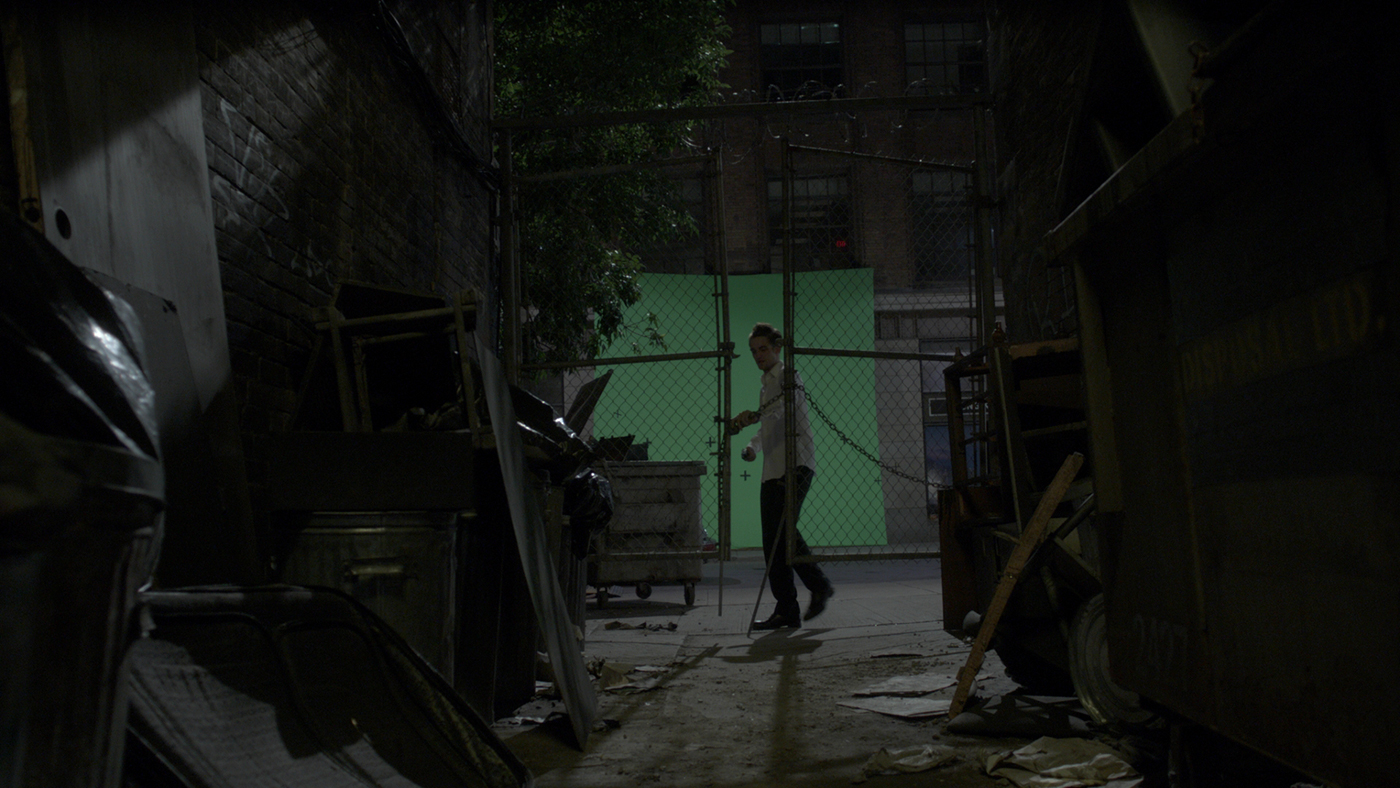
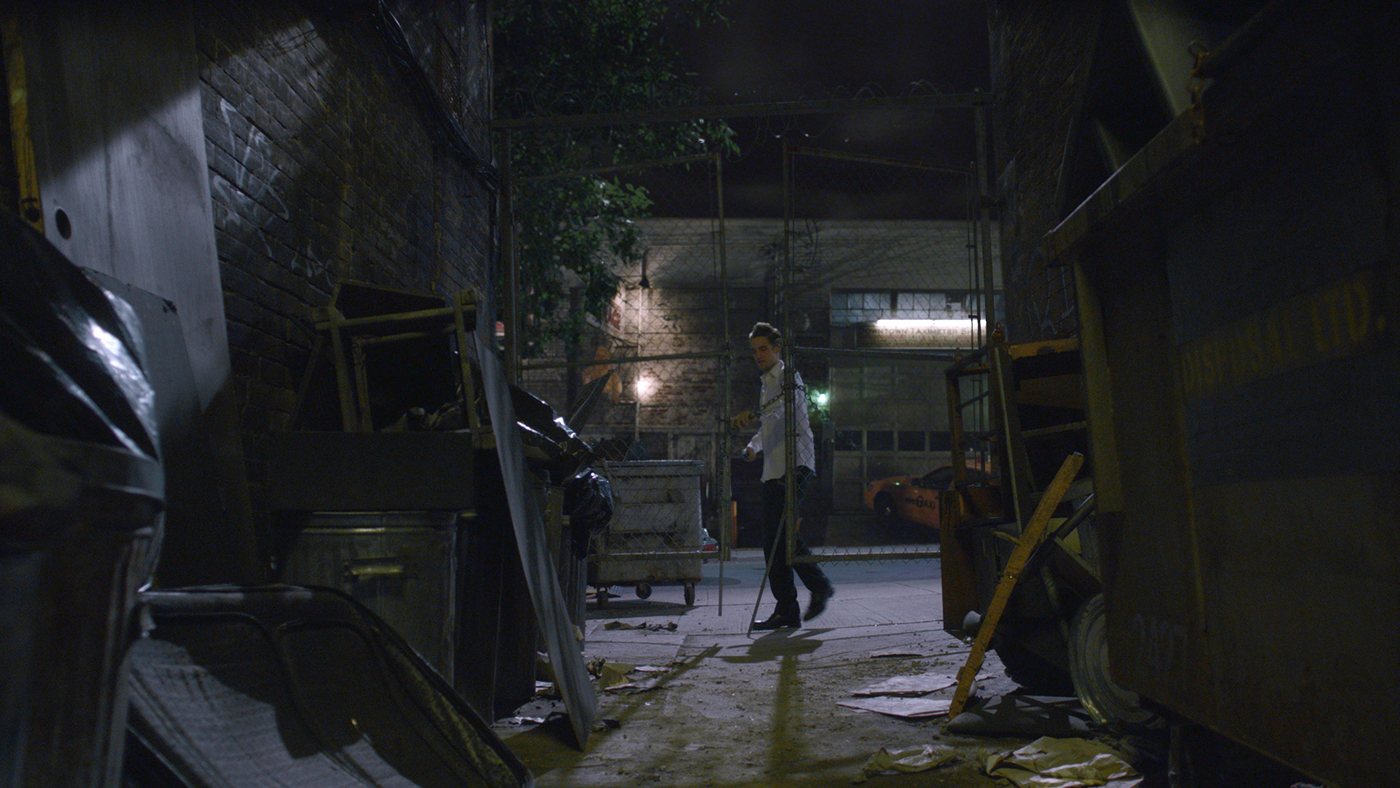
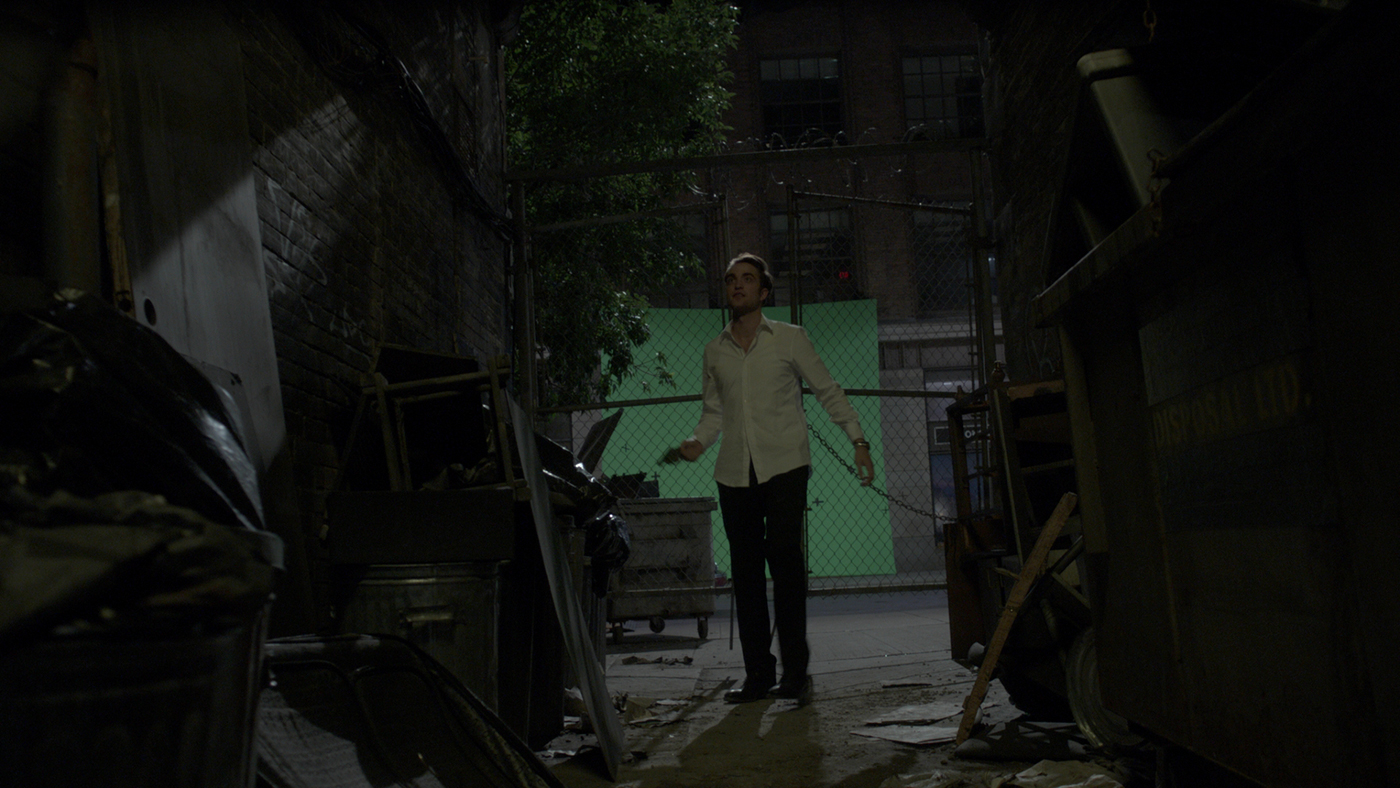
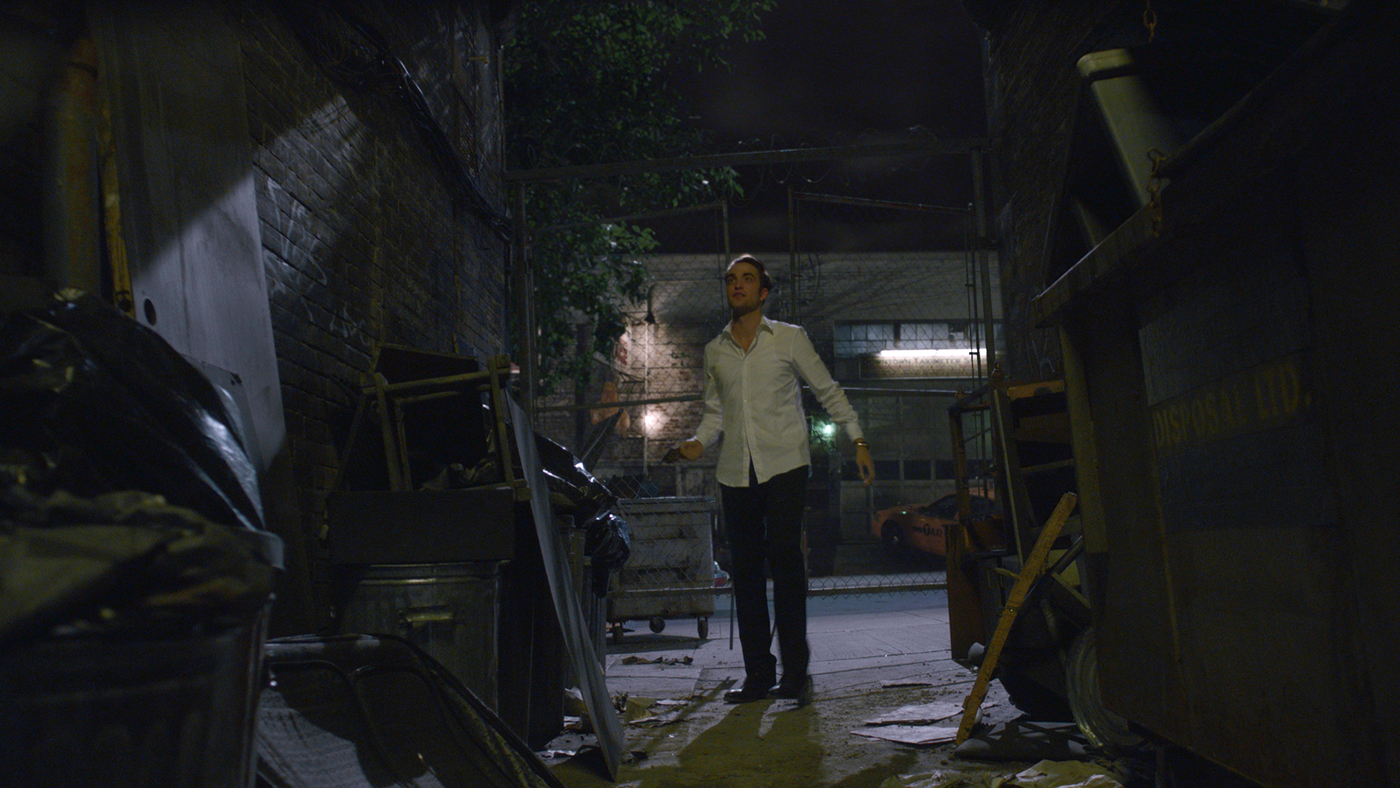
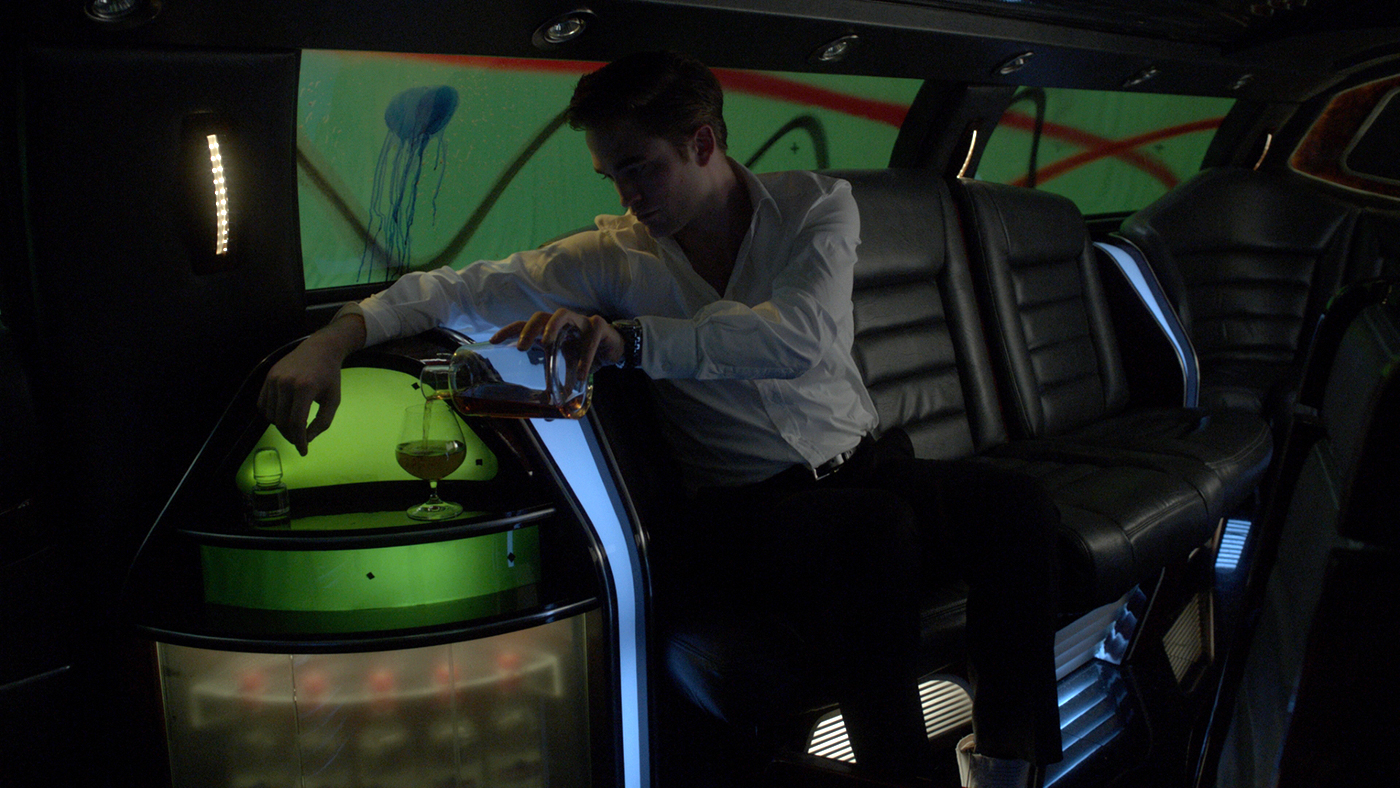
Ridley likes to shoot as much practical as he possibly can; he much prefers to capture in camera than use CG. This has a lot advantages because it means that his images are real, his actors are responding to real events, not to green screen. It also means he can direct in the style he is used to. As much as possible, even when it was clear we would be replacing something digitally, he would have a physical maquette built – something tangible and real – which would help with the design process.

What have you done on this movie?
We worked on the opening sequence with the transformation and destruction of the engineer and his DNA, the medpod scene with the C-section of the trilobite, a fully digital Fifield monster, the engineer vs trilobite fight, the ‘birth’ of the deacon and the reveal of the Pilot’s Chair, and numerous spot effects and set extensions.

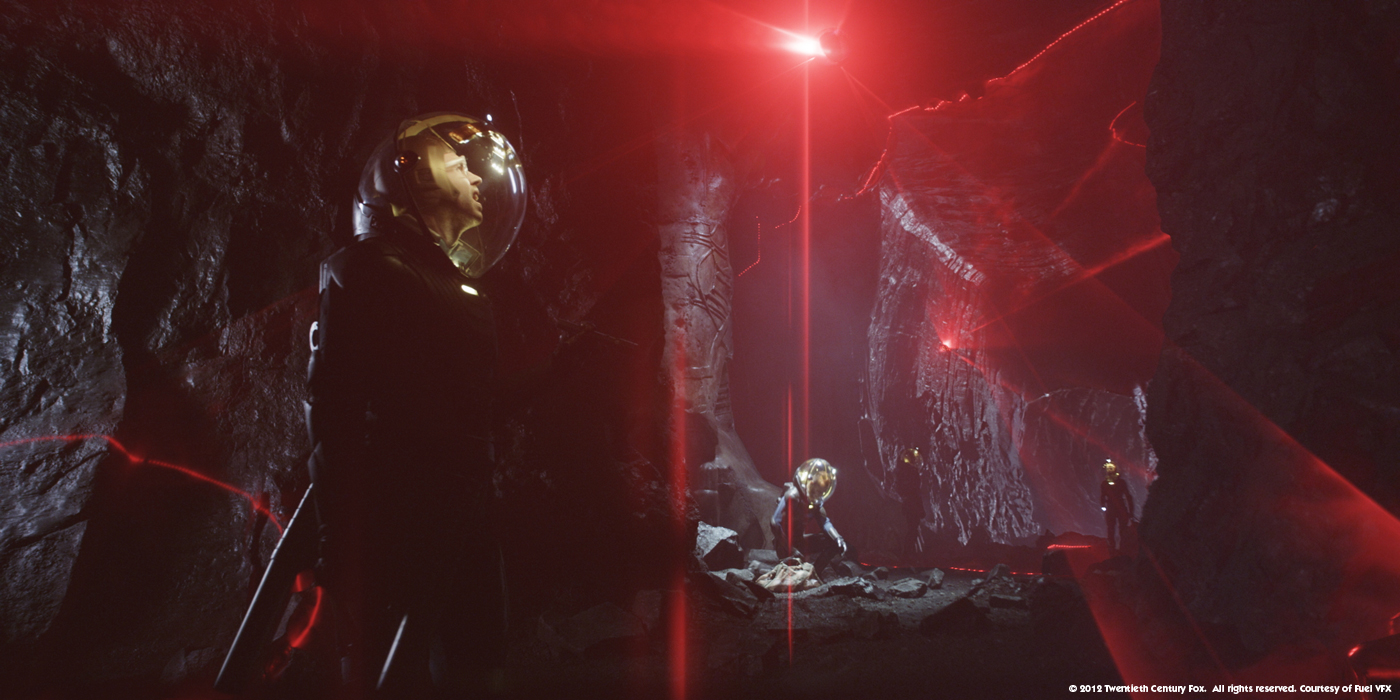
Have you enhanced the beautiful environments of the opening sequence?
The Dettifoss Waterfall is a beautiful location, which really didn’t need a lot of enhancement, so we did mostly interaction work, for example replacing the sky where the ship flies through the clouds disturbing them. There was a lot of grade work by Christoph Salzmann, the comp lead of this sequence. We also had to paint out a man walking his dog! We did have to recreate part of the waterfall when the engineer splashes in. We couldn’t throw a practical element into the waterfall for the interaction as it’s a place of natural beauty. We had to digitally recreate the flow and choppiness of the waterfall digitally to be able to simulate the splashing and interaction of the engineer.

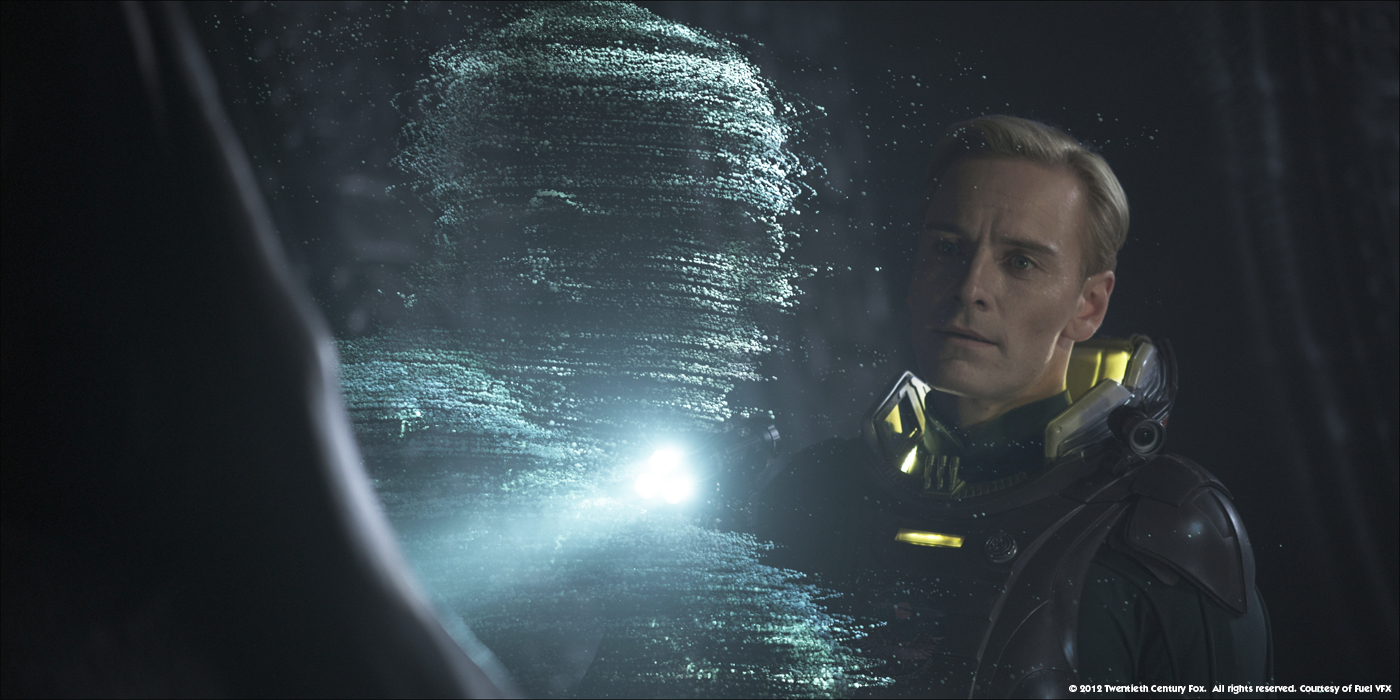
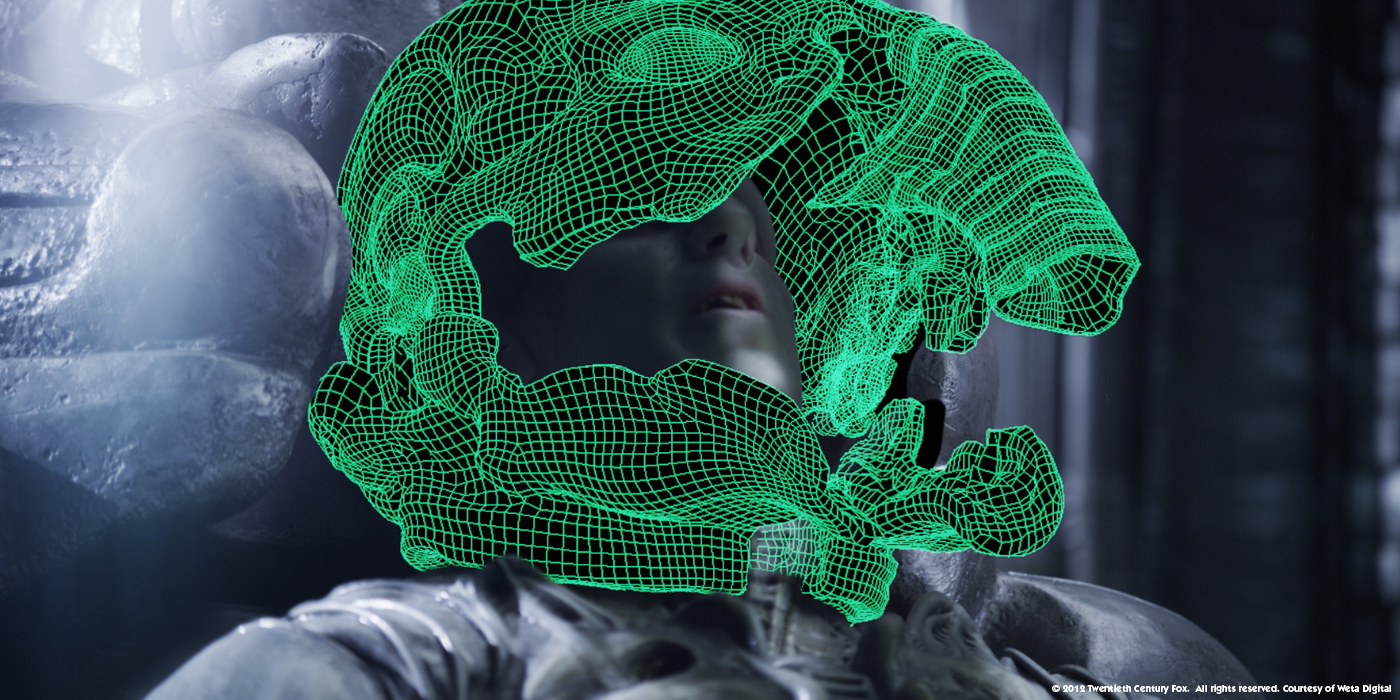
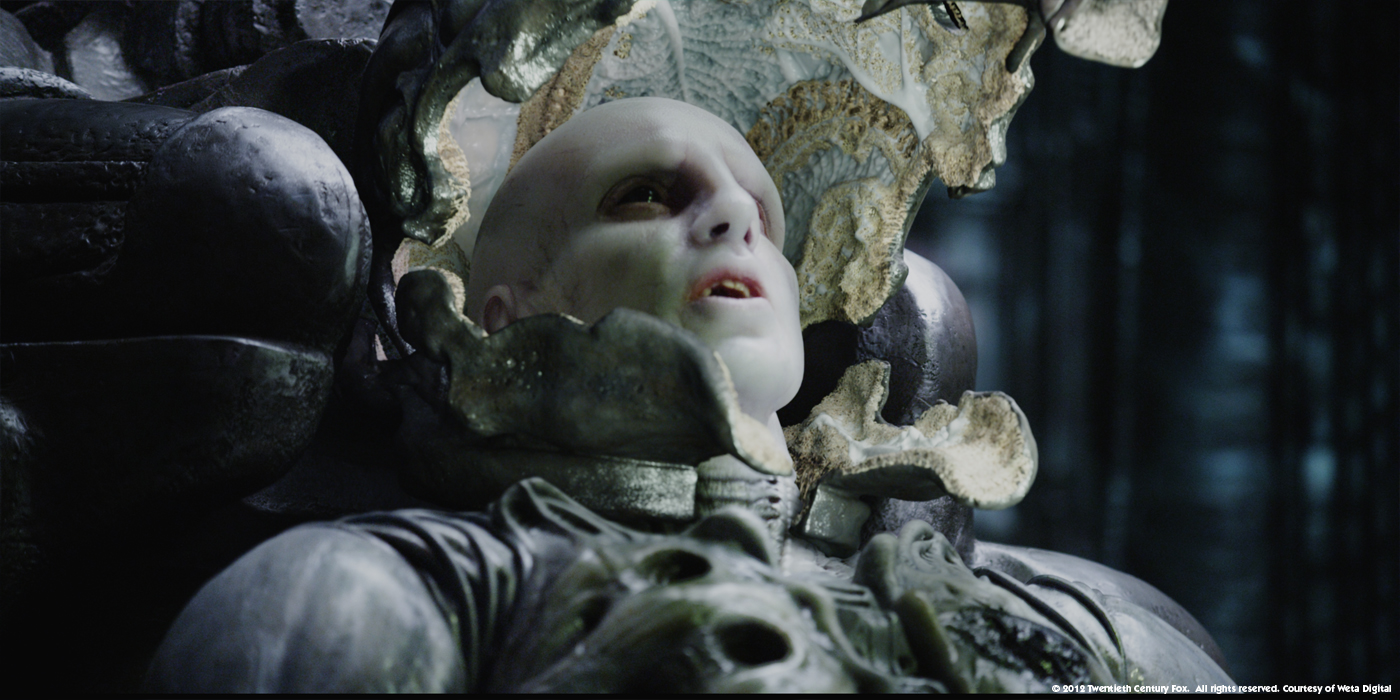
How did you create the digi-double for the Engineer?
The engineer had unique challenges. Usually we would strive to make a digi character as anatomically accurate as possible in terms of its musculature, articulation, and the thickness and pliability of the fat under the skin. For continuity with the practical plate we had to make some compromises to match an actor in silicone prosthetics. For example, because the silicon was so thick, we needed to increase the depth of our subsurface vastly, which causes problems with light bleeding through areas like the bridge of the nose and the fingers, making him look waxy. To counter this we added an extension to our TDQ subsurface plugin written by Eugene D’Eon, which added internal blocking structures to the model. Our creature’s supervisor Matthias Zeller had to augment our muscle system to make some of the muscle contractions and tendons less pronounced to match the performance on set.

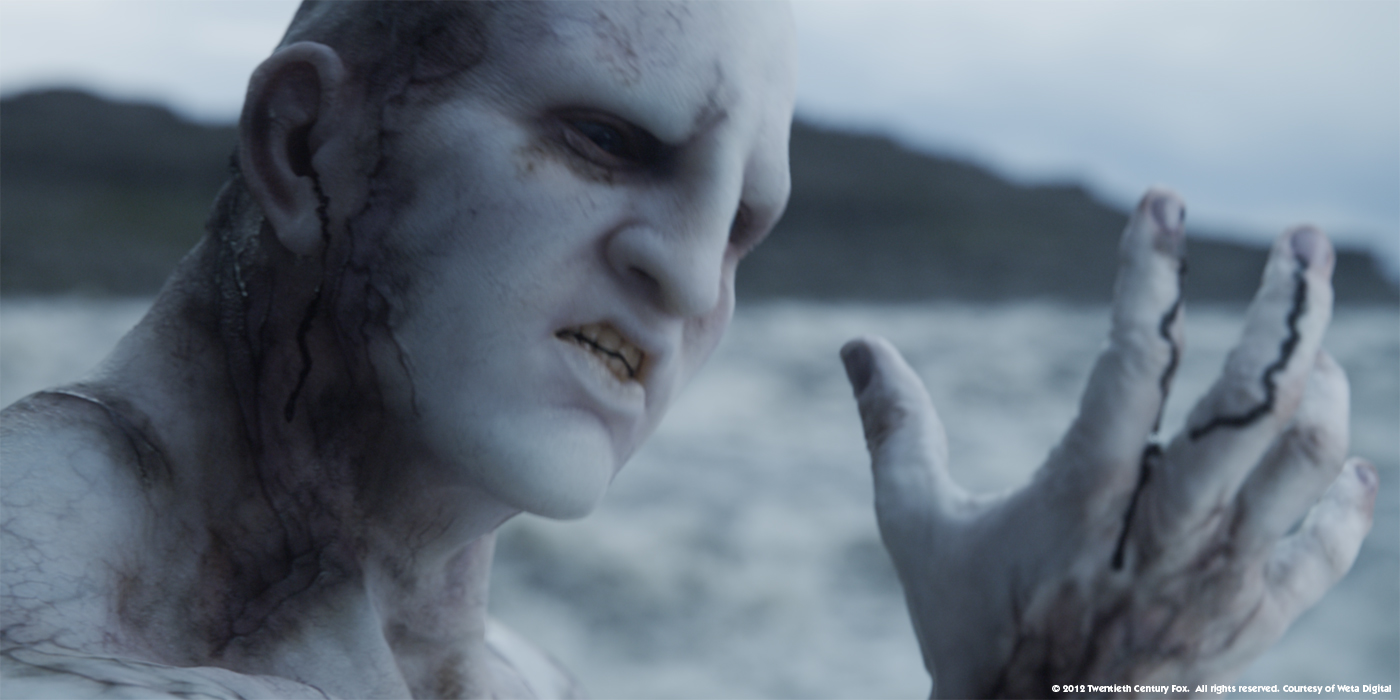
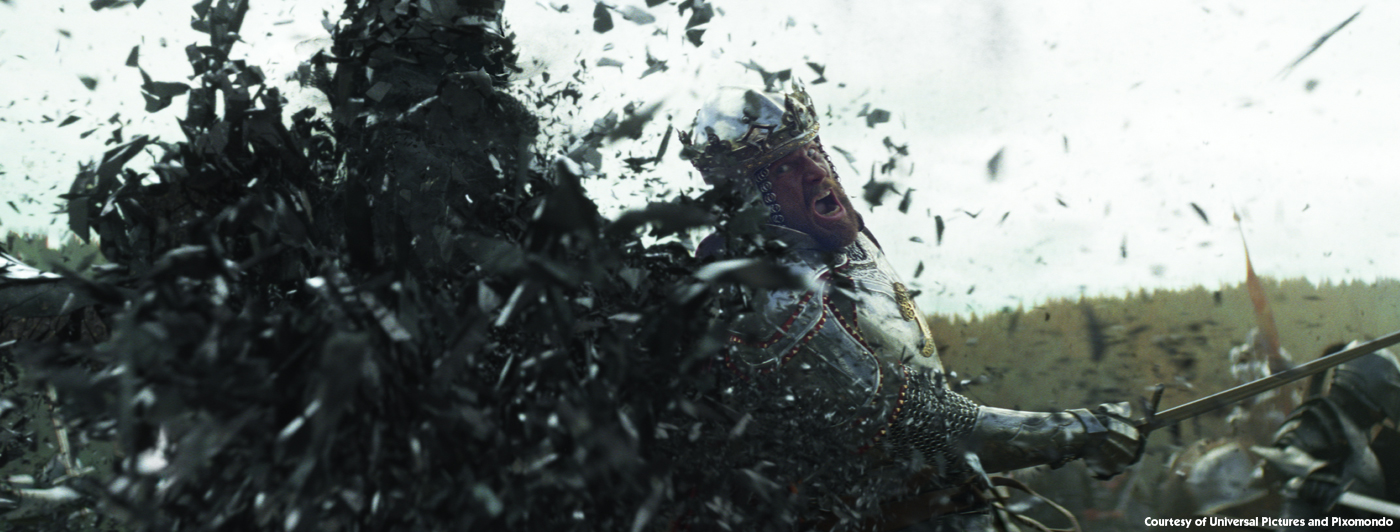
The Engineer got contaminated. How did you design it and create this effect?
Taking Ridley’s lead, we endeavoured to use as much reality as possible. We shot a lot of practical elements that we used either directly in our comps, or indirectly as driving mechanisms for a more natural texture, feel and motion.

The effect needed to be aggressive and visceral, whilst still looking plausible. It also had to keep escalating, each shot being visibly more advanced than the previous. For the start of the disintegration, the black goo the engineer drinks is swiftly transported around his body using the vein and nervous system. We took silicon blocks, carved vein structures into them and pumped through oils and inks. We backlit and filmed these elements which were then post processed and used to drive procedural shaders that created the displacement and colour of the effect, and also secondary effects such as bulging veins which would become materially more specular. The same elements processed with a delay would also drive bruising and bursting capillaries. This effect was led by CG supervisor Thelvin Cabezas and Shader Writers Remi Fontan and Chris George.

As the effect increased, the skin would dry out and become cracked. Again we used practical filmed elements (such as drying paint and clay) as drivers for the digital cracking effect and the skin becoming hard and leathery. The same elements were also used to drive sculpted atrophy deformers of the engineer created by Models supervisor Florian Fernandez’s team. Having multiple layers of the effect driven by the same mechanisms, helped create the natural feel.

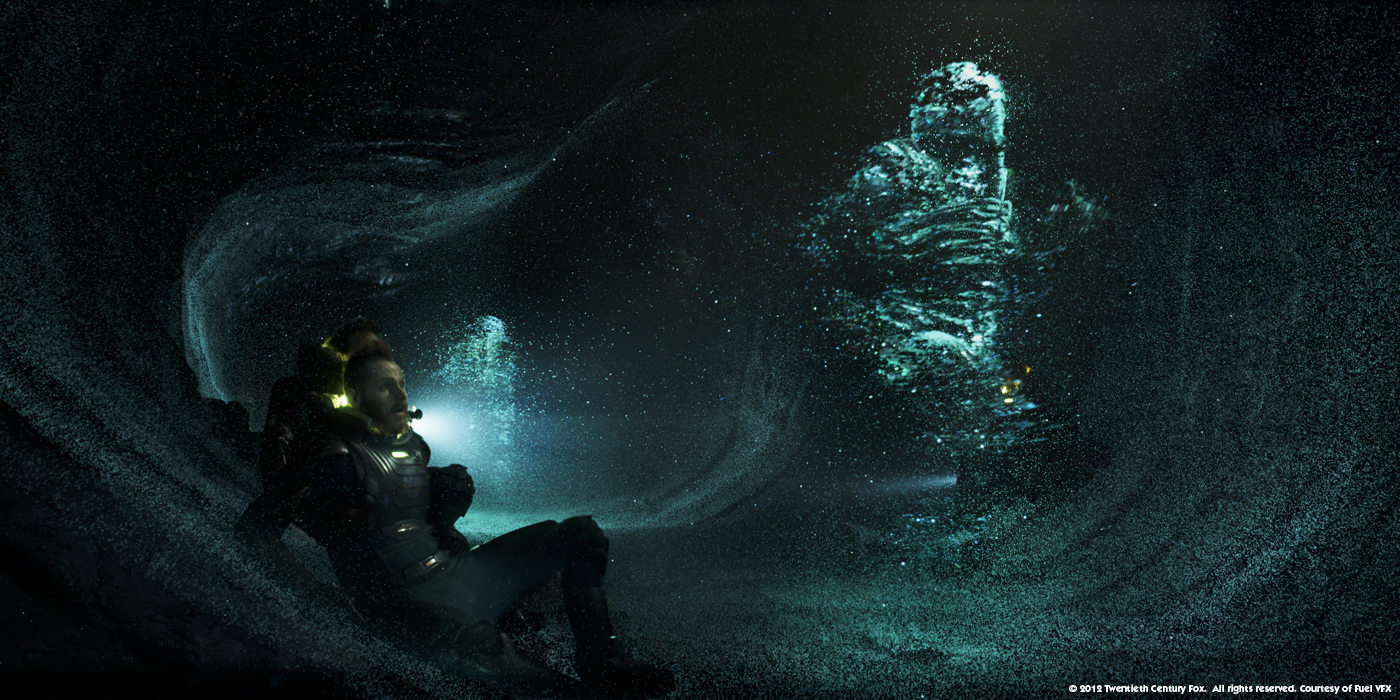
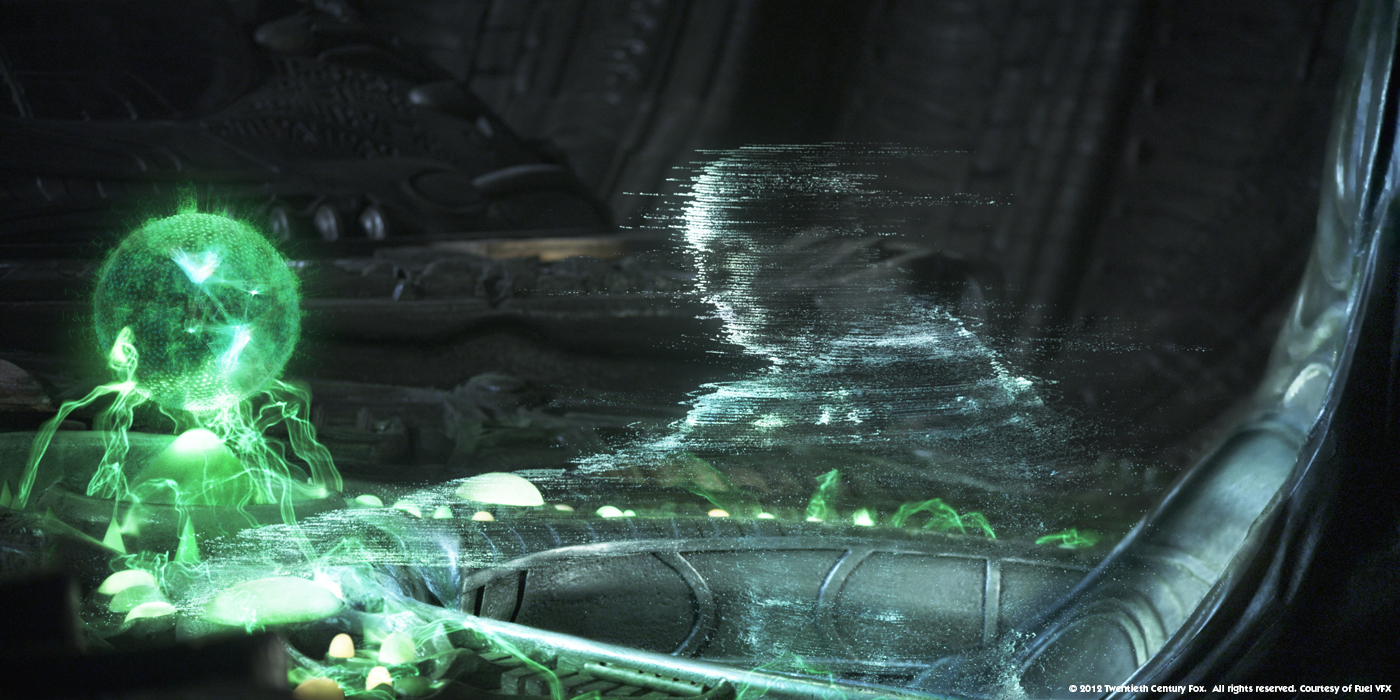
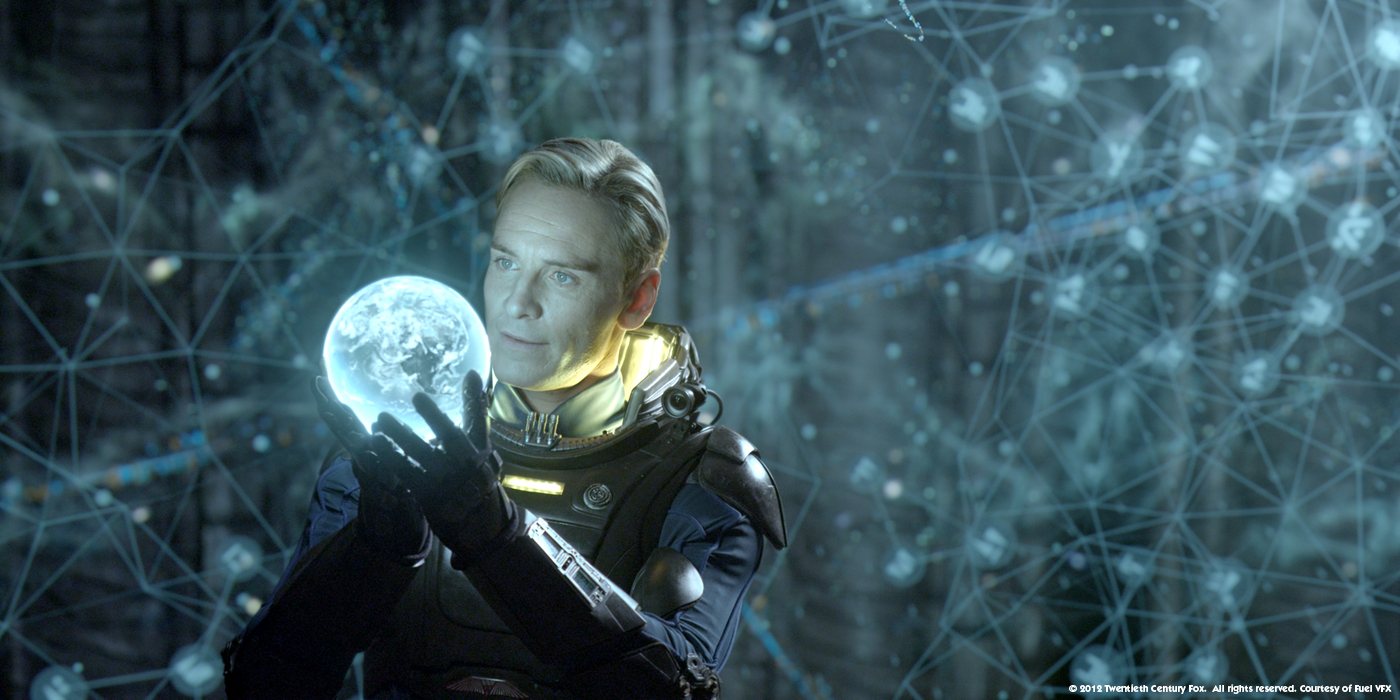
Can you tell us more about the shots showing the transforming DNA in the water?
We had to design three types of DNA. The engineer’s DNA, the infected DNA and the ‘Earth’ DNA. We got a first brief from Ridley about the first DNA transition in which he said ‘It’s like war in there’. For the engineer, we had to create quite a sinister looking DNA for which we used fish spines/bones as practical reference. They are very translucent and so you really get the contrast with the infection. For the infection we based it on some practical animations using melting polystyrene to give it its infected look and animating shader work by Masaya Suzuki.

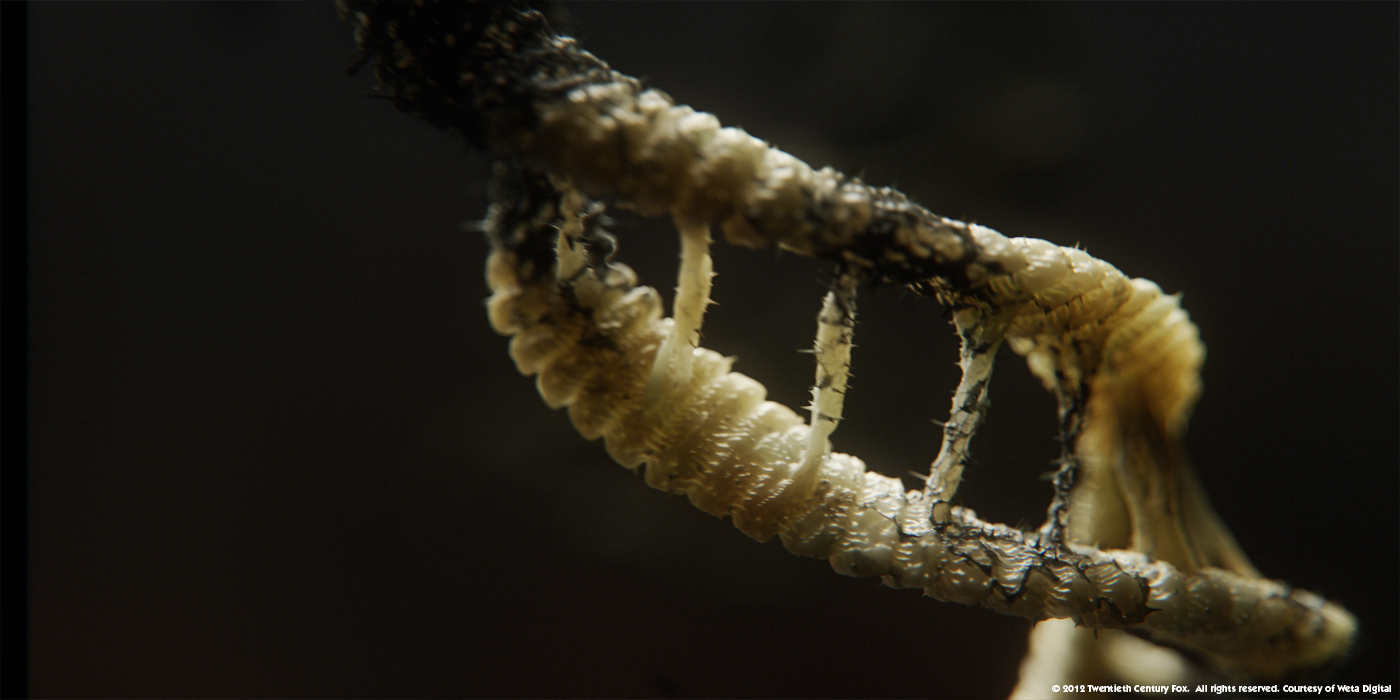
As we enter the arm, we travel through a very large particle sim for the blood and internal structure of the veins of the arm until we get down to the cellular level, where we can actually run along the strand of DNA following the infection until the DNA is smashed apart, using a rigid body sim by FX TD Francois Sugny.

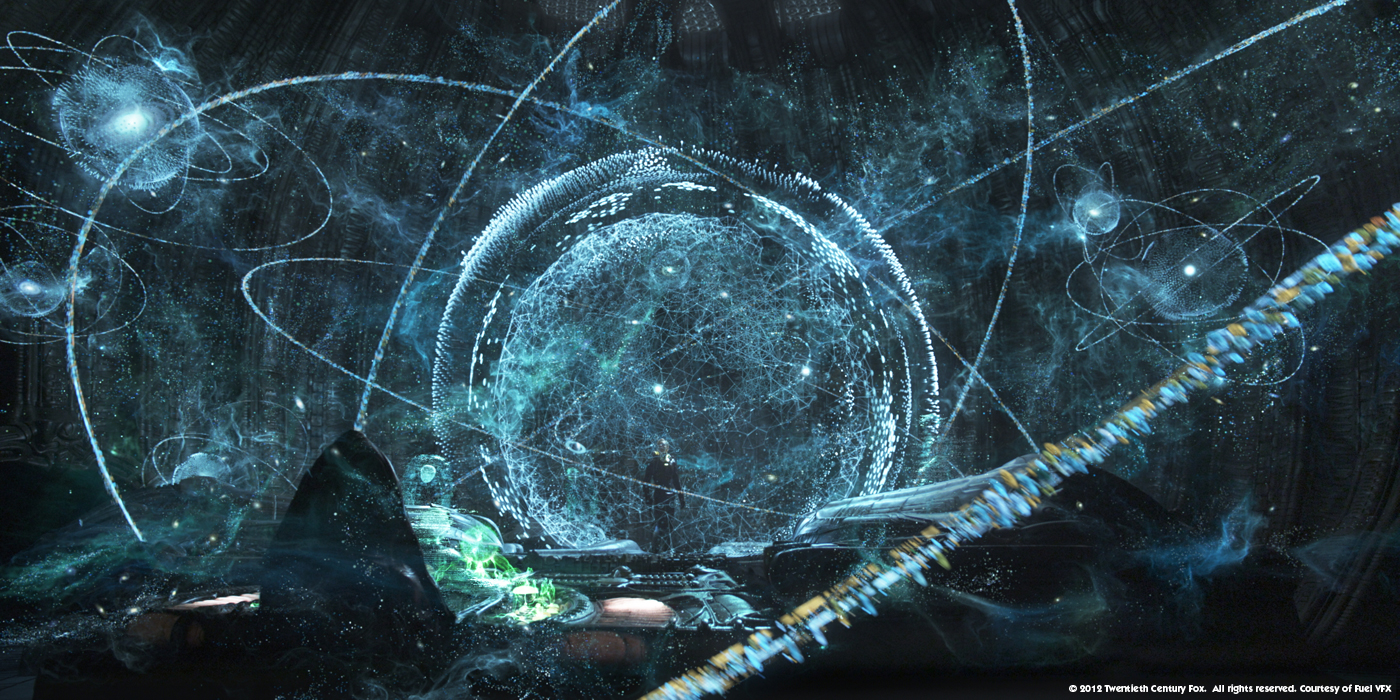
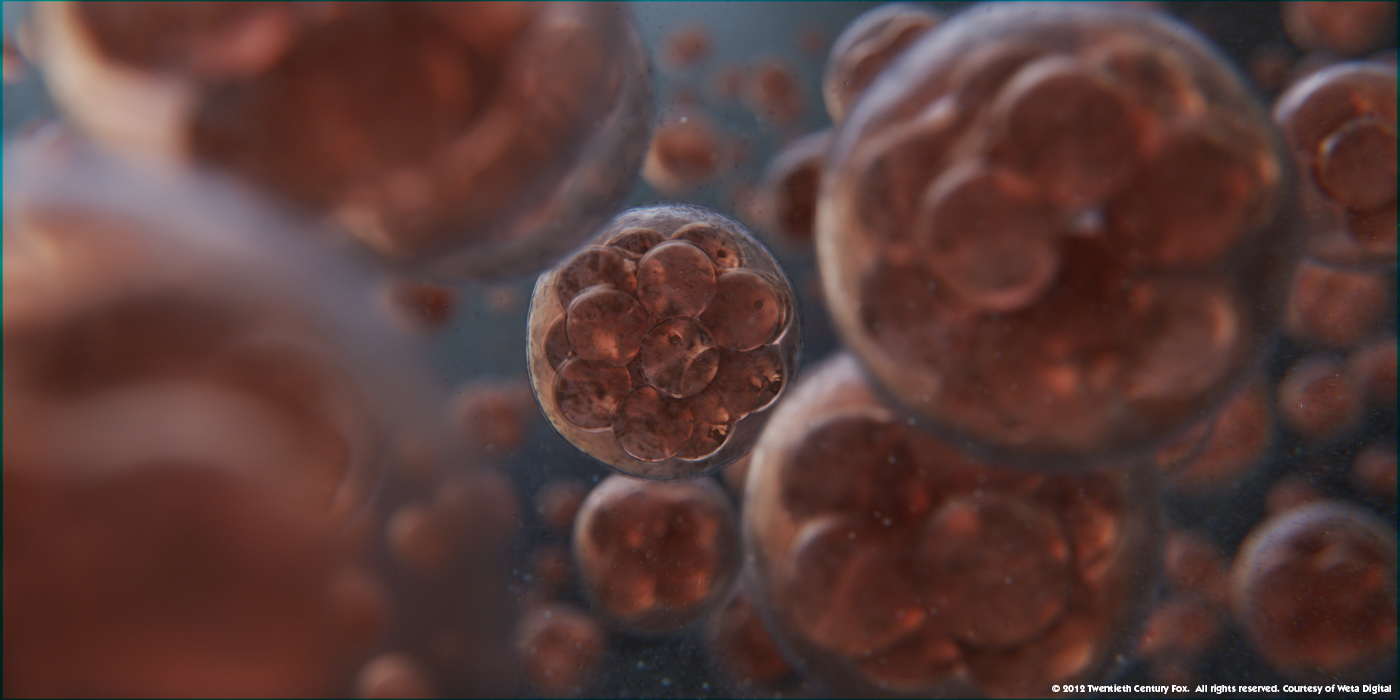
The second DNA sequence uses the broken pieces from the first in a particle system in a very different colour palette. The first DNA sequence is very dark and destructive in tone, the second has much warmer tones and is all about rebirth and having the broken part of DNA reforming into a softer looking DNA structure, from which we refocus out on to the cells undergoing mitosis which were animated with a tight collaboration between the animation team and secondary procedural animation by FX TD Brian Goodwin within Houdini.

What was your collaboration with Neal Scanlan’s teams for the creatures and especially the Trilobite?
Neal’s team built a fantastic animatronic for the baby trilobite. It had a huge amount of articulation and it was very flexible with a very organic looking motion to it. This was used directly in quite a few shots and gave us a really good foundation for where we needed to replace the trilobite digitally.

We took the cast of Neal’s teams’ models for the internal and external structure of the baby trilobite, rebuilt these in CG and rigged the trilobite digitally in the same way as the armature. This meant that we were able to get the same range of motion but we could also perform more precise and extreme poses than was possible with the practical model. Basing our digital model on the prosthetic made it easier to cut seamlessly between the digital model and the practical model.

The Med pod sequence is really intense. Can you tell us about the medical instruments that operate on Elizabeth?
Ridley wanted the machinery to move in a disconcerting and sinister way. We looked at reference of the motion of industrial machinery such as car manufacturing robotic limbs, and motion control cameras – particularly the way the camera head can keep completely still and controlled while the rest of the machines limbs are moving furiously around.

We augmented motion slightly to make it a little bit more sinister, often having more tools than were necessary for the shots medical procedure to create some extra claustrophobia. To give the stapler more impact we added some elements from pneumatic drills, making the whole shaft move to make the tool seem more forceful and give it more weight. Alfred Murrle and Phil Leonhardt’s team digitally projected Noomi’s body in a 2 1/2D way onto the matchmove geometry so that we could compress where the stapler was punching into her, the staples take some time to settle back to their rest state.

Have you create a digi-double for Elizabeth?
We created two kinds of digital doubles. One was for the match moves for the trilobite fight at the end – we needed to be able to wrap the creature’s tentacles around Noomi’s legs so we needed a full digital model which animation could pose the trilobite to, and also our creature deformers had something to grab hold of to know where Noomi was in 3D space so it could press against her body.

For the med pod sequence we needed a high-res geometry for her torso for which we could cut open, stretch and deform as the trilobite is pressing against her skin from the inside, for which we re-projected the plates back on to. The team then re-applied the specular highlights to match the augmented motion.

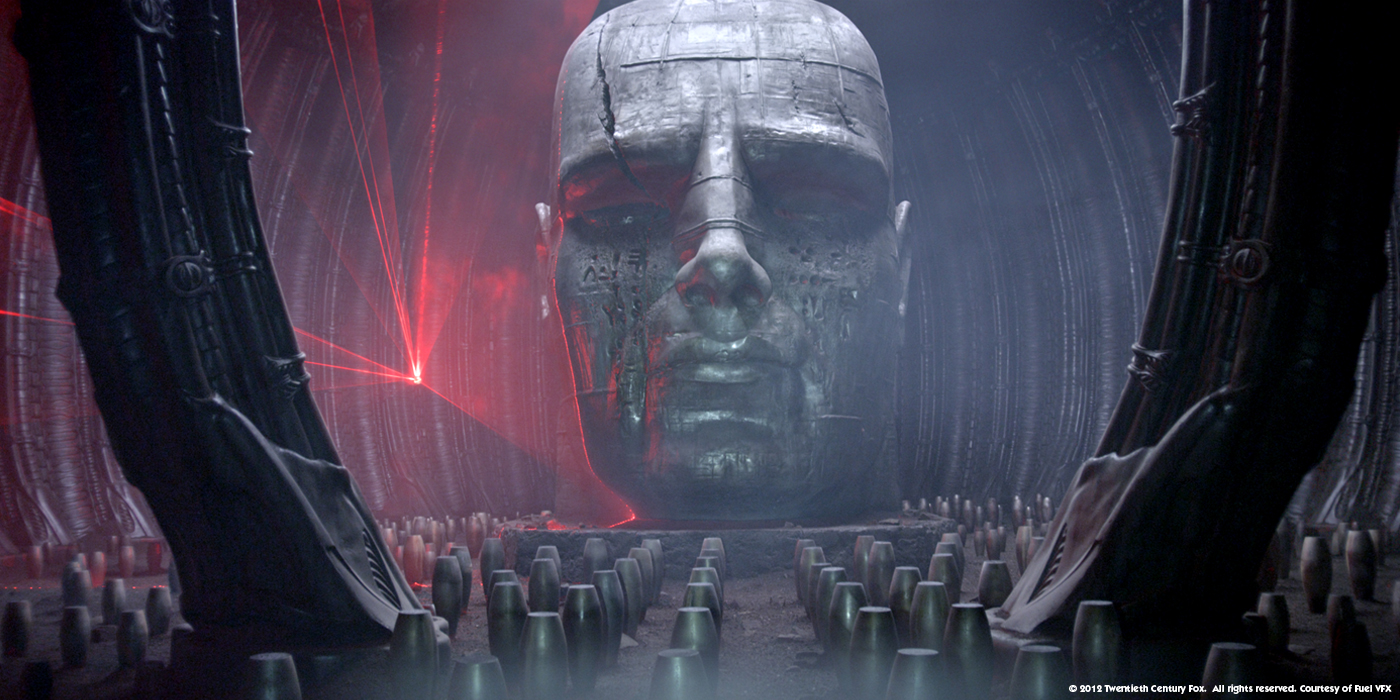
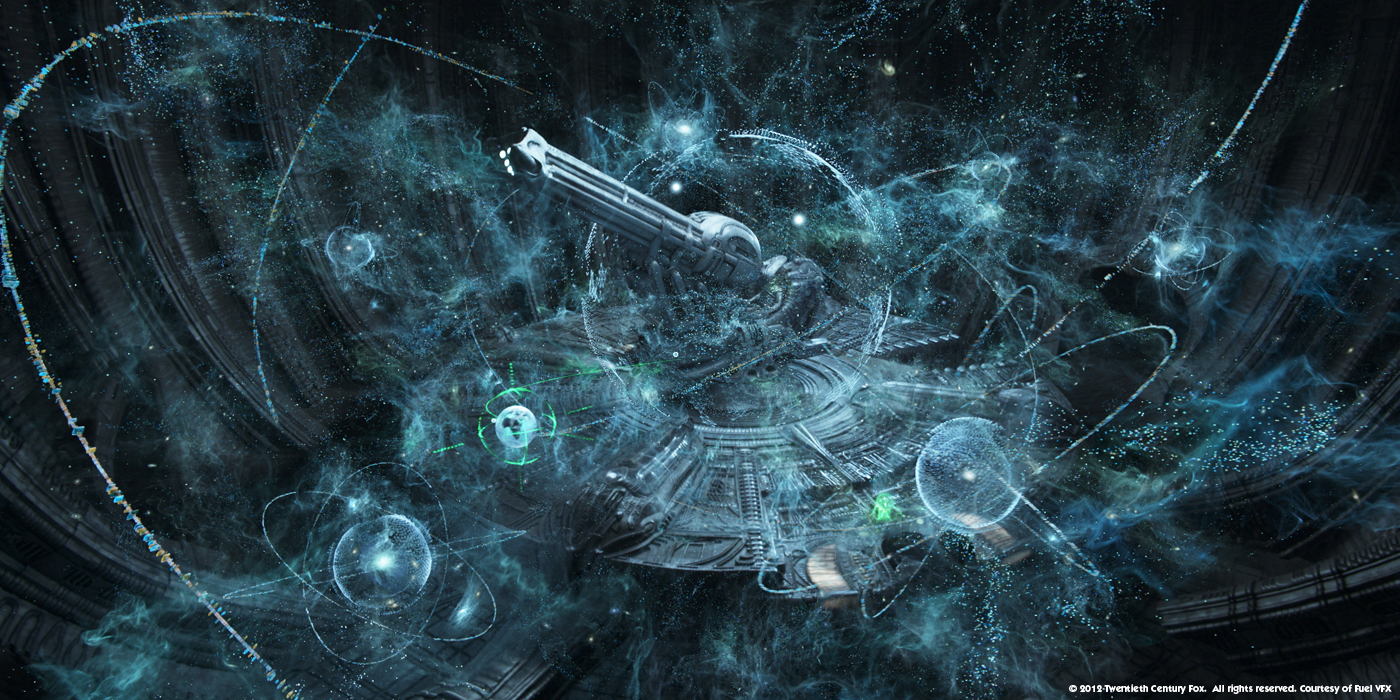
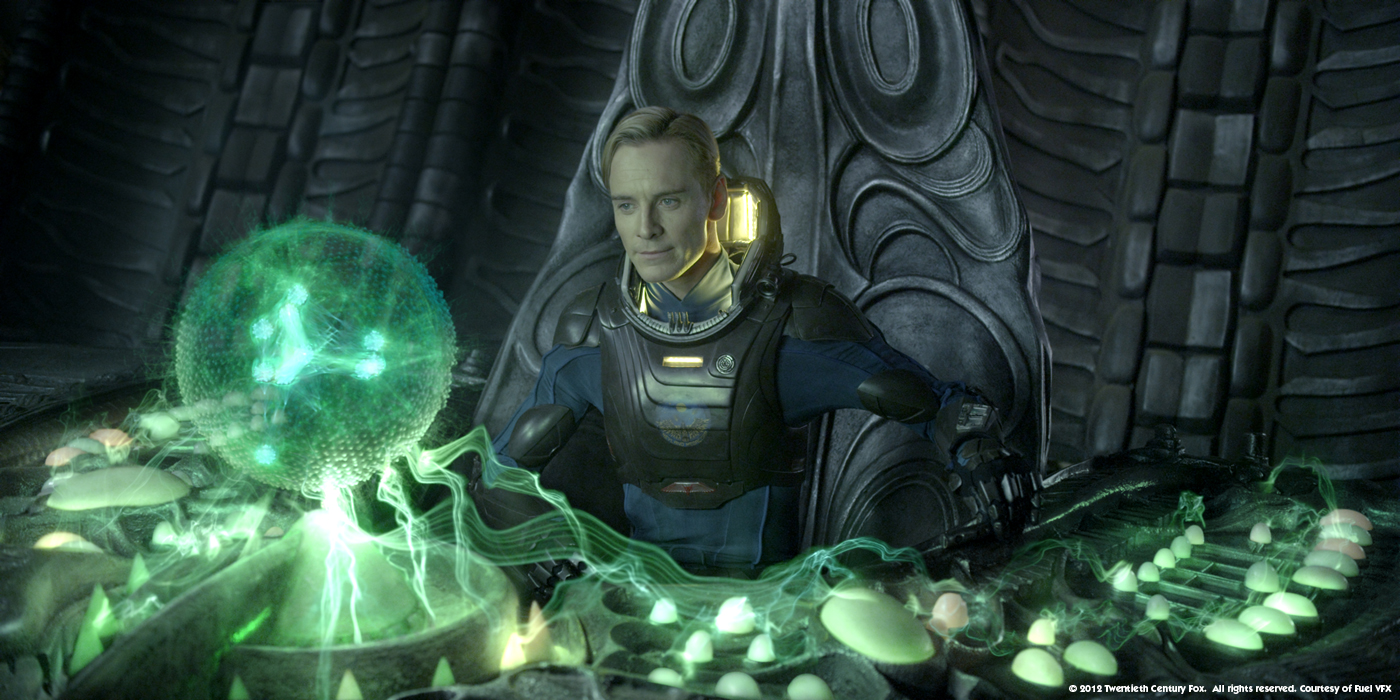
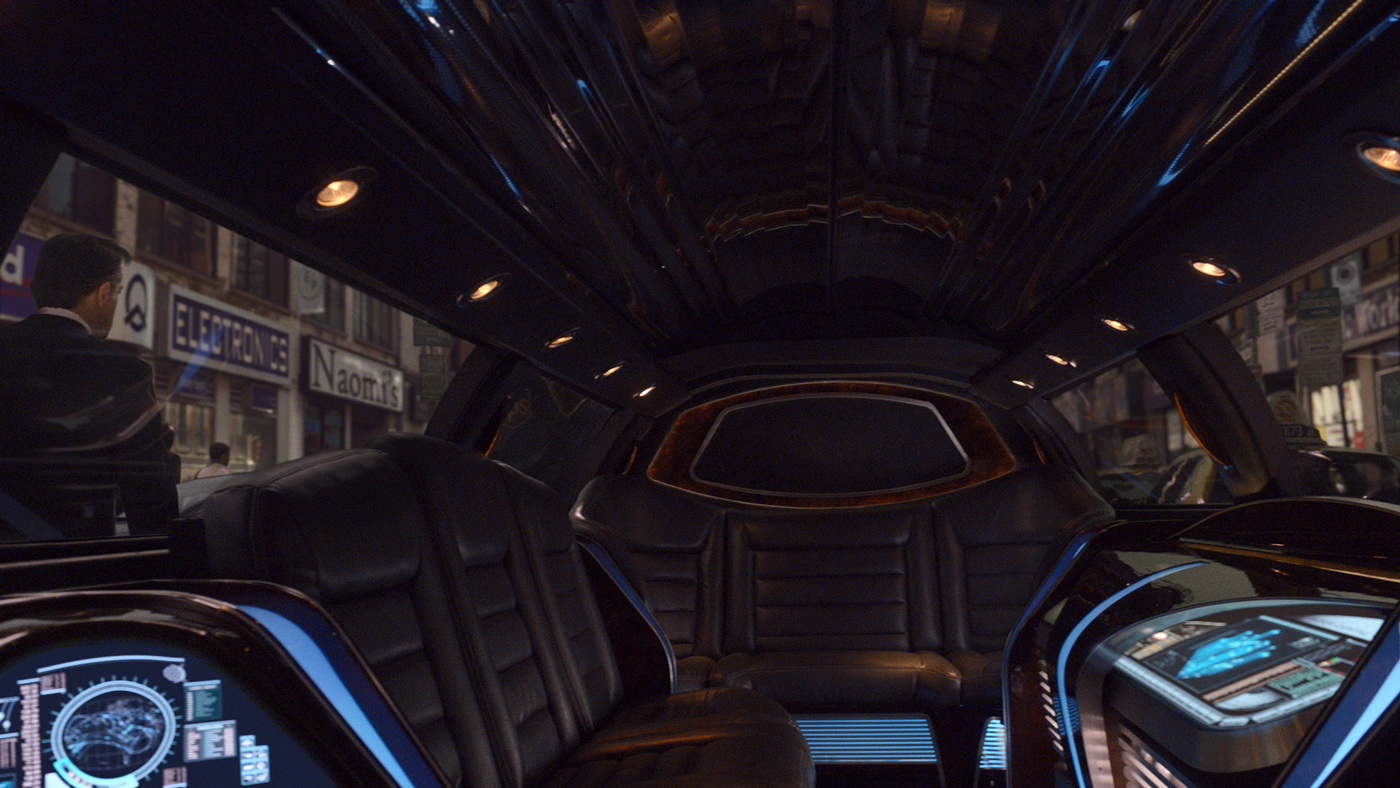
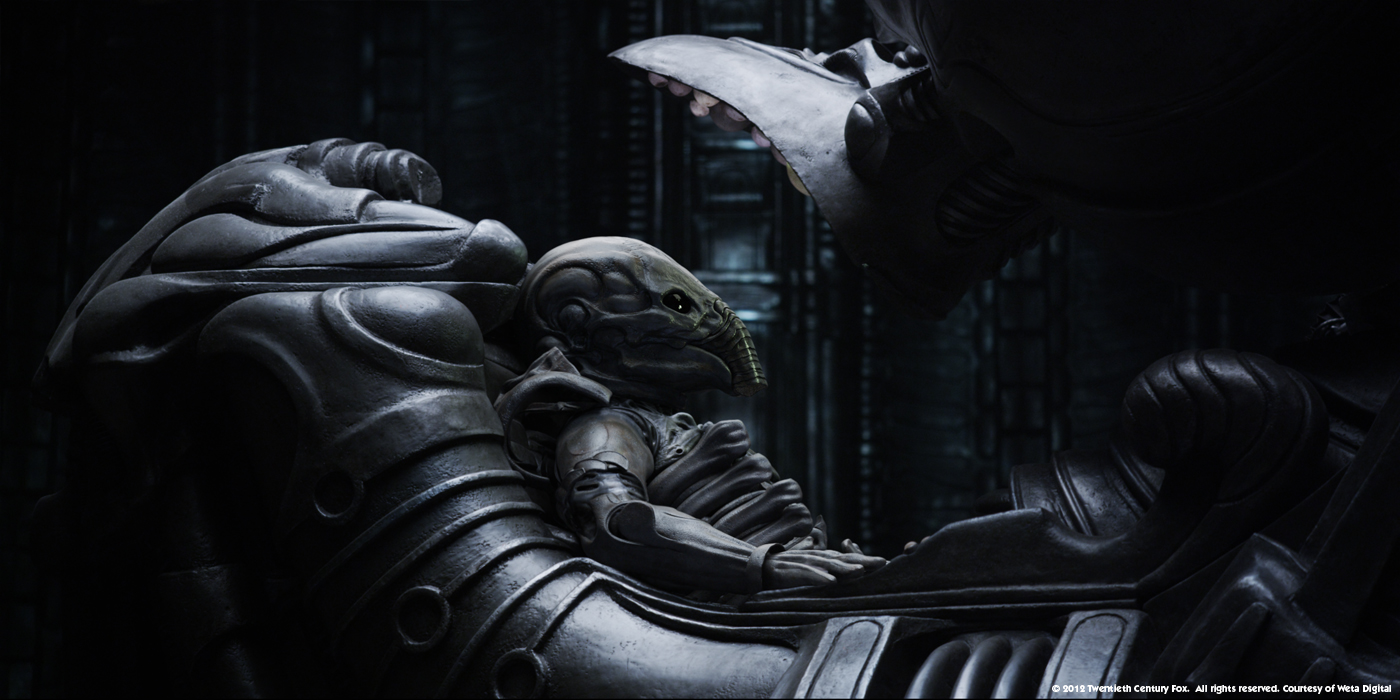
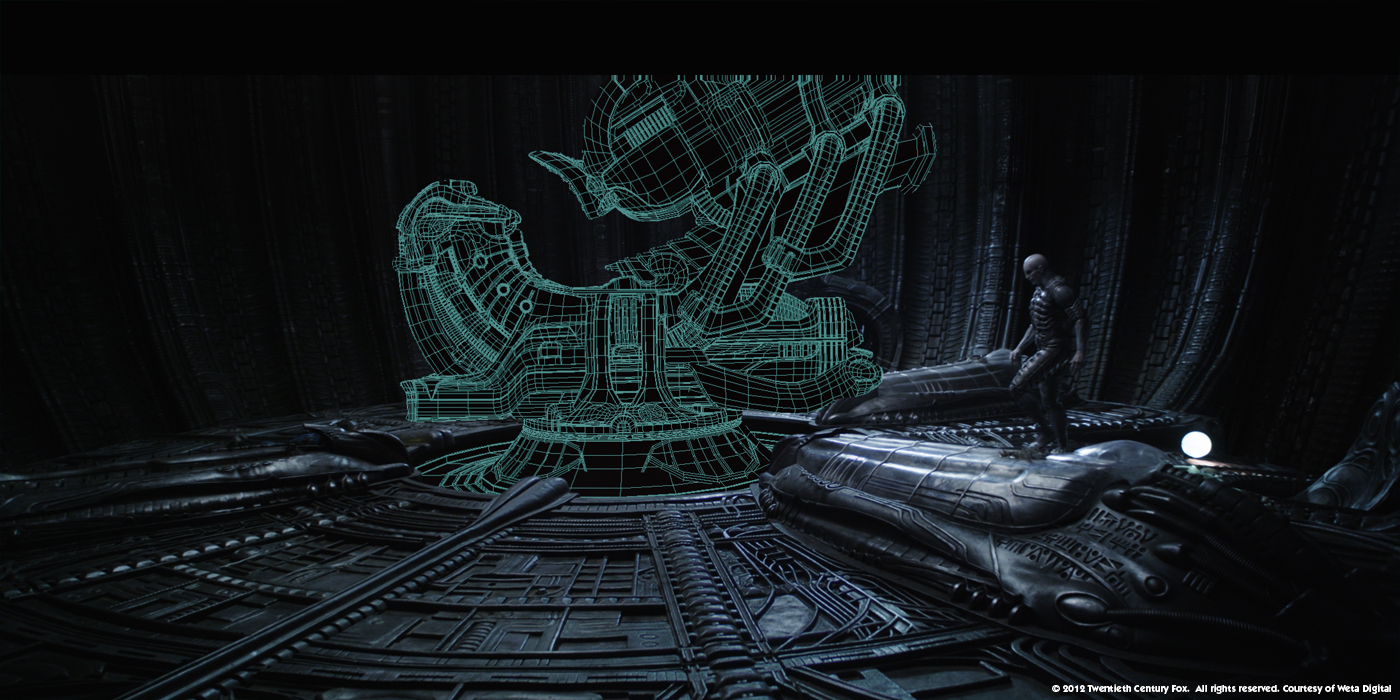
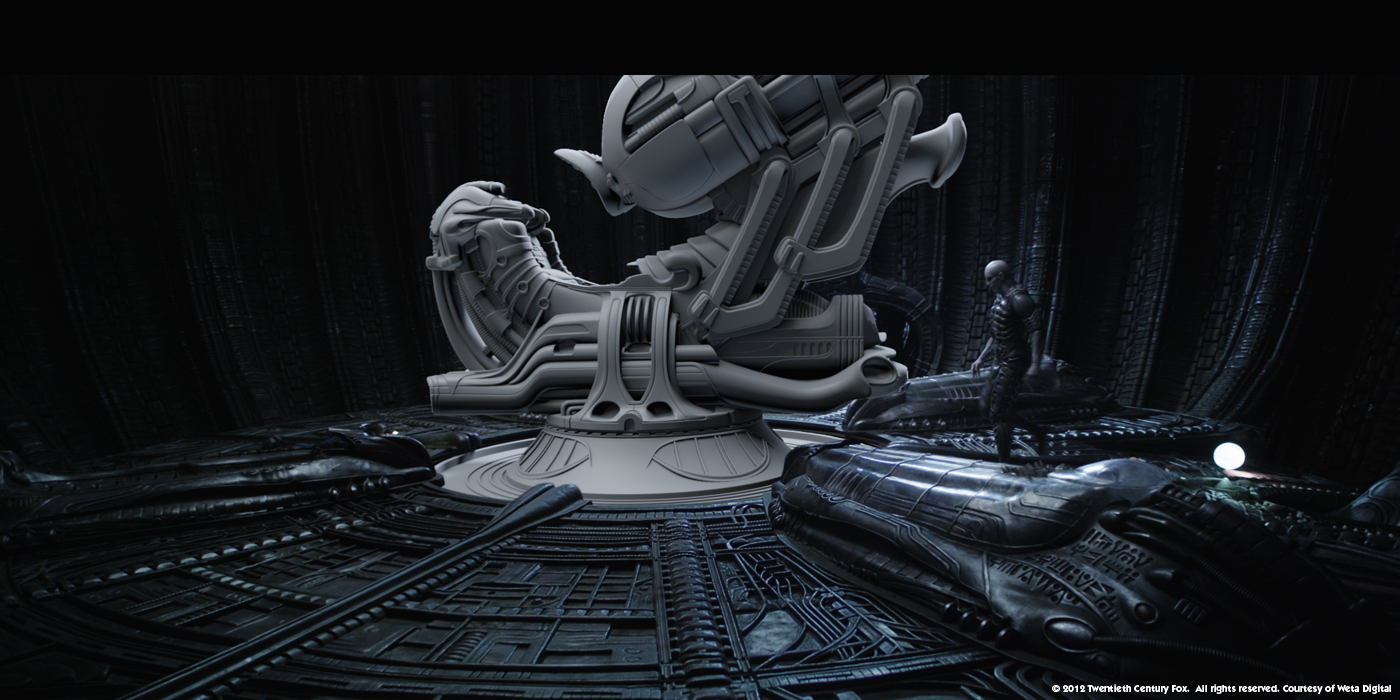
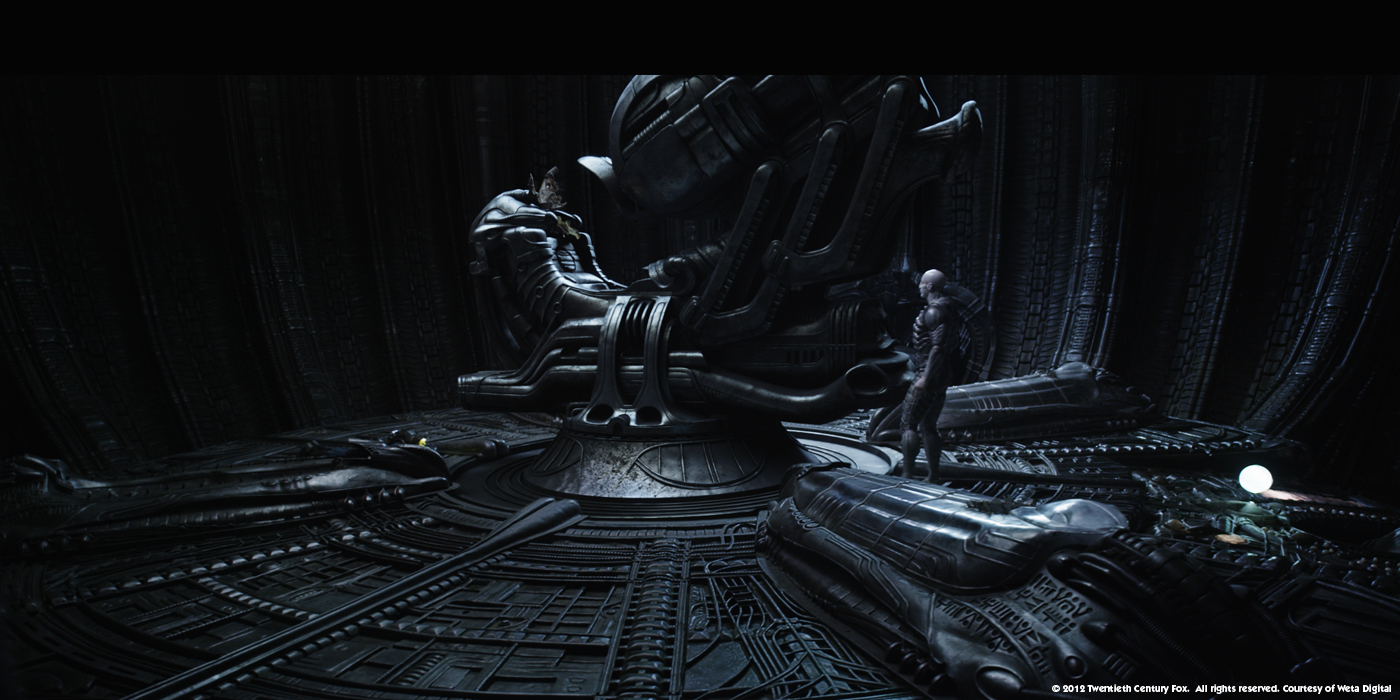
What was your feeling about bringing back to life the mythical Space Jockey chair?
It’s a real thrill to be able to work on something so iconic, which has been a mystery since 1979. Who is the space jockey? Is that skin or armour? What is the chair for? To build it in CG and work out how the elephantine suit encases the engineer, or how the chair articulates was something we put a lot of thought in to because it is such a revered piece of cinematic imagery. We knew that what we did had to look really special.

How did you design and animate the chair?
The design is from the original film and they built one on set. It could rotate in place, but the barrel of the chair and the helmet were fixed, so we needed to figure out how the articulation was going to work. We looked at all the struts on the side of the chair and worked out a way that all those things would interact in motion. One of the things that was interesting about the chair was in order to give it the biomechanical look that honoured the onset design, we had to add some distortion to our models so that they didn’t look too perfect and too mechanical and they retained the organic feel of the original film and the practical chair. This was the case with a lot of the Engineer’s biomechanical structures. Also the practical elements had a retroreflective quality to them, caused by graphite powder used on set. We had to write custom shaders to achieve this look.


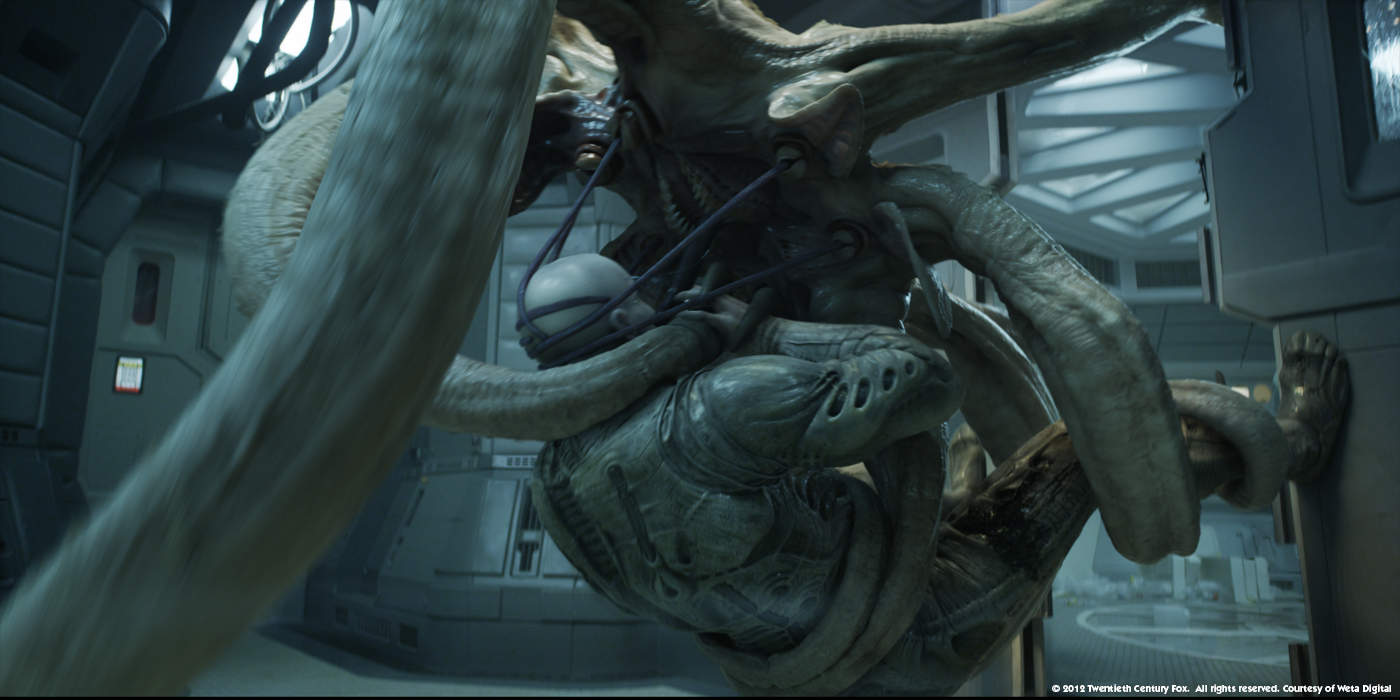
At the end, the Engineer is fighting with a big Trilobite. Can you explain to us in detail its creation and the challenge of rigging?
With a tentacled creature, it is always a big challenge to create an animation rig that doesn’t collapse or twist, but still gives the animator full control of where the tentacles go. Also making sure that the stretching is even across the tentacle and that one section doesn’t get stretched more than others around it, which defies the elasticity of the creature and makes it look unnatural. On top of this, where a tentacle is wrapping around the Engineer or pinned to the floor it needs to fix there, but also needs to be able to compress and deform against the surface it’s touching. Matthias Zeller, our Creature’s Supervisor used the layered deformer approach to the muscle rig that would fire the muscles in tension and relax them in compression. This was then passed through to a solver, which would wrinkle skin where it was more heavily compressed. Where it is stretched it would wrinkle along the tentacle. These same tension and compression attributes were passed along to the shading system so that when the skin was taught and tense it would become lighter and shinier. In compression it would become rougher and darker in the folds of the wrinkles. On top of that there was a secondary peeling/flaking skin which sat on top of the other deformers and was fixed in place at the base of the peeling skin of the underlying structure, but didn’t stretch with the main tentacle motion.

On the animation side, how did you manage so many arms and the fight with the Engineer?
Animating trilobites was down to the skill of our fantastic animation team led by Mike Cozens who hand animated each tentacle and the body of the creature to always feel like a continuously moving organic mass, and also solving the incredibly complex problem of making it fit with the engineer’s motion onset. Our camera department had to do a perfect matchmove of the engineer for which we used three reference cameras . This was further complicated by the onset lighting having erratically strobing banks of lights that traditional tracking software had a hard time with. Lee Bramwell’s camera team did a great job making sure the engineer sat correctly in 3D space to give the animators a target to work with.

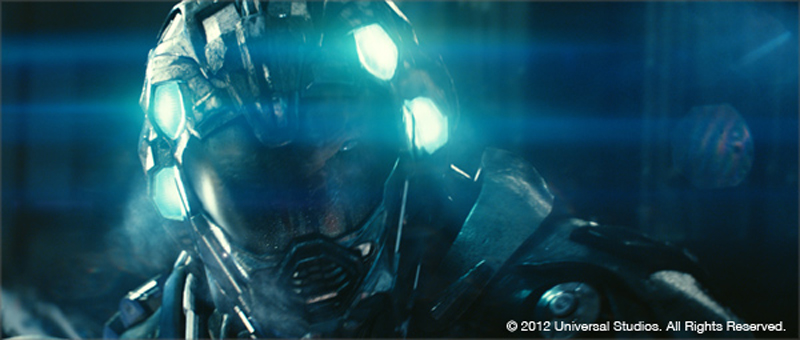
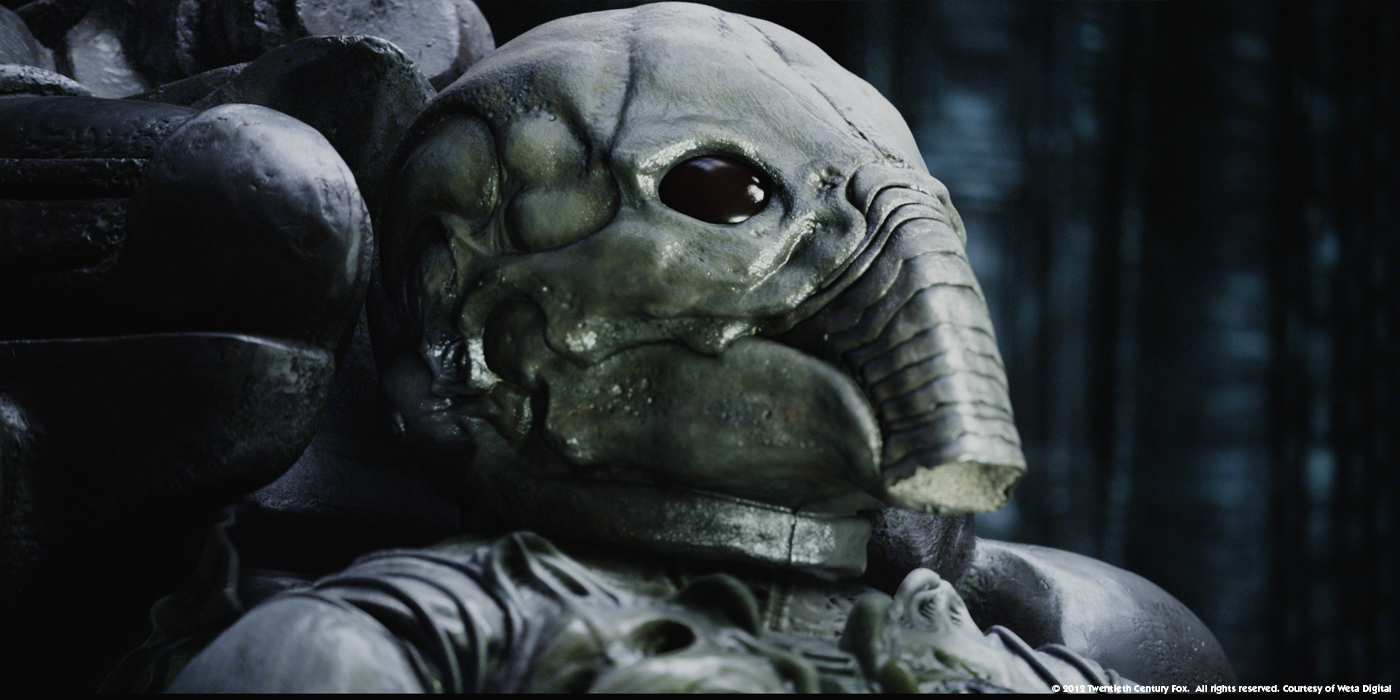
What was your approach with the Proto-Alien that emerges from the Engineer?
Similar to the baby trilobite, the deacon was a real puppet built for the performance on set, so we started by replicating its build digitally. We quickly discovered that we needed to augment the model considerably for articulation of the muscles and joints to make it feel more like a natural, physical creature. Ridley wanted the secondary mouth animation to reference the action of a goblin shark, which can dislocate it’s jaw and launch it forward to catch its prey. We needed to redesign the whole mouth and lower jaw to give the structure to build in the mechanics of this action. For this we went back to reference Giger’s original work and added in his details, which our sculpting team led by Florian Fernandez designed.

Can you tell us more about the challenge of its particular skin?
The deacon’s skin is slightly pearlescent. We wrote a custom shader for the way the pearlescense reacts with the light. There is also a layer of blood, mucus and liquid all over the skin, which gave us a layered shading model to get the complexity of the material qualities of the skin. The lighting was a continuation of the strobing lighting and was artfully matched to the clean plates by leads Florian Schroeder and Adam King.

How did you use Deep Compositing on this show?
Deep compositing is now standard at Weta Digital, where we find it has numerous advantages. Its biggest use was probably in the engineer/trilobite fight where we had such a tight integration of digital tentacles and the practical engineer.

What was the biggest challenge on this project and how did you achieve it?
The diversity of the effects was the biggest challenge. Almost every shot was bespoke in one way or another. Every engineer shot was an escalation of the one before it, all the medpod shots were unique, and each Trilobite shot had it’s own tracking or animation design issues.


Was there a shot or a sequence that prevented you from sleep?
Some of the reference footage we looked at for the medpod sequence kept me up at night!

What do you keep from this experience?
I have a world-class team to work with at Weta Digital who pulled out all the stops, and I think their enthusiasm really shows in the quality of the work. Working on such an iconic film with such a great collaboration with the studio, Ridley and Richard, really bought out the best in the VFX.

How long have you worked on this film?
We started the first test in Dec 2010, and completed the last final in March 2012.

How many shots have you done?
About 215.

What is your next project?
Joining the Weta team on THE HOBBIT.

What are the four movies that gave you the passion for cinema?
This list could go on for a long time! Off the top of my head.
BLADE RUNNER – the dystopia of the city was immersive.
2001 – Trumbull’s slitscan effects are immense on a 70mm print.
BRAZIL – imaginative, bleak and hilarious at the same time.
WITHNAIL AND I – watched far too many times as a student, it never gets old.
and of course ALIEN!

A big thanks for your time.

// WANT TO KNOW MORE?

Weta Digital: Official website of Weta Digital.


© Vincent Frei – The Art of VFX – 2012

DARK SHADOWS: Christophe Dupuis – VFX Supervisor VFX – Buf

Chrisophe Dupuis joined BUF in 1995. He has worked on many projects such as BATMAN & ROBIN, FIGHT CLUB or SPEED RACER.

Can you explain your background?
An art school in Belgium in the 90s (until I was 17 years old). And traditional illustrator for 2 years in advertising. I then made a quick training on tools and 3D video games for a year to finally join BUF in 1995.

How did BUF got involved on this film?
We have always worked with Warner on a historical way: THE MATRIX RELOADED and THE MATRIX REVOLUTIONS, HARRY POTTER, the different BATMAN. So it’s naturally that they thought of us to participate for the DARK SHADOWS adventure.

How was the collaboration with Tim Burton?
It was all right. Primarily through the Supervisor Angus Bickerton who regularly presented our shots according to their progress. We were fortunate to have Tim Burton one day in Paris for a review in our office.

How have you worked with Production VFX Supervisor Angus Bickerton?
We presented once a week and on every week the progress of our work by video conferencing and cineSync. Angus gave us his feedbacks online, then the next day or the day after we have the Tim’s feedback.

Can you tell us what BUF did on this film?
BUF has delivered fifty shots on DARK SHADOWS.
A good half is for the rejuvenation of Alice Cooper. We also worked on the sex scene between Barnabas and Angelique: we made a shot in which Eva Green has several arms and rips the Johnny Depp shirt. There is the shot with the extra long tongue, all the shots of glass breaking and addition of destruction in the room. Finally, BUF has made a dozen shots with the disco ball falls and that almost crushes David.

How did you create the destruction of the disco ball?
We can start by saying that this action of the ball falls was filmed live: a true ball was dropped on the floor. Unfortunately the effect obtained was not sufficiently impressive. It was therefore decided to completely redo the ball in CG.
Tim took this opportunity to ask us to be more spectacular by exaggerating the rebound of small pieces of mirror. This is a result of a real solid simulation.

What was the challenge with this destruction?
Do better than what was filmed: more energetic and dynamic.
Have a photorealistic rendering with thousands of tiny mirrors that fly around the room.

Can you explain in detail your work on the sex sequence between Barnabas and Angelique?
We can talk in more detail about the shot of multiple arms of Angelique. This was by far the most complicated shot for us: firstly because it was decided during the filming to not put trackers on the shirt of Barnabas. This greatly complicated the work of rotoscoping. And secondly because we need to completely rebuilt the shirt in CG to tear it on the passage of the Angelique’s nail. We also need to rebuilt the Johnny Depp back. We also had to add more detail to make these tears credible: multiple small wires of fabric have been added for example.
As for the arm that was a clever mix of different passes filmed, retimed and distorted, then back on lights in 2D. This shot has mobilized three people during two months.

How did you create the evil tongue of Angelique?
We modeled a ordinary tongue initially. Then over the animatics, Tim shifted the tongue to something more reptilian. So we modified our model to add a fork like that found in snakes, for example.
We need to made detailed rotoscopies of the heads of the two actors, then we offered different versions of the animation: from the slowest and languid to something more energetic. Finally the render was first matches on the real Eva’s tongue for the light and the material was match with a snake material.

Can you explain in detail the rejuvenation of Alice Cooper?
These shots need a perfect rotoscoping of Alice Cooper’s character on a 3D model whose the face perfectly matched the actual singer.
From there, we build a second set up of a 30 years younger Alice Cooper based on period pictures. In other words, we could compare that to a surgical facelift in 3D.
The size of the nose, ears and abdomen was reduced. The flesh relaxed by the weight of ages (neck, arms …) have also been specially treated to give a tone more in keeping with the Alice in the 70s.
The brief was not to exactly stick as closely, but to reach to get a sense of youth on the screen.

Can you tell us about the work of BUF on the Manor paintings?
Ultimately and unfortunately there is only one shot (at the beginning, the sequence should have more shots). We have to bring life into three paintings in which there was a character who had come alive and giggling. The work was to recreate the characters in 3D, then put them back on a 2D plane, animate them, and finally composite them. Angus filmed and gave us references animation

Have you developed specific tools for this project?
For the shirt shot, a system of dynamic CG folds was established.
An additional system for regaining control of these folds was also added.

Was there a shot or a sequence that prevented you from sleeping?
Not really, everything went really smoothly from beginning to end.
We can take this issue to thank Angus for his kindness, his willingness and goodwill.

What do you keep from this experience?
The meeting with Tim Burton.

How long have you worked on this film?
6 months.

How big was your team?
As always we start with a small team which is growing progressively.
At the maximum, we were 14 on the project (during 2 months).

How many shots have you made?
45.

What is your next project?
A very big commercial for Coke Zero. All in CG with fluids in space!
A first directing experience.

What are the four films that gave you the passion for film?
DELICATESSEN
THE NIGHTMARE BEFORE CHRISTMAS
ALIEN
SUPERMAN 1
And to name a few others: TOTAL RECALL, E.T. and the INDIANA JONES.

A big thanks for your time.

// WANT TO KNOW MORE?

Buf: Official website of Buf.

© Vincent Frei – The Art of VFX – 2012


PROMETHEUS: Vincent Cirelli – VFX Supervisor – Luma Pictures

Last week, Vincent Cirelli and his team at Luma Pictures spoke about their work for THE AVENGERS. This time, they explain their involvement on the movie that marks the return to SF for Ridley Scott: PROMETHEUS.

How did Luma Pictures get involved on this show?
Payam Shohadai, Executive VFX Supervisor and Luma Co-Founder // We were introduced to VFX Producer Allen Maris a few years ago and PROMETHEUS was the first opportunity that arose to collaborate. We also have a great relationship with FOX, having worked on several of their films.

How did you collaborate with Production VFX Supervisor Richard Stammers?
Vincent Cirelli, VFX Supervisor // Richard gave clear concise notes and was a pleasure to work with.

What have you done on this movie?
Vincent Cirelli, VFX Supervisor // We worked on the hologram volumes in the sequence in which Holloway comes into Shaw’s quarters of the ship to make up and give her a rose.

How did you design the hologram?
Richard Sutherland, CG Supervisor // We received reference of what the design should look like from the art department. Along with design reference, we also received the footage that needed to be projected into our fluid volume.

Can you explain to us in detail the creation of the hologram?
Vincent Cirelli, VFX Supervisor // For scenes in which the actor was partially inside the volume of the hologram, we were faced with creating detailed holdout geometry and matchmoves of the actors, so they would integrate properly within the CG fluid.

Richard Sutherland, CG Supervisor // To create the look of the distortion field for this hologram shot, we used FumeFX for Maya, which we recently worked with Sitni Sati to implement. PROMETHEUS was the perfect testbed for this new fluid based tool.

How did you manage the interaction with the character and the rose going through the hologram?
Richard Sutherland, CG Supervisor // We created models for the actor and rose, then matchmoved them into place. This allowed us to create a proper distortion field around the geometry, in addition to data passes that could be used inside of Nuke to create a believable falloff of light emission.

Can you tell us more about the CG fluid?
Vincent Cirelli, VFX Supervisor // Our developers worked with Sitni Sati to create a Maya version of the FumeFX solver. We were able to create a volume inside of Maya, rendered through Arnold, then comped in Nuke.

How did you create the distortion field?
Richard Sutherland, CG Supervisor // The distortion field is a combination of turbulence in the fluid volume and some complementary Nuke tricks.

Have you collaborated with other vendors to have the same hologram aspects?
Vincent Cirelli, VFX Supervisor // Yes, we were provided certain elements such as the HUD and various reference, although the final look of this particular effect was unique to this scene.

What was the biggest challenge on this project and how did you achieve it?
Richard Sutherland, CG Supervisor // The biggest challenge on the film was integrating a light-emitting hologram with lighting that was shot practically.

Ridley Scott’s return to SF is something highly anticipated. What was your feeling to be part of it?
Vincent Cirelli, VFX Supervisor // As you can imagine, it was very exciting to be a part of PROMETHEUS. Many of Ridley’s films have inspired our career paths.

A big thanks for your time.

// WANT TO KNOW MORE?

Luma Pictures: Dedicated page about PROMETHEUS on Luma Pictures website.


© Vincent Frei – The Art of VFX – 2012

THE AVENGERS: Simon Maddison – VFX Supervisor – Fuel VFX

Simon Maddison is back on The Art of VFX. After he discuss the effects of Fuel VFX on COWBOYS & ALIENS, now he explains his work on THE AVENGERS.

How did Fuel VFX got involved on this show?
We’ve been working with Marvel for a few years now. THE AVENGERS is the fourth film we’ve done following IRON MAN 2, THOR and CAPTAIN AMERICA and it was really good to work with Janek Sirrs (VFX Supervisor) and Susan Pickett (VFX Producer) again who we got to know on IRON MAN 2.

Can you tell us more about your collaboration with Production VFX Supervisor Janek Sirrs?
Janek is great to work with because he’s a very good communicator and gives clear briefs with reference materials to help illustrate the look or feel that’s required. We’re very fortunate with Marvel that we’ve been trusted to bring some of our own design ideas to the table, and Janek is excellent at giving the necessary feedback on what’s the right direction for various effects.

What Fuel VFX done on this show?
Fuel looked after three sequences in and around Tony Stark’s penthouse. In a scene near the film’s opening Tony and Pepper are celebrating Stark Tower coming online when Agent Coulson from S.H.I.E.L.D interrupts them. Fuel designed and created the various holograms featured in this scene that give an insight into some of the other members of the Avengers team as well as the tesseract artefact.

We added the sweeping views of New York behind the large glass windows for both night and day looks in two different sequences, and extensions to parts of the interior set.

Towards the end of the film, Loki and Thor battle it out on the balcony outside of Tony’s apartment. This was shot on a blue screen in a studio, but needed to look like it was on the Stark Tower balcony in New York so we created a CG exterior of the Tower that could replace the small set piece where required and also join up to some of the live action elements.

And then there were some extra shots including the CG Stark Jet (a re-use of the Fuel design used in IRON MAN 2); the Security Council monitors; and some shots at the end of the film to integrate Loki into the smashed concrete floor after he has a run-in with the Hulk.

Can you tell us in detail the design of the various holograms inside Tony Stark apartment?
We really started by referencing the IRON MAN films because there was a strong design precedent set there, so we spent a lot of time discussing what was relevant and what we could do with them.

Some of the things we paid attention to when designing the holograms included the lighting. If we pushed how much it ‘flickered’ for example, it looked fake. Push it too far the other way and it was hard to read, or just didn’t look good.

Another important factor was how much focus we placed on each of the elements in the dossiers. When Tony activates them, there are over 70 unique elements of information all on the screen at the same time conveying parts of the story. We needed the audience to take some of that information away, but it still needed to look cool, not interfere with Robert Downey Jr’s performance, and we needed to incorporate the tesseract. So we were careful to get the balance right.

Most of the early work on the holograms was done using Photoshop and After Effects with the 3D done with Maya. All of our compositing was done in Nuke.

Can you tell us more about the creation of the impressive New York background and how did you manage the challenges of the day and night versions of it?
The New York background was a digital asset supplied by ILM. However, the way we needed to use it was a bit different to their usage so we had a bit of work on our end to adapt it – mainly additional work on the Chrysler building as it was quite prominent in our shots and adding life to the background cyc that was particular to our shot angles.

For the daytime cyc this included steam from rooftop vents, moving clouds, moving reflections on the water and some slight rolling highlights on the Chrysler Tower when the camera moved. At night though, these subtleties wouldn’t be readable so for that we mainly just added bright defocused city lights that danced around because they were being affected by the atmosphere. Some distant planes in the sky and moving traffic with headlights also helped in certain shots.

Can you tell us more about the challenge with the reflective glass windows to composite the cityscape?
There’s two parts to that challenge: the technical work of extracting the set and cast reflections, which were sometimes corrupted by the undesirable reflections of lights and gear; and then the creative decisions regarding what reflections to keep in the shot and at what brightness.

Getting the overall exposure of the New York cyc for the daytime shots was probably the most important thing. Obviously you want to be able to see the city outside the window but you also need make it bright enough so that it looks like it’s all been exposed in the same image as the foreground. If you really tried to shoot that with a camera you would probably find that the background would have blown right out. We came to a balance with Janek by pulling it down slightly from where it should probably sit in reality and using the idea that the glass in the windows was slightly polarized. There’s a number of layers of glass in those shots and if you look carefully at the balcony outside the apartment, you can see that the more levels of glass you see through, the darker the background appears to be. Other less obvious things helped as well, such as how much the light wrapped around the edges of the foreground plate, especially the actors’ hair.

Have you extended the interior set?
Yes, there was some minor set extensions required for the inside of the penthouse. The glass windows needed to be extended to the ceiling and we did some extensions to the underside of the balcony outside.

Can you tell us more about your work on the Loki – Thor fight sequence on the balcony?
The sequence is quite complex in that we needed to include a lot of CG elements such as a CG Stark Tower set extension, a New York city panoramic cyc, a CG replacement of Loki’s scepter, scepter blast FX and hammer/scepter clash FX, background alien chariots and reflection replacements in the practical glass. It’s also got about 60 shots in it, which is many more than you think when viewing it.

Getting the Stark Tower set extension looking right was probably the biggest challenge. It wasn’t long after we received the plates that we realized that the partial set-piece wasn’t a good fit with the CG version of the Tower. So we had to modify the design of the CG Tower as well as replace more of the practical set than we originally intended. That would be OK in most circumstances, except in this case, any changes we made affected ILM because they also had Stark Tower in their shots. So with a bit of back-and-forth with Janek and ILM’s supervisors, we worked it out to make sure we found a solution.

Meanwhile the lighting in the plates was proving a bit tricky. The Loki-Thor fight was filmed on a sound stage with the partial set against blue screen, but needs to take place outdoors, on Tony Stark’s penthouse balcony. So we were fighting the studio lighting a bit – the plate photography was telling us one thing, but we needed to make that look like something else. To complicate matters, our shots also had to seamlessly intercut with ILM’s fully CG shots.

Janek was fantastic in this respect, working closely with us to push the live action grade and lighting in one direction, while working with ILM to keep their adjacent shots in line as well.

As the bigger issues were sorted, we could concentrate on getting the close-up textures on the Tower right, as well as focusing on the finer details such as the reflections in the glass windows, matching sun flares across the shots, and concentrating on the colour and brightness of the sky across all the shots – not to mention pulling keys through Thor’s messy hair which were still being worked on right up until delivery. All those things you take for granted when you’re watching the film, but without that attention to detail, would compromise the final shots..

Can you tell us more about the FX for Loki’s scepter?
There were two different effects in our sequences: an energy blast; and what became known as the ‘hijack effect’ where Loki taps his scepter to the chest of people to gain control of them.

These effects appeared in various other scenes throughout the film so it was really a matter of liaising with Janek about how he was directing the other vendors and coming up with a look for our shots that was consistent. Both of our scepter effects were relatively straight forward particle FX achieved in Maya.

How did you work with other vendors especially for the shots continuity?
Fuel’s work had continuity implications with ILM’s work, mainly in relation to the Loki-Thor fight scene where our work intercut with theirs. Janek was invaluable here and kept his eye on the bigger picture directing each vendor accordingly. Every so often both the Fuel and ILM teams would get on a call with Janek and talk through any issues and how we could help each other stay on track – the need to make changes to the CG Stark Tower model is a good example of where we needed to get our heads together.

What was the biggest challenge on this project and how did you achieve it?
Probably the Loki-Thor fight sequence for the reasons outlined previously.

Was there a shot or a sequence that prevented you from sleep?
No not really.

What do you keep from this experience?
A positive collaboration with clients and fellow VFX vendors allows for challenges to be overcome in the most efficient way possible and will make for the best results.

How long have you worked on this film?
We were in production for approximately 5 months.

How many shots have you done?
We delivered just over 150 shots.

What was the size of your team?
We had about 50 crew work on THE AVENGERS over the course of the schedule.

What is your next project?
Fuel was one of the lead vendors on PROMETHEUS, looking after most of the design-driven visual effects. So we are looking forward to telling people about our work on that.

A big thanks for your time.

// WANT TO KNOW MORE?

Fuel VFX: Dedicated page about THE AVENGERS on Fuel VFX website.


© Vincent Frei – The Art of VFX – 2012